To install wooden balusters, measure and mark the correct spacing, drill holes for the balusters, insert them into the holes, and secure them in place with adhesive or screws. Transforming your staircase with the addition of wooden balusters can enhance the overall aesthetic appeal and add a touch of elegance to your home.
Installation is a relatively simple process that can be completed with a few basic tools and supplies. In this guide, we will walk you through the step-by-step process of installing wooden balusters, providing you with the information you need to complete the project successfully.
So, let’s get started and give your staircase a stylish upgrade with wooden balusters.
Gathering The Necessary Materials
Before you start installing wooden balusters, it is important to gather all the necessary materials. This will ensure a smooth and efficient installation process. In this section, we will go over the measurements and calculations you need to take, choosing suitable balusters, and the tools required for the installation.
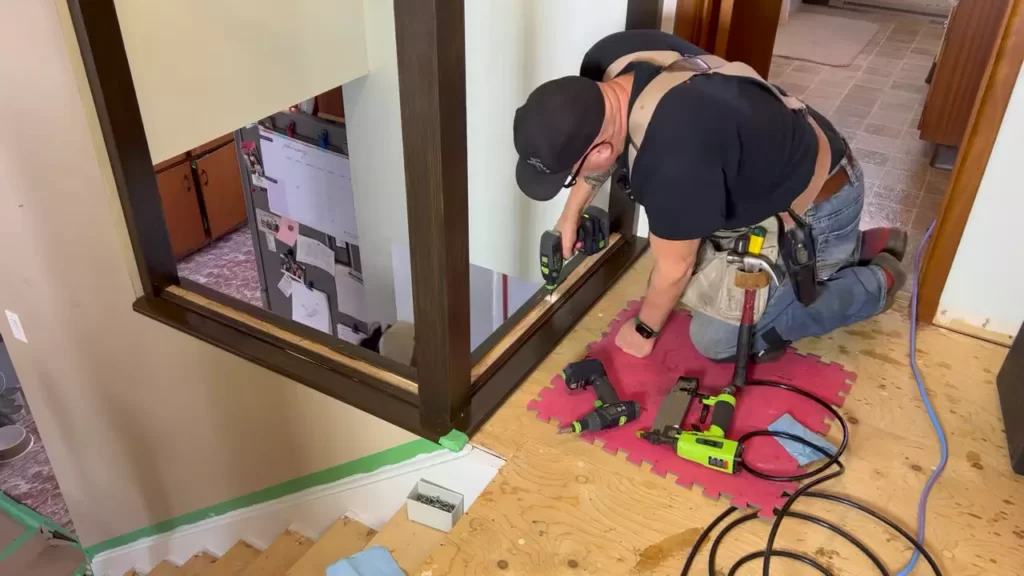
Measurements and Calculations
One of the first steps in installing wooden balusters is taking accurate measurements and making the necessary calculations. This will help determine the number of balusters needed and their spacing along the handrail. To ensure a visually appealing and structurally sound installation, follow these steps:
- Measure the length of your handrail to determine the total number of balusters needed. Divide the length by the desired spacing between each baluster to find the approximate number required.
- Consider local building codes, which may have specific requirements for baluster spacing and height. Ensure compliance with these regulations for safety and legal reasons.
- Take note of any corners or turns in your handrail, as these areas may require special arrangements or additional balusters. Measure the angles and distances accurately to ensure a seamless installation.
- Double-check all your measurements before proceeding with the installation. Remember, it’s better to be precise in the planning stage than to encounter issues later on.
Choosing Suitable Balusters
When selecting the balusters for your installation, there are a few factors to consider. These will ensure that you choose balusters that not only complement your overall aesthetic but also provide the necessary structural support:
- Material: Wooden balusters come in various types of wood, such as oak, pine, mahogany, or maple. Choose a wood species that suits your preferences in terms of appearance, durability, and maintenance requirements.
- Style: Balusters come in different styles, ranging from traditional to contemporary. Consider the overall design of your staircase and choose balusters that harmonize with the existing decor.
- Size: Balusters come in various dimensions, including height, width, and length. Ensure that the balusters you choose are of the appropriate size to fit your specific handrail and meet local building codes.
- Quality: Verify the quality of the balusters you intend to purchase. Look for well-crafted balusters with no visible defects, such as cracks or knots, as these can compromise their structural integrity.
Tools Needed for the Installation
Before starting the installation process, make sure you have the necessary tools on hand. Here are some of the essential tools you may require:
| Tools | Description |
|---|---|
| Measuring tape | Used to take accurate measurements of the handrail and determine baluster spacing. |
| Pencil | Allows you to mark the desired location for each baluster on the handrail. |
| Saw | Used to trim balusters to the correct length or make adjustments for angled or curved handrails. |
| Drill | Required for creating pilot holes in the handrail and the floor or steps, facilitating the installation process. |
| Clamps | Help secure the balusters in place while you attach them to the handrail and floor. |
| Screwdriver | Used to fasten screws or attach brackets to secure the balusters in position. |
| Level | Ensures that the balusters are properly aligned and plumb during installation. |
| Sander | Allows you to smoothen the surfaces of the balusters and remove any rough edges. |
Gathering the necessary materials is an essential step before proceeding with the installation of wooden balusters. Accurate measurements, careful selection of balusters, and having the right tools at your disposal will contribute to a successful and hassle-free installation process. Now that you have everything you need, it’s time to move on to the next steps of installing wooden balusters.
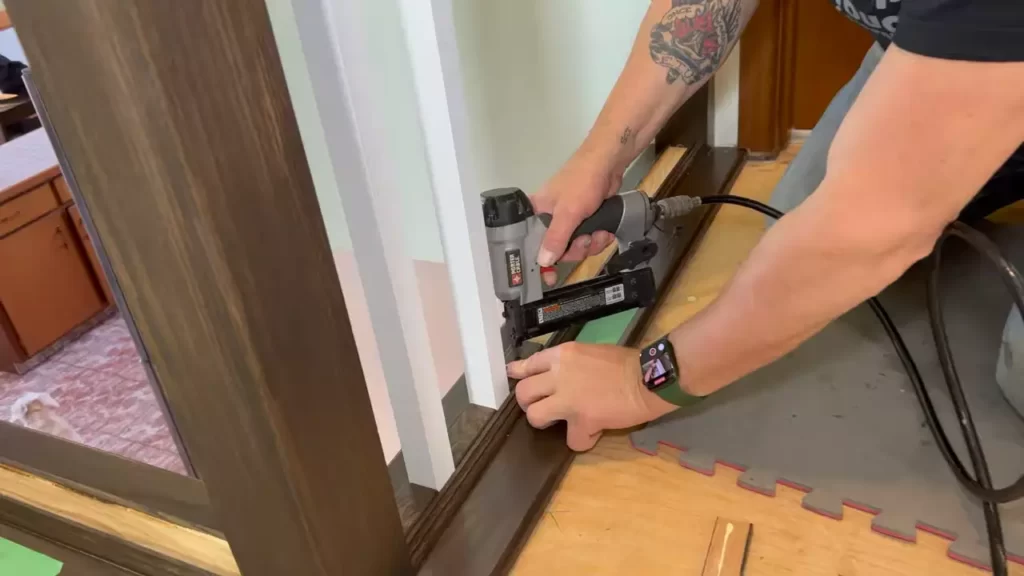
Preparing The Staircase For Baluster Installation
Before you can begin installing your wooden balusters, it’s important to properly prepare your staircase. This will ensure a smooth and successful installation process. In this section, we will cover the steps you need to take to clear the work area, remove any existing balusters (if applicable), and repair any damaged or loose parts.
Clearing the Work Area
Before you start working on your staircase, it’s important to clear the area of any obstacles or debris. This will not only make it easier for you to move around, but it will also help prevent any accidents or injuries. Here are some steps you can follow to clear your work area:
- Remove any furniture or objects that may be in the way.
- Sweep or vacuum the staircase to remove any dust or dirt.
- Ensure there is enough lighting in the area so you can clearly see what you’re doing.
- Have all your tools and materials organized and within reach.
Removing Existing Balusters (if applicable)
If your staircase already has balusters in place, you will need to remove them before installing the new ones. Here’s how you can do it:
- Inspect the balusters to determine how they are attached to the staircase.
- Using a screwdriver, remove any screws or bolts that are holding the balusters in place.
- Gently pry the balusters away from the staircase, being careful not to damage the surrounding area.
- If the balusters are glued or nailed, use a hammer or chisel to carefully loosen them.
- Repeat this process for all the existing balusters until they have been completely removed.
Repairing any Damaged or Loose Parts
Once the existing balusters have been removed, it’s important to inspect the staircase for any damaged or loose parts. Repairing these issues will ensure that your new balusters are properly supported and secure. Here are some steps you can follow:
- Inspect the staircase for any cracks, splits, or other signs of damage.
- If you find any damaged parts, use wood filler or epoxy to fill in the cracks and reinforce the area.
- Tighten any loose screws or bolts that are holding the staircase together.
- If there are any loose or wobbly steps, use construction adhesive or screws to secure them in place.
- Allow the repaired parts to dry completely before moving on to the next step.
By following these steps to prepare your staircase for baluster installation, you can ensure that your project starts off on the right foot. With a cleared work area, removed balusters (if applicable), and repaired damaged parts, you’ll be ready to move on to the next phase of your installation process.
Installing New Wooden Balusters
If you are looking to enhance the aesthetic appeal of your staircase, installing new wooden balusters can make a significant difference. Wooden balusters not only provide support but also add a touch of elegance and charm to your stairs. In this guide, we will walk you through the process of installing new wooden balusters, covering vital steps such as determining the baluster spacing, marking the baluster locations on the stair treads and handrail, and drilling pilot holes for the balusters.
Determining the baluster spacing
Before you begin installing your wooden balusters, it is crucial to determine the appropriate spacing between each baluster. Baluster spacing is essential for both safety and visual appeal. To determine the spacing, follow these steps:
- Measure the width of your handrail or the distance between the existing balusters. This measurement will serve as a starting point for your baluster spacing.
- Consult your local building codes to ensure compliance with safety regulations. Building codes may specify a maximum allowable gap between balusters to prevent accidents.
- Divide the width of the handrail or the distance between balusters by the number of balusters you plan to install, including the end balusters. This will give you the ideal spacing between each baluster.
- Adjust the spacing slightly, if needed, to achieve an aesthetically pleasing layout. It is best to avoid small spacing variations that may disrupt the visual flow.
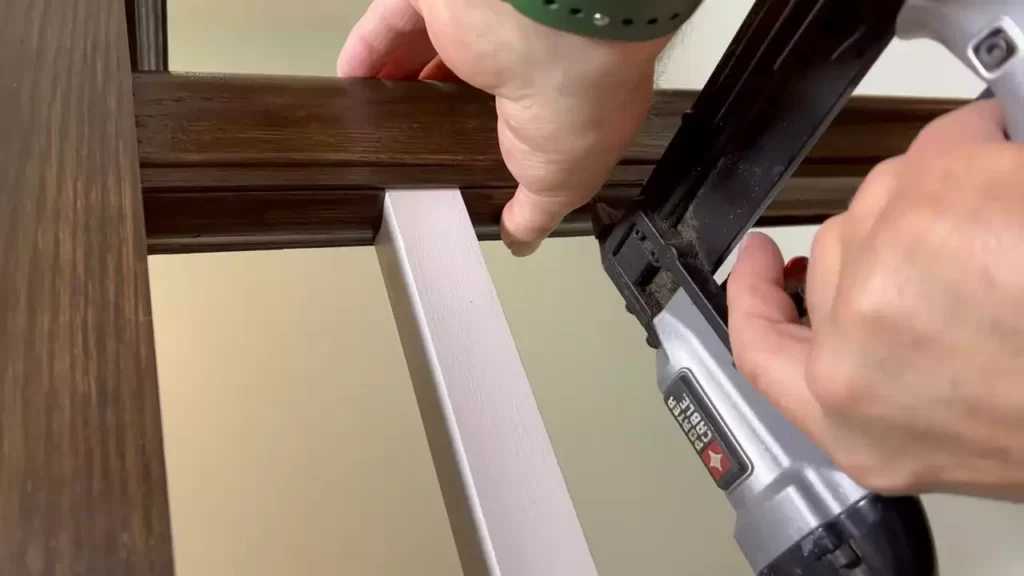
Marking the baluster locations on the stair treads and handrail
Once you have determined the baluster spacing, it is time to mark the locations where the balusters will be installed. Follow these steps:
- With a measuring tape, mark the center of each step on both the stair tread and the handrail. This will serve as a reference point for baluster placement.
- Using a square or a level, draw vertical lines from the center marks on the stair tread up to the bottom of the handrail. These lines will indicate the precise location for each baluster.
- Double-check the measurements and alignment to ensure accurate and even placement.
Drilling pilot holes for the balusters
Before installing the balusters, it is essential to drill pilot holes to guide the screws or fasteners. Follow these steps to ensure proper installation:
- Take the appropriate-sized drill bit and carefully drill holes at each marked location on both the stair tread and the handrail. The size of the drill bit should match the diameter of the screws or fasteners you will be using.
- Ensure that the pilot holes are deep enough to accommodate the screws or fasteners without protruding from the surface.
- For added stability, consider using wood glue in each pilot hole before inserting the screws or fasteners.
- Once all the pilot holes have been drilled, you are ready to attach the wooden balusters securely in place.
By following these steps, you can install new wooden balusters with precision and achieve a stunning transformation of your staircase. Take your time during the installation process and pay attention to detail to achieve a polished and professional finish.
Securing Balusters To The Stair Treads
One crucial step in installing wooden balusters is securing them to the stair treads. This step ensures the stability and safety of the balustrade system. There are a few methods you can use to achieve a secure installation, such as using adhesives or epoxy, inserting the balusters into pilot holes, and ensuring proper alignment and levelness. Read on to learn more about these methods.
Using Adhesives or Epoxy for Extra Stability
Using adhesives or epoxy is a great way to provide extra stability to your balusters. These materials help bond the balusters to the stair treads, preventing any wobbling or loosening over time.
To use adhesives or epoxy, follow these steps:
- Clean the surface of the stair tread where the baluster will be installed.
- Apply a generous amount of adhesive or epoxy to the bottom end of the baluster.
- Insert the baluster into the pilot hole on the stair tread.
- Hold the baluster firmly in place for a few minutes to allow the adhesive or epoxy to set.
- Repeat the process for each baluster.
Inserting the Balusters into the Pilot Holes
Inserting the balusters into pilot holes is another effective method for securing balusters to the stair treads. This method ensures a tight fit and reduces the risk of the balusters coming loose.
Here’s how you can insert the balusters into the pilot holes:
- Drill pilot holes into the stair treads at the desired locations for the balusters. Make sure the holes are slightly smaller than the diameter of the balusters.
- Apply a small amount of adhesive or epoxy into each pilot hole.
- Gently insert the baluster into the pilot hole, twisting it slightly to ensure a snug fit.
- Hold the baluster in place for a few seconds to allow the adhesive or epoxy to set.
- Repeat the process for each baluster.
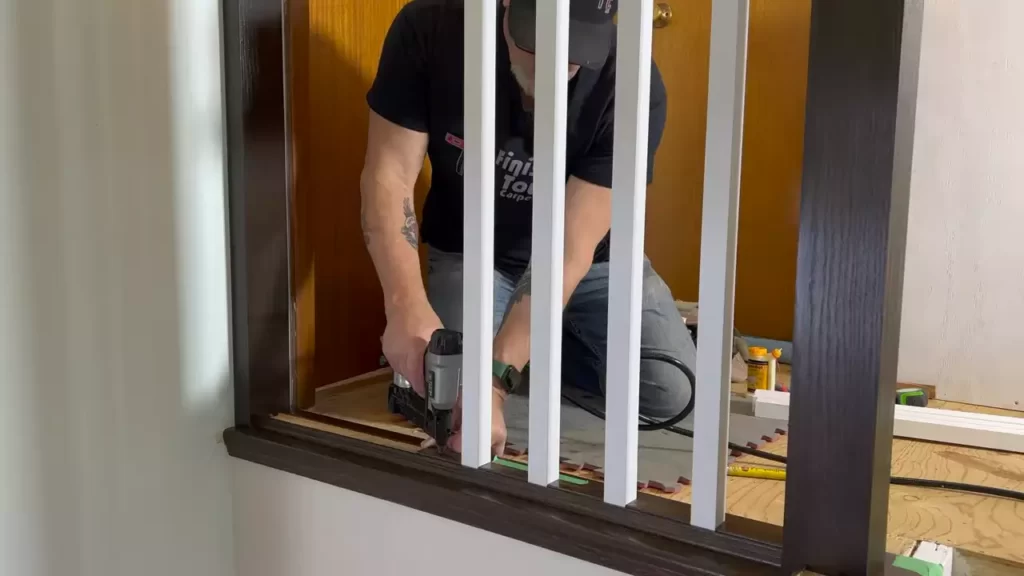
Ensuring Proper Alignment and Levelness
Proper alignment and levelness are crucial for achieving an aesthetically pleasing and structurally sound balustrade system. To ensure this, follow these guidelines:
- Use a level tool to ensure that each baluster is perfectly vertical.
- Check that the balusters are evenly aligned and spaced along the stair treads.
- Make any necessary adjustments before securing the balusters completely.
By following these methods, you can securely install wooden balusters and create a stunning balustrade system for your stairs.
Attaching Balusters To The Handrail
Marking the baluster locations on the handrail
Before you start attaching the balusters to the handrail, it’s important to mark their locations on the handrail accurately. This ensures a precise and visually appealing installation. To mark the locations, you can follow these steps:
- Start by measuring the length of your handrail and dividing it evenly to determine the spacing between each baluster. For example, if your handrail is 120 inches long and you want a spacing of 5 inches between each baluster, you’ll have 24 balusters in total.
- Using a measuring tape, begin from one end of the handrail and mark the positions where each baluster will be installed. Make sure to measure and mark both the top and bottom of the handrail to ensure accuracy.
- Once you’ve marked the locations, double-check your measurements to ensure they are consistent and evenly spaced. This step is crucial to achieve a professional and balanced look.
Pre-drilling holes in the handrail
Pre-drilling holes in the handrail will make it easier to attach the balusters securely and minimize the risk of splitting the wood. Follow these steps to pre-drill the holes:
- Select an appropriate drill bit size that matches the diameter of your balusters. The size may vary based on the type of balusters you are using.
- Using a measuring tape, mark the desired drilling depth on the drill bit to ensure consistent hole depths across all balusters.
- Position the drill bit on the marked location for the first baluster, ensuring it is perpendicular to the handrail’s surface.
- Apply steady pressure and drill the hole, being cautious not to drill through the bottom of the handrail.
- Repeat this process for each marked location, ensuring that the holes are aligned and consistent in size.
Attaching the balusters to the handrail securely
Now that you’ve marked the baluster locations and pre-drilled the holes in the handrail, you’re ready to attach the balusters securely. Follow these steps:
- Apply a high-quality wood adhesive to the bottom end of each baluster.
- Insert each baluster into the pre-drilled holes, ensuring they are positioned straight and aligned with the markings on the handrail.
- Apply gentle pressure to seat the baluster firmly into place.
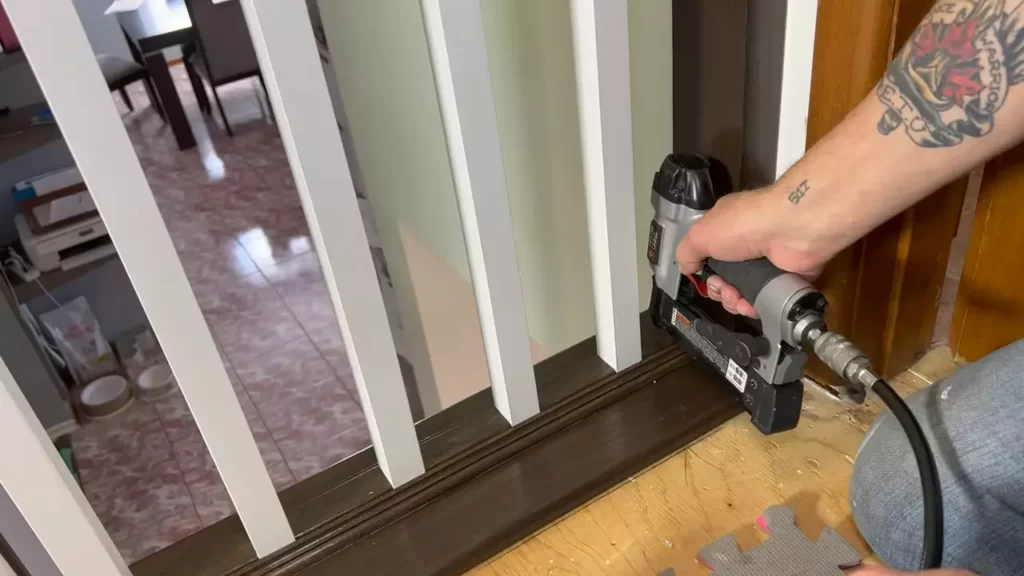
- Alternatively, you can use screws or nails to secure the balusters to the handrail if desired. Make sure to choose fasteners that are suitable for wood and won’t cause splitting or damage.
- Check that all balusters are securely attached and that there are no gaps or unevenness in their alignment.
- Allow sufficient time for the adhesive to cure or fasteners to set before putting any weight or stress on the balusters.
By following these steps, you can confidently attach balusters to your handrail, creating a beautiful and sturdy railing that adds style and safety to your space. Remember to take your time and ensure accuracy throughout the process to achieve the best results.
Adding Finishing Touches
Once you have installed your wooden balusters, it’s time to add those crucial finishing touches that will not only enhance the overall look but also protect your balusters from wear and tear. These final steps will ensure that your wooden balusters stand the test of time, maintaining their beauty and adding character to your staircase. In this section, we will guide you through the process of filling in any gaps or holes, sanding and smoothing the balusters, and applying a protective finish.
Filling in any gaps or holes
Before moving on to the sanding process, it’s essential to fill in any gaps or holes that may be present in your wooden balusters. This step will ensure a smooth and seamless appearance. Start by cleaning the surface of the balusters to remove any dust or debris. Then, using a wood filler that matches the color of your balusters, apply it to the gaps or holes using a putty knife.
Ensure that you press the wood filler firmly into the gaps and smooth it out for a seamless finish. Remove any excess filler with the putty knife and let it dry according to the manufacturer’s instructions. Once the filler is dry, use sandpaper to gently sand the filled areas, creating a smooth and even surface.
Sanding and smoothing the balusters
Sanding is a crucial step in achieving a professional-looking finish for your wooden balusters. Start by using rough-grit sandpaper, such as 80 or 100 grit, to remove any rough spots, imperfections, or remaining wood filler. Sand in the direction of the wood grain, using smooth and even strokes. Be sure to pay attention to the corners and edges to achieve a consistent appearance.
After sanding with the rough-grit sandpaper, switch to a finer grit, such as 220 or 320 grit, for a smoother finish. Repeat the sanding process, ensuring that you sand the entire surface of each baluster. This will help to remove any remaining imperfections and leave you with a perfectly smooth surface.
Applying a protective finish
Once you have finished sanding and smoothing the balusters, it’s time to apply a protective finish to enhance their appearance and provide long-lasting protection. There are various options available, such as polyurethane, varnish, or a clear sealant. Choose a finish that complements the style and décor of your staircase.
Before applying the protective finish, thoroughly clean the balusters to remove any dust or debris. Then, use a brush or a sponge to apply an even coat of the finish, following the manufacturer’s instructions. Allow each coat to dry completely before applying additional coats, if needed. This will help to achieve a durable and smooth finish that will protect the wood from scratches, stains, and moisture.
Remember to take your time during the process and pay attention to detail. By completing these steps, you will be able to enjoy the beauty of your wooden balusters for years to come. Whether you’re renovating your staircase or adding a touch of elegance to your home, the finishing touches will make all the difference.
Maintaining And Caring For Wooden Balusters
When it comes to maintaining and caring for wooden balusters, regular cleaning and inspections are crucial to ensure their longevity and appearance. By following a few simple steps, you can keep your wooden balusters looking their best and prevent any potential damage or wear. In this section, we will discuss the importance of regular cleaning and dusting, checking for signs of damage or wear, and applying touch-ups or repairs as needed.
Regular Cleaning and Dusting
Regular cleaning and dusting are essential to prevent dirt, dust, and grime from accumulating on your wooden balusters. Over time, these particles can damage the wood and cause discoloration. To clean your wooden balusters, follow these steps:
- Dust the balusters using a soft cloth or a feather duster. This will remove any loose debris or dust particles.
- Mix a mild solution of warm water and a gentle wood cleaner. Avoid using harsh chemicals or abrasive cleaners, as they can strip the protective finish of the balusters.
- Dip a soft cloth or sponge into the cleaning solution and gently wipe down each baluster, working in small sections at a time.
- After cleaning, wipe the balusters with a clean, damp cloth to remove any residue from the cleaning solution.
- Allow the balusters to air dry completely before applying any protective finishes or treatments.
Checking for any Signs of Damage or Wear
Regular inspections of your wooden balusters are important to catch any signs of damage or wear early on. This allows you to address any issues before they worsen and potentially cause significant damage. Here are a few things to look out for when inspecting your balusters:
- Cracks or splits in the wood: Inspect each baluster carefully for any cracks or splits. These can weaken the structure and eventually lead to breakage.
- Discoloration or fading: Check if the balusters have any areas of discoloration or fading. This could be a sign that the protective finish needs to be reapplied.
- Loose or wobbly balusters: Gently shake each baluster to check if they feel loose or wobbly. This indicates that they may need to be tightened or reinforced.
- Signs of insect damage: Look for any signs of insects, such as small holes or sawdust-like residue. If you suspect insect damage, consult a professional to address the issue.
Applying Touch-ups or Repairs as Needed
If you notice any signs of damage or wear during your inspection, it is important to address them promptly. This will help prevent further deterioration and ensure the longevity of your wooden balusters. Here are a few steps to follow when applying touch-ups or repairs:
- Sand down any rough or damaged areas using a fine-grit sandpaper. This will prepare the surface for the touch-up or repair.
- Apply wood putty to fill in any cracks or holes in the balusters. Smooth out the putty using a putty knife and let it dry completely.
- Once the putty is dry, use the sandpaper to smooth out the repaired areas until they are level with the rest of the baluster.
- If necessary, apply a fresh coat of protective finish or paint to the balusters to restore their appearance and provide added protection.
By following these maintenance steps, you can keep your wooden balusters in excellent condition for years to come. Regular cleaning, inspections, and repairs ensure their beauty and structural integrity, enhancing the overall aesthetic of your space.
Enhancing The Appearance Of Wooden Balusters
When it comes to home improvement projects, one area that often gets overlooked is the staircase. However, with just a few simple enhancements, you can transform your staircase into a stunning focal point that enhances the overall aesthetics of your home. One way to achieve this is by focusing on the wooden balusters, which can be upgraded and customized to reflect your personal style.
Staining or painting the balusters
The first step in enhancing the appearance of wooden balusters is to decide whether you want to stain or paint them. Staining is a popular choice as it allows the natural beauty of the wood to shine through, while still providing a protective coating. To stain your balusters, begin by sanding them down to remove any existing finish or imperfections.
Once sanded, apply a wood stain of your choice using a brush or cloth, following the manufacturer’s instructions. Allow the stain to dry completely before applying a clear topcoat for added durability. On the other hand, if you prefer a more dramatic look, painting the balusters can offer a bold statement. Choose a color that complements your existing decor and apply multiple coats for a smooth and even finish.
Adding decorative elements or accents
To further enhance the appearance of your wooden balusters, consider adding decorative elements or accents. These can range from simple additions such as metal brackets or rosettes, to more elaborate carvings or scrollwork. These decorative details can be attached to the balusters using wood glue or small nails, depending on their size and weight.
Additionally, incorporating decorative accents such as finials or newel posts at the top and bottom of the staircase can add an extra touch of elegance and sophistication.
Considering alternative baluster designs or materials
If you’re looking to make a bolder statement with your staircase, it may be worth considering alternative baluster designs or materials. There are a variety of options available, including wrought iron, glass, or even cable railing systems. These alternatives can add a modern or contemporary touch to your staircase, creating a visually striking focal point. Before making a decision, it’s essential to consider the overall style of your home and how the alternative balusters will complement the existing architecture.
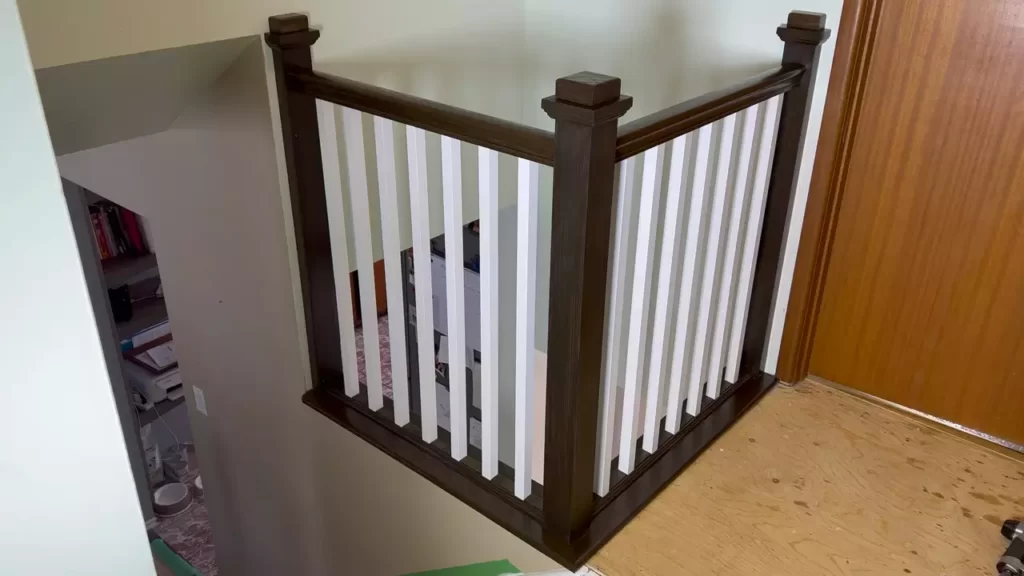
In conclusion, enhancing the appearance of wooden balusters is a simple yet effective way to transform your staircase and elevate the overall visual appeal of your home. Whether you choose to stain or paint them, add decorative elements or accents, or explore alternative designs or materials, taking the time to upgrade your balusters will undoubtedly yield impressive results.
Troubleshooting Common Issues During Installation
When installing wooden balusters, there are a few common issues that can arise. By being aware of these potential challenges and knowing how to fix them, you can ensure a smooth installation process. In this section, we will discuss three common issues that may occur during the installation of wooden balusters: balusters not fitting properly, uneven spacing or alignment, and baluster movement or instability.
Balusters Not Fitting Properly
One of the most frustrating issues that can arise during the installation of wooden balusters is when they do not fit properly. This can result in gaps between the balusters or a loose and unstable installation. To troubleshoot this problem, follow these steps:
- Double-check the measurements: Ensure that the measurements for the balusters are accurate and consistent. Use a measuring tape to measure the distance between the top and bottom rails at multiple points.
- Sand or trim the balusters: If the balusters are not fitting due to excess material, gently sand or trim the ends until they fit snugly in the baluster holes. Take care to remove only a small amount of material at a time to avoid over-trimming.
- Use a baluster installer tool: Consider using a baluster installer tool, such as a baluster wrench or baluster pliers, to help guide the balusters into place.
Uneven Spacing or Alignment
Another common issue that can occur during the installation of wooden balusters is uneven spacing or alignment. This can result in an unattractive and unprofessional-looking finished product. To troubleshoot this problem, try the following solutions:
- Measure and mark the spacing: Before installing the balusters, measure and mark the desired spacing between each one. Use a level to ensure that the marks are aligned vertically.
- Adjust the position of the balusters: If you notice any uneven spacing or misalignment after installing the balusters, gently adjust their position as needed. Use a rubber mallet or a similar tool to avoid damaging the wood.
- Check the railing: Sometimes, uneven spacing or alignment can be caused by issues with the railing itself. Ensure that the railings are straight and properly secured.
Baluster Movement or Instability
If your wooden balusters feel loose or wobbly after installation, it is important to address this problem to ensure the safety and stability of your railing. Here are some troubleshooting steps to follow:
- Secure the balusters: Check that the balusters are tightly secured in the baluster holes. You may need to use wood glue or an adhesive specifically designed for baluster installation to enhance the stability.
- Add support blocks: If the balusters continue to move or feel unstable, consider adding support blocks beneath them. These blocks can help reinforce the connection between the balusters and the railing.
- Inspect the railing structure: Examine the overall structure of the railing to ensure that it is properly built and reinforced. Any structural issues should be addressed before attempting to fix the baluster movement.
By troubleshooting these common issues during the installation of wooden balusters, you can achieve a secure and visually appealing finished result. Remember to take accurate measurements, use appropriate tools, and address any problems promptly for a successful baluster installation.
Safety Considerations When Installing Wooden Balusters
When it comes to installing wooden balusters, it is important to prioritize safety. This not only ensures the well-being of the individuals involved but also helps to guarantee the longevity and stability of the balusters. Here are some key safety considerations to keep in mind during the installation process.
Wearing Appropriate Protective Gear
Protective gear is essential when handling wooden balusters. It helps to minimize the risk of injuries and accidents. Below are some important items of protective gear to wear:
- Safety goggles: These will shield your eyes from flying wood chips, dust, and other debris that may be generated during the installation process.
- Gloves: Wearing gloves provides you with a firm grip on the tools and protects your hands from splinters and cuts.
- Ear protection: The noise generated by power tools used in the installation process can be damaging to your hearing. Therefore, wearing ear protection like earplugs or earmuffs is recommended.
- Dust mask: Wood dust can be hazardous if inhaled. Wearing a dust mask helps to filter out airborne particles and protect your respiratory system.
Following Proper Safety Measures
Following proper safety measures is crucial to prevent accidents and ensure a smooth installation process. Consider the following measures:
- Secure the work area: Clear the area of any obstacles or tripping hazards. Make sure the floor is clean and stable to provide a safe working environment.
- Use the right tools: Ensure that you have the appropriate tools for the job. Using the correct tools not only ensures the quality of the work but also reduces the risk of accidents.
- Read and follow instructions: Before starting the installation, thoroughly read the manufacturer’s instructions for the balusters. Following the instructions correctly helps avoid mistakes and potential safety hazards.
- Maintain proper posture: Maintaining proper posture while working can prevent strain and injury. Avoid bending or twisting your body in awkward positions and use proper body mechanics.
- Secure the balusters: Make sure the balusters are securely attached and anchored to prevent any accidents. Double-check the stability before proceeding with the installation.
Engaging Professional Help if Necessary
If you are unsure about your abilities or lack the necessary experience in carpentry work, it is best to seek professional help. Installing wooden balusters requires precision and expertise to ensure a safe and durable installation. Professional carpenters have the knowledge and skills needed to carry out the task effectively. Don’t hesitate to consult a professional if you have any doubts about your abilities.
By prioritizing safety considerations, wearing appropriate protective gear, following proper safety measures, and engaging professional help if necessary, you can ensure a successful and safe installation of wooden balusters for your staircase or deck.
Frequently Asked Questions On How To Install Wooden Balusters
How Are Balusters Attached To The Floor?
Balusters are attached to the floor using screws or brackets. These are secured into the floor surface, ensuring stability and support. The attachment method will vary depending on the type of baluster and the specific installation requirements.
How Do You Attach Wood Spindles To Stairs?
To attach wood spindles to stairs, follow these steps:
1. Measure and mark the desired spacing of the spindles.
2. Drill holes into the stairs and the bottom of the spindles.
3. Apply wood glue inside the holes and then insert the spindles.
4. Use screws or nails to secure the spindles in place.
5. Fill any gaps or cracks with wood filler and sand the surfaces for a smooth finish.
What Is The Proper Spacing For Balusters?
Balusters should be spaced no more than 4 inches apart. This spacing ensures safety and meets building codes. Keep in mind that local regulations may vary, so check with your local building department for specific requirements. Follow these guidelines to ensure proper spacing for balusters in your project.
How Do You Install Pin Top Wood Balusters?
To install pin top wood balusters, follow these steps:
1. Start by measuring and marking the desired spacing for the balusters on the handrail.
2. Drill holes at the marked spots using a drill bit that matches the diameter of the balusters.
3. Apply a small amount of wood glue to the holes and insert the pin top balusters into the holes.
4. Use a mallet or hammer to gently tap the balusters into place.
5. Allow the glue to dry completely before using the staircase.
Conclusion
To sum up, installing wooden balusters is a straightforward process that can greatly enhance the aesthetic appeal of your home. By following the steps outlined in this blog post, you can ensure a secure and visually pleasing baluster installation. Remember to measure accurately, select the right materials, and use the proper tools for a successful project.
Whether you’re an experienced DIY enthusiast or a novice, this guide has provided you with the essential information needed to tackle this home improvement task with confidence. Happy installation!
