To install wood slats on a wall, first measure and mark the desired position for the slats. Then, attach the slats to the wall using screws or adhesive, ensuring they are level and evenly spaced.
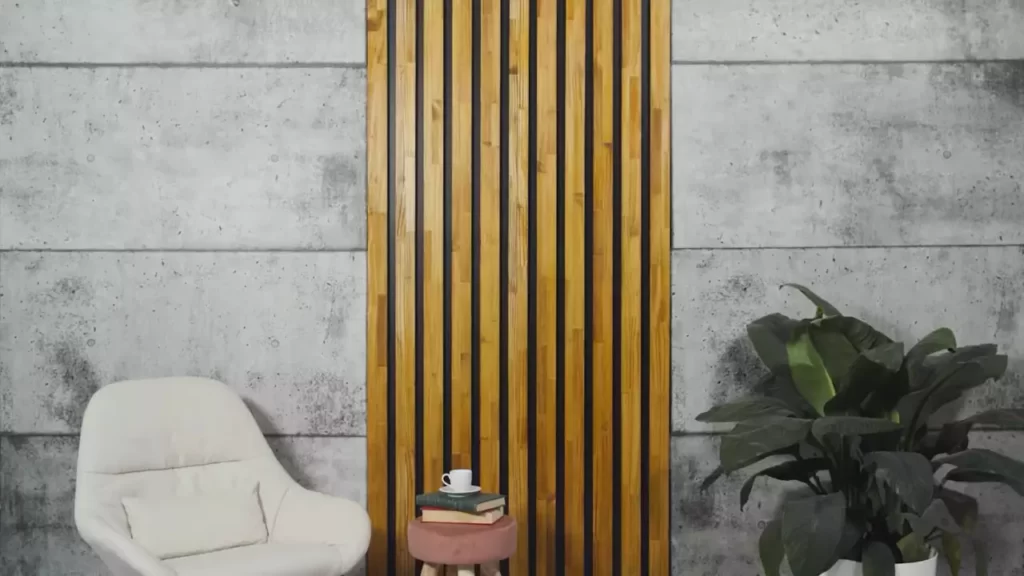
Are you looking to add a touch of natural warmth and texture to your interior space? Installing wood slats on a wall can be a great way to achieve this. Wood slats lend a rustic charm and bring a cozy appeal to any room.
Whether you want to create an accent wall, add an interesting backdrop, or simply enhance a plain surface, this guide will walk you through the process of installing wood slats on your wall. With some basic tools and a little patience, you’ll be able to transform your space with a stunning wooden feature that will leave a lasting impression. Let’s get started!
Checking The Wall’S Condition
Before installing wood slats on your wall, it is important to thoroughly check the wall’s condition. This will ensure that the installation process goes smoothly and the end result looks fantastic. In this section, we will explore the steps to check and prepare your wall for wood slat installation.
Inspecting for cracks, holes, or uneven surfaces
The first step in checking the wall’s condition is to visually inspect it for any cracks, holes, or uneven surfaces. Cracks and holes can negatively impact the overall appearance of the wood slats, and uneven surfaces may cause the slats to be misaligned. To perform this inspection, carefully examine the entire wall from top to bottom.
If you come across any cracks or holes, mark them with a pencil or tape for easy identification during the repair process. Additionally, make a note of any areas with uneven surfaces. This initial inspection will help you determine the level of work required to prepare your wall for wood slat installation.
Repairing any damages or flaws
Once you have identified cracks, holes, or uneven surfaces, it’s time to take necessary steps to repair them. Fill in any cracks or holes with an appropriate wall filler or spackle. Use a putty knife to apply the filler, ensuring that it is evenly spread across the damaged area. Smooth out the filler with the putty knife and let it dry according to the manufacturer’s instructions.
For uneven surfaces, consider using a sanding block or electric sander to level them out. Be sure to remove any excess dust or debris resulting from sanding to achieve a smooth surface.
After repairing any damages or flaws, it is advisable to prime the wall. This will create a smooth surface and improve the overall adhesion of the wood slats. Apply a coat of primer using a paint roller or brush, following the manufacturer’s instructions. Allow the primer to dry completely before proceeding with the wood slat installation.
Taking the time to inspect and repair the condition of your wall will not only enhance the aesthetic appeal of your wood slat installation but also prolong its longevity. By ensuring the wall is in good condition, you are setting a solid foundation for a successful and visually pleasing project.
Measuring And Marking
Determining the desired height and spacing of wood slats
Before installing wood slats on your wall, it’s important to determine the desired height and spacing. This will help create a visually appealing and balanced look. To start, consider the overall aesthetic of your space. Are you looking for a modern and sleek design or a more rustic and natural feel? This will influence the width and spacing of the slats.
Next, take into account the height of your wall. If you’re installing slats in a room with high ceilings, you might want to opt for taller slats to create a sense of grandeur. On the other hand, lower ceilings may benefit from shorter slats to maintain proportionality.
It’s also important to consider the purpose of the slats. Are they purely decorative or do they serve a functional role, such as acting as a headboard or providing a backdrop for shelves? This will help determine the ideal height and spacing to ensure practicality and visual harmony.
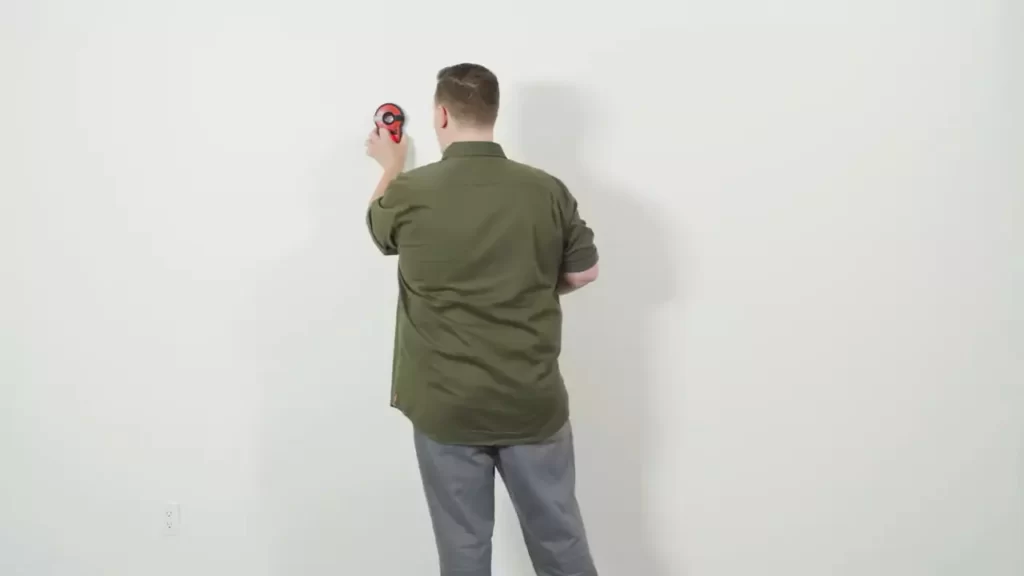
Marking the measurements on the wall
Once you’ve determined the desired height and spacing of your wood slats, it’s time to mark the measurements on the wall. Start by gathering the necessary tools: a measuring tape, a level, a pencil, and painter’s tape.
- Begin by locating the starting point for your slats. This can be at the bottom or top of the wall, depending on your preference. Use the measuring tape to mark the starting height with a small pencil mark.
- Using the level, draw a straight horizontal line across the wall at the desired height. This will serve as a guide to ensure the slats are level throughout.
- Measure the spacing between slats and mark these measurements on the horizontal line. This can be done by making small pencil marks at the desired intervals.
- Continue marking the measurements along the entire length of the wall until you reach the desired endpoint.
Once you’ve marked all the measurements, step back and assess the placement of the pencil marks. Make any necessary adjustments to ensure a balanced and visually appealing arrangement.
When all the measurements are marked to your satisfaction, it’s time to apply painter’s tape over the pencil marks. This will help prevent the pencil marks from smudging during the installation process. Additionally, the tape can act as a visual guide for aligning the slats.
With the measurements marked and the tape in place, you’re now ready to move on to the next step: actually installing the wood slats onto your wall.
Gathering The Necessary Tools And Materials
Gathering the necessary tools and materials is essential before starting the installation of wood slats on a wall. By ensuring you have everything you need at the beginning of the project, you can avoid unnecessary delays and interruptions. In this section, we will list the tools and materials required for the installation to help you prepare adequately.
Listing the tools and materials needed for installation
Before you begin, make sure you have the following tools and materials:
| Tools | Materials |
|---|---|
|
|
Having these tools and materials at your disposal will enable a smooth and efficient installation process.
Ensuring you have everything before starting the project
Once you have gathered all the necessary tools and materials, it is crucial to double-check that you have everything required before starting the wood slat installation project. This will help you avoid interruptions and minimize any unforeseen delays.
Read through the materials and tools list once again to ensure you haven’t missed anything. Having everything in place will allow you to focus on the installation process, ensuring a seamless and satisfying end result.
Choosing The Right Type Of Wood
Discussing different types of wood suitable for wall slats
Choosing the right type of wood for your wall slats is crucial to ensure a successful and visually appealing installation. Consider factors such as durability, aesthetics, and cost when making this decision. There are a variety of wood options available, each with its own unique characteristics. Let’s delve into some popular choices that you can consider for your wall slats.
Considering factors such as durability, aesthetics, and cost
When it comes to selecting the type of wood for your wall slats, it is essential to consider the durability, aesthetics, and cost. Each of these factors plays a significant role in determining the overall outcome and maintenance of your wall slats.
Solid Wood
One of the most popular choices for wall slats is solid wood. It offers a classic and timeless look, providing a warm and inviting ambiance to any space. With its natural grain patterns and variations, solid wood creates a unique and organic feel. It is worth noting that solid wood may require periodic maintenance, such as refinishing. Common types of solid wood used for wall slats include:
| Wood Type | Durability | Aesthetics | Cost |
|---|---|---|---|
| Oak | High | Natural grain patterns, diverse color options | Medium |
| Walnut | High | Rich, dark tones, elegant appearance | High |
| Maple | Medium-high | Smooth, light color, minimal grain | Medium |
Engineered Wood
If you desire the look of solid wood but seek a more budget-friendly option, engineered wood might be the right choice for you. Engineered wood is made up of layers of wood veneer adhered together, providing stability and durability. It offers a similar aesthetic to solid wood while being less prone to warping or shrinking. Some popular types of engineered wood that can be considered for wall slats include:
- Veneered MDF (Medium-Density Fiberboard)
- Plywood
- Laminate
Each of these options has its own unique features and advantages, including cost-effectiveness and ease of installation. However, it is important to note that engineered wood may not have the same longevity as solid wood.
Reclaimed Wood
If you are seeking a rustic and environmentally friendly option, reclaimed wood can add character and charm to your wall slats. Reclaimed wood is wood that has been salvaged from old buildings, barns, or other sources. It offers a weathered and aged look, capturing the beauty of history in its imperfections. Due to its uniqueness, reclaimed wood can be more expensive compared to other options.
Considering the factors of durability, aesthetics, and cost, you have a range of wood options to choose from for your wall slats. Whether you prefer the classic appeal of solid wood, the affordable versatility of engineered wood, or the rustic charm of reclaimed wood, selecting the right type will ensure a stunning and long-lasting installation for your walls.
Cutting The Wood Slats To Size
One of the key steps in installing wood slats on a wall is cutting them to the appropriate size. This ensures that the slats fit perfectly and create a visually pleasing and seamless look. In this section, we will guide you through the process of measuring and marking the wood slats according to the wall dimensions and using a saw to cut them accurately.
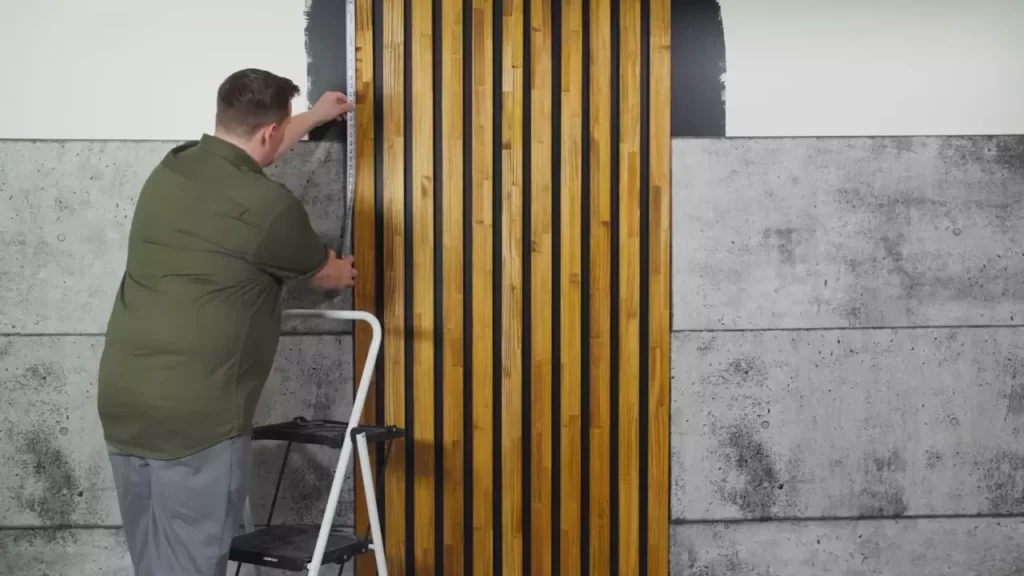
Measuring and marking the wood slats according to wall dimensions
To start, measure the dimensions of the wall where you plan to install the wood slats. Take into account any outlets, light switches, or other obstructions that may affect the measurements. It’s crucial to be precise, so using a measuring tape and a pencil, mark the measurements directly on the wood slats.
In order to maintain consistency and symmetry, it’s recommended to create a layout plan before marking the wood slats. This layout plan will help you visualize how the slats will be positioned on the wall and the spacing between them. It can be as simple as a rough sketch or a more detailed diagram, depending on your preference.
Using a saw to cut the wood slats accurately
Now that you have your wood slats marked according to the wall dimensions, it’s time to cut them to size. Using a saw, such as a circular saw or a miter saw, carefully cut along the marked lines. Ensure that each cut is straight and clean to achieve a professional finish.
If you’re using a circular saw, set the blade to the appropriate depth and guide the saw steadily along the marked line. For a miter saw, adjust the angle and position of the slat accordingly and make the cut in a controlled manner. Safety should be a top priority throughout the process, so always wear protective goggles and gloves, and work in a well-ventilated area.
After cutting each wood slat, label it with a corresponding number or letter to keep track of their position on the wall. This will save you time during the installation process, ensuring that each slat is placed in the right spot.
By following these steps, you’ll be well on your way to cutting the wood slats to the perfect size for your wall installation. Next, we will cover how to prepare the wall and attach the slats securely, so stay tuned!
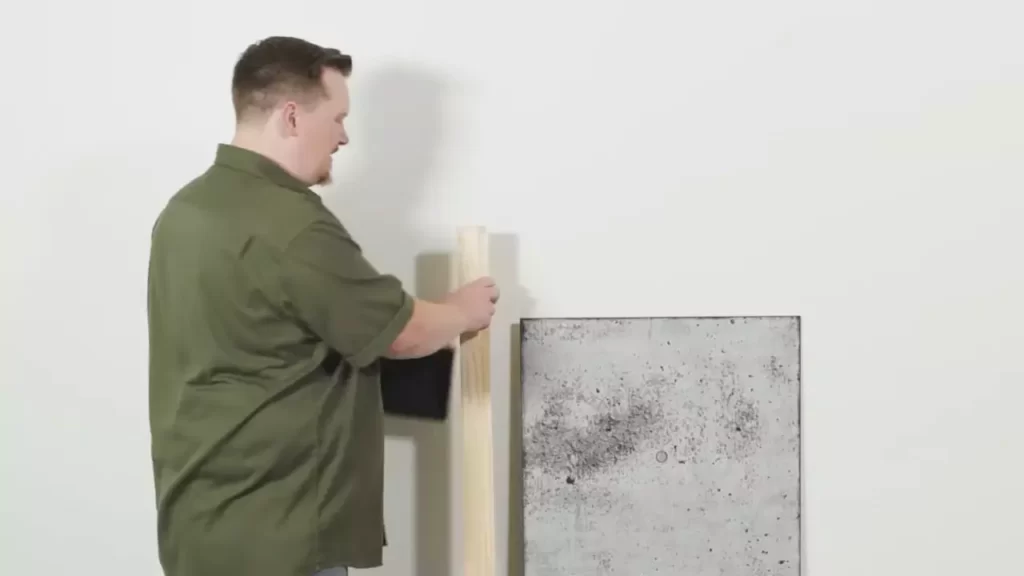
Applying Adhesive And Securing The Slats
Applying Adhesive on the Backside of the Wood Slats
Once you have measured, cut, and sanded your wood slats to the desired size, it’s time to apply adhesive on the backside. The adhesive will not only help the slats adhere firmly to the wall but also prevent any potential warping or shifting over time.
Choose a strong adhesive suitable for wood applications. Ensure that the adhesive is compatible with the type of wood and the surface you are working with. Read the manufacturer’s instructions carefully for the best results.
Apply the adhesive evenly on the backside of each wood slat using a trowel or a similar tool. Ensure that the adhesive is spread across the entire surface, paying extra attention to the edges and corners. Avoid applying excessive adhesive as it may cause messiness and difficulty in aligning the slats on the wall.
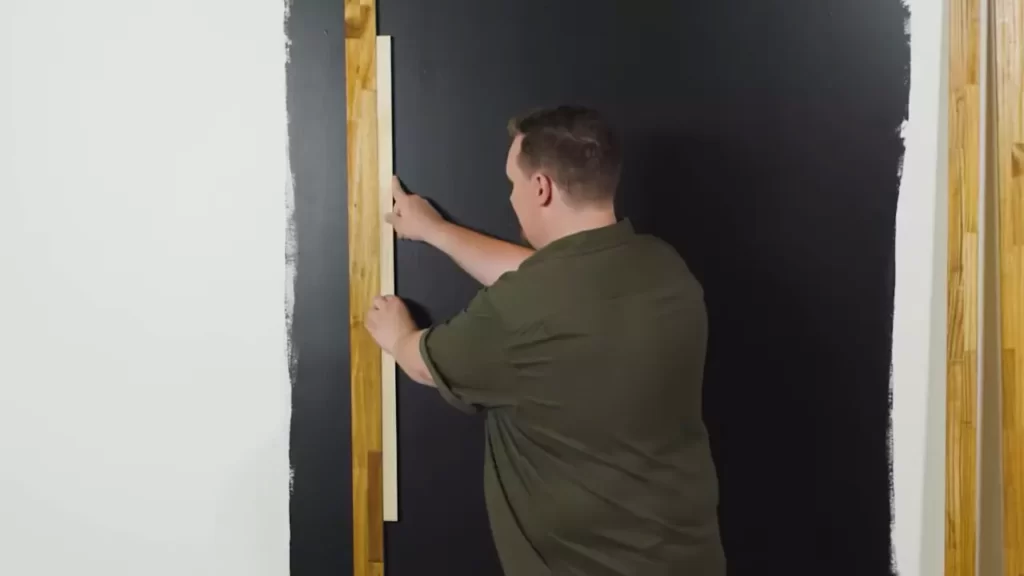
Pressing the Slats Firmly Onto the Wall
Once the adhesive is applied, it’s time to press the wood slats firmly onto the wall. This step is crucial to ensure secure attachment and prevent any gaps or air bubbles.
Starting from one end, align the slat with the desired position on the wall. Gently press the slat onto the wall, using a level to ensure it is straight. Apply even pressure across the entire length of the slat to ensure proper contact with the adhesive.
Continue this process for each wood slat, making sure to leave a small gap between the slats for expansion and contraction. Use spacers or small pieces of wood as guides to maintain consistent spacing throughout the installation.
Pay attention to the alignment and spacing as you go along, making any necessary adjustments before the adhesive sets.
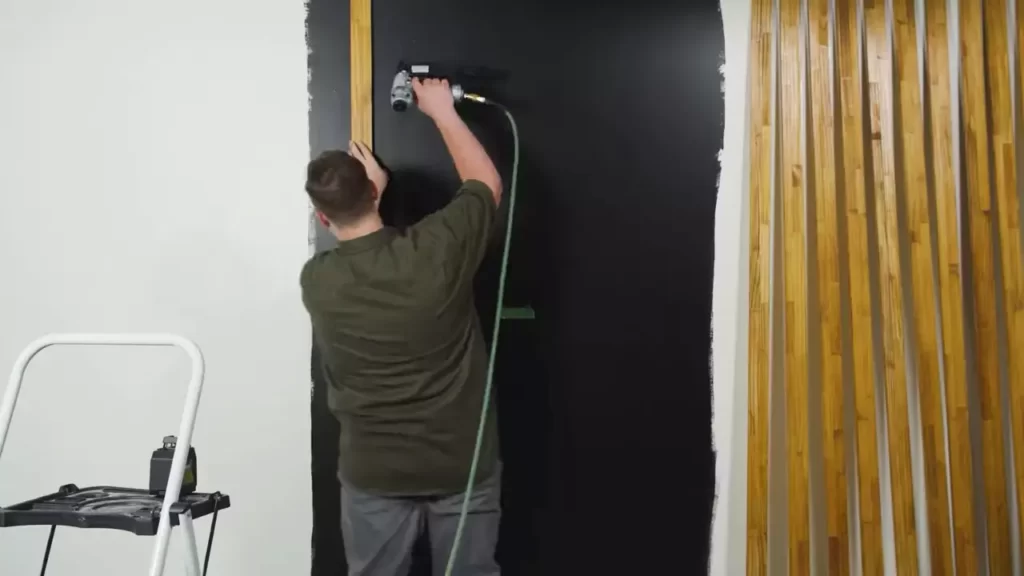
Using Nails or Screws for Additional Support, If Desired
If you want to add extra strength and support to your wood slat installation, consider using nails or screws. While the adhesive should provide sufficient stability on its own, nails or screws can give you added peace of mind.
Choose nails or screws that are suitable for the type and thickness of your wood slats. Predrill the holes to prevent splitting or cracking the wood when inserting the nails or screws.
For added aesthetic appeal, countersink the nails or screws slightly into the wood surface to hide them from view. Fill the holes with wood filler and sand it down to achieve a seamless appearance.
Use a level throughout the installation process to ensure the slats remain straight and level. This will help achieve a professional-looking result.
Remember, the use of nails or screws is optional and may not be necessary depending on the strength of your adhesive and the weight of the wood slats. Evaluate your specific needs and preferences before deciding to incorporate additional support.
Sanding And Staining/Painting The Slats
Once you have installed the wood slats on your wall, the next step is to sand and stain or paint them to achieve the desired finish. Smoothening the surface of the wood slats with sandpaper and choosing the right finish are crucial to creating a beautiful and durable wall feature. In this section, we will explore how to smoothen the surface of the slats using sandpaper and decide whether to stain or paint them.
Smoothening the surface of the wood slats with sandpaper
To ensure a smooth and even surface on your wood slats, you’ll need to use sandpaper. Start by selecting sandpaper with a medium to fine grit, such as 120 or 180. Using a sanding block or a piece of sandpaper wrapped around a sanding sponge, gently sand the slats in the direction of the wood grain. Be sure to sand evenly and avoid applying too much pressure, as this could result in uneven surfaces or damage to the slats. After sanding, wipe away any dust using a clean cloth or a tack cloth.
Choosing whether to stain or paint the slats for a desired finish
Once you have achieved a smooth surface on your wood slats, it’s time to decide whether to stain or paint them. The choice between staining and painting depends on the desired finish and the overall style of your space.
If you want to enhance the natural beauty of the wood and preserve its texture and grain, staining is a great option. Stains come in a variety of colors, allowing you to choose the shade that best complements your decor. Before applying the stain, make sure to stir it well and test it on a small, inconspicuous area of one of the slats to ensure you are happy with the color. Apply the stain in even strokes using a brush or a clean cloth, following the manufacturer’s instructions. Allow the stain to penetrate the wood for the recommended amount of time, and then wipe off any excess with a clean cloth.
If you prefer a solid, opaque finish or want to match the slats to the existing color scheme of your space, painting is the way to go. Before painting, make sure the surface is clean and free of any dust or debris. Apply a coat of primer to ensure good adhesion and coverage, then let it dry completely. Once the primer is dry, apply your chosen paint color using a high-quality brush or roller. Allow the paint to dry between coats, and apply additional coats as needed for full coverage. Remember to follow the paint manufacturer’s instructions for drying times and any specific recommendations.
By smoothening the surface of the wood slats with sandpaper and choosing the right finish, you can transform your wall into a stunning focal point that adds warmth and character to your space. Whether you decide to stain or paint the slats, be sure to take your time, follow the proper techniques, and enjoy the process of creating a unique and stylish feature in your home.
Cleaning And Maintaining The Wood Slats
Providing tips on cleaning and maintaining the wood slats on the wall
Cleaning and maintaining the wood slats on your wall is essential to keep them looking beautiful and prolong their lifespan. By following a few simple tips and using the right cleaning products and techniques, you can ensure that your wood slats remain in pristine condition for years to come.
Recommending appropriate cleaning products and techniques
When it comes to cleaning your wood slats, it’s important to use non-abrasive products and gentle techniques to avoid damaging the wood. Here are some recommendations for cleaning products and techniques:
- Gentle wood cleaner: Use a gentle wood cleaner specifically formulated for cleaning wooden surfaces. These cleaners are designed to remove dirt and grime without causing any harm to the wood.
- Mild soap and water: In some cases, a mixture of mild soap and water can be an effective and safe option for cleaning your wood slats. Simply mix a small amount of mild soap with water, dampen a soft cloth or sponge, and gently wipe the slats.
- Microfiber cloth: When cleaning your wood slats, opt for a microfiber cloth instead of rough scrubbing pads or brushes. Microfiber cloths are soft and won’t scratch or damage the wood surface.
Once you have selected the appropriate cleaning product, it’s time to move on to the cleaning technique. Here’s how to clean your wood slats:
- Dust the slats: Before applying any cleaning product, start by dusting the slats to remove loose dirt and debris. You can use a microfiber cloth or a soft bristle brush to gently dust off the surface.
- Apply the cleaner: If you’re using a gentle wood cleaner, follow the instructions provided on the packaging. Apply the cleaner to a damp cloth and gently wipe the slats in the direction of the wood grain.
- Wipe off excess cleaner: After cleaning, make sure to wipe off any excess cleaner with a clean, damp cloth. This will prevent any residue from drying on the slats and leaving streaks or smudges.
- Dry properly: It’s crucial to allow the wood slats to dry completely after cleaning. Leaving them damp can lead to water damage or warping. Use a dry cloth to remove any excess moisture and let the slats air dry naturally.
By following these tips and using the appropriate cleaning products and techniques, you can ensure that your wood slats on the wall remain clean and well-maintained. Regular cleaning and proper maintenance will not only enhance the aesthetic appeal of your space but also prolong the life of your wood slats.
Showcasing Your Wood Slats Wall
Exploring Creative Ideas to Enhance the Visual Appeal of the Wood Slats Wall
Once you have successfully installed wood slats on your wall, it’s time to showcase your masterpiece. A wood slats wall adds a touch of elegance and warmth to any space. However, you can elevate its visual appeal even further by implementing creative ideas that make it the highlight of your room. Here are some exciting ways to enhance the beauty and charm of your wood slat wall:
Adding Complementary Elements Like Lighting or Decor to Highlight the Slats
One of the simplest yet most effective ways to accentuate your wood slats wall is through strategic lighting. By adding lights that are focused on the slats, you can create beautiful patterns and shadows, bringing attention to the texture and depth of the wood. Consider using wall sconces, pendant lights, or even recessed lighting to create a dramatic effect. Additionally, hanging artwork or mirrors on the wood slats wall will not only add interest but also provide an opportunity to play with reflections and dimensions.
Ensuring Each H3 Heading Adheres to HTML Syntax
It is important to adhere to HTML syntax in order to ensure proper formatting and readability on WordPress. To achieve this, use the following format:
<h3>Heading Text</h3>
For example, the heading “Added Complementary Elements Like Lighting or Decor to Highlight the Slats” would be written as:
<h3>Adding Complementary Elements Like Lighting or Decor to Highlight the Slats</h3>
By using HTML syntax, you can structure your content appropriately and optimize it for search engines. This way, your blog post will not only be visually appealing but also accessible and user-friendly.
With the right lighting and decorative elements, you can transform your wood slats wall into a stunning focal point that grabs attention and impresses anyone who walks into the room. Don’t be afraid to get creative and experiment with different ideas to find the perfect combination that truly showcases the beauty of your wood slats wall.
Frequently Asked Questions On How To Install Wood Slats On Wall
Can You Glue Wood Slats To Wall?
Yes, you can glue wood slats to the wall. It’s important to choose a strong adhesive and ensure the wall is clean and dry before applying the glue. Apply the glue evenly to the slat and press firmly against the wall for a secure bond.
How Do You Install Slatted Wall Panels?
To install slatted wall panels, follow these steps:
1. Measure and mark the desired placement of panels on the wall.
2. Secure wall brackets at appropriate intervals.
3. Attach the panels to the brackets using screws or nails.
4. Ensure panels are level and secure.
5. Repeat the process until all panels are installed.
What Wood Do You Use For A Slat Wall?
Slat walls are commonly made from various types of wood such as pine, cedar, or MDF. These woods are known for their durability, versatility, and aesthetic appeal, making them ideal for creating functional and stylish slat walls.
How Far Apart Should Slats Be On A Wall?
The slats on a wall should be spaced evenly, typically between 4 to 6 inches apart. This spacing ensures stability and allows for proper airflow, preventing moisture buildup.
Conclusion
Installing wood slats on a wall can be a simple and trendy way to add character and warmth to any space. By following the step-by-step guide outlined in this blog post, you’ll be able to achieve a professional-looking result. Remember to choose quality materials, properly measure and prepare the wall, and secure the slats securely.
With a little time and effort, you’ll have a stunning wood slat wall that will be the envy of your friends and family.