To install wood planks on a wall, follow these steps: measure and mark the planks cut them to size, apply adhesive, and secure them to the wall using nails or screws. Transforming the look of your walls with wood planks can add warmth and character to any room.
Whether you are aiming for a rustic or modern aesthetic, wood planks can create a stunning focal point or accent wall. In this guide, we will walk you through the process of installing wood planks on your wall, from measuring and cutting the planks to securing them with adhesive and fasteners.
With a few tools and some patience, you can achieve a beautiful, customized look that will enhance the overall design of your space. So, let’s get started with the installation process.
Choosing The Right Wood Planks
Factors to Consider When Selecting Wood Planks for Your Wall
Choosing the right wood planks is a crucial step in ensuring a successful and visually appealing installation on your wall. Here are some factors to consider before making your decision:
- Budget: Determine your budget and stick to it. Wood planks come in various price ranges, so it’s important to find a balance between quality and affordability.
- Style and Aesthetic: Consider the overall style and aesthetic of your space. Different types of wood can create different atmospheres, from rustic to modern and everything in between.
- Durability: Assess the level of durability you require for your installation. Some wood species are more durable and resistant to wear and tear, making them suitable for high-traffic areas or places with potentially high moisture levels.
- Installation Location: Consider where you plan to install the wood planks. Indoor installations may have different requirements compared to outdoor or partially exposed installations.
- Maintenance: Determine the amount of time and effort you are willing to dedicate to the maintenance of your wood planks. Some types of wood require regular staining or sealing to maintain their appearance and longevity.
Different Types of Wood and Their Characteristics
Various types of wood are available for your wall plank installation, each with its own unique characteristics. Let’s explore some popular options:
| Wood Type | Characteristics |
|---|---|
| Pine | Softwood with a light color and often contains knots. It’s an affordable option but may require more maintenance. |
| Oak | Hardwood known for its durability and attractive grain patterns. It comes in various shades, including red oak and white oak. |
| Cedar | Softwood with a pleasant aroma and natural resistance to insects and rot. It’s often used for outdoor installations. |
| Maple | Hardwood with a pale color and subtle grain patterns. It provides a clean and contemporary look. |
| Walnut | Hardwood with a rich, dark brown color and distinctive grain patterns. It adds elegance and warmth to any space. |
These are just a few examples, and there are many more wood species available. Make sure to explore different options and consider their specific characteristics before making your final decision.
By choosing the right wood planks and understanding their characteristics, you can create a stunning and durable wall installation that enhances the overall ambiance of your space.
Preparing The Wall Surface
Assessing the condition of the wall
One of the first steps in installing wood planks on a wall is to carefully assess the condition of the wall surface. By doing so, you can identify any existing problems that may need to be addressed before proceeding with the installation. Checking for cracks, holes, or unevenness is crucial to ensure a smooth and seamless installation. To assess the condition of the wall, follow these steps:
- Inspect the entire wall surface, paying close attention to any visible imperfections such as cracks, dents, or water damage.
- Use your fingers to gently press on the wall, feeling for any soft or hollow spots that may require additional attention.
- Take note of any areas that need repair, as these will need to be addressed before moving forward with the installation.
Cleaning and repairing any damage
Once you have assessed the condition of the wall and identified any areas in need of repair, it’s time to clean and repair the wall surface. This step ensures that the wood planks adhere properly to the wall and helps create a smooth and flawless finish. Follow the steps below to clean and repair the wall surface effectively:
- Begin by removing any dirt, dust, or debris from the wall using a soft-bristled brush or a vacuum cleaner. This will help create a clean surface for the wood planks to adhere to.
- If there is any loose or flaky paint, use a scraper or sandpaper to gently remove it. Be sure to wear protective goggles and a face mask to avoid inhaling any dust particles.
- Fill any cracks, holes, or dents in the wall with a suitable wall filler or spackle. Smooth out the filler using a putty knife and let it dry completely according to the manufacturer’s instructions.
- After the filler has dried, use sandpaper to smooth out the repaired areas. This will ensure a seamless finish when the wood planks are installed.
Applying a primer for better adhesion
To guarantee optimal adhesion between the wood planks and the wall, it is crucial to apply a primer. Primer acts as a bonding agent, creating a strong foundation for the wood planks and improving their overall adherence. Follow these steps to apply a primer effectively:
- Choose a primer that is suitable for both your wall surface and the wood planks you will be installing. You can consult your local paint store or seek professional advice to ensure you select the right primer.
- Use a paint roller or brush to apply an even coat of primer to the entire wall surface. Be sure to follow the manufacturer’s instructions regarding drying time.
- Allow the primer to dry completely. This may take anywhere from a few hours to overnight, depending on the specific product you are using.
By assessing the condition of the wall, cleaning and repairing any damage, and applying a primer for better adhesion, you are now ready to install wood planks onto your wall. These steps ensure a smooth and successful installation, resulting in an aesthetically pleasing and durable finish. Remember to carefully follow manufacturer instructions and seek professional advice if needed.
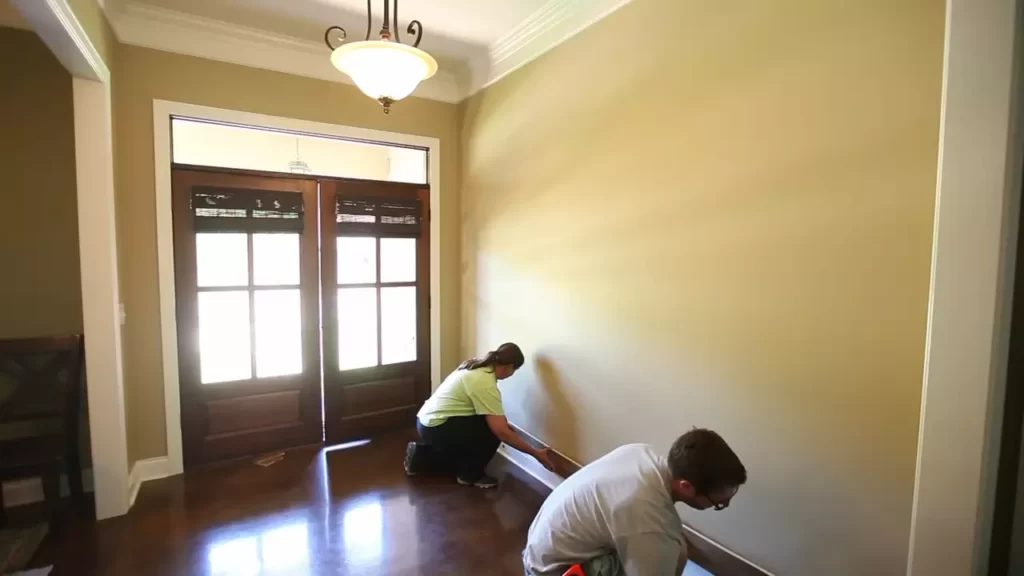
Installing The Wood Planks
Installing wood planks on a wall is a great way to add warmth and character to any room. Whether you’re going for a rustic, farmhouse look or a more modern aesthetic, wood planks can transform the entire vibe of the space. In this guide, we’ll walk you through the step-by-step process of installing wood planks on your wall, from measuring and marking to final installation.
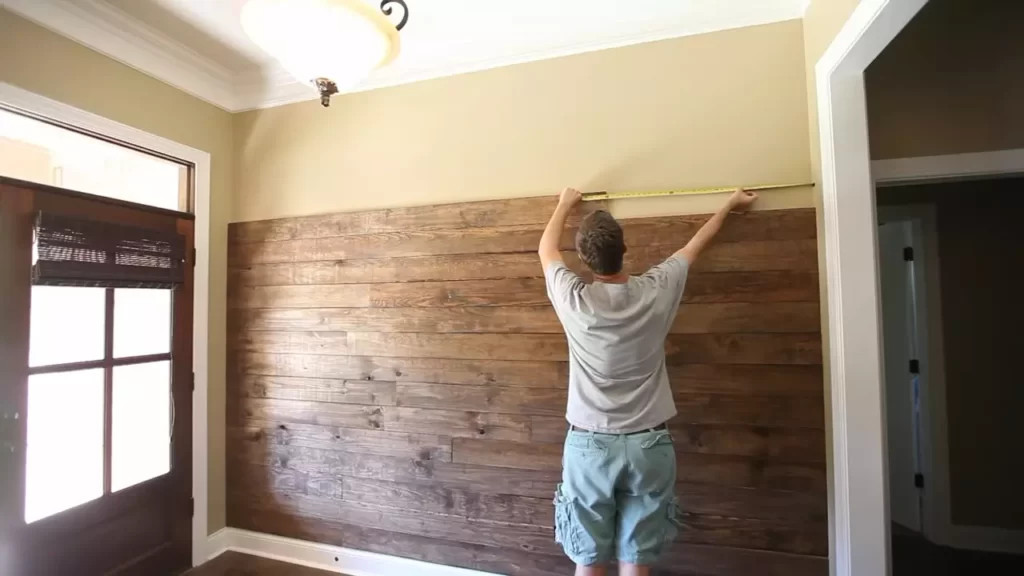
Measuring and marking the wall for plank placement
Before you begin installing the wood planks, it’s crucial to properly measure and mark the wall to ensure accurate placement. Here’s how you can do it:
- Start by measuring the height and width of the wall using a tape measure.
- Divide the height of the wall by the height of the wood planks to determine the number of rows needed.
- Using a level and a pencil, mark a straight line along the top and bottom of the wall for the first row of wood planks.
- Measure and mark the vertical placement of the remaining rows, ensuring equal spacing between each row.
Cutting the wood planks to the desired sizes
Once you have marked the wall for plank placement, it’s time to cut the wood planks to the desired sizes. Here’s what you need to do:
- Measure the width of the wall to determine the length of the planks needed.
- Using a miter saw or a circular saw, cut the planks to the measured length. Be sure to wear safety goggles and gloves to protect yourself while cutting.
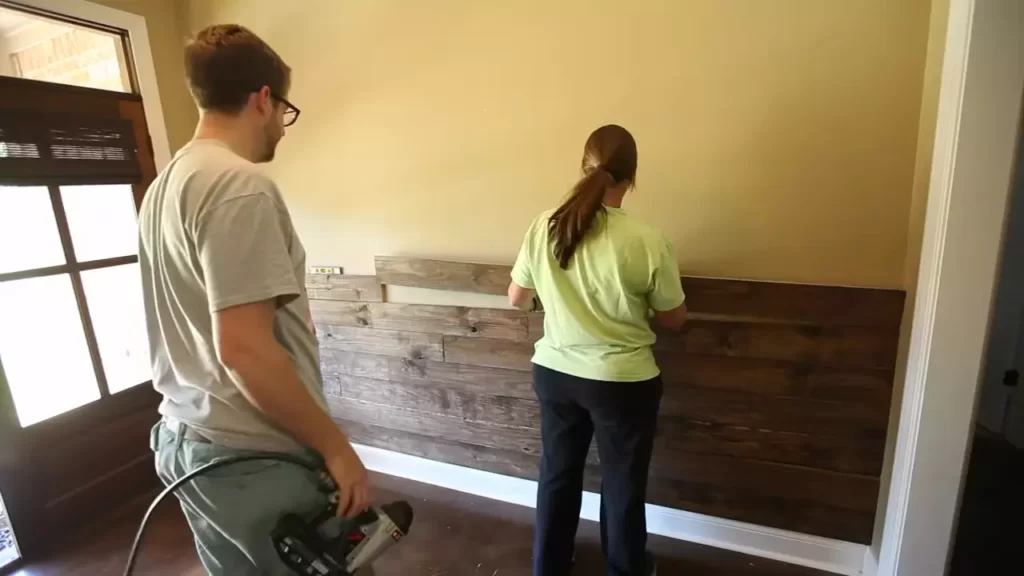
Applying adhesive or using nails for installation
Now that you have the wood planks cut to size, it’s time to secure them to the wall. You can choose to use an adhesive or nails for installation. Here are the steps to follow:
Using adhesive:
- Apply a generous amount of wood adhesive to the back of each wood plank.
- Press the plank firmly onto the marked area of the wall.
- Repeat this process for each row of planks, ensuring a tight fit between each plank.
Using nails:
- Using a nail gun or a hammer and nails, secure the wood planks to the wall.
- Place the nails along the top and bottom edges of each plank, as well as in the center for added stability.
- Ensure that the nails are driven flush with the surface of the wood to create a seamless look.
Ensuring proper alignment and spacing between planks
As you install the wood planks, it’s crucial to ensure proper alignment and spacing between them. This will create a visually appealing and professional-looking finished product. Here are some tips to help you achieve this:
- Use a level to check the alignment of each plank as you install them.
- Ensure that each plank is tightly pressed against the previous one to eliminate any gaps.
- Use spacers or a small piece of wood to maintain consistent spacing between the planks.
- Adjust as necessary to ensure an even and balanced appearance.
By following these steps, you’ll be able to install wood planks on your wall with precision and confidence. Remember to take your time and double-check your measurements and alignment throughout the process. Soon enough, you’ll have a stunning feature wall that adds warmth and character to your space.

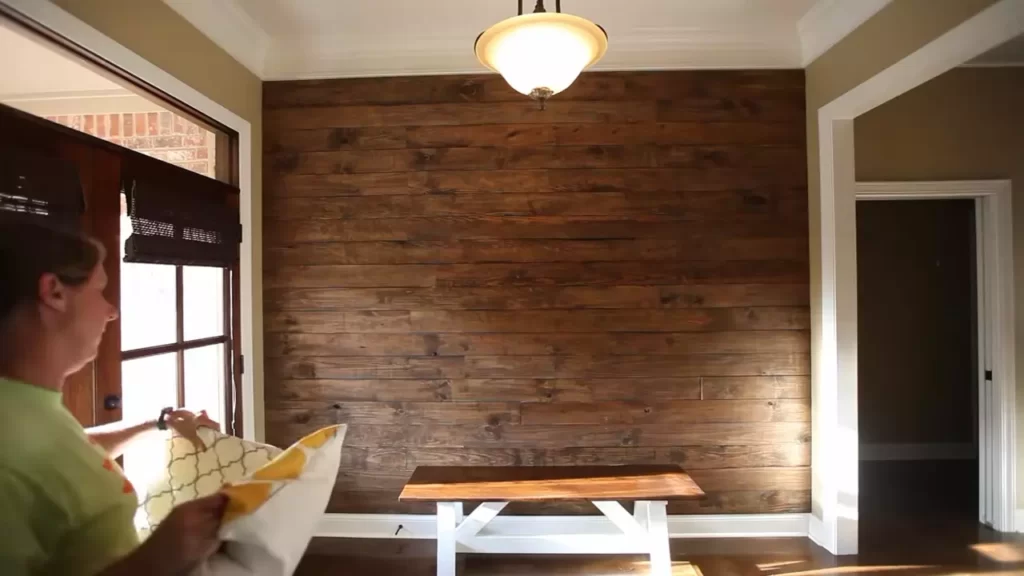
Finishing Touches
The finishing touches are what will truly elevate your wood plank wall installation, making it a standout feature in any room. By taking the time to sand the wood planks, applying stain or paint, and sealing the wood for added protection, you can ensure that your wall not only looks stunning but can also withstand the test of time. In this section, we will walk you through each step of the finishing process, ensuring a smooth and professional-looking result.
Sanding the wood planks for a smooth finish
Sanding the wood planks is a crucial step in achieving a flawless finish on your wall. Start by using a coarse-grit sandpaper to remove any rough areas or imperfections on the surface. Be sure to sand in the direction of the grain to avoid creating scratches. Once you have sanded the planks with the coarse-grit sandpaper, switch to a finer-grit sandpaper to smooth out the surface even further.
To make the sanding process easier and more efficient, consider using a sanding block or an electric sander. These tools will help you achieve a consistent and uniform sanding across all the planks.
After sanding, wipe down the planks with a damp cloth to remove any dust or debris. This will prepare the surface for the next step of the finishing process.
Applying stain or paint to enhance the appearance
Once the wood planks are sanded and cleaned, it’s time to enhance their appearance by applying stain or paint. Whether you prefer the natural look of stained wood or want to add a pop of color with paint, the choice is yours.
If you decide to stain the wood, choose a stain color that complements the overall aesthetic of your space. Apply the stain using a brush or a cloth, following the direction of the grain. Allow the stain to penetrate the wood for the recommended amount of time, then wipe off any excess with a clean cloth.
If you prefer to paint the wood, make sure to use a high-quality paint suitable for wood surfaces. Before applying the paint, apply a primer to ensure better adhesion and durability. Once the primer is dry, you can begin painting with a brush or roller. Apply multiple coats as needed, allowing each coat to dry before applying the next one.
Sealing the wood for protection against moisture and pests
To safeguard your wood plank wall against moisture and pests, it’s essential to seal the wood. A clear wood sealer or polyurethane finish can provide a protective barrier, preventing water damage and infestation.
Before applying the sealer, ensure that the stained or painted surface is completely dry. Using a brush, roller, or sprayer, apply a thin and even coat of the sealer, making sure to cover all exposed surfaces. Allow the sealer to dry according to the manufacturer’s instructions, and then lightly sand the surface with a fine-grit sandpaper. This will help smooth out any imperfections or rough spots.
Apply a second coat of sealer for added protection, following the same process. Remember to allow sufficient drying time between coats. Once the final coat is dry, your wood plank wall is ready to be admired.
Maintenance And Care
Proper maintenance and care are essential for ensuring the longevity and beauty of your wood plank wall. By understanding how to regularly clean and upkeep the planks, addressing potential issues such as warping or fading, and following some key tips, you can preserve the appeal of your wall for years to come.
Regular cleaning and upkeep of the wood planks
To keep your wood plank wall looking its best, it’s crucial to establish a routine cleaning and upkeep regimen. Here are a few steps you can follow:
- Dust regularly: Dust accumulation can dull the appearance of your wood planks over time. Use a soft cloth or a duster to gently remove dust from the surface.
- Wipe with a gentle cleaner: Occasionally, you may need to use a mild and non-abrasive cleaner to remove dirt or stains. Mix a small amount of gentle cleaner with warm water, dampen a cloth, and wipe the planks gently. Remember to dry the surface thoroughly afterward to avoid water damage.
- Avoid harsh chemicals: Harsh chemicals and abrasive cleaners can damage the wood and its finish. Stick to gentle and natural cleaners to ensure the longevity of your wood plank wall.
Dealing with potential issues such as warping or fading
Wood planks may be susceptible to certain issues like warping or fading. However, with proper care, you can prevent or address these problems. Here are some tips:
- Monitor humidity levels: Fluctuations in humidity can cause wood to expand or contract, leading to warping. Use a hygrometer to measure the humidity in the room and consider using a dehumidifier or humidifier to maintain stable levels.
- Avoid direct sunlight: Prolonged exposure to sunlight can cause fading and discoloration of the wood. Use curtains or blinds to limit the amount of direct sunlight hitting the wall, especially during the peak hours of the day.
- Inspect for damage: Regularly check your wood plank wall for any signs of damage, such as cracks, chips, or loose planks. Promptly address these issues to prevent further damage and maintain the overall integrity of the wall.
Tips for preserving the longevity and beauty of the wall
To ensure the longevity and beauty of your wood plank wall, there are a few additional tips you can follow:
- Apply protective finishes: Consider applying a protective finish, such as a clear coat or sealant, to safeguard the surface of the wood and enhance its durability.
- Avoid excessive moisture: Water can cause significant damage to wood. Ensure that the wall is not exposed to excessive moisture, such as splashes from nearby sinks or water leaks.
- Avoid sharp objects: Be cautious when handling sharp objects around the wood plank wall. Scratches and gouges can diminish its appearance and compromise its integrity.
- Regularly inspect and clean adjacent areas: Dust and dirt can accumulate around the wood plank wall, affecting its overall cleanliness and appeal. Regularly inspect and clean the adjacent areas to prevent particles from settling on the planks.
By following these maintenance and care guidelines, you can enjoy a beautiful wood plank wall that adds warmth and character to your living space. Remember to conduct regular inspections and cleanings to ensure the ongoing beauty and longevity of your wall.
Enhancing The Look With Decorative Elements
When it comes to installing wood planks on the wall, the transformation that it brings to your space is already remarkable. However, there are some additional decorative elements that can take it a step further and truly elevate the look of your wall.
Adding Trim or Molding to Create a Polished Look
If you want to achieve a more refined and polished appearance for your wood plank wall, adding trim or molding is the way to go. This decorative element not only adds an elegant touch but also helps to create a clean and finished look.
Consider installing crown molding at the top of the wall to add a touch of sophistication. This type of molding not only hides any imperfections between the wall and ceiling but also creates a smooth transition between the wall and the ceiling. Alternatively, you can opt for chair rail molding to add an architectural detail to your wood plank wall.
Another way to enhance the look of your wood plank wall is by adding baseboard trim. Baseboard trim not only adds a decorative element but also protects the bottom edge of the wall from damage.
Incorporating Other Design Features such as Shelves or Accent Lighting
Aside from trim and molding, incorporating other design features can further enhance the aesthetic appeal of your wood plank wall. One way to do this is by incorporating shelves into the design. Shelves not only provide functionality by offering storage or display space but also create visual interest on the wall.
| Pro Tip: | If you want to highlight certain objects or create a focal point on your wood plank wall, consider installing accent lighting. Accent lighting can be used to illuminate artwork, decorative items, or even specific areas of the wall. This addition can create a dramatic effect and draw attention to your wall. |
By adding these decorative elements to your wood plank wall, you can transform it into a stunning focal point in any room. Whether it’s through the use of trim and molding or incorporating shelves and accent lighting, these design features will undoubtedly enhance the overall look and feel of your space.
Frequently Asked Questions Of How To Install Wood Planks On Wall
How Do You Attach Wood Planks To The Wall?
To attach wood planks to the wall, follow these steps:
1. Measure and mark the desired location for the plank on the wall.
2. Use a stud finder to locate the wall studs for secure attachment.
3. Pre-drill holes into the plank and the studs.
4. Use screws to attach the plank to the wall, aligning it with the marks.
5. Repeat the process for each plank, ensuring they are securely fastened to the wall.
Can You Glue Wood Planks To Wall?
Yes, you can glue wood planks to a wall. Use strong adhesive designed for wood and make sure both the wall and planks are clean and dry before applying. Apply the glue evenly, press the planks firmly against the wall, and allow sufficient time for the adhesive to dry completely.
How Do You Put Wood Pieces On The Wall?
To put wood pieces on the wall, follow these steps:
1. Clean the wall surface and make sure it is smooth.
2. Measure and mark the desired positions for the wood pieces.
3. Apply adhesive or screws to attach the wood pieces to the wall.
4. Use a level to ensure the pieces are straight and aligned.
5. Allow sufficient time for the adhesive to dry or tighten the screws securely.
For a professional finish, consider staining or sealing the wood pieces before attaching them to the wall.
Do You Start At The Top Or Bottom Of A Wood Plank Wall?
Start at the bottom of a wood plank wall.
Conclusion
To sum up, installing wood planks on a wall can be a great way to add warmth and character to any space. By following the step-by-step process outlined in this blog post, you can easily transform your walls into a stunning focal point.
Whether you choose to use reclaimed wood or opt for new planks, the end result will be a beautiful and timeless look that enhances the overall aesthetic of your home. Don’t hesitate to give it a try and let your creativity shine!