To install a window AC in a side sliding window, you need to measure the window opening, purchase a compatible bracket or installation kit, secure the bracket to the window frame, and then securely mount the AC unit onto the bracket. Make sure to follow the manufacturer’s instructions for the specific AC model you are installing.
Installing a window AC in a side sliding window can be done with the right tools and careful attention to detail. It is important to ensure a proper fit and secure installation to prevent any accidents or damage. By following the correct steps, you can enjoy a cool and comfortable space during hot summers.
Gathering The Necessary Tools And Materials
Before you start the process of installing a window AC in a side sliding window, it is important to gather all the necessary tools and materials. This will ensure a smooth and hassle-free installation. In this section, we will discuss the measures and tools needed as well as acquiring the required materials.
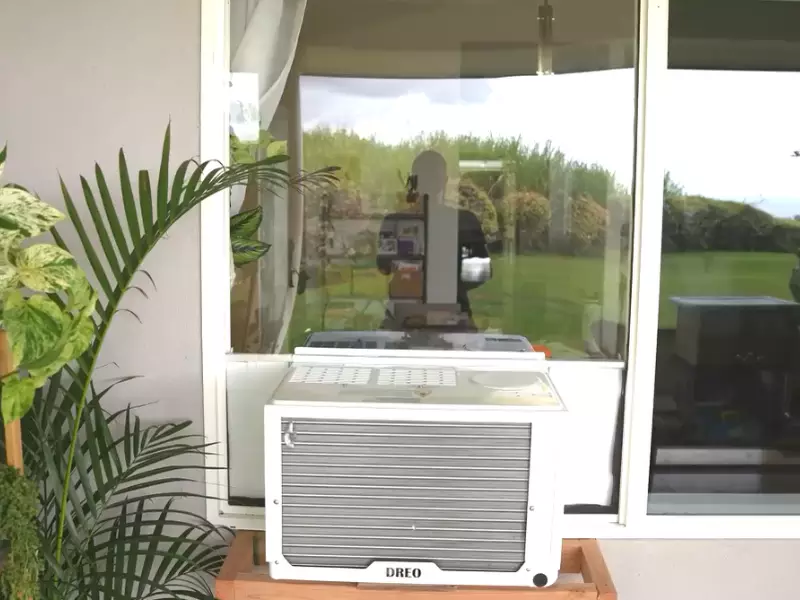
Measures and Tools Needed
Before you begin, take the following measures and ensure you have the required tools:
- Measurements: Measure the dimensions of your window opening to ensure that the AC unit you purchase fits perfectly.
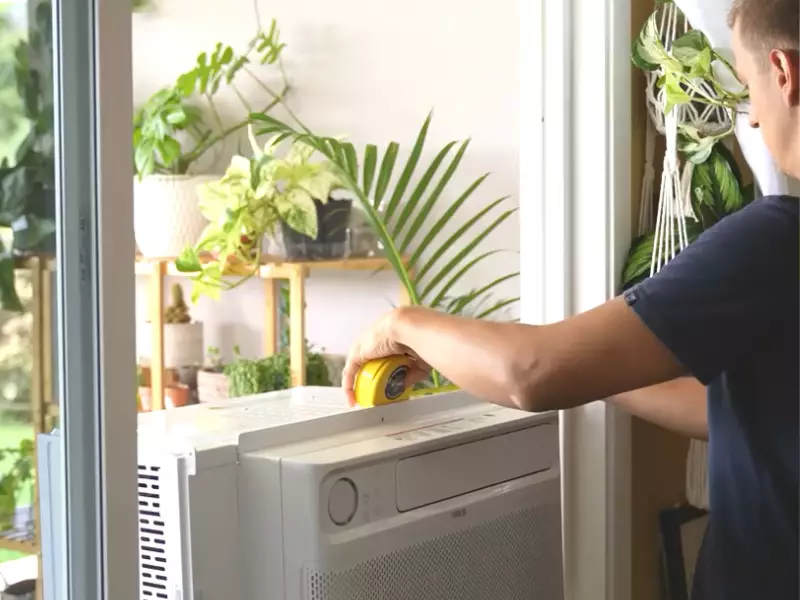
- Tape Measure: Use a reliable tape measure to accurately measure the width, height, and depth of the window opening.
- Level: A level is essential to ensure that the AC unit is installed evenly and properly aligned.
- Drill: A drill will be needed to create holes for mounting brackets and support.
- Screwdriver: Have a set of screwdrivers available for loosening and tightening screws during the installation process.
Acquiring the Required Materials
In addition to the tools mentioned above, make sure you acquire the following materials:
| Materials | Description |
|---|---|
| Mounting Brackets | These brackets will securely hold the AC unit in place. |
| Support Bracket | A support bracket is necessary to provide additional support for the AC unit. |
| Window Seal Kit | A window seal kit will help seal any gaps between the AC unit and the window frame, preventing air leakage. |
| Weatherstripping | Weatherstripping will further seal the gap between the window and the AC unit, enhancing energy efficiency. |
| Extension Cord | If the power outlet is not within reach, an extension cord may be needed to connect the AC unit. |
By ensuring you have the correct tools and materials in advance, you can proceed with confidence knowing that you are well-prepared for the installation process. In the next section, we will discuss the step-by-step instructions to install the window AC unit.
Measuring The Window Opening
Measuring the Window Opening is an essential step to ensure a proper installation of your window air conditioner (AC). By accurately measuring the window opening, you can determine the right size of the AC unit and avoid any installation issues. In this section, we will guide you through the process of taking accurate measurements and determining the required capacity for your window AC.
Taking Accurate Measurements
Before you begin the installation process, it is crucial to measure the window opening accurately. The measurements will help you determine the dimensions of the window AC unit required for a perfect fit. Follow these steps to take accurate measurements for your window opening:
- Start by measuring the width of the window opening. Use a tape measure to measure the distance between the left and right sides of the window frame. Ensure that you measure the inside width of the opening, excluding any bars or obstructions that may be present.
- Next, measure the height of the window opening. Use the tape measure to measure the distance from the top to the bottom of the window frame. Again, make sure to measure the inside height of the opening, excluding any bars or obstructions.
| Measurement | Value |
|---|---|
| Window Opening Width | XX inches |
| Window Opening Height | XX inches |
Make sure to note down these measurements accurately as you will need them when determining the required capacity of your window AC unit.
Determining the Required Capacity
Once you have taken the measurements of the window opening, the next step is to determine the required capacity of the window AC unit. The capacity of an AC unit is measured in British Thermal Units (BTUs) and is determined by the size of the room or space you want to cool. The general rule of thumb is to multiply the square footage of the room by 20 to find the recommended BTU capacity.
For example, if your room measures 200 square feet, you would need a window AC unit with a BTU capacity of 4000 (200 x 20 = 4000). However, several factors may affect the required capacity, such as the number of windows in the room, the level of insulation, and the presence of heat-generating appliances.
To get a more accurate estimate of the required capacity, it is recommended to consult an HVAC professional or refer to the manufacturer’s guidelines. They will consider these factors and provide you with the most suitable BTU capacity for your window AC unit.
By taking accurate measurements and determining the required capacity, you can ensure a successful installation of your window AC unit in a side sliding window. Remember, proper measurements and capacity calculations are vital for optimal cooling performance and energy efficiency.
Preparing The Window Opening
Before you can install a window AC unit in a side sliding window, you need to make sure the window opening is prepared properly. This involves clearing any obstructions and ensuring proper alignment. Follow these steps to get your window opening ready for installation.
Clearing Obstructions
The first step in preparing the window opening is to clear any obstructions that may hinder the installation process. This includes removing any curtains, blinds, or other window coverings that block the window. Make sure the area around the window is free from clutter, as this will make it easier to work.
Ensuring Proper Alignment
Proper alignment is crucial to ensure a secure and efficient installation of your window AC unit. Follow these guidelines to ensure your window opening is properly aligned:
- Measure the width of your window opening to determine if it is suitable for your AC unit. Compare this measurement to the dimensions of the AC unit to ensure compatibility.
- Check if the window opening is level. Use a spirit level to verify that the top and bottom edges are parallel.
- Inspect the window frame for any signs of damage or rot. Repair or replace any damaged areas before proceeding with the installation.
- Ensure the window sash is in good condition and can be securely closed and locked once the AC unit is installed.
By taking these steps to clear obstructions and ensure proper alignment, you will be ready to proceed with the installation of your window AC unit in a side sliding window. Stay tuned for the next steps in our guide to learn how to complete the installation process.
Mounting The Bracket
Installing a window air conditioner in a side sliding window is a convenient solution to keep your space cool during those hot summer months. One essential step in the installation process is mounting the bracket securely. In this section, we will guide you through the necessary steps to choose the right location for your air conditioner and attach the bracket securely.
Choosing the Right Location
Before you begin mounting the bracket for your window air conditioner, it is important to carefully choose the right location. Here are a few factors to consider:
- Ensure that the window you have chosen has adequate support to hold the weight of the air conditioner.
- Choose a window that is close to an electrical outlet to avoid any potential hazards or inconvenience.
- Consider the direction of sunlight and prevailing winds to maximize the efficiency of the air conditioner.
Once you have identified the ideal location, proceed to the next step of attaching the bracket securely.
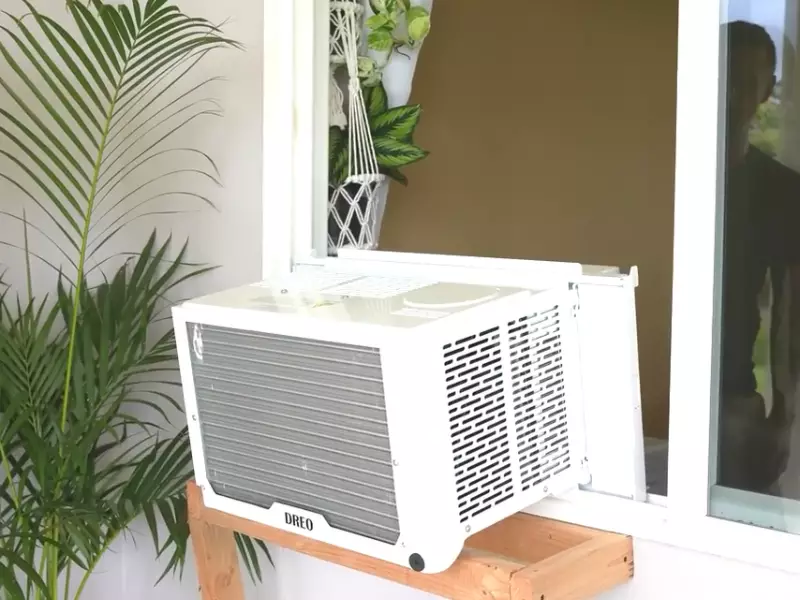
Attaching the Bracket Securely
To ensure a safe and stable installation, follow these steps to attach the bracket securely:
- Clean the surface of the window frame thoroughly.
- Measure the width of the window frame and mark the center point.
- Position the bracket in the center of the window frame and mark the screw holes with a pencil.
- Use a drill to create pilot holes at the marked points.
- Align the bracket with the pilot holes and secure it in place using screws or bolts, depending on the type of bracket provided with your air conditioner.
- Double-check the stability of the bracket, making sure it is firmly attached.
Once the bracket is securely attached, you can proceed to install the window air conditioner onto the bracket. Refer to the manufacturer’s instructions for further guidance on the installation process specific to your model of air conditioner.
Mounting the bracket is a crucial step in installing a window air conditioner in a side sliding window. By choosing the right location and attaching the bracket securely, you can enjoy a cool and comfortable environment throughout the summer season.
Installing The Air Conditioner
Properly Positioning the Unit
To ensure efficient cooling, it is important to properly position the window air conditioner within the side sliding window. Start by opening the window to its maximum width, allowing sufficient space for the AC unit. Ideally, the window should be on the shorter side, as this allows the conditioner to rest securely on the window sill.
Inserting the Unit into the Bracket
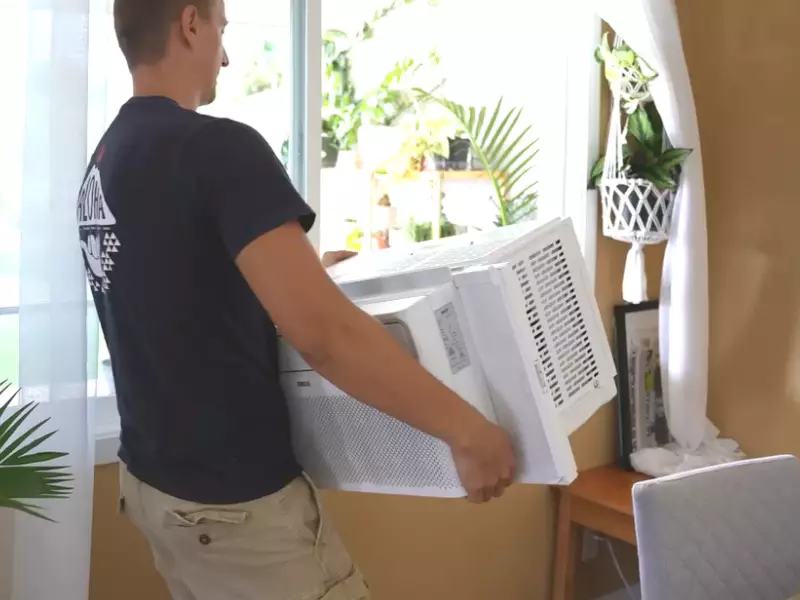
Before inserting the AC unit into the bracket, make sure the bracket is securely installed. It should be mounted at a suitable height, ensuring the unit is level with the window frame. Once the bracket is in place, carefully lift the air conditioner and align it with the opening in the window. Slowly slide the unit into the bracket, ensuring it fits snugly.
Here is a step-by-step guide to help you through the process:
- Open the side sliding window to its maximum width.
- Ensure the bracket is securely mounted at the appropriate height.
- Lift the window air conditioner and align it with the window opening.
- Slowly slide the unit into the bracket, making sure it sits securely.
- Double-check that the unit is level and well-positioned within the window.
- Carefully close the window, ensuring it is fully sealed around the air conditioner to prevent air leakage.
- Turn on the AC unit and adjust the settings as desired for optimal cooling.
By following these steps, you can successfully install your window air conditioner in a side sliding window, maximizing the cooling efficiency while keeping your space comfortable during the hot summer months.
Sealing And Insulating
When it comes to installing a window AC in a side sliding window, a crucial step is properly sealing and insulating the setup. This ensures that the installation is secure, airtight, and efficient for cooling purposes. By taking the time to seal and insulate, you can enhance the performance of your AC unit and prevent any leaks or drafts. In this section, we will explore two key aspects of sealing and insulating – ensuring efficient cooling and weatherproofing the installation.
Ensuring Efficient Cooling
To ensure efficient cooling in your room, it is important to properly seal the gaps between the AC unit and the window frame. This helps to prevent the escape of cool air and the entry of warm air from outside. Here are some steps to follow to ensure optimal cooling:
- Measure the dimensions of your window and the AC unit. This will help you determine the necessary materials for sealing.
- Apply weatherstripping adhesive tape along the edge of the AC unit that will come in contact with the window frame. This tape helps to create a tight seal and prevent any air leakage.
- Place foam insulation strips on the sides of the window frame. These strips fill in any gaps between the AC unit and the window frame, improving insulation.
- Ensure that the AC unit is securely mounted in the window, using brackets or support brackets as recommended by the manufacturer.
- After installation, inspect the seal to ensure there are no visible gaps or cracks. Use caulk or sealant to fill in any remaining openings.
By following these steps, you can create a well-sealed and insulated setup, allowing your window AC to cool your room efficiently without wasting energy.
Weatherproofing the Installation
In addition to ensuring efficient cooling, weatherproofing the installation helps to protect your window AC unit from external elements such as rain, dust, and pests. Here are some methods to weatherproof your installation:
- Apply a coat of waterproof sealant around the exterior of the window frame. This prevents water from seeping into the gaps between the frame and the AC unit.
- Consider installing a window insulator kit, which includes a plastic film that provides an additional barrier against drafts and moisture.
- Inspect and clean the window track regularly to ensure smooth operation of the sliding window.
- Use a window cover or insulated fabric panel during the off-season to protect the AC unit from the elements and improve energy efficiency.
By weatherproofing your installation, you can extend the lifespan of your window AC unit and maintain its performance even in challenging weather conditions.
Testing And Finishing Touches
When it comes to installing a window AC unit in a side sliding window, the testing and finishing touches are crucial to ensure proper functionality. These final steps will give you peace of mind and help you enjoy the cool comfort of your air conditioner to its fullest. In this section, we will discuss two key aspects: Powering Up the Unit and Checking for Proper Functionality.
Powering Up the Unit
Before plugging in your window AC unit, it is important to double-check that the power cord is in good condition and not frayed or damaged. A damaged power cord can be a safety hazard and may cause electric shock or fire. Once you have confirmed the power cord is intact, carefully plug it into a grounded electrical outlet.
Note: Avoid using extension cords or power strips as they may not provide sufficient power to the unit and can also be a potential fire hazard. It’s always best to plug the AC unit directly into a dedicated wall outlet.
Checking for Proper Functionality
After powering up the unit, it’s time to check if it is functioning correctly. Start by setting the thermostat to the desired temperature and the cooling mode. Allow the AC unit to run for a few minutes and listen for any unusual or loud noises. Ideally, the sound should be moderate, indicating that the compressor is running smoothly.
Next, check for proper airflow. Place your hand in front of the vents to feel if the air is coming out cold and with sufficient force. If the airflow seems weak, check if there are any obstructions blocking the vents, such as curtains or furniture. Also, ensure that the air conditioner is properly sealed in the window frame to prevent air leaks.
Furthermore, inspect the condensation drain to make sure it is not blocked. If your window AC unit has a condensation drainage system, such as a drip tray or hose, ensure it is properly connected and free from any clogs.
If you encounter any issues or notice anything unusual during the testing process, consult the user manual or contact the manufacturer’s customer support for guidance. It’s better to address any problems early on to avoid further complications and optimize the performance of your window AC unit.
Regular Cleaning And Maintenance
Regular cleaning and maintenance are essential for keeping your window AC unit in optimal working condition. By performing these tasks regularly, you can improve the unit’s cooling efficiency and prolong its lifespan. In this section, we will walk you through two crucial aspects of AC maintenance: cleaning the filters and inspecting the unit for wear and tear.
Cleaning the Filters
One of the most important maintenance tasks for your window AC unit is cleaning the filters. Over time, these filters can become clogged with dust, dirt, and other debris, which restricts airflow and reduces the unit’s ability to cool the room effectively.
To clean the filters, follow these simple steps:
- Turn off the AC unit and unplug it from the power source.
- Locate the filter panel, usually located on the front or side of the unit.
- Remove the filter panel by gently pulling it away from the unit.
- Take out the filters and inspect them for any visible dirt or debris.
- If the filters are washable, rinse them under running water. Alternatively, use a vacuum cleaner to remove the dust and dirt.
- Allow the filters to dry completely before placing them back into the unit.
- Reattach the filter panel to the unit.
By cleaning the filters at least once every month, you can ensure that your window AC unit performs optimally and maintains good indoor air quality.
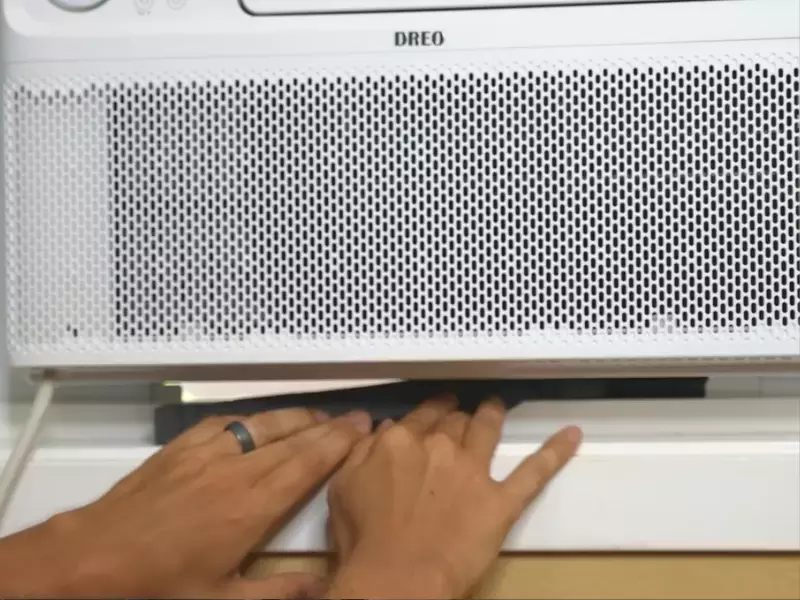
Inspecting the Unit for Wear and Tear
Another important aspect of regular maintenance is inspecting your window AC unit for any signs of wear and tear. This allows you to identify potential problems early on and take necessary measures to prevent further damage.
Here are a few key areas to inspect:
| Area | What to Inspect |
|---|---|
| Condenser Coils | Check for dirt and debris buildup, which can affect the unit’s cooling efficiency. |
| Electric Wiring | Look for any frayed wires, loose connections, or other signs of electrical problems. |
| Control Panel | Ensure that all buttons and settings are functioning properly. |
| Drainage System | Check for any clogs or leaks in the condensate drain pan and drain pipe. |
If you notice any issues during your inspection, it is recommended to consult a professional technician to address the problem promptly.
In conclusion, regular cleaning and maintenance are essential for keeping your window AC unit in top shape. By cleaning the filters and inspecting the unit for wear and tear, you can ensure optimal performance and prolong the lifespan of your cooling system.
Ensuring Safety
Proper Ventilation
Proper ventilation is key to ensuring the safe installation and operation of a window AC in a side sliding window. Without adequate ventilation, heat and moisture can build up, leading to a host of problems such as decreased cooling efficiency and potential damage to the unit.
To ensure proper ventilation, it is important to:
- Clear any obstacles in front of the air intake and exhaust vents on the unit. This includes furniture, curtains, and any other objects that may obstruct the airflow.
- Consider using window seals or weatherstripping to prevent hot air from leaking in from the outside and cool air from escaping.
- Regularly clean and maintain the AC unit to remove any accumulated dirt, dust, or debris that can inhibit airflow.
Regular Inspections and Repairs
Regular inspections and repairs are crucial for maintaining the safety and performance of your window AC unit. By routinely checking for any signs of wear, damage, or malfunction, you can address issues before they escalate and potentially cause harm.
Here are some key points to keep in mind when it comes to inspections and repairs:
- Inspect the power cord and plug for any fraying or damage. If any issues are found, the cord should be replaced immediately to prevent electrical hazards.
- Check the window frame and sliding mechanism for any signs of damage or instability. A secure and stable window is essential for proper installation and safe operation.
- Examine the unit for any leaks or unusual noises. If you notice any leaks, it may indicate a refrigerant or condensate problem that requires professional attention.
- Regularly clean or replace the air filter to maintain optimal airflow and prevent the buildup of dirt and allergens.
- Ensure that the electrical connections are secure and free from corrosion. Loose or damaged electrical connections can pose a fire risk.
By prioritizing proper ventilation and conducting regular inspections and repairs, you can enjoy a safe and efficient window AC installation in your side sliding window. Remember, safety should always be a top consideration when it comes to home appliances.
Unit Not Cooling Properly
One of the most frustrating problems when it comes to window air conditioners is when the unit is not cooling properly. A lack of cool air can make your living space uncomfortable, especially during the hot summer months. However, before you start panicking and calling a professional, there are a few simple steps you can take to troubleshoot and potentially fix the issue on your own.
Checking Airflow
One of the first things you should check when your unit is not cooling properly is the airflow. Restricted airflow can greatly affect the cooling efficiency of your air conditioner. To check the airflow, follow these steps:
- Start by ensuring that the air filter is clean. A dirty or clogged filter can restrict airflow and reduce the cooling capacity of your unit. If your filter is dirty, remove it and clean it according to the manufacturer’s instructions. If it’s damaged or too dirty to clean, replace it with a new one.
- Next, inspect the vents and make sure they are not blocked or obstructed. Furniture, curtains, or other objects can inadvertently block the airflow, resulting in poor cooling performance. Clear any obstructions and ensure that the vents are open and unobstructed.
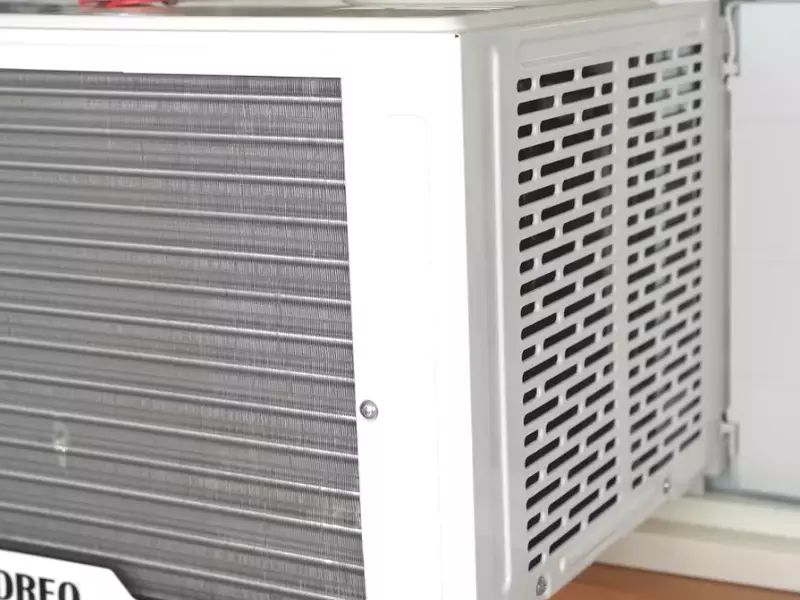
Cleaning the Coils
Dirty coils can also contribute to poor cooling performance. Over time, dust, dirt, and debris can accumulate on the condenser and evaporator coils, inhibiting heat transfer and reducing the efficiency of the unit. To clean the coils:
- First, turn off the power to the air conditioner to prevent any electrical accidents.
- Next, remove the front panel or grille to access the coils. Refer to your unit’s manual for specific instructions on how to remove the panel.
- Using a soft brush or vacuum with a brush attachment, gently clean the coils, removing any visible dirt or debris. Be careful not to bend or damage the delicate fins of the coils.
- After cleaning the coils, replace the front panel or grille and restore power to the unit.
Regular maintenance, including cleaning the air filter and coils, can help improve the cooling efficiency of your window air conditioner. If these troubleshooting steps do not resolve the issue, it may be necessary to seek professional assistance or consider purchasing a new unit.
Excessive Noise
Excessive noise from your window AC unit can not only be irritating but also disruptive to your daily activities. The constant buzzing or rattling can make it difficult to concentrate or enjoy a peaceful environment. However, there are several steps you can take to address this issue and restore tranquility to your space.
Inspecting the Fan
One common source of excessive noise in a window AC unit is a malfunctioning fan. Over time, the fan blades can become misaligned or clogged with dust and debris, causing it to vibrate and produce unwanted noise. To inspect the fan, follow these simple steps:
- Turn off the unit and unplug it from the power source for safety.
- Remove the front cover or grille of the AC unit to access the fan.
- Visually inspect the fan blades for any signs of damage or debris.
- If you notice any build-up of dust or dirt, clean the blades using a soft cloth or brush.
- Gently rotate the fan blades by hand to check for any misalignment or unusual resistance.
- If the fan blades appear damaged or are not spinning smoothly, they may need to be replaced.
By regularly inspecting and cleaning the fan blades, you can prevent excessive noise and ensure optimal performance from your window AC unit.
Addressing Loose Parts
Another common cause of excessive noise in a window AC unit is loose parts. The constant vibrations and movements of the unit can gradually loosen screws, bolts, or other components, leading to rattling noises. To address this issue:
- Turn off the unit and unplug it from the power source.
- Carefully examine the unit for any loose screws, bolts, or fasteners.
- Tighten any visible loose parts using the appropriate tools.
- If necessary, consult the user manual or seek professional assistance to ensure proper tightening of internal components.
By addressing loose parts, you can minimize the noise and vibrations produced by your window AC unit, creating a more peaceful and comfortable environment.
In conclusion, excessive noise from a window AC unit can be a nuisance, but by inspecting the fan and addressing loose parts, you can effectively reduce the noise levels and enjoy a quieter space. Regular maintenance and cleaning of your window AC unit will not only enhance its performance but also extend its lifespan. So, take the necessary steps today to create a serene and relaxing atmosphere in your home or office.
Frequently Asked Questions On How To Install Window AC in Side Sliding Window
Can You Put An Air Conditioner In A Side Sliding Window?
Yes, you can install an air conditioner in a side sliding window. It is a suitable option for cooling a room, but make sure to choose an AC unit that is specifically designed for vertical window installation.
Do Window Air Conditioners Work With Sliding Windows?
Yes, window air conditioners can be used with sliding windows. These units are designed to fit into a window frame and can be adjusted to fit different window types, including sliding windows. Make sure to properly secure the unit to prevent any accidents.
How To Install Portable AC in Side Sliding Window?
To install a portable AC in a side sliding window:
- Measure the size of the window and choose a compatible AC unit.
- Remove the window screen and open the window fully.
- Place the AC in the window opening and adjust the installation kit to fit securely.
- Extend the exhaust hose and secure it to the window opening.
- Plug in the AC unit and adjust the settings for optimal cooling.
How Do You Install A Window AC in A Side Sliding Window?
To install a window AC in a side sliding window, start by measuring the window size to ensure compatibility. Remove the sash and place the AC unit on the window sill. Attach support brackets and secure them tightly. Close the window, install weatherstripping, and plug in the unit.
Finally, adjust the angle for proper drainage.
Conclusion
Installing a window AC in a side sliding window may seem daunting, but with the right steps, it can be done easily. From measuring and preparing the window to securing the unit in place, the process requires attention to detail.
By following the guidelines mentioned in this blog post, you can successfully install a window AC in your side sliding window and enjoy cool comfort during hot summer days. Keep these tips handy and stay cool all summer long!
