To install a wall AC, choose a suitable location on the wall and mark it. Make sure the wall is structurally sound and can support the weight.
Then, install the mounting bracket and secure it to the wall. Finally, attach the AC unit to the wall. With summer approaching, many homeowners are considering installing a wall AC to keep their homes cool and comfortable. However, the installation process may seem daunting at first.
This guide will provide step-by-step instructions on how to install a wall AC unit in your home. By following these instructions, you can ensure that your AC is securely and correctly installed, allowing you to enjoy a cool and refreshing environment during the hot summer months.
Factors To Consider When Selecting A Wall Ac
Installing a wall AC unit can be a practical and efficient way to cool your home or office. But with so many options available in the market, it’s important to consider a few factors before making your purchase. By taking into account important aspects such as room size, energy efficiency, noise level, additional features, and your budget, you can ensure that you select the right wall AC unit for your specific needs. Let’s take a closer look at these factors to make an informed decision.
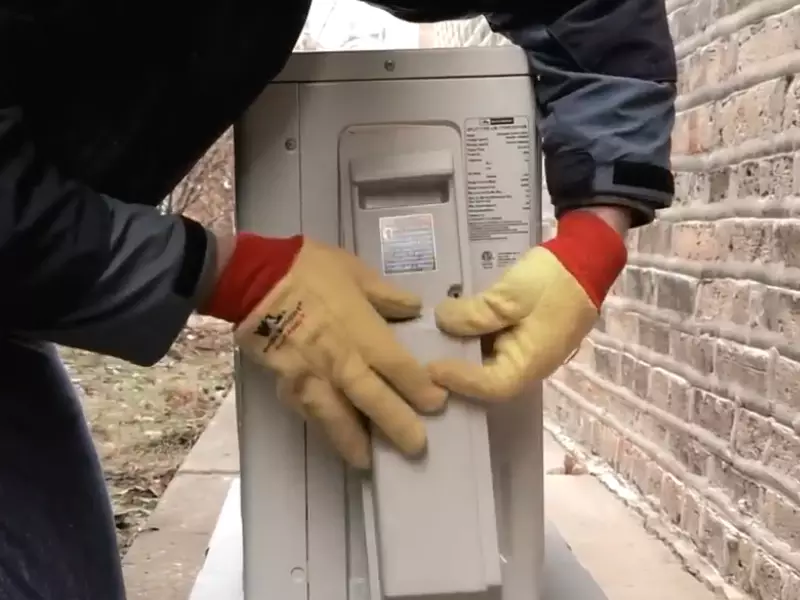
Room Size and Cooling Capacity
One of the most crucial factors to consider when selecting a wall AC unit is the size of the room you intend to cool. Different AC units have varying cooling capacities, measured in British Thermal Units (BTUs). It’s essential to choose a unit with a cooling capacity that matches the square footage of your room. If the unit is too small, it may struggle to cool the space effectively.
Conversely, an oversized unit will not only be inefficient but could also result in excessive electricity consumption. Check the manufacturer’s guidelines or consult with a professional to determine the appropriate cooling capacity for your room size.
Energy Efficiency and Rating
With environmental concerns and rising energy costs, it’s crucial to select an energy-efficient wall AC unit. Look for units with a high Energy Efficiency Ratio (EER) or Seasonal Energy Efficiency Ratio (SEER) rating. These ratings indicate how efficiently the unit converts electricity into cooling power.
Generally, higher EER or SEER ratings mean lower energy consumption, saving you money on your utility bills in the long run. Be sure to check for energy-saving features like programmable timers and sleep modes that help optimize energy usage.
Noise Level
When purchasing a wall AC unit, it’s important to consider the noise level it produces. After all, you wouldn’t want a unit that disrupts your peace and quiet while you sleep or work. Look for units that have low noise levels, typically measured in decibels (dB). Manufacturers often provide information on noise levels in their product specifications. Keep in mind that as a general guideline, quieter operation is usually preferred, especially for areas where silence is essential, such as bedrooms or study rooms.
Additional Features and Functions
Wall AC units come with a range of additional features and functions that can enhance your cooling experience. Consider what features are important to you and your specific needs. Some units feature remote control operation, allowing you to adjust settings conveniently from a distance. Others offer air purifying filters that help remove allergens and improve indoor air quality.
Additional features like dehumidification and fan-only modes can provide additional comfort, especially during humid conditions. Evaluate the available features and choose a unit that offers the functionalities you desire.
Budget
Finally, it’s essential to consider your budget when selecting a wall AC unit. Prices can vary greatly depending on the brand, size, cooling capacity, and additional features of the unit. Determine your budget range and look for options that offer the best value for your money. Remember to consider the long-term costs as well, such as energy efficiency and maintenance requirements.
By carefully considering these factors – room size and cooling capacity, energy efficiency and rating, noise level, additional features and functions, and your budget – you can confidently select a wall AC unit that meets your cooling needs, improves energy efficiency, and provides a comfortable environment for years to come.
Measuring The Wall And Marking The Location For Installation
Installing a wall AC unit in your home can greatly improve comfort during the hot summer months. Before you begin the installation process, it’s important to measure the wall and mark the exact location where the unit will be installed. This step-by-step guide will help you choose the appropriate wall, measure its dimensions accurately, and mark the spot to ensure a successful installation.
Choosing the Appropriate Wall
First and foremost, choose a wall that meets the necessary criteria for installing a wall AC unit. The wall should have sufficient space both inside and outside for the unit to fit properly. Additionally, consider the proximity to electrical outlets and the availability of proper ventilation to ensure optimal performance.
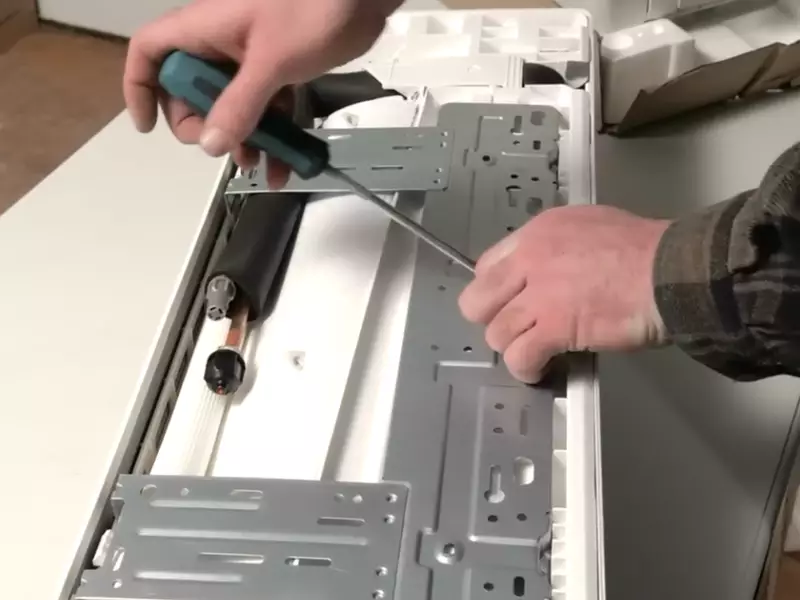
Measuring the Wall Dimensions
To get accurate measurements for your wall AC unit, you’ll need the following tools:
- Tape measure
- Pencil or marker
- Spirit level
Start by measuring the height and width of the wall. Use the tape measure to determine the exact dimensions, and make sure to record them for reference. It’s important to ensure that the wall can accommodate the size of the AC unit.
Next, locate the center of the wall by dividing the width measurement in half. Mark this center point with a pencil or marker. This will serve as the starting point for determining the precise location of the AC unit.
Marking the Spot for the AC Unit
Once you’ve found the center point, use a spirit level to draw a straight line vertically from the center to the desired height where you want the AC unit to be installed. This will help ensure a level of installation.
Using the measurements of the AC unit, mark the exact dimensions on the wall, starting from the center line. This will create a clear outline of where the unit will be placed.
At this stage, double-check your measurements and ensure that all dimensions are accurate. It’s essential to avoid any mistakes that could hinder the installation process or result in unnecessary damage to the wall.
Finally, verify the markings to ensure that the spot you’ve selected for the AC unit doesn’t interfere with any obstacles, such as electrical wires or plumbing pipes, that may be hidden behind the wall.
With the wall properly measured and the location marked, you’re now ready to proceed with the installation of your wall AC unit. Following these steps will help you achieve a hassle-free installation and ensure optimal cooling throughout your home.
Preparing The Electrical Wiring
Introduction
Preparing the electrical wiring is a crucial step when it comes to installing a wall AC unit. Ensuring that the electrical supply is up to par and compatible with the unit is of utmost importance to ensure efficient and safe operation. In this article, we will guide you through the necessary steps to prepare the electrical wiring for your wall AC installation. Let’s dive in!
Ensuring proper electrical supply
Before you start the installation process, it is essential to verify that you have a proper electrical supply in place. This involves assessing the voltage, amperage, and wiring configuration to ensure compatibility with the wall AC unit. Sticking to the manufacturer’s specifications is crucial to avoid potential hazards and malfunctions.
Installing a dedicated circuit
An effective measure to enhance the performance of your wall AC unit is to install a dedicated circuit. This eliminates the risk of overloading existing circuits and optimizes the power supply for your AC. To do this, follow these steps:
- Shut off the power to the designated area on the electrical panel.
- Choose an appropriate circuit breaker size based on the manufacturer’s recommendation and electrical load requirements.
- Run a new electrical cable from the panel to the designated installation location of the AC unit.
- Ensure proper grounding of the circuit by connecting the cable’s ground wire to the designated grounding point.
Installing a dedicated circuit provides a reliable power source for your wall AC unit, minimizing the chances of electrical issues and promoting efficient cooling.
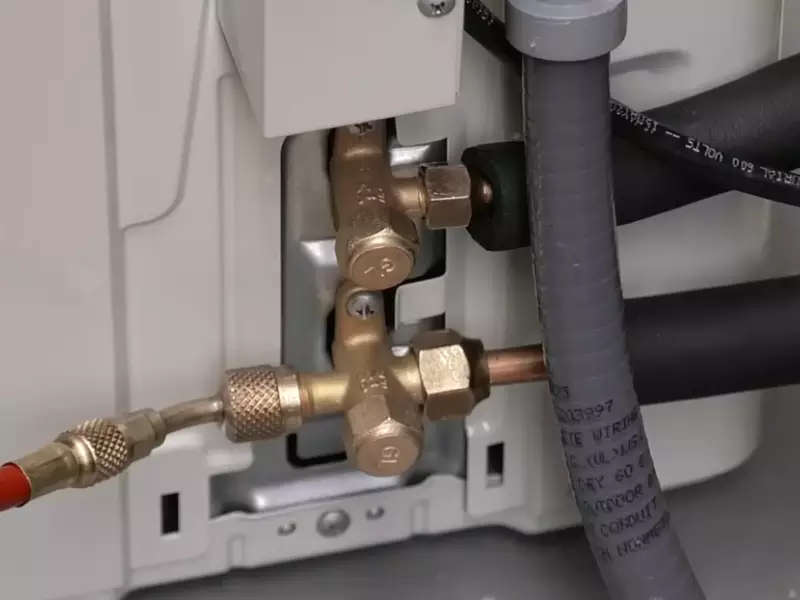
Checking the electrical panel compatibility
Prior to installation, it is essential to check the compatibility of your electrical panel with the wall AC unit. This involves assessing whether there is sufficient space and capacity for an additional circuit. Here’s what you need to do:
- Inspect the electrical panel to ensure there are enough available slots for a new circuit breaker.
- Check the total amperage capacity of the panel to determine if it can handle the AC unit’s power requirements. This information can usually be found on the panel’s label.
- If there are any concerns or doubts about panel compatibility, contact a licensed electrician for a thorough assessment.
Verifying the compatibility of your electrical panel is crucial to avoid overloading the system and to ensure the safe installation and operation of your wall AC unit.
Gathering The Necessary Tools And Equipment
Before you begin installing a wall AC, it’s essential to gather all the necessary tools and equipment. Having the right tools on hand will make the installation process more efficient and ensure a successful outcome. In this section, we will discuss the tools required for the installation and the safety precautions you need to take.
Tools required for installation
Here is a list of tools that you will need:
| Tool | Description |
|---|---|
| Screwdriver | A screwdriver is needed to remove the old AC unit and install the new one. |
| Level | A level will help you ensure that the AC unit is properly aligned and balanced on the wall. |
| Drill | You will need a drill to create holes in the wall for mounting brackets and wiring. |
| Tape Measure | Use a tape measure to accurately measure the dimensions of the wall and the AC unit. |
| Pliers | Pliers will come in handy when you need to secure electrical wiring or tighten screws. |
| Wire Cutters | Wire cutters will be useful for cutting and stripping electrical wires. |
| Masking Tape | Masking tape can be used to temporarily secure components or mark positions on the wall. |
| Utility Knife | A utility knife will be necessary for cutting through packaging, insulation, or other materials. |
Safety precautions
When installing a wall AC, it’s crucial to prioritize safety. Here are some safety precautions you should take:
- Wear protective gear like gloves and safety goggles to protect yourself from potential injuries.
- Shut off the power supply to the area where you will be installing the AC unit.
- Ensure that the wall you’re mounting the unit on is structurally sound and can support the weight.
- Avoid installing the AC in areas prone to excessive moisture or direct sunlight.
- Follow the manufacturer’s instructions closely to prevent any damage or accidents during the installation process.
- If you’re unsure about any step, consult a professional for assistance.
By gathering the necessary tools and taking the appropriate safety precautions, you are one step closer to successfully installing a wall AC unit. In the next section, we will guide you through the process of preparing the installation area.
Mounting The AC Unit
Removing any obstacles or obstructions
Before you begin mounting your AC unit, it’s essential to ensure that there are no obstacles or obstructions in the way. You want to guarantee that the unit has a clear path and is not obstructed by any furniture, shelves, or decorations hanging on the wall. Clearing the area around the designated spot for your AC unit will not only make the installation process easier but also ensure optimal performance.
Properly aligning and securing the AC unit
Once you have removed any obstacles, the next step in mounting your AC unit is to properly align and secure it. Proper alignment is crucial to ensure the unit fits seamlessly on the wall and prevents any air leakage. Begin by placing the mounting bracket on the wall at the desired height, making sure it is level using a spirit level. Use a pencil to mark the mounting holes, and then drill them into the wall accordingly.
After the bracket is securely attached, carefully lift the AC unit and slide it onto the bracket. Ensure that the unit is properly centered and aligned with the mounting holes. Using screws provided with the unit, fasten the AC unit to the bracket, making sure it is tightly secured. Double-check the alignment and stability of the unit before proceeding to the next step.
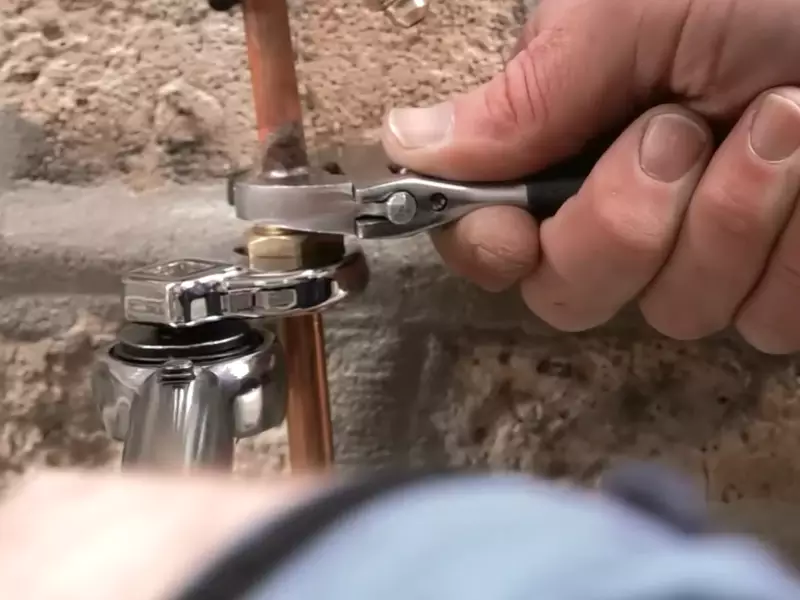
Checking the stability and levelness
Checking the stability and level of the AC unit is crucial to its proper functioning. A stable unit ensures optimal cooling performance and prevents any unnecessary strain on the components. To check the stability, gently rock the unit back and forth to ensure it is securely attached to the mounting bracket. If there is any wobbling or instability, adjust the screws until it is sturdy and firm.
Additionally, it is essential to check the levelness of the AC unit. An uneven installation can cause the unit to overflow or not cool the room efficiently. To check the levelness, place a spirit level horizontally on top of the AC unit. Adjust the position of the unit by loosening or tightening the screws until the bubble in the spirit level is centered.
Once you have ensured the stability and levelness of the AC unit, you can move forward with connecting it to the power source and any necessary drainage systems. Proper installation will not only ensure the longevity of your AC unit but also provide you with optimal cooling comfort during those hot summer months.
Connecting The Electrical Wiring
Understanding electrical connections
Before you begin connecting the electrical wiring for your wall AC unit, it’s important to have a proper understanding of electrical connections. This will ensure that the installation process goes smoothly and safely.
Electrical connections involve connecting the wires from the AC unit to the electrical system of your home. This allows the unit to receive power and function properly. It’s essential to follow the correct steps and guidelines to ensure a secure and reliable connection.
Following the manufacturer’s instructions
When it comes to electrical connections, it’s crucial to adhere to the manufacturer’s instructions provided with your wall AC unit. These instructions are specific to your unit and will guide you through the wiring process efficiently.
Make sure to carefully read and understand the instructions before starting the installation. This will help you determine the necessary tools and materials required for the electrical connection. Always prioritize safety by turning off the power supply to the designated area before beginning any electrical work.
Testing the electrical connections for safety
Once you have completed the electrical wiring, it’s essential to test the connections for safety. This will ensure that the unit is properly connected and will minimize any potential hazards or damages.
To test the electrical connections, you can use a multi-meter or a voltage tester. These tools will help you verify that the wires are correctly connected and that there are no loose or exposed connections.
- Start by turning on the power supply to the area where the wall AC unit is installed.
- Then, using the multi-meter or voltage tester, check the voltage at the unit’s electrical terminals.
- If the readings match the specifications provided in the manufacturer’s instructions, it indicates that the electrical connections are safe and secure.
- However, if you notice any irregularities or discrepancies, it is advised to consult a professional electrician to rectify the issue.
Testing the electrical connections is a crucial step in ensuring the safety and efficiency of your wall AC unit. By following these steps and guidelines, you can install your wall AC unit with confidence and enjoy a cool and comfortable space during the hotter months.
Sealing And Insulating The Unit
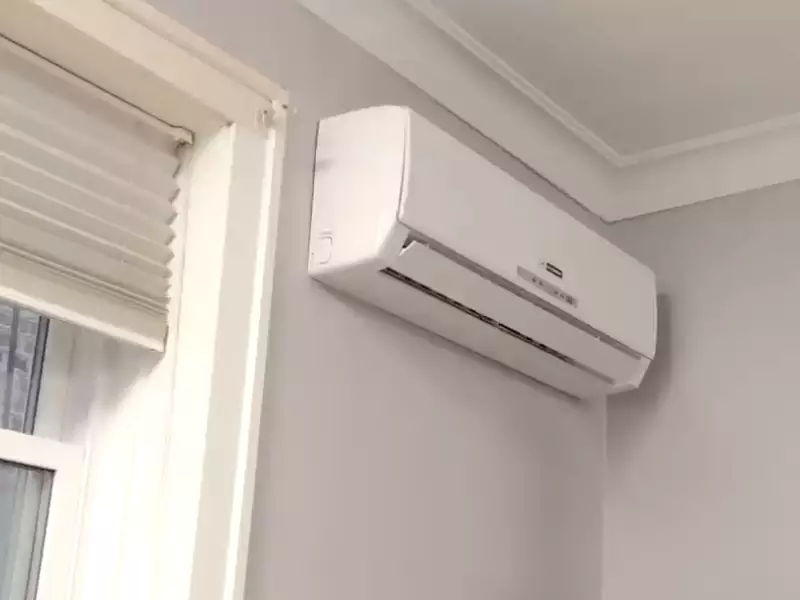
One crucial step in installing a wall AC unit is properly sealing and insulating it. This not only ensures that the unit functions efficiently but also helps to prevent air leaks and drafts. In this section, we will discuss the steps involved in securing the AC unit in the wall, insulating any gaps and cracks, and sealing the unit to prevent air leaks.
Securing the AC Unit in the Wall
To begin, it is essential to secure the AC unit properly in the wall. This involves positioning the unit correctly and using the appropriate mounting hardware to anchor it securely. Follow these steps:
- Choose a suitable location for the AC unit on the wall, ensuring there is enough space around it for proper ventilation.
- Refer to the manufacturer’s instructions on how to install the mounting bracket or sleeve.
- Use a level to ensure the bracket or sleeve is perfectly horizontal or vertical, depending on the unit’s orientation.
- Secure the bracket or sleeve tightly to the wall using screws or bolts provided.
- Double-check the stability of the bracket or sleeve to ensure it can support the weight of the AC unit.
Insulating the Gaps and Cracks
Proper insulation of any gaps and cracks around the AC unit is crucial to prevent air leakage and maintain the unit’s efficiency. Here’s how you can do it:
- Identify any gaps or cracks between the AC unit and the wall, as well as around the mounting bracket or sleeve.
- Use an appropriate insulation material, such as foam weatherstripping or caulk, to fill the gaps and cracks.
- Apply the insulation material carefully, ensuring a tight seal to prevent air infiltration.
- Allow the insulation material to dry or cure according to the manufacturer’s instructions before proceeding.
Sealing the Unit to Prevent Air Leaks
Sealing the AC unit is the final step in ensuring optimal performance and energy efficiency. Follow these steps to seal the unit effectively:
- Apply a high-quality weather sealant or caulking around the edges of the AC unit.
- Ensure complete coverage along all sides of the unit to eliminate any potential air leaks.
- Smooth out the sealant or caulking with a caulking tool or finger to create a neat and secure seal.
- Allow the sealant or caulking to dry or cure fully, as per the manufacturer’s instructions.
By properly sealing and insulating your wall AC unit, you can enjoy a more comfortable and energy-efficient cooling experience. Take the time to follow these steps, and you’ll be rewarded with a well-installed unit that operates smoothly and effectively.
Testing The Functionality Of The Wall Ac
Now that you have successfully installed your wall AC, it’s time to test its functionality to ensure it’s cooling your space effectively. Let’s go through the steps to test and adjust the settings of your new wall AC unit.
Setting up the Remote Control
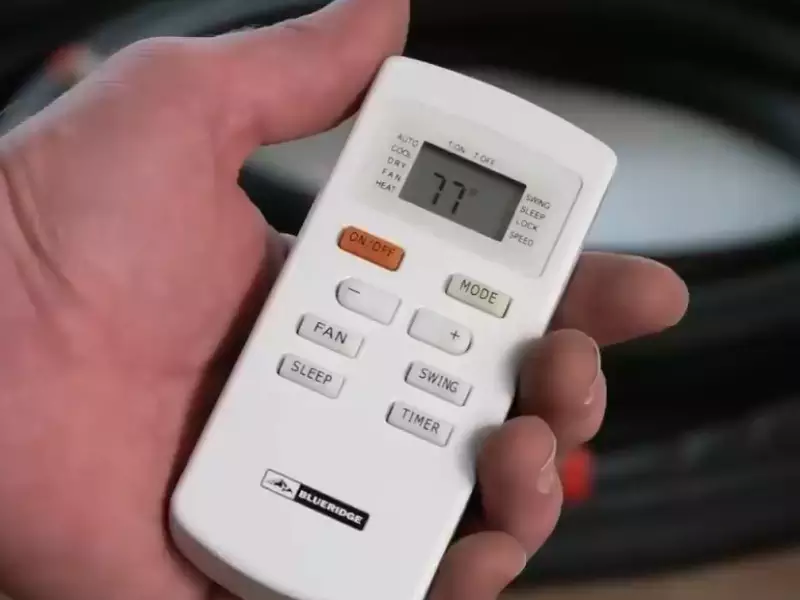
The remote control is a convenient way to interact with your wall AC unit. Start by checking the battery compartment at the back of the remote control and insert the batteries correctly. Ensure that the polarity of the batteries aligns with the markings inside the compartment.
Once the batteries are in place, point the remote control towards the wall AC unit. Make sure there are no obstacles blocking the signal path between the remote control and the unit. Press the power button on the remote control to turn on the wall AC unit. You should hear a beep indicating that the unit has powered on.
Adjusting the Temperature and Fan Speed
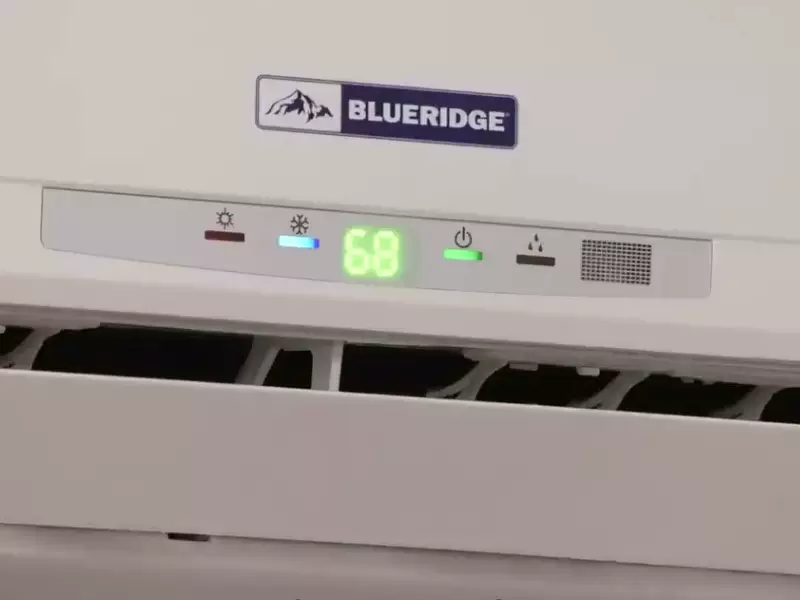
With the wall AC unit powered on, you can now adjust the temperature and fan speed settings. On the remote control, locate the temperature control buttons. These buttons usually have a plus (+) and minus (-) sign along with a thermometer icon.
To lower the temperature, press the minus (-) button. To increase the temperature, press the plus (+) button. It’s recommended to set the temperature to a comfortable level, usually around 72°F (22°C). Remember, the lower the temperature, the cooler the air will be.
Next, you can adjust the fan speed to your desired level. Look for the fan speed control buttons on the remote control. These buttons usually have icons representing different fan speed settings, such as low, medium, and high. Press the appropriate button to select the desired fan speed.
Verifying the Cooling Performance
Now that you have set the temperature and fan speed, it’s time to verify the cooling performance of the wall AC unit. Feel the air flowing out from the unit and check if it is cool and refreshing. If the air is not cool enough, you can try lowering the temperature further or increasing the fan speed.
If the cooling performance is satisfactory, let the wall AC unit run for at least 15 minutes and observe the temperature of the room. Keep in mind that it may take some time for the room to reach the desired temperature, especially if it’s a larger space.
During this testing phase, you may also want to check for any unusual sounds or smells coming from the wall AC unit. If you notice anything out of the ordinary, refer to the user manual or contact the manufacturer for assistance.
By following these steps and testing the functionality of your wall AC unit, you can ensure that it’s working properly and effectively cooling your space.
Troubleshooting Common Issues
Installing a wall AC can provide much-needed relief during hot summer days. However, like any other appliance, these units can encounter common issues that hamper their performance. Here, we will discuss the common problems that you may encounter and some troubleshooting techniques to handle them effectively.
Identifying Common Problems
Before troubleshooting, it is essential to identify the common problems that can occur with a wall AC. By being able to recognize these issues, you can take the necessary steps to fix them. Some of the most common problems include:
- AC not cooling the room adequately
- Foul odor emanating from the vents
- Water leakage from the unit
- Unusual noises or vibrations
- AC not turning on or off
Troubleshooting Techniques
Once you have identified the problem, it’s time to troubleshoot and find a solution. Here are some techniques to help you resolve the common issues with your wall AC:
- AC not cooling the room adequately: Check if the unit is set to the correct temperature. Also, ensure that the air filter is clean and not obstructed by dust or debris. If the issue persists, you may need to call a professional for a thorough inspection.
- Foul odor emanating from the vents: This could be due to a dirty or clogged air filter. Clean or replace the air filter and monitor if the odor persists. If the problem continues, calling a professional is advisable.
- Water leakage from the unit: Check if the condensate drain line is clogged or blocked. Clear any debris or obstructions in the drain line. Additionally, ensure that the unit is level to prevent water from pooling around the indoor unit.
- Unusual noises or vibrations: Check for loose or damaged components, such as the fan blades or motor. Tighten any loose parts or call a professional if you are unsure how to proceed. Unusual noises and vibrations can indicate a more severe issue.
- AC not turning on or off: Verify that the unit is receiving power by checking the circuit breaker and ensuring that the power cord is securely connected. If the problem persists, it may indicate an electrical issue that requires professional expertise.
Seeking Professional Assistance When Necessary
It is important to note that while troubleshooting techniques can help resolve common issues, there may be situations where professional assistance is necessary. If you are unsure how to proceed or if the problem persists despite your efforts, it is best to seek help from a qualified technician. Attempting to fix complex problems without the right knowledge and tools can potentially worsen the issue.
By following these troubleshooting techniques and seeking professional assistance when needed, you can ensure that your wall AC operates efficiently and provides maximum cooling comfort during hot summer months.
Cleaning And Maintaining The Wall Ac
Regular cleaning of filters and vents
Regular cleaning of filters and vents is essential to keep your wall AC running efficiently. Over time, dirt, dust, and other particles can accumulate on the filters and vents, obstructing airflow and reducing the unit’s cooling capacity. To prevent this, it’s important to clean these components at least once every few months.
To clean the filters, remove them from the AC unit and gently tap them to remove loose debris. If the filters are washable, rinse them with lukewarm water and mild soap, then allow them to air dry completely before reinserting them. For disposable filters, simply replace them with new ones.
In addition to the filters, it’s also important to clean the vents. Use a vacuum cleaner or a soft brush attachment to remove any visible dust or debris from the vents. Make sure to reach into all the nooks and crannies to ensure a thorough cleaning.
Removing dust and debris
Aside from regular filter and vent cleaning, it’s also important to remove dust and debris from other parts of your wall AC to prevent clogs and maintain optimal performance. Here are some steps you can follow:
- Turn off the power to the AC unit to avoid any accidents.
- Gently remove the front cover of the AC unit.
- Using a soft brush or a cloth, carefully dust off the evaporator fins and coils.
- If you notice any stubborn dirt or debris, you can use a vacuum cleaner with a brush attachment to gently remove them.
- Ensure that the fan blades are also free from any dust or dirt by giving them a quick wipe with a damp cloth.
- Once you’re done, reattach the front cover, making sure it is securely in place.
Performing routine maintenance tasks
In addition to regular cleaning, performing routine maintenance tasks can help prolong the lifespan of your wall AC and ensure its optimal performance. Here are a few maintenance tasks you should consider:
- Check the refrigerant levels: If you notice that your AC unit is not cooling efficiently, it might be a sign of low refrigerant levels. In such cases, it’s best to call a professional technician to handle the recharging process.
- Inspect the insulation: Check the insulation around the refrigerant lines and replace any damaged or deteriorated insulation to maintain proper cooling efficiency.
- Check the drainage system: Ensure that the condensate drain line is clear of any obstructions to prevent water leakage. If you notice any blockages, you can use a mixture of bleach and water to flush out the drain line.
- Inspect the electrical connections: Regularly check for loose, damaged, or frayed electrical connections and have them repaired or replaced as needed.
By following these simple cleaning and maintenance steps, you can ensure that your wall AC operates at its best, providing you with cool and comfortable indoor temperatures all year round.
Extending The Lifespan Of The Wall Ac
Installing a wall AC is a great way to keep your home cool and comfortable during the hot summer months. However, like any other appliance, your wall AC requires proper care and maintenance to ensure it continues running efficiently for years to come. By taking a few simple steps to protect your unit from extreme weather conditions, checking for signs of damage or wear, and scheduling regular professional maintenance checks, you can significantly extend the lifespan of your wall AC.
Protecting the Unit from Extreme Weather Conditions
Extreme weather conditions such as heavy rain, high humidity, and strong winds can take a toll on your wall AC. To protect it from these elements, you can:
- Install a weatherproof cover over the unit when not in use.
- Ensure the area around the AC is clear of any debris that could block airflow or cause damage.
- Use a waterproof sealant around the edges of the unit to prevent water leakage.
These simple steps will help shield your wall AC from the damaging effects of harsh weather and ensure its longevity.
Checking for Any Signs of Damage or Wear
Regularly inspecting your wall AC for signs of damage or wear is crucial in preventing small issues from turning into major problems. Here are a few things to look out for:
- Check for any cracks or dents in the exterior casing of the unit.
- Inspect the power cord for any fraying or exposed wires.
- Listen for unusual noises such as rattling or squeaking.
- Observe any changes in performance, such as reduced cooling capacity.
If you notice any of these signs, it’s important to address them promptly by either repairing or replacing the affected parts. This proactive approach will help prevent further damage and ensure your wall AC continues functioning optimally.
Scheduling Professional Maintenance Checks
While regular inspections are beneficial, it’s also essential to schedule professional maintenance checks for your wall AC. A qualified HVAC technician can thoroughly clean the unit, check the refrigerant levels, inspect electrical components, and identify potential issues before they escalate.
By adhering to a regular maintenance schedule, you can:
- Maximize the efficiency and performance of your wall AC.
- Prolong the lifespan of the unit by addressing minor problems early on.
- Ensure any warranty requirements are met.
Remember, a well-maintained wall AC is a more reliable and cost-effective cooling solution in the long run.
In conclusion, taking steps to protect your wall AC from extreme weather conditions, checking for signs of damage or wear, and scheduling regular professional maintenance checks will go a long way in extending its lifespan. By investing a little time and effort into the care of your wall AC, you can enjoy consistent cooling comfort for many years to come.
Frequently Asked Questions Of How To Install Wall Ac
Can You Install A Wall Air Conditioner Yourself?
Yes, you can install a wall air conditioner yourself. However, it is important to follow the manufacturer’s instructions carefully to ensure proper installation. If you are unsure or uncomfortable with the process, it is recommended to hire a professional for assistance.
How Do You Install A mounted AC unit?
To install a wall mounted AC unit, follow these steps:
1. Choose a suitable location on the wall.
2. Install a support bracket according to the manufacturer’s instructions.
3. Connect the refrigerant lines, electrical wiring, and drain pipe.
4. Secure the unit to the bracket and insulate any gaps.
5. Test the unit to ensure it is working properly.
How Much Does It Cost To Install A Wall Mounted AC Unit?
The installation cost for a wall-mounted AC unit varies depending on factors such as the size of the unit and the complexity of the installation. Generally, the cost can range from $500 to $2,000, including materials and labor. You can contact a professional HVAC technician for a specific quote.
Does Wall Mounted Air Conditioners Need To Be Vented?
Yes, wall mounted air conditioners need to be vented. Venting is necessary to remove hot air from the room and maintain proper cooling. Without venting, the air conditioner will not function efficiently and may not cool the room effectively.
Conclusion
Now that you have learned the step-by-step process of installing a wall AC, you can confidently tackle this task on your own. By following these instructions closely, you can ensure a cool and comfortable living space during the hot summer months.
Remember to prioritize safety and consult a professional if needed. With these insights, you are well-equipped to tackle any wall AC installation project.
