To install a Studor vent, begin by determining the appropriate location and fitting size. Then, connect the vent to the drain pipe and secure it with a coupling device.
Are you tired of dealing with unpleasant odors caused by the lack of proper venting in your plumbing system? Installing a Studor vent can provide an effective solution. This compact and easy-to-install device allows air to enter the drain pipe and equalize the pressure, preventing the release of foul smells.
By following a few simple steps, you can quickly and easily install a Studor vent and enjoy a more hygienic and odor-free environment in your home. We will guide you through the process of installing a Studor vent, ensuring a hassle-free experience. So, let’s get started and say goodbye to those annoying sewer odors once and for all.
The Purpose And Benefits Of Studor Vent
In any plumbing system, proper ventilation is crucial to ensure it runs smoothly and efficiently. One component that plays a significant role in maintaining the balance of air pressure is the Studor Vent. This small but mighty device helps to eliminate unwanted odors and prevent the buildup of harmful gases in your plumbing system. Understanding what a Studor Vent is and the advantages it offers will help you appreciate the importance of having one installed.
What is a Studor Vent and why do you need it?
A Studor Vent, also known as an Air Admittance Valve (AAV), is a one-way valve designed to replace traditional venting methods in plumbing systems. It is typically installed in locations where it is difficult or impractical to install conventional vent pipes, such as under sinks or in basements.
So, why do you need a Studor Vent? The primary purpose of a Studor Vent is to equalize air pressure in your plumbing system. As water flows down the drain, it creates a vacuum that can lead to the siphoning of the water in nearby traps. Without proper venting, this siphoning effect can result in gurgling sounds, slow drainage, and even trap seals being broken. By installing a Studor Vent, you can effectively eliminate these issues and ensure proper venting.
Advantages of using a Studor Vent in your plumbing system
Using a Studor Vent offers several advantages that make it an ideal choice for your plumbing system. Here are some of the key benefits:
- Cost-effective: Installing a Studor Vent eliminates the need for expensive and time-consuming traditional vent pipe installations. This saves you both money and installation hassle.
- Space-saving: Studor Vents are compact in size and can be installed in tight spaces where conventional vent pipes would be impractical or impossible to fit.
- Odor elimination: The Studor Vent effectively prevents odors from escaping through the plumbing system, ensuring your living space remains fresh and odor-free.
- Efficient drainage: By equalizing air pressure, the Studor Vent helps maintain proper drainage, preventing slow drainage, gurgling sounds, and other related issues.
- Flexible installation options: Studor Vents are versatile and can be installed vertically or horizontally, giving you the flexibility to adapt to different plumbing configurations.
In conclusion, installing a Studor Vent in your plumbing system is a smart choice that offers multiple benefits. Not only does it save you money and space, but it also ensures efficient drainage and eliminates unpleasant odors. Consider adding a Studor Vent to your plumbing system to improve its functionality and enjoy the peace of mind that comes with a well-ventilated plumbing system.
Necessary Tools And Materials For Installation
Understanding the Tools and Materials Needed for a Successful Installation
If you’re planning to install a Studor Vent in your plumbing system, it’s important to gather all the necessary tools and materials beforehand. This will ensure a smooth and hassle-free installation process. As with any home improvement project, having the right equipment at your disposal is crucial, and it can save you from unforeseen complications down the line.
A Comprehensive List of Everything You Will Need
To help you prepare, we’ve compiled a comprehensive list of tools and materials required for a successful Studor Vent installation:
| Tools | Materials |
|---|---|
|
|
With these tools and materials in hand, you’ll be well-equipped to install the Studor Vent effectively. The adjustable wrench and screwdriver will help you tighten connections, while the hacksaw will come in handy for cutting and resizing pipes. Plumbers tape and Teflon tape are essential for ensuring leak-free joints.
Additionally, it’s important to have a socket set for securing the mounting brackets and washers/nuts for a secure fit. A measuring tape and level will aid in accurately positioning and aligning the Studor Vent. Finally, the PVC pipe fittings, glue or solvent cement, drain pipe, couplings, and end caps will provide the necessary components for a complete installation.
By having all these tools and materials ready, you’ll have everything you need to successfully install a Studor Vent in your plumbing system. Remember, having the right equipment at the start will save you time and effort in the long run. Now that you’re well-prepared, let’s move on to the actual installation process in our next section.
Planning And Preparation
Before installing a Studor Vent in your plumbing system, it is important to carefully plan and prepare for the installation. This will ensure that the vent is located in the most optimal position and that the installation process goes smoothly. In this section, we will discuss assessing your plumbing system and determining the best location for the Studor Vent, as well as measuring and marking the installation area accurately.
Assessing your plumbing system and determining the best location for the Studor Vent
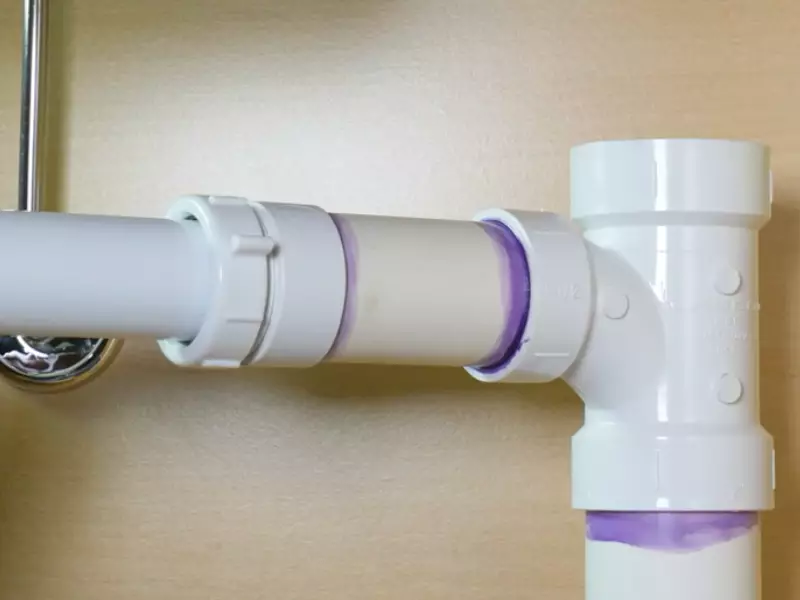
Assessing your plumbing system is the first step in determining the best location for the Studor Vent. Start by examining your existing plumbing layout and identifying any problem areas where the vent may be needed. Look for places where drain pipes intersect and where fixtures, such as sinks, toilets, or showers, are located.
Identifying these areas will help you determine where the Studor Vent should be installed. The vent should be placed as close as possible to where the pipe changes direction or where a fixture is located. This will ensure that the vent effectively prevents the buildup of negative pressure in the plumbing system, allowing wastewater to flow freely.
Measuring and marking the installation area accurately
Once you have identified the best location for the Studor Vent, it’s time to measure and mark the installation area accurately.
To do this, follow these steps:
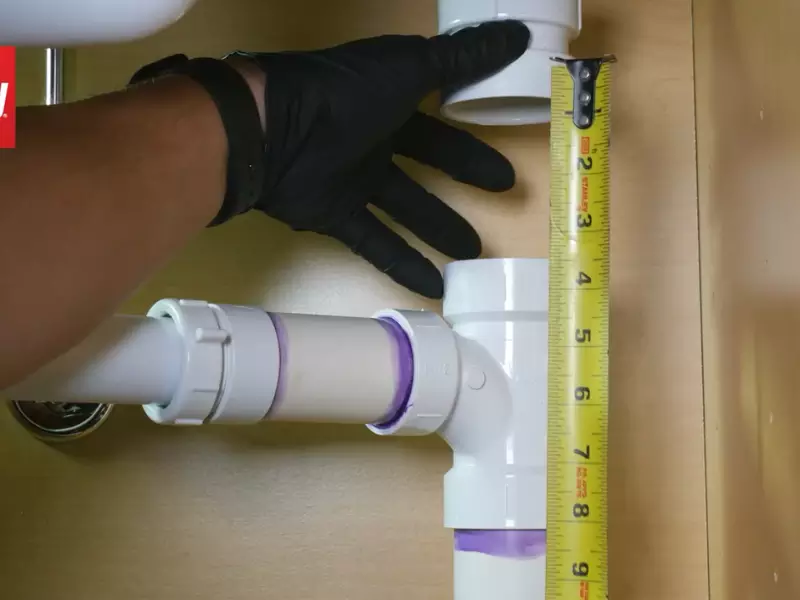
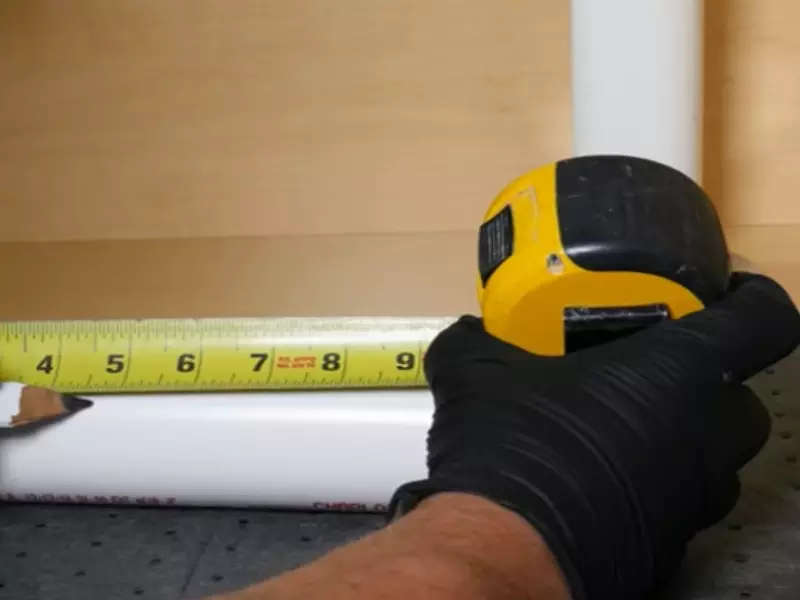
- Measure the diameter of the Studor Vent using a tape measure. This will determine the size of the hole you need to cut into the wall or cabinet.
- Mark the center of the installation area using a pencil or marker. This will serve as your reference point for cutting the hole.
- Use a level to ensure that the installation area is straight and aligned properly. This will help prevent any issues with the Studor Vent’s performance.
- Measure the distance from the floor or ceiling to the center of the installation area. This will help you position the Studor Vent at the correct height.
By measuring and marking the installation area accurately, you can ensure that the Studor Vent will fit properly and function effectively in your plumbing system.
Now that you have assessed your plumbing system and determined the best location for the Studor Vent, as well as measured and marked the installation area accurately, you are ready to proceed with the installation process. In the next section, we will discuss the step-by-step guide for installing the Studor Vent.
Shutting Off The Water Supply And Drainage
Before installing a Studor Vent, it is crucial to shut off the water supply and temporarily stop the drainage. This step is essential to ensure a smooth and hassle-free installation process. In this section, we will provide you with step-by-step instructions on how to turn off the water supply and stop the drainage temporarily. Following these instructions will enable you to proceed with the installation of your Studor Vent swiftly and efficiently.
Step 1: Turning off the Water Supply
Firstly, locate the main water valve in your dwelling. The main water valve is usually found near the water meter or where the water supply enters your property. Once you have located the main water valve:
- Turn the valve handle clockwise to shut off the water supply to your property.
- Verify that the water supply has been successfully shut off by turning on a faucet in the bathroom or kitchen. If no water flows from the faucet, the water supply has been properly turned off.
Step 2: Stopping the Drainage Temporarily
After turning off the water supply, the next step is to temporarily stop the drainage. This is important to prevent any unwanted water flow during the installation process. Here’s how to do it:
- Identify the drain pipe that you will be working on. This pipe should be easily accessible.
- Place a bucket or container underneath the section of the drain pipe that needs temporary stoppage.
- Depending on the type of drain pipe, you may need to use a pipe plug, rubber stopper, or even a rag to block the pipe temporarily.
- Ensure that the blockage is secure and there are no gaps for water to escape.
By following these step-by-step instructions, you can successfully shut off the water supply and stop the drainage temporarily, allowing you to proceed with the installation of your Studor Vent. Remember to double-check that both the water supply and drainage have been effectively halted before moving on to the next stages of the installation process. Taking these precautionary measures will help ensure a seamless and hassle-free installation experience, ultimately improving the functionality of your plumbing system.
Removing The Old Vented System
Before installing a Studor Vent, it is important to remove the existing vented system properly. This process involves disassembling and removing the old components, followed by the appropriate disposal of these items. By following these steps, you can ensure a seamless transition to the new Studor Vent system.
Disassembling and removing the existing vented system
To begin, you need to disassemble and remove the components of the old vented system. Follow these steps:
1. Turn off the water supply:
Before disassembling the vented system, it is crucial to turn off the water supply. Locate the main shutoff valve and shut it off to prevent any leaks or water damage.
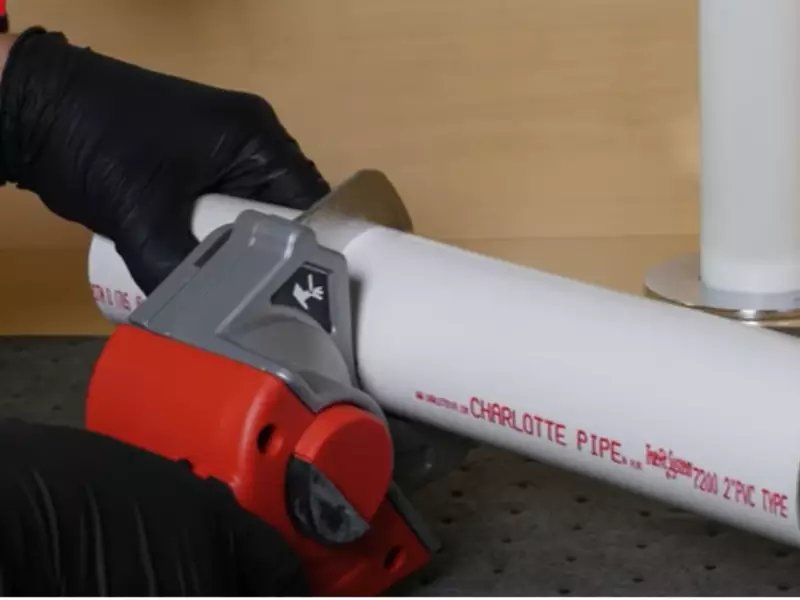
2. Remove the vent pipe:
Identify the vent pipe connected to the old vented system. Typically, it is a pipe that protrudes through the roof or sidewall of the building. Using a wrench or pliers, loosen and remove any fittings or clamps connecting the vent pipe to the system.
3. Disconnect the vent pipe from the main pipeline:
Trace the vent pipe back to where it connects to the main pipeline. Depending on the setup, you might find a fitting, adapter, or a tee joint. Unscrew or detach this connection carefully, ensuring not to damage the surrounding pipes or fittings.
4. Take apart the remaining components:
Inspect the vented system for any additional components such as valves, traps, or air admittance valves. Use the appropriate tools to disconnect and remove these items, keeping them aside for proper disposal.
Proper disposal of the old components
Now that you have disassembled the old vented system, it is crucial to dispose of the components in an appropriate manner. Follow these guidelines:
1. Check local regulations:
Before disposing of the old components, familiarize yourself with your local regulations regarding waste disposal. Certain components might require specific handling or recycling methods to ensure environmental safety.
2. Separate recyclable materials:
If any of the old components can be recycled, separate them from the non-recyclable items. This helps reduce waste and ensures a more sustainable approach to disposal.
3. Bag non-recyclable items:
For the non-recyclable components, place them in suitable garbage bags or containers. Ensure the bags are securely tied to prevent leakage or contamination during transportation.
4. Arrange professional disposal if necessary:
If there are any hazardous materials or components that require professional disposal, contact your local waste management authorities or hire a certified disposal service to handle these items safely.
By following these steps, you can successfully remove the old vented system and dispose of the components responsibly. This sets the stage for the installation of the Studor Vent, ensuring proper functionality and improved plumbing performance.
/sink-vent-installing-an-auto-vent-2718828-05-ca0dcb2915be457b9693ccd2655e6c21.jpg)
Credit: www.thespruce.com
Installing The Studor Vent
Installing a Studor Vent is an essential step in any plumbing project as it enables proper ventilation and prevents sewer gases from infiltrating your home. A Studor Vent is a one-way valve that allows air to enter the plumbing system, facilitating the smooth flow of wastewater without any backflow. In this section, we will guide you through the process of mounting the Studor Vent in the designated location and connecting it to the existing plumbing system.
Mounting the Studor Vent in the designated location
To begin, you need to identify the ideal location for mounting the Studor Vent. It should be positioned above the flood level rim of the drain it serves, typically near the highest point in the plumbing system. Once you have determined the location, follow these steps:
- Ensure that the area is clean and free from any debris.
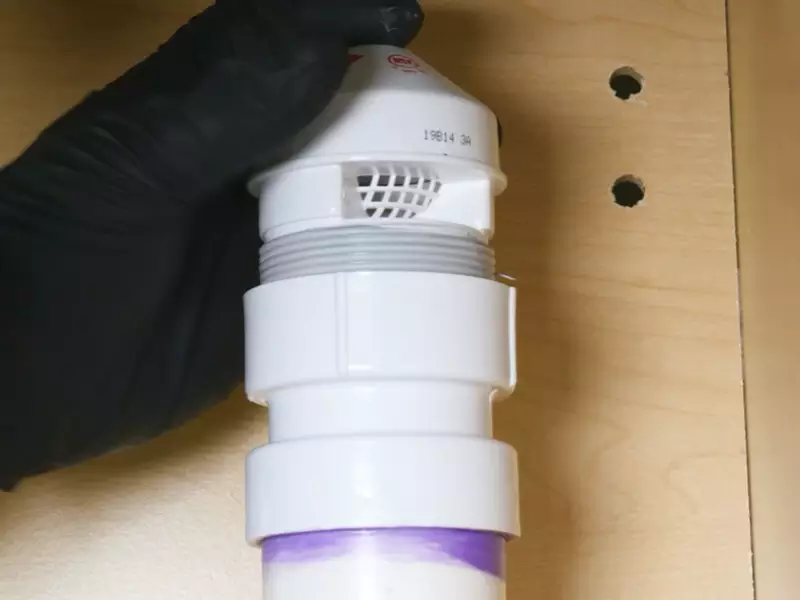
- Take the Studor Vent and remove any protective caps or covers.
- Hold the Studor Vent firmly and align it with the designated location, making sure it is positioned vertically.
- Using screws or nails (depending on the mounting surface), secure the Studor Vent in place. Make sure it is stable and tightly fastened.
- Inspect the mounted Studor Vent to confirm that it is level and properly installed.
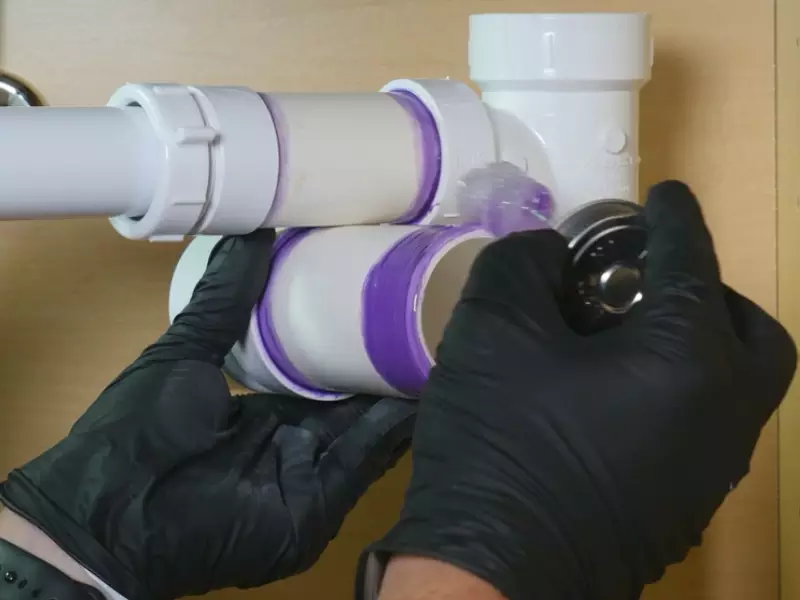
Connecting the Studor Vent to the existing plumbing system
Once the Studor Vent is securely mounted, you can now connect it to the existing plumbing system. This step requires careful attention to ensure a proper connection and seamless functioning. Follow the steps below:
- Make sure the plumbing system is turned off to avoid any water flow during the installation.
- Using a wrench, loosen the existing plumbing system’s fitting or cleanout where you will connect the Studor Vent.
- Gently remove any dirt or debris from the fitting to ensure a clean connection.
- Take the appropriate sized rubber coupling or clamp and slide it onto the Studor Vent’s outlet.
- Insert the Studor Vent’s outlet into the fitting of the existing plumbing system.
- Tighten the rubber coupling or clamp securely using a wrench, ensuring a watertight seal.
Once you have completed these steps, carefully inspect the connection to confirm it is tight and secure. Turn on the water supply and test the system for any leaks or issues. The Studor Vent should now be successfully installed and ready to effectively ventilate your plumbing system.
Testing And Checking For Proper Functioning
Once the Studor Vent is installed, it is crucial to test and check for proper functioning to ensure it is performing effectively. This will not only prevent potential plumbing issues but also save you money in the long run. In this section, we will outline the steps to ensure the proper sealing and connection of the Studor Vent as well as conduct a thorough inspection to verify its functionality.
Ensuring Proper Sealing and Connection of the Studor Vent
The first step in testing the Studor Vent is to ensure that it has been properly sealed and connected. Any leaks or loose connections can affect its performance and render it ineffective. Follow these steps for a seamless installation:
- Begin by inspecting the vent stack for any visible signs of damage or obstruction.
- Ensure that the Studor Vent is installed in the correct orientation, with the arrow pointing in the direction of the airflow.
- Tighten all connections using a wrench, ensuring they are secure.
- Apply plumber’s tape to threaded connections for added sealing.
- Double-check that all connections are secure and there are no visible gaps or leaks.
Conducting a Thorough Inspection to Verify Functionality
After ensuring the proper sealing and connection of the Studor Vent, it is essential to conduct a thorough inspection to verify its functionality. This will help identify any issues and ensure the vent is working efficiently. Follow these steps to complete the inspection:
- Run water in the nearby drain or flush a toilet to create a flow of air through the plumbing system.
- Listen for any gurgling or bubbling noises, as these indicate improper venting.
- Check for any foul odors or sewage smells, as these could be signs of a malfunctioning vent.
- Inspect each connection point for leaks or moisture buildup.
- Measure the water level in the toilet bowl after flushing to ensure it returns to a normal level.
- If any issues are detected during the inspection, consult a professional plumber to address them promptly.
By carefully following these steps and conducting regular inspections, you can ensure the Studor Vent is functioning properly and avoid potential plumbing problems down the line. Remember, a well-maintained Studor Vent is key to a reliable and efficient plumbing system.
Completing The Installation
Once you have successfully installed the Studor Vent in your plumbing system, it is crucial to complete the installation process by following a few final steps. Completing these steps will ensure the proper functioning of the vent and the smooth operation of your drainage system. In this section, we will guide you through the essential tasks of restoring the water supply and testing the drainage system, as well as reassembling any additional components or fixtures.
Restoring the Water Supply
After the Studor Vent has been securely installed, it’s time to restore the water supply to your plumbing system. To do this, follow these simple steps:
- Turn off the water supply valve, typically located near the water meter or in the basement.
- Slowly open the valve to allow water to flow back into the system.
- Check for any leaks around the Studor Vent and tighten any connections if necessary.
Once you have restored the water supply, it is essential to ensure the proper functioning of the drainage system.
Testing the Drainage System
Before considering the installation complete, it is crucial to test the drainage system to verify that it is working correctly. Follow these steps to perform a simple test:
- Remove any drain stoppers or plugs from the sinks, tubs, or toilets in your plumbing system.
- Turn on the water in each fixture, one at a time, and observe the flow of water.
- Check for any signs of slow drainage or backups.
- If you notice any issues, consult a professional plumber to address the problem.
By performing this quick test, you can ensure the Studor Vent is effectively venting the drainage system and preventing any problems from occurring.
Reassembling Additional Components or Fixtures
Once you have confirmed that the water supply is restored, and the drainage system is functioning correctly, it’s time to reassemble any additional components or fixtures that were disconnected during the installation process. Follow these steps:
- Reattach any pipes, fittings, or fixtures that were disconnected.
- Check the connections for any leaks and tighten them if necessary.
- Turn on the water supply and test each fixture to ensure proper operation.
By reassembling any additional components carefully, you can ensure the optimal performance and functionality of your entire plumbing system.
Completing the installation of a Studor Vent is an essential step in maintaining a well-functioning plumbing system. By following the steps outlined above, you can ensure the proper installation, restoration of the water supply, and testing of the drainage system. Additionally, reassembling any additional components or fixtures will guarantee the seamless operation of your plumbing system. Remember, if you encounter any difficulties or uncertainties during the installation process, it is always recommended to seek assistance from a professional plumber.
Maintenance And Troubleshooting Tips
Proper Care and Maintenance of Your Newly Installed Studor Vent
After successfully installing your Studor Vent, it is essential to take proper care of it to ensure its functionality and longevity. By following a few maintenance tips, you can keep your Studor Vent operating smoothly and avoid potential issues in the long run.
Tips for Identifying and Resolving Common Issues
Despite proper installation and maintenance, Studor Vents may encounter common issues that require troubleshooting. By being aware of these problems and knowing how to resolve them, you can quickly address any issues that arise and keep your plumbing system functioning efficiently.
Here are some common issues you may encounter with your Studor Vent:
1. Gurgling Sounds
If you notice gurgling sounds coming from your plumbing fixtures, it may indicate an air blockage in the vent. This can be caused by debris or foreign objects blocking the air pathways. To resolve this issue, follow these steps:
- Locate the Studor Vent and check if it is obstructed.
- If there is an obstruction, remove it using a soft brush or compressed air.
- Inspect the drainage system for any clogs or blockages.
- Clear the blockages by using a plunger or a drain snake.
2. Odor Issues
If you notice unpleasant odors coming from your plumbing fixtures, it may indicate a problem with your Studor Vent. To address this issue, follow these steps:
- Check if the Studor Vent is properly installed and sealed.
- Inspect the plumbing fixtures for any leaks or cracks that may be causing the odor.
- If you find any leaks or cracks, repair or replace the affected fixtures.
- Consider using odor-blocking products or additives to eliminate any lingering smells.
3. Inadequate Ventilation
If you notice slow drainage or gurgling sounds when multiple fixtures are in use, it may indicate inadequate ventilation. To improve ventilation, consider the following:
- Check if there are sufficient Studor Vents installed in your plumbing system.
- Consult a professional plumber to assess your system and determine if additional vents are required.
- Ensure all vents are properly installed and positioned in accordance with plumbing regulations.
By following these maintenance and troubleshooting tips, you can ensure the proper care, functioning, and longevity of your Studor Vent and plumbing system. Regular maintenance and timely resolution of issues will help prevent costly repairs and keep your plumbing system running smoothly for years to come.
Frequently Asked Questions For How To Install Studor Vent
Why Is Studor Vent Illegal?
Studor vents may be considered illegal because some jurisdictions require traditional venting systems to maintain air circulation, while Studor vents eliminate the need for vertical piping. As a result, local building codes may prohibit the use of Studor vents for sanitary drainage.
Does The Air Admittance Valve Go Before Or After The Trap?
The air admittance valve is typically installed after the trap.
Does A Studor Vent Need To Be Above The Sink?
No, a Studor vent does not need to be above the sink. The Studor vent can be installed at any location that provides proper air circulation within the plumbing system.
Where Can A Studor Vent Be Installed?
A Studor vent can be installed in various locations within a plumbing system. Common installation areas include underneath sinks, behind washing machines, and between floors.
Conclusion
To sum up, installing a Studor Vent is an essential step in maintaining a healthy plumbing system. By preventing sewer gas from entering your home and ensuring proper air circulation, this innovative device offers practical solutions to common plumbing problems.
Whether you are a DIY enthusiast or a professional plumber, following the step-by-step installation guide provided in this blog post will enable you to successfully incorporate a Studor Vent into your plumbing system. Enjoy the benefits of improved ventilation and say goodbye to unpleasant sewer odors!