To install spindles on a staircase, measure and mark the height and spacing of each spindle, drill pilot holes, and attach the spindles using screws or glue.
Prepare The Staircase
Before installing spindles on your staircase, it’s important to properly prepare the area to ensure a smooth and successful installation. This involves measuring and marking the locations for the spindles, removing any existing spindles or balusters, and cleaning and sanding the staircase surface. Follow these steps to prepare your staircase for the installation of new spindles:
Measure and Mark the Locations for the Spindles
The first step in preparing your staircase is to measure and mark the locations where the spindles will be installed. This will help ensure that the spindles are evenly spaced and aligned. Use a measuring tape to determine the desired distance between each spindle, and make corresponding marks on the top and bottom rails of the staircase. Double-check your measurements to ensure accuracy.
Remove any Existing Spindles or Balusters
If your staircase already has spindles or balusters in place, you’ll need to remove them before installing the new ones. This can typically be done by loosening the screws or nails that secure the spindles to the rails. Once the spindles are removed, set them aside for disposal or potential reuse. Be careful not to damage the staircase or surrounding areas during this process.
Clean and Sand the Staircase Surface
After removing the existing spindles, it’s important to clean and sand the staircase surface. This will remove any dirt, debris, or adhesive residue that may be present. A clean and smooth surface will provide a better foundation for installing the new spindles. Use a soft cloth or sponge to wipe down the surfaces, and consider using a mild cleaning solution if necessary. Once the surface is dry, use sandpaper or a sanding block to gently smooth out any rough areas or imperfections.
By properly preparing your staircase before installing new spindles, you’re setting the stage for a successful and visually appealing outcome. Take the time to measure and mark the locations for the spindles, remove any existing spindles or balusters, and clean and sand the staircase surface. These steps will ensure that the installation process goes smoothly and that your staircase looks its best.
Gather Materials And Tools
Before you begin installing spindles on your staircase, it’s important to gather all the necessary materials and tools. Having everything ready will not only save you time but also ensure a smooth installation process. In this section, we will provide you with a list of required materials, necessary tools, and safety equipment you will need for the job.
List of required materials for the installation:
| Materials |
|---|
| – Spindles |
| – Handrail |
| – Newel posts |
| – Baluster connectors |
| – Screws |
| – Wood glue |
| – Sandpaper |
| – Stain or paint (optional) |
Necessary tools for the job:
- – Measuring tape
- – Level
- – Pencil
- – Chisel
- – Drill
- – Drill bits (appropriate for your spindles)
- – Screwdriver
- – Hammer
- – Miter saw
- – Coping saw
- – Sanding block
Safety equipment to use during the process:
- – Safety goggles
- – Dust mask
- – Ear protection
- – Work gloves
- – Knee pads
Having these materials, tools, and safety equipment at hand will help you complete the spindle installation on your staircase efficiently and safely. Make sure to double-check your list before you get started to avoid any delays or interruptions during the process.
Install Newel Posts
Determine the placement and height of the newel posts
To begin installing newel posts, you’ll need to determine their placement and height. The newel posts should be strategically positioned at the bottom and top of the staircase, as well as any intermediate landing points for added stability and aesthetic appeal. Consider the overall design and structure of your staircase as you decide where to place the newel posts. Additionally, measure the height of the posts to ensure they align with the handrail and balusters properly.
Mark and cut the newel posts to the appropriate length
Once you have determined the placement and height of the newel posts, it’s time to mark and cut them to the appropriate length. Start by measuring the distance from the base of the staircase to the desired height of the newel post. Mark this measurement on the post using a pencil or marker. Double-check your measurements to ensure accuracy.
Using a saw suitable for cutting wooden posts, carefully cut the post along the marked line. Take your time to ensure a clean and straight cut. Remember that safety should always be a priority when using power tools, so make sure to follow the appropriate precautions and wear protective gear.
Secure the newel posts to the stair tread and the floor
With the newel posts cut to size, it’s time to secure them in place. Begin by positioning the first newel post at the designated bottom or top of the staircase. Use a level to ensure the post is plumb and straight. Once you are satisfied with the alignment, secure the post to the stair tread by drilling pilot holes and inserting screws or lag bolts.
Next, secure the other end of the newel post to the floor using the appropriate hardware. This could involve using brackets or anchoring the post directly to the floor joists. Be sure to follow the manufacturer’s instructions and use the recommended hardware for maximum stability.
Repeat this process for any additional newel posts you’re installing, taking care to ensure each one is securely fastened. Remember, the newel posts play a crucial role in the overall stability and safety of your staircase, so it’s essential to install them correctly.
In conclusion, installing newel posts is an important step in the process of installing spindles on a staircase. By determining their placement and height, marking and cutting them to the appropriate length, and securely fastening them to the stair tread and the floor, you can ensure a sturdy and visually appealing staircase that enhances the overall aesthetic of your home.
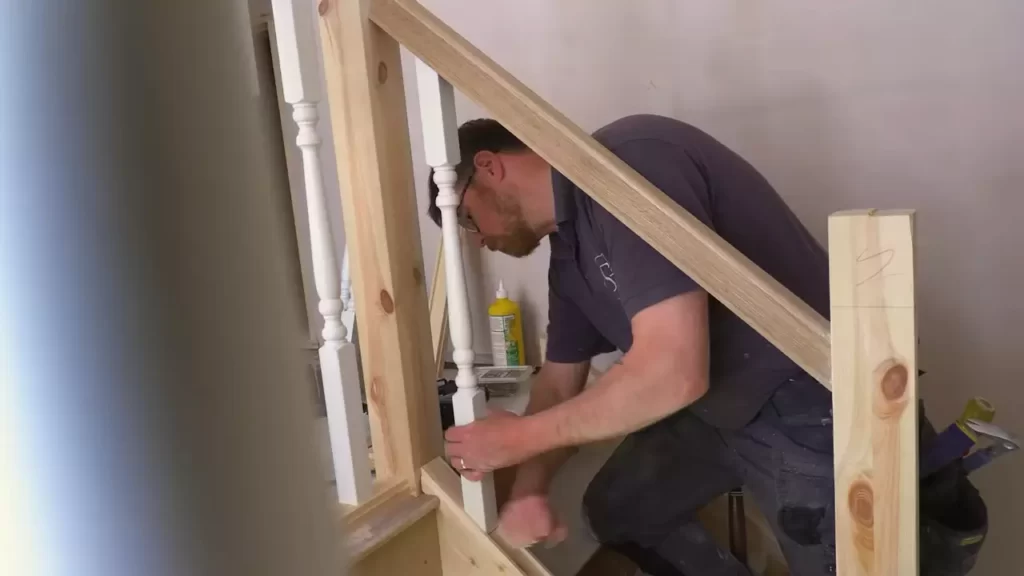
Attach Handrail
Measure and cut the handrail to the desired length
Before attaching the handrail to the newel posts, it is important to measure and cut it to the desired length. This ensures a proper fit and a visually appealing appearance. Follow these steps to measure and cut the handrail:
- Start by measuring the distance between the newel posts. This will determine the length of the handrail.
- Mark the measurement on the handrail using a pencil. Double-check your measurement to ensure accuracy.
- Once you have marked the handrail, use a suitable saw to cut it to the desired length. Be careful and follow all safety precautions when using the saw.
- After cutting, smooth any rough edges with sandpaper to create a finished look.
By carefully measuring and cutting the handrail, you will ensure a professional installation that fits perfectly with your staircase.
Attach the handrail to the newel posts using brackets or connectors
Once you have the handrail cut to the desired length, it’s time to attach it to the newel posts. This step is crucial for the stability and safety of the handrail. Here’s how you can attach the handrail using brackets or connectors:
- Select the appropriate brackets or connectors for your specific handrail design. These are typically available at hardware stores in various styles and finishes.
- Position the first bracket or connector on the newel post, aligning it with the top edge of the post and the underside of the handrail.
- Secure the bracket or connector to the newel post using screws or nails. Make sure it is firmly attached for stability.
- Repeat the process for the remaining brackets or connectors, spacing them evenly along the length of the handrail.
- Ensure that the handrail is securely attached to each newel post, and the brackets or connectors are tightened properly.
Attaching the handrail using brackets or connectors provides a secure and sturdy support system for anyone using the staircase, giving you peace of mind knowing that it is installed correctly.
Check for stability and secure any loose connections
Once the handrail is attached to the newel posts, it is important to check for stability and secure any loose connections. This step ensures that the handrail is safe to use and will withstand regular wear and tear. Here’s how you can check for stability and secure any loose connections:
- Gently apply pressure to different parts of the handrail to test its stability. Wiggle it to check if it feels loose or unstable.
- If you notice any movement or loose connections, tighten the screws or nails on the brackets or connectors.
- Inspect the entire handrail for any other loose connections or hardware. Tighten any loose screws or nails as necessary.
- Ensure that the handrail is securely fastened to the newel posts and doesn’t move or wobble when pressure is applied.
By checking for stability and securing any loose connections, you can ensure that your handrail is safe and reliable for everyone using the staircase. Regularly inspect the handrail and tighten any connections as needed to maintain its stability over time.
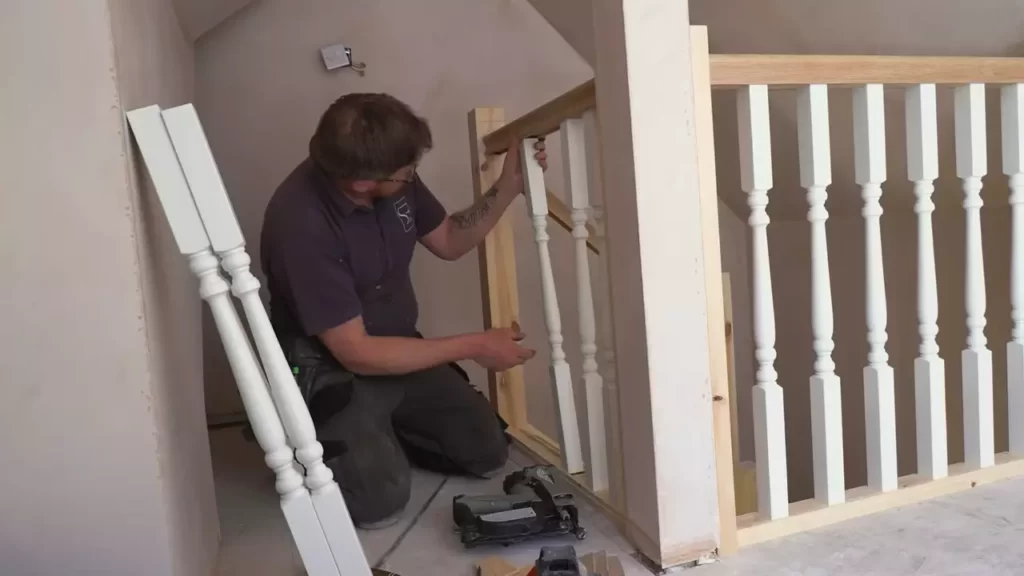
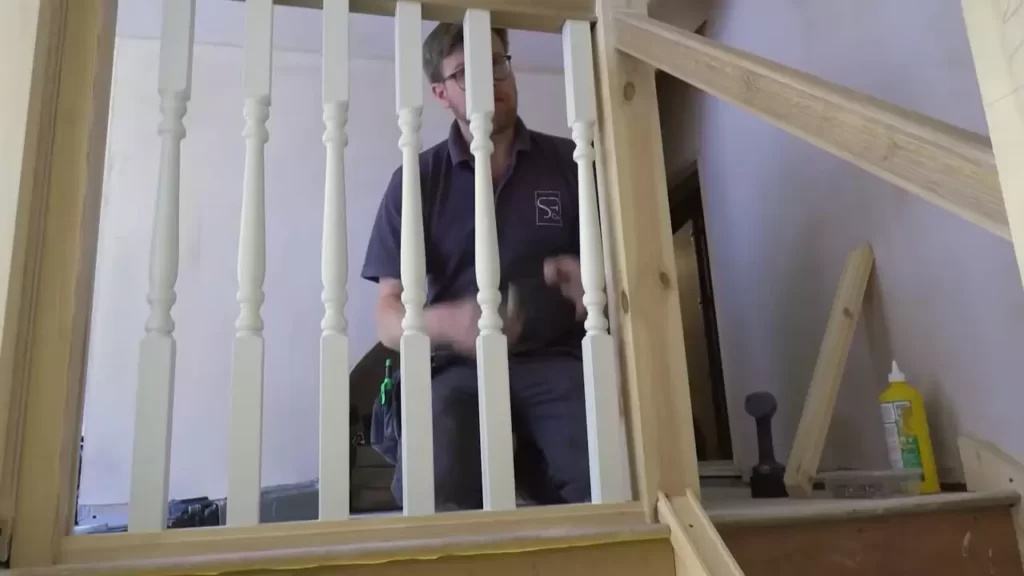
Install Balusters
Installing balusters on a staircase is an important step in enhancing both the safety and aesthetic appeal of your stairs. Balusters, also known as spindles, provide support to the handrail and prevent accidents by preventing falls. Here, we will guide you through the process of installing balusters, ensuring a secure and attractive staircase for your home.
Measure and cut the balusters to the correct height
The first step in installing balusters is to accurately measure and cut them to the correct height. This ensures that they fit seamlessly into the pre-drilled holes on the handrail and stair tread. It’s crucial to measure each baluster individually, as variations in height can lead to an uneven appearance. Use a tape measure to measure from the bottom of the handrail to the top of the stair tread, and mark the dimensions on the baluster accordingly.
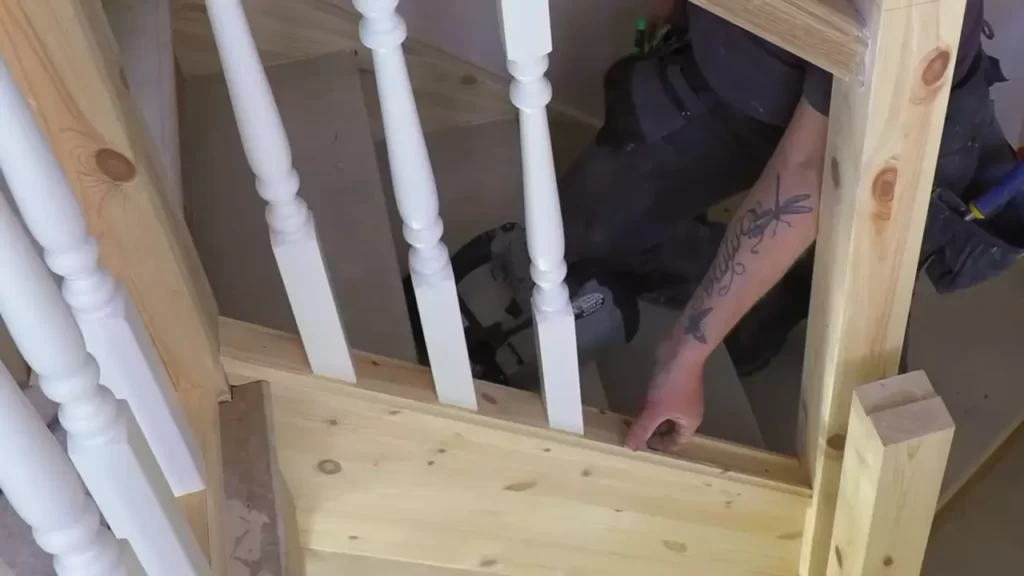
Insert the balusters into the pre-drilled holes on the handrail and stair tread
Once you have cut the balusters to the correct height, it’s time to insert them into the pre-drilled holes on the handrail and stair tread. Carefully align the baluster with the holes, ensuring a snug fit. Apply gentle pressure while inserting the baluster to ensure it is securely in place. It’s recommended to work systematically from one end of the handrail to the other, gradually filling in each hole with a baluster.
Secure the balusters using screws or adhesive
After inserting the balusters, it’s crucial to secure them properly to ensure their stability. There are two common methods for securing balusters: using screws or adhesive. If you choose to use screws, insert them through the pre-drilled holes on the handrail and into the balusters, ensuring a tight connection. Alternatively, the adhesive can be applied to the base of each baluster before inserting them into the holes, providing a strong bond. Whichever method you choose, make sure each baluster is securely fastened to prevent any wobbling or loosening over time.
By following these steps, you can successfully install balusters on your staircase, secure the handrail, and create a beautiful visual element in your home. Remember to measure and cut the balusters accurately, insert them carefully into the pre-drilled holes, and secure them firmly with screws or adhesive. With a little patience and attention to detail, you can achieve a safe and visually appealing staircase that will impress both guests and loved ones.
Secure The Handrail
One of the most crucial steps in installing spindles on a staircase is to secure the handrail properly. The handrail provides stability and support, ensuring the safety of those using the stairs. In this section, we will discuss how to securely attach the handrail to the balusters and test its stability and strength.
Check the alignment and levelness of the handrail
Before attaching the handrail to the balusters, it is important to check its alignment and level. This ensures that the handrail will provide a smooth and even surface for those using the staircase. To check the alignment, use a level to ensure that the handrail is straight and not leaning to one side. Additionally, make sure the handrail is at a comfortable height for users.
Attach the handrail to the balusters using screws or brackets
To securely attach the handrail to the balusters, you have two options: screws or brackets. If you choose to use screws, pre-drill holes into the handrail to prevent splitting. Then, align the handrail with the balusters and use screws to secure it in place. Make sure to use screws that are long enough to firmly hold the handrail.
If you prefer to use brackets, attach them to the balusters first and then slide the handrail into the brackets. Ensure the brackets are securely fastened to the balusters to provide stability. No matter which method you choose, make sure that the handrail is securely attached to the balusters to prevent any wobbling or movement.
Test the stability and strength of the handrail
After securing the handrail, it is important to test its stability and strength. Gently apply pressure to different parts of the handrail to ensure it can support the weight of users without bending or flexing excessively. Check all the attachment points, screws, and brackets to verify that everything is securely in place.
Additionally, give the handrail a few firm shakes to simulate the movements it might experience during use. This will help you identify any weaknesses or loose connections that need to be addressed. Remember, the handrail should be solid and stable, providing confidence and support for anyone using the stairs.
By following these guidelines, you can ensure that your handrail is securely attached to the balusters and provides the necessary stability and support for your staircase. Taking the time to check the alignment, properly attach the handrail, and test its stability will ensure the safety and durability of your staircase for years to come.
Finish And Clean Up
Once you have installed the spindles on your staircase, it’s time to focus on the finish and clean up. This step is crucial because it not only ensures the aesthetic appeal of your staircase but also protects it from wear and tear. In this section, we will walk you through the process of filling nail holes and gaps, sanding the surfaces, and applying a finish or paint to give your staircase that final touch of beauty and durability.
Fill any visible nail holes or gaps with wood putty
To achieve a seamless and polished look for your staircase, it’s important to fill in any visible nail holes or gaps. Fortunately, this can be easily done with the help of wood putty. Wood putty is a versatile material that can be used to fill small holes and gaps in wooden surfaces. Start by selecting a wood putty that matches the color of your staircase, as this will help it blend in seamlessly.
Then, using a putty knife or a small spatula, scoop out a small amount of putty and apply it to the nail holes or gaps. Make sure to press the putty firmly into the holes to ensure a tight bond. Allow the putty to dry completely, and then use fine-grit sandpaper to sand down any excess putty, leaving behind a smooth and even surface.

Sand and smooth the surfaces of the staircase
Once the nail holes and gaps are filled, it’s time to sand and smooth the surfaces of your staircase. Sanding not only helps to create a uniform and consistent finish but also removes any rough edges or imperfections. Start by using a medium-grit sandpaper to sand down the entire surface of the staircase, focusing on any areas that feel rough or uneven.
Then, switch to a fine-grit sandpaper to further smooth out the surfaces. Remember to sand in the direction of the grain for the best results. Once you are satisfied with the smoothness of the surfaces, use a clean cloth or brush to remove any sanding dust.
Apply a finish or paint to protect and enhance the appearance of the staircase
The final step in the finish and clean up process is to apply a finish or paint to your staircase. This not only protects the wood from moisture and daily wear but also enhances its natural beauty. There are various finishes to choose from, such as polyurethane, varnish, or stain, depending on the desired look and level of protection. Before applying the finish, ensure that the surfaces are clean and free from any dust or debris.
Use a clean brush or roller and apply the finish evenly, following the grain of the wood. Allow the finish to dry completely between coats, and apply additional coats as necessary, following the manufacturer’s instructions. Once the finish is dry, admire the beautiful transformation of your staircase!
Final Inspection And Maintenance
After completing the installation of spindles on your staircase, it is important to conduct a thorough inspection before considering the project complete. This inspection will ensure that the spindles are properly installed and secure, providing both safety and longevity to your staircase. Once the inspection is completed, any necessary adjustments or repairs can be made to ensure the stability and functionality of the spindles.
Conduct a thorough inspection of the completed installation
The first step in the final inspection process is to carefully examine each spindle and its attachment points to ensure they are securely fastened. Check for any loose or wobbly spindles, as well as any visible signs of damage or wear. Inspect the handrail for stability and ensure that it is properly aligned and secure.
Next, examine the overall alignment of the spindles and handrail. They should be straight and parallel to each other, providing a clean and polished appearance. Any deviations or misalignments should be addressed and corrected to ensure a professional end result.
Make any necessary adjustments or repairs
If any loose or wobbly spindles were identified during the inspection, it is important to address these issues promptly. Use a screwdriver or appropriate tool to tighten any loose screws or fasteners. If necessary, additional reinforcement can be added to ensure a secure fit. Consider using wood glue or epoxy adhesive to strengthen any weakened areas.
If any damage or wear is discovered on the spindles or handrail, it may be necessary to make repairs or replacements. Depending on the extent of the damage, this could involve sanding down rough areas, filling in cracks or holes, or even replacing individual spindles or sections of the handrail. It is important to address these issues promptly to prevent further damage and maintain the structural integrity of the staircase.
Develop a regular maintenance routine to ensure the longevity of the staircase and spindles
Proper maintenance is key to preserving the beauty and functionality of your staircase and spindles. By developing a regular maintenance routine, you can ensure that they remain in top condition for years to come. Here are some steps to consider:
- Regularly clean the spindles and handrail using a mild soap and water solution. This will remove dirt, dust, and other debris that can accumulate over time.
- Inspect the spindles and handrail periodically for any signs of damage or wear. Look for cracks, splintering, or loose screws. Address any issues promptly to prevent further damage.
- Consider applying a protective finish or sealant to the spindles and handrails to enhance their durability and resistance to wear and tear. This can help extend their lifespan and maintain their appearance.
- Avoid placing excessive weight on the handrail or leaning on the spindles. This can cause unnecessary strain and potential damage.
By following these maintenance practices, you can ensure the longevity and beauty of your staircase and spindles, creating a safe and functional feature in your home for years to come.
Frequently Asked Questions Of How To Install Spindles On Staircase
Is It Easy To Install Stair Spindles?
Installing stair spindles is a simple process. With basic tools and some DIY skills, you can easily install them yourself. Just follow the instructions provided with the spindles, measure accurately, and secure them in place. It’s a straightforward task that can enhance the beauty and safety of your staircase.
How Do You Attach Spindles To Stair Railings?
To attach spindles to stair railings, follow these steps:
1. Measure and mark where the spindles will be placed on the railing.
2. Drill pilot holes into the marked spots on the railing.
3. Apply adhesive to the bottom of each spindle.
4. Insert the spindles into the pilot holes and hold them firmly in place.
5. Allow the adhesive to dry completely before use.
Can You Just Replace Spindles On Staircase?
Yes, you can replace the spindles on a staircase. However, it is important to handle the process carefully and ensure proper installation to maintain the structural integrity and safety of the staircase.
How Do You Attach Wood Spindles?
To attach wood spindles, follow these steps:
1. Measure and mark where the spindles will go.
2. Use a drill to create pilot holes.
3. Apply wood glue to the bottom of each spindle and insert it into the holes.
4. Secure with screws from the bottom or top.
5. Fill any gaps with wood filler and sand smooth.
Conclusion
To sum up, installing spindles on a staircase is a task that requires careful planning and precision. With the right tools and know-how, you can transform your stairs and enhance the overall aesthetic of your home. Whether you decide to tackle this project yourself or hire a professional, the end result will be worth it.
By following the step-by-step guide provided in this blog post, you can confidently take on this project and enjoy the beautiful and safe staircase you’ve always wanted.