To install shelves in drywall, mark the desired location, drill pilot holes, and install wall anchors. Once the anchors are in place, attach the brackets and shelves using screws.
If you’re looking to add some storage space to your home, installing shelves in drywall is a great solution. With just a few simple steps, you can easily mount shelves on your walls. We will guide you through the process of installing shelves in drywall, ensuring a secure and sturdy fit.
By following these steps, you can have your shelves installed in no time, providing you with a functional and stylish storage solution for your home. Let’s dive right in and get started with the installation process.
Factors To Consider When Selecting Shelves
Installing shelves in drywall can be a great way to maximize space and add functionality to your living or working area. However, it’s essential to select the right shelves that can withstand the weight of your items, fit seamlessly with your decor, and provide the durability you need. When choosing shelves for your drywall, there are a few key factors you should take into consideration:
Weight Capacity
The weight capacity of your shelves is a crucial factor to consider. You want to make sure the shelves can support the weight of the items you plan to place on them without the fear of them collapsing. To determine the weight capacity needed, assess the items you intend to store on the shelves and ensure that the shelves you choose have a weight capacity exceeding that total. It’s always better to have shelves with a higher weight capacity to ensure sturdiness and longevity.
Shelf Size
The size of your shelves is another significant consideration. Take accurate measurements of the available wall space where you plan to install the shelves. This will help you determine the appropriate width and height for your shelves. Consider the items you intend to store and choose a size that allows for proper display or storage. Remember to leave enough space between shelves to accommodate taller items or adjustable brackets if necessary.
Material and Finish
The material and finish of the shelves can greatly impact their overall look and durability. Choose materials that are strong and long-lasting, such as solid wood or metal, depending on your preference and budget. Assess the room decor and select a finish that complements the existing style. For example, if you have a modern or minimalist aesthetic, sleek metal shelves with a black or chrome finish can be ideal. If you want a more rustic or traditional look, wooden shelves with a natural or stained finish may be more suitable.
Locating Studs Behind The Drywall
Using a Stud Finder
One of the most straightforward and accurate methods for locating studs behind drywall is by using a stud finder. A stud finder is a handheld electronic device that detects changes in density behind the wall, indicating the presence of a stud. Here’s how to use a stud finder to find studs with ease:
- Choose a reliable stud finder with good reviews and ratings.
- Turn on the stud finder and hold it against the wall.
- Slowly move the stud finder horizontally across the wall, following the manufacturer’s instructions.
- Listen for beeps or look for fluctuating readings on the display as you pass over a stud.
- Once you detect a stud, mark its location with a pencil or masking tape.
Using a stud finder eliminates guesswork and helps you locate studs quickly and accurately, making the installation of shelves in drywall much easier.
Knocking Technique
If you don’t have access to a stud finder or prefer a more traditional approach, the knocking technique can be a reliable method to locate studs. Here’s how to do it:
- Start by tapping the wall gently with your knuckles, about 1 inch away from the potential stud location.
- Listen carefully to the sound produced. A hollow and low-pitched sound indicates the absence of a stud, while a solid and higher-pitched sound suggests the presence of a stud.
- Continue tapping along the wall, moving horizontally until you consistently hear a solid and higher-pitched sound.
- Once you locate a stud, mark its position for reference during shelf installation.
While the knocking technique might require some practice, it can be a cost-effective alternative for locating studs when a stud finder is not available.
Marking The Position Of The Shelves
Before installing shelves in drywall, it’s essential to mark their positions accurately. This step ensures that your shelves will be level and properly aligned, providing a sturdy and visually appealing storage solution. In this section, we will cover two crucial steps to mark the position of the shelves: Measuring and Leveling, and Using a Pencil or Masking Tape.
Measuring and Leveling
Measuring the space where you want to install the shelves is the first step towards ensuring a perfect fit. Use a tape measure to determine the horizontal distance between the desired shelf’s ends. Take note of this measurement as it will help you when cutting the shelf material later.
Next, it’s important to check the levelness of the area where the shelves will be installed. Place a level against the wall, aligning it vertically. Make any necessary adjustments to ensure the bubble is centered in the level. Repeat this step at various locations along the wall to account for any inconsistencies.
Using a Pencil or Masking Tape
Once you’ve determined the measurements and ensured the levelness of the area, use a pencil or masking tape to mark the position of the shelves on the wall. Consider the following steps:
- Start by marking the vertical location of each shelf. Use a pencil or a small piece of masking tape to create straight, horizontal lines where the bottom edge of each shelf will be. Take your time to ensure that each line is even and parallel to the floor.
- Now it’s time to mark the horizontal position of the shelves. Measure the desired distance for the first shelf from the nearest corner or adjacent shelf and mark it with a vertical line. Repeat this process for all the shelves you plan to install.
- Double-check all your measurements and marks to ensure accuracy. Taking the time to do this will save you from potential errors and the need for adjustments later.
By following these steps, you are now ready to move forward with the installation process. Properly marking the position of the shelves will serve as a guide, making it easier to install them securely and seamlessly into your drywall.
Gathering The Necessary Tools
Gathering the necessary tools is the first step in successful shelf installation in drywall. Having the right tools on hand will make the process easier and ensure that the shelves are installed securely. In this section, we will discuss the essential tools needed to complete this task.
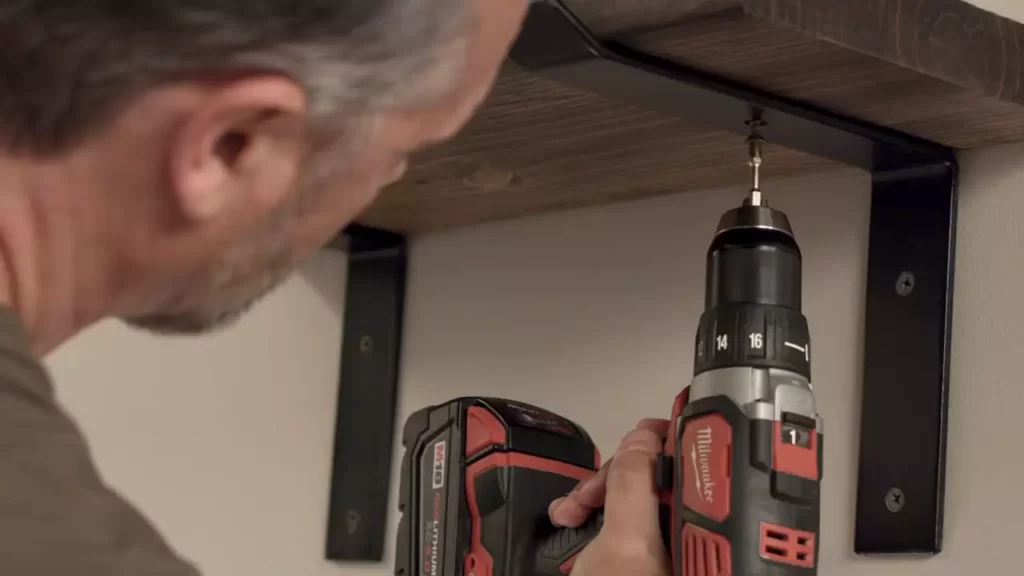
Electric Drill
An electric drill is an essential tool for installing shelves in drywall. It is used to create pilot holes for the screws that will hold the shelves in place. When selecting an electric drill, consider the type of screws you will be using and choose a drill bit that matches the size of the screw. This will prevent the drywall from splitting and provide a secure and stable anchor for the shelves.
Screwdriver
A screwdriver is another crucial tool needed for shelf installation. It is used to drive the screws into the pilot holes created by the electric drill. When choosing a screwdriver, ensure that it is the appropriate size and type for the screws you are using. A screwdriver with a comfortable grip will make the task more manageable and prevent hand fatigue during the installation process.
Level
A level is an indispensable tool for ensuring that the shelves are installed straight and properly aligned. It helps prevent the shelves from tilting or sagging, providing a visually appealing and functional result. Place the level against the shelves and adjust their position until the bubble is centered between the lines, indicating that the shelves are perfectly level.
Tape Measure
A tape measure is necessary to measure the exact location for shelf installation and ensure proper spacing between shelves. Measure the desired height and distance between shelves and mark these measurements on the wall with a pencil. This will help you achieve a symmetrical and aesthetically pleasing arrangement of the shelves.
By gathering these necessary tools, you will be well-prepared to install shelves in drywall. The electric drill will create pilot holes, the screwdriver will drive the screws in, the level will ensure straight and level installation and the tape measure will help achieve precise measurements. With these tools in hand, let’s proceed to the next step of the shelving installation process.
Acquiring The Required Materials
Shelf Brackets
Once you’ve decided to install shelves in your drywall, the first step is to gather all the necessary materials. One of the key items you’ll need is shelf brackets. These brackets are essential for supporting the weight of the shelves and ensuring they stay securely in place. When selecting shelf brackets, opt for sturdy and durable options that can hold the weight of the items you plan to place on the shelves.
Screws
To attach the shelf brackets to the wall, you’ll need screws. It’s important to choose the right size and type of screws for your project. Consider the thickness of your drywall and the weight capacity of your shelf brackets when selecting screws. Typically, you’ll want to use screws that are long enough to penetrate the drywall and securely attach the brackets. It’s recommended to use at least two screws per bracket for optimal stability.
Anchors (if necessary)
Depending on the weight of the items you plan to store on the shelves, you may need to use anchors. Anchors provide extra support by creating a secure connection between the shelf brackets and the wall. They are particularly useful if you’re planning to store heavy objects on your shelves. When choosing anchors, consider the weight capacity and the type of wall you have. There are different types of anchors available, such as toggle bolts, plastic anchors, or molly bolts. Make sure to follow the manufacturer’s instructions for proper installation.
Shelves
Of course, you’ll also need shelves themselves to complete your installation. When selecting shelves, consider the dimensions and weight capacity you require. Whether you’re looking for wooden, metal, or glass shelves, ensure they are suitable for the items you plan to display or store. Measure the length and width of your desired shelves, keeping in mind the available wall space and the overall aesthetic you’re aiming for.
Pencil or Masking Tape
Lastly, don’t forget to have a pencil or masking tape on hand. These simple yet essential tools will help you mark the exact positions for your shelf brackets on the wall. Measure and mark where the screws will go, ensuring they align with your desired shelf height and spacing. Double-check your measurements before drilling any holes to avoid any mistakes.
Now that you have acquired all the required materials, it’s time to move on to the next step: preparing the wall for installation. But first, let’s review the items you’ll need one more time:
– Shelf brackets
– Screws
– Anchors (if necessary)
– Shelves
– Pencil or masking tape
By having these materials ready, you’ll be well-prepared to install shelves in your drywall efficiently and securely.
Step 1: Marking The Location Of The Shelf Brackets
Installing shelves in drywall is an excellent way to maximize your storage space. Before you can hang your shelves, you need to properly mark the location of the shelf brackets. This step is crucial in ensuring that your shelves are level, secure, and able to support the weight of your items. In this guide, we will walk you through the process of marking the location of the shelf brackets in three simple steps. Let’s get started!
Measuring and Marking the Stud Locations
The first step in marking the location of the shelf brackets is to locate the wall studs. Wall studs are the vertical wooden beams behind the drywall that provide structural support. Finding and securing your shelf brackets to the studs will ensure that your shelves are stable and can hold the weight of your items.
Here’s how you can measure and mark the stud locations:
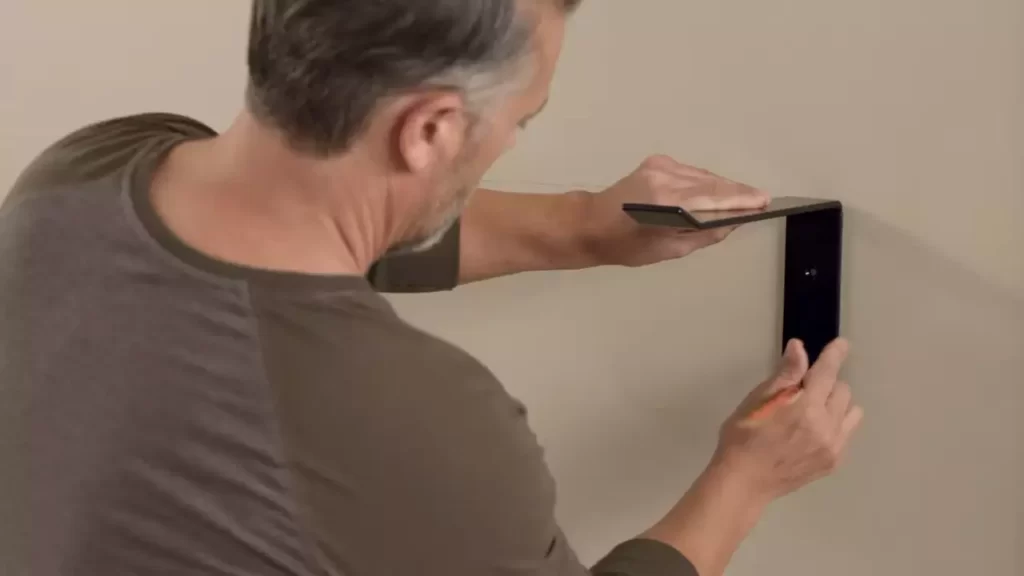
- Use a stud finder tool to locate the studs in the wall where you want to install the shelves. Slide the stud finder along the wall until it indicates the presence of a stud.
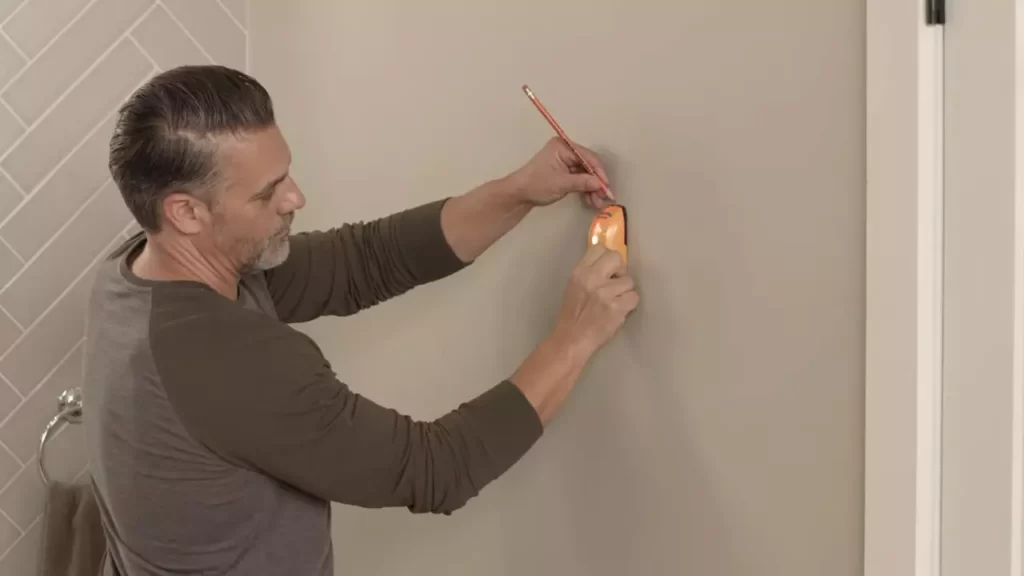
- Once you have located the first stud, measure and mark its position using a pencil. To ensure accuracy, measure from the floor or ceiling and make multiple marks along the stud’s vertical line.
- Repeat the process to locate and mark the position of the remaining studs where you plan to install the shelf brackets.
Indicating the Position and Spacing of the Brackets
After marking the stud locations, the next step is to indicate the position and spacing of the shelf brackets. This will ensure that your shelves are evenly supported and aesthetically pleasing.
Follow these steps to indicate the position and spacing of the brackets:
- Measure the desired height of your shelves from the floor or ceiling and mark it on the wall using a pencil. This will serve as your reference point for positioning the brackets.
- Measure the length or width of your shelves, depending on how you plan to install them. Divide the measurement by the number of shelf brackets you have, minus one. This will give you the ideal spacing between brackets.
- Starting from one end of the wall, measure and mark the position of the first bracket. Then, use the spacing measurement to mark the position of the subsequent brackets along the wall.
- Double-check the levelness of the marks using a level tool. This will ensure that your shelf brackets will be installed straight.
Once you have completed these steps, you will have successfully marked the location of the shelf brackets on your drywall. This careful marking process will make the installation of the shelves easier and more precise. In the next step, we will guide you on how to securely install the shelf brackets to ensure the stability of your shelves. Stay tuned!
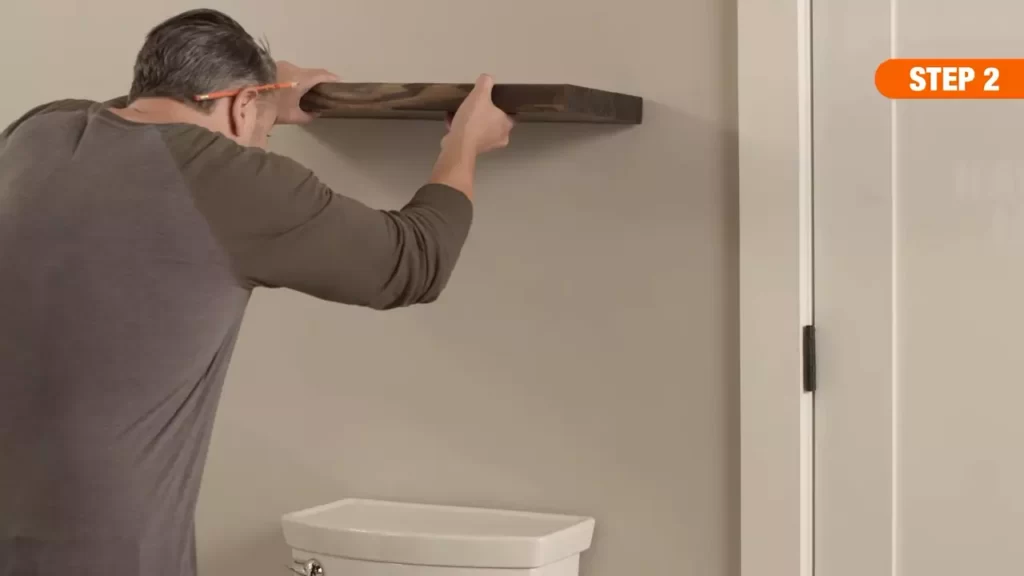
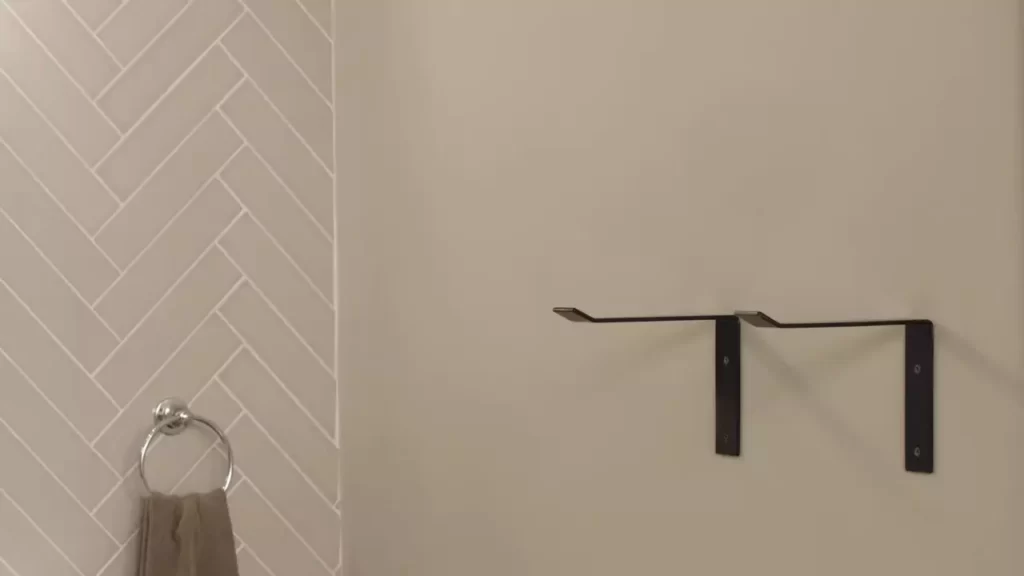
Step 2: Installing The Shelf Brackets
Once you have determined the proper height and location for your shelves, it’s time to move on to the next step: installing the shelf brackets. These brackets will provide the support and stability for your shelves, ensuring they can hold the weight of your items without damaging the drywall. In this step, we will guide you through the process of attaching the brackets to the studs and ensuring they are level and secure.
Attaching the Brackets to the Studs
The first and most crucial step in installing shelf brackets is to attach them securely to the studs in your drywall. Studs are the vertical framing members behind the walls that provide the strength needed to support heavy loads. To find the studs, you can use a stud finder, which is a small handheld device that detects the presence of wood or metal behind the surface of the wall.
Once you have located the studs, mark their positions on the wall using a pencil or a small piece of masking tape. It’s important to note that brackets should be attached to at least two studs for maximum stability. For longer shelves or heavier items, it may be necessary to attach brackets to additional studs.
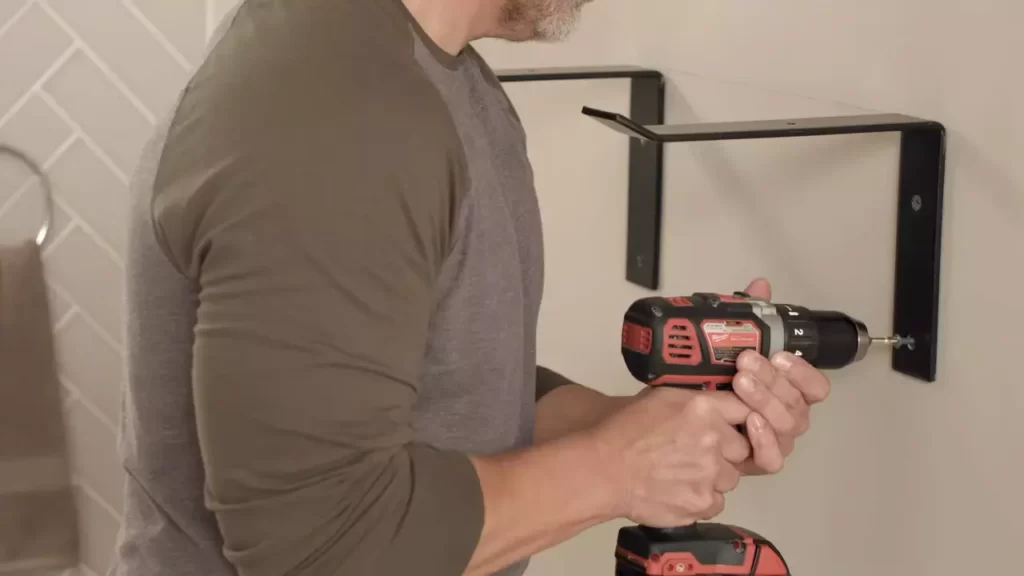
Next, align the bracket holes with the marked positions on the wall and hold the bracket against the wall. Using a drill and the appropriate screws or wall anchors, secure the bracket to the studs. Ensure that the screws are long enough to penetrate the drywall and reach the studs for a strong and secure hold.
Ensuring the Brackets are Level and Secure
Once the brackets are attached to the studs, it’s important to ensure they are level and securely fastened. This will prevent your shelves from sagging or falling off the wall. To check if the brackets are level, use a spirit level across the top edge of the brackets. Adjust the position as necessary until the bubble in the spirit level is centered.
After confirming the brackets are level, tighten the screws or wall anchors to ensure they are securely fastened to the studs. Avoid over-tightening, as this can damage the drywall or distort the bracket. If any screws or anchors feel loose, tighten them further to ensure a solid connection.
It’s essential to test the stability of the brackets before placing any items on the shelves. Apply pressure to the brackets and shelves to verify they can withstand the weight. If there is any movement or instability, reinforce the brackets by adding more screws or wall anchors.
Now that the shelf brackets are securely and levelly installed, you are ready to move on to the next step: placing the shelves onto the brackets. Stay tuned for the next part of our guide, where we will walk you through the process of properly positioning and attaching the shelves to the brackets.
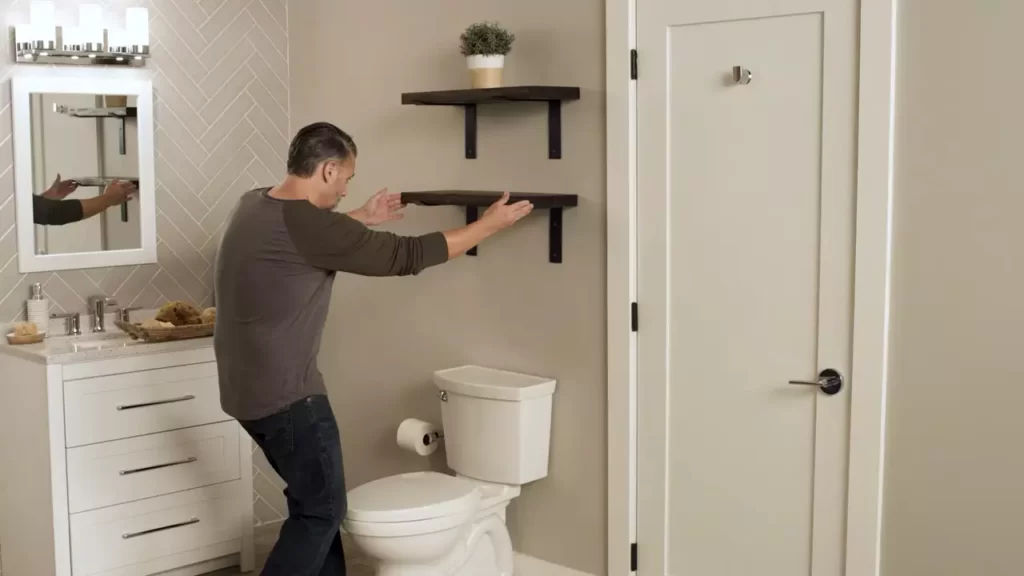
Step 3: Mounting The Shelves On The Brackets
Now that you have successfully installed the brackets on the wall and secured them properly, it’s time to move on to the next step – mounting the shelves on the brackets. This is where your shelves will finally come to life and provide you with the extra storage space you need. In this step, we will cover two important aspects: placing the shelves on the brackets and adjusting their position and leveling to ensure a stable and visually appealing result.
Placing the Shelves on the Brackets
When it comes to placing the shelves on the brackets, it is essential to handle them with care to avoid any damage. Start by lifting the shelf and positioning it above the brackets, making sure that the holes or slots on the shelf align with the bracket’s mounting points. Gently lower the shelf onto the brackets, ensuring a snug fit. If the shelves have predefined slots, you may need to slide the shelf into place until it rests securely on the brackets.
It’s important to note that different shelves may have varying mounting methods – some may require screws to secure them to the brackets, while others rely on gravity and a tight fit. Refer to the manufacturer’s instructions for your specific shelves to ensure proper placement. Additionally, double-check that all the brackets and shelves are rated to hold the weight you intend to place on them. This will ensure the durability and safety of your newly installed shelves.
Adjusting the Position and Leveling of the Shelves
Once the shelves are securely placed on the brackets, it’s time to assess their positioning and ensure they are level. Using a level tool, check to see if the shelves are straight horizontally, vertically, or both, depending on your desired arrangement. Ensure that the shelves are parallel to each other and align with any adjacent shelves or elements in the room.
If you find that the shelves are not leveled, you can make adjustments by slightly lifting the shelf and repositioning it on the brackets. Alternatively, you may need to loosen the screws holding the shelf in place, make the necessary leveling adjustments, and then tighten the screws again. Take your time to achieve the desired result, as properly leveled shelves not only enhance the aesthetics of your space but also contribute to their functionality.
In conclusion, mounting the shelves on the brackets is the crucial final step in the installation process. By following these steps and paying attention to the details, you’ll be able to securely place and level your shelves, giving your room a functional and visually pleasing storage solution. Enjoy the newfound organization and convenience that these installed shelves provide!
Using Anchors For Extra Stability
When it comes to installing shelves in drywall, it’s important to ensure that they are securely mounted. One way to achieve extra stability is by using anchors. Anchors provide additional support and prevent the shelves from becoming loose or falling off the wall. In this section, we will discuss the process of choosing the right type of anchors and installing them properly.
Choosing the Right Type of Anchors
The first step in using anchors for your shelves is to choose the right type that is suitable for your specific needs. There are several types of anchors available in the market, each designed for different weights and applications. To make an informed decision, consider the weight capacity of your shelves and the material of your drywall. Here are a few common types of anchors:
| Type of Anchor | Description |
|---|---|
| Molly Bolts | Molly bolts are designed for heavy-duty applications and can hold substantial weights. They consist of a screw and an expanding sleeve that distributes the weight across a larger area. |
| Toggle Bolts | Toggle bolts are suitable for moderate loads and are easy to install. They consist of a threaded bolt with wings that expand behind the wall, providing excellent support. |
| Plastic Anchors | Plastic anchors are ideal for lightweight shelves and are easy to use. They expand and grip the drywall when the screw is inserted, creating a secure hold. |
Based on the weight of your shelves and your drywall type, choose the anchor that best meets your requirements.
Installing the Anchors Properly
1. Mark the Placement: Before installing the anchors, mark the exact positions where you want your shelves to be mounted. Use a level to ensure that the marks are straight and aligned.
2. Preparing the Holes: Once you have marked the placements, use an appropriate drill bit to create pilot holes for the anchors. The size of the hole should correspond to the size of the anchor you are using.
3. Inserting the Anchors: Gently tap the anchor into the pilot hole using a hammer until it is flush with the wall. Make sure the anchor is securely seated and doesn’t stick out.
4. Securing the Screws: Finally, insert the screws into the anchors and tighten them using a screwdriver or drill. Take care not to overtighten, as it can damage the anchor or the drywall.
By following these steps, you can effectively install anchors for extra stability when mounting shelves on drywall. This ensures that your shelves are firmly secured and can hold the desired weight without any concerns of them becoming loose or dislodged.
Distributing The Weight On The Shelves
A well-installed shelf provides a convenient and attractive way to display and store items in your home. However, it is essential to distribute the weight properly to ensure the shelves can support the load without risking damage to your drywall. In this section, we will discuss two crucial aspects of weight distribution: spacing heavier items along the shelves and avoiding overloading them.
Spacing Heavier Items Along the Shelves
When organizing your shelves, it’s important to consider the weight of each item and distribute them evenly to prevent excessive stress on any one section of the shelf. Placing heavier items in an organized manner can help maintain structural integrity and reduce the risk of shelves sagging or even collapsing.
To achieve even weight distribution, follow these guidelines:
- Start by determining the total weight the shelves can support. This information can typically be found in the manufacturer’s instructions or by consulting an expert.
- Divide your shelves into sections based on their length. For example, if you have a 6-foot-long shelf, you might divide it into three 2-foot sections.
- Distribute the heavier items evenly across these sections. For example, if you have three books weighing 10 pounds each, you can place one book in each section instead of stacking them all in one area.
By spacing heavier items along the shelves, you create a balanced distribution of weight that reduces the strain on the shelf brackets and the drywall behind them, ensuring the longevity and stability of your shelves.
Avoiding Overloading the Shelves
While it may be tempting to use every inch of space on your shelves, it’s crucial to avoid overloading them. Overloading can lead to sagging shelves, weakened brackets, and even damage to the drywall.
To prevent overloading, keep the following tips in mind:
- Consider the weight capacity of your shelves and do not exceed it. Remember that it’s better to distribute the weight evenly across multiple shelves.
- Avoid stacking heavy items on top of each other, as this concentrates the weight on a small area. Instead, spread them out horizontally.
- Regularly assess the condition of your shelves and adjust the weight distribution as needed. This is especially important if you frequently rearrange or add new items to your shelves.
By following these tips, you can maintain the stability and functionality of your shelves, ensuring they continue to serve their purpose effectively without compromising the structural integrity of your drywall.
Checking The Stability Of The Shelves
When it comes to installing shelves in drywall, one of the most important considerations is ensuring the stability of the shelves. After all, you want your shelves to be able to hold the weight of your items without any concerns about them falling off the wall. In this section, we will explore two crucial steps to check the stability of your shelves: shaking and testing for movement, and tightening loose screws.
Shaking and Testing for Movement
Before you start loading your shelves with your belongings, it is crucial to shake and test them for any movement. This step is essential to detect any potential issues early on and ensure that your shelves are secure.
To check for stability, give the shelves a gentle shake. Observe if there is any noticeable movement. If the shelves feel loose or wobble, it could indicate that the installation is not secure. In such cases, it is important to identify the root cause of the movement before proceeding.
Tightening Loose Screws
If you notice any movement during the shaking test, it is likely due to loose screws. Loose screws can compromise the stability of the shelves, making them susceptible to accidents. To address this issue, follow these simple steps to tighten loose screws:
- First, use a screwdriver or a drill with the appropriate bit size to tighten the screws.
- Apply gentle pressure while turning the screws clockwise to ensure a secure fit.
- Continue to tighten all the visible screws on the shelf brackets, making sure each screw is tightened as much as possible without damaging the drywall.
- If needed, consider using anchors or wall plugs for additional support. These devices can help distribute the weight more evenly and provide a stronger foundation for your shelves.
Once you have tightened all the loose screws and added any necessary anchors, repeat the shaking test to check for any remaining movement. If the shelves feel sturdy and do not exhibit any wobbling, you can have confidence in their stability.
By performing these simple steps, you can ensure that your shelves are securely installed and ready to serve their purpose. Remember, regular checks on the stability of your shelves are essential to prevent accidents and maintain the safety of your belongings.
Regular Cleaning And Inspection Of The Shelves
Regular cleaning and inspection of your shelves is essential to ensure their longevity and maintain their aesthetic appeal. Dusting and wiping down the shelves regularly helps to remove any dirt, dust, or grime that may accumulate over time. Inspecting the shelves for wear and tear is equally important, as it allows you to address any issues before they worsen.
To keep your shelves clean, begin by dusting them regularly. This can be done using a soft cloth or a feather duster. Make sure to reach all the nooks and crannies, as dust tends to accumulate in those areas. If your shelves are made of wood, consider using a wood cleaner or polish for an added shine. For shelves made of other materials, such as metal or plastic, use a mild detergent mixed with warm water to wipe them down. Remember to dry the shelves thoroughly to prevent any water damage.
Inspecting the shelves for wear and tear is an important step in their maintenance. Start by checking for any loose brackets or screws. If you find any, tighten them carefully to ensure stability. Also, inspect the shelves for any signs of damage, such as cracks or chips. These can weaken the structure of the shelves and potentially pose a safety hazard. If you notice any such issues, consider replacing the damaged parts or contacting a professional for assistance.
Maintaining a clean and well-inspected shelving system not only enhances the overall appearance of your space but also prolongs the lifespan of your shelves. By dusting and wiping down the shelves regularly, you prevent the accumulation of dirt that can make them look dull and unappealing. Regular inspections help you catch any potential problems early on, preventing them from worsening and ensuring the safety of your belongings.
Frequently Asked Questions For How To Install Shelves In Drywall
How Do You Hang Shelves On Drywall Without Studs?
To hang shelves on drywall without studs, use wall anchors or toggle bolts for added support. These enable you to securely anchor the shelf to the wall. Be sure to choose the appropriate anchor type based on the weight and size of the shelf.
Can You Put Floating Shelves On Drywall?
Yes, you can install floating shelves on drywall. Use appropriate anchors and screws designed for drywall to ensure secure installation. Always follow the manufacturer’s instructions and consider the weight capacity of the shelves to prevent any damage to the drywall.
Should I Use Drywall Anchors For Shelves?
Yes, it is recommended to use drywall anchors for shelves. Drywall anchors provide extra support and prevent shelves from falling or sagging. They are particularly necessary if you plan to put heavy items on the shelves. By using drywall anchors, you can ensure stability and avoid potential damage to your walls.
Do Floating Shelves Need Studs?
Floating shelves do not need studs for installation. They are designed to be mounted directly onto the wall using brackets or hardware that is included with the shelf. This allows for flexible positioning and makes installation easier.
Conclusion
Installing shelves in drywall is a simple and practical way to maximize storage space in your home. By following the step-by-step instructions provided in this blog post, you can successfully complete this DIY project without much hassle. Remember, proper measurements, using the right tools, and ensuring a secure installation are key to a successful outcome.
So, go ahead and enhance your living space with stylish and functional shelves!