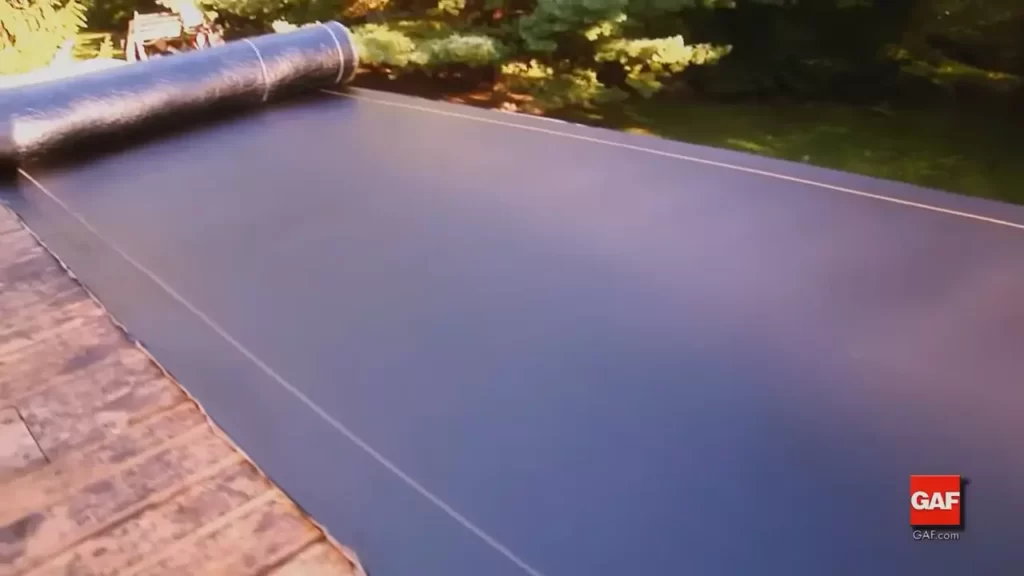
To install rolled roofing on a patio, clean the surface thoroughly and apply roofing adhesive using a paint roller. Then, unroll the roofing material and press it into place, making sure to smooth out any wrinkles or bubbles.
Keep the material flush with the edge of the patio and secure it in place with roofing nails every 6-8 inches along the edges and 12-18 inches in between. Repeat this process for each row, overlapping the previous row by a few inches.
Finally, trim any excess material and apply roofing cement to seal any gaps or seams. This guide will walk you through the step-by-step process of installing rolled roofing on your patio, ensuring a watertight and durable surface.
Planning And Preparation
Before installing rolled roofing on your patio, it’s important to plan and prepare properly. This ensures a smooth installation process and helps to ensure that your patio is properly protected.
Evaluate the patio structure and condition
The first step in the planning process is to evaluate the structure and condition of your patio. Check for any damage, such as cracks or leaks, that may need to be repaired before installing the roofing. Additionally, assess the overall stability and strength of the patio to ensure it can support the weight of the rolled roofing materials.
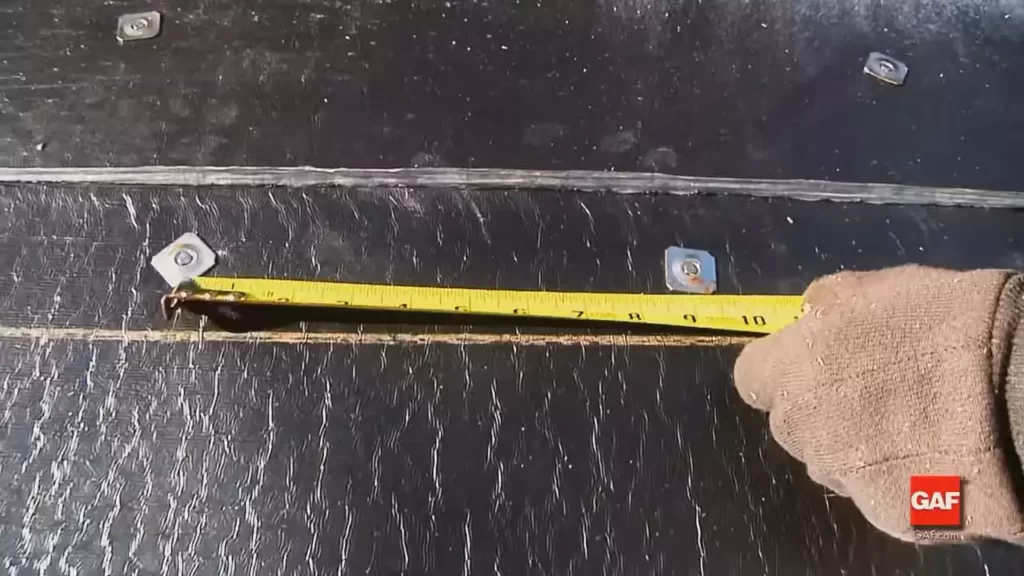
Measure the patio dimensions and calculate the roofing material needed
Accurate measurements are crucial in determining how much-rolled roofing material you’ll need for your patio. Using a tape measure, measure the length and width of the patio. Multiply these measurements to calculate the square footage. Consider adding a few extra feet to account for any overlapping or waste.
Choose the appropriate rolled roofing materials
When it comes to choosing rolled roofing materials for your patio, consider factors such as durability, weather resistance, and aesthetics. Select a product that is specifically designed for use on flat or low-slope roofs and suitable for your climate. Take into account the color and style that will complement your home’s exterior.
Gather the necessary tools and equipment
Before you begin the installation process, make sure you have all the necessary tools and equipment. Here is a list of items you will likely need:
- Roller brush
- Utility knife
- Roofing nails
- Hammer
- Roofing adhesive
- Measuring tape
- Wire brush
- Roofing cement
- Safety goggles
- Gloves
Prepare the patio surface for installation
Before installing rolled roofing, you need to prepare the patio surface. Follow these steps:
- Ensure the patio is clean and free of any debris or loose materials. Use a wire brush to remove any dirt or grime.
- Inspect the surface for any cracks or holes. Fill these areas with roofing cement and smooth it out with a putty knife.
- If there are any low spots on the patio, fill them with a layer of roofing cement and level it using a trowel.
- Cover the entire patio surface with a layer of roofing adhesive. Use a roller brush to apply the adhesive evenly.
By thoroughly planning and preparing your patio for installation, you’ll ensure a successful and long-lasting rolled roofing application. With the right materials and tools in hand, you’ll be ready to move on to the next step of the installation process.
Installing Rolled Roofing
Installing rolled roofing on a patio is a straightforward process that can provide long-lasting protection and durability. By following a few simple steps, you can have your patio covered and ready for all types of weather. In this section, we will guide you through the essential steps to ensure a successful installation.
Steps to clean and prime the patio surface
The first step in installing rolled roofing on a patio is to prepare the surface. This involves cleaning the patio thoroughly to remove any dirt, debris, or loose material. Start by sweeping the surface to remove larger particles. Then, use a pressure washer or a hose with a strong jet of water to wash away smaller debris and stains.
Once the patio is clean and dry, it is important to prime the surface. Priming helps the rolled roofing material adhere better and ensures a stronger bond. Apply a layer of roofing primer using a paint roller or a brush, covering the entire surface evenly. Allow the primer to dry completely before moving on to the next step.
Cutting and fitting the rolled roofing material
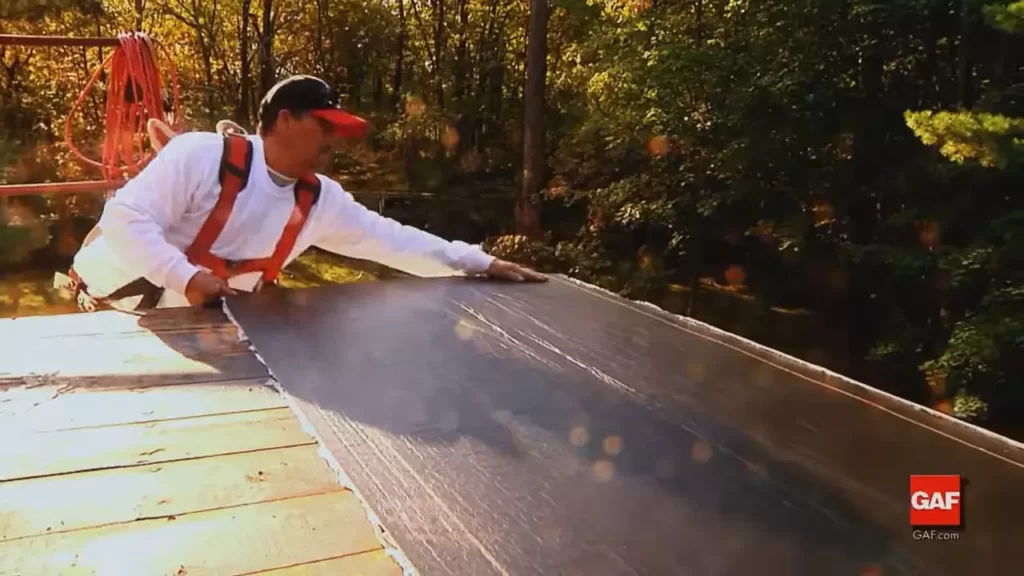
After preparing the patio surface, it’s time to cut and fit the rolled roofing material. Measure the length and width of the patio, and then transfer these measurements onto the rolled roofing material. Use a utility knife or a roofing cutter to cut the material to the desired size.
Once the roofing material is cut, carefully place it on the patio, making sure to align it with the edges and corners. It’s crucial to leave a slight overhang on all sides to allow for proper overlapping and sealing later on.
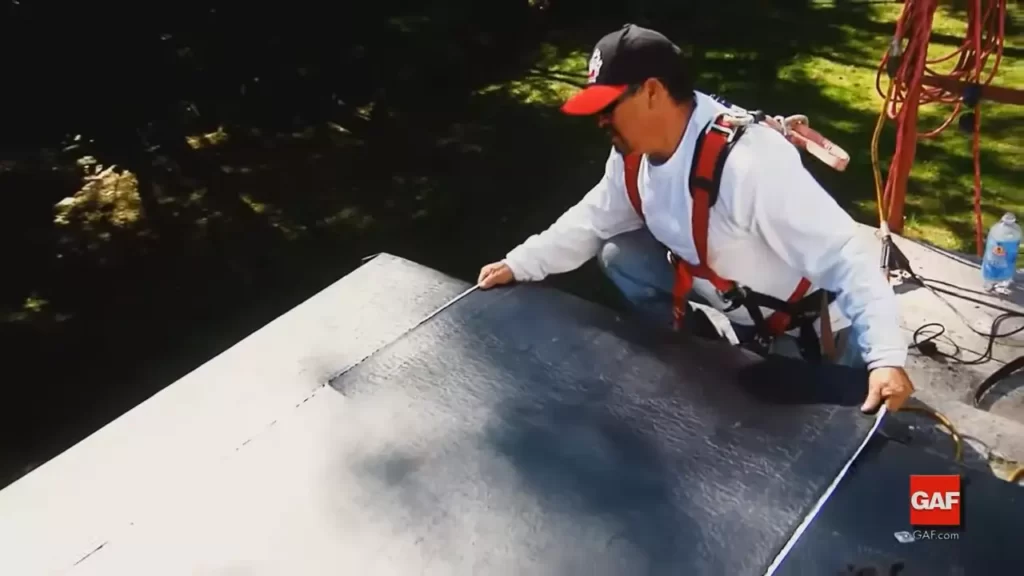
Properly aligning and overlapping the roofing sheets
Aligning and overlapping the roofing sheets is vital to create a watertight seal. Start by laying the first sheet along one edge of the patio, ensuring it is parallel to the edge and has the correct overhang on all sides. Use a ruler or a straight edge to ensure the sheet is perfectly aligned.
Overlap the second sheet with the first by about 3 inches. This overlapping technique helps prevent water from seeping through the seams. Continue installing the rest of the roofing sheets, making sure each one overlaps the previous sheet properly.
Securing the roofing material with nails or adhesive
After aligning and overlapping the roofing sheets, it’s time to secure them to the patio surface. Depending on the type of rolled roofing material, you can use either nails or adhesive to fix it in place.
If using nails, space them approximately 12 inches apart along the edges and 24 inches apart across the field. Make sure the nails are driven flush with the surface but not overdriven, as this can damage the material. Alternatively, if using adhesive, follow the manufacturer’s instructions for proper application and drying time.
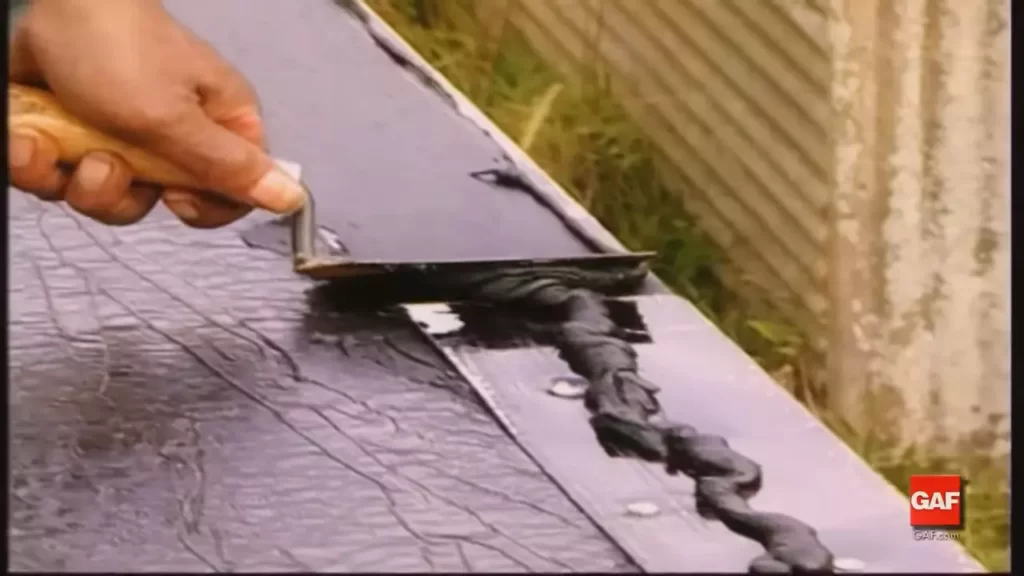
Sealing the edges and seams
Sealing the edges and seams is crucial to prevent water infiltration and ensure a durable installation. Apply a bead of roofing sealant along all edges, including the eaves and gables. Use a caulking gun for precise application. Smooth the sealant with a putty knife to create a watertight seal.
Pay special attention to the seams between the roofing sheets. Apply an additional layer of roofing sealant along these seams to reinforce the waterproofing. Smooth the sealant with a putty knife to create an even and seamless finish.
Applying additional layers if necessary
In some cases, it may be necessary to apply additional layers of rolled roofing material for added protection or insulation. If you decide to add more layers, repeat the steps mentioned earlier, ensuring proper alignment, overlapping, and sealing.
Remember to allow for appropriate drying time between layers and follow the manufacturer’s guidelines for maximum layer thickness. Applying too many layers can compromise the integrity of the installation.
By following these steps, you can successfully install rolled roofing on your patio, providing a protective barrier against the elements and enhancing your outdoor space. Ensure to follow safety precautions and use appropriate equipment throughout the installation process.
Finishing Touches And Maintenance
Installing Drip Edge and Trim
After successfully installing rolled roofing on your patio, it’s time to add the finishing touches that will not only enhance the appearance but also ensure the longevity of your roof. One crucial element to consider is the installation of drip edge and trim.
Drip edge is a metal strip designed to prevent water from seeping into the edges of the roofing material. It is installed along the edges of the roof, providing a barrier against water damage. Trim, on the other hand, is used to cover any exposed edges and create a neat and finished look.
To install drip edge and trim, follow these steps:
- Measure the length of each side of your patio roof and cut the drip edge accordingly.
- Align the drip edge with the edge of the roof, ensuring that it extends slightly over the roofing material. Secure it in place using roofing nails.
- Next, cut the trim to the appropriate length and attach it to the edges of the roof using roofing nails.
Properly Flashing and Sealing Any Roof Penetrations
Another important aspect of finishing your rolled roofing installation is properly flashing and sealing any roof penetrations. Roof penetrations can include items such as skylights, vents, or chimneys, which require special attention to prevent water leakage.
To flash and seal roof penetrations:
- Carefully inspect the area around the penetration for any gaps or cracks.
- Apply a layer of roofing cement or sealant around the base of the penetration to create a watertight seal.
- Secure a metal flashing over the sealant, extending it up onto the roofing material and ensuring it overlaps the edges.
- Seal any seams or edges of the flashing with roofing cement to provide additional protection against water intrusion.
Tips for Troubleshooting and Fixing Common Issues
While rolled roofing is relatively easy to install, it’s not uncommon to encounter some issues along the way. Here are a few troubleshooting tips to help you address common problems:
- If you notice any loose seams or edges, use roofing adhesive to secure them back in place.
- In case of small tears or punctures, apply a patch of roofing material over the damaged area, ensuring it is tightly adhered.
- If you find any areas where water is pooling, create a small slope by adding additional layers of roofing material to encourage proper drainage.
Regular Inspections and Maintenance for Longevity
Ensuring the longevity of your rolled roofing requires regular inspections and maintenance. By conducting routine checks, you can identify and address any issues before they worsen and cause significant damage.
Consider the following maintenance tasks:
- Inspect the roof for any signs of damage or wear, such as loose seams, tears, or cracks.
- Clean any debris, leaves, or branches that may have accumulated on the surface of the roof.
- Trim back overhanging tree branches that can scrape against the roofing material or cause excessive shade, leading to moisture retention.
Final Checks and Cleaning of the Patio Area
Before concluding the installation of rolled roofing on your patio, there are a few final checks and cleaning tasks to perform:
- Inspect the entire patio area for any loose nails or sharp edges that may pose a risk.
- Sweep the patio surface to remove any loose debris or dirt.
- If necessary, spray the patio with a gentle hose to remove any remaining dirt.
With these finishing touches and maintenance tasks completed, you can enjoy a well-protected and visually appealing patio for years to come.
Frequently Asked Questions On How To Install Rolled Roofing On A Patio
What Do You Put Under Rolled Roofing?
Rolled roofing is typically applied directly on top of the roof deck or existing roofing materials. It is commonly used on low-slope roofs or as an underlayment for other roofing materials.
How Do You Install Roll Roofing On A Patio Cover?
To install roll roofing on a patio cover, follow these steps:
1. Clean the roof surface and ensure it is dry.
2. Measure and cut the roofing material to fit the area.
3. Apply an adhesive to the roof surface.
4. Unroll the roofing material and press it firmly onto the adhesive.
5. Smooth out any wrinkles and secure the edges with nails or roofing cement.
Do You Need To Nail Down Rolled Roofing?
No, you don’t need to nail down rolled roofing. It is typically adhered using roofing cement or adhesive.
What Is The Proper Way To Install Rolled Roofing?
To install rolled roofing properly, follow these steps:
1. Prepare the roof surface by cleaning and removing any debris.
2. Apply roofing cement along the edges of the roof to create a secure base.
3. Roll out the roofing material over the roof, ensuring it is straight and aligned.
4. Secure the roofing material with roofing nails every 6-12 inches.
5. Finally, apply roofing cement along the edges and seams for added protection.
Conclusion
Installing rolled roofing on a patio is not as daunting as it may seem. By following the step-by-step guide provided in this blog post, you can easily accomplish this task and protect your patio from the elements. With a few tools and some patience, you’ll have a durable and long-lasting roofing solution in no time.
So don’t hesitate, to give your patio the upgrade it deserves!