To install range hood ducting, measure and mark the desired location for the duct, drill a hole, then connect the duct to the hood and secure it in place. Installing range hood ducting involves measuring and marking the desired location, drilling a hole, and connecting and securing the duct to the hood.
Range hood ducting is an essential component for effective ventilation in the kitchen. It helps to remove cooking odors, smoke, and excess heat from the cooking area, improving indoor air quality. Additionally, proper installation ensures that the ducting functions efficiently and prevents air leakage.
This article provides a step-by-step guide on how to install range hood ducting, allowing you to maintain a clean and comfortable kitchen environment. With the right tools and materials, you can easily tackle this project and enjoy the benefits of a well-vented kitchen.

Factors To Consider For Proper Range Hood Ducting Installation
1. Ventilation requirements for your kitchen:
Before installing range hood ducting, it is essential to understand the ventilation requirements of your kitchen. Adequate ventilation helps in removing smoke, odors, and excess heat from the cooking area, improving indoor air quality. Consider the size of your kitchen, the type of cooking you do, and the frequency of cooking to determine the appropriate airflow capacity for your range hood.
2. Types of range hood ducting materials:
Choosing the right ducting material is crucial for effective and efficient range hood installation. There are various materials available, including:
| Material | Pros | Cons |
|---|---|---|
| Flexible Aluminum | Easy to install and adjust | Not suitable for long duct runs |
| Rigid Metal | Durable and efficient | More labor-intensive to install |
| PVC/Plastic | Affordable and lightweight | Less durable and may release harmful fumes |
3. Sizing considerations for range hood ducting:
Proper sizing of the range hood ducting ensures optimal performance. It is essential to select the correct duct size based on the airflow requirements of your range hood. Larger ducts minimize airflow resistance and improve efficiency, while smaller ducts may cause back pressure and reduce the effectiveness of your range hood. Refer to the manufacturer’s guidelines or consult a professional to determine the appropriate duct size for your specific range hood model.
4. Compatibility with your range hood:
Ensure that the ducting system you choose is compatible with your range hood. Consider the shape and size of the range hood’s exhaust outlet, as well as any additional components required for installation, such as connectors, elbows, and transition pieces. Proper compatibility ensures a secure and airtight connection, preventing air leaks and ensuring efficient ventilation.
Essential Equipment For Range Hood Ducting Installation
When it comes to installing ducting for your range hood, having the right equipment is crucial. Not only does it ensure smooth and efficient installation, but it also helps maintain optimal airflow and ventilation in your kitchen. In this section, we’ll take a look at the essential equipment you’ll need for range hood ducting installation.
Ductwork
Ductwork is the backbone of any range hood installation. It is responsible for carrying the filtered air from your kitchen to the outdoors. Ductwork comes in various materials, including aluminum and steel, and has different shapes and sizes to fit your specific needs. Make sure to choose the right ductwork that is compatible with your range hood and suitable for your kitchen setup.
Vent Wall Cap
The vent wall cap is an essential component that provides an outlet for the air to escape outside. It is typically installed on an exterior wall and ensures that the air is properly expelled without any backflow. When selecting a vent wall cap, make sure it is compatible with the size and type of ductwork you’re using.
Duct Connector
A duct connector is used to join two sections of ductwork together. It provides a secure and tight connection, ensuring that there are no leaks or gaps that can compromise the effectiveness of your range hood. When choosing a duct connector, opt for one that fits the size and material of your ductwork.
Clamps
Clamps are essential for securing the connections between ductwork and other components. They provide stability and prevent any accidental disconnections or leaks. Make sure to choose high-quality clamps that are designed for ductwork and can withstand the airflow and pressure of your range hood.
Screwdriver
A screwdriver is a versatile tool that you’ll need for securing screws and brackets during the installation process. It’s important to choose a screwdriver that is compatible with the type of screws you’ll be using, ensuring a secure and sturdy installation.
Measuring Tape
A measuring tape is an essential tool for accurate and precise measurements. It allows you to measure the length and dimensions of your ductwork, ensuring a proper fit and alignment. Use the measuring tape to measure the required length of ductwork, the distance for installing the vent wall cap, and any other measurements needed during the installation process.
Duct Tape
Duct tape is a versatile adhesive tape that is commonly used in range hood ducting installation. It is used to secure joints and connections, ensuring an airtight seal. When choosing duct tape, opt for one that is specifically designed for ductwork and can withstand high temperatures and humidity levels.
Vent Hood Transition Piece
A vent hood transition piece is used to connect the range hood to the ductwork. It ensures a smooth transition, allowing the air to flow efficiently from the range hood to the ductwork. When selecting a vent hood transition piece, make sure it is compatible with your range hood and the size of your ductwork.
By having the essential equipment mentioned above, you’ll be well-equipped to install range hood ducting with ease and efficiency. Remember to choose high-quality materials and tools that are specifically designed for range hood installation, ensuring optimal performance and ventilation in your kitchen.
Pre-Installation Preparations For Range Hood Ducting
Pre-Installation Preparations for Range Hood Ducting
Before diving into the installation process of range hood ducting, there are a few important pre-installation preparations you need to take into consideration. These preparations will ensure a smooth and hassle-free installation, giving your range hood the proper ventilation it needs. In this section, we will cover how to measure and plan the ducting route, determine the installation location for the range hood, and ensure there is sufficient clearance for ducting.
Measure and plan the ducting route
One of the first steps in preparing for range hood ducting installation is to measure and plan the route for the ducting. This involves determining the shortest and most efficient path from your range hood to an exterior wall or roof vent. To do this, follow these steps:
- Measure the distance between the range hood and the exterior vent location.
- Identify any potential obstacles or obstructions along the path, such as walls, cabinets, or ceiling joists.
- Use these measurements and considerations to plan the route, ensuring the ducting will have a clear and unobstructed path to vent outside.
Determine the installation location for the range hood
Once you have planned the ducting route, the next step is to determine the installation location for the range hood. This includes considering factors such as:
- The proximity to the cooking surface to effectively capture and remove smoke, grease, and odors.
- The availability of an electrical power source nearby to connect the range hood.
- The existing cabinetry or clearance requirements for the range hood’s specific size and model.
Ensure there is sufficient clearance for ducting
Before installing the range hood ducting, it is crucial to ensure that there is sufficient clearance for the ducts to fit properly. This includes:
- Checking for any structural beams, electrical wiring, or plumbing that may obstruct the path of the ducting.
- Allowing for a minimum of 18 inches of clearance between the top of the cooking surface and the bottom of the range hood to ensure proper airflow.
- Verifying the manufacturer’s specifications and requirements for ducting clearance, as each range hood model may have specific recommendations.
Cutting The Hole For Duct Placement
When it comes to installing range hood ducting, one of the crucial steps is cutting the hole for duct placement. This step ensures proper ventilation and exhaust for your kitchen. In this article, we will guide you through the process of cutting the hole for duct placement, so you can complete your range hood installation smoothly. By following our step-by-step instructions, you’ll be able to locate an appropriate location for the duct hole, mark the measurements accurately, and use a saw to cut the hole in the appropriate size.
Locate an Appropriate Location for the Duct Hole
Before you begin cutting the hole for duct placement, it’s important to locate an appropriate location for the hole. This will ensure efficient airflow and proper ventilation in your kitchen. Typically, you’ll want to place the duct hole in a spot that is close to the range hood and allows for easy access to the outside.
Here are a few factors to consider when selecting the location:
- The distance and proximity to the range hood.
- The availability of an exterior wall or roof for the duct to pass through.
- Any obstacles, such as cabinets or electrical wiring, that may interfere with the duct placement.
Take your time to carefully evaluate these factors, as the location of the duct hole will impact the overall effectiveness and efficiency of your range hood ventilation system.
Mark the Measurements for the Duct Hole
Once you have identified the appropriate location for the duct hole, it’s time to mark the measurements accurately. This will ensure that the hole is cut in the right size, allowing for a snug fit for the ducting.
To mark the measurements, follow these simple steps:
- Measure the diameter of the ducting you will be using.
- Using a pencil or marker, mark the outline of the duct on the surface where the hole will be cut.
- Double-check the measurements to ensure accuracy.
By taking the time to mark the measurements correctly, you’ll avoid any unnecessary mistakes when cutting the hole.
Use a Saw to Cut the Hole in the Appropriate Size
Now that you’ve located the appropriate location and marked the measurements, it’s time to cut the hole in the appropriate size. You’ll need a saw that is suitable for the surface you are cutting through, whether it’s drywall, wood, or another material.
Follow these steps to cut the hole:
- Put on safety goggles and gloves to protect yourself.
- Align the saw with the marked outline of the duct hole.
- Begin cutting along the marked line, applying steady pressure.
- Take your time and be cautious when nearing the end of the cut to ensure a clean and precise hole.
Remember to clean up any debris or dust left behind after cutting the hole.
With the hole cut, you are now ready to proceed with the next steps of installing range hood ducting.
Connecting The Ductwork To The Range Hood
When installing a range hood, connecting the ductwork correctly is crucial to ensure optimal functionality and safety. This step-by-step guide will walk you through the process of attaching the duct connector to the range hood, securing the connection with clamps or screws, and ensuring a tight seal between the ductwork and range hood.
Attach the duct connector to the range hood
Start by locating the duct connector on the range hood. This connector is usually located at the top or back of the hood, depending on the model. Place the duct connector against the opening and align it carefully to ensure a proper fit.
Secure the connection with clamps or screws
Once the duct connector is in place, it’s time to secure the connection. Depending on the design of your range hood, you may use either clamps or screws to hold the duct connector firmly in place. Follow the manufacturer’s instructions for your specific model to ensure the connection is secure and tight.
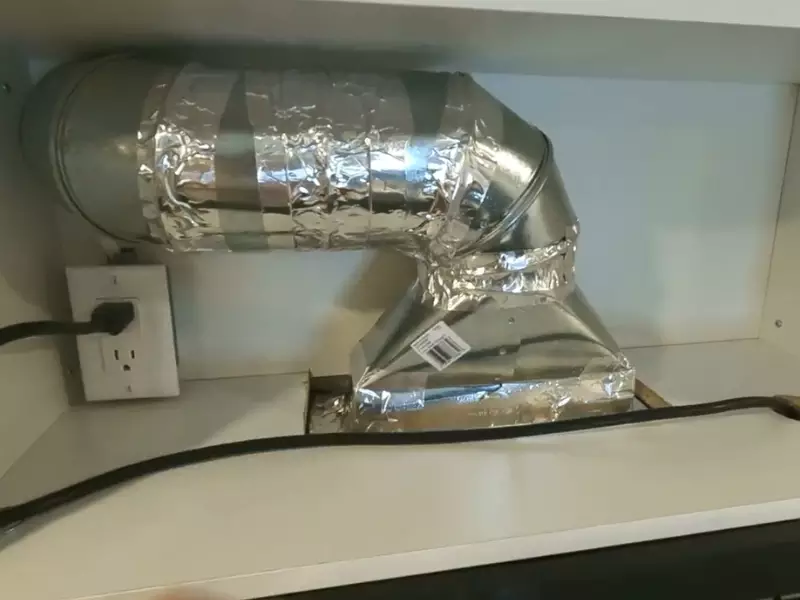
Ensure a tight seal between the ductwork and range hood
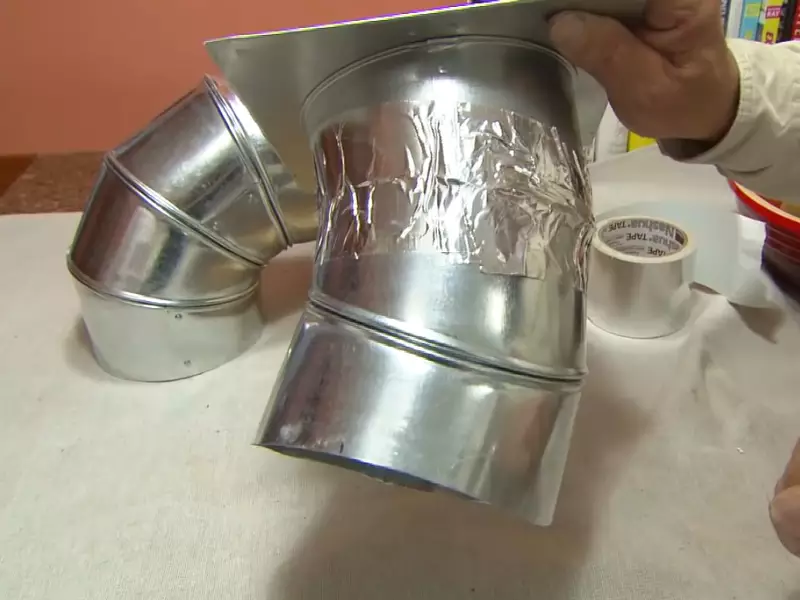
A tight seal between the ductwork and range hood is essential to prevent air leaks and maximize the effectiveness of your ventilation system. Inspect the connection carefully, looking for any gaps or loose fittings. If needed, use foil tape or a duct sealant to seal any areas of concern, ensuring a tight and secure connection.
To summarize:
- Attach the duct connector to the range hood, aligning it carefully
- Secure the connection with clamps or screws according to the manufacturer’s instructions
- Ensure a tight seal between the ductwork and range hood using foil tape or a duct sealant
By following these steps, you can confidently connect the ductwork to your range hood, ensuring proper ventilation and safety in your kitchen.
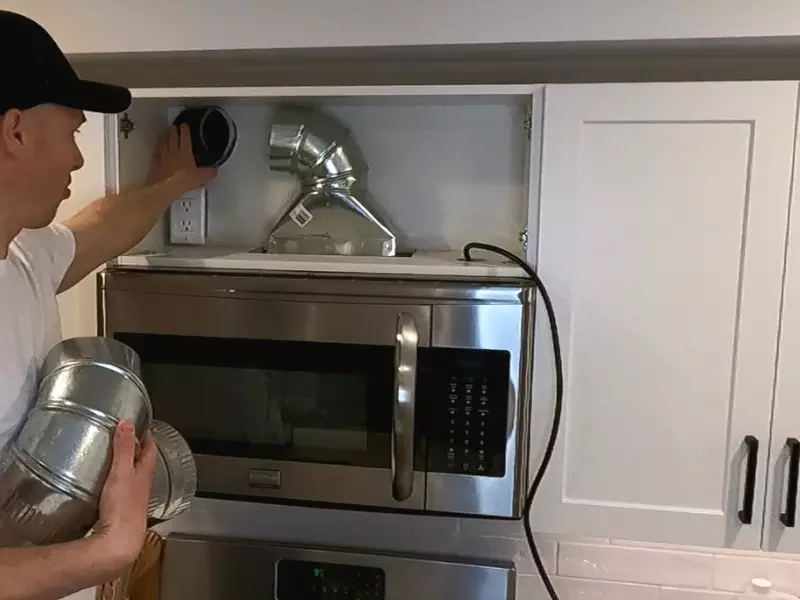
Extending The Ductwork To The Exterior Wall
Determine the optimal ducting route to the exterior
Before you begin extending the ductwork to the exterior wall, it’s important to determine the optimal route for your range hood ducting. The goal is to find the shortest, most direct path that allows for efficient airflow and minimizes bends and turns. This will help to maximize the effectiveness of your range hood in removing odors, smoke, and grease from your kitchen.
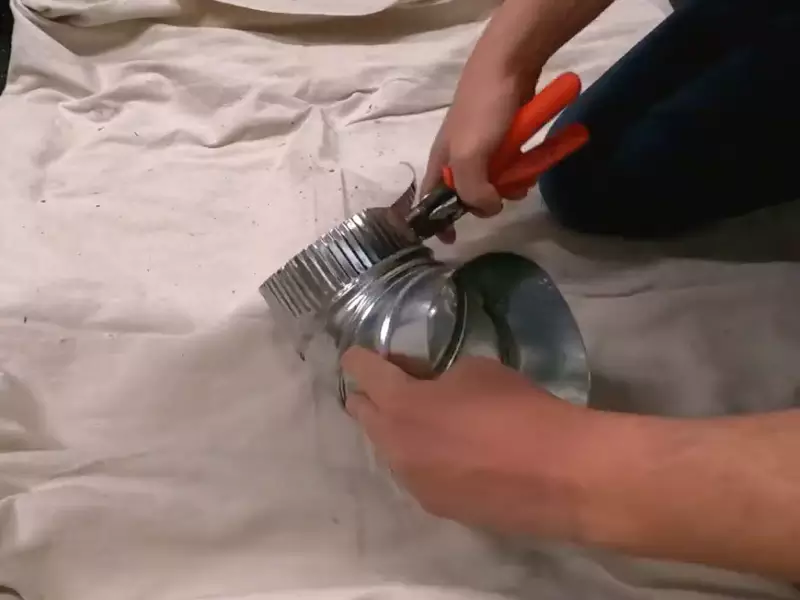
Measure and cut the necessary lengths of ductwork
Once you have determined the optimal route for your ducting, it’s time to measure and cut the necessary lengths of ductwork. Be sure to measure accurately to ensure a proper fit and alignment. Keep in mind that you may need to use elbows or other fittings to navigate around obstacles such as cabinets or beams.
To measure the ductwork, you can use a tape measure or a ruler. Take precise measurements of the required lengths and mark them on the ductwork using a marker or a pencil. Make sure to account for any fittings or connectors that need to be attached to the ductwork.
Connect the duct segments using clamps or tape
With the duct segments cut to size, it’s time to connect them together. There are several methods you can use to connect the duct segments, such as using clamps or tape. The method you choose will depend on the type of ductwork you are using and your personal preference.
If you are using flexible ductwork, you can use clamps or zip ties to securely connect the segments. Simply slide the clamp or zip tie over the overlapping ends of the duct segments and tighten it to create a tight seal.
If you are using rigid ductwork, you can use foil tape or metal screws to connect the segments. Apply the tape or screws to the overlapping ends of the duct segments to create a secure connection. Make sure to press the tape firmly to ensure a proper seal.
Secure the ductwork to the wall with brackets or straps
Now that the ductwork segments are connected, it’s time to secure them to the wall. This will help to keep the ductwork in place and prevent it from moving or sagging over time. The method you choose to secure the ductwork will depend on the type of wall you are working with.
If you are working with a drywall or plaster wall, you can use brackets or straps to secure the ductwork. Attach the brackets or straps to the wall using screws, and then wrap them around the ductwork to hold it securely in place.
If you are working with a concrete or masonry wall, you can use concrete anchors or straps to secure the ductwork. Drill holes in the wall, insert the anchors, and then attach the straps to the ductwork.
Ensure that the ductwork is properly aligned and level as you secure it to the wall. This will help to maintain a smooth airflow and prevent any obstructions.
Installing The Vent Wall Cap
Installing the vent wall cap is an important step in the process of installing range hood ducting. The vent wall cap is the exterior termination point for the duct, allowing the exhaust to be expelled outside the home. Ensuring proper installation of the vent wall cap is crucial for efficient and effective ventilation. In this section, we will guide you through the process of selecting an appropriate location for the vent wall cap, cutting a hole in the exterior wall, and mounting and securing the vent wall cap to the wall.
Select an appropriate location for the vent wall cap
Before installing the vent wall cap, it is essential to choose a suitable location. The location should be on an exterior wall, preferably near the range hood or where the ducting is accessible. Consider the following factors when selecting the location:
- Keep the vent wall cap away from any obstructions, such as windows, doors, or vents.
- Ensure the location provides a clear path for the exhaust to exit the home without any restrictions.
- Choose a spot that is aesthetically pleasing and blends well with the exterior of the house.
Cut a hole in the exterior wall for the vent
Once you have identified the appropriate location for the vent wall cap, it’s time to cut a hole in the exterior wall. Follow these steps:
- Measure and mark the exact position where you want to install the vent wall cap.
- Put on protective gear such as goggles and gloves before using a reciprocating saw or a jigsaw to cut the hole.
- Start cutting the hole by carefully following the marked lines, ensuring a clean and precise cut.
- Once the hole is cut, remove any excess debris or insulation from the inside.
Mount and secure the vent wall cap to the exterior wall
With the hole in place, it’s time to mount and secure the vent wall cap to the exterior wall. Here’s how to do it:
- Insert the vent wall cap through the hole from the outside.
- Align the cap properly, ensuring it is level and centered.
- Use screws or nails to secure the vent wall cap to the wall, following the manufacturer’s instructions.
- Tightly seal the area around the vent wall cap with weatherproof sealant to prevent any air leaks.
By following these steps, you will successfully install the vent wall cap for your range hood ducting. Remember to take necessary precautions and consult professional help whenever needed to ensure a safe and efficient installation process.
Ensuring Proper Airflow And Finishing Touches
Ensuring Proper Airflow and Finishing Touches
After successfully installing the range hood ducting, the next crucial step is to ensure proper airflow and add those finishing touches that will make your installation complete. This stage involves checking the connections for any leaks, sealing any gaps or loose connections with duct tape, and testing the range hood airflow for optimal ventilation. Let’s delve into each of these steps in more detail to ensure that your range hood is functioning efficiently to keep your kitchen free from unwanted fumes and odors.
Check the connections and ensure there are no leaks
Before testing the airflow, it’s essential to thoroughly examine the connections between the range hood and the ductwork. Leaks in the ducting system can significantly reduce the effectiveness of your range hood and lead to poor ventilation. To prevent this, carefully inspect each connection point for any signs of leaks or loose fittings. Ensure that all joints are securely fastened and that there are no gaps between the duct sections.
Use duct tape to seal any gaps or loose connections
If you come across any gaps or loose connections during your inspection, don’t fret! These issues can easily be resolved with the help of duct tape. Duct tape is a versatile and durable solution that ensures a tight seal, preventing any air leakage. Apply the duct tape generously around the areas that require sealing, covering any gaps or loose connections completely. This simple step will go a long way in improving the overall efficiency of your range hood.
Test the range hood airflow for proper ventilation
Once all the connections are secure and sealed, it’s time to test the airflow to ensure that your range hood is functioning as intended. Turn on the range hood fan and feel the airflow near the vent to check if it’s strong and consistent. You can also use a piece of tissue paper or a smoke test to verify that the air is being properly transported out of your kitchen. If you notice weak airflow or any issues with ventilation, double-check all the connections and inspect for possible leaks.
Remember, proper airflow is crucial for efficient ventilation, eliminating cooking odors, and maintaining a pleasant and clean kitchen environment. By following these steps and diligently attending to any gaps or loose connections using duct tape, you can ensure that your range hood is working optimally, keeping your kitchen fresh and odor-free.
Maintaining Proper Clearance And Distance For Optimal Performance
When it comes to installing range hood ducting, maintaining proper clearance and distance is crucial for optimal performance. Adequate space between the range hood and combustible materials as well as proper distance from heat sources are essential considerations to ensure safety and efficiency.
Adequate space between the range hood and combustible materials
One of the most critical aspects of installing range hood ducting is making sure there is adequate space between the range hood and any combustible materials in the kitchen. This includes cabinets, shelves, and other fixtures that could potentially ignite or melt under the heat of the range hood.
To maintain proper clearance, ensure that there is a minimum distance of [insert minimum required distance] between the range hood and any combustible materials. This distance is typically specified by the manufacturer and can vary depending on the specific model of the range hood.
By maintaining the recommended clearance, you not only prevent the risk of fire but also allow the range hood to function optimally. Adequate space ensures that the airflow is not obstructed, allowing the hood to effectively capture and remove cooking fumes and odors from your kitchen.
Proper distance from heat sources for safety
In addition to maintaining clearance from combustible materials, it is crucial to consider the proper distance between the range hood ducting and any heat sources. This includes stovetops, ovens, and other appliances that generate heat during cooking.
Installing the range hood ducting too close to these heat sources can not only pose a safety hazard but also negatively impact the performance of the hood. Excessive heat can cause the ducting to degrade and lead to reduced airflow or even ventilation system failure.
To ensure safety and optimal performance, it is important to adhere to the manufacturer’s guidelines regarding the minimum distance between the range hood ducting and heat sources. This information is typically provided in the installation manual and should be followed carefully.
By maintaining the proper distance, you can prevent any potential damage to the range hood ducting and ensure efficient ventilation in your kitchen. This will help to eliminate smoke, grease, and other cooking byproducts, improving air quality and creating a more comfortable cooking environment.
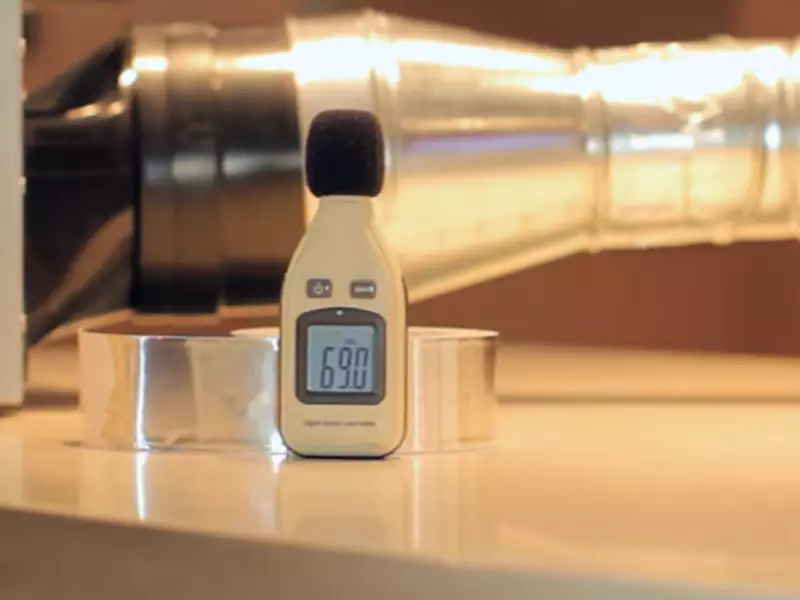
Using Insulated Ductwork For Noise Reduction
Benefits of Insulated Ducting for Noise Reduction
Using insulated ductwork for noise reduction can greatly enhance the overall experience of your range hood installation. By minimizing noise levels, this type of ducting allows you to cook and entertain without being disturbed by excessive ventilation sounds. Here are some key benefits of using insulated ducting for noise reduction:
- Noise Reduction: Insulated ductwork acts as a barrier that effectively blocks and absorbs soundwaves produced by the range hood. This means you can enjoy a peaceful cooking environment, free from the loud noise typically associated with range hood ventilation.
- Improved Acoustics: Insulated ducting helps to muffle vibration and reduce resonance, which can further contribute to a quieter kitchen. With better acoustics, you can focus on your culinary creations or engage in conversations without having to raise your voice over the sound of the range hood.
- Enhanced Comfort: A quieter range hood can significantly improve your overall kitchen experience. Whether you’re enjoying a family meal or hosting a gathering, the reduced noise levels allow you and your guests to fully enjoy the ambiance and conversation, without being disrupted by the noise of a loud range hood.
- Premium Quality: Insulated ductwork is often made of high-quality materials that are designed to reduce noise effectively. These ducts are specifically engineered to improve sound insulation, ensuring that you achieve the desired noise reduction while maintaining optimal functionality.
- Increased Efficiency: Insulated ducting not only reduces noise but also helps to improve the overall efficiency of your range hood system. It minimizes air leakage and maintains the proper airflow, enabling the range hood to operate at its best capacity. This results in better ventilation while reducing energy waste.
Considerations When Choosing Insulated Ductwork
When selecting insulated ductwork for your range hood installation, there are a few important factors to consider:
- Insulation Material: Different types of insulation materials offer varying levels of noise reduction. Common options include fiberglass, foam, and flexible acoustic insulation. Consider the noise reduction properties of each material and choose one that best suits your requirements.
- Duct Size: Ensure that the insulated ductwork you choose is compatible with the dimensions of your range hood and the space available for duct installation. Proper sizing is essential for optimal performance and noise reduction.
- Installation Ease: Look for insulated ductwork that is easy to install and compatible with your range hood and ventilation system. User-friendly installation methods, such as snap-lock connections or flexible ducts, can save you time and effort during the installation process.
- Durability: Selecting durable insulated ductwork is crucial for long-term performance and noise reduction. Choose ducts that are resilient to temperature changes, moisture, and wear and tear, ensuring they can withstand the demands of a kitchen environment.
- Compliance with Regulations: Ensure that the insulated ductwork you choose adheres to local building codes and regulations. Compliance ensures the safety and efficiency of your range hood system while minimizing any potential noise-related issues.
By carefully considering these factors when choosing insulated ductwork for your range hood installation, you can enjoy the benefits of noise reduction while maintaining optimal efficiency and functionality in your kitchen. Upgrade your range hood ventilation system with insulated ducting and create a quieter, more enjoyable cooking experience.
Maintenance And Cleaning Of Range Hood Ducting
Regular cleaning and maintenance of your range hood ducting is crucial to ensure optimal performance and prevent blockages. Over time, grease, dust, and other particles can accumulate inside the ductwork, reducing its efficiency and increasing the risk of fire hazards. In this section, we will discuss the steps involved in maintaining and cleaning your range hood ducting to keep it functioning effectively.
Regular cleaning and maintenance to prevent blockages
Regularly cleaning your range hood ducting is essential to prevent blockages that can restrict airflow and reduce the effectiveness of your ventilation system. Here are some tips for keeping your ductwork clean:
- Inspect the exterior surfaces of the ductwork for any visible signs of dirt, debris, or grease buildup. Use a damp cloth or sponge and a mild detergent to clean the exterior parts.
- Check the hood filters regularly and clean or replace them as needed. These filters capture grease particles and prevent them from entering the ductwork.
- Ensure that the ductwork is properly insulated to prevent condensation, which can lead to mold growth and blockages. Inspect the insulation and repair or replace any damaged sections.
- Consider using a range hood with a self-cleaning feature, which reduces the accumulation of grease and makes the cleaning process easier.
How to remove and clean ductwork and vent wall cap
Periodically, you will need to remove and clean the ductwork and vent wall cap to ensure proper airflow. Follow these steps to clean your ductwork effectively:
- Turn off the range hood and disconnect it from the power source to ensure safety.
- Carefully remove any screws or fasteners that secure the ductwork to the wall or ceiling.
- Gently detach the ductwork from the range hood, being cautious not to damage any delicate parts.
- Thoroughly clean the interior of the ductwork using a brush with stiff bristles or a vacuum cleaner. Pay special attention to areas where grease and dirt tend to accumulate.
- Inspect the vent wall cap for any debris or blockages. Clean it using a damp cloth or a brush.
- Reattach the ductwork to the range hood and secure it properly with screws or fasteners.
- Plug the range hood back into the power source and turn it on to ensure proper functioning.
By following these maintenance and cleaning steps regularly, you can keep your range hood ducting clean, blockage-free, and efficient. This not only enhances the airflow and ventilation in your kitchen but also extends the lifespan of your range hood.
Frequently Asked Questions For How To Install Range Hood Ducting
How Do You Install A Ceiling Duct For A Range Hood?
To install a ceiling duct for a range hood, follow these steps:
- Choose a suitable location on the ceiling.
- Cut a hole in the ceiling using a saw.
- Install the ductwork from the range hood to the hole in the ceiling.
- Attach the ductwork securely using screws or duct tape.
- Seal any gaps using duct sealant to ensure proper ventilation.
How Do You Run A Range Hood Duct?
To run a range hood duct, follow these steps:
- Choose the most suitable location for the duct.
- Measure and mark the desired path.
- Cut a hole in the wall or ceiling.
- Install the ductwork, ensuring proper ventilation and a secure connection.
- Test the duct for any air leaks or obstructions.
Is It OK to Use Flexible Duct For the Range Hood?
Yes, it is OK to use a flexible duct for a range hood.
How Do You Install A Range Hood Duct Through The Wall?
To install a range hood duct through the wall, follow these steps:
- Locate a suitable spot on the wall for the duct.
- Mark the area and cut a hole using a jigsaw.
- Insert and secure the vent cap on the exterior wall.
- Attach the duct to the hood and connect it to the vent cap.
- Seal any gaps with duct tape or caulk.
Conclusion
To summarize, installing range hood ducting is a crucial step in ensuring proper ventilation in your kitchen. By following the steps and guidelines outlined in this blog post, you can successfully install the ducting system and improve the air quality in your home.
Remember to measure correctly, use the appropriate materials, and seek professional help if needed. With a well-functioning range hood, you can enjoy a clean and healthy cooking environment. Happy installation!