To install rafter hangers, first, make sure the hangers are positioned correctly on the rafters. Then, secure them in place with nails or screws.
A rafter hanger installation is a relatively straightforward process that can provide additional support and stability to your roof structure. Introduction (120 words): Rafter hangers play a crucial role in providing support and stability to a roof structure. Whether you’re building a new roof or replacing existing rafters, proper installation of rafter hangers is essential.
By securely and accurately positioning the hangers on the rafters, you can ensure the long-term integrity and durability of your roof. The installation process involves a few simple steps, starting with identifying the correct position for the hangers on the rafters. Once the hangers are in the right place, they can be easily secured with nails or screws. This guide will walk you through the process of correctly installing rafter hangers, allowing you to achieve a robust and reliable roof structure that meets professional standards.
Factors To Consider When Selecting Rafter Hangers
Choosing the right rafter hangers is crucial for any construction project involving rafters. Rafter hangers play a vital role in securely holding the rafters in place and ensuring the structural stability of the roof. However, with so many options available in the market, it can be overwhelming to pick the right one. To help you make an informed decision, consider the following key factors when selecting rafter hangers:
Load Capacity
The load capacity of a rafter hanger is an essential factor to consider. It refers to the maximum weight or load that the hanger can support. To determine the load capacity required for your project, you need to calculate the weight of the roof material, the ceiling, and any potential additional loads such as snow accumulation. Ensure that the rafter hanger you choose has a load capacity that exceeds the calculated total load to guarantee its stability.
Material
The material of the rafter hanger is another important consideration. Different materials offer varying levels of strength, durability, and resistance to corrosion. Common materials used for rafter hangers include galvanized steel, stainless steel, and powder-coated steel. Each material has its own advantages and disadvantages, so it’s essential to assess the environmental conditions and potential exposure to moisture or chemicals to select a suitable material that can withstand these factors.
Design Options
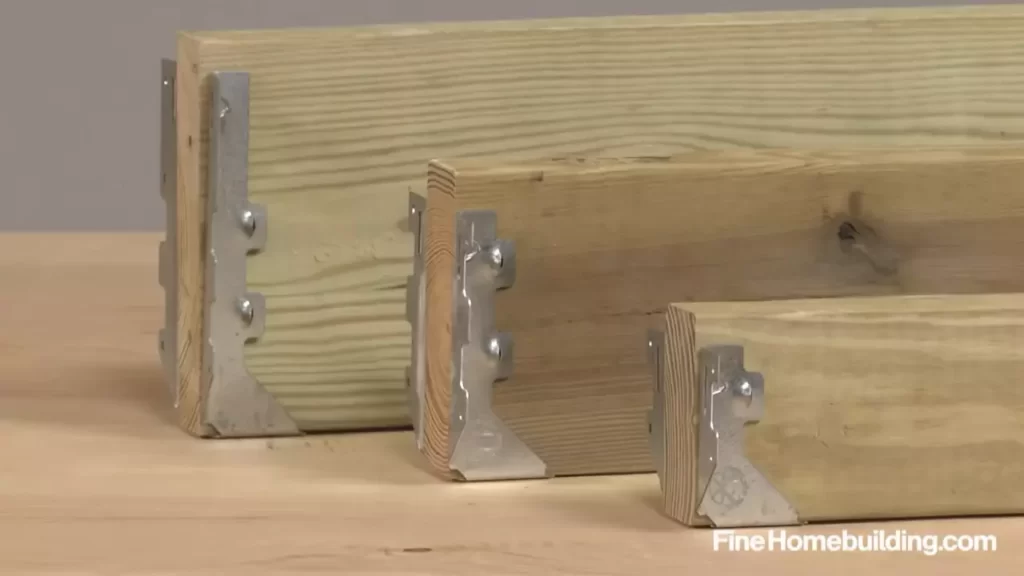
Rafter hangers come in various designs, each catering to different installation requirements and aesthetic preferences. Some common design options include face-mount hangers, top-mount hangers, and skewed hangers. Face-mount hangers are attached to the face of the supporting beam, while top-mount hangers are installed on the top of the beam.
Skewed hangers are designed for angled or sloped installations. Consider the specific needs of your project and consult with a structural engineer or building professional to determine the appropriate design option that will provide optimal support and stability.
To summarize, selecting the right rafter hangers involves considering factors such as load capacity, material, and design options. By carefully evaluating these factors and consulting with professionals if needed, you can ensure that your rafter hangers provide the necessary strength and stability for your construction project.
Gathering The Necessary Tools And Materials
Before you start installing rafter hangers, it’s important to gather all the necessary tools and materials. Having everything prepared in advance will help streamline the installation process and ensure everything goes smoothly. Here are the essential tools and materials you will need:
Rafter Hangers
The first item on your list is, of course, the rafter hangers themselves. Make sure you have enough hangers to support the number of rafters you plan to install. It’s a good idea to have a few extras just in case. Rafter hangers come in various sizes and types, so choose the ones that are appropriate for your specific project.
Measuring Tape
A measuring tape is an indispensable tool for any DIY project. It will help you accurately measure the length and placement of your rafters. This is crucial to ensure that your hangers are positioned correctly and provide adequate support. Make sure your measuring tape is in good condition and has clear markings for accurate measurements.
Pencil
A pencil is a simple but essential tool for marking measurements and guidelines on the lumber. It allows you to make accurate and easily visible marks that will guide your installation process. Keep a sharp pencil handy to ensure precise markings.
Hammer
A hammer is necessary for driving nails into the rafters and securing them to the hangers. Choose a hammer with a comfortable grip and a claw for easy nail removal if needed. A hammer with a smaller head can provide better control and accuracy while driving nails.
Nails
You’ll need nails to secure the rafter hangers to the rafters and the structure you are attaching them to. Make sure to use nails that are appropriate for the specific type of hangers you are using. It’s always a good idea to have a variety of nail sizes on hand to accommodate different installation scenarios.
Safety Equipment
- Gloves
- Safety Glasses
Don’t forget about your safety! Wear gloves to protect your hands from any potential injuries. Safety glasses are also essential to shield your eyes from flying debris or accidental impact. Ensure that both your gloves and safety glasses fit properly and are comfortable to wear throughout the installation process.
By gathering all these tools and materials before you begin, you’ll be well-prepared to install rafter hangers efficiently and effectively. Now that you have everything ready, let’s move on to the next steps of the installation process!
Ensuring Proper Rafter Spacing
Determining the required spacing for your project
Before you start installing rafter hangers, it is crucial to determine the proper spacing for your project. The spacing of the rafters depends on various factors such as the type of roof, the span of the structure, and the building codes in your area. To make sure you get it right, follow these steps:
- Check building codes: Familiarize yourself with the local building codes or consult a professional to determine the required rafter spacing. Building codes often provide guidelines based on the type of roof and the climate in your area.
- Consider the type of roof: Different roof types may require different rafter spacings. For example, a sloped roof will have different spacing requirements compared to a flat roof. Take into account the style and design of your roof when determining the spacing.
- Calculate the span: Measure the span of your structure, which is the distance between the exterior walls or supports. This will help you determine the number and spacing of the rafters needed to support the weight of the roof.
- Consult an engineer if necessary: If you’re unsure about the required spacing or you have a complex project, it’s always a good idea to consult with a structural engineer or a professional contractor. They can provide expert advice tailored to your specific project.
Marking the rafter layout on the top plate
Once you have determined the proper spacing for your rafters, you can start marking the rafter layout on the top plate. This step is essential to ensure accurate installation and proper support for the roof. Follow these steps:
- Measure and mark: Use a measuring tape and a pencil to measure and mark the locations for each rafter on the top plate. Start from one end of the structure and work your way to the other end, evenly spacing the rafters according to your previously determined spacing.
- Double-check your measurements: It’s essential to double-check your measurements before making any cuts or installations. Measure the distances between the marked locations to ensure they align with the required spacing.
- Use a chalk line: To create straight and accurate lines, consider using a chalk line. Stretch the chalk line between each marked location, snap the line against the surface, and you’ll have a clear visual guide for installing the rafter hangers.
- Label the layout: It’s a good practice to label each mark with a letter or number to help you stay organized during the installation process. This will make it easier to identify the correct location for each rafter hanger.
By following these steps, you can ensure proper rafter spacing and accurate installation of rafter hangers. Remember to always refer to the building codes and consult professionals if needed to ensure the structural integrity of your project.
Measuring And Marking The Installation Points
In order to properly install rafter hangers, it is crucial to accurately measure and mark the locations where they will be attached. This ensures that the hangers are positioned correctly and securely. Here, we will guide you through the step-by-step process of measuring and marking the installation points. Follow these instructions carefully to ensure a successful installation.
Measuring and marking the locations of the hangers on the rafter
The first step is to measure and mark the locations on the rafter where the hangers will be installed. This will provide a reference point for proper placement. To do this:
- Carefully measure the distance from the edge of the rafter to the desired location for the hanger using a tape measure. Ensure that this measurement is accurate and consistent for all hangers.
- Mark this spot on the rafter with a pencil or marker. Make sure the mark is clearly visible and will not be easily rubbed off or concealed during the installation process.
- Repeat this process for each rafter where a hanger will be installed.
By measuring and marking the locations on the rafters, you will have a clear guide for positioning the hangers accurately.
Transferring the reference marks to the top plate
Once you have marked the locations on the rafters, the next step is to transfer these reference marks to the top plate. This will ensure that the hangers are aligned properly with the rafters. To do this:
- Align the rafter hanger with the marked location on the rafter.
- Hold the hanger in place and use a pencil or marker to transfer the mark onto the top plate of the wall. This will create a reference point for attaching the hanger.
- Repeat this process for each rafter hanger, ensuring that the marks are accurately transferred to the top plate.
By transferring the reference marks from the rafters to the top plate, you can be confident that the hangers will be installed in the correct position, providing a solid and secure connection.
Remember, precise measurements and accurate marking are essential for a successful installation of rafter hangers. Take your time during this step to ensure that everything is done correctly. This will result in a safe and reliable support system for your construction project.
Attaching The Rafter Hangers To The Rafters
Attaching rafter hangers properly is crucial for ensuring structural integrity and stability in any construction project. By securely fastening the hangers to the rafters, you create a solid connection that supports the weight of the roof and helps distribute it evenly. In this section, we will guide you through the process of attaching rafter hangers to the rafters, ensuring a secure and level installation.
Aligning the hangers with the reference marks
Before attaching the rafter hangers, it’s important to align them with the reference marks you have made on the rafters. These marks indicate the exact location where the hangers should be attached for optimal support. To align the hangers, follow these steps:
- Carefully position the rafter hanger against the rafter, making sure it lines up with the reference mark.
- Double-check the alignment by using a level to ensure that the hanger is perfectly vertical.
- Make any necessary adjustments to ensure that the hanger is precisely aligned with the reference mark.
Aligning the hangers accurately will ensure a proper fit and prevent any issues with the stability and overall structure of the roof.
Ensuring they are level and straight
Along with aligning the hangers with the reference marks, it’s vital to ensure that they are level and straight. This step is crucial for maintaining the structural integrity of the roof and preventing any future problems. Here’s how to ensure the hangers are level and straight:
- Once the hanger is aligned with the reference mark, use a level to confirm that it is level horizontally.
- If the hanger is not level, adjust it by tapping it gently with a hammer until it aligns properly.
- Double-check the level and make any necessary adjustments until the hanger is level and straight.
By taking the time to ensure that the rafter hangers are both aligned and level, you can be confident in the stability and longevity of your roof structure.
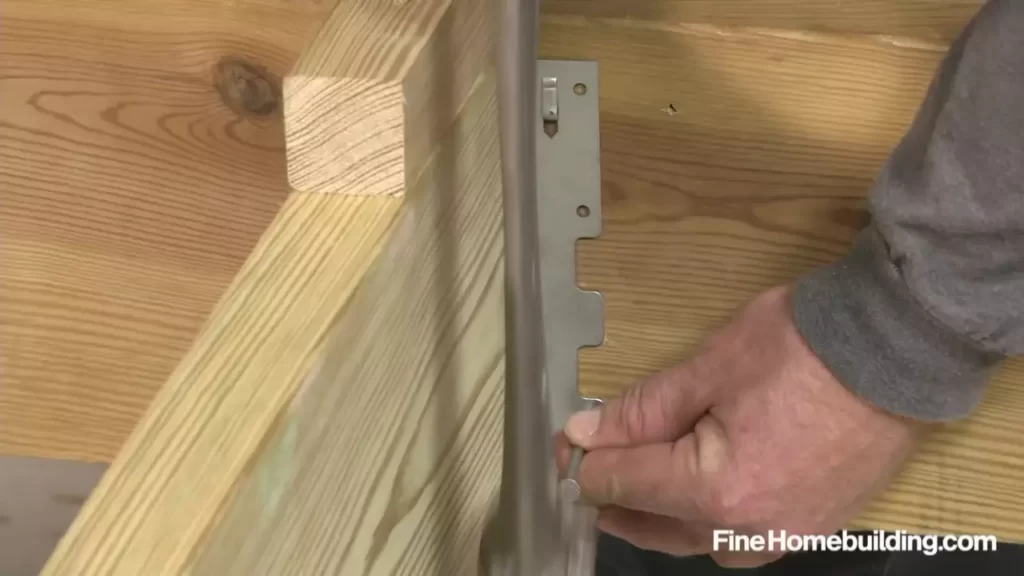
Attaching the hangers with nails or screws
Once the rafter hangers are properly aligned and level, it’s time to attach them securely to the rafters. The method of attachment may vary depending on the specific hangers you are using, so be sure to follow the manufacturer’s instructions. In most cases, you will use either nails or screws to attach the hangers. Follow these steps for a secure attachment:
- Place the rafter hanger against the rafter, ensuring it remains properly aligned and level.
- Insert nails or screws through the pre-drilled holes in the hanger, ensuring they penetrate the rafter securely.
- Repeat the process for each hole in the rafter hanger, ensuring that each nail or screw is driven in tightly.
Attaching the rafter hangers securely will provide the necessary support for the roof structure, ensuring its strength and stability for years to come.
By following these steps to align, level, and attach the rafter hangers properly, you will be able to install them securely and create a sound foundation for your roof structure. Remember to consult the manufacturer’s instructions for any specific guidance related to the rafter hangers you are using.
Securing The Rafter Hangers To The Top Plate
Securing the rafter hangers to the top plate is crucial for ensuring the stability and strength of your roof structure. This step-by-step guide will walk you through the process of positioning the hangers over the reference marks on the top plate and fastening them securely using nails or screws.
Positioning the hangers over the reference marks on the top plate
Before you start securing the rafter hangers, it is important to properly position them over the reference marks on the top plate. The reference marks indicate where the hangers should be placed to align with the roof rafters. Follow these steps to position the hangers:
- Measure and mark the desired spacing between the rafters on the top plate. This spacing should be determined by the design of your roof.
- Place the rafter hangers on the top plate, aligning them with the reference marks.
- Double-check the alignment and make any necessary adjustments to ensure the hangers are properly positioned.
By carefully positioning the hangers over the reference marks, you will ensure that the roof rafters are correctly supported.
Fastening the hangers securely to the top plate using nails or screws
Once the hangers are properly positioned, it’s time to fasten them securely to the top plate. This step is crucial for the stability and structural integrity of your roof. Follow these steps to fasten the hangers:
- Select the appropriate type and size of nails or screws for the job. The choice will depend on the material of the hangers and the top plate.
- Start by attaching the hanger to the top plate using a single nail or screw.
- Check the alignment of the hanger again and make any necessary adjustments.
- Once the alignment is confirmed, secure the hanger to the top plate by adding additional nails or screws. Space them evenly and ensure they penetrate both the hanger and the top plate for a secure hold.
When fastening the hangers, it is important to follow the manufacturer’s guidelines and recommendations. Use the appropriate number and type of fasteners to ensure a strong and durable connection.
By following these steps, you will be able to securely fasten the rafter hangers to the top plate, providing a solid foundation for your roof structure. Remember to always prioritize safety and consult with professionals if you have any doubts or concerns.
Adding Extra Support With Blocking
Introduction:
Adding extra support with blocking is an important step in installing rafter hangers properly. Blocking, or horizontal beams, provides additional stability and prevents sagging or shifting of the roof structure. In this section, we will discuss the steps involved in cutting and installing blocking between the rafters, as well as securing the blocking to the rafter hangers and top plate.
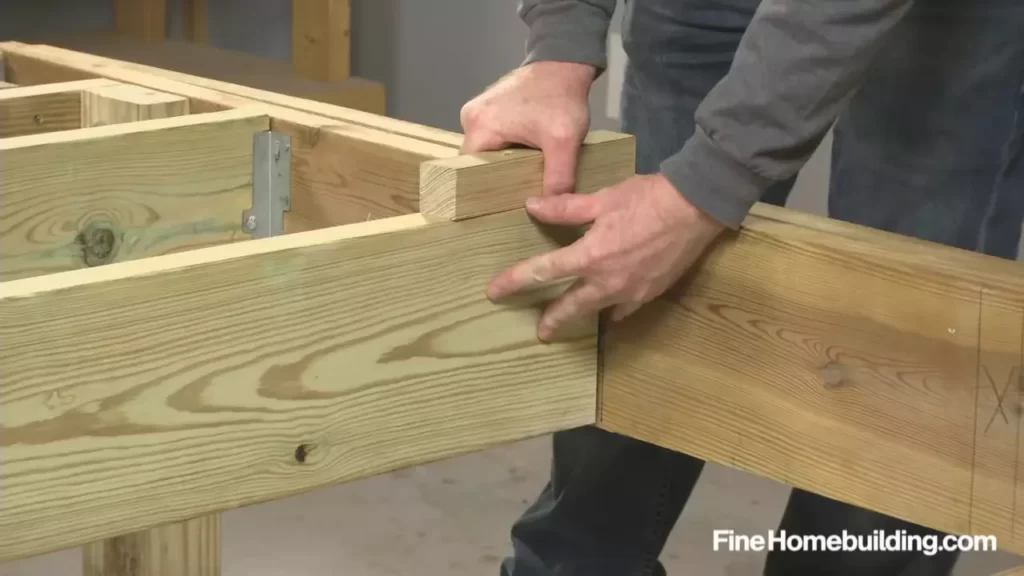
1. Cutting and installing blocking between the rafters:
To begin, measure the distance between the rafters where the blocking will be installed. Use a circular saw or hand saw to cut pieces of blocking to the desired length, ensuring they fit snugly between the rafters.
TIP: It is recommended to use pressure-treated lumber for blocking as it provides better resistance to rot and moisture.
Next, position the blocking between the rafters at the desired height. Ensure the top surface of the blocking is flush with the tops of the rafters.
TIP: If you are installing blocking on an angle or slope, measure and cut each piece accordingly to ensure a proper fit.
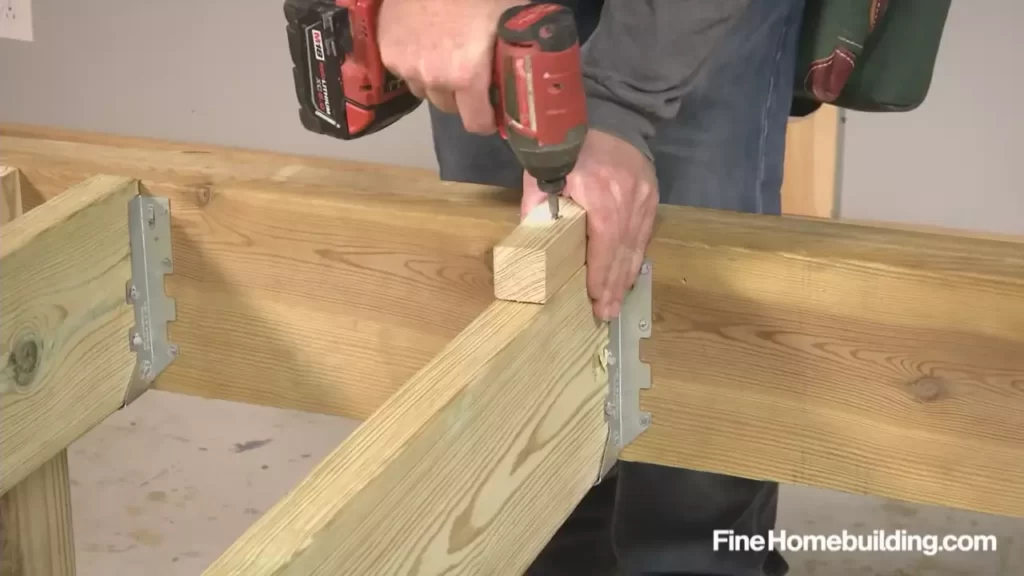
2. Securing the blocking to the rafter hangers and top plate:
Once the blocking is in place, use framing nails or screws to secure it to the rafter hangers and top plate. Drive the fasteners through the blocking into the hangers and top plate, ensuring a secure and tight connection.
TIP: It is important to use the appropriate fasteners for the job. Consult the manufacturer’s instructions for recommended fasteners.
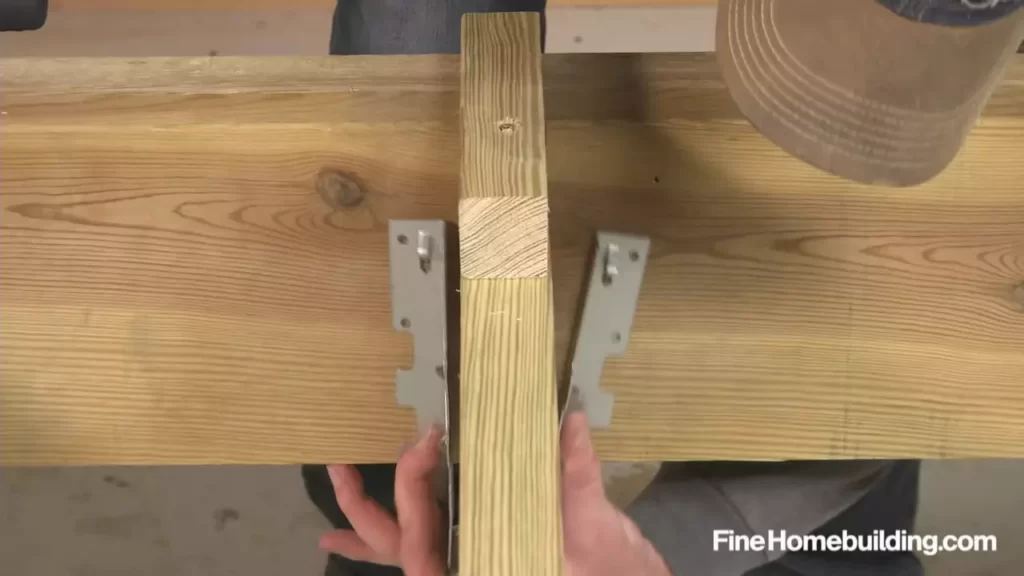
Repeat the process for each section of blocking, ensuring they are evenly spaced and securely attached to the rafters, hangers, and top plate.
TIP: If you are installing blocking on multiple levels or tiers, ensure each layer is properly secured.
NOTE: The number of blocking sections required will depend on the size and span of the roof. It is recommended to consult a professional or engineer for guidance on the specific requirements of your project.
By following these steps, you can effectively add extra support to your rafter hangers with blocking. This ensures a sturdy and durable roof structure, providing peace of mind for years to come.
Installing Additional Bracing
Properly installing additional bracing is crucial when it comes to maximizing stability and ensuring the longevity of your rafter hangers. By utilizing additional bracing options such as hurricane ties or angle brackets, you can provide your roof with the support it needs to withstand heavy winds and other external forces. In this section, we will discuss the importance of installing additional bracing and provide a step-by-step guide on how to do it correctly.
Utilizing Additional Bracing Options such as Hurricane Ties or Angle Brackets
When it comes to reinforcing your rafter hangers, two popular options to consider are hurricane ties and angle brackets. Both of these options provide additional support and help distribute the load more evenly across the structure.
Hurricane ties are metal connectors that are designed to secure the rafters to the walls, making them ideal for regions prone to hurricanes or high winds. These ties are typically installed at various points along the rafters to ensure maximum stability. To install hurricane ties:
- Position the tie on the rafter and align it with the wall stud.
- Mark the screw holes on both the rafter and wall stud.
- Drill pilot holes at the marked locations.
- Attach the hurricane tie using appropriate screws, making sure it is securely fastened.
Angle brackets are L-shaped metal brackets that provide additional support for the connection between the rafters and the beams. These brackets can be installed on both sides of the connection to ensure maximum stability. To install angle brackets:
- Position the bracket on the rafter-beam connection.
- Mark the screw holes on both the rafter and beam.
- Drill pilot holes at the marked locations.
- Attach the angle bracket using appropriate screws, ensuring a tight and secure fit.
By utilizing these additional bracing options, you can enhance the stability of your rafter hangers, reducing the risk of structural damage and prolonging the lifespan of your roof.
Ensuring Proper Installation for Maximum Stability
Proper installation of the additional bracing is essential to ensure maximum stability. Here are some key considerations:
- Follow manufacturer guidelines: Before installing any additional bracing, carefully read and follow the manufacturer’s instructions. This will help you understand specific requirements and recommendations for your chosen bracing options.
- Secure attachment: Make sure that all screws or fasteners used for attaching the bracing are tightly secured. Loose connections can compromise the overall stability and effectiveness of the additional bracing.
- Even distribution: When installing multiple hurricane ties or angle brackets, ensure they are evenly spaced along the rafters and beams. This will help distribute the load evenly and provide consistent support throughout the structure.
- Regular inspections: Regularly inspect the condition of the bracing and make any necessary repairs or replacements. Over time, weather conditions and other factors can affect the integrity of the bracing, so it’s important to address any issues promptly.
By adhering to these installation guidelines, you can ensure that your additional bracing provides optimal stability and protection for your rafter hangers.
Ensuring Level And Straight Hangers
Rafter hangers play a crucial role in providing stability and structural support to your roof. To ensure a strong and secure roof, it is essential to install the hangers in a level and straight manner. This not only improves the overall aesthetics of your roof but also prevents any potential issues with the structure in the long run.
Using a Level to Check the Alignment of the Installed Rafter Hangers
Once you have successfully installed the rafter hangers, it is important to check their alignment to ensure they are level and straight. To do this, you will need a level tool, such as a spirit level.
Procedure:
- Start by placing the level on top of each rafter hanger.
- Check the bubble inside the level. If it is centered between the two level lines, it indicates that the hanger is correctly aligned.
- If the bubble is off-center, it means the hanger is not level and adjustments are needed.
Making Adjustments if Necessary
If you find that the rafter hangers are not level during the alignment check, don’t worry! It is relatively easy to make the necessary adjustments. Here’s how:
Procedure:
- Use a hammer to gently tap the bottom of the hanger that needs adjustment.
- Continue tapping until the hanger reaches the desired level position.
- Double-check the alignment by using the level again.
- Repeat the process for any hangers that require adjustment.
Making these adjustments ensures that each rafter hanger is level and straight, providing a solid foundation for your roof. Remember, maintaining the proper alignment is crucial for the overall integrity of your roof.
Testing The Load Capacity
Once you have successfully installed the rafter hangers, it is crucial to test their load capacity to ensure they can withstand the weight and pressure they will be subjected to. This step is essential for the safety and stability of your structure. Testing the load capacity involves applying weight or pressure to the rafter hangers and checking for any signs of bending, sagging, or instability. By following these steps, you can ensure that your rafter hangers are strong enough to support the weight they are designed for.
Applying weight or pressure to the rafter hangers
To test the load capacity of your rafter hangers, you will need to apply weight or pressure to them. This can be done using various methods, depending on the type of hangers you have installed. Here are some common ways to apply weight or pressure:
- Hang weights: If you are installing rafter hangers in a residential or commercial building, you can use weights to simulate the load they will bear. Hang weights of appropriate size and weight from the hangers and observe their response.
- Apply pressure: If you have installed the rafter hangers in a structure that will experience pressure, such as a deck or balcony, you can apply pressure using a hydraulic jack or a similar tool. Gradually increase the pressure and monitor the hangers for any signs of bending or instability.
Checking for any signs of bending, sagging, or instability
While applying weight or pressure, it is important to closely observe the rafter hangers for any signs of bending, sagging, or instability. These signs can indicate that the hangers are not able to handle the expected load. Here are some key things to check for:
- Bending: Look for any visible bending of the hangers. This can be observed by checking if the hangers deviate from their original shape or if they appear distorted under the weight or pressure.
- Sagging: Check if the hangers sag under the applied weight or pressure. Sagging can be seen as a downward displacement of the hangers from their initial position.
- Instability: Observe if the hangers remain stable or if they exhibit any wobbling or shaking. Instability can indicate that the hangers are not securely attached or lack sufficient strength.
If you notice any of these signs during the load capacity test, it is crucial to address the issue before proceeding with the installation. Contact a professional or consult the manufacturer for guidance on reinforcing or replacing the rafter hangers.
By testing the load capacity of your rafter hangers and ensuring they can withstand the anticipated weight and pressure, you can have peace of mind knowing that your structure is secure and stable. Don’t skip this important step in the installation process!
Frequently Asked Questions For How To Install Rafter Hangers
How Do You Install Roof Rafter Hangers?
To install roof rafter hangers, follow these steps. First, determine the required placement and quantity of hangers. Then, attach the hangers to the rafters using nails or screws as per manufacturer’s instructions. Ensure the hangers are securely fastened to provide proper support for the roof.
Finally, repeat the process for each rafter.
Is It Better To Screw Or Nail Joist Hangers?
It is better to screw joist hangers rather than nail them. Screws provide a stronger and more secure connection, ensuring the stability and durability of the hangers.
Can You Use Screws On Rafter Hangers?
Yes, screws can be used on rafter hangers. They provide a secure attachment and are commonly used for this purpose.
Do Roof Rafters Need Hangers?
Yes, roof rafters need hangers. Roof hangers provide support and stability to the rafters, ensuring that the roof structure remains strong and secure. They help distribute the weight evenly and prevent sagging or collapsing of the roof. Hangers are essential for the durability and safety of the roof.
Conclusion
Installing rafter hangers is a crucial step in the construction process. By following the steps outlined in this blog post, you can ensure the structural integrity and stability of your roof. Remember to choose the appropriate type and size of rafter hangers for your project and always prioritize safety.
With proper installation, your roof will be built to last and withstand the test of time. Happy building!