To install a radiant barrier in the attic, follow these steps: Clean the attic space and remove any existing insulation. Measure and cut the radiant barrier foil to fit the attic space, leaving a few inches of overlap between panels.
Attach the radiant barrier to the attic rafters using a staple gun or adhesive. Seal any gaps or seams with foil tape to ensure an airtight installation. Lastly, secure any loose or hanging foil with additional staples or adhesive. A radiant barrier in the attic is a great way to reduce heat transfer and improve energy efficiency in your home.
By reflecting radiant heat, this insulation method can help keep your attic cooler in the summer and warmer in the winter. Installing a radiant barrier is a straightforward process that involves cleaning the attic space, measuring and cutting the foil panels, and attaching them to the rafters. Proper installation and sealing of the radiant barrier is crucial to ensure maximum effectiveness. We will guide you through the steps to install a radiant barrier in your attic, providing you with a more comfortable living environment and potential energy savings.
Understanding Radiant Barrier
Before diving into the process of installing a radiant barrier in the attic, it’s important to understand what a radiant barrier is and how it works. A radiant barrier is a type of insulation that is designed to limit the transfer of radiant heat. While traditional insulation materials like fiberglass or cellulose slow down heat transfer by conduction and convection, a radiant barrier works by reflecting radiant heat back towards its source.
What is a radiant barrier?
A radiant barrier is a thin, reflective material that is installed in the attic. It is typically made of a durable aluminum foil, which is combined with other materials to enhance its effectiveness. This reflective surface is designed to bounce back the radiant heat that comes from the sun, preventing it from penetrating the attic space and heating up your home. By blocking the transfer of this radiant heat, a radiant barrier helps to keep your home cooler in the summer and warmer in the winter.
How does a radiant barrier work?
When the sun’s rays strike your roof, the heat is transferred through the roof materials and into the attic space. Without a radiant barrier in place, this heat can continue to radiate downwards into your home, causing your cooling system to work harder to maintain a comfortable temperature.
However, with a radiant barrier, this process is interrupted. The reflective surface of the radiant barrier reflects the heat back towards the roof, preventing it from entering your living space. This simple yet efficient mechanism helps to reduce the amount of heat that is transferred into your home, resulting in lower energy costs and a more comfortable living environment.
The benefits of installing a radiant barrier in the attic
Now that we have a better understanding of what a radiant barrier is and how it works, let’s explore the benefits of installing one in your attic:
- Increased energy efficiency: By reflecting radiant heat, a radiant barrier helps to minimize the load on your cooling system, reducing the need for excessive energy consumption.
- Improved comfort: With a radiant barrier in place, your home will stay cooler in the summer and warmer in the winter, providing a more comfortable living environment for you and your family.
- Extended lifespan of your HVAC system: By reducing the workload on your cooling system, a radiant barrier can help prolong its lifespan, saving you money on costly repairs or replacements.
- Enhanced insulation: In addition to reflecting heat, a radiant barrier also acts as an extra layer of insulation, further reducing heat transfer and improving the overall energy efficiency of your home.
In conclusion, installing a radiant barrier in your attic can have a significant impact on your home’s energy efficiency and overall comfort. By understanding how a radiant barrier works and the benefits it offers, you can make an informed decision about whether to invest in this effective insulation solution.
Assessing Attic Insulation
Before installing a radiant barrier in your attic, it is essential to assess the existing insulation to determine if additional measures are necessary. Insulation plays a crucial role in maximizing the effectiveness of a radiant barrier, ensuring optimum energy efficiency and comfort in your home. In this section, we will discuss how to inspect existing insulation and how to determine if additional insulation is needed.
Inspecting existing insulation
The first step in assessing your attic insulation is to carefully inspect the current conditions. Take a flashlight and enter your attic, observing the insulation material and its distribution throughout the space. Look for any signs of aging, damage, or uneven coverage. Pay close attention to areas around pipes, ducts, and vents, as these are common spots for insulation gaps.
Key Points:
- Inspect the insulation material and its distribution throughout the attic.
- Look for signs of aging, damage, or uneven coverage.
- Check areas around pipes, ducts, and vents for insulation gaps.
Determining if additional insulation is needed
Once you have assessed the current insulation, it is important to determine if additional insulation is required for optimal performance. Several factors should be considered in this decision. Firstly, check the recommended R-value for your geographical region. The R-value measures the insulation’s thermal resistance, and meeting or exceeding the recommended value can help ensure energy efficiency.
Additionally, consider the age of your home. Older homes are more likely to have inadequate insulation and may require upgrading. Evaluate the comfort level in your living spaces. Are certain areas noticeably colder or hotter than others? Uneven temperature distribution is a sign that additional insulation may be needed in specific areas.
Key Points:
- Check the recommended R-value for your geographical region.
- Evaluate the age of your home.
- Consider comfort levels in different living areas.
The role of insulation in maximizing the effectiveness of a radiant barrier
Insulation plays a crucial role in maximizing the effectiveness of a radiant barrier. A radiant barrier reflects heat, preventing it from entering or escaping your living spaces. However, for the radiant barrier to function optimally, it should be combined with proper insulation.
Insulation helps to reduce the transfer of heat through conduction and convection. By minimizing the amount of heat entering or escaping your attic, insulation complements the reflective properties of the radiant barrier, creating a more energy-efficient and comfortable home environment.
Key Points:
- Proper insulation is essential for maximizing the effectiveness of a radiant barrier.
- Insulation reduces heat transfer through conduction and convection.
- Combined with a radiant barrier, insulation enhances energy efficiency and comfort.
Preparing For Installation
When it comes to maximizing energy efficiency in your home, installing a radiant barrier in the attic is a wise investment. This innovative solution helps to reduce the transfer of heat from the sun to your living space, keeping your home cooler in the summer and warmer in the winter. Preparing for the installation process is essential to ensure a smooth and successful project. Here, we will guide you through the necessary steps to get ready for installing a radiant barrier in your attic.
Gathering the necessary tools and materials
To begin, you will need to gather the necessary tools and materials required for the installation. Here is a comprehensive list of items you will need:
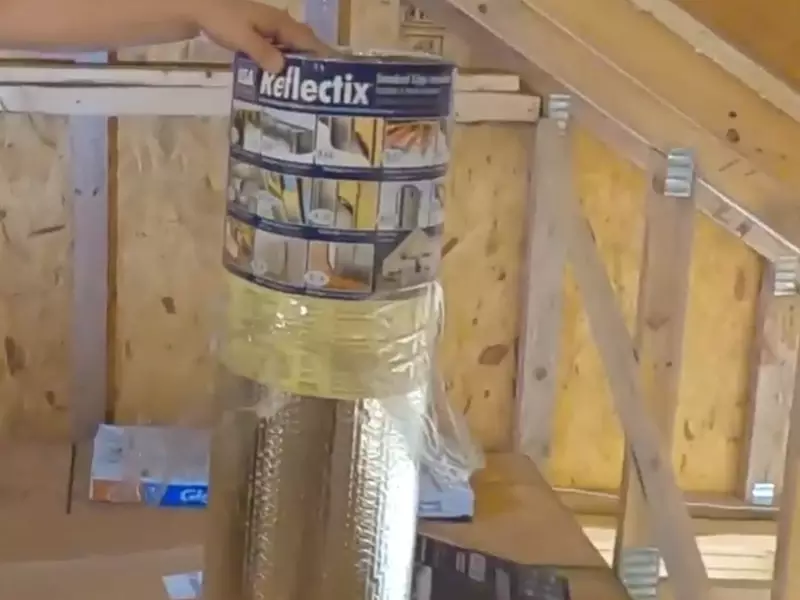
- Radiant barrier material: Choose a high-quality radiant barrier product that suits your needs. This could be a reflective foil or a paintable coating, depending on your preference and budget.
- Measuring tape: Accurate measurements are crucial for ensuring proper coverage. Grab a measuring tape to measure the length and width of your attic space.
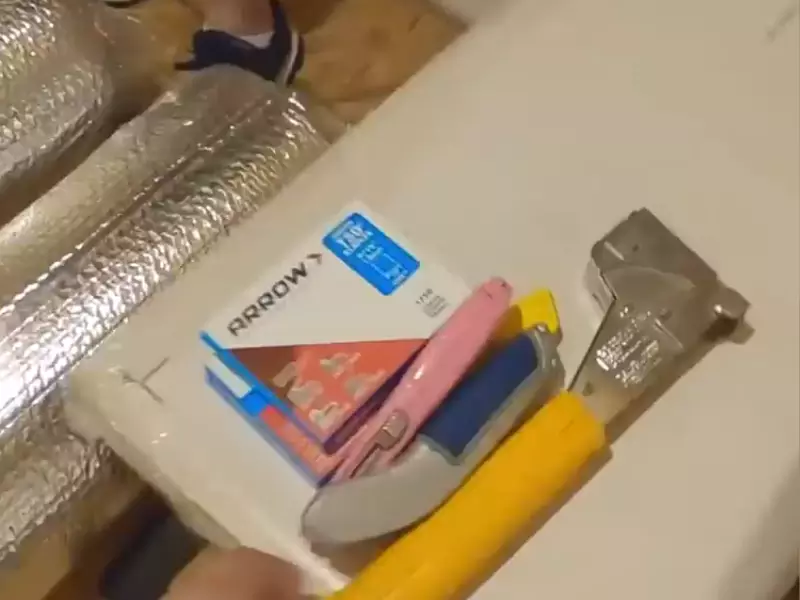
- Utility knife: A utility knife will come in handy for cutting the radiant barrier material to the appropriate size and shape.
- Staple gun: You will need a staple gun to secure the radiant barrier in place. Make sure you have enough staples to complete the installation.
- Safety goggles and gloves: Safety should always be a top priority during any home improvement project. Wear safety goggles and gloves to protect yourself from potential hazards.
Measuring the attic for accurate coverage
Before you begin the installation, it is essential to measure your attic space accurately. This step will ensure that you have enough radiant barrier material to cover the entire area without any gaps. Follow these simple steps to measure your attic:
- Start at one corner of the attic and measure the length of one side. Make a note of the measurement.
- Move to the adjacent side and measure the width of the attic. Make sure to measure from the same starting point as before.
- Multiply the length and width measurements to get the total square footage of your attic.
- Consider any obstacles such as HVAC ducts or electrical wiring when measuring, as you will need to cut the radiant barrier material around these areas.
Clearing the attic space for easy installation
To ensure a smooth installation process, it is crucial to clear the attic space of any items or debris that may obstruct your work. Here’s what you need to do:
- Remove stored items: If you use your attic for storage, temporarily relocate any items to another area of your home. This will give you ample space to work and prevent any damage to your belongings.
- Check for debris: Sweep or vacuum any debris, dust, or insulation that may have accumulated in your attic. A clean workspace will make it easier to lay down the radiant barrier material.
- Inspect for mold or leaks: Take a moment to inspect your attic for any signs of mold or leaks. It is essential to address these issues before installing the radiant barrier to ensure a healthy and moisture-free environment.
By following these steps, you will be well-prepared to install a radiant barrier in your attic. Remember, proper planning and preparation are key to achieving optimal results.
Installing Radiant Barrier
Installing a radiant barrier in your attic is a wise investment that can significantly improve energy efficiency and decrease your utility bills. By reflecting the sun’s heat away from your home, a radiant barrier helps to keep your living space cool during the hot summer months. Additionally, it prevents heat loss during the winter, ensuring optimal comfort year-round. In this section, we will guide you through the step-by-step process of installing a radiant barrier in your attic, ensuring maximum effectiveness and energy savings.
Cleaning and Preparing the Attic Surface
Before applying the radiant barrier, it is crucial to clean and prepare the attic surface properly. This involves removing any debris, dust, or insulation that may hinder the effectiveness of the barrier. Here’s how you can accomplish this:
- Start by clearing out any loose debris, such as leaves, dust, or insulation remnants. Use a broom or a vacuum cleaner to ensure a clean and smooth surface.
- Inspect the attic for any existing moisture issues or leaks. Addressing these problems beforehand is essential to prevent any damage to the radiant barrier.
- Repair any damaged areas of the attic, such as leaks or cracks, to create a stable and secure foundation for the radiant barrier installation.
By thoroughly cleaning and preparing the attic surface, you are laying the groundwork for a successful radiant barrier installation.
Cutting and Securing the Radiant Barrier Material
Once the attic surface is clean and prepared, it’s time to cut and secure the radiant barrier material. Here are the steps to follow:
- Measure the dimensions of the attic space to determine the amount of radiant barrier material needed. Cut the material with a utility knife or scissors, ensuring a precise fit for each section.
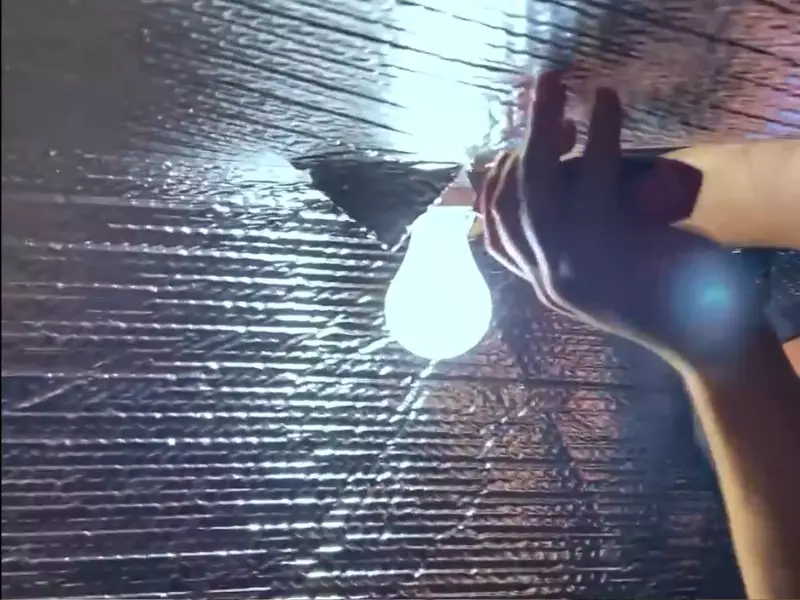
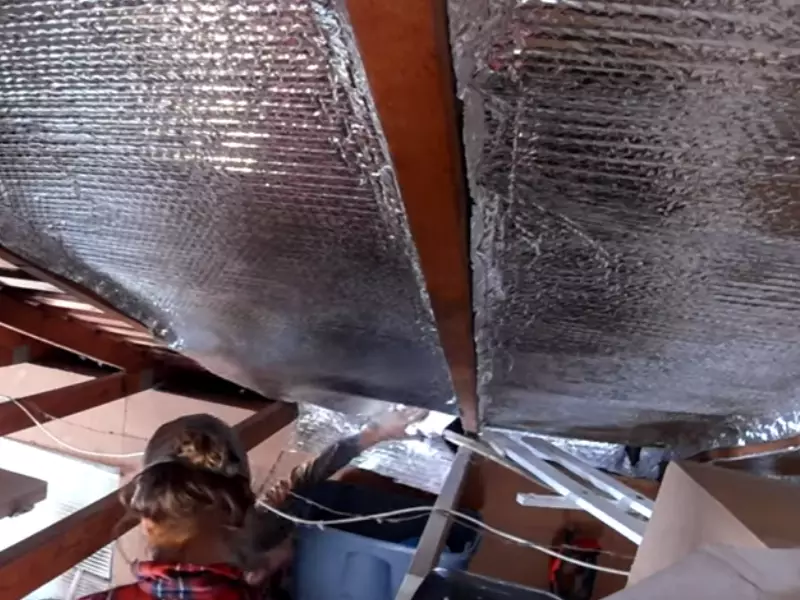
- Using a staple gun or adhesive, secure the radiant barrier material to the attic surface. Start at one end and work your way across, making sure the material is taut and wrinkle-free.
- Pay special attention to the eaves and the area around any attic openings, such as vents or chimneys. Ensuring complete coverage in these areas is vital for optimal performance.
By cutting and securing the radiant barrier material properly, you are setting the stage for a well-insulated attic space.
Properly Sealing Seams and Edges for Optimal Performance
After securing the radiant barrier material, it’s crucial to seal any seams and edges to maximize its performance. This prevents air infiltration and ensures an airtight barrier. Follow these steps:
- Apply radiant barrier tape or reflective foil tape along the seams of the material. This will create a tight seal, preventing heat transfer through the gaps.
- Seal all edges of the radiant barrier, including those near walls, chimneys, and HVAC vents. Use a high-quality adhesive or sealant to guarantee a seamless and secure installation.
- Inspect the entire radiant barrier installation for any gaps or areas that may require additional sealing. Address any potential issues promptly to optimize the performance of the barrier.
By properly sealing all seams and edges, you are ensuring that your radiant barrier functions at its best, providing you with maximum energy savings.
Now that you know the step-by-step process of installing a radiant barrier in your attic, you can proceed with confidence. The installation may require some time and effort, but the energy savings and increased comfort levels will make it all worth it in the end. Enjoy the benefits of a well-insulated home and a more sustainable future!
Choosing The Right Radiant Barrier Material
When it comes to installing a radiant barrier in your attic, selecting the right material is crucial. The material you choose will determine the effectiveness and longevity of your radiant barrier. In this section, we will discuss different types of radiant barrier materials, factors to consider when selecting the material, and compare the pros and cons of various options.
Different types of radiant barrier materials
There are several types of radiant barrier materials available in the market. Here are a few commonly used ones:
- Foil Radiant Barriers: Made of aluminum foil, these barriers are highly reflective and are often used in attics. They effectively block radiant heat, preventing it from entering your home. Foil barriers are lightweight and easy to install.
- Spray-On Radiant Barriers: These are liquid barriers that are sprayed on the underside of the roof deck. Once dried, they form a thin, reflective coating. Spray-on barriers provide seamless coverage and can be applied to irregular surfaces.
- Reflective Insulation: This type of radiant barrier consists of multiple layers of reflective material, often laminated with foam or fiberglass. Reflective insulation not only blocks heat radiation but also provides insulation against conduction and convection.
Factors to consider when selecting the material
Choosing the right radiant barrier material requires considering several factors:
- Installation method: Some materials are easier to install than others. Consider whether you will be installing the barrier yourself or hiring a professional.
- Attic conditions: Take into account the climate of your region, the presence of moisture or pests in your attic, and any electrical wiring or HVAC equipment that might be affected by the barrier.
- Longevity: Evaluate the durability and lifespan of the material. A longer-lasting barrier will provide better insulation and value in the long run.
- Reflectivity: Look for materials with a high reflectivity rating. The higher the rating, the more effectively the barrier will reflect radiant heat.
Comparing the pros and cons of different options
Let’s take a closer look at the pros and cons of the different radiant barrier materials:
| Material | Pros | Cons |
|---|---|---|
| Foil Radiant Barriers | Highly reflective, lightweight, easy to install | Not as effective in colder climates, requires proper handling to prevent tears |
| Spray-On Radiant Barriers | Seamless coverage, can be applied to irregular surfaces | Professional installation recommended, may require reapplication after a certain period |
| Reflective Insulation | Blocks radiant heat, provides additional insulation | Thicker and bulkier than other options, may require professional installation |
Each material has its own advantages and disadvantages, so it’s important to assess your specific needs and preferences before making a decision.
By understanding the different types of radiant barrier materials, considering important factors, and comparing the pros and cons of each option, you’ll be well-equipped to choose the right material for your attic installation. A well-selected radiant barrier material can make a significant difference in your home’s energy efficiency and comfort.
Additional Tips For Installation
In addition to following the general steps for installing a radiant barrier in the attic, there are a few more tips that can help ensure a successful and efficient installation. These tips focus on proper handling and safety precautions, addressing common challenges that may arise during installation, and maintaining and inspecting the radiant barrier over time.
Proper handling and safety precautions
When installing a radiant barrier in the attic, it is important to take the necessary safety precautions and handle the materials properly. Here are some key tips:
- Wear protective clothing, including gloves and safety goggles, to protect yourself from any sharp edges or potential hazards.
- Make sure to handle the radiant barrier rolls carefully to avoid any tears or damages that could compromise its effectiveness.
- If using a stapler or any other tools, be cautious to avoid accidentally puncturing electrical wiring or damaging other components in the attic.
- Work in teams whenever possible, as it can help with both safety and efficiency. Having someone to assist you can make the installation process smoother and reduce the risk of accidents.
Addressing common challenges during installation
Installing a radiant barrier in the attic can sometimes present challenges that need to be addressed. Here are some common challenges you may encounter and tips to overcome them:
- Uneven surfaces: If the attic has uneven surfaces or obstacles such as pipes or vents, use reflective tape to seal any gaps or overlaps in the radiant barrier to ensure there are no areas where heat can escape or enter the attic.
- Limited space: In attics with restricted space, consider using a multi-layer radiant barrier to maximize its effectiveness. This involves installing a second layer perpendicular to the first layer to create additional thermal insulation.
- Insulation compatibility: If your attic already has insulation, it is essential to ensure that the radiant barrier does not compromise its performance. Properly assess the compatibility of the radiant barrier with the existing insulation and make any necessary adjustments or modifications.
Maintaining and inspecting the radiant barrier over time
To ensure the radiant barrier continues to function optimally, regular maintenance and inspections are necessary. Here are some tips for maintaining and inspecting the radiant barrier:
- Regularly check for any signs of damage, such as tears, holes, or unwanted moisture. If any issues are discovered, promptly repair or replace the affected sections to maintain the barrier’s efficiency.
- Clear any debris or obstructions that may accumulate in the attic, as they can hinder the radiant barrier’s performance.
- Consider conducting periodic energy audits to assess the effectiveness of the radiant barrier. This can help identify any areas that need improvement or any adjustments that need to be made.
By following these additional tips for installing a radiant barrier in the attic, you can maximize its efficiency and ensure long-lasting energy savings. Remember to prioritize safety, address any installation challenges, and regularly maintain and inspect the radiant barrier for optimal performance.
Maximizing Energy Savings
How the Installation of a Radiant Barrier can Reduce Energy Costs
Installing a radiant barrier in your attic is a smart way to reduce energy costs and make your home more energy-efficient. A radiant barrier works by reflecting the radiant heat that enters your attic, keeping it from penetrating into your living space. This can significantly reduce the need for air conditioning during hot summer months, as well as decrease the strain on your HVAC system, resulting in lower energy bills.
Other Energy-Saving Practices to Combine with the Radiant Barrier
While installing a radiant barrier is a great step towards maximizing energy savings, you can further enhance the efficiency of your home by combining it with other energy-saving practices. Here are a few additional measures to consider:
- Proper Insulation: Ensuring that your attic has adequate insulation will help prevent heat transfer and reduce energy loss. Consider adding insulation to further complement the effectiveness of the radiant barrier.
- Air Seal Your Home: Sealing air leaks around doors, windows, and other openings will prevent hot air from entering your living spaces in the summer and keep warm air inside during the winter. This will reduce the workload on your heating and cooling systems.
- Upgrade to Energy-Efficient Appliances: Replacing old, energy-draining appliances with energy-efficient ones can significantly cut down your energy consumption and further contribute to energy savings.
- Use Natural Ventilation: Take advantage of natural ventilation strategies, such as opening windows during cooler evenings or using ceiling fans, to provide a natural breeze and reduce the reliance on air conditioning.
Monitoring and Evaluating Energy Savings
Once you have installed a radiant barrier and implemented other energy-saving practices, it’s important to monitor and evaluate your energy savings. This will allow you to assess the impact of these efforts and make any necessary adjustments to further optimize your energy efficiency. Consider implementing the following steps to ensure you are maximizing your energy savings:
- Maintain a Record: Keep a record of your energy bills before and after the installation of the radiant barrier and other energy-saving measures. This will help you track your savings over time.
- Monitor Energy Usage: Use a smart energy monitoring system to track your energy usage in real time. This will allow you to identify any spikes or changes in consumption and pinpoint areas for improvement.
- Regular Inspections: Periodically inspect the radiant barrier and insulation in your attic to ensure they are in good condition and functioning optimally. Address any issues promptly to avoid potential energy losses.
By combining the installation of a radiant barrier with other energy-saving practices and actively monitoring your energy usage, you can maximize your energy savings and enjoy the benefits of a more efficient home.
Hiring A Professional Vs. Diy
When it comes to installing a radiant barrier in your attic, you have two options: hiring a professional or tackling the project yourself. Both options have their pros and cons, and it’s important to assess the feasibility of a DIY installation and consider the factors involved in hiring a professional. Additionally, comparing the cost-effectiveness of both options will help you make an informed decision. Let’s delve into these aspects further.
Assessing the feasibility of a DIY installation
Before you decide to go the DIY route, it’s essential to assess the feasibility of installing a radiant barrier in your attic on your own. While DIY projects can provide a sense of satisfaction and potentially save you money, there are a few factors to consider:
- Technical knowledge and skills: Installing a radiant barrier requires some technical know-how. You’ll need to understand the materials, tools, and techniques involved. If you have experience with similar projects and feel confident in your abilities, a DIY installation might be feasible.
- Time commitment: Installing a radiant barrier is not a quick task. It requires careful planning, preparation, and execution. Consider whether you have the time available to commit to the project and whether you’re willing to invest the necessary effort.
- Physical capabilities: Attic spaces can be tight, confined, and challenging to access. Ensure that you’re physically capable of maneuvering in the space and handling the materials and equipment safely.
Factors to consider when hiring a professional
On the other hand, hiring a professional for your radiant barrier installation can bring several benefits. Keep the following factors in mind:
- Experience and expertise: Professionals have the required knowledge and experience to install a radiant barrier correctly. They understand the best practices, safety measures, and potential pitfalls.
- Efficiency and speed: Professionals are accustomed to working efficiently and can complete the installation in a shorter timeframe. This can be especially beneficial if time is a priority or if you have a large attic space.
- Warranty and guarantee: Many professional installers offer warranties and guarantees on their work. This provides peace of mind, knowing that any issues or defects will be handled promptly and without additional cost.
Comparing the cost-effectiveness of both options
Cost is often a significant consideration when deciding between a professional installation and a DIY project. Let’s compare the cost-effectiveness of both options:
| Cost Factors | DIY Installation | Professional Installation |
|---|---|---|
| Materials | DIY materials can be cheaper upfront, but quality varies | Professionals may have access to high-quality materials at discounted rates |
| Tools and Equipment | You may need to purchase or rent tools | Professionals have the necessary tools and equipment |
| Time | DIY installation is time-consuming | Professional installation is typically quicker |
| Expertise and Quality | Results may vary depending on your skills and knowledge | Professionals ensure high-quality installation |
| Warranty or Guarantee | No warranty or guarantee with DIY | Professionals often offer warranties |
Considering these factors and weighing the costs against the potential risks and benefits will help you make an informed decision about hiring a professional or undertaking a DIY radiant barrier installation in your attic.
Frequently Asked Questions On How To Install Radiant Barrier In Attic
How Should A Radiant Barrier Be Installed In An Attic?
To install a radiant barrier in an attic, follow these steps:
1. Clean the attic and remove any debris or insulation.
2. Measure and cut the radiant barrier to fit the attic space.
3. Attach the radiant barrier to the underside of the roof using staples or adhesive.
4. Overlap the seams of the radiant barrier to ensure full coverage.
5. Use tape or foil to seal any gaps or joints.
Can I Install Radiant Barrier Myself?
Yes, you can install a radiant barrier yourself. Just follow these guidelines: measure and cut the barrier to fit, clean the area, lay the barrier over the insulation, and seal any gaps. However, it’s important to consult installation instructions and consider enlisting professional help for larger or complex projects.
Can You Add Radiant Barrier In Attic?
Yes, you can add a radiant barrier in your attic. It helps to reflect heat and keep your home cooler.
How Much Does It Cost To Install Radiant Barrier In Attic?
Installing a radiant barrier in your attic can cost anywhere from $1,500 to $3,000, depending on the size of your attic and the materials used. The cost may vary further based on the location and the complexity of the installation.
Conclusion
Installing a radiant barrier in your attic can significantly enhance the energy efficiency of your home. By reflecting heat away from your living space, it helps maintain a comfortable temperature and reduces reliance on heating and cooling systems. With the easy step-by-step process outlined in this guide, you can successfully install a radiant barrier in your attic and enjoy long-term energy savings.
Don’t wait any longer to experience the benefits of this home improvement project. Start transforming your attic today!