To install a portable air conditioner without a window, follow these steps: adjust the bracket to fit your door or wall, secure the bracket in place, attach the exhaust hose to the unit and direct it outside, and finally, plug in the air conditioner and turn it on. Installing a portable air conditioner without a window may seem challenging, but with the right tools and instructions, it can be a straightforward process.
We will guide you through the steps to easily install a portable air conditioner without the need for a window. By the end, you’ll be able to cool your space efficiently, even without a window.
Convenient Cooling Solution For Any Room Size
When it comes to beating the summer heat, a portable air conditioner is a convenient cooling solution for any room size. Not only does it provide effective cooling, but it also offers the flexibility of being installed without the need for a window. This makes it a perfect choice for rented apartments and buildings with restrictions where traditional window AC units may not be allowed or feasible.
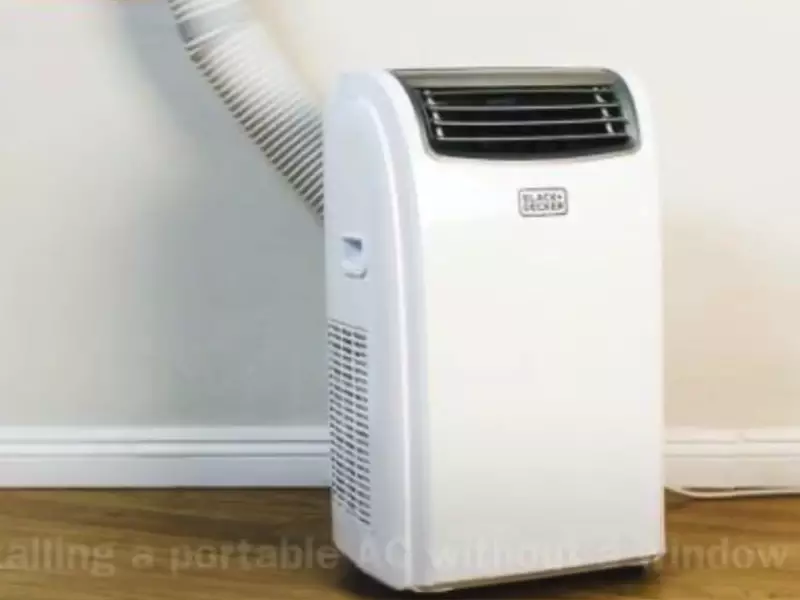
Cooling flexibility without the need for a window
One of the major advantages of a portable air conditioner is its cooling flexibility without the need for a window. Unlike traditional AC units, which require a window installation, portable ACs can be installed anywhere in the room. This means you can easily move it from one room to another, depending on your cooling needs.
Additionally, the installation process is simple and hassle-free. All you need is a nearby power outlet and a suitable location for the unit. Some portable AC models even come with window venting kits that allow you to vent the hot air outside through a small opening, such as a sliding glass door or a drop ceiling.
Perfect for rented apartments and buildings with restrictions
In rented apartments or buildings with restrictions, installing a traditional window AC unit may not be an option. Landlords or building management often have strict rules regarding modifications to windows, making it difficult to enjoy the cooling benefits of an air conditioner.
However, with a portable AC, you can stay cool without breaking any rules. Simply find a suitable spot in the room and set up the unit. Since the installation is non-permanent, you can easily remove it without leaving any traces behind. This makes it the ideal cooling solution for those who are renting or living in buildings with restrictions.
Moreover, portable ACs are available in a variety of sizes and capacities, allowing you to find the perfect fit for your room size. Whether you have a small bedroom, a spacious living room, or even an office space, there is a portable air conditioner that can provide efficient cooling to keep you comfortable all summer long.
So, if you’re looking for a convenient cooling solution that doesn’t require a window installation, consider investing in a portable air conditioner. It offers flexibility, ease of installation, and is perfect for rented apartments or buildings with restrictions. Stay cool and comfortable wherever you are with a portable AC.
Evaluating Room Size And Layout
Choosing the right portable air conditioner for your space involves more than just picking a unit and plugging it in. Properly evaluating your room’s size and layout is essential for optimal cooling and air circulation. By ensuring the unit’s cooling capacity matches the room’s square footage and assessing the room’s layout for the best air circulation and placement of the unit, you can create a comfortable and efficient environment. Let’s dive into these two important factors:
Ensure the unit’s cooling capacity matches the room’s square footage
One of the crucial considerations when selecting a portable air conditioner is to ensure that the cooling capacity matches the square footage of your room. Each portable air conditioner comes with a BTU (British Thermal Units) rating, which refers to its cooling power. To determine the appropriate BTU rating for your room, consider the following:
- Measure the room: Start by measuring the length and width of your room in feet.
- Calculate the square footage: Multiply the length and width measurements to get the total square footage.
- Match BTU to square footage: Refer to the manufacturer’s guidelines or use a BTU calculator to determine the BTU rating needed for your specific square footage.
| Room Size (in square feet) | BTU Recommendation |
|---|---|
| Up to 150 sq. ft. | 5,000-6,000 BTU |
| 150-300 sq. ft. | 7,000-8,000 BTU |
| 300-450 sq. ft. | 9,000-10,000 BTU |
| 450-700 sq. ft. | 12,000-14,000 BTU |
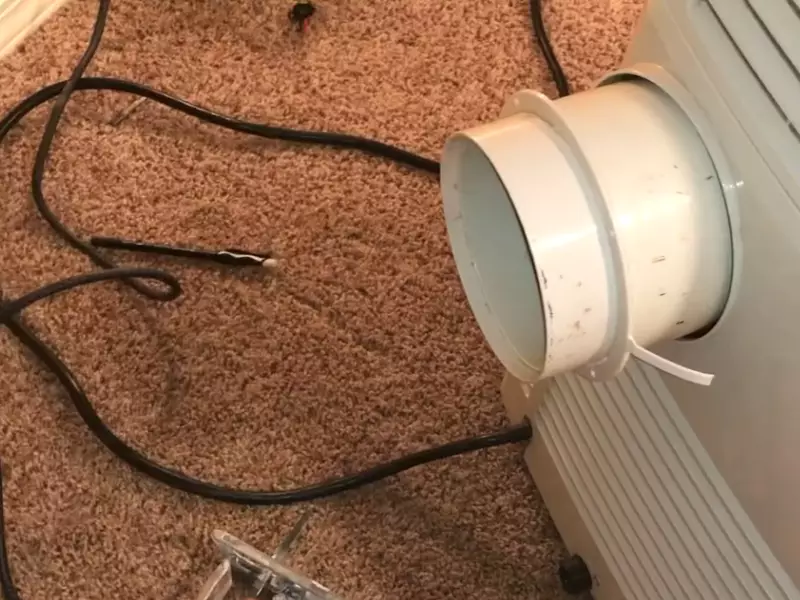
Assess the room’s layout for optimal air circulation and placement of the unit
Another critical aspect to consider is the layout of your room. To ensure proper air circulation and effectively cool the space, follow these guidelines:
- Clear the area: Remove any furniture, obstructions, or objects that may block the airflow or limit the unit’s functionality.
- Place the unit near a power source: Ensure the unit is positioned close to an electrical outlet to avoid using extension cords, which can be a potential hazard.
- Direct the airflow: Position the unit in a location that allows the cool air to flow freely throughout the room. Avoid placing it behind curtains or directly next to walls.
- Consider venting options: If possible, choose a portable air conditioner with a separate venting hose that can be directed outside through a nearby window, sliding door, or vent opening.
- Use fans for better circulation: Consider using fans to help circulate the cool air and distribute it more evenly within the room.
By carefully evaluating your room’s size and layout, you can select the appropriate portable air conditioner and optimize its performance for a cool and comfortable living environment. Now that you have the tools to assess your room, it’s time to choose the perfect portable air conditioner!
Ventilation Options For Portable Air Conditioner Without Window
Exploring alternative ventilation methods
When it comes to cooling your space without a window, it’s essential to find alternative ventilation options for your portable air conditioner. Luckily, there are several methods you can consider to effectively exhaust the hot air generated by the unit.
Sometimes, using an existing ductwork system in your home can be an ideal solution. If you have a central heating or cooling system with ducts, you can use those ducts to direct the hot air outside. However, it’s important to note that this method may not be suitable for everyone, as it requires access to the ducts and the ability to redirect the airflow.
Another option is utilizing a drop ceiling or attic space as an exhaust outlet. This method involves creating an opening in the drop ceiling or attic and installing a venting system to direct the hot air outside. It’s crucial to ensure that the venting system is properly sealed to prevent any air leakage, as that can impact the efficiency of your portable air conditioner.
Using an existing ductwork system
If you have an existing ductwork system in your home, you can take advantage of it to ventilate your portable air conditioner. This method allows you to redirect the hot air generated by the unit outside, using the same ducts that are used for central heating or cooling.
To use this method, you’ll need to locate the nearest duct to the room where the portable air conditioner is being used. Once you’ve identified the appropriate duct, you can attach a vent hose to the air conditioner’s exhaust port and connect the other end to the duct. This will allow the hot air to be directed through the ducts and expelled outside.
It’s important to ensure that the connection between the vent hose and the duct is secure and airtight. Any gaps or leaks can result in the recirculation of hot air back into your space, reducing the effectiveness of the cooling. Using duct tape or a compatible sealing material can help to seal the connection properly.
Utilizing a drop ceiling or attic space as an exhaust outlet
If you don’t have access to a window or a ductwork system, utilizing a drop ceiling or attic space as an exhaust outlet can be another effective option. This method involves creating an opening in either the drop ceiling or the attic and installing a venting system to direct the hot air outside.
To utilize a drop ceiling as an exhaust outlet, you’ll need to remove one of the ceiling panels and cut a hole that is large enough to accommodate the venting system. The venting system can be connected to the portable air conditioner using a vent hose, allowing the hot air to be expelled through the opening in the drop ceiling.
Similarly, if you choose to utilize an attic space as an exhaust outlet, you’ll need to create a hole in the ceiling of the room where the air conditioner is located and install a venting system. This venting system will connect to the portable air conditioner, enabling the hot air to be directed through the attic and out of the house.
When utilizing a drop ceiling or attic space as an exhaust outlet, it’s crucial to ensure that the venting system is properly sealed to prevent any air leakage. Using compatible sealing materials can help to ensure that the connection between the vent hose and the venting system is airtight, maximizing the efficiency of your portable air conditioner.
Preparing The Room And Unit
Before you install a portable air conditioner without a window, it is essential to prepare the room and unit properly. By following these steps, you can ensure a smooth and efficient installation process.
Cleaning the area where the unit will be placed
First and foremost, you need to clean the area where the portable air conditioner will be placed. Dust, dirt, and debris can hinder the unit’s performance and reduce its cooling efficiency. To clean the area effectively, follow these simple steps:
- Remove any furniture or obstacles near the installation spot.
- Vacuum the floor and wipe away any dust or dirt. Pay attention to corners and hard-to-reach areas.
- If possible, mop the floor with a damp cloth to remove any remaining dust particles.
- Make sure there are no obstructions around the area.
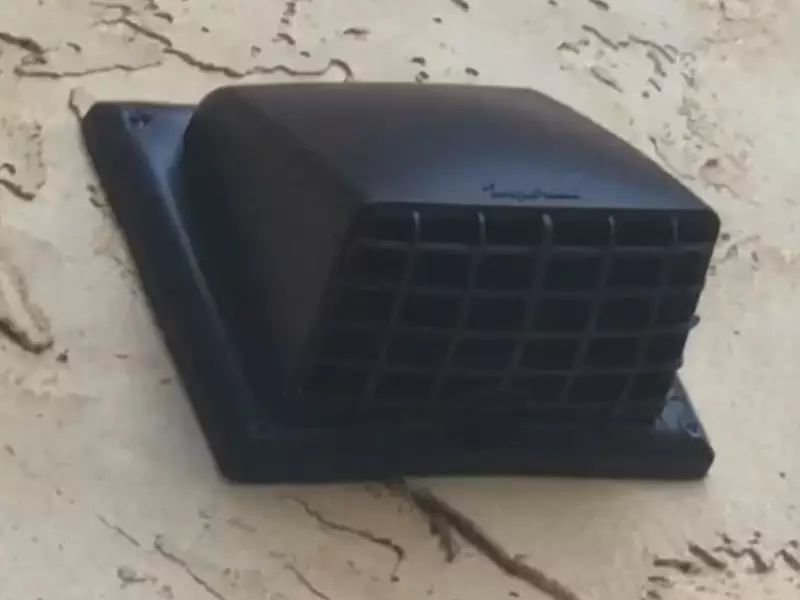
Assembling the portable air conditioner according to the manufacturer’s instructions
Once the room is clean and ready, it’s time to assemble the portable air conditioner. Every manufacturer provides detailed instructions on how to assemble their units correctly. Follow the steps below to ensure you assemble the unit properly:
- Unbox the portable air conditioner and take out all the components.
- Refer to the instruction manual provided by the manufacturer and identify the corresponding parts.
- Assemble the unit following the step-by-step instructions provided. This may include attaching the exhaust hose, connecting the control panel, and securing any loose parts.
- Make sure each component is securely attached and tightened according to the manufacturer’s guidelines.
Checking for any damages or defects before installation
Before you proceed with the installation, it is crucial to check for any damages or defects that may affect the performance of the portable air conditioner. By inspecting the unit beforehand, you can prevent any potential issues or malfunctions. Follow these steps to ensure a thorough inspection:
- Inspect the unit for any visible damages, such as dents, scratches, or broken parts.
- Check all the electrical connections for loose wires or exposed cables. If you notice any issues, contact the manufacturer for further assistance.
- Test the control panel and buttons to ensure they are functioning correctly.
- Plug in the unit and listen for any unusual sounds or vibrations, which could indicate internal damage.
- Verify that the cooling and fan modes are working properly.
By following these steps, you can ensure that the room is prepared and the portable air conditioner is assembled correctly. Additionally, conducting a thorough inspection before installation will help identify any potential damages or defects that might hinder the unit’s performance. Once you have completed these steps, you can proceed with installing the portable air conditioner without a window and enjoy a cool and comfortable environment.
Creating An Exhaust Outlet
Installing a portable air conditioner without a window is a great solution for those who don’t have access to a traditional window or don’t want to obstruct their view. Creating an exhaust outlet is an essential step in this process as it allows hot air to be vented out of the room, keeping it cool and comfortable. In this article, we will walk you through the steps of determining the best location for the exhaust outlet and installing an exhaust hose using a window, sliding door, or through-wall kit.
Determining the best location for the exhaust outlet
Before you start installing the exhaust outlet for your portable air conditioner, you need to determine the best location for it. Here are some factors to consider:
- Proximity to an outer wall: Choose a location that is closest to an outer wall to minimize the length of the exhaust hose.
- Avoid obstacles: Make sure there are no obstacles, such as furniture or curtains, blocking the airflow from the exhaust outlet.
- Away from flammable materials: Keep the exhaust outlet away from any flammable materials to prevent the risk of fire.
- Accessibility: Ensure that the chosen location allows easy access for installation and maintenance.
Installing an exhaust hose using a window, sliding door, or through-wall kit
Once you have determined the best location for the exhaust outlet, you can proceed with installing the exhaust hose. There are three common methods you can choose from:
1. Window installation:
If you have a window nearby, you can use a window kit that usually comes with the portable air conditioner. Here’s how you can install the exhaust hose using a window:
- Open the window slightly and measure the width to ensure the window kit fits properly.
- Attach the window kit to the window frame according to the manufacturer’s instructions.
- Connect the exhaust hose to the window kit and secure it in place.
2. Sliding door installation:
If you have a sliding glass door, you can use a sliding door kit to install the exhaust hose. Here’s how:
- Measure the width of the sliding door to ensure the kit fits properly.
- Install the sliding door kit according to the manufacturer’s instructions.
- Attach the exhaust hose to the sliding door kit and secure it in place.
3. Through-wall installation:
If you prefer a more permanent solution, you can install the exhaust hose through a wall using a through-wall kit. Here are the steps:
- Select a suitable location on the wall for the exhaust outlet.
- Mark the area and cut a hole in the wall according to the kit’s instructions.
- Install the through-wall kit, ensuring it is securely attached to the wall.
- Connect the exhaust hose to the through-wall kit and secure it in place.
By following these steps, you can easily create an exhaust outlet for your portable air conditioner without a window. Remember to always refer to the manufacturer’s instructions for your specific model and kit to ensure proper installation and maximum efficiency of your cooling unit.
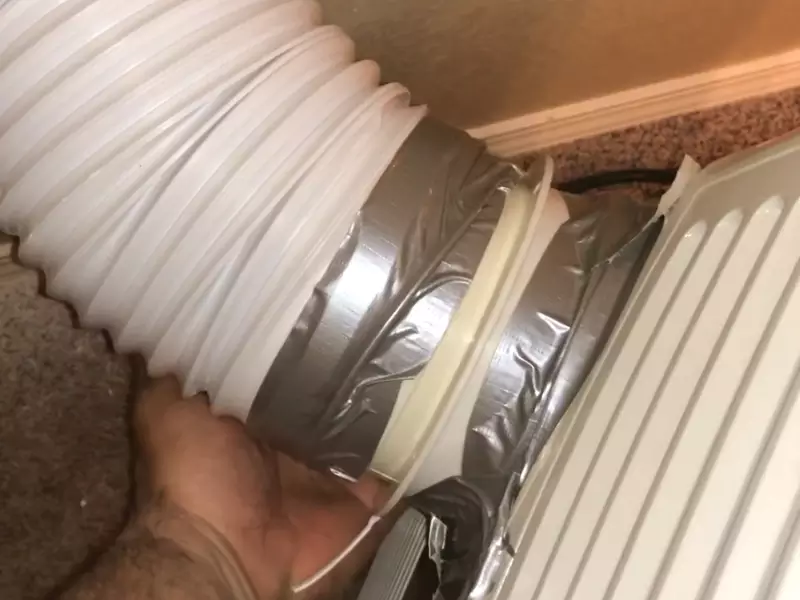
Securing The Unit And Ensuring Proper Functionality
Installing a portable air conditioner without a window may seem like a challenging task, but with the right knowledge and steps, it can be a smooth process. Once you have selected the designated area where you want to place your portable air conditioner, the next crucial step is to secure the unit and ensure its proper functionality. In this section, we will discuss how to secure the unit to prevent accidental tipping or movement, as well as testing the unit’s functionality and adjusting settings as needed.
Placing the portable air conditioner in the designated area
Before securing the unit, it is essential to find the best location for your portable air conditioner. Consider factors such as proximity to an electrical outlet and whether the unit’s exhaust hose can be properly vented. Once you have selected the perfect spot, follow these simple steps to place the unit:
- Clear the area: Make sure the designated area is free from any obstacles or clutter that could obstruct the unit’s air intake or impede the airflow.
- Place on a flat surface: Ensure that the surface where you are going to place the portable air conditioner is level and stable.
- Position near an electrical outlet: To ensure an easy and safe connection, position the unit within reach of an electrical outlet. Avoid using extension cords, as they can cause voltage drop and potential fire hazards.
Securing the unit to prevent accidental tipping or movement
To ensure the safety of both your portable air conditioner and the surrounding area, it is crucial to secure the unit properly. Follow these steps to prevent accidental tipping or movement:
- Using a window kit or sealing the window opening: Although you are not installing the air conditioner in a window, you can still use a window kit or seal the window opening with a temporary sealant to enhance stability.
- Using brackets or supports: Some portable air conditioners come with brackets or supports that can be mounted to the wall or the floor. These accessories help anchor the unit and prevent it from tipping over.
- Securing with straps or cords: Another effective method to secure the unit is by attaching straps or cords to anchors in the wall or floor. By fastening the unit to these anchor points, you can minimize the risk of accidental movement.
Testing the unit’s functionality and adjusting settings as needed
Once the portable air conditioner is securely placed and fixed in its designated area, it’s time to test its functionality and make necessary adjustments. Follow these steps to ensure the unit is operating correctly:
- Power on the unit: Connect the portable air conditioner to the electrical outlet and switch it on.
- Adjust temperature and fan settings: Depending on your comfort preferences, adjust the temperature and fan settings accordingly. Start with a lower temperature and gradually increase it until you find the desired cooling level.
- Check the airflow: Stand in front of the unit and feel for the cool air being emitted. Ensure that the airflow is strong and efficient. If needed, clean the air filters to improve airflow.
- Monitor for any unusual noises or vibrations: While the unit is running, pay attention to any unusual noises or vibrations coming from the unit. If you notice anything out of the ordinary, contact the manufacturer for assistance.
By securing the unit properly and testing its functionality, you can enjoy a cool and comfortable environment without the need for a traditional window installation. Follow these steps to ensure your portable air conditioner works efficiently and fits seamlessly into your living space.
Maintaining Proper Airflow And Temperature Control
Clearing obstructions around the unit to ensure proper airflow
One essential step in installing a portable air conditioner without a window is to maintain proper airflow. Poor airflow can affect the unit’s performance and hinder its ability to cool the room effectively. To ensure the air conditioner functions optimally, it is crucial to clear any obstructions around the unit.
Start by removing any furniture, curtains, or objects that could impede the airflow. Placing the unit in an area with sufficient space around it is also important. Typically, it is recommended to keep a minimum distance of 12-18 inches on all sides of the unit to allow for proper air circulation. This will prevent the air conditioner from recycling warm air and enable it to draw in fresh air effectively.
If the portable air conditioner unit utilizes a hose or duct for exhaust, ensure that it is not bent, kinked, or obstructed. A clear and unobstructed exhaust hose will help remove the hot air generated by the air conditioner, promoting efficient cooling.
Using additional fans to enhance air circulation and cooling efficiency
Enhanced air circulation can significantly improve the cooling efficiency of a portable air conditioner. Strategic placement of additional fans can help distribute cool air throughout the room more comprehensively.
Consider using oscillating fans placed strategically in areas where the cool air may struggle to reach. These fans, when positioned correctly, can help circulate air towards corners or areas shielded by obstacles like furniture or walls. They can also help alleviate hot spots or zones with poor air movement.
In addition to oscillating fans, a ceiling fan can also be beneficial in improving air circulation. The upward airflow generated by a ceiling fan can help push warm air towards the ceiling, creating a more efficient cooling effect in combination with the portable air conditioner. This method not only enhances airflow but also helps maintain a consistent temperature throughout the room.
Remember, when using additional fans, make sure they are strategically placed to avoid obstructing the intake or exhaust vents of the portable air conditioner unit. This will help prevent any interference with its performance.
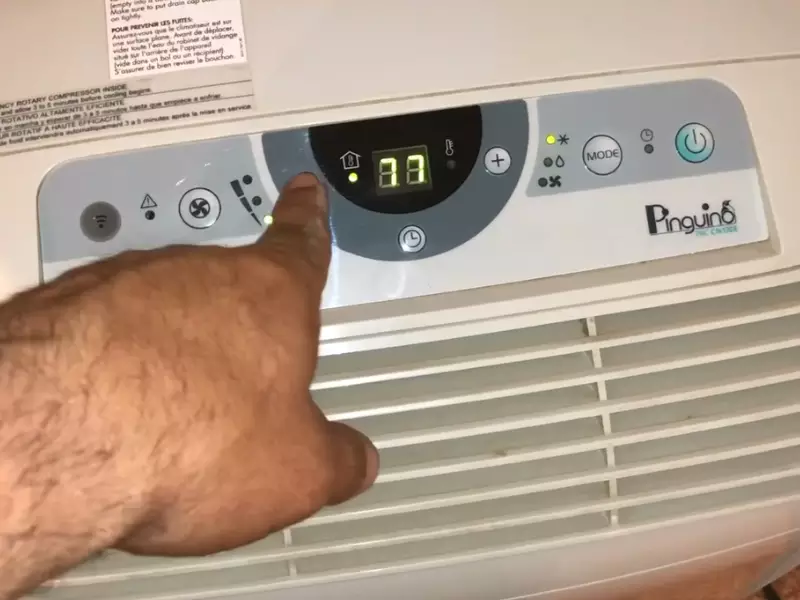
Managing Noise And Condensation
Strategies to reduce noise produced by the portable air conditioner
When installing a portable air conditioner without a window, managing the noise produced by the unit is crucial to ensure a comfortable living environment. Nobody wants to be distracted or disturbed by a loud buzzing sound. Fortunately, there are a few strategies you can employ to reduce the noise and enjoy the cooling benefits of your portable air conditioner:
- Choose a quieter model: Before purchasing a portable air conditioner, check the noise rating specified by the manufacturer. Look for units that have a noise level of 50 decibels (dB) or lower, which is equivalent to the sound of a quiet conversation. Aim for a model with noise reduction features like an insulated compressor and a low operating sound level.
- Use soundproofing materials: To minimize noise transmission, you can consider using soundproofing materials. Apply adhesive-backed foam padding or acoustic panels to the walls surrounding the air conditioner. These materials absorb sound waves and help create a quieter environment.
- Place the unit on a vibration-absorbing mat: Another effective method to reduce noise is to place the portable air conditioner on a vibration-absorbing mat or pad. This helps to dampen vibrations produced by the unit, preventing them from resonating and contributing to the noise level of the room.
- Keep the unit stable: Ensure the portable air conditioner is placed on a stable surface to minimize rattling sounds. Avoid placing it on uneven or wobbly surfaces, as this can increase noise levels.
Dealing with condensation buildup and effective drainage solutions
Condensation buildup can be a common issue when using a portable air conditioner, especially in humid climates. The excess moisture needs to be effectively managed to prevent damage to your floors or furniture. Here are a few tips to deal with condensation and ensure efficient drainage:
- Use a drip pan: Placing a drip pan or tray under your portable air conditioner can help collect excess water. Make sure the pan is large enough to accommodate the anticipated amount of condensate and empty it regularly to prevent overflow.
- Connect a drainage hose: Many portable air conditioner models allow you to connect a drainage hose for continuous drainage. This eliminates the need for manual emptying of the drip pan. Ensure the hose is securely connected and directs the water flow to an appropriate drainage point, such as a nearby sink or floor drain.
- Empty the water tank frequently: If your portable air conditioner has a built-in water tank, make it a habit to empty it regularly. This prevents the accumulation of excess water and reduces the risk of leakage or spills.
- Install a condensate pump: For more convenience, you can install a condensate pump that automatically removes water from the unit. This ensures continuous drainage without the need for manual intervention.
By implementing these strategies and drainage solutions, you can effectively manage noise levels and condensation buildup when installing a portable air conditioner without a window. Stay cool and comfortable without the annoying noise or worrying about excess moisture damaging your surroundings.
Energy Efficiency And Cost-Effective Cooling
When it comes to keeping your space cool during hot summer months, portable air conditioners have become a popular choice for many households. Not only do they offer convenience and flexibility, but they also provide energy-efficient and cost-effective cooling solutions. In this post, we will explore the various ways you can implement energy-saving techniques while using a portable air conditioner, as well as compare the energy consumption of portable air conditioners to traditional window units.
Implementing energy-saving techniques while using a portable air conditioner
Using a portable air conditioner efficiently can help you save on energy consumption and reduce your cooling costs. Here are some effective techniques you can implement:
- Optimal Temperature Settings: Set your portable air conditioner to an optimal temperature that ensures comfort without unnecessary cooling. The ideal temperature range is typically between 72°F and 78°F.
- Timer Function: Take advantage of the timer function available in most portable air conditioners. This feature allows you to schedule when the unit turns on and off, ensuring that it only operates when needed. By programming the timer to coincide with your occupation of the space, you can avoid wasting energy during unoccupied periods.
- Proper Insulation: Ensure proper insulation in your space to prevent cool air from escaping and warm air from entering. Properly insulated windows, doors, and walls can significantly increase the efficiency of your portable air conditioner.
- Positioning: Properly position your portable air conditioner in a way that maximizes airflow and minimizes obstructions. Keep it away from direct sunlight or other sources of heat and ensure that it has enough space around it for optimal ventilation.
Comparing energy consumption of portable air conditioners to traditional window units
When it comes to energy consumption, portable air conditioners have an edge over traditional window units. These portable units are designed to efficiently cool a specific space, allowing you to save on energy costs compared to whole-house air conditioning systems. Here is a comparison for better understanding:
| Criteria | Portable Air Conditioner | Traditional Window Unit |
|---|---|---|
| Energy Efficiency | Uses advanced technology and adjustable settings to provide efficient cooling with reduced energy consumption. | Standard window units can be less efficient, resulting in higher energy consumption and increased utility bills. |
| Installation | Easily portable and can be set up without the need for permanent installation, making it a versatile cooling option. | Requires permanent installation, limiting flexibility and portability. |
| Cost | Generally more cost effective than traditional window units due to lower energy consumption and flexibility to cool specific areas. | Can be expensive to purchase and install, especially for larger window units. |
Overall, portable air conditioners offer a more energy-efficient and cost-effective cooling solution compared to traditional window units. By implementing energy-saving techniques while using your portable air conditioner, you can further optimize its performance and enjoy a comfortable, cool environment without breaking the bank.
Frequently Asked Questions For How To Install Portable Air Conditioner Without Window
Is There A Portable Ac That Doesn’t Need To Be Vented?
No, there is no portable AC that doesn’t need to be vented. Venting is necessary to remove hot air from the space and ensure efficient cooling.
Can You Put An Air Conditioner In A Room Without A Window?
Yes, it is possible to use an air conditioner in a room without a window. You can opt for a portable air conditioner that doesn’t require a window. It works by venting hot air through a hose that can be connected to a small opening in the room, such as a sliding door or a hole in the wall.
Can I Vent Portable AC into Floor Vent?
Yes, you can vent a portable AC into a floor vent. This allows you to direct the cooled air into the desired area efficiently. Make sure the floor vent can handle the airflow and that there are no obstructions.
How Can I Install A Portable Air Conditioner Without A Window?
Installing a portable air conditioner without a window is possible by using alternative methods such as venting through a sliding glass door, using a drop ceiling vent, or utilizing a dryer vent. Make sure to properly seal the vent to prevent hot air from entering the room.
Conclusion
Installing a portable air conditioner without a window is definitely a feasible option, as we have seen in this blog post. By following the simple steps and considerations outlined, you can enjoy a cool and comfortable space without the need for a traditional window installation.
With the right planning and equipment, you can easily cool any room in your home or office. So go ahead and keep cool without compromising on style or functionality.
