To install a portable air conditioner, position it near a window and connect the exhaust hose. Let’s explore the simple steps you need to follow for a hassle-free installation of your portable air conditioner.
Portable air conditioners provide a convenient solution for cooling a specific area without the need for expensive and permanent installation. Whether you live in a rented apartment or need an additional cooling option for a specific room, a portable air conditioner can be a practical choice.
However, it is important to properly install the unit to ensure efficient cooling and avoid any potential hazards. We will guide you through the step-by-step process of installing a portable air conditioner. By following these guidelines, you’ll be able to enjoy the benefits of a portable air conditioner and beat the heat during the upcoming warm months.
Factors To Consider
When considering how to install a portable air conditioner, there are several factors to take into account. These factors can greatly impact the effectiveness and efficiency of your cooling system. By considering these factors before installation, you can ensure that you choose the right location and setup for optimal cooling performance in your space.
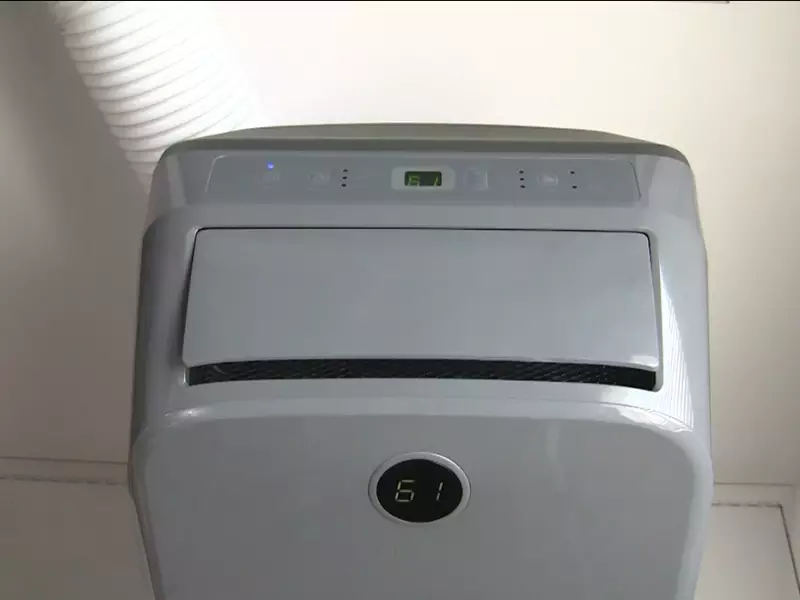
Room size and layout
The size and layout of the room where you plan to install your portable air conditioner play a crucial role in determining its cooling capacity. The cooling capacity of an air conditioner is measured in BTUs (British Thermal Units), and it is essential to choose a unit that can adequately cool the space.
To determine the appropriate cooling capacity for your room, you can refer to a BTU calculator or consult the manufacturer’s guidelines. Generally, larger rooms or spaces with high ceilings may require a higher BTU rating, while smaller rooms may need a lower BTU rating. It is important not to oversize or undersize the air conditioner, as this can lead to inefficiency and increased energy consumption.
In addition to considering the size of the room, its layout is also an important factor. If the room has multiple partitions or open doorways, it may affect the airflow and overall cooling efficiency. Therefore, it is advisable to choose a central location where the airflow from the portable air conditioner can reach all areas of the room evenly.
Availability of a window or vent
Another crucial factor to consider before installing a portable air conditioner is the availability of a window or vent for proper exhaust. Portable air conditioners generate hot air as they remove heat from the room, and this hot air needs to be vented outside for the unit to operate effectively.
Most portable air conditioners come with an adjustable window kit that allows you to fit the exhaust hose into the window opening. It is important to ensure that your window is compatible with the window kit provided by the air conditioner manufacturer. Additionally, you should check if the window can be adequately sealed to prevent hot air from entering the room.
If you do not have a suitable window for venting, you can consider alternative options such as using a venting kit to create a hole in the wall or using a drop ceiling vent if applicable. However, it is essential to follow the manufacturer’s instructions and guidelines for proper venting to maintain the efficiency and performance of the portable air conditioner.
Electrical outlet placement
The placement of the electrical outlet is another factor to consider when installing a portable air conditioner. The unit will require a standard electrical outlet to power its operation. Therefore, it is necessary to ensure that there is an outlet within reach of the air conditioner’s power cord.
It is important to avoid using extension cords or power strips, as they may not provide sufficient power and can create a fire hazard. If the nearest outlet is not in an ideal location for the unit, you can consult an electrician to install a new outlet or relocate an existing one.
Additionally, it is crucial to ensure that the electrical circuit can handle the power requirements of the air conditioner. You can refer to the manufacturer’s specifications to determine the ampere rating of the unit and compare it with the capacity of the circuit to prevent overloading.
By considering these factors, you can make an informed decision on how to install a portable air conditioner in your space. Taking into account room size and layout, the availability of a window or vent, and the placement of the electrical outlet, you can maximize the cooling performance and efficiency of your portable air conditioner.
Clearing The Area
Remove furniture and obstacles
Prior to installing your portable air conditioner, it is essential to clear the area where it will be placed. This not only ensures the optimal performance of the unit but also guarantees safety. Begin by removing any furniture or objects that might obstruct the airflow or impede your access to the air conditioner. This includes chairs, tables, and any other items that might be in close proximity to the installation area.
Additionally, make sure to clear any objects that could potentially obstruct the vents or filters of the portable air conditioner. These obstructions can hinder proper air circulation, ultimately affecting the cooling efficiency of the unit. By removing these obstacles, you create a clear path for the air to flow, maximizing your air conditioner’s performance.
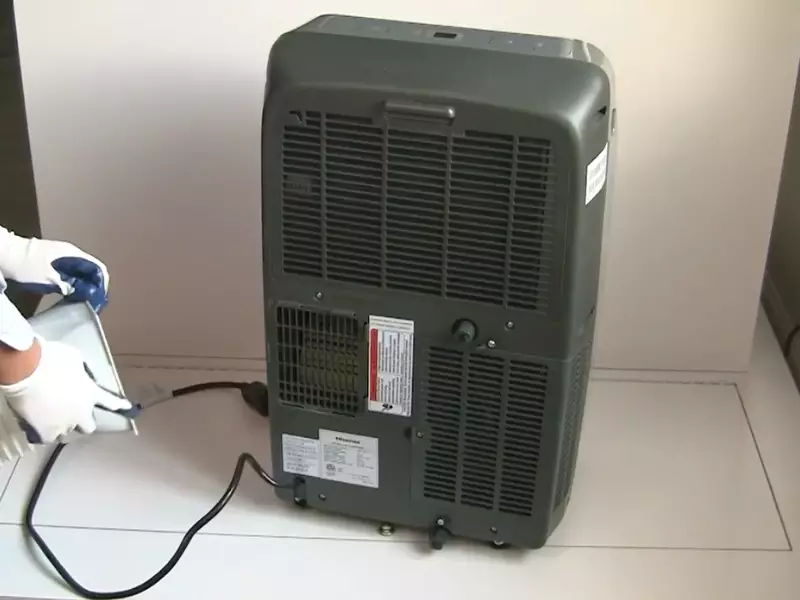
Clean the room
Once you have removed all the furniture and obstacles from the area, it’s time to thoroughly clean the room. A clean environment not only enhances the effectiveness of your portable air conditioner but also contributes to the overall air quality of your living space. Start by dusting and vacuuming the floor, walls, and any surfaces that might accumulate dust or debris.
It is crucial to pay extra attention to areas prone to allergens, such as carpeted floors or upholstered furniture. By eliminating these allergens and improving indoor air quality, you can create a healthier living environment for you and your loved ones.
Furthermore, don’t overlook the importance of cleaning the windows and curtains. Dust and dirt particles on these surfaces can reduce the efficiency and cooling performance of your portable air conditioner. Wipe the windows with a suitable cleaner and vacuum or wash the curtains to remove any accumulated dust and dirt.
Remember to clean the air conditioner’s filters as well, as dirty filters can significantly decrease its efficiency. Refer to the manufacturer’s instructions on how to clean the filters properly. Regular maintenance of these filters not only maximizes the cooling potential of your unit but also prolongs its lifespan.
In conclusion, by clearing the area and thoroughly cleaning the room before installing your portable air conditioner, you can ensure optimal performance, improve air quality and prolong the lifespan of your unit. Taking these simple steps will undoubtedly create a comfortable and refreshing environment in your home during the hot summer months.
Setting Up The Venting System
One of the key steps in installing a portable air conditioner is setting up the venting system. This is important because it allows the hot air generated by the air conditioner to be expelled outside, while the cool air is circulated within the room. In this section, we will guide you through the process of installing the venting hose and securing it in place.
Installing the venting hose
The first step in setting up the venting system is to install the venting hose. This hose is usually included with your portable air conditioner and is responsible for carrying the hot air out of the room. Follow these steps to install the venting hose:
- Locate the exhaust port on the back of your portable air conditioner. This is where the venting hose will be connected.
- Insert one end of the venting hose into the exhaust port, making sure it fits securely.
- Extend the venting hose to the window or opening where you will be venting the hot air.
- Ensure that the venting hose is not kinked or blocked in any way, as this can restrict airflow.
By following these steps, you will have successfully installed the venting hose for your portable air conditioner.
Securing the hose in place
Once you have installed the venting hose, it is important to secure it in place to ensure proper ventilation and prevent any leaks. Here are some methods you can use to secure the hose:
- Use duct tape or hose clamps to secure the venting hose to the exhaust port and the window or opening.
- Ensure that the connections are tight but not overly tightened, as this can cause damage to the hose or the ports.
- Make sure there are no gaps or openings where hot air can escape. If necessary, use weatherstripping or foam insulation to seal any gaps.
By properly securing the venting hose, you can ensure efficient and effective ventilation for your portable air conditioner.
Setting up the venting system is an essential part of installing a portable air conditioner. By following the steps outlined above to install the venting hose and secure it in place, you can ensure that your air conditioner functions optimally and provides you with the cool and comfortable environment you desire.
Connecting The Exhaust Hose
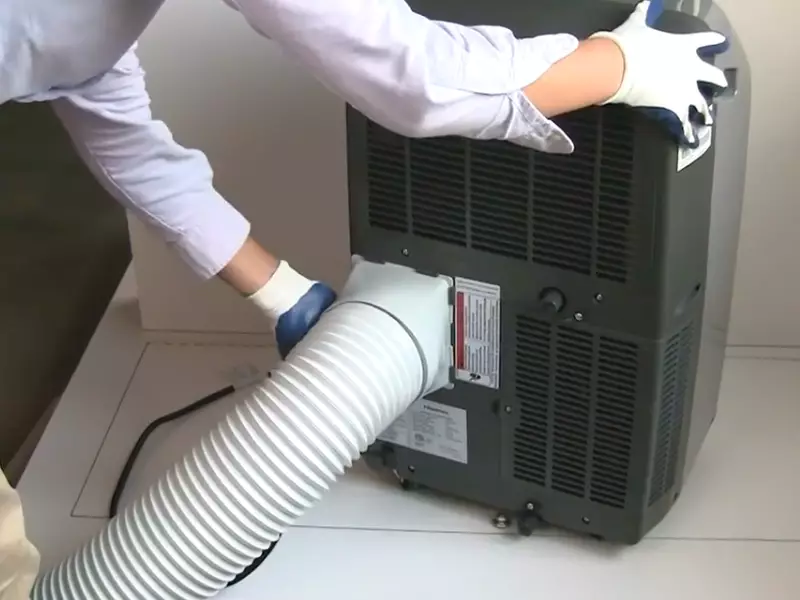
Once you have chosen the right location for your portable air conditioner, the next step is connecting the exhaust hose. This crucial step ensures that the hot air generated by the unit is properly expelled outside, allowing your air conditioner to function efficiently and cool your space effectively.
Attaching the Hose to the Unit
Before attaching the hose to the unit, make sure the air conditioner is turned off and unplugged from the power source. Locate the exhaust vent on the back of the portable AC unit, usually located at the top or back corner.
Next, take the exhaust hose and align it with the vent on the unit. Twist the hose clockwise until it securely locks into place. It’s important to ensure a tight connection to prevent any air leaks.
Connecting the Hose to the Window or Vent
When it comes to connecting the hose to the window or vent, you have a few options depending on your specific setup. The most common method is to use a window installation kit provided with your portable air conditioner.
To start, open your window or vent and measure the width. Cut the window installation kit to fit the width of the opening, allowing for a snug fit. Insert the kit into the window or vent, closing it securely to create a seal.
Take the other end of the exhaust hose and attach it to the window installation kit, securing it with the provided connector or tape. Make sure to eliminate any gaps or openings between the hose and the kit to prevent any hot air from escaping back into your space.
If a window installation kit is not suitable for your situation, you can also consider using a vent or wall mount. Simply attach the exhaust hose to the vent or mount, and securely fasten it to ensure a sealed connection that efficiently vents the hot air outside.
With the exhaust hose properly connected, your portable air conditioner is now ready to function and provide cool comfort to your space. Remember to regularly check the connections to ensure they remain secure and tightly sealed.
By following these simple steps, you can confidently install a portable air conditioner and enjoy a cool and comfortable environment all summer long.
Plugging In And Testing Your Air Conditioner
Plugging in and testing your portable air conditioner is the final step to ensure that it is working properly and providing the cool air you need. In this section, we will guide you on finding a suitable electrical outlet and powering on the unit, as well as adjusting the settings to achieve your desired level of comfort.
Finding a suitable electrical outlet
Before plugging in your portable air conditioner, it is important to find a suitable electrical outlet that can handle the unit’s power requirements. Look for an outlet that is easily accessible and near the area where you plan to install your air conditioner. Make sure that the outlet is not overloaded with other devices, as this can lead to safety hazards.
If there are no available outlets nearby, you may need to use an extension cord. However, it is crucial to choose the right type of extension cord and ensure that it is rated for the power consumption of your air conditioner. Using an inadequate extension cord can cause damage to both the air conditioner and the electrical system in your home.
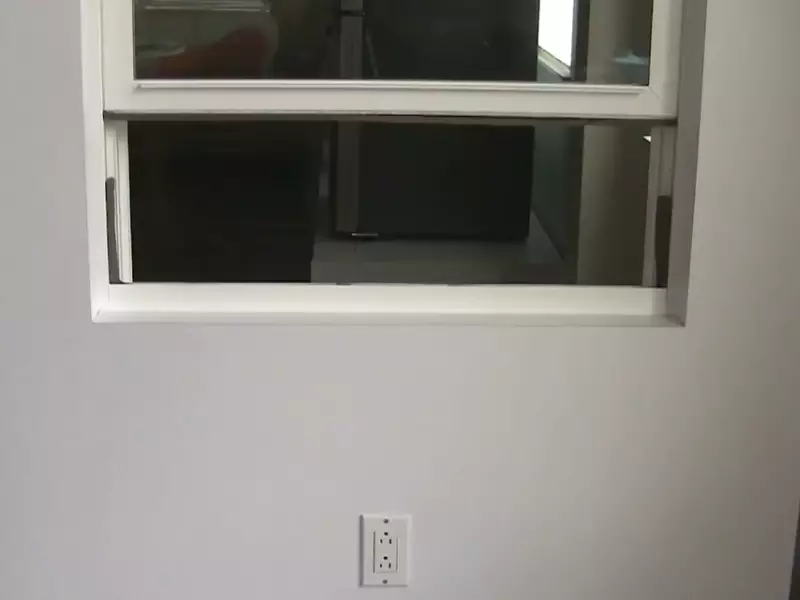
Powering on the unit and adjusting settings
Once you have found a suitable electrical outlet, it’s time to power your portable air conditioner. Follow these simple steps:
- Make sure that the air conditioner is in the “Off” position before plugging it in.
- Plug the power cord into the electrical outlet securely. Ensure that the plug is fully inserted to avoid any loose connections.
- After plugging in the unit, locate the power button on the control panel. Press it once to turn on the air conditioner.
- You should hear the unit start-up and feel the cool air coming out of the vent within a few moments.
Now that your air conditioner is powered on, you can adjust the settings to suit your preferences. Most portable air conditioners come with a digital display and a remote control for easy operation. Here’s how you can adjust the settings:
- Use the temperature control buttons to set your desired temperature. Typically, you can increase or decrease the temperature in one-degree increments.
- Use the mode button to select the cooling mode. This mode is usually represented by a snowflake symbol.
- If your air conditioner has a fan mode, you can switch between different fan speeds to optimize the air circulation in the room.
- Some units also feature a timer function, allowing you to set a specific time for the air conditioner to turn on or off automatically.
Remember to refer to the user manual provided by the manufacturer for detailed instructions on operating your specific portable air conditioner model.
By following these steps and guidelines, you can effectively plugin and test your portable air conditioner. Enjoy the cool and comfortable environment it provides during those hot summer months.
Cleaning The Filter
One of the essential maintenance tasks for a portable air conditioner is cleaning the filter. Regular filter cleaning ensures proper airflow, improves cooling efficiency, and helps maintain a healthy indoor environment. In this section, we will discuss a regular filter cleaning schedule and proper cleaning techniques to ensure the longevity of your portable air conditioner.
Regular Filter Cleaning Schedule
Maintaining a regular filter cleaning schedule is crucial to keep your portable air conditioner running efficiently. Over time, dust, debris, and contaminants accumulate on the filter, hindering proper airflow and reducing the cooling performance. To prevent these issues, follow this regular filter cleaning schedule:
- Weekly: Check the filter every week to assess its cleanliness. If you notice visible dirt or dust buildup, it’s time for cleaning.
- Monthly: Even if the filter appears clean, it is recommended to clean it thoroughly once a month. Regular cleaning helps prevent the accumulation of microscopic particles that can affect air quality.
- Seasonal: Before the start of each cooling season, thoroughly clean and inspect the filter. This ensures optimal performance when you need it the most.
Proper Cleaning Techniques
To properly clean the filter of your portable air conditioner, follow these steps:
- Step 1: Power off the unit: Before cleaning, make sure to turn off the portable air conditioner and unplug it from the power source. Safety always comes first.
- Step 2: Locate the filter: Remove the filter cover from the unit. The filter is typically located behind the front grille or on the side of the air conditioner. Consult the user manual if you’re unsure about its placement.
- Step 3: Remove the filter: Gently slide or pull the filter out from its position. Be cautious not to damage the filter during this process.
- Step 4: Vacuum the filter: Use a handheld vacuum cleaner with a brush attachment to remove loose dirt and debris from the filter. Ensure thorough cleaning of both sides.
- Step 5: Rinse the filter: Rinse the filter under running water to remove any remaining dust and particles. Use lukewarm water and gently clean it by hand. Avoid using hot water, as it can damage the filter.
- Step 6: Air dry the filter: Allow the filter to air dry completely before placing it back into the unit. This helps prevent mold or mildew growth. Avoid using heat sources to expedite drying, as it may distort the filter shape.
- Step 7: Reinstall the filter: Once the filter is dry, slide it back into its original position. Make sure it fits snugly and securely. Reattach the filter cover.
- Step 8: Power on the unit: Plug the portable air conditioner back into the power source and turn it on. Your freshly cleaned filter will now contribute to efficient cooling and clean air circulation.
By following this regular filter cleaning schedule and using proper cleaning techniques, you can ensure that your portable air conditioner operates optimally, providing cool and clean air for a comfortable environment.
Checking For Leaks And Airflow Issues
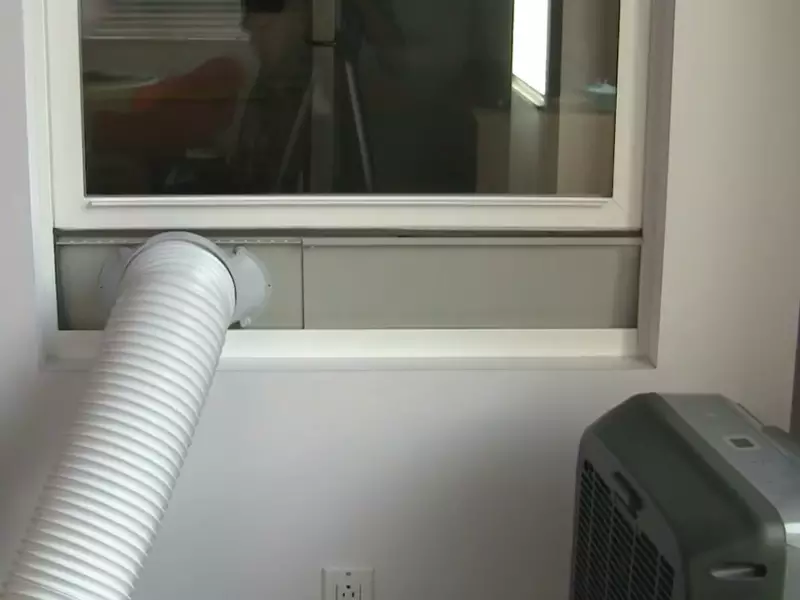
One of the most important steps in installing a portable air conditioner is checking for leaks and airflow issues. It is crucial to ensure that your unit is properly connected and that there are no obstructions that could hinder its performance. In this section, we will guide you through inspecting the hose connections and ensuring proper ventilation for efficient cooling.
Inspecting the hose connections
Begin by examining the hose connections to ensure there are no leaks or loose fittings. A leaky connection can result in not only reduced cooling efficiency but also potential water damage to your surroundings. To check for leaks, run your hand along the connections while the unit is operational. If you feel any air escaping or notice water dripping, it indicates a leak that needs to be fixed.
If you find any loose fittings, tighten them securely to ensure a snug connection. A loose connection can cause air leakage, affecting the cooling capacity of the air conditioner. It’s always a good idea to refer to the manufacturer’s instructions to ensure you are tightening the connections correctly.
Ensuring proper ventilation
Adequate ventilation is crucial for the efficient operation of a portable air conditioner. Improper ventilation can lead to hot air recirculation, reduced cooling performance, and even potential damage to the unit itself. Here are a few key points to consider when setting up ventilation:
- Place the unit near a window or a dedicated exhaust vent to allow the hot air to escape.
- Ensure that the exhaust hose is properly installed and securely connected to both the air conditioner and the designated exhaust point.
- Keep the exhaust hose as straight and as short as possible to minimize air resistance and optimize airflow.
- Avoid kinks or bends in the hose, as they can restrict airflow and reduce cooling efficiency.
- Do not exhaust the hot air into a room or an enclosed space, as it will only lead to increased ambient temperature and hinder the cooling performance.
Proper ventilation is essential for the portable air conditioner to work effectively and maintain a comfortable indoor environment. By following these guidelines, you can ensure that your unit has the necessary airflow for optimal cooling efficiency.
Storing Your Air Conditioner In The Off-Season
Cleaning and Drying the Unit
Before storing your portable air conditioner in the off-season, it is essential to clean and dry the unit properly. This will help prevent any build-up of dirt, dust, or moisture that can lead to unpleasant odors or even damage the unit.
To clean the unit, carefully remove the air filters and wash them with warm soapy water. Gently scrub away any dirt or debris, then rinse thoroughly and allow them to dry completely. While the filters are drying, use a soft cloth or brush to remove any dust or debris from the exterior and interior surfaces of the unit.
Next, it’s important to ensure that the unit is completely dry before storing it. Any moisture left inside the unit can promote the growth of mold or mildew, which can be detrimental to its performance and longevity. To dry the unit, you can use a cloth or towel to absorb any excess moisture, and then allow it to air dry in a well-ventilated area for a few hours. It’s crucial to make sure that all parts of the unit, including the filters, are completely dry before storing.
Proper Storage Techniques
When it comes to storing your portable air conditioner in the off-season, following proper techniques will ensure its optimum performance when you’re ready to use it again. Here are a few expert tips to help you store your unit safely and effectively:
- Choose a clean, dry, and cool storage location: It’s important to store your air conditioner in a place where it won’t be exposed to excessive heat, humidity, or moisture. A dry basement, garage, or storage closet can be ideal.
- Protect the unit from dust and debris: Cover the unit with a breathable dust cover or use a large plastic bag to prevent dust and debris from settling on the surfaces. Avoid using plastic sheets that can trap moisture.
- Store the unit in an upright position: It is recommended to store the portable air conditioner in an upright position to prevent any potential damage to internal components. If necessary, you can use supportive materials such as foam or packing materials to keep it stable.
- Keep the unit elevated: Placing the unit on a raised platform or pallet can help protect it from moisture on the ground and improve air circulation around the unit.
- Remove batteries from remotes or control panels: If your portable air conditioner has a remote or control panel that uses batteries, it’s advisable to remove them to prevent any potential leakage or corrosion.
By following these cleaning and storage techniques, you can ensure that your portable air conditioner remains in optimal condition during the off-season. Proper maintenance and care will prolong its lifespan and ensure that it continues to provide cool and comfortable air when you need it the most.
Frequently Asked Questions On How To Install Portable Air Conditioner
Do All Portable Air Conditioners Have To Be Vented Out A Window?
Yes, all portable air conditioners need to be vented out a window. Venting removes hot air and moisture from the room, allowing the unit to cool effectively. Without proper ventilation, the air conditioner won’t work efficiently. Make sure to use the provided window kit for proper installation.
Do Portable Air Conditioners Need To Be Vented Outside?
Yes, portable air conditioners need to be vented outside. This is because they remove hot air from the room and need a way to release it. The venting process ensures proper cooling and prevents the unit from overheating.
Do You Have To Hook Up A Hose To A Portable Air Conditioner?
Yes, a portable air conditioner requires a hose to be connected.
Are Portable Ac Units Easy To Install?
Portable AC units are easy to install. They require no permanent installation, making them flexible and convenient. Simply connect the exhaust hose, plug it in, and you’re ready to enjoy cool air. No complex setup or professional assistance is needed.
Conclusion
Installing a portable air conditioner doesn’t have to be a daunting task. By following the step-by-step process outlined in this guide, you can have a cool and comfortable home in no time. Remember to choose the right location, properly exhaust the hot air, and ensure a secure installation.
With the right knowledge and tools, you can enjoy the benefits of a portable air conditioner all summer long. Stay cool!
