To install a mini fridge in a cabinet, start by measuring the dimensions of the fridge and the cabinet to ensure a proper fit. Then, remove any shelves or drawers from the cabinet, allowing enough space for the fridge.
Next, position the fridge in the cabinet and secure it using brackets or straps to prevent movement. Finally, attach the cabinet door to the fridge door using hinges or a conversion kit.
Assessing Space And Measurements
Before installing a mini fridge in a cabinet, it is important to assess the available space and take accurate measurements. This step is crucial to ensure a proper fit and functionality of your mini fridge. In this guide, we will walk you through the process of determining the cabinet size, measuring the cabinet dimensions, and checking the space requirements for the mini fridge.
Determining the Cabinet Size
The first step in installing a mini fridge in a cabinet is to determine the size of the cabinet. This will help you choose the right mini fridge that fits perfectly without any inconvenience. To determine the cabinet size, follow these steps:
- Clear out the cabinet: Empty the cabinet completely to get an accurate measurement.
- Measure the width: Use a measuring tape to measure the width of the cabinet from the inside walls. Make sure to measure both the top and bottom of the cabinet as they may differ slightly.
- Measure the height: Measure the height of the cabinet, again from the inside walls. Take measurements at multiple points to account for any irregularities.
- Measure the depth: Measure the depth of the cabinet from the back wall to the front. This measurement will determine how far the mini fridge can extend into the cabinet.
Measuring the Cabinet Dimensions
Once you have determined the cabinet size, it is important to measure the dimensions of the cabinet properly. This will help you find the right mini fridge model that not only fits in terms of width, height, and depth, but also in terms of clearance required for ventilation. Here’s how to measure the cabinet dimensions:
- Measure the opening width: Measure the width between the cabinet walls at the front opening. This measurement will determine the maximum width of the mini fridge that can be installed.
- Measure the opening height: Measure the height between the cabinet walls at the front opening. This measurement will determine the maximum height of the mini fridge that can be installed.
- Measure the opening depth: Measure the depth from the front opening to the back wall of the cabinet. This measurement will determine the maximum depth of the mini fridge that can be installed.
Checking the Space Requirements for the Mini Fridge
Before finalizing the installation, it is crucial to check the space requirements for the mini fridge. This includes considering the ventilation needs, electrical outlet placement, and any additional space required for easy access and proper functioning. Here are some key points to consider:
- Ventilation: Mini fridges require adequate ventilation to dissipate heat. Make sure there is enough space around the sides, back, and top of the fridge to allow for proper airflow. Refer to the manufacturer’s guidelines for specific ventilation requirements.
- Electrical outlet: Ensure the cabinet has a nearby electrical outlet that can safely accommodate the mini fridge’s power requirements. Consider the cord length and placement to avoid any obstruction or safety hazards.
- Access: Leave enough space in front of the cabinet for easy access to the mini fridge. You should be able to open the door fully without any restrictions.
By assessing the space and taking accurate measurements, you can confidently install a mini fridge in your cabinet, optimizing functionality and convenience. Remember to always refer to the manufacturer’s guidelines and specifications for your specific mini fridge model.
Gathering Tools And Materials
Before you begin the installation process, it’s important to gather all the necessary tools and materials. This will ensure a smooth and efficient installation process. In this section, we will discuss the essential tools you will need, the necessary materials for the project, and optional accessories that can enhance the functionality of your mini fridge in the cabinet.
Essential Tools for Installation
Having the right tools will make the installation process much easier. Here are the essential tools you will need:
- A cordless drill with a drill bit set
- A screwdriver set
- A measuring tape
- An adjustable wrench
- A level
- A pencil or marker
These tools will help you drill holes, secure screws, measure accurately, and level the cabinet for a professional-looking installation.

Necessary Materials for the Project
In addition to the tools, you will also need a few materials to complete the installation. Here’s what you’ll need:
- A cabinet large enough to accommodate the mini fridge
- Screws and mounting brackets
- A power outlet nearby
- Cabinet liner or insulation for heat and noise reduction
- Optional ventilation system for proper airflow
- A door or panel for the cabinet (if desired)
These materials are essential for securing and enclosing the mini fridge within the cabinet, ensuring it fits properly and functions optimally.
Optional Accessories for Enhanced Functionality
If you want to take your mini fridge installation to the next level, there are a few optional accessories you can consider. These accessories can enhance the functionality of your mini fridge and make it more convenient to use. Here are a few ideas:
- A temperature monitor to keep an eye on the fridge’s temperature
- Interior lighting for better visibility
- Wire baskets or dividers for better organization
- A door lock for added security
- A door alarm to alert you if the door is left open
These accessories can make your mini fridge more user-friendly and cater to your specific needs and preferences.
Now that you have a clear understanding of the tools, materials, and optional accessories, you are ready to move on to the next step – measuring and preparing the cabinet for installation.
Clearing And Cleaning The Cabinet
Before you install a mini fridge in a cabinet, it’s important to clear and clean the cabinet properly. This will ensure a clean and efficient space for your mini fridge to function optimally. Follow these steps to clear and clean the cabinet:
Removing Existing Shelves or Drawers
To start, remove any existing shelves or drawers inside the cabinet. This will create enough space for the mini fridge to fit comfortably. Take measurements and carefully pull out the shelves or drawers, keeping them aside for reinstallation later if desired.
Cleaning the Interior of the Cabinet
Once you’ve removed the shelves or drawers, it’s time to clean the interior of the cabinet. Use a vacuum cleaner or a handheld brush to remove any dust, dirt, or debris from the cabinet’s surfaces. Pay special attention to the corners and crevices where dirt tends to accumulate. After vacuuming, wipe down the interior with a damp cloth and mild soap solution to ensure a thorough clean.
Making Necessary Repairs or Modifications
If you notice any damage or require modifications to the cabinet, now is the time to address them. Inspect the cabinet for any loose hinges, broken panels, or uneven surfaces. Make the necessary repairs or modifications to ensure that the cabinet is structurally sound and capable of accommodating the mini fridge securely.
Additionally, consider any modifications you may need to make for ventilation purposes. Proper ventilation is crucial to keep the mini fridge functioning efficiently and prevent overheating. If required, drill small holes in the cabinet to improve air circulation.
By clearing and cleaning the cabinet thoroughly before installing the mini fridge, you’ll create a clean and functional space that will enhance the performance and longevity of your appliance.
Adding Ventilation And Insulation
When installing a mini fridge in a cabinet, one crucial step is to add ventilation and insulation. This ensures proper air circulation, helps with heat dissipation, and improves energy efficiency. In this section, we will explore the steps involved in adding ventilation and insulation to your cabinet.
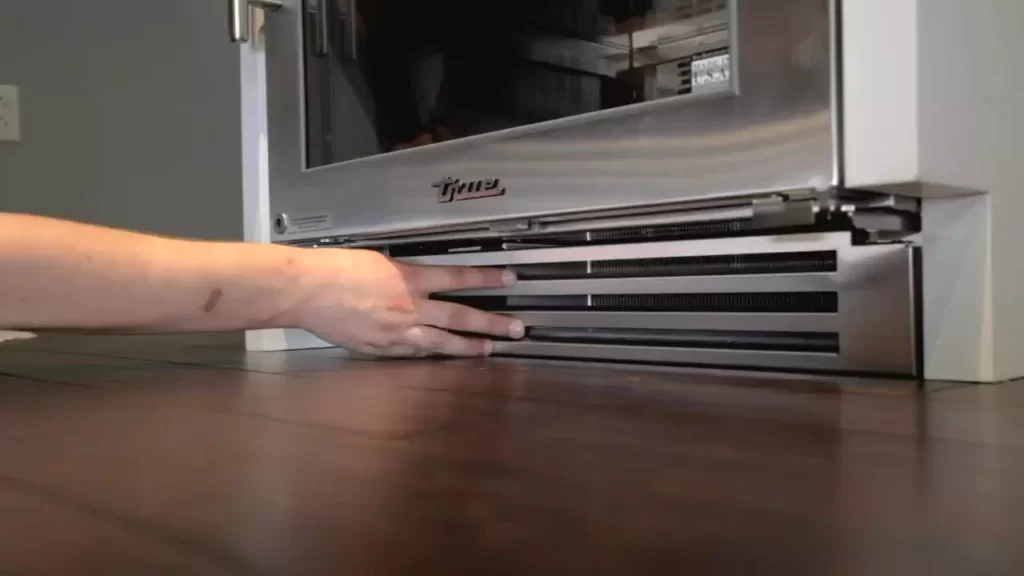
Ensuring Proper Air Circulation
Proper air circulation is essential for the optimal functioning of your mini fridge. Without adequate airflow, the fridge may overheat, resulting in reduced efficiency and potential damage.
To ensure proper air circulation:
- Leave ample space around the mini fridge to allow air to flow freely.
- Avoid tightly packing items around the fridge or blocking the vents.
- Regularly clean the vents and remove any debris that may obstruct airflow.
Installing Vents for Heat Dissipation
Vents play a crucial role in dissipating the heat generated by the mini fridge. Without proper ventilation, the excess heat could lead to overheating and potential damage to the appliance.
Here’s how you can install vents in your cabinet:
- Choose the appropriate location for the vents, ensuring they will not be obstructed.
- Use a measuring tape to mark the desired size and shape of the vents.
- Use a jigsaw or a hole saw to cut out the vent openings.
- Smooth the edges of the openings with sandpaper to prevent any sharp edges.
- Attach vent covers to the openings using screws or adhesive.
Insulating the Cabinet for Energy Efficiency
Insulating your cabinet helps to maintain a consistent internal temperature and improves energy efficiency. By preventing heat transfer and minimizing the workload on your mini fridge, insulation can contribute to its longevity and performance.
Take the following steps to insulate your cabinet:
- Clean the inside of the cabinet and remove any debris.
- Measure and cut sheets of insulation foam to fit the interior walls and doors of the cabinet.
- Apply adhesive to one side of the foam sheets and press them firmly against the cabinet walls.
- Seal any gaps or seams with insulation tape to prevent air leaks.
- Consider adding a thermal barrier, such as reflective foil, to further enhance insulation.
By adhering to these steps, you can ensure proper ventilation and insulation when installing a mini fridge in your cabinet. This will not only enhance the lifespan and performance of your fridge but also improve energy efficiency in your kitchen.
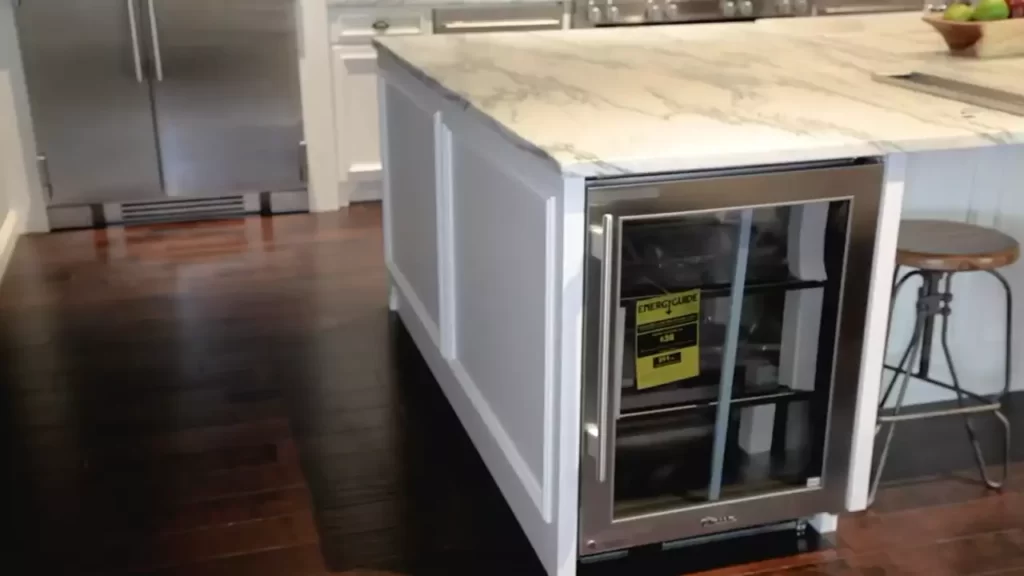
Positioning The Fridge In The Cabinet
Installing a mini fridge in a cabinet can not only save space but also give your kitchen or living area a streamlined and modern look. However, proper positioning is crucial to ensure the fridge fits correctly and functions optimally. In this section, we will walk you through the steps of placing the fridge correctly, aligning it with the cabinet openings, and securing it to prevent any movement.
Placing the Fridge Correctly
The first step in positioning your mini fridge in the cabinet is to ensure it is placed correctly. Follow these steps to ensure precise placement:
- Measure the dimensions of your cabinet and ensure it is spacious enough to accommodate the mini fridge.
- Measure the height, width, and depth of the fridge to confirm it will fit snugly within the cabinet.
- Clear out any obstructions or items from within the cabinet to make room for the fridge.
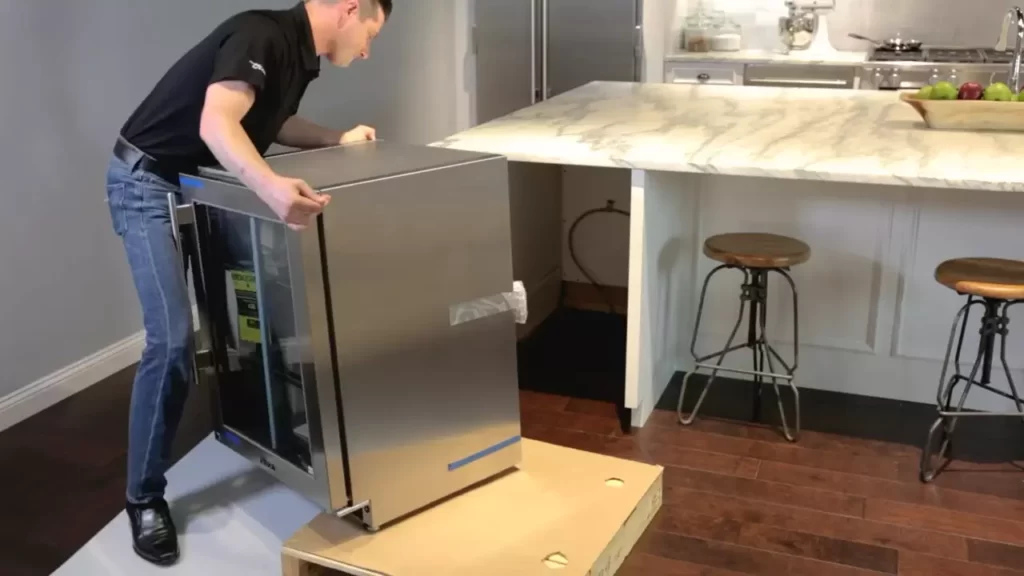
- Gently slide the mini fridge into the cabinet, ensuring it is centered and aligned with the front of the cabinet.
- Before proceeding to the next step, double-check the positioning from various angles to ensure it looks visually pleasing and symmetrical.
Aligning the Fridge with the Cabinet Openings
Once the fridge is placed correctly, the next step is to align it with the cabinet openings. Here’s how to do it:
- Check if the cabinet has any pre-cut openings for ventilation and access to electrical outlets.
- If there are no existing openings, use a measuring tape to mark the exact positions where you need to create the openings.
- Use a jigsaw or a suitable cutting tool to carefully create the required openings in the cabinet walls.
- Ensure the openings are aligned with the corresponding areas on the mini fridge, such as the ventilation grilles and power cord entry point.
- Smooth out any rough edges or splinters around the openings to prevent any damage to the fridge or its components.
Securing the Fridge to Prevent Movement
Securing the mini fridge within the cabinet is crucial to prevent any movement or accidents. Follow these steps to ensure its stability:
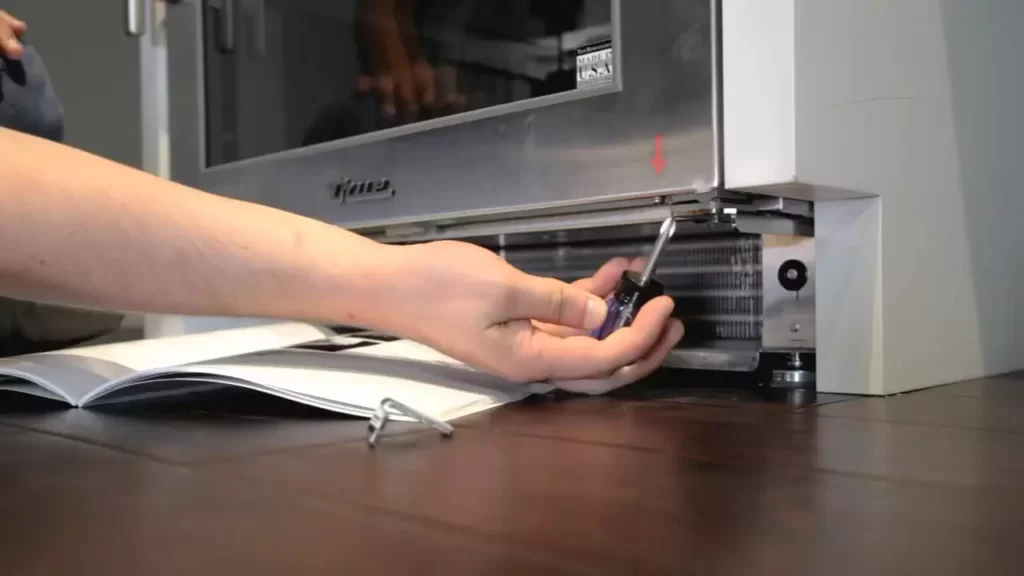
- Refer to the manufacturer’s instructions to locate the mounting brackets or screws that are needed to secure the fridge.
- Attach the mounting brackets or screws to the walls of the cabinet, ensuring they are positioned at appropriate points to hold the fridge securely.
- Slide the mini fridge back into the cabinet, making sure it fits snugly against the brackets or screws.
- Use a screwdriver or appropriate tool to tighten the brackets or screws, ensuring the fridge is securely fastened and does not move.
- Test the stability of the fridge by gently pushing and pulling it to ensure it is firmly held in place.
By following these steps, you can successfully position your mini fridge in a cabinet, creating a seamless and functional addition to your living space.

Connecting Power And Utilities
Connecting Power and Utilities is an essential step when it comes to installing a mini fridge in a cabinet. In this section, we will discuss three crucial aspects: locating an accessible power source, connecting the fridge to the electrical outlet, and ensuring proper water supply and drainage (if applicable). Let’s delve into each of these aspects to ensure a smooth and hassle-free installation process.
Locating an Accessible Power Source
Before you begin installing your mini fridge in the cabinet, it is vital to locate an accessible power source. You need to ensure that the power source is nearby and compatible with the electrical requirements of the mini fridge. Follow these steps to find an appropriate power source:
- Identify an electrical outlet within close proximity to the cabinet where you plan to install the mini fridge.
- Check the voltage and amperage requirements of your mini fridge, usually specified in the user manual or on the product label.
- Make sure that the electrical outlet can handle the power demand of the mini fridge without overloading. If necessary, consult an electrician to assess the electrical capacity of the outlet and make any necessary adjustments.
Connecting the Fridge to the Electrical Outlet
Now that you have located an accessible power source, it’s time to connect the mini fridge to the electrical outlet. Follow these steps to ensure a secure and efficient connection:
- Position the mini fridge near the electrical outlet with enough space to maneuver the power cord.
- Ensure the mini fridge is turned off and unplugged before proceeding.
- Check the power cord of the mini fridge for any damage or frayed wires. Do not proceed if you notice any signs of wear and tear.
- Insert the power cord plug into the electrical outlet firmly. Make sure it fits snugly and does not come loose easily.
- Switch on the mini fridge and verify that it is receiving power. You can do this by checking the interior light or any other indicators present on the fridge.
Ensuring Proper Water Supply and Drainage (if applicable)
If your mini fridge requires a water supply and drainage system, it is crucial to ensure its proper functioning. This step is typically applicable to mini fridges with built-in ice makers or water dispensers. Here’s how you can ensure proper water supply and drainage:
- Consult the mini fridge’s user manual to understand the specific water supply and drainage requirements.
- Locate the water supply valve and connect the fridge’s water line to it.
- Check for any leaks or drips along the water line connections and fix them if necessary.
- If required, connect the drain hose of the mini fridge to an appropriate drainage system.
- Test the water supply and drainage system by turning on any ice makers or water dispensers. Monitor for any irregularities and address them promptly.
By following these steps, you can successfully connect power and utilities for your mini fridge installed in a cabinet. Remember to exercise caution and consult professional help when needed. Now that you have completed this crucial step, you can move on to the next stage of installing and organizing your mini fridge for optimal efficiency.
Installing Additional Features
Once you have successfully installed your mini fridge in a cabinet, you may want to consider adding some additional features to enhance its functionality and aesthetic appeal. In this section, we will discuss three popular options: adding a cabinet door for a seamless look, incorporating roll-out shelves or drawers, and installing LED lighting for better visibility.
Adding a Cabinet Door for a Seamless Look
One way to create a polished and seamless appearance for your mini fridge cabinet is by adding a cabinet door. Not only does this give your space a more streamlined look, but it also helps to keep your mini fridge concealed when not in use. To install a cabinet door, follow these steps:
- Measure the dimensions of your mini fridge cabinet opening.
- Choose a cabinet door that matches your existing cabinetry or suits your desired aesthetic.
- Pre-drill holes on the cabinet door to align with the hinges.
- Attach the hinges to the cabinet door and then mount the door to the mini fridge cabinet. Make sure it opens and closes smoothly.
- Install a handle or knob on the cabinet door for easy access.
By adding a cabinet door, you can create a cohesive look in your kitchen or living space, while still enjoying the convenience of a mini fridge.
Incorporating Roll-out Shelves or Drawers
Including roll-out shelves or drawers in your mini fridge cabinet can greatly improve accessibility and organization. These features allow you to easily access items stored in the fridge without having to reach or bend down. Here’s how you can incorporate roll-out shelves or drawers:
- Measure the dimensions of your mini fridge cabinet to determine the size of the roll-out shelves or drawers.
- Purchase roll-out shelf hardware or drawer slides that can support the weight of the items you plan to store.
- Install the roll-out shelf hardware or drawer slides according to the manufacturer’s instructions.
- Attach the roll-out shelves or drawers to the hardware or slides.
By incorporating roll-out shelves or drawers, you can maximize the storage capacity of your mini fridge cabinet and improve the overall convenience of accessing items stored inside.
Installing LED Lighting for Better Visibility
Enhance the visibility of your mini fridge cabinet by installing LED lighting. LED lights are energy-efficient, long-lasting, and provide bright illumination to help you easily locate items in your fridge. Here’s how you can install LED lighting:
- Choose LED light strips or puck lights that fit the dimensions of your mini fridge cabinet.
- Clean the inside of the cabinet to ensure proper adhesion of the LED lights.
- Peel off the adhesive backing of the LED light strips or puck lights and carefully attach them to the desired locations inside the cabinet.
- Connect the LED lights to a power source, such as a wall outlet or battery pack.
- Test the LED lights to ensure they are working properly.
With LED lighting in your mini fridge cabinet, you can easily locate items even in low-light conditions and create a stylish ambiance in your space.
Safety And Maintenance Considerations
When it comes to installing a mini fridge in a cabinet, safety, and maintenance considerations are essential for ensuring the longevity and efficient functioning of the appliance. This section will discuss the various precautions that need to be taken to avoid potential hazards and risks, along with guidelines for cleaning, maintaining, and troubleshooting common issues.
Avoiding Potential Hazards and Risks
Installing a mini fridge in a cabinet requires careful planning and attention to detail to avoid any potential hazards or risks. Here are some important factors to consider:
- Choose a location that provides proper ventilation to prevent overheating of the fridge’s cooling system.
- Ensure that the cabinet is sturdy enough to support the weight of the fridge and does not pose any risk of toppling over.
- Leave sufficient space around the fridge to allow for airflow and prevent obstruction of the condenser coils.
- Secure the fridge in the cabinet using appropriate fasteners to prevent any movement or shifting that could lead to damage or accidents.
- Check the electrical outlet and wiring in the cabinet to ensure it meets the power requirements and is properly grounded to avoid electrical mishaps.
Cleaning and Maintaining the Fridge Regularly
Cleaning and maintaining your mini fridge on a regular basis is crucial for preserving its performance and lifespan. Follow these tips to keep your fridge in top condition:
- Unplug the fridge from the power source before performing any cleaning or maintenance tasks.
- Remove all items from the fridge and discard any expired or spoiled food.
- Use a mild detergent and warm water to clean the interior and exterior surfaces of the fridge.
- Pay special attention to cleaning the shelves, drawers, and door gaskets to remove any food residue or spills.
- Wipe down the condenser coils at the back of the fridge to remove dust or debris that can affect cooling efficiency.
- After cleaning, dry all surfaces thoroughly before plugging the fridge back in.
- Regularly defrost the freezer compartment if your mini fridge is equipped with one, to prevent ice buildup and maintain optimal cooling performance.
Troubleshooting Common Issues
Even with proper installation and maintenance, mini-fridges can encounter common issues. Here are some troubleshooting tips to help resolve these problems:
| Issue | Solution |
|---|---|
| The fridge is not cooling properly. | Check if the temperature settings are correct and adjust if needed. Ensure that the ventilation around the fridge is not obstructed, and clean the condenser coils if they are dirty. If the issue persists, contact a professional technician. |
| The fridge is making unusual noises. | Ensure that the fridge is level and stable. Some noise during operation is normal, but if the noise is excessive or unusual, it may indicate a problem with the compressor or other components. Contact a technician for further diagnostics and repairs. |
| The fridge door doesn’t seal properly. | Check if there is any debris or food stuck in the door gasket. Clean the gasket with warm, soapy water, and ensure that it is not torn or damaged. If the door still doesn’t seal properly, the gasket may need to be replaced. |
By following these safety guidelines, regular cleaning and maintenance routines, and troubleshooting tips, you can ensure the safety, efficiency, and longevity of your mini fridge installed in a cabinet.
Frequently Asked Questions Of How To Install Mini Fridge In Cabinet
Can I Put A Mini Fridge In A Cabinet?
Yes, you can put a mini fridge in a cabinet. It’s important to consider ventilation and electrical access for safety.
Can I Put Freestanding Mini Fridge Under Counter?
Yes, you can place a freestanding mini fridge under the counter.
Where Not To Put A Mini Fridge?
Do not place a mini fridge in direct sunlight, near a heat source, inside a closed cabinet, against a wall, or in an unventilated space.
Can A Refrigerator Be Put In A Closet?
Yes, a refrigerator can be placed in a closet as long as there is enough space for proper ventilation. Make sure to leave at least 6 inches of space around all sides and the back of the fridge to allow for air circulation.
Conclusion
Installing a mini fridge in a cabinet is a simple and practical solution for maximizing space and enhancing the aesthetics of your kitchen or living area. By following the step-by-step guide outlined in this blog post, you can easily complete this project and enjoy the convenience of a hidden and seamlessly integrated mini fridge.
So go ahead, get creative with your design, and make the most of your available space!