To install a medicine cabinet, follow these steps: Measure and mark the desired location on the wall. Use a stud finder to locate the wall studs and mark them.
Position the cabinet against the wall, aligning it with the marked studs. Use a level to ensure it is straight. Drill pilot holes into the studs and attach the cabinet using screws. Finally, insert the shelves and secure them in place.
Make sure to consult the manufacturer’s instructions for any specific guidelines. Installing a medicine cabinet is a straightforward and practical way to add storage space to your bathroom. Whether you need a place to keep your toiletries organized or want to enhance the overall appearance of your bathroom, a medicine cabinet offers convenience and style. By following a few simple steps, you can have your medicine cabinet securely mounted on the wall in no time. We will guide you through the installation process, making it easy for you to take on this DIY project. So, let’s get started and transform your bathroom with a well-installed medicine cabinet.
Factors To Consider
When it comes to installing a medicine cabinet in your bathroom, there are several factors to consider that will ensure you choose the right one for your space. These factors include the size and dimensions of the cabinet, the mounting options available, as well as the material and finishes. Each of these considerations is important in order to make a well-informed decision and to achieve a seamless installation. Let’s delve deeper into each of these factors.
Size and Dimensions
One of the first things to consider when choosing a medicine cabinet is its size and dimensions. The size of the cabinet will largely depend on the available space in your bathroom. Before making a purchase, it is essential to measure the area where you plan to install the cabinet. This will help you determine the appropriate width, height, and depth of the cabinet. It is also crucial to consider the storage needs and the number of shelves or compartments you require for your medications, toiletries, and other essentials. By carefully considering the size and dimensions, you can ensure that the medicine cabinet fits perfectly into your bathroom space.
Mounting Options
Another vital factor to consider is the mounting options available for the medicine cabinet. There are typically two types of mounting options: recessed and surface-mounted. Recessed cabinets are built into the wall, creating a seamless and streamlined look. They are ideal for bathrooms with limited space and provide a more polished aesthetic. Surface-mounted cabinets, on the other hand, are attached to the wall surface and are easier to install. They are a great option if you don’t want to make any modifications to your bathroom walls. Consider the pros and cons of each mounting option and choose the one that best suits your needs and preferences.
Material and Finishes
The material and finishes of a medicine cabinet play a significant role in its durability and visual appeal. Common materials used for medicine cabinets include wood, metal, and plastic. Wood cabinets offer a classic and elegant look, while metal cabinets provide a modern and sleek appearance. Plastic cabinets are often more affordable and easy to clean. In addition to material, consider the finishes available for the cabinet, such as painted, stained, or mirrored finishes. The finish should complement the overall style and color scheme of your bathroom. Carefully evaluating the material and finishes will ensure that you select a medicine cabinet that not only meets your functional needs but also enhances the aesthetic appeal of your bathroom.
Gather The Necessary Tools And Materials
Before you start installing your medicine cabinet, it is important to gather all the necessary tools and materials. This will save you time and frustration during the installation process. Here are the essential tools and materials you will need:
Screwdriver
A screwdriver is an indispensable tool when it comes to installing a medicine cabinet. You will use it to remove any existing screws, as well as to secure the new cabinet in place. Ensure you have a screwdriver that fits the screws provided with your cabinet to avoid damaging the screws or the cabinet.
Level
Having a level is essential to ensure that your medicine cabinet is properly aligned and straight. This tool will help you avoid any crooked installations, resulting in a more professional and aesthetically pleasing look. Make sure to use the level throughout the installation process to achieve a perfectly balanced cabinet.
Stud Finder
A stud finder is a valuable tool when installing a medicine cabinet. It allows you to locate the studs behind your wall, which are necessary to securely attach the cabinet. By finding the studs, you will be able to avoid damaging the drywall and ensure a sturdy installation. Use the stud finder to mark the locations of the studs before proceeding with the installation.
Measuring Tape
Accurate measurements are crucial to ensure a proper fit for your medicine cabinet. A measuring tape will help you measure the dimensions of the cabinet and the wall space where it will be installed. Take precise measurements to avoid any errors and ensure the cabinet fits perfectly in the designated area. Remember, a well-fitted cabinet adds both functionality and visual appeal to your bathroom.
Anchors and Screws
For a secure installation, you will need anchors and screws. Anchors provide extra support and stability, especially if you cannot attach the cabinet directly to a stud. Choose anchors and screws that are designed to handle the weight of your cabinet and are suitable for the type of walls you have in your bathroom. This will ensure a solid and long-lasting installation.
By gathering all these necessary tools and materials, you will be well-prepared for a successful installation of your medicine cabinet. Having everything you need at hand will save you time and allow for a smooth and hassle-free process.
Measure And Mark The Placement
Installing a medicine cabinet requires careful measurements and precise markings to ensure a seamless and functional addition to your bathroom. In this section, we will walk you through the process of measuring and marking the placement of your medicine cabinet, step by step.
Locate studs and mark them
The first step in installing your medicine cabinet is to locate the studs behind the wall. Find a stud finder tool and run it along the wall until it beeps or lights up, indicating the presence of a stud. Once you have located a stud, mark its location using a pencil. Repeat this process to find and mark the location of all the studs that you will be using to mount your medicine cabinet.
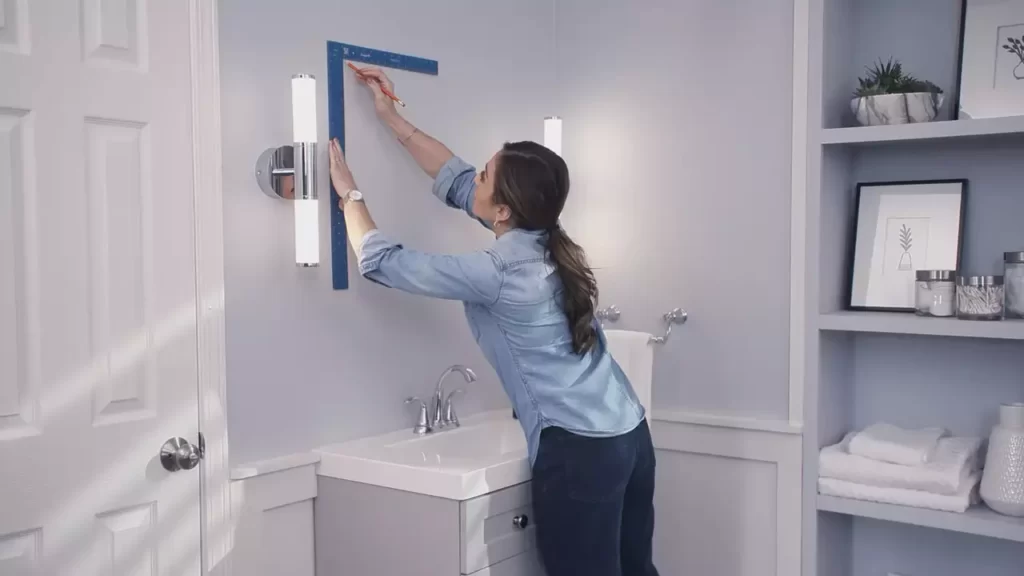
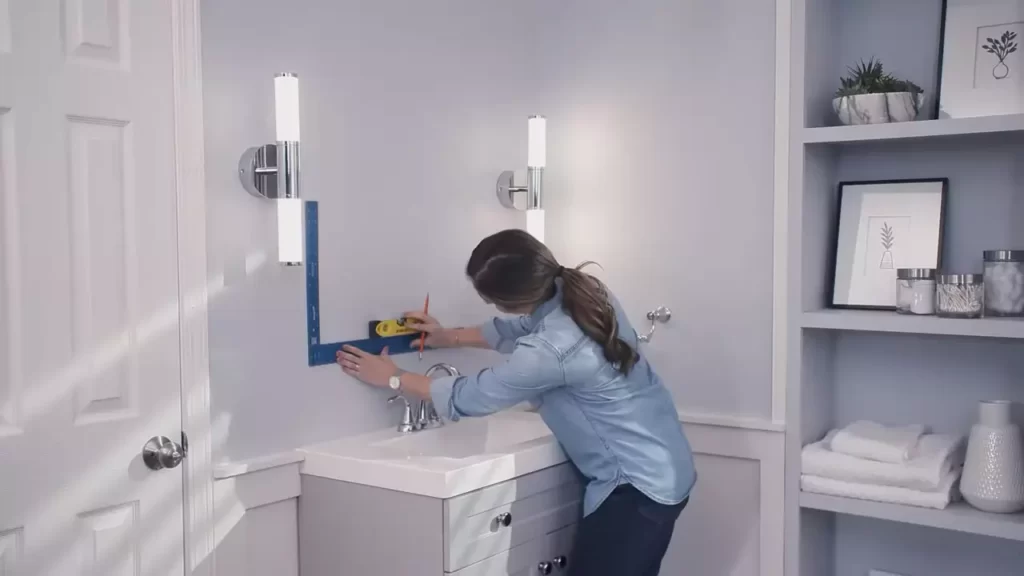
Determine the desired height and mark it
Next, determine the desired height at which you want to install your medicine cabinet. Consider factors such as convenience and accessibility when deciding on the height. Once you have decided on the height, use a measuring tape to measure and mark it on the wall. Make sure to use a level to ensure that the mark is perfectly horizontal.
Measure the width and mark the centerline
With the height marked, it’s now time to measure the width of your medicine cabinet and mark the centerline on the wall. Use a measuring tape to determine the exact width of the cabinet and divide it by two to find the center. Mark the centerline on the wall, ensuring it aligns with the height mark you made earlier. This will help you position the cabinet accurately.
By following these steps to measure and mark the placement of your medicine cabinet, you are setting the foundation for a successful installation. The next section will guide you through the actual process of installing your cabinet, so stay tuned!
Mounting Option: Surface Mount
Mounting a medicine cabinet on the wall can be a convenient and stylish addition to your bathroom. One popular option for mounting a medicine cabinet is the surface mount. This method involves attaching the cabinet directly to the wall, eliminating the need for cutting into the wall and creating a recessed space. If you’re considering a surface mount for your medicine cabinet, here are the steps to follow.
Attach the mounting brackets to the wall
Start by determining the desired height and location for your medicine cabinet. Measure and mark the positions where the mounting brackets should be placed. Using a level to ensure accuracy, attach the brackets to the wall using screws suitable for your wall type. It’s important to securely fasten the brackets to provide proper support for the cabinet.
Align and secure the cabinet onto the brackets
Once the brackets are in place, it’s time to align the cabinet onto them. Carefully lift the medicine cabinet and position it against the wall, aligning the brackets with the corresponding slots or holes on the back of the cabinet. Make sure the cabinet is level and centered before moving on to the next step.
Check for level and make adjustments
After the cabinet is in place, check for level using a spirit level. This step is crucial to ensure the proper functionality and aesthetics of the cabinet. If adjustments are needed, use shims or adjust the positioning of the brackets accordingly. Take your time to make sure the cabinet is perfectly level before proceeding.
Now that your surface-mounted medicine cabinet is securely attached to the wall, it’s ready to be used. This mounting option provides a sleek and modern look while also being relatively easy to install. You can now enjoy the convenience of having your medications and toiletries within reach while adding a touch of style to your bathroom.
Remember to follow the manufacturer’s instructions and recommendations throughout the installation process. By doing so, you’ll ensure that your medicine cabinet is mounted securely and will provide years of reliable service.
Mounting Option: Recessed Mount
When it comes to installing a medicine cabinet, one of the mounting options you may consider is the recessed mount. This type of installation offers a sleek and integrated look, as the cabinet is mounted directly into the wall. If you’re interested in achieving a seamless finish, read on to learn how to install a recessed medicine cabinet.
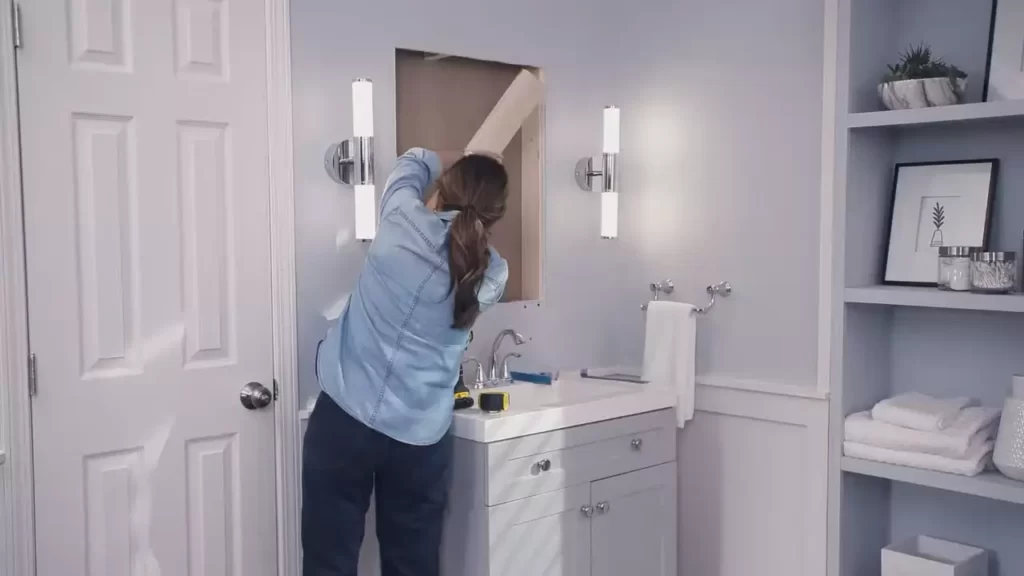
Create an opening in the wall
The first step in installing a recessed medicine cabinet is to create an opening in the wall. Before you begin, make sure you have all the necessary tools such as a stud finder, a level, a pencil, a drywall saw, and safety goggles.
Follow these steps to create the opening:
- Locate a suitable spot on the wall where you want to install the cabinet. Use a stud finder to identify any studs or electrical wires that may be hidden behind the wall.
- Once you’ve identified a safe area, use a level and a pencil to mark the outline of the opening. Make sure the dimensions match the size of the cabinet.
- Put on your safety goggles and use a drywall saw to carefully cut along the marked outline. Take your time to ensure a clean and precise cut.
- Remove the cut section of drywall to create the opening for the cabinet. Check the depth and adjust if necessary to accommodate the cabinet.
Install framing support
After creating the opening, the next step is to install framing support to ensure the cabinet is securely mounted. Follow these steps:
- Measure and cut two pieces of 2×4 lumber to fit the height and width of the opening. These will serve as the horizontal and vertical framing supports.
- Position the vertical support inside the opening, against the wall studs. Use a level to ensure it is plumb, and secure it to the studs using screws.
- Place the horizontal support along the top of the opening, flush with the vertical support. Secure it to the studs using screws.
- Double-check the alignment and stability of the framing supports to ensure they can properly hold the weight of the cabinet.
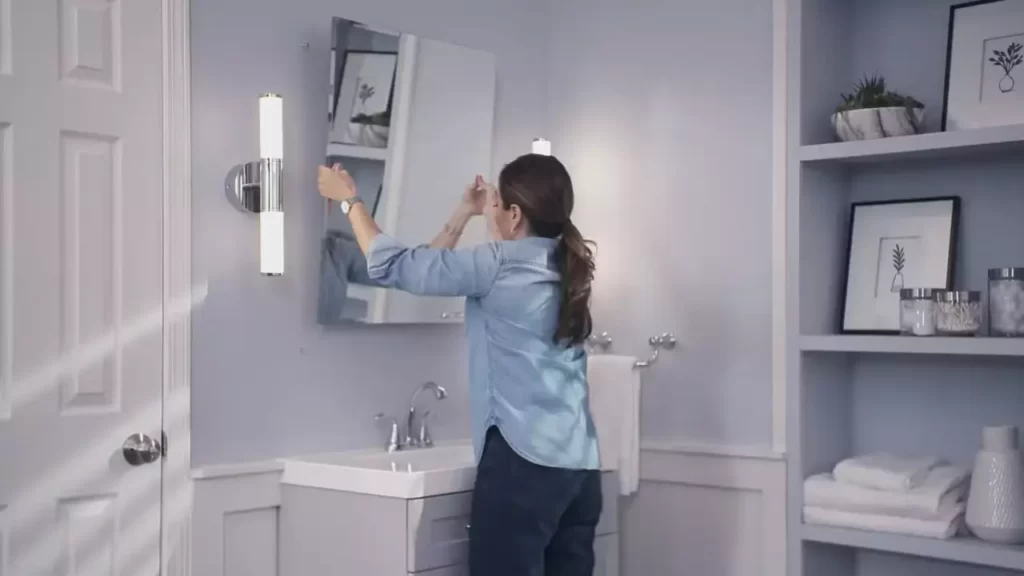
Slide the cabinet into the opening and secure it
With the framing support in place, it’s time to slide the medicine cabinet into the opening and securely mount it. Follow these final steps:
- Carefully position the cabinet into the opening, ensuring it fits snugly against the framing supports.
- Use screws or mounting brackets provided with the cabinet to secure it to the framing supports. Make sure to follow the manufacturer’s instructions for proper installation.
- Check the alignment of the cabinet using a level and make any necessary adjustments to ensure it is perfectly horizontal and vertical.
- Finally, test the cabinet by opening and closing its doors to ensure smooth operation.
By following these steps, you’ll be able to successfully install a recessed medicine cabinet in your bathroom. Remember to take your time during the installation process and always refer to the manufacturer’s instructions for specific guidance related to your cabinet.
Adjusting Shelves And Doors
Install shelves and adjust their positions if needed
Proper installation and adjustment of shelves in your medicine cabinet are essential for optimal storage and organization of your medicines, toiletries, and other items. Follow these simple steps to install and adjust the shelves:
- Start by positioning the cabinet door horizontally on a flat surface.
- Insert the shelves into the pre-drilled holes in the cabinet’s interior, adjusting their positions based on your needs. Make sure to leave enough space between each shelf to accommodate your items effectively.
- If the shelves don’t fit correctly, you may need to readjust them by carefully removing them from the holes and placing them at a different height.
- Ensure that each shelf sits firmly and securely in its position. You can gently push down on each shelf to make sure it is stable.
By taking the time to properly install and adjust the shelves, you can maximize the storage space inside your medicine cabinet and create a more organized and functional bathroom space.
Ensure that the doors open and close smoothly
A medicine cabinet’s doors should open and close smoothly to allow quick and easy access to your items. Here’s how to ensure smooth door operation:
- Inspect the hinges to ensure they are properly aligned and secure. If any screws are loose, use a screwdriver to tighten them.
- If the doors are not aligned correctly, you may need to adjust the hinges. Loosen the screws holding the hinges in place just enough to allow movement.
- With a gentle push or pull, adjust the door’s position until it aligns properly with the cabinet frame. Once aligned, tighten the screws to secure the hinges.
- Test the door by opening and closing it several times to ensure smooth operation. If necessary, make further adjustments until the door glides effortlessly.
By following these steps, you can ensure that your medicine cabinet doors operate smoothly, providing convenient access to your stored items without any hassle.
Tighten any loose screws or hardware
Over time, the screws or hardware holding your medicine cabinet together may become loose due to regular usage and vibrations. Here’s how to tighten them:
- Carefully inspect the cabinet for any visible signs of loose screws or hardware.
- Using a screwdriver or an appropriate tool, tighten any loose screws or nuts, ensuring that everything is securely fastened.
- Pay extra attention to the areas around the hinges, handles, and other attachment points, as these are common places where loosening may occur.
- After tightening all the screws, test the stability of the cabinet by gently shaking it. If you notice any remaining movement or instability, double-check the screws and hardware.
By regularly checking and tightening any loose screws or hardware, you can keep your medicine cabinet securely together and prevent any potential accidents or damage.
Cleaning And Maintenance
Wipe down the cabinet and mirrors
To keep your medicine cabinet looking clean and shiny, it’s important to regularly wipe down both the cabinet and mirrors. This will not only remove any dust or fingerprints but also prevent the buildup of dirt and grime. To do this, you can simply use a soft cloth or microfiber cloth dampened with water or a mild cleaning solution. Make sure to avoid using abrasive cleaners or rough materials that may scratch the surface.
Clean any spills or stains promptly
Accidental spills or stains can happen around your medicine cabinet, especially if it’s located in a bathroom or kitchen. It’s crucial to clean up any spills or stains promptly to prevent permanent damage or discoloration. When dealing with liquid spills, blot the area gently with a clean cloth or paper towel. For stubborn stains, you can use a mild soap or cleaning solution diluted in water. Remember to fully rinse and dry the affected area to avoid leaving any residue behind.
Regularly check for loose screws or other issues
Regularly inspecting your medicine cabinet for any loose screws or other issues is essential in maintaining its stability and functionality. Over time, screws may become loose due to the constant opening and closing of the cabinet. To ensure your cabinet remains secure, thoroughly check each screw and tighten if necessary using a screwdriver. Additionally, be on the lookout for any other issues such as loose hinges or damaged parts that may affect the overall performance of the cabinet. Address these issues promptly to prevent further damage and ensure the longevity of your medicine cabinet.
In conclusion, cleaning and maintaining your medicine cabinet is a relatively simple task that can extend its lifespan and enhance its appearance. Remember to wipe down the cabinet and mirrors regularly, clean up spills promptly, and check for any loose screws or other issues. By implementing these simple steps, you’ll be able to enjoy a clean and functional medicine cabinet for years to come.
Frequently Asked Questions Of How To Install Medicine Cabinet
Can You Install A Medicine Cabinet Yourself?
Yes, you can install a medicine cabinet yourself. It’s a simple DIY project that doesn’t require professional assistance. Just follow the instructions, use basic tools, and ensure proper wall anchoring.
How Are Medicine Cabinets Attached To The Wall?
Medicine cabinets are attached to the wall using screws or mounting brackets. Measure the desired height, mark the area on the wall, and use a level to ensure it is straight. Drill holes into the marked spots, then secure the cabinet by attaching it to the wall with screws or mounting brackets.
Can You Mount A Medicine Cabinet On Drywall?
Yes, you can mount a medicine cabinet on drywall. It is recommended to use anchors or studs for secure installation. Make sure to follow the manufacturer’s instructions and use appropriate tools for mounting.
How Do You Hang A Bathroom Cabinet Without Drilling?
To hang a bathroom cabinet without drilling, you can use adhesive hooks or adhesive tape specifically designed for heavier objects. Make sure the surface is clean and dry, and follow the instructions on the adhesive product for proper application. This method allows for easy installation and avoids damaging your walls.
Conclusion
Installing a medicine cabinet can be a simple and rewarding DIY project. By following the step-by-step guide outlined in this blog, you can easily transform your bathroom with a stylish and functional addition. Remember to measure carefully, gather all necessary tools, and take your time to ensure a seamless installation.
With these tips, you’ll have a beautiful and organized medicine cabinet in no time.