To install an LG portable air conditioner, you need to follow a few simple steps. First, position the unit near a power outlet and make sure the exhaust hose is properly attached.
Then, secure the window installation kit in the desired window, ensuring a tight seal. Finally, plug in the unit and adjust the settings as needed. This installation process will allow you to conveniently cool your space with the LG portable air conditioner.
Cool down with ease by following these steps. Whether in your home or office, installing the LG portable air conditioner is a straightforward process. With its portable design and efficient cooling capabilities, this unit is a reliable choice for temperature control. Keep reading to learn more about the quick and easy installation process for the LG portable air conditioner.
Preparing For Installation
Before you start installing your LG portable air conditioner, it’s important to prepare your space and gather all the necessary tools and materials. Taking these steps will help ensure a smooth and successful installation process.
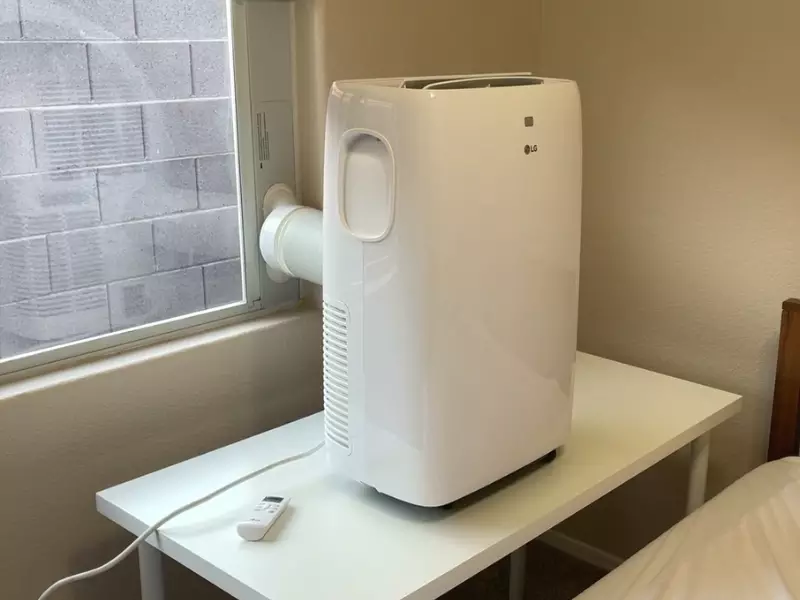
Choosing the right location for your air conditioner
One of the first steps in preparing for the installation of your LG portable air conditioner is choosing the right location. When selecting the spot, it’s crucial to consider several factors:
- The proximity to an electrical outlet: Ensure that the chosen location is near a suitable electrical outlet to power the air conditioner.
- Adequate ventilation: Opt for a space with proper ventilation, such as a window or a door, to allow for the proper circulation of air.
- Avoiding direct sunlight: Try to select a spot that is shielded from direct sunlight, as this can affect the unit’s performance and efficiency.
Checking the window dimensions and electrical requirements
Once you’ve chosen the location for your LG portable air conditioner, it’s important to check the window dimensions and ensure that the electrical requirements are met.
Window dimensions: Measure the width of your window to ensure that your LG portable air conditioner will fit snugly. Write down the measurements for reference.
Electrical requirements: Refer to the user manual or specifications for your LG portable air conditioner to determine the electrical requirements. Make sure that the electrical outlet in your chosen location meets the necessary voltage and amperage requirements.
Gathering the necessary tools and materials
Before you begin the installation process, gather all the necessary tools and materials to ensure a seamless experience. Here’s a list of the items you’ll likely need:
| Tools | Materials |
|---|---|
| Screwdriver | Window sealing kit |
| Tape measure | Drainage hose |
| Pliers | Weatherstripping |
| Level | Insulation foam |
Having these tools and materials on hand will ensure that you’re prepared and ready to install your LG portable air conditioner efficiently.
By following these steps and adequately preparing for the installation of your LG portable air conditioner, you can enjoy a cool and comfortable indoor environment in no time. Stay tuned for our next blog post, where we’ll guide you through the installation process step by step.
Installing The Window Kit
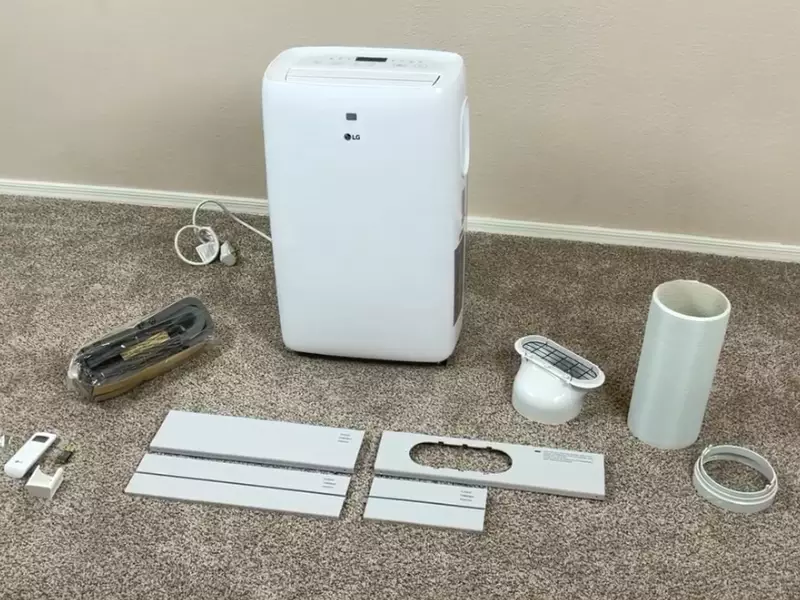
Installing the window kit is an essential step when setting up your LG portable air conditioner. The window kit allows you to properly exhaust the hot air generated by the air conditioner, ensuring efficient cooling and maintaining the desired temperature in your room. In this section, we will walk you through the process of assembling the window kit components, adjusting the window bracket for a secure fit, and attaching the exhaust hose to the window bracket.
Assembling the window kit components
To get started, gather all the components of the window kit. The window kit typically includes a window bracket, adjustable panels, foam weatherstripping, and screws. Follow these steps to assemble the window kit:
- Measure the dimensions of your window to ensure a proper fit.
- Attach the adjustable panels to the window bracket, aligning them according to the width of your window.
- Secure the panels in place with the provided screws.
- Apply the foam weatherstripping to the window bracket to create a seal between the kit and the window.
Once you have assembled the window kit components, you are ready to proceed to the next step.
Adjusting the window bracket for a secure fit
The window bracket allows you to securely mount the window kit in your window. Follow these steps to adjust the window bracket for a secure fit:
- Place the assembled window kit in the desired window.
- Extend the window bracket on both sides of the window to match its width.
- Make sure the window bracket is level and centered in the window opening.
- Tighten the screws on the window bracket to securely hold it in place.
By properly adjusting the window bracket, you can ensure a stable and secure installation for your LG portable air conditioner.
Attaching the exhaust hose to the window bracket
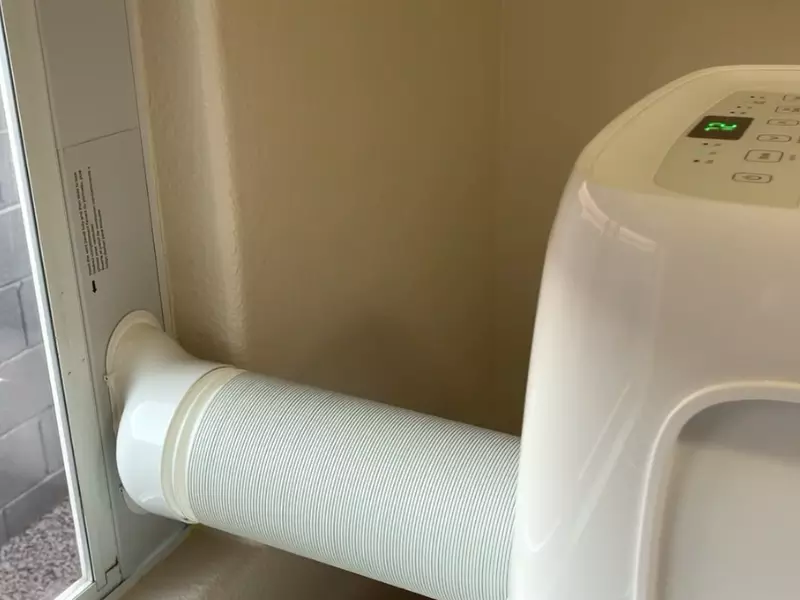
Now that the window kit is securely installed, it’s time to attach the exhaust hose. Follow these steps to complete the installation:
- Connect one end of the exhaust hose to the back of the air conditioner unit.
- Place the other end of the exhaust hose into the designated slot on the window bracket.
- Ensure a tight fit between the exhaust hose and the window bracket to prevent any air leakage.
Once you have attached the exhaust hose to the window bracket, your LG portable air conditioner is ready to provide cool and comfortable air to your space.
Mounting The Air Conditioner Unit
Mounting the air conditioner unit properly is crucial for its efficient and effective performance. In this section, we will guide you through the steps of placing the air conditioner in the designated location, securing the unit to prevent movement and vibration, and connecting the exhaust hose to the air conditioner.
Placing the air conditioner in the designated location
To begin the installation process, you need to select the perfect spot for your LG portable air conditioner. Before deciding on the location, keep in mind the following considerations:
- Choose an area near a window or any other suitable opening to allow for easy installation of the exhaust hose.
- Avoid placing the unit near curtains, furniture, or other objects that may obstruct proper airflow.
- Ensure there is a power outlet nearby to connect the unit.
- Keep the unit away from direct sunlight, as it can affect its cooling efficiency.
Once you have found the perfect spot, you can proceed to place the air conditioner in position. Make sure it is stable and level to prevent any water leakage or damage. You may refer to the user manual for specific instructions on the recommended positioning of the air conditioner.
Securing the unit to prevent movement and vibration
After placing the unit in the designated location, it is essential to secure it properly to prevent any movement or vibration. This will not only ensure the longevity of the air conditioner but also reduce any noise generated during operation.
One way to secure the unit is by using mounting brackets or braces, which are typically provided with the LG portable air conditioner. Follow these steps to secure the unit:
- Identify the mounting points on the air conditioner and the corresponding holes on the wall or window frame.
- Fix the brackets or braces securely to the wall or window frame using screws or other suitable fasteners.
- Align the mounting points on the air conditioner with the brackets or braces.
- Secure the air conditioner to the brackets or braces using screws or other provided attachments.
- Ensure the unit is firmly attached and does not move or wobble when gently shaken.
Connecting the exhaust hose to the air conditioner
Now that the air conditioner unit is securely mounted, it’s time to connect the exhaust hose. The exhaust hose helps to remove hot air generated by the air conditioner. Follow these steps to connect the hose:
- Locate the exhaust vent on the back of the air conditioner unit.
- Insert one end of the exhaust hose into the exhaust vent.
- Twist the hose clockwise to secure it in place.
- Extend the other end of the hose towards the window or opening.
- Attach the hose to the window kit or any other suitable adapter provided with the air conditioner.
- Seal any gaps between the exhaust hose, window kit, or adapter using tape or other sealing materials.
Ensure that the exhaust hose is properly aligned and does not have any sharp bends or kinks, as this can restrict airflow and affect the performance of the air conditioner.
By following these steps, you will be able to mount your LG portable air conditioner correctly. Remember to refer to the user manual for any specific instructions related to your model. Enjoy staying cool and comfortable during those warm summer days!
Powering And Testing The Air Conditioner
Welcome to the step-by-step guide on powering and testing your LG portable air conditioner. Properly plugging in the air conditioner, adjusting the settings on the control panel, and testing its functionality are crucial steps to ensure effective cooling. Follow the instructions below to get your air conditioner up and running in no time.
Plugging the air conditioner into a dedicated electrical outlet
- Before plugging in your LG portable air conditioner, ensure that the unit is positioned near a dedicated electrical outlet. This outlet should have the appropriate voltage and amperage rating for your air conditioner. Refer to the product manual for the specific electrical requirements.
- Carefully inspect the power cord of the air conditioner for any damages or frayed wires. If you notice any issues, do not proceed and contact a professional for assistance.
- Insert the plug of the air conditioner into the dedicated electrical outlet and ensure a secure connection is made.
- Do not use extension cords or power strips, as they may not provide sufficient power and could pose a safety risk.
- Once the air conditioner is properly plugged in, you are ready to move on to adjusting the settings on the control panel.
Adjusting the settings on the control panel
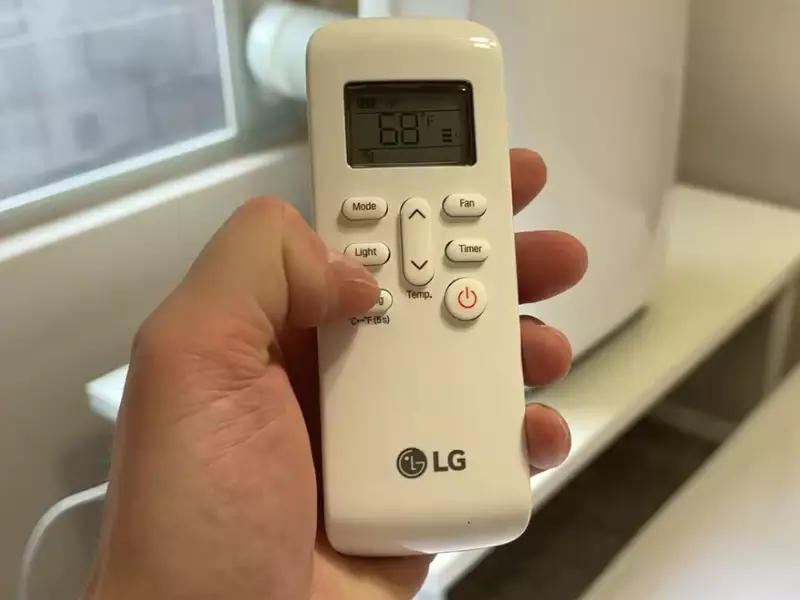
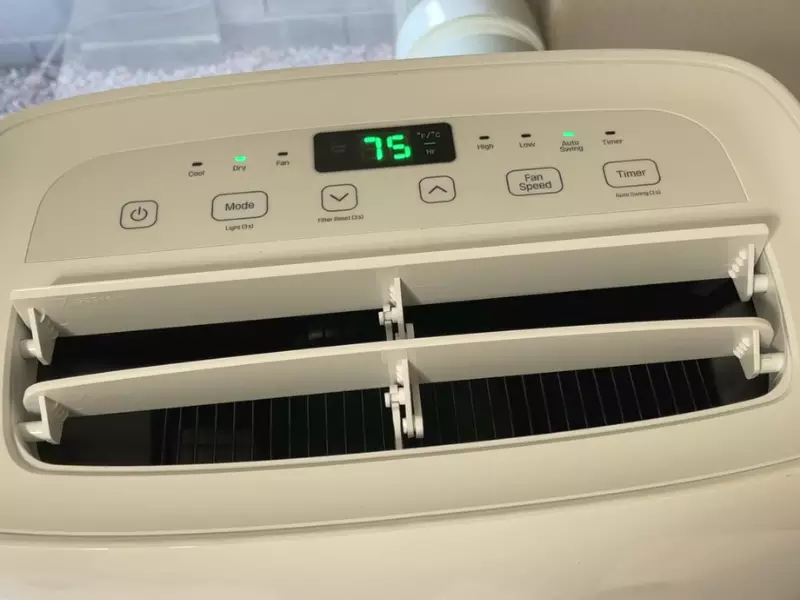
- Locate the control panel on your LG portable air conditioner. It is typically located on the top or front of the unit.
- Turn on the air conditioner by pressing the “Power” button. The control panel should light up and display the current settings.
- Adjust the temperature setting to your desired level using the up and down buttons. Select a temperature that will provide optimal comfort in your space.
- Explore the different operating modes available, such as Cool, Fan, or Dehumidify. Select the mode that suits your cooling needs.
- Some LG portable air conditioners come with additional features, such as a timer or sleep mode. Familiarize yourself with these features and adjust them as desired.
Testing the functionality of the air conditioner
Once you have plugged in your LG portable air conditioner and adjusted the settings on the control panel, it’s time to test its functionality. Follow the steps below to ensure proper functioning of the air conditioner:
- Allow the air conditioner to run for a few minutes to cool down the room.
- Feel the air coming out of the air conditioner. It should be cool and refreshing.
- Listen for any unusual sounds or vibrations coming from the unit. If you notice any abnormalities, turn off the air conditioner and contact customer support for assistance.
- Check if the air conditioner is effectively cooling the room. If you feel that the cooling is inadequate, consider adjusting the temperature setting or contacting an HVAC professional for further evaluation.
Congratulations! You have successfully powered and tested your LG portable air conditioner. Enjoy the cool air and stay comfortable throughout the summer season.
Troubleshooting Common Installation Issues
Installing an LG portable air conditioner can be a great way to stay cool and comfortable during the hot summer months. However, sometimes, installation issues can arise, causing gaps or air leaks, improper cooling or airflow, or excessive noise and vibrations. In this section, we will address these common installation problems and provide you with some simple troubleshooting steps to resolve them.
Dealing with gaps or air leaks around the window kit
One common issue many people face when installing an LG portable air conditioner is gaps or air leaks around the window kit. These gaps can occur due to improper installation or a poor fit between the window kit and the window. Here are some steps you can take to address this problem:
- Ensure that the window kit is properly installed. Make sure all the components are securely connected and there are no gaps.
- Inspect the window and the window frame for any cracks or gaps. If you find any, use weatherstripping or caulk to seal them and prevent air leaks.
- Consider using foam insulation tape to create a tight seal between the window kit and the window. This will help prevent any gaps or air leaks.
Addressing issues with improper cooling or airflow
If you notice that your LG portable air conditioner is not cooling properly or there is limited airflow, there may be a few causes for this. Here are some troubleshooting tips to resolve these issues:
- Check the air filter. A clogged or dirty filter can restrict airflow and reduce cooling efficiency. Remove the filter and clean or replace it if necessary.
- Inspect the exhaust hose for any obstructions or kinks. Straighten the hose if needed and ensure there are no blockages that could restrict airflow.
- Make sure the unit is positioned correctly. It should be placed away from any walls or furniture that could obstruct airflow.
- Check the thermostat settings. Ensure that the temperature is set to a level that allows the air conditioner to cool the room effectively.
Troubleshooting excessive noise or vibrations
If your LG portable air conditioner is producing excessive noise or vibrations, it can be quite annoying. Here’s how you can troubleshoot and address this issue:
- Check for any loose components. Make sure all screws and fasteners are tightly secured.
- Ensure that the unit is placed on a stable surface. If it is on an uneven surface, try repositioning it on a more stable area.
- Inspect the fan blades for any debris or damage. Clean the blades and ensure they are not hitting any obstructions.
- If the noise persists, it may be a mechanical issue. In such cases, it is best to contact LG customer support for further assistance.
By following these troubleshooting steps, you can easily resolve common installation issues with your LG portable air conditioner. Remember to always refer to the user manual for specific instructions and contact customer support if you encounter any difficulties.
Maintaining And Caring For The Air Conditioner
Proper maintenance and care are essential for keeping your LG portable air conditioner running efficiently and effectively. By following a few simple steps, you can ensure the longevity and optimal performance of your air conditioner. In this section, we will discuss three important aspects of maintaining and caring for your LG portable air conditioner: cleaning the air filters regularly, removing and properly storing the air conditioner during the off-season, and scheduling professional maintenance when necessary.
Cleaning the air filters regularly for optimal performance
To maintain optimal performance, it’s crucial to clean the air filters of your LG portable air conditioner regularly. Over time, dust, debris, and other particles can accumulate, which can hinder the airflow and reduce the cooling capacity of the unit. Follow these steps to clean the air filters:
- Ensure that the air conditioner is turned off and unplugged before starting the cleaning process.
- Locate the air filter compartment. In most LG portable air conditioners, it is located at the front of the unit.
- Open the compartment and remove the air filters.
- Use a vacuum cleaner or a soft brush to remove the dust and debris from the filters.
- If the filters are heavily soiled, you can wash them with mild soap and water. Ensure they are completely dry before placing them back into the unit.
- Once the filters are clean and dry, place them back into the air filter compartment, ensuring they are securely in place.
By cleaning the air filters regularly, you can ensure that your LG portable air conditioner can maintain optimal cooling performance, improve indoor air quality, and extend the lifespan of the unit.
Removing and properly storing the air conditioner during the off-season
During the off-season or when you do not need to use your LG portable air conditioner for an extended period, it is important to remove and store it properly. This helps protect the unit from dust, moisture, and other potential hazards. Follow these steps to remove and store your air conditioner:
- Switch off and unplug the air conditioner from the power source.
- Ensure that the unit is completely dry before proceeding to the next step.
- Detach the exhaust hose from the air conditioner.
- Gently remove any excess moisture from the hose and air conditioner with a soft cloth.
- Store the air conditioner and its components in a clean, dry, and well-ventilated area.
- Consider covering the unit with a protective cover or bag to prevent dust and debris from accumulating.
Properly storing your LG portable air conditioner during the off-season will help maintain its performance and extend its lifespan.
Scheduling professional maintenance when necessary
While regular cleaning and storage can go a long way in ensuring the optimal performance of your LG portable air conditioner, it’s important to schedule professional maintenance when necessary. A trained technician can inspect the unit, check for any potential issues, and perform necessary repairs or maintenance tasks. Professional maintenance can help identify and address any underlying problems before they escalate and cause significant damage to the air conditioner. Be sure to follow the manufacturer’s recommendations on when to schedule professional maintenance, typically once a year.
By following these maintenance and care tips, you can ensure that your LG portable air conditioner performs at its best, provides optimal cooling, and lasts for many years to come.
Frequently Asked Questions On How To Install Lg Portable Air Conditioner
Does A LG Portable Air Conditioner Need A Drain Hose?
Yes, an LG portable air conditioner requires a drain hose. The drain hose allows the unit to remove excess moisture and condensation from the air, preventing it from building up and causing damage to the unit.
How To Install A Lg Room Air Conditioner?
To install an LG room air conditioner:
1. Choose a suitable location near a power outlet.
2. Remove the front grille and mounting plate from the unit.
3. Attach the mounting plate to the wall using screws.
4. Lift the air conditioner onto the mounting plate and secure it.
5. Connect the unit to the power supply and test for proper operation.
How Do You Hook Up A Portable Air Conditioner?
To hook up a portable air conditioner, follow these steps:
1. Position the unit near a window or ventilation source.
2. Attach the exhaust hose to the back of the unit.
3. Extend the hose to the window and secure it.
4. Plug in the unit to an electrical outlet.
5. Adjust the settings and enjoy the cool air.
How Do I Connect My LG air Conditioner?
To connect your LG air conditioner, follow these steps:
1. Make sure the unit is plugged into a power outlet.
2. Use the remote control or touchpad on the unit to turn it on.
3. Set the desired temperature and fan speed using the controls.
4. Adjust the airflow direction if necessary.
5. Enjoy the cool air!
Conclusion
Installing an LG portable air conditioner is a simple and straightforward process that can provide immediate relief from the scorching heat. By carefully following the step-by-step instructions outlined in this blog post, you can effortlessly cool down your space and enjoy a more comfortable environment.
Remember to consider the positioning of the unit, ensure proper ventilation, and maintain the unit regularly for optimal performance. Stay cool and beat the heat with your newly installed LG portable air conditioner!
