To install glass block with mortar, start by preparing the work area and gathering the necessary materials. Measure and mark the location of each block, then mix the mortar according to the instructions.
Apply a layer of mortar to the marked area and press the glass block firmly into place. Repeat this process for each block, making sure to leave a small gap between them for expansion. Allow the mortar to dry for at least 24 hours before grouting and sealing the glass block installation.
Choosing The Right Tools And Materials
When it comes to installing glass block with mortar, selecting the right tools and materials is key to ensure a successful and durable installation. In this guide, we will walk you through the essential tools and materials needed for glass block installation, how to select the appropriate mortar for the job, and the safety precautions you need to take when working with glass blocks.
Essential tools and materials for glass block installation
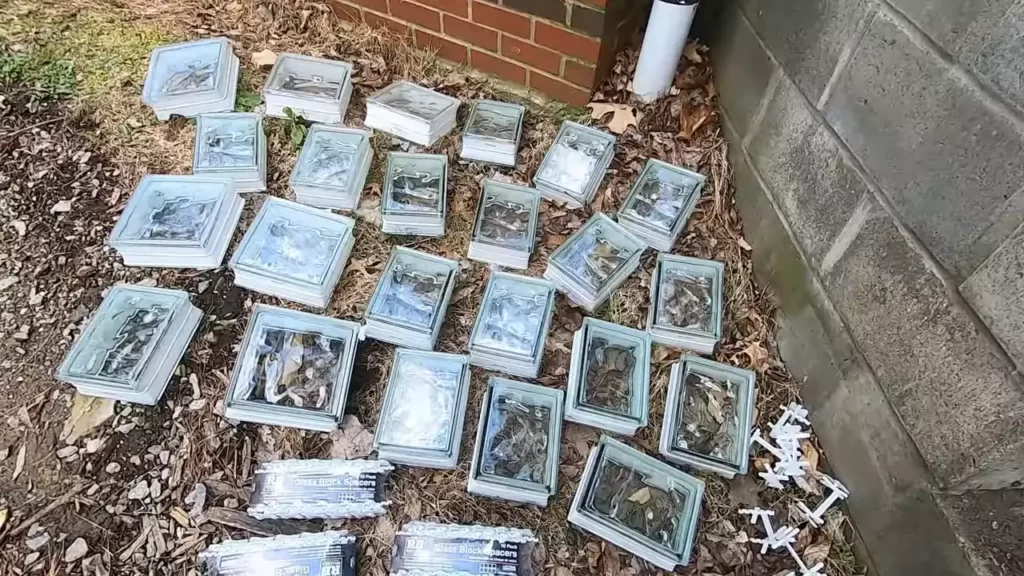
Before you begin your glass block installation project, it’s important to gather all the necessary tools and materials. Here is a comprehensive list of what you’ll need:
| Tools | Materials |
|---|---|
| – Glass block spacers | – Glass blocks |
| – Glass block mortar | – Mortar mixing tray |
| – Trowel | – Mortar mixing paddle |
| – Level | – Plastic sheeting |
| – Masonry saw or glass block diamond blade | – Wetting agent (optional) |
| – Chalk line | – Rubber gloves |
| – Caulking gun | – Safety glasses |
Selecting the appropriate mortar for the job
Choosing the right mortar is crucial for a secure and long-lasting glass block installation. There are different types of mortar available, but for glass block installation, it’s best to use a mortar specifically formulated for this purpose. It should have a high bond strength and be resistant to water and temperature changes.
Make sure to read the manufacturer’s instructions and choose a mortar that is suitable for your specific project needs. Using the right mortar will ensure that your glass blocks are properly supported and securely held in place.
Safety precautions for working with glass blocks
Working with glass blocks requires special precautions to ensure your safety. Here are a few important safety guidelines to follow:
- Wear rubber gloves and safety glasses to protect your hands and eyes from any potential injuries.
- Place plastic sheeting over the work area to protect surrounding surfaces and keep the area clean.
- If using a wetting agent to aid in mortar application, follow the manufacturer’s instructions and take necessary precautions.
- Be cautious when using a masonry saw or glass block diamond blade. Follow proper safety guidelines and wear appropriate protective gear.
- Keep the work area well-ventilated to minimize exposure to dust and fumes.
By following these safety precautions, you can ensure a safe and smooth glass block installation process.
Preparing The Work Area
When it comes to installing glass blocks with mortar, preparing the work area is an essential step that shouldn’t be overlooked. Properly preparing the installation area will ensure a smooth and successful installation process. In this article, we will guide you through the necessary steps to follow when preparing the work area for installing glass blocks with mortar.
Measuring and marking the installation area
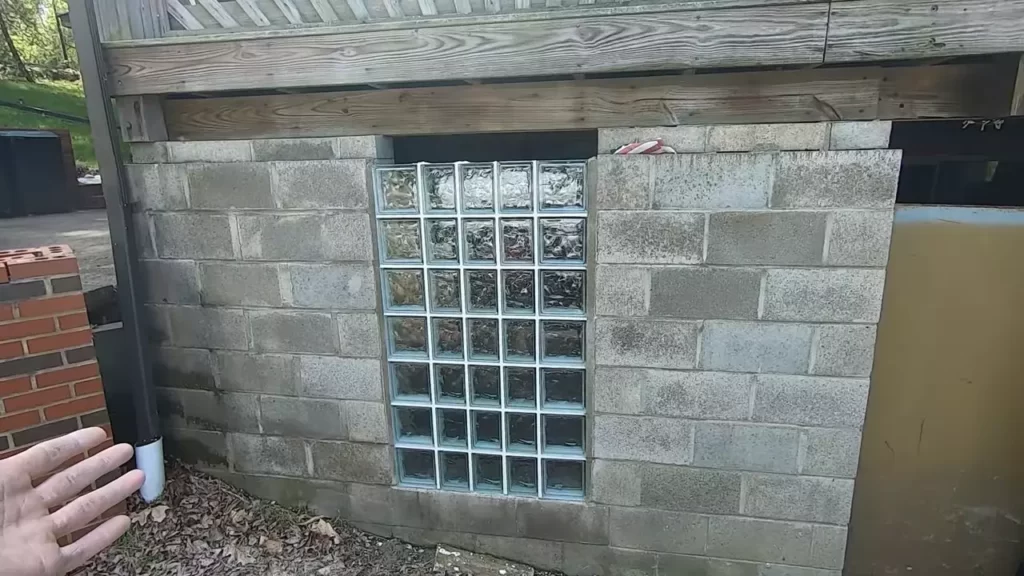
The first step in preparing the work area is to accurately measure and mark the installation area. This will help you determine the exact size and position of the glass blocks. Using a measuring tape, measure the width and height of the opening where the glass blocks will be installed. Mark these measurements on the surrounding surfaces using a pencil or a marker. Ensure that the marks are visible and easily distinguishable throughout the installation process.
Removing existing windows or surfaces
If there are existing windows or surfaces in the installation area, they will need to be removed before proceeding with the glass block installation. Carefully remove any windows, frames, or surfaces using the appropriate tools. Take caution during this step to avoid damaging the surrounding areas. Once the existing windows or surfaces are removed, clean the area thoroughly to remove any debris or adhesive residues.
Cleaning and priming the surface for proper adhesion
To ensure proper adhesion of the mortar and glass blocks, it is essential to clean and prime the surface. Start by removing any dirt, dust, or grease from the installation area using a suitable cleaner. Rinse the surface with water and allow it to dry completely. Once dry, apply a layer of primer to the surface. This will provide a smooth and even base for the mortar to adhere to. Follow the manufacturer’s instructions for the specific primer you are using to achieve optimal results.
By following these steps, you will have successfully prepared the work area for installing glass blocks with mortar. Now you can proceed with the actual installation process, and soon enough, you’ll have a stunning glass block feature that enhances the aesthetics and functionality of your space.
Mixing And Applying Mortar
Mixing and applying mortar properly is a crucial step in the process of installing glass blocks. By following the correct techniques, you can ensure a secure bond between the blocks and the installation area, resulting in a durable and aesthetically pleasing finish. In this section, we will guide you through the steps of measuring and mixing the mortar, using a trowel to apply it, and ensuring consistent mortar coverage for a secure bond.
Properly measuring and mixing the mortar
Before you begin mixing the mortar, it is important to measure the right quantities of mortar and water. This ensures the right consistency and strength for the adhesive.
- Start by wearing protective gloves and safety goggles.
- In a clean container, such as a mixing bucket, measure the required amount of dry mortar mix according to the manufacturer’s instructions. It is important to follow the recommended ratio of water to dry mix to achieve the desired consistency.
- Slowly add the water to the dry mix, gradually stirring it with a mixing paddle or a drill fitted with a mixing attachment. Mix thoroughly until the mortar has a smooth and uniform consistency, without any lumps.
Remember, the consistency of the mortar should be thick enough to hold its shape when lifted with a trowel, but still spreadable.
Using a trowel to apply mortar to the installation area
Once the mortar is properly mixed, it is time to apply it to the installation area using a trowel. The trowel helps ensure an even and consistent application of mortar.
- Make sure the installation area is clean and free from dust or debris. This will ensure a better bond between the mortar and the surface.
- With a trowel, scoop a generous amount of mortar onto the trowel blade.
- Hold the trowel at a 45-degree angle and apply the mortar to the back of a glass block, spreading it evenly across the surface.
- Place the mortar-covered block onto the installation area, pressing it firmly in place. Repeat this process for each glass block, ensuring proper spacing between them.
Be careful not to apply excessive mortar, as it can squeeze out when placing the blocks and create an uneven finish.
Ensuring consistent mortar coverage for a secure bond
To ensure a secure bond between the glass blocks and the installation area, it is important to achieve consistent mortar coverage.
| Tips for ensuring consistent mortar coverage: |
|---|
| Regularly check the mortar coverage by visually inspecting the sides and bottom of the glass blocks. |
| Use a straightedge or a level to ensure that the mortar is evenly distributed and matches the height and level of adjacent blocks. |
| Apply additional mortar if needed to fill in any gaps or irregularities. |
| Smooth out the excess mortar using a jointer or a trowel, ensuring a clean and neat finish. |
By following these steps and techniques, you can achieve consistent mortar coverage for a secure bond between the glass blocks and the installation area. This will not only enhance the overall structural integrity but also create a visually appealing glass block installation.
Setting Glass Blocks
When it comes to installing glass blocks with mortar, setting them properly is crucial for a strong and durable installation. This involves determining the proper layout and placement, applying mortar to individual blocks, and pressing them firmly into the mortar bed. In the following sections, we will discuss each step in detail to help you successfully set your glass blocks.
Determining the Proper Layout and Placement of Glass Blocks
Before you start the installation, it’s essential to determine the proper layout and placement of your glass blocks. This involves planning the design and identifying where each block should be positioned.
To determine the layout, consider factors like the size of the glass blocks, the size of the installation area, and any specific design patterns you want to create. You may choose to create a standard grid pattern, a diamond pattern, or even a custom design.
Next, use a pencil to mark the placement of each block on the installation surface. This will serve as your guide during the installation process.
Applying Mortar to Individual Blocks for Installation
Once you have determined the layout and placement, it’s time to apply mortar to the individual blocks. Mortar is a crucial component that holds the glass blocks together and provides structural stability.
To apply mortar to each block, follow these steps:
- Carefully mix the mortar according to the manufacturer’s instructions. The consistency should be similar to that of peanut butter.
- Using a trowel, scoop a generous amount of mortar onto the bottom edge of the first glass block.
- Apply mortar to one side of the block as well, ensuring even coverage.
- Repeat the process for each block, making sure to apply mortar to both the bottom edge and one side.
Remember to work efficiently, as mortar tends to dry quickly. It’s also important to remove any excess mortar to ensure a clean and polished finish.
Pressing Glass Blocks Firmly into the Mortar Bed
Once you have applied mortar to the individual blocks, it’s time to press them firmly into the mortar bed. This ensures proper adhesion and creates a strong bond between the blocks.
To press the glass blocks, follow these steps:
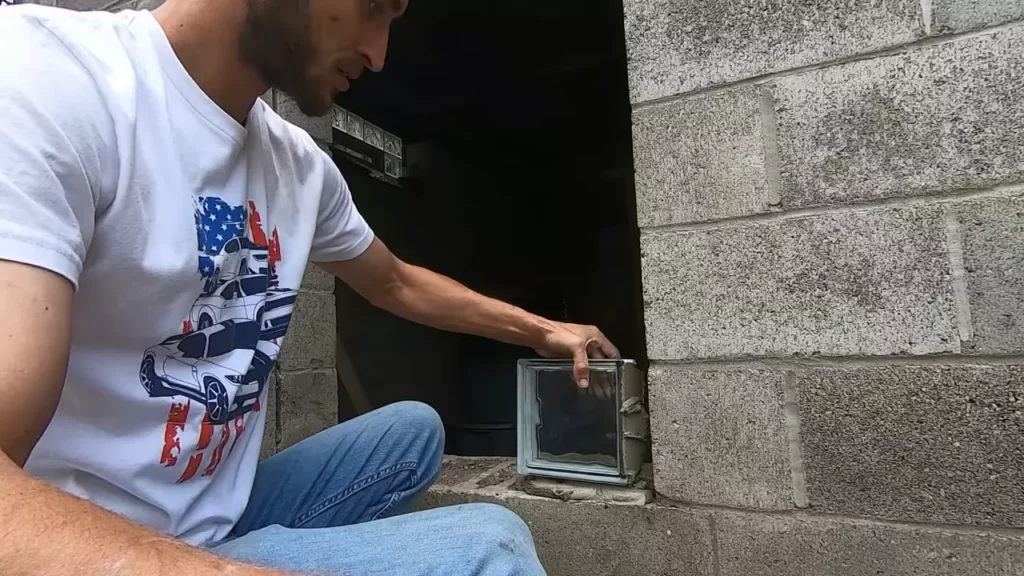
- Start with the first block and carefully place it onto the marked position on the installation surface.
- Using slight pressure, press the block down into the mortar bed and slide it gently side-to-side to ensure proper adhesion.
- Repeat the process for each block, ensuring they are aligned with the marked positions and pressed firmly into the mortar bed.
Take your time during this step to ensure each glass block is securely set. You may use a level to check for proper alignment as you go along.
Once all the blocks are set, allow the mortar to dry and cure as recommended by the manufacturer. This typically takes several hours or even a day, depending on the specific type of mortar used.
Following these steps and taking proper care during the installation process will help you achieve a successful and visually appealing glass block installation. Enjoy the beauty and functionality that glass blocks can bring to your space!
Creating An Airtight Seal
When it comes to installing glass blocks with mortar, creating an airtight seal is crucial to ensure the integrity and durability of the installation. An airtight seal not only enhances the beauty of the glass block wall but also helps with insulation, noise reduction, and moisture resistance. In this section, we will discuss three key steps to achieve a tight and secure seal: using spacers for consistent spacing between blocks, adding mortar between blocks to fill any gaps or voids, and smoothing mortar joints for a finished look.
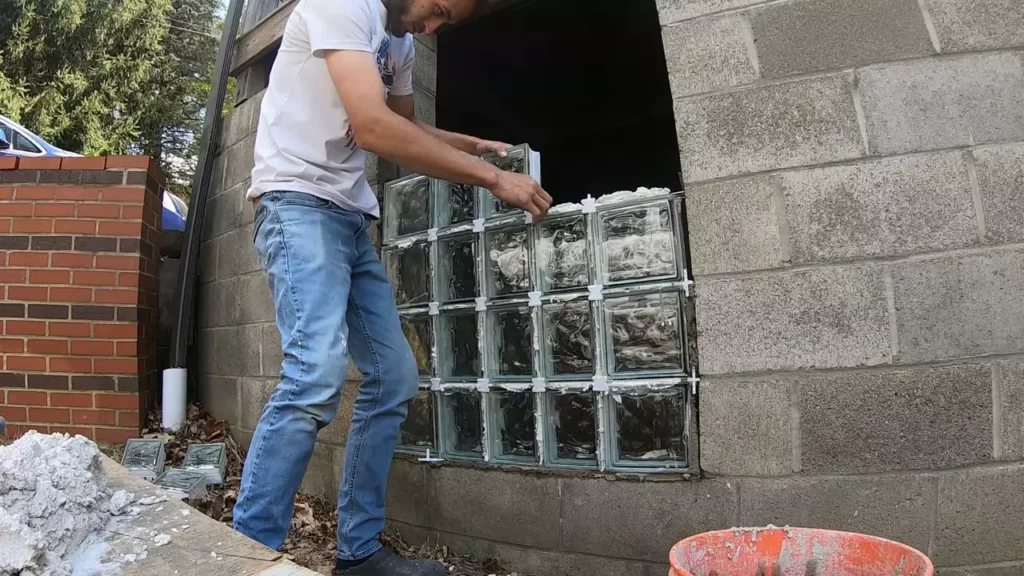
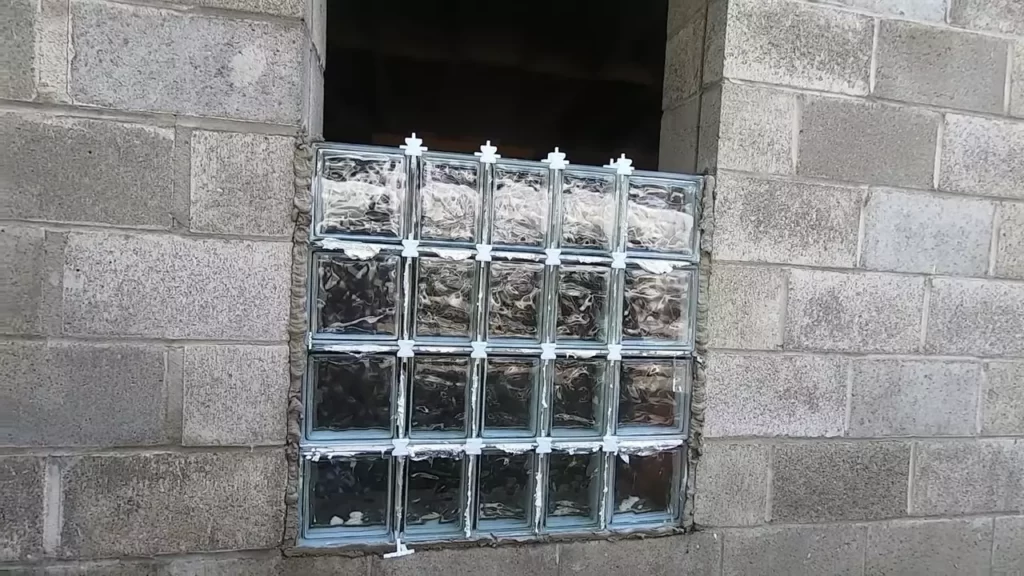
Using spacers to achieve consistent spacing between blocks
Consistent spacing between glass blocks is essential for an airtight seal. Spacers are small plastic or rubber accessories that help maintain a uniform gap between blocks. These spacers are inserted vertically between adjacent blocks, ensuring even spacing throughout the installation. By using spacers, you can ensure that there is enough room for the mortar to be applied, creating a strong and reliable seal.
Adding mortar between blocks to fill any gaps or voids
Once the glass blocks are properly spaced using spacers, the next step is to fill any gaps or voids between them with mortar. Mortar acts as a strong adhesive and filling material that not only helps bond the blocks together but also seals any imperfections. Prepare a suitable mortar mix according to the manufacturer’s instructions and apply it using a trowel. Carefully fill the gaps between the blocks, making sure the mortar completely fills the voids. This step is crucial to creating an airtight seal and ensuring the stability of the glass block wall.
Smoothing mortar joints for a finished look
After the mortar has been applied and the gaps filled, it is essential to smooth the mortar joints to achieve a polished and finished look. A pointed trowel or a jointing tool can be used to carefully shape and smooth the mortar joints, removing any excess mortar and achieving a clean and professional finish. Smoothing the mortar joints not only enhances the aesthetic appeal of the glass block installation but also helps create a tighter seal by eliminating potential gaps or openings.
To summarize, creating an airtight seal when installing glass blocks with mortar involves using spacers to achieve consistent spacing between blocks, adding mortar between blocks to fill gaps or voids, and smoothing mortar joints for a finished look. Following these steps will not only ensure a secure and durable glass block wall but also contribute to the overall beauty and functionality of the installation.
Finishing Touches And Clean-Up
Once you have successfully installed the glass block with mortar, there are a few important finishing touches and clean-up steps to ensure a professional and long-lasting result. Follow these steps to complete the installation process:
Removing Excess Mortar and Cleaning Glass Blocks
After the mortar has been set for about 30 minutes, it’s time to remove any excess mortar and clean the glass blocks. Using a pointing trowel or a jointing tool, scrape away any mortar that has squeezed out between the blocks or onto the edges. Be careful not to damage the mortar joints in the process.
Next, use a clean sponge and a bucket of water to gently wipe down the glass blocks, removing any residual mortar or smudges. Rinse the sponge frequently to prevent the transfer of mortar back onto the glass. Wipe the blocks in a circular motion to ensure thorough cleaning.
Allowing Adequate Curing Time for the Mortar to Set
After cleaning the glass blocks, it’s crucial to allow sufficient curing time for the mortar to set. This ensures that the installation will be strong and durable. The recommended curing time is typically 24 to 48 hours, depending on the specific mortar product used.
During this curing period, it’s essential to protect the installation from excess moisture or extreme temperatures. Close any windows or doors nearby to prevent drafts and cover the glass blocks with plastic sheeting or drop cloths to shield them from rain or direct sunlight.
Applying a Waterproof Sealant to Protect the Installation
Finally, to provide added protection and durability to your glass block installation, it is recommended to apply a waterproof sealant. This step helps to prevent water infiltration and prolong the lifespan of the mortar and glass blocks.
Choose a high-quality waterproof sealant specifically designed for use with glass blocks. Follow the manufacturer’s instructions for application, making sure to cover all mortar joints and the edges of the glass blocks. Allow the sealant to dry completely before exposing it to moisture or other environmental factors.
Remember, proper clean-up and finishing touches are essential to achieving a professional and visually appealing glass block installation. By following these steps, you can ensure that your project will not only look great but also stand the test of time.
Tips For Maintenance And Repair
Proper maintenance and repair of glass block installations are crucial for ensuring their durability and preserving their attractive appearance. Neglecting to address issues promptly could result in more extensive damage and costly repairs down the line. In this section, we will discuss important tips for maintaining and repairing glass block installations, as well as how to properly seal and protect them over time.
Maintaining the durability and appearance of glass block installations
To maintain the durability and appearance of your glass block installations, regular cleaning and inspection are essential. Here are some key tips:
- Regularly clean the glass blocks using a mild detergent and a soft cloth or sponge. Avoid abrasive cleaners or materials that could scratch the glass surface.
- Inspect the grout and mortar joints for any signs of wear or damage. If you notice any cracks or gaps, it’s important to address them promptly to prevent water penetration.
- Check the seals around the glass blocks and ensure they are intact. If you notice any broken or deteriorating seals, they should be replaced as soon as possible to maintain the structural integrity of the installation.
- Keep an eye out for mold or mildew growth, especially in areas with high humidity. If you spot any, clean it using a solution of water and bleach, while ensuring proper ventilation to prevent future growth.
- Consider applying a protective coating to the glass surface to enhance its resistance to dirt and stains. There are various glass coatings available on the market that can help keep your glass block installation looking pristine.
Identifying and addressing common issues and repairs
Even with proper maintenance, glass block installations can still encounter issues that require repairs. Here are some common problems you may come across:
| Issue | Cause | Repair |
|---|---|---|
| Cracked glass block | Impact or excessive pressure | Remove the damaged block and replace it with a new one, ensuring a proper seal. |
| Loose or crumbling grout | Inadequate installation or age | Remove the damaged grout and regrout the joints, making sure to properly cure the new grout. |
| Water leakage | Improper seal or damaged sealant | Identify the source of leakage and repair the seal or sealant as necessary. |
It’s important to address these issues promptly to prevent further damage and ensure the long-term integrity of your glass block installation.
Properly sealing and protecting glass block installations over time
To extend the lifespan and beauty of your glass block installations, proper sealing and protection are vital. Here are some tips:
- Regularly inspect the seals and sealant around the glass blocks and reapply sealant as needed to maintain a watertight and airtight installation.
- Avoid using harsh chemicals or abrasive cleaning tools that could damage the glass surface or the seals.
- Consider applying a UV-blocking film to the glass blocks to reduce fading caused by prolonged sun exposure.
- If your glass block installation is in an area prone to extreme temperature fluctuations, such as near a fireplace, consider using insulating glass blocks to minimize the risk of cracking.
By following these tips for maintenance and repair, as well as proper sealing and protection, you can ensure the longevity and aesthetic appeal of your glass block installations.
Frequently Asked Questions On How To Install Glass Block With Mortar
Can I Use Regular Mortar For the Glass Block?
No, regular mortar should not be used for glass block installation. Glass block requires a specialty mortar that has a higher flexibility and adhesion strength to properly secure and support the blocks. Ensure you use the correct type of mortar specifically designed for glass block installations.
What Kind Of Mortar Do I Use For Glass Block?
Use a high-quality mortar designed specifically for glass block installation. This type of mortar is typically a pre-mixed, latex-modified mortar that provides excellent adhesion and flexibility. It is important to choose a mortar that is sufficient for the weight and size of the glass blocks being used to ensure a strong and durable installation.
How Do You Attach Glass Blocks?
To attach glass blocks, follow these steps:
1. Prepare the surface by cleaning and ensuring it is level.
2. Apply adhesive to the block using a notched trowel.
3. Press the block firmly onto the surface, aligning it as needed.
4. Repeat for each block, leaving a small gap for grout.
5. Allow the adhesive to dry completely before grouting.
How Long Does It Take For Glass Block Mortar To Set?
Glass block mortar typically takes around 24 to 48 hours to set completely.
Conclusion
Installing glass blocks with mortar is a straightforward process if you follow the right steps. By preparing the surface, mixing the mortar correctly, and installing the blocks securely, you can create beautiful and functional glass block walls or windows. With a little patience and attention to detail, you’ll have a finished project that adds style and elegance to any space.
So, why wait? Start your glass block installation project today and enjoy the stunning results!