To install a gas stove top, remove the old stove top and disconnect the gas line, then connect the new stove top and secure it in place. Now, let’s dive into the details of how to install a gas stove top.
A gas stove top is an essential appliance in any kitchen, providing a quick and efficient way to cook your favorite meals. Whether you’re replacing an old stove top or installing a new one, it’s important to follow the proper steps to ensure a safe and secure installation.
First, start by turning off the gas supply to the stovetop. Use an adjustable wrench to disconnect the gas line from the old stovetop. Once the gas line is disconnected, carefully remove the old stove top and set it aside. Next, connect the gas line to the new stovetop. Apply a small amount of pipe joint compound or gas-rated Teflon tape to the threads of the gas line connection. This will help create a tight seal and prevent leaks.
Carefully position the new stovetop in place and align it with the countertop. Use screws or brackets provided by the manufacturer to secure the stovetop to the countertop. Make sure it is level and centered to ensure even cooking.
Finally, turn on the gas supply and test for any leaks. Apply a soapy water solution to the gas connections and look for any bubbles. If there are no bubbles, it means there are no leaks. If you spot any bubbles, turn off the gas immediately and tighten the connections or call a professional for assistance.
Installing a gas stove top involves removing the old stove top, connecting the gas line to the new stove top, securing it in place, and checking for gas leaks. By following these steps carefully, you can ensure a safe and successful installation of your gas stove top.

Factors To Consider When Selecting A Gas Stove Top
Installing a gas stove top is an important decision that can greatly enhance the functionality and aesthetics of your kitchen. With various options available in the market, it’s essential to consider certain factors before making your final selection. By taking into account the size and dimensions, number of burners, cooktop material, BTU output, and safety features of a gas stove top, you can ensure that the one you choose perfectly suits your cooking needs and requirements.
Size and Dimensions
The size and dimensions of a gas stove top play a crucial role in determining its fit and compatibility with your kitchen’s countertop space. Before purchasing, measure the available area where the stovetop will be installed. Consider both the width and depth of the stovetop to ensure a proper fit and seamless integration with your kitchen layout.
Number of Burners
The number of burners you need on your gas stove top depends on your cooking habits and requirements. If you often cook multiple dishes at once or entertain guests frequently, a stovetop with more burners is recommended. Additionally, additional burners can provide versatility, allowing you to cook different types of food simultaneously. Conversely, if you have limited space or rarely cook elaborate meals, a stovetop with fewer burners may be sufficient.
Cooktop Material
The cooktop material of a gas stove top is another essential consideration. Different materials offer distinct advantages and disadvantages. Options include stainless steel, glass, iron, and ceramic, each with its own unique features, durability, and maintenance requirements. Consider factors such as heat distribution, ease of cleaning, and compatibility with your cookware when selecting the appropriate cooktop material for your gas stove top.
BTU Output
BTU (British Thermal Unit) output is a measurement of the heat output of a gas stove top. It is an important factor to consider as it determines how quickly and efficiently the stove top can cook your food. Higher BTU output indicates a more powerful and faster heating capability. However, keep in mind that higher BTU output also requires more ventilation and may lead to increased energy consumption. Assess your cooking needs to determine the ideal BTU output for your gas stove top.
Safety Features
Prioritize the safety of your household by selecting a gas stove top with appropriate safety features. Look for options such as flame failure detection, automatic ignition, and child lock functions. Flame failure detection automatically cuts off the gas supply if the flame extinguishes, preventing the leakage of flammable gas. Automatic ignition eliminates the need for matches or lighters, while child lock functions offer added safety when there are young children in the house.
By carefully considering these factors when selecting a gas stove top, you can make an informed decision and choose the perfect appliance for your kitchen. Remember to prioritize your unique cooking habits, lifestyle, and safety requirements to ensure a stove top that not only enhances your culinary experience but also provides long-lasting functionality and peace of mind.

Comparing Different Gas Stove Top Brands
When it comes to choosing a gas stove top for your kitchen, it’s important to consider the different brands available in the market. Each brand offers unique features and benefits that can enhance your cooking experience. In this article, we will compare three popular gas stove top brands: Brand A, Brand B, and Brand C.
Brand A: Features and Benefits
| Features | Benefits |
|---|---|
| High-quality stainless steel construction | Ensures durability and longevity |
| Four burners with variable power settings | Allows precise control over cooking temperatures |
| Electronic ignition system | Offers convenient and effortless lighting |
| Easy-to-clean surfaces | Saves time and effort in maintenance |
Brand A is known for its high-quality stainless steel construction, ensuring durability and longevity. With four burners and variable power settings, this gas stove top allows you to have precise control over cooking temperatures. The electronic ignition system offers convenient and effortless lighting, making it easy to start cooking. Additionally, the easy-to-clean surfaces of Brand A’s gas stove top save you time and effort in maintenance.
Brand B: Features and Benefits
| Features | Benefits |
|---|---|
| Sealed burners | Prevents food particles from falling into the burners |
| Continuous grates | Provides a stable surface for pots and pans |
| Simmer burner | Allows low-temperature cooking without scorching |
| Flame failure safety device | Shuts off gas flow if the flame is accidentally extinguished |
Brand B stands out with its sealed burners, preventing food particles from falling into the burners and making cleaning easier. The continuous grates provide a stable surface for your pots and pans, ensuring stability during cooking. With a simmer burner, you can achieve low-temperature cooking without the risk of scorching. Safety is also a priority for Brand B, as it features a flame failure safety device that shuts off the gas flow if the flame is accidentally extinguished.
Brand C: Features and Benefits
| Features | Benefits |
|---|---|
| Extra-large cooking surface | Offers ample space for multiple pots and pans |
| High-powered burners | Enables quick and efficient cooking |
| Cast-iron grates | Provides robust support for heavy cookware |
| LED backlit knobs | Enhances visibility and adds a modern touch |
Brand C features an extra-large cooking surface, providing ample space for multiple pots and pans, perfect for those who love to multitask in the kitchen. The high-powered burners ensure quick and efficient cooking, saving you valuable time. The cast-iron grates offer robust support for heavy cookware, preventing any accidents while cooking. With LED backlit knobs, Brand C’s gas stove top enhances visibility and adds a modern touch to your kitchen decor.
By comparing the features and benefits of Brand A, Brand B, and Brand C, you can make an informed decision when choosing a gas stove top for your kitchen. Consider your specific cooking needs and preferences to find the perfect match that will elevate your culinary experience.
Gathering The Necessary Tools And Materials
Before you start installing your gas stove top, it’s important to gather all the necessary tools and materials. This will ensure a smooth and efficient installation process, keeping you safe and confident in your work. Below, we’ll go over the essential items you’ll need for this task:
Gas Pipe
One of the key components you’ll need is a gas pipe. This pipe will connect your gas stove top to the gas supply in your home. Make sure to choose a pipe that is suitable for gas applications and the size that fits your stove top.
Shut-off Valve
A shut-off valve is a crucial safety feature that allows you to control the flow of gas to your stove top. It’s important to have easy access to this valve, preferably located near the stove. This way, you can quickly shut off the gas in case of any emergencies or when the stove is not in use.
Flexible Gas Line
A flexible gas line is necessary to connect the gas pipe to the shut-off valve and ultimately to your stove top. This component is great for its flexibility and ease of installation, allowing for adjustments and movement if needed. Ensure you choose a reliable and durable flexible gas line that meets safety regulations and is the appropriate length for your setup.
Pipe Joint Compound
When working with gas connections, it’s essential to have a pipe joint compound on hand. This compound helps create a secure and leak-free seal between the gas pipe and the flexible gas line connections. Be sure to select a compound specifically designed for gas applications, following the manufacturer’s instructions carefully.
Wrench
To tighten and secure the connections, you’ll need a wrench. Opt for an adjustable wrench that can accommodate different sizes of nuts and bolts. This tool will make it easier to tighten the gas pipe fittings and ensure a strong and reliable connection.
Thread Tape
Thread tape, also known as plumber’s tape or Teflon tape, is an important tool for sealing threaded connections. Wrap this tape around the male end of the fittings before attaching them to create a tight seal that prevents gas leaks. This small but crucial step can make a significant difference in the safety and efficiency of your installation.
Gathering all these necessary tools and materials before starting your gas stove top installation will streamline the process and give you peace of mind knowing that you have everything you need. With these essentials in hand, you’ll be ready to move on to the next steps of the installation process.
Measuring And Checking For Compatibility
Before you dive into the installation process of a gas stove top, it’s essential to measure the space, check the gas line compatibility, ensure proper ventilation, and determine the required gas pipe size. Taking these steps will ensure a smooth and safe installation. Let’s break down each aspect for a better understanding.
Checking Gas Line Compatibility
One of the first things you need to do is check the compatibility of your existing gas line with the new gas stove top. Make sure the gas line is compatible with the stove top’s requirements. To do so, follow these steps:
- Turn off the gas supply to your home. Safety should always be your top priority!
- Locate the gas shut-off valve, usually situated near the gas meter or outside your home.
- Inspect the valve for any signs of damage or corrosion. If you notice any issues, it’s crucial to call a professional before proceeding with the installation.
- Consult the manufacturer’s specifications for the gas stove top to determine the gas supply requirements, such as the gas pressure and BTU rating.
- Compare these specifications with the information provided on your gas line. Ensure the gas line can meet the stove top’s demands without any issues.
Measuring the Space
Now that you’ve checked the gas line compatibility, it’s time to measure the space where you’ll be installing the gas stove top. Accurate measurements are essential to ensure a proper fit and avoid any complications during installation. Follow these steps to measure the space:
- Clear the area of any obstacles or debris to get a precise measurement.
- Measure the width, depth, and height of the designated installation area using a tape measure.
- Take note of the measurements and compare them with the dimensions provided by the manufacturer. Ensure that the space is adequate for the gas stove top to fit properly.
- If the measurements don’t align with the stove top’s requirements, you may need to make adjustments to the installation area or consider a different stove top model.
Ventilation is crucial when installing a gas stove top to ensure the safe operation and dispersion of any unwanted gases. To ensure proper ventilation during the installation, consider these factors:
- Check for existing ventilation systems, such as exhaust fans or windows, in the installation area.
- Ensure there is an adequate airflow in the vicinity of the stove top to prevent the accumulation of gas.
- If necessary, consult a professional to install a ventilation system or make improvements to the existing one.
- Remember to comply with local building codes and regulations regarding ventilation requirements for gas stove top installations.
Determining Gas Pipe Size
Proper gas pipe sizing is crucial for the safe and efficient operation of your gas stove top. Determining the correct gas pipe size involves a few simple steps:
- Refer to the manufacturer’s specifications to determine the required gas pipe size for your gas stove top.
- Measure the length of the gas line from the gas source to the installation area.
- Consult a gas pipe sizing chart or use an online gas pipe sizing calculator to determine the appropriate pipe size based on the length and the gas load of your stove top.
- Make sure to choose the correct material for the gas pipe, such as copper or stainless steel, based on your local building codes.
- If needed, seek assistance from a professional plumber to ensure accurate gas pipe sizing and proper installation.
By measuring the space, checking gas line compatibility, ensuring proper ventilation, and determining the correct gas pipe size, you are well on your way to successfully installing your new gas stove top.
Preparing The Installation Area
Before installing a gas stove top, it is important to properly prepare the installation area. This involves clearing the countertop, removing the old stovetop, and cleaning the surface. Following these steps will ensure a smooth and successful installation.
Clearing the Countertop
Firstly, clear the countertop of any objects or items that may obstruct the installation. Make sure to remove any cooking utensils, appliances, or decorative items that are in the vicinity of the stove top to allow for easier access and to avoid any potential damage.
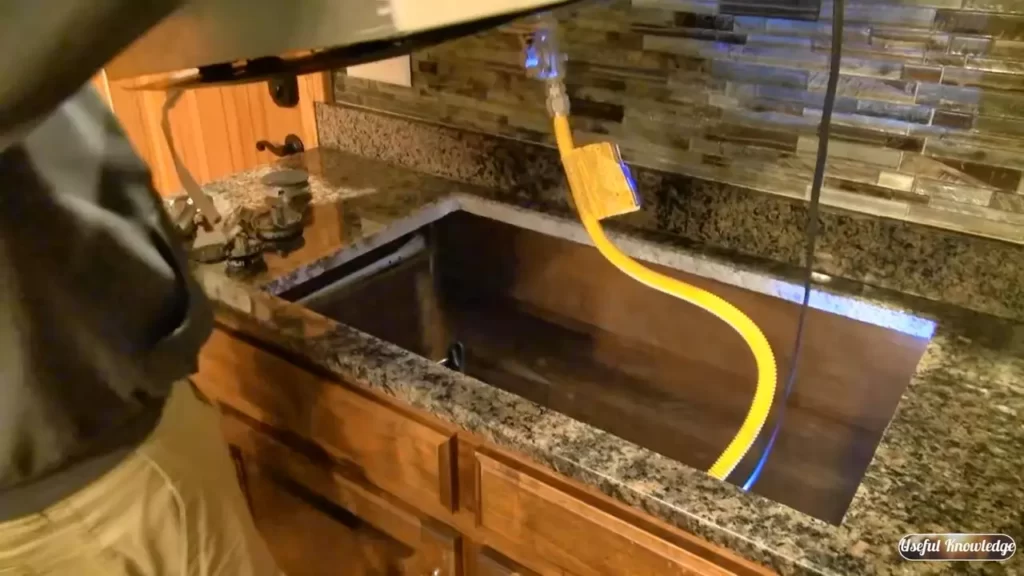
Removing the Old Stove Top
Next, it is necessary to remove the old stove top. Start by disconnecting the gas and electrical connections. Turn off the gas supply valve and unplug the stove from the electrical outlet. Carefully lift the old stove top off the countertop, taking care not to damage the surrounding area or any of the gas or electrical connections.
Cleaning the Surface
Once the old stove top has been removed, it is essential to clean the surface thoroughly. Use a non-abrasive cleaner and a soft cloth or sponge to remove any built-up grime, grease, or residue. Ensure that the surface is completely dry before proceeding with the installation to prevent any potential damage or interference with the new stove top.

Shutting Off The Gas Supply
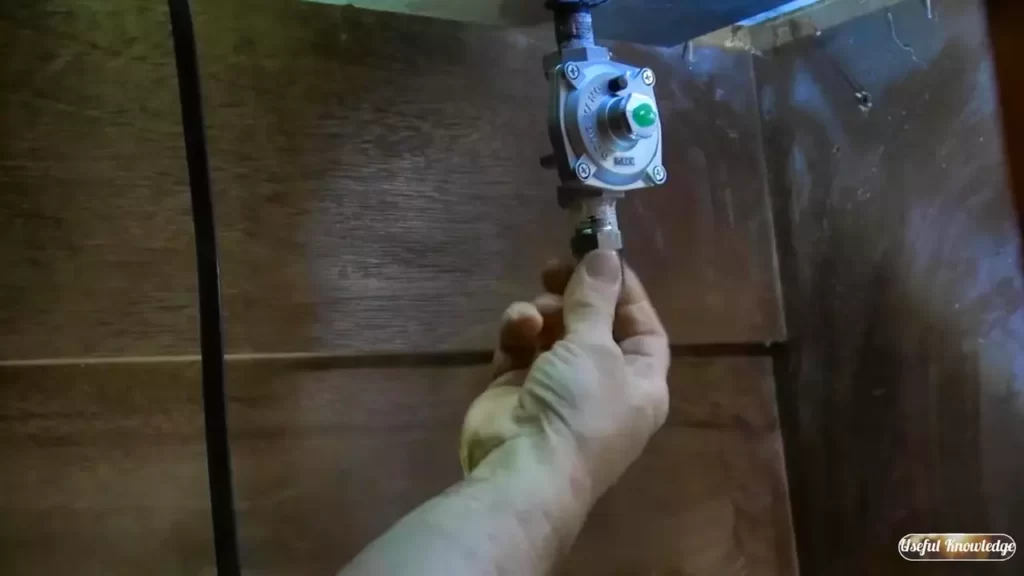
Locating the Gas Valve
Before you begin the installation process for your new gas stove top, it’s crucial to first locate the gas valve. The gas valve is usually found in close proximity to your stove, and it may be located behind the stove or in a nearby cabinet or wall.
When searching for the gas valve, keep an eye out for a small metal lever or dial. This is the control that will allow you to shut off the gas supply to the stove. It’s important to familiarize yourself with the location of this valve so that you can easily access it when needed.
Turning Off the Gas Supply
Now that you have located the gas valve, you can proceed with turning off the gas supply to the stove. This step is essential for your safety during the installation process.
To shut off the gas supply, follow the steps below:
- Ensure that the stove is turned off and that all burners are extinguished.
- Locate the gas valve and identify the “off” position.
- Using a wrench or pliers, turn the valve to the “off” position. You may need to turn it clockwise or counterclockwise, depending on the type of valve.
- Once you have successfully turned off the gas supply, it’s recommended to perform a quick test to ensure that no gas is flowing to the stove. Simply turn on one of the stove burners and wait a few seconds to see if it ignites. If there is no flame, then the gas supply has been successfully shut off.
By following these steps, you have effectively shut off the gas supply to your stove, making it safe to proceed with the installation process. Remember to always prioritize your safety when working with gas appliances.
Connecting The Gas Line
Connecting the gas line is a crucial step in installing a gas stove top. This process ensures that the stove top receives a consistent supply of gas, allowing it to function properly. In this section, we will guide you through the steps of connecting the gas pipe to the stove top, applying pipe joint compound, and using thread tape for secure connections.
Attaching the Gas Pipe to the Stove Top
To begin, you’ll need to attach the gas pipe to the stove top. This pipe will deliver the gas from your home’s gas line to the stove top. Follow these steps to ensure a proper connection:
- Locate the gas pipe connection on the stove top. It is usually found at the back, near the bottom.
- Ensure that the gas pipe is clean and free of any debris or obstructions.
- Align the gas pipe with the connection on the stove top and insert it firmly.
- Secure the connection by tightening the nut with an adjustable wrench. Be careful not to overtighten, as this can damage the threads.
Applying Pipe Joint Compound
Applying pipe joint compound to the gas pipe connection is essential to create a seal and prevent gas leaks. Here’s how to apply it correctly:
- Clean the threaded ends of the gas pipe and the stove top connection with a wire brush or sandpaper to remove any dirt or corrosion.
- Apply a thin and even layer of pipe joint compound to the male threads of the gas pipe and the corresponding female threads of the stove top connection.
- Twist the two ends together firmly, ensuring that the threads engage properly.
Using Thread Tape for Secure Connections
Thread tape is another option to create a secure connection and prevent gas leaks. Follow these steps to use thread tape effectively:
- Wrap the male threads of the gas pipe with thread tape in a clockwise direction. Ensure that you wrap the tape tightly and cover the entire length of the threads.
- Once the tape is applied, carefully thread the gas pipe into the stove top connection.
- Tighten the connection using an adjustable wrench until it is secure.
By following these steps and ensuring a proper connection, you can safely and successfully install your gas stove top. Remember to always prioritize safety when working with gas appliances, and if you’re unsure, consult a professional.
Securing The Stove Top In Place
Placing and Aligning the Gas Stove Top
After ensuring you have properly connected the gas line to your stove top, the next step is to securely place and align it on your countertop. This ensures stability and safe operation of the stove top. Follow these steps to correctly position the gas stove top:
- Measure the dimensions of the stove top and your countertop to ensure a proper fit.
- Clean the countertop surface thoroughly to remove any dirt or debris that could affect the installation process.
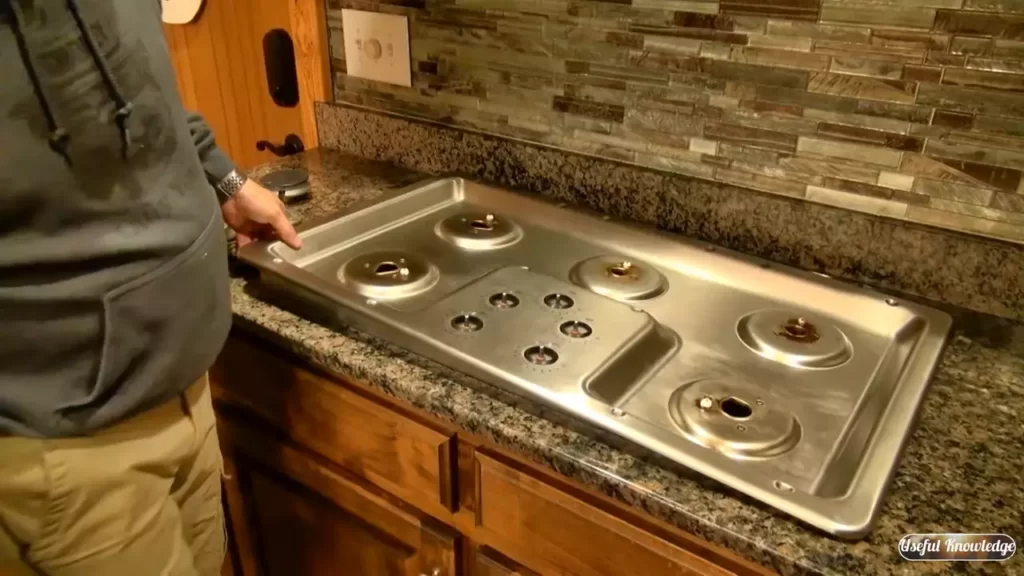
- Place the stove top on the countertop, aligning it with the designated cutout area.
- Ensure that the stove top is centered and leveled correctly. This can be done using a leveling tool or by visual inspection.
- Make any adjustments necessary to achieve a perfect alignment.
Connecting the Stove Top to the Gas Line
Once you have securely positioned the gas stove top on your countertop, it’s time to connect it to the gas line. This step is crucial for the proper functioning of the stove top and for safety reasons. Here’s how you can connect the stove top to the gas line:
- Locate the gas line connection point on the underside of the stove top.
- Insert the gas line into the connection point, ensuring a tight fit.
- Tighten the connection using an adjustable wrench or pliers, being careful not to overtighten and damage the fittings.
- Check for any potential leaks by applying a solution of soapy water to the connection. If you notice bubbles forming, this indicates a leak, and the connection should be retightened.
- Once you have confirmed a secure and leak-free connection, proceed to the final step of securing the stove top to the countertop.
Securing the Stove Top to the Countertop
Securing the stove top to the countertop is essential to prevent any accidental movement or dislodging while cooking. To ensure stability, follow these steps:
- Locate the mounting brackets that came with your stove top.
- Place the brackets in the designated areas on the underside of the stove top, ensuring they are aligned with the corresponding holes on the countertop.
- Secure the brackets to the countertop using screws or bolts, following the manufacturer’s instructions.
- Double-check that the stove top is firmly secured to the countertop.
By following these steps, you can confidently secure your gas stove top in place. Remember to always refer to the manufacturer’s instructions for your specific stove top model and consult a professional if you are unsure about any step in the installation process. A properly secured gas stove top provides a safe and efficient cooking experience for you and your family.
Testing For Leaks
Before using your new gas stove top, it’s crucial to test for any potential gas leaks. This step is essential for your safety and the safety of your home. In this section, we will discuss two methods for detecting gas leaks: using a gas leak detector solution and checking for bubbles.
Using a Gas Leak Detector Solution
One effective method for testing gas leaks is by using a gas leak detector solution. This solution, also known as a gas leak detection spray, is a specialized liquid designed to identify leaks in gas connections. Here’s how you can use it:
- Ensure that your gas supply is turned off.
- Apply the gas leak detector solution to all the gas connections, including the fittings and valves.
- Observe the areas where you applied the solution closely and look for any signs of bubbles or foam formation.
- If bubbles or foam appear, it indicates a gas leak. In this case, you should not proceed with the installation and instead seek professional assistance to fix the issue.
- If no bubbles or foam are present, it suggests that there are no gas leaks in those connections.
Using a gas leak detector solution is a simple and effective way to identify any potential gas leaks in your stove top installation.
Checking for Bubbles
An additional method to check for gas leaks is by using a soap and water solution. This method is quick and requires only basic household items. Here’s how you can do it:
- Mix a solution of soap and water in a spray bottle or bowl.
- Apply the soapy solution to all the gas connections.
- Observe the areas where you applied the solution closely and look for any formation of bubbles.
- If bubbles appear, it indicates a gas leak. In this case, avoid using the gas stove top and seek professional help to resolve the issue.
- If no bubbles are formed, it suggests that there are no gas leaks in those connections.
Regularly checking for bubbles is a good practice to ensure the ongoing safety of your gas stove top.
Testing for leaks is an essential step when installing a gas stove top. By using either a gas leak detector solution or checking for bubbles, you can identify and address any potential gas leaks, ensuring the safety of your home and family.
Ensuring Proper Ventilation
When installing a gas stove top, one of the most important factors to consider is ensuring proper ventilation. Adequate ventilation is crucial for the safe operation of your gas stove top, as it helps to remove harmful gases and odors from your kitchen. In this section, we will discuss the importance of checking the ventilation system and clearing the vents to ensure safe and efficient cooking.
Checking the Ventilation System
Before you begin the installation process, it is essential to check the existing ventilation system in your kitchen. Proper ventilation helps to prevent the buildup of carbon monoxide and other hazardous gases that can be released during the cooking process. Here are a few steps to help you check your ventilation system:
- Start by inspecting the exhaust hood or range hood above your stove. Ensure it is clean and free from any debris or grease buildup that may obstruct the airflow.
- Check if the exhaust hood is properly connected to an external vent. This vent should lead to the outside of your home to allow the gases to escape.
- Test the exhaust fan by turning it on and ensuring that it effectively draws the air out of the kitchen. Listen for any unusual noises that could indicate a malfunctioning fan.
By thoroughly inspecting your ventilation system, you can identify any potential issues that may need to be addressed before installing your gas stove top.
Clearing the Vents
Once you have checked the ventilation system, it is time to clear any obstructions that may impede airflow. Blocked vents can prevent the proper release of gases, leading to a buildup of carbon monoxide in your kitchen. Here’s how you can clear the vents:
- Remove the vent covers or grilles located on or near your gas stove top.
- Using a vacuum cleaner, carefully remove any dust, dirt, or debris from the vents.
- Inspect the vent pipes or ducts for any blockages. If you notice any obstructions, such as bird nests or accumulated grease, clean them thoroughly.
- Reinstall the vent covers or grilles securely.
By clearing the vents, you can ensure that your gas stove top operates efficiently and safely, allowing for adequate ventilation and preventing the accumulation of harmful gases in your kitchen.
Proper ventilation is essential when installing a gas stove top. By checking the ventilation system and clearing any obstructions, you can enjoy safe and efficient cooking in your kitchen. Remember to always prioritize safety and consult a professional if you have any doubts or concerns during the installation process.
Safety Tips For Using A Gas Stove Top
When it comes to using a gas stove top, safety should always be a top priority. Gas stoves provide an efficient and convenient way to cook, but if not used properly, they can pose serious risks. To ensure the safety of yourself and your home, it is essential to follow some important tips when using a gas stove top. In this article, we will discuss five key safety measures that you should keep in mind: maintaining cleanliness, proper use of burner controls, monitoring flames and gas odor, keeping flammable objects away, and regular maintenance and inspections.
Maintaining Cleanliness
Cleanliness plays a vital role in preventing any potential safety hazards when using a gas stove top. Regularly cleaning your stove top not only keeps it looking nice, but it also helps to prevent grease buildup, which can lead to fire incidents. Here are a few tips to keep your stove top clean:
- After each use, wipe down the surface with a damp cloth to remove any spills or food debris.
- Use a non-abrasive cleaner to remove stubborn stains without damaging the surface of your stove top. Simply apply the cleaner, let it sit for a few minutes, and then wipe it off.
- Regularly clean and remove any grease or food particles from the burner grates and drip pans.
Proper Use of Burner Controls
Knowing how to properly use the burner controls is essential for safe cooking. Here are some tips to keep in mind:
- Always make sure that the burner knobs are in the “off” position before lighting the gas stove top.
- When lighting the burner, use a long-reach lighter or an extended match to avoid getting too close to the flame.
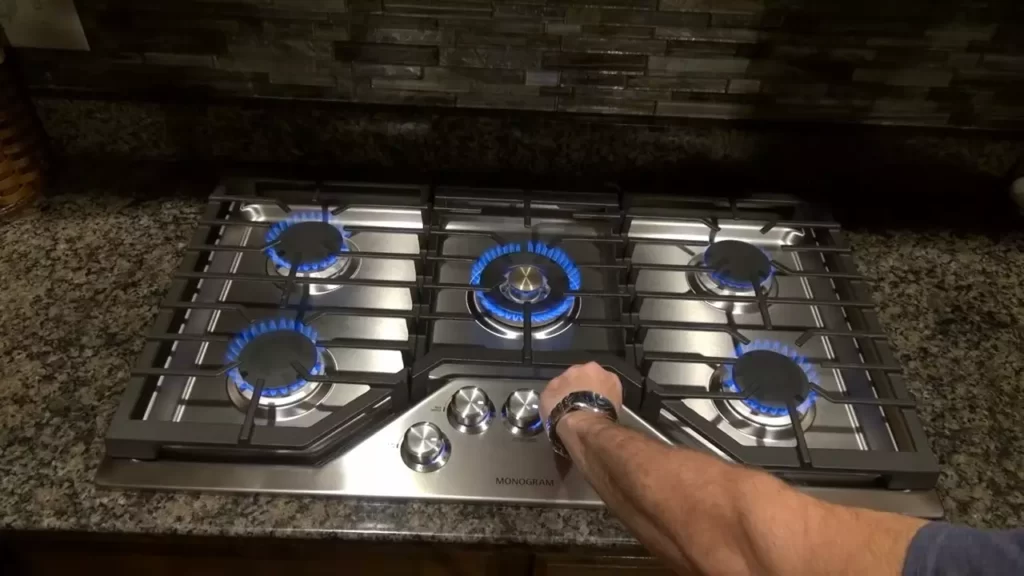
- Adjust the flame to the desired level, ensuring it is not too high or too low. A blue flame indicates a proper burn, while a yellow or orange flame may indicate a problem with the burner.
Monitoring Flames and Gas Odor
It is important to monitor the flames and gas odor when using a gas stove top. Here are some key points to keep in mind:
- Ensure that the flames are always steady, without any excessive flickering or sputtering.
- If you notice an unusual gas odor or strong smell of gas, immediately turn off the burner, open windows for ventilation, and contact a professional to inspect for any possible leaks.
- Never ignore the smell of gas, as it can indicate a potentially dangerous situation.
Keeping Flammable Objects Away
Flammable objects should be kept away from the gas stove top to reduce the risk of fire incidents. Here are some guidelines to follow:
- Avoid placing flammable items such as towels, paper, or plastic near the stove top.
- Ensure that there is enough space around the stove top to prevent any accidental contact with flammable objects.
- Keep curtains or other fabrics at a safe distance from the stove top while in use.
Regular Maintenance and Inspections
Regular maintenance and inspections are crucial in ensuring the safe operation of your gas stove top. Here are some steps to take:
- Inspect the gas stove top regularly for any signs of damage or wear.
- Make sure that all connections, hoses, and valves are secure and in good condition.
- Have a professional technician perform regular maintenance, including cleaning the burners and checking for any gas leaks.
By following these safety tips and guidelines, you can enjoy the benefits of using a gas stove top while keeping yourself and your home safe. Remember, safety should always come first when it comes to cooking with gas!
Frequently Asked Questions On How To Install Gas Stove Top
Can I Install the Gas Cooktop Myself?
No, it is not recommended to install a gas cooktop yourself. It requires technical expertise and knowledge of gas connections and safety regulations. It is best to hire a professional gas fitter to ensure proper installation and safety precautions are followed.
How Do You Set Up A Gas Stove Top?
To set up a gas stove top, follow these steps:
1. Turn off the gas supply to the area.
2. Attach the gas line to the stove using a wrench.
3. Ensure all connections are tight and secure.
4. Test for leaks by applying soapy water to the connections and watching for bubbles.
5. Once there are no leaks, turn on the gas supply and ignite the burners.
How Much Does It Cost To Install A Gas Cooktop?
The cost of installing a gas cooktop varies but typically ranges from $150 to $500. Factors that affect the price include the complexity of installation, location, and any additional materials or services needed. It is best to consult with a professional for an accurate estimate of your specific situation.
Do You Need A Gas Hookup For A Gas Stove?
Yes, you need a gas hookup for a gas stove. It’s necessary to connect the stove to a gas supply for it to operate properly.
Conclusion
Installing a gas stove top can seem intimidating at first, but with the right tools and guidance, it can be a manageable DIY project. By following the step-by-step instructions provided in this blog post, you can safely and successfully install a gas stove top in your kitchen.
Remember to prioritize safety, consult the manufacturer’s instructions, and seek professional help if needed. Enjoy cooking on your new gas stove top!