To install a gas stove line, first, ensure the gas supply is turned off. Then, connect the line to the stove and secure it with appropriate fittings.
Installing a gas stove line requires careful attention to detail and safety precautions. It is essential to follow proper procedures and guidelines to ensure a safe and efficient installation. In the following sections, we will outline the necessary steps to install a gas stove line in a clear and concise manner.
By following these steps, you can confidently set up your gas stove line and enjoy the convenience of cooking with gas in your home. Remember to exercise caution throughout the process and consult a professional if needed. Let’s get started!
Gathering The Necessary Tools And Materials
Before you start installing a gas stove line, it’s important to gather all the necessary tools and materials. Having everything you need at hand will ensure a smooth and efficient installation process. In this section, we will walk you through the essential items you will need to install a gas stove line properly. Read on to learn more!
Gas Pipe
Having a reliable gas pipe is crucial for a safe and secure gas stove installation. Make sure to choose a durable and high-quality gas pipe that is compatible with your stove. The pipe should be made of materials such as copper or stainless steel, which are known for their strength and resistance to corrosion.
Pipe Wrench
To tighten and secure the gas pipe, you will need a pipe wrench. This tool is designed specifically for gripping and turning pipes. Ensure that the pipe wrench you use is the right size for your gas pipe to avoid any mishaps during the installation process.
Pipe Sealant
Using pipe sealant is essential to create a tight seal and prevent any gas leaks. Make sure to choose a pipe sealant that is specifically designed for gas pipe installations. Apply the sealant to the threaded connections of the pipe to ensure a secure connection.
Gas Shut-off Valve
A gas shut-off valve is an important safety feature that allows you to control the flow of gas to your stove. It’s crucial to have a shut-off valve installed near the gas stove line for easy access. This valve will come in handy in case of emergencies or when you need to disconnect the gas supply for maintenance purposes.
Flexible Gas Line
A flexible gas line is a flexible tube that connects the gas pipe to the stove. It allows for easy maneuverability and eliminates the need for rigid connections. When choosing a flexible gas line, make sure it is the correct length and compatible with your gas stove.
Gas Leak Detection Solution
Ensuring the safety of your gas stove installation is of utmost importance. That’s why having a gas leak detection solution is essential. This solution typically comes in the form of a solution that creates bubbles when applied to the gas connections. It allows you to identify any leaks and take the necessary steps to address them promptly.
By gathering all the necessary tools and materials, you are taking the first step towards a successful gas stove line installation. Ensure you have each item listed above to make the installation process smooth and safe. In the next section, we will guide you through the step-by-step process of installing the gas stove line. Stay tuned!
Determining The Correct Placement For The Gas Stove Line
When it comes to installing a gas stove line, determining the correct placement is crucial for both safety and functionality. Evaluating the kitchen layout, ensuring proper ventilation, measuring the distance to the gas source, and checking local building codes are all important factors that need to be considered. Let’s delve into each of these elements to help you install your gas stove line with confidence.
Evaluating the kitchen layout
Before installing the gas stove line, it’s essential to evaluate your kitchen layout. Take into account the location of your kitchen cabinets, countertops, and other appliances. Determine the most convenient and suitable spot for the gas stove, considering factors such as ease of use and accessibility.
Ensuring proper ventilation
Proper ventilation is crucial when installing a gas stove line. Gas stoves produce combustion gases that need to be safely expelled from your kitchen. Ensure that your kitchen has adequate ventilation, either through a range hood or an exhaust fan. This will help prevent the buildup of harmful gases, such as carbon monoxide, and maintain a safe environment for cooking.
Measuring the distance to the gas source
Measuring the distance to the gas source is another important step in determining the correct placement for the gas stove line. The gas source, typically a gas pipe or a propane tank, should be located in close proximity to the stove. Measure the distance from the desired stove location to the gas source to ensure that it falls within the allowable limits set by local building codes.
Checking local building codes
Before proceeding with the installation, it is crucial to check your local building codes. Building codes may vary depending on your location, and it is important to ensure compliance to avoid any safety hazards or legal issues. Verify that your chosen placement for the gas stove line adheres to the regulations set forth by your local authorities.
By carefully evaluating the kitchen layout, ensuring proper ventilation, measuring the distance to the gas source, and checking local building codes, you can determine the correct placement for your gas stove line. Taking these factors into account will not only ensure the safety of your household but also enhance the efficiency and functionality of your kitchen.
Shutting Off The Gas Supply And Preparing The Area
Before you install your gas stove line, it is crucial to shut off the gas supply and properly prepare the area. This is not only essential for your safety but also ensures a smooth installation process. In this section, we will guide you through the necessary steps to locate the main gas shut-off valve, turn off the gas supply, clear the area around the stove, and take the proper safety precautions.
Locating the main gas shut-off valve
The first step in shutting off the gas supply is to locate the main gas shut-off valve. This valve is usually located near the gas meter or where the gas line enters your home. It is important to familiarize yourself with the location of this valve so that you can easily access it in case of an emergency or for routine maintenance.
Turning off the gas supply
Once you have located the main gas shut-off valve, it’s time to turn off the gas supply. This ensures that there is no gas flowing through the lines while you are working on the installation. To turn off the gas supply, simply rotate the valve clockwise until it is completely closed. It is recommended to use a wrench to ensure a tight closure and prevent any chance of gas leakage.
Clearing the area around the stove
Before installing the gas stove line, it is important to clear the area around the stove. Remove any flammable items from the vicinity to reduce the risk of fire hazards. This includes cleaning any spills, removing loose papers or fabrics, and ensuring there is proper ventilation in the area. By clearing the space, you create a safe environment for both the installation process and the future use of your gas stove.
Ensuring proper safety precautions
When working with gas lines, it is crucial to take the necessary safety precautions. This includes wearing protective gloves and goggles to prevent any injury. Additionally, ensure that there are no open flames or sparks nearby, as gas is highly flammable. It is also recommended to have a fire extinguisher nearby in case of emergencies. By adhering to these safety measures, you can minimize any potential risks and ensure a safe installation process.
Connecting The Gas Stove Line
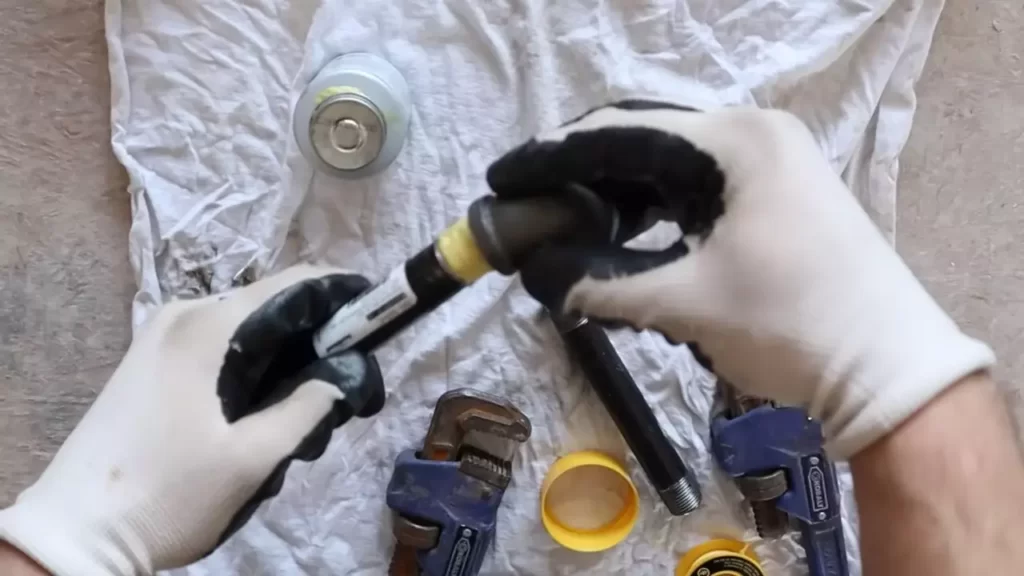
Applying Pipe Sealant to the Threads
Before connecting the gas stove line, it is important to apply pipe sealant to the threads. This will help create a tight seal and prevent any gas leaks in the future. To do this, follow these steps:
- Ensure that the threads on both the gas stove line and the shut-off valve are clean and free from any debris or rust.
- Apply a thin layer of pipe sealant onto the male threads of the shut-off valve. Be sure to only use sealant that is specifically designed for gas lines.
- Using a clockwise motion, carefully thread the gas pipe onto the shut-off valve until it is hand-tight.
- Use a pipe wrench to firmly tighten the connection, ensuring that it is secure and leak-free.
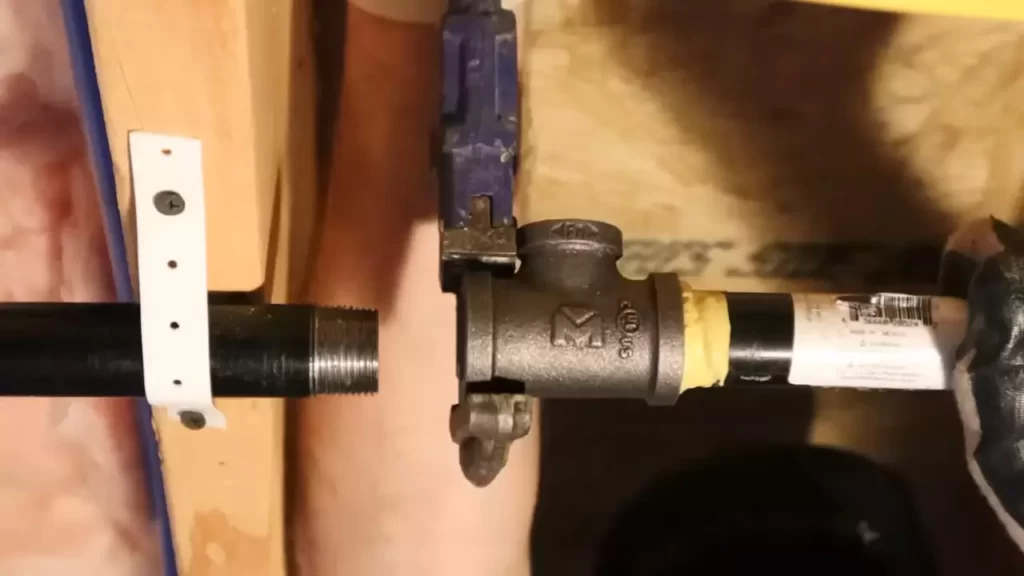
Connecting the Gas Pipe to the Shut-Off Valve
Now it’s time to connect the gas pipe to the shut-off valve. This step is crucial as it will allow the flow of gas to the stove. Here’s how you can do it:
- Carefully align the gas pipe with the shut-off valve.
- Gently push the pipe onto the valve, ensuring that it is completely inserted.
- Using a wrench, tighten the connection by turning it in a clockwise direction.
- Check for any signs of leakage by applying a small amount of soapy water onto the connections.
- If you notice any bubbles forming, it indicates a leak. In this case, you will need to disconnect the pipe and troubleshoot the issue before proceeding further.
Attaching the Flexible Gas Line
Now it’s time to attach the flexible gas line, which will connect the stove to the gas pipe. Here’s how to do it:
- Connect one end of the flexible gas line to the gas pipe using a wrench, ensuring that it is tightened securely.
- Attach the other end of the flexible gas line to the stove’s gas inlet, again using a wrench to tighten the connection.
- Double-check all connections to ensure they are secure and leak-free.
Checking for Leaks
Once everything is connected, it’s crucial to check for any gas leaks before using the stove. Here’s how:
- Turn on the gas supply at the shut-off valve.
- Use a soapy water solution to carefully inspect all connections for bubbles.
- If you notice any bubbles forming, it indicates a leak. In this case, turn off the gas immediately and recheck the connections.
- Once you are confident that there are no leaks, you can proceed with testing the stove.
By following these steps and ensuring each connection is secure and leak-free, you can safely install the gas stove line and enjoy cooking with gas in your kitchen. Remember to always prioritize safety and consult a professional if you have any doubts or concerns.
Testing For Gas Leaks And Ensuring Safety
When installing a gas stove line, one of the most important steps is testing for gas leaks to ensure the safety of your home and everyone in it. Even a small gas leak can have serious consequences, so it’s crucial to take the time to properly check for any signs of leaks before using your newly installed gas stove. In this section, we will walk you through the steps to test for gas leaks and ensure that your installation is safe and secure.
Applying gas leak detection solution
The first step in testing for gas leaks is to apply a gas leak detection solution to the gas connections. This solution is typically a mixture of soapy water that helps to identify any leaks by producing bubbles when it comes into contact with gas. To apply the solution, follow these simple steps:
- Prepare a mixture of soapy water by combining dish soap with water in a container.
- Use a clean cloth or sponge to soak up the soapy water mixture.
- Apply the solution generously to all gas connections, including the gas line, connectors, and fittings.
By applying this gas leak detection solution, you will be able to easily identify any leaks by the presence of bubbles.
Checking for bubbles to indicate leaks
Once you have applied the gas leak detection solution, it’s time to check for any signs of leaks. This is done by closely examining the gas connections for the presence of bubbles. To perform this check, follow these steps:
- Carefully inspect all gas connections, paying close attention to areas where leaks are more likely to occur, such as joints and fittings.
- Look for any bubbles forming on the surface of the gas connections.
- If you notice any bubbles, it indicates a gas leak, and immediate action is required.
Remember, even the tiniest bubble can be a sign of a potentially dangerous gas leak, so it’s important not to ignore them. If you do find any bubbles, it’s essential to take the necessary steps to fix the leak before proceeding with using the gas stove.
Making necessary adjustments and retesting
If you do find any gas leaks during the initial inspection, the next step is to make the necessary adjustments and retest the connections. Follow these guidelines to address any potential leaks:
- Tighten any loose connections using an adjustable wrench. Ensure they are securely fastened but be careful not to overtighten.
- Remove the gas leak detection solution by wiping the connections clean with a cloth or sponge.
- Apply the gas leak detection solution again and check for the presence of bubbles.
Repeat this process of making adjustments and retesting until there are no signs of gas leaks. This step is crucial in ensuring that your gas stove line is safe and secure for use.
Ensuring proper ventilation
In addition to testing for gas leaks, it’s important to ensure proper ventilation when installing a gas stove line. Gas stoves produce combustion byproducts that need adequate airflow to be safely removed from your home. To ensure proper ventilation, follow these guidelines:
- Make sure the area where the gas stove is installed has sufficient ventilation, such as an overhead range hood or a vented exhaust system.
- Keep the exhaust vents clean and free from obstructions, such as grease buildup or debris.
- Regularly check and clean the range hood filters to maintain optimal ventilation.
By following these guidelines, you can ensure that the air quality in your home remains healthy and safe while using your gas stove.
Testing for gas leaks is essential when installing a gas stove line, as it helps to prevent any potential safety hazards. By applying a gas leak detection solution, checking for bubbles, making necessary adjustments, and ensuring proper ventilation, you can have peace of mind knowing that your gas stove is installed safely and ready to be used.
Securing And Testing The Gas Stove Line
Once you have successfully installed the gas stove line, it is crucial to ensure that it is securely fastened and properly positioned before turning on the gas supply. In this section, we will guide you through the steps of fastening the gas pipe securely, positioning the flexible gas line properly, turning on the gas supply, and testing the stove for proper gas flow and ignition.
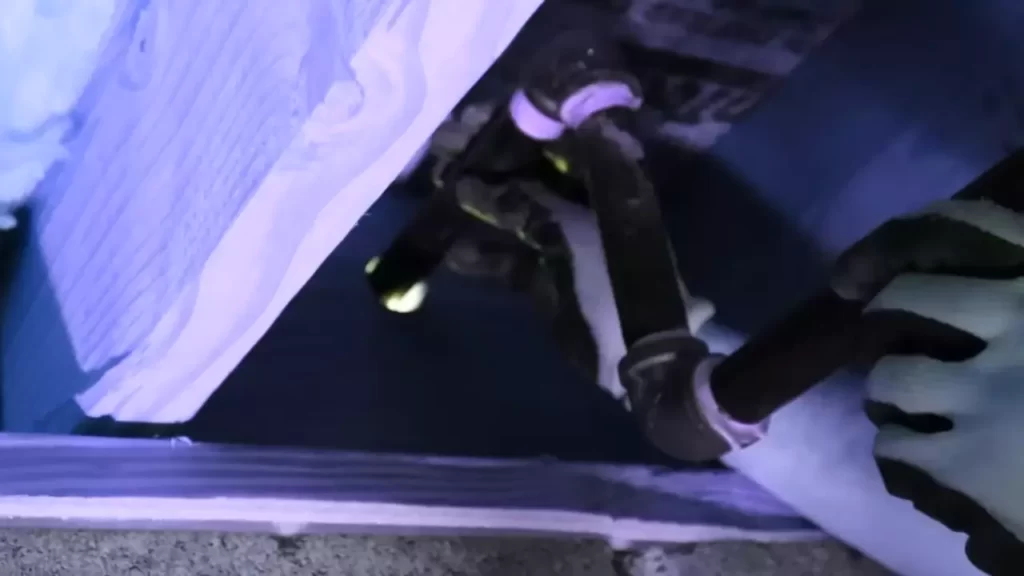
Fastening the gas pipe securely
To begin, it is essential to secure the gas pipe properly to avoid any potential leaks or accidents. Follow these steps to fasten the gas pipe securely:
- Use a wrench to tighten the connections between the gas pipe and the stove’s gas inlet.
- Ensure that the fittings are properly aligned and tightened, using thread sealant or Teflon tape if needed to provide an additional layer of security.
- Inspect the connections for any signs of leakage by applying a solution of soapy water to them. If you notice any bubbles forming, it indicates a leak, and you will need to retighten the connection.
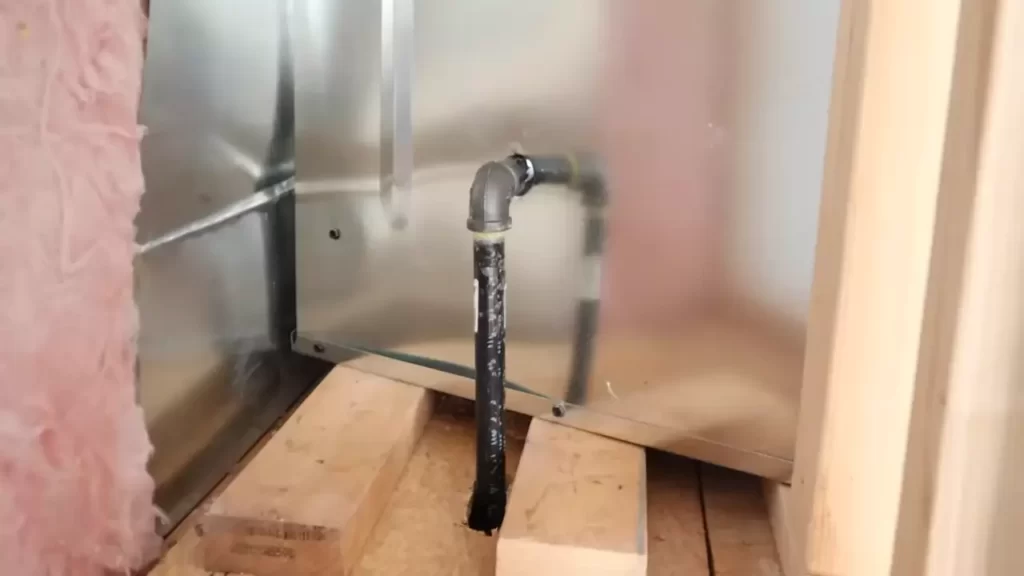
Positioning the flexible gas line properly
Proper positioning of the flexible gas line is crucial for the safe and efficient functioning of your gas stove. Follow these guidelines to position the flexible gas line properly:
- Ensure that there are no kinks, bends, or sharp turns in the flexible gas line. This allows for smooth gas flow and minimizes the risk of leakage.
- Keep the flexible gas line away from any potential sources of heat or flame, such as other appliances, electrical outlets, or open flames. This prevents the risk of fire or damage to the line.
- Secure the flexible gas line in place using clamps or brackets, ensuring that it is adequately supported and protected.
- Double-check the positioning of the flexible gas line, making sure it does not obstruct the movement of the stove or create any tripping hazards.
Turning on the gas supply
Now that the gas pipe is securely fastened and the flexible gas line is properly positioned, it’s time to turn on the gas supply. Follow these steps:
- Locate the gas shut-off valve, usually located near the gas meter or propane tank.
- Turn the valve in a counterclockwise direction to open it and allow the gas to flow to the stove.
- Listen for the sound of gas flowing through the line.
Testing the stove for proper gas flow and ignition
Once the gas supply is turned on, it’s important to test the stove for proper gas flow and ignition. Follow these steps:
- Ensure that all stove burners are in the off position.
- Turn one burner on and ignite it using the stove’s ignition system or a long-reach lighter.
- Observe the flame on the burner. It should be a steady blue flame. If the flame is yellow or flickering, it may indicate an issue with the gas flow.
- Repeat this process for each burner, checking the flame quality and stability.
Congratulations! You have successfully secured and tested the gas stove line. By following these steps, you can ensure the safe and efficient operation of your gas stove while enjoying delicious meals.
Final Steps And Safety Precautions
After successfully installing the gas stove line, it is important to follow some final steps and safety precautions to ensure that everything is in order and to avoid any potential hazards. By taking the time to check all connections and fittings, clean up the work area, review safety guidelines, and contact a professional if needed, you can enjoy peace of mind knowing that your gas stove line is installed properly and safely.
Checking all connections and fittings
Before considering the installation process complete, it is crucial to carefully inspect all connections and fittings. This involves ensuring that each connection is secure and tightly fitted, so there are no leaks or loose ends. Take the time to visually double-check each fitting and use a soap and water solution to test for any gas leaks. If you notice any bubbles forming where the solution is applied, this indicates a leak, and immediate action should be taken. It is also a good idea to inspect the gas supply line for any signs of wear or damage and replace it if necessary.
Cleaning up the work area
Once you have successfully installed the gas stove line, it is important to clean up the work area properly. This will help prevent any potential accidents or obstructions while working in the kitchen. Make sure to remove any tools, leftover materials, or debris from the installation process. Wipe down the area and ensure it is free from any dirt or grease. By leaving your work area clean and organized, you can enjoy a safer and more functional kitchen space.
Reviewing safety guidelines
In addition to checking all connections and cleaning up the work area, it is essential to review safety guidelines specific to gas stove line installations. These guidelines can vary depending on your location and local codes, so it is crucial to read and adhere to them carefully. Some important safety precautions to keep in mind include proper ventilation for gas appliances, ensuring that the area is well-ventilated, and having a carbon monoxide detector installed nearby. Remember to also keep flammable items away from the stove and have a fire extinguisher readily accessible in case of emergencies.
Contacting a professional for assistance, if needed
If you encounter any difficulties during the installation process or feel unsure about certain steps, it is always better to err on the side of caution and seek professional assistance. Gas-related installations can be complex and require expertise to ensure a safe and reliable setup. Contacting a professional gas fitter or plumber who specializes in gas stove line installations will not only help you avoid any potential mishaps but will also give you the reassurance that the job is done correctly. Professionals can provide the necessary guidance and expertise, making sure your gas stove line is safe and ready to use.
Frequently Asked Questions Of How To Install Gas Stove Line
How Hard Is It To Run A Gas Line For A Stove?
Running a gas line for a stove is not excessively difficult. It requires proper planning, measuring, and secure connections. Working with a professional and following local codes and regulations is recommended for safe installation.
Can I Hook Up A Gas Stove Myself?
It is not recommended to hook up a gas stove yourself. Professional installation ensures safety and compliance with local codes.
How Do You Seal A Gas Stove Line?
To seal a gas stove line, apply a gas-rated pipe joint compound or gas-rated Teflon tape to the threads of the gas connector fitting. Hand tighten the fitting securely but avoid overtightening. Check for any gas leaks using a gas leak detector solution or soapy water.
How Do You Install A Gas Stove Connector?
To install a gas stove connector, turn off the gas supply and disconnect the old connector. Attach the new connector by connecting it to the stove and gas supply, using a wrench to ensure tight connections. Check for leaks using a soapy solution and test the stove for proper operation.
Conclusion
Installing a gas stove line may seem daunting, but by following these step-by-step instructions, you can achieve it with ease. Begin by turning off the gas supply and ensuring all safety measures are in place. Then, carefully connect the line to the stove and tighten the fittings.
Don’t forget to perform a leak test before using the stove. By taking these precautions and following the necessary precautions, you’ll have a safe and functional gas stove line in your home.