To install a gas line for a fireplace, shut off the gas supply, connect the gas line to the fireplace, and test for leaks. Installing a gas line for a fireplace is a straightforward process.
By following a few simple steps, you can ensure a safe and efficient gas supply to your fireplace. We will guide you through the installation process, from shutting off the gas supply to testing for leaks. Whether you are constructing a new fireplace or converting it from wood-burning to gas, this guide will provide you with the necessary information to complete the installation successfully.
So, let’s get started and make your fireplace cozy and warm with the installation of a gas line.
Determining The Requirements
Installing a gas line for a fireplace is an essential step in ensuring a safe and efficient heating system for your home. Before you begin, it is important to determine the specific requirements for your installation. This involves assessing the fireplace location and gas availability, understanding local building codes and regulations, and calculating the gas line capacity needed for your fireplace. Let’s explore each of these requirements in detail.
The first step in determining the requirements for your gas line installation is to assess the fireplace location and gas availability in your home. Take note of the exact location where you plan to install the fireplace and ensure that it meets the necessary qualifications. Consider factors such as the proximity to walls, windows, and other combustible materials. It is also important to check if there is an existing gas supply available near the fireplace location.
Next, familiarize yourself with the local building codes and regulations that apply to gas line installations. These codes vary by region, so it is crucial to adhere to the specific guidelines in your area. Check with your local building authority or consult a professional to ensure compliance with all safety standards. Failure to comply with these regulations can lead to potential hazards and legal consequences. Safety should always be a top priority when installing a gas line for a fireplace.
One of the crucial aspects of determining the requirements for your gas line installation is calculating the gas line capacity needed for your fireplace. This involves determining the BTU requirement of your chosen fireplace and selecting the appropriate size of gas line. The BTU, or British Thermal Unit, is the measurement of heat output. Consider factors such as the fireplace size, burner type, and altitude to accurately calculate the gas line capacity needed. It is recommended to consult a professional gas installer or refer to the fireplace manufacturer’s specifications to ensure the correct calculations.
By properly determining the requirements for your gas line installation, you can ensure a safe and efficient fireplace that will provide warmth and comfort for years to come. Assessing the fireplace location and gas availability, understanding local building codes and regulations, and calculating the gas line capacity needed are essential steps in the process. Stay informed, follow the guidelines, and seek professional assistance when needed to make your gas line installation a success.
Essential Tools
Before you embark on installing a gas line for your fireplace, it is crucial to have the right tools at your disposal. Having the appropriate tools will not only make the installation process more efficient but also ensure your safety. Let’s take a look at the essential tools you will need for this task:
Pipe Cutter
A pipe cutter is a must-have tool when it comes to installing a gas line. It allows you to cut the pipe to your desired length accurately. The pipe cutter’s sharp blade ensures a clean and precise cut, minimizing the risk of leaks or fitting issues.
Pipe Wrench
A pipe wrench is an essential tool for tightening and loosening pipes and fittings. With its adjustable jaws, you can securely fasten the pipe connections without damaging them. It provides the necessary grip and leverage to ensure a tight and leak-free gas line installation.
Adjustable Wrench
In addition to a pipe wrench, an adjustable wrench is another versatile tool required for gas line installation. It allows you to tighten or loosen smaller nuts and bolts that may be present in the gas line fittings. Its adjustable jaw width makes it compatible with various pipe sizes.
Gas Leak Detector
Your safety should always be a top priority when working with gas lines. A gas leak detector is an invaluable tool that helps you identify any potential leaks during and after the installation process. By using this detector, you can quickly locate and address any gas leaks, ensuring a secure and hazard-free fireplace.
Tape Measure
Accurate measurements are crucial for a successful gas line installation. A tape measure allows you to measure and mark the pipe lengths precisely. By ensuring the correct measurements, you can ensure that the gas line fits perfectly and is free from any unnecessary bends or twists.
Pipe Threader
In some cases, you may need to thread the ends of the gas line pipes to facilitate secure connections. A pipe threader serves this purpose by cutting threads onto the pipe ends, enabling tight and leak-free fittings. It is an essential tool if you encounter pipes that do not come pre-threaded.
By having these essential tools in your toolbox, you will be well-prepared to install a gas line for your fireplace. With the right equipment, you can ensure a safe and efficient installation process. Remember to always prioritize safety and consult professional guidance if needed.
Required Materials
When it comes to installing a gas line for your fireplace, having the right materials is crucial. With the proper materials, you can ensure the safe and efficient operation of your fireplace. In this section, we will outline the required materials that you will need for this installation.
Gas Line Pipe
The first essential material you will need is a gas line pipe. This pipe is specially designed to carry natural gas or propane from the source to your fireplace. It is important to choose a pipe that is made of durable materials and is approved for gas line installation. The size of the pipe will depend on the BTU (British Thermal Units) rating of your fireplace, so make sure to check the manufacturer’s specifications.
Fittings and Connectors
In addition to the gas line pipe, you will need fittings and connectors to connect the pipe to the fireplace and gas source. These fittings and connectors are essential for creating a secure and leak-proof connection. They are available in various sizes and configurations, so ensure that you choose the ones that are compatible with your gas line pipe and fireplace.
Pipe Dope or Gas-rated Teflon Tape
To create a tight seal between the fittings and connectors, you will need pipe dope or gas-rated Teflon tape. These materials are applied to the threads of the fittings and connectors before they are screwed together. They help prevent any gas leakage from occurring and ensure a safe installation. Make sure to choose a product that is specifically designed for gas lines.
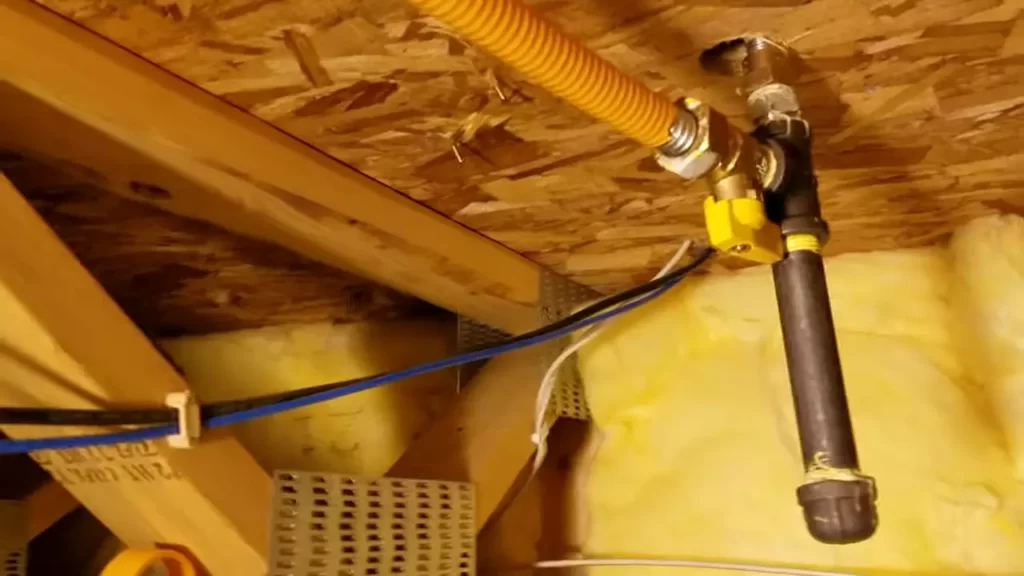
Sediment Trap
A sediment trap, also known as a dirt leg or drip leg, is an important component of a gas line installation. It is a vertical section of pipe that is installed just before the gas enters the fireplace. Its purpose is to catch any debris or moisture that may be present in the gas line, preventing it from reaching and potentially damaging the fireplace. Ensure that the sediment trap is correctly sized and installed according to local building codes.
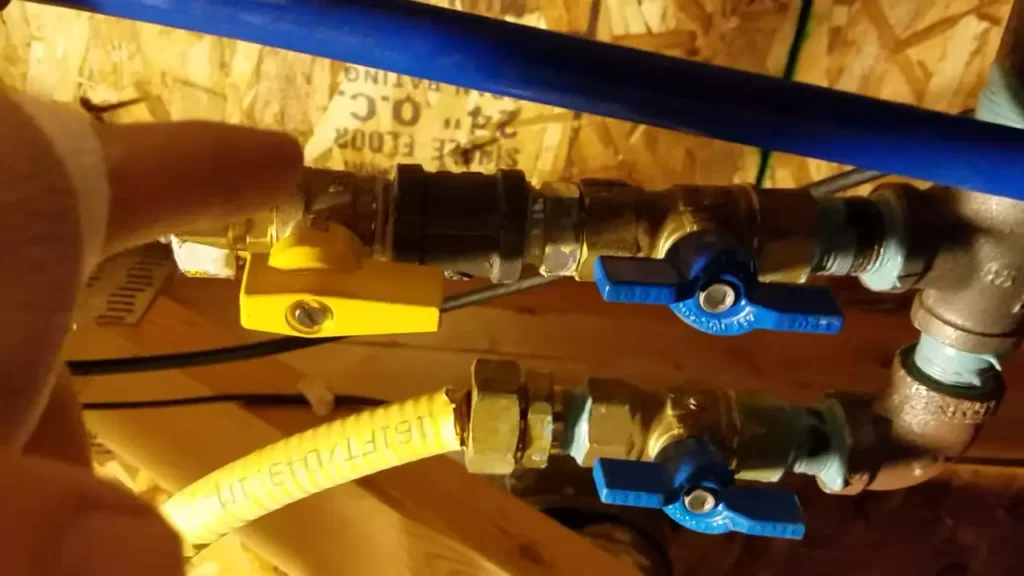
Shut-off Valve
Lastly, a shut-off valve is necessary to control the flow of gas to the fireplace. This valve allows you to turn off the gas supply in case of emergencies or when the fireplace is not in use. It is crucial to install a shut-off valve in an easily accessible location, preferably within reach of the fireplace. This ensures that you can quickly and safely shut off the gas supply when needed.
In conclusion, to install a gas line for your fireplace, you will need a gas line pipe, fittings and connectors, pipe dope or gas-rated Teflon tape, a sediment trap, and a shut-off valve. By gathering these necessary materials, you can proceed with confidence in your gas line installation project.
Preparing The Fireplace And Surrounding Area
Before you begin installing a gas line for your fireplace, it’s important to prepare the fireplace and the area surrounding it. This will ensure a smooth and safe installation process. In this section, we will guide you through the steps to clear any obstacles around the fireplace and protect the flooring and adjacent surfaces.
Clearing any obstacles around the fireplace
Firstly, take a thorough look around the fireplace and remove any obstacles that may impede the installation process. Clearing the area will create a safe and convenient workspace for installing the gas line. Here’s what you need to do:
- Remove any furniture or decor items that are positioned near the fireplace. This will give you ample space to work comfortably and avoid any damage to these items during the installation process.
- Check for any flammable materials such as papers, textiles, or cleaning solutions in close proximity to the fireplace. These should be relocated to a safe distance to prevent any accidents or fire hazards.
- Inspect the chimney for any debris or obstructions. Ensure that it is clear of leaves, bird nests, or other blockages that may affect the proper functioning of the gas line and the fireplace.
Protecting the flooring and adjacent surfaces
Installing a gas line may involve drilling and other activities that could potentially cause damage to your flooring and adjacent surfaces. To protect these areas, follow these steps:
- Place a durable tarp or drop cloth around the fireplace area. This will catch any debris or spills during the installation process, preventing them from damaging the flooring or other surfaces.
- If your fireplace has a hearth, cover it with a protective layer such as cardboard or thick plastic sheeting. This will safeguard the hearth from scratches, dings, or accidental spills.
- Use painter’s tape to carefully attach the protective materials to the surrounding walls or any other nearby surfaces. This will create a barrier that shields these areas from accidental damage.
By taking the time to prepare the fireplace and the surrounding area, you are ensuring a safe and successful gas line installation. This initial effort will set the stage for the next steps, bringing you closer to enjoying the warmth and coziness of your fireplace with peace of mind.
Cutting And Assembling The Gas Line
Measuring and cutting the gas line pipe to the required lengths
Installing a gas line for your fireplace involves careful measurement and cutting of the gas line pipe to ensure a safe and efficient installation. Before starting, make sure you have the necessary tools such as a pipe cutter, measuring tape, and safety gloves. Begin by measuring the distance from the gas source to the fireplace, taking into account any bends or angles that may be required. Using the pipe cutter, cut the gas line pipe to the required lengths, ensuring precise measurements for a secure fit.
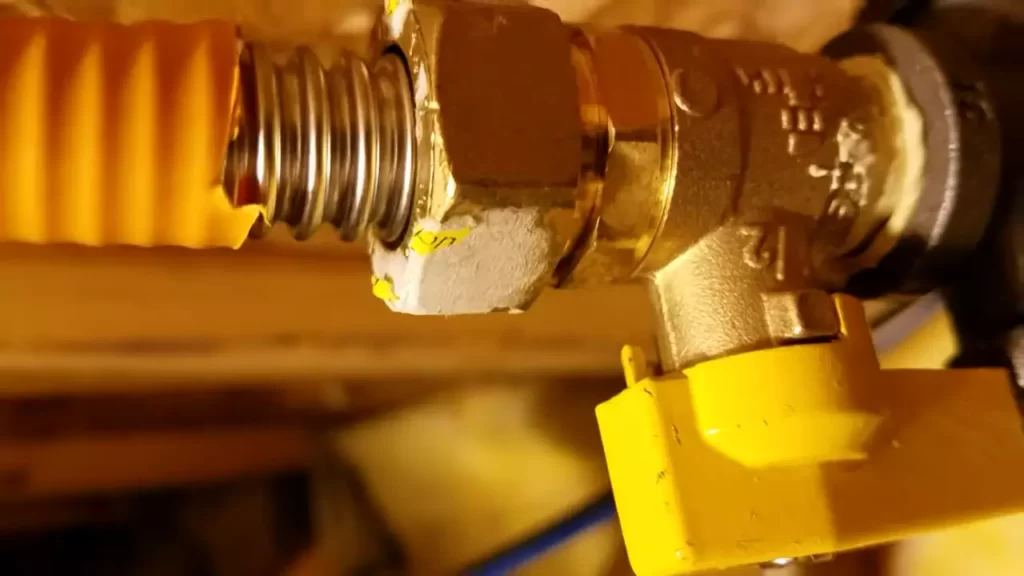
Applying pipe dope or gas-rated Teflon tape to the fittings
Proper sealing of the fittings is crucial to prevent gas leaks in your fireplace gas line installation. To ensure a tight and secure connection, it is recommended to apply either pipe dope or gas-rated Teflon tape to the threaded ends of the fittings. Pipe dope is a compound that creates a seal between the threads, while Teflon tape provides an additional layer of protection against leaks. Apply a thin layer of pipe dope or wrap the Teflon tape clockwise around the threads, ensuring full coverage. This step will provide added peace of mind that your gas line connections are secure.
Connecting the gas line pipe and fittings
Once the gas line pipe and fittings are cut to the required lengths and the threads are sealed, it’s time to connect them. Begin by screwing the fittings onto the respective ends of the gas line pipe, ensuring a tight and secure connection. Use a wrench to tighten the fittings, making sure not to overtighten to avoid damaging the threads. Check for any visible gaps or leaks around the connections by performing a soapy water test. Apply a solution of soapy water to the connections and look for any bubbles, which indicate a leak. If bubbles are present, tighten the fittings further or disassemble and reapply the pipe dope or Teflon tape as needed.
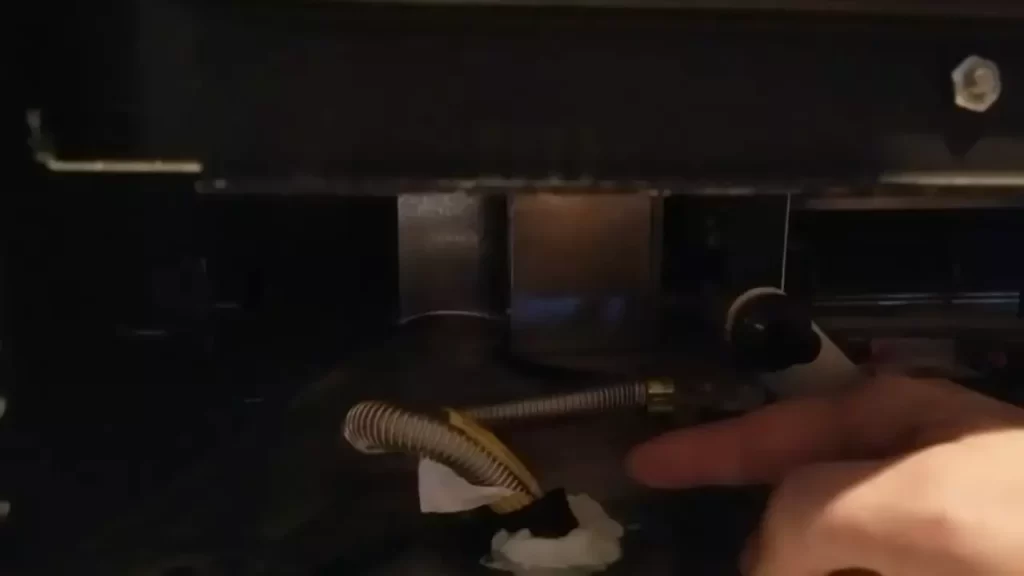
Installing a sediment trap near the fireplace
To maintain the long-term efficiency and safety of your fireplace gas line, it is essential to install a sediment trap near the fireplace. A sediment trap, also known as a dirt leg or drip leg, helps to catch any debris or sediment that may be present in the gas line, preventing it from reaching and potentially damaging the fireplace components. To install a sediment trap, locate a suitable location near the fireplace and attach a tee fitting with a downward-facing outlet. This outlet will act as the sediment trap, allowing any debris to settle at the bottom. Regularly inspect and clean the sediment trap to ensure optimum performance and functionality of your fireplace gas line.
Securing And Testing The Gas Line
When installing a gas line for your fireplace, it is crucial to secure and test the line before proceeding with the installation. Securing the line ensures that there are no loose fittings or potential leaks, while testing the line helps identify any leaks that may be present. In this section, we will guide you through the steps of tightening the fittings, conducting a pressure test, and checking for gas leaks using a gas leak detector.
Tightening the Fittings with a Pipe Wrench
Once you have installed the gas line for your fireplace, the first step in securing the line is to tighten the fittings using a pipe wrench. It’s important to tighten the fittings properly to prevent any gas leaks that could be hazardous. Here’s how you can do it:
- Put on a pair of safety gloves and goggles to protect yourself from any potential hazards.
- Inspect each fitting to ensure they are properly aligned.
- Using a pipe wrench, carefully tighten each fitting in a clockwise direction until they are snug.
- Make sure not to overtighten as it may damage the fittings or cause gas leaks.
Conducting a Pressure Test to Identify Leaks
Once you have tightened the fittings, the next step is to conduct a pressure test to identify any potential leaks in the gas line. This test will help ensure that the line is secure and gas-tight before proceeding with the fireplace installation. Here’s how you can conduct a pressure test:
- Turn off the gas supply valve to the fireplace.
- Connect a manometer to the gas line to measure the pressure.
- Slowly turn on the gas supply valve and observe the manometer.
- If the pressure holds steady for a specific period (check manufacturer’s instructions), it indicates that the line is secure and leak-free.
- If the pressure drops, it indicates a potential gas leak that needs to be addressed.
Checking for Gas Leaks Using a Gas Leak Detector
After conducting the pressure test, it is essential to check for gas leaks using a gas leak detector. This step ensures that there are no undetected leaks in the gas line. Follow these steps to check for gas leaks:
- Before starting, ensure that all possible ignition sources in the area are turned off.
- Using a gas leak detector, carefully scan the fittings, connections, and joints along the gas line.
- If the gas leak detector indicates the presence of gas, it means there is a leak that needs to be addressed.
- Identify the source of the leak and take appropriate measures to fix it. This may involve tightening a fitting or replacing a faulty component.
- Retest the gas line with the pressure test to ensure the repairs have resolved the issue.
By following these steps to secure and test the gas line for your fireplace, you can ensure a safe and reliable installation. Take your time, be thorough, and if you encounter any challenges, consult a professional to ensure everything is properly installed and in compliance with local codes and regulations.
Inspecting The Gas Line Installation
Inspecting the gas line installation is a crucial step to ensure the safety and efficiency of your fireplace. It is essential to verify that the gas line is securely installed and that all connections and alignments are properly done. In this section, we will guide you on the key aspects to consider when inspecting the gas line installation.
Verifying that the gas line is securely installed
The first step in inspecting the gas line installation is to confirm that the gas line is securely installed. This involves checking that the line is free from any damages or leaks that can compromise the performance and safety of the fireplace. Here’s what you need to do:
- Visually inspect the gas line for any visible damages such as cracks, corrosion, or loose fittings. Pay close attention to joints and connections.
- If you suspect a gas leak, use a gas leak detection solution to identify any potential leaks along the gas line. Apply the solution on the connections and joints, and if bubbles form, it indicates a gas leak.
- Check for any signs of gas odor. Natural gas has a distinct odor, and if you notice it around the gas line, it could be an indication of a gas leak.
- If you have any doubts about the gas line’s installation or suspect any issues, it is best to contact a professional gas line inspector to evaluate and address the problem.
Checking for proper connections and alignment
Proper connections and alignment are vital for the safe and efficient operation of the gas line. Here’s how you can ensure that the connections and alignment are correctly done:
- Inspect the fittings and joints to ensure they are tightly secured. Loose connections can lead to gas leaks and potential hazards.
- Make sure that the gas line is aligned correctly, without any kinks or bends. Any obstruction in the line can restrict the flow of gas and hinder the fireplace’s performance.
- Verify that the gas line is properly connected to the fireplace. Check for any loose connections and ensure that the line is securely attached to the gas valve.
- If your gas line includes a shut-off valve, ensure that it is easily accessible and in good working condition. It’s crucial to have a functioning shut-off valve for emergencies or maintenance purposes.
In conclusion, inspection of the gas line installation is crucial to ensure the safety and effectiveness of your fireplace. By verifying that the gas line is securely installed and checking for proper connections and alignment, you can enjoy a cozy and worry-free fireplace experience.
Consulting With A Professional
When it comes to installing a gas line for your fireplace, it is crucial to prioritize safety and ensure that the job is done correctly. While some homeowners may feel confident enough to tackle this task on their own, it is strongly recommended to seek assistance from a certified professional. Consulting with a licensed gas technician will not only provide you with peace of mind but also ensure that the installation meets all necessary safety codes and regulations. Here are a couple of key reasons why it is important to consult with a professional during this process.
Seeking assistance from a certified professional if necessary
Installing a gas line requires a certain level of expertise and knowledge about gas connections and safety precautions. In some jurisdictions, it may even be illegal to install a gas line for a fireplace without the proper certification. Therefore, it is important to assess your own skills and understanding of gas line installation before embarking on this project. If you have any doubts or lack the necessary experience, it is highly advisable to seek the help of a certified professional.
Consulting with a licensed gas technician for a final inspection
Even if you decide to take on the installation yourself, it is crucial to consult with a licensed gas technician for a final inspection. This step ensures that the gas line has been properly installed and all connections are secure. A licensed technician has the expertise and tools necessary to check for any potential leaks or hazards, ensuring the safety of your home and family.
During the final inspection, the licensed gas technician will carefully examine the gas line installation, including the connection to the fireplace. They will check for any signs of damage or improper installation, such as loose connections or faulty seals. Their trained eye can easily spot any issues that an untrained homeowner might miss, preventing potential gas leaks and other dangerous situations.
Additionally, consulting with a professional allows you to benefit from their knowledge and experience. They can provide valuable advice on maintaining the gas line and offer suggestions on best practices for fireplace usage. This guidance can help extend the lifespan of your gas line and prevent any unnecessary repairs or safety concerns down the road.
In conclusion, when installing a gas line for your fireplace, it is crucial to consult with a professional. They can ensure that the installation adheres to safety codes, provide a final inspection, and offer expert advice. By seeking professional assistance, you can enjoy the warmth and comfort of your fireplace with peace of mind, knowing that you have prioritized safety and followed proper installation procedures.
Frequently Asked Questions Of How To Install Gas Line For Fireplace
Can I Use Flexible Gas Line For Fireplace?
Yes, you can use a flexible gas line for a fireplace. It is a safe and convenient option that allows for flexibility during installation and maintenance. Make sure to consult with a professional for proper installation and follow all local building codes and regulations.
Can I Install A Gas Fireplace Myself?
No, it is not recommended to install a gas fireplace yourself. It requires expertise and knowledge to ensure safety and proper installation. It is best to hire a professional who specializes in gas fireplace installation to avoid any potential hazards.
Can I Install A Gas Fireplace Without A Gas Line?
No, you cannot install a gas fireplace without a gas line. A gas fireplace requires a gas line to provide the fuel needed for the fire. It is essential to have a properly installed gas line by a professional to ensure the safety and functionality of the fireplace.
What Size Gas Pipe Do I Need For A Gas Fire?
You will need to determine the BTU (British Thermal Unit) rating of your gas fire and consult a professional to calculate the appropriate pipe size. This is essential for safety and to ensure efficient operation. A trained expert will consider factors such as distance and pressure requirements to determine the correct pipe size for your gas fire.
Conclusion
To sum up, installing a gas line for a fireplace is a crucial task that should be approached with caution and expertise. By following the steps mentioned in this guide, you can ensure a safe and efficient installation process. Remember to carefully plan, measure, and connect the necessary components, while also considering professional assistance if needed.
With proper care and attention, you can enjoy the warmth and ambience of a gas fireplace while ensuring the safety of your home and loved ones.