To install flexible ductwork, measure and cut the duct to the required length, then secure it with metal or plastic duct ties. Ensure all connections are properly sealed to prevent air leakage.
Installing flexible ductwork involves measuring, cutting, securing, and sealing the ducts to ensure efficient airflow. By following these steps, you can easily install flexible ductwork in your home or office space.
Why Flexible Ductwork Is The Better Choice
When it comes to installing a ductwork system in your home or commercial building, you have a few options to choose from. One of the most popular choices among HVAC professionals and homeowners alike is flexible ductwork. Its versatility and ease of installation make it a better choice for many applications. In this section, we will explore the benefits of using flexible ductwork and discuss key considerations before installation.

Benefits of using flexible ductwork
Flexible ductwork offers several advantages over traditional rigid ductwork. Understanding these benefits can help you make an informed decision when it comes to selecting the right ductwork for your project. Here are some key advantages of using flexible ductwork:
| Advantages |
|---|
| 1. Easy installation: Flexible ductwork is lightweight and easy to handle, allowing for quick and hassle-free installation. It can be easily maneuvered around obstacles and through tight spaces, making it ideal for retrofitting or updating existing ductwork systems. |
| 2. Energy efficient: Flexible ductwork reduces the risk of air leakage, ensuring that conditioned air reaches its intended destination without any loss. This helps improve energy efficiency, resulting in lower energy bills. |
| 3. Versatility: Flexible ductwork can be easily bent or shaped to fit the unique layout of your space. It allows for greater flexibility in designing and routing the airflow system, ensuring optimal airflow distribution throughout the building. |
| 4. Cost-effective: Compared to rigid ductwork, flexible ductwork is generally more affordable. Its lower material and installation costs make it a cost-effective option for both residential and commercial projects. |
| 5. Reduced noise transmission: The flexibility of the ductwork helps minimize noise transmission from the HVAC system to the occupied spaces. This creates a quieter and more comfortable environment for occupants. |
| 6. Easy maintenance: Flexible ductwork is relatively easy to clean and maintain. It can be accessed and serviced more conveniently compared to rigid ductwork, saving both time and effort. |
Considering these benefits, it’s clear why many HVAC professionals and homeowners prefer flexible ductwork over other options. However, before you proceed with the installation, there are a few key considerations to keep in mind.
Key considerations before installation
Before installing flexible ductwork, it’s important to carefully assess your specific requirements and take the following considerations into account:
- Duct sizing: Ensure the proper sizing of the flexible ductwork to meet the airflow requirements of your HVAC system. Proper sizing is crucial for optimizing system performance and efficiency.
- Pathway and obstructions: Plan the pathway for the flexible ductwork, taking into account any obstructions such as electrical wires, plumbing, or structural elements. Ensuring a clear and unobstructed pathway will prevent damage to the ductwork and maximize airflow.
- Insulation: Consider the insulation requirements for your ductwork, especially if you live in a region with extreme temperatures. Proper insulation helps prevent heat loss or gain, improving energy efficiency.
- Code compliance: Check local building codes and regulations to ensure compliance with ductwork installation standards. Following the codes and regulations will help ensure the safety and performance of your HVAC system.
- Professional installation: While flexible ductwork is relatively easy to install, it is recommended to hire a professional HVAC contractor for complex installations or if you are unsure about the process. Professional installation ensures proper sealing, support, and overall system performance.
By considering these key factors before installation, you can ensure a successful and efficient ductwork system that meets your heating and cooling needs.
Essential Equipment For Installing Flexible Ductwork
Installing flexible ductwork in your home or office can be a cost-effective and efficient way to distribute air. However, to ensure a successful installation, it’s important to have the right equipment on hand. In this section, we will discuss the essential tools and materials needed for installing flexible ductwork.
List of tools needed
The following tools are necessary for a smooth and efficient installation:
- Tape Measure: A tape measure is essential for accurately measuring the length of the ductwork and ensuring a proper fit.
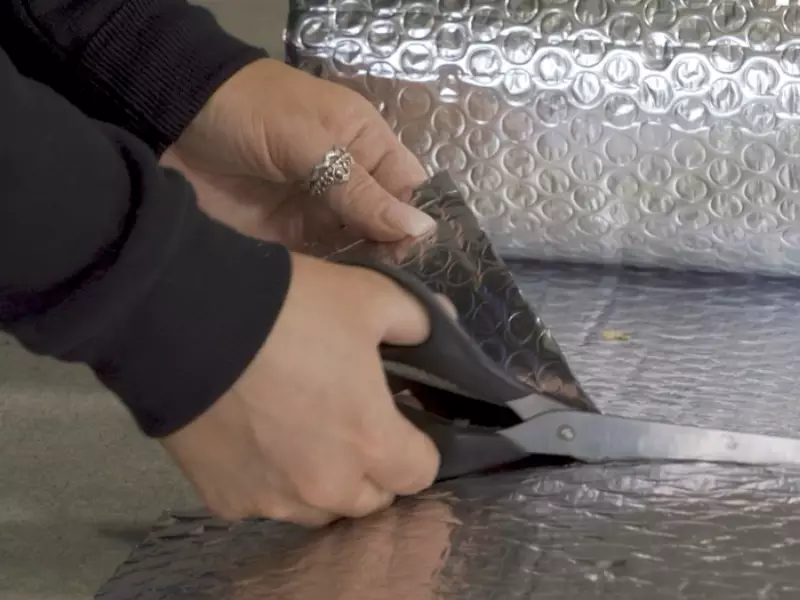
- Tin Snips: Tin snips are used to cut the flexible ductwork to the desired length. They should have a long enough handle to provide enough leverage for cutting through the duct material.
- HVAC Duct Attachment Kit: This kit includes items such as screwdrivers, drill bits, and mounting hardware that are needed to secure the ductwork to the HVAC system.
- Gloves: Gloves are necessary to protect your hands during the installation process. Choose gloves that are flexible yet durable to provide maximum dexterity.
- Utility Knife: A utility knife is used for trimming excess duct material and making precise cuts.
- Duct Insulation: Insulation helps to prevent condensation and improve energy efficiency. Make sure to have the appropriate amount of insulation for your installation.
- Duct Sealing Tape: Duct sealing tape is used to seal the seams and connections of the ductwork to ensure proper airflow and prevent air leaks.
Types of materials required
In addition to the aforementioned tools, here are the materials required for installing flexible ductwork:
| Material | Description |
|---|---|
| Flexible Ductwork | The main component of the installation, flexible ductwork allows for easy maneuverability and is available in various sizes and lengths. |
| Installation Hardware | This includes items such as straps, clamps, and hangers that are used to secure the ductwork to the structure. |
| Duct Connectors | Duct connectors are used to join different sections of the ductwork together. |
| Duct Sealant | Duct sealant is applied to ensure airtight seals at the connections and joints of the ductwork. |
By having the essential tools and materials listed above, you’ll be well-equipped to install flexible ductwork with ease. Remember to prioritize safety by wearing the appropriate protective gear and following manufacturer instructions for a successful installation.
Preparing For Installation
If you’re looking to install flexible ductwork in your home or office, proper preparation is key. Taking the time to measure, plan, and assess the existing infrastructure will ensure a smooth installation process. In this section, we’ll cover the important steps you need to take before installing flexible ductwork. By following these guidelines, you’ll be well-prepared and ready to tackle the installation project with confidence.
Properly measuring and planning the layout
One of the first steps in preparing for flexible ductwork installation is to properly measure and plan the layout. This will ensure that you have the right amount of materials and that the ductwork will be installed correctly. Here are a few things to keep in mind:
- Measure the length and width of each room where the ductwork will be installed. Take note of any irregularities or obstructions that may affect the layout.
- Consider the airflow requirements for each room. This will help you determine the size and number of ducts needed.
- Create a layout plan, taking into consideration the most efficient path for the ductwork. Keep in mind any structural elements or other systems in the building that may affect the installation.
By taking the time to measure and plan the layout, you’ll have a clear roadmap for the installation process.
Ensuring adequate space for installation
Before installing flexible ductwork, it’s important to ensure that there is adequate space for the installation. Here are a few steps to follow:
- Check the available space in the walls, ceilings, or floors where the ductwork will be installed. Make sure there is enough clearance to accommodate the ducts.
- If necessary, remove any obstructions such as insulation, wiring, or debris that may be in the way.
- Consider any future access needs for maintenance or repairs. Leave enough space for easy access to the ductwork if needed.
By ensuring adequate space for installation, you’ll be able to avoid potential issues and ensure a smooth and efficient installation process.
Assessing existing ductwork infrastructure (if applicable)
If you are installing flexible ductwork as part of a renovation or upgrade, it’s important to assess the existing ductwork infrastructure. This will help you determine if any adjustments or modifications need to be made. Here’s what you need to do:
- Inspect the existing ductwork for any signs of damage, leaks, or obstructions. Address any issues before installing the new ductwork.
- Consider the airflow balance and distribution throughout the building. Identify any areas that may need additional ductwork or adjustments to improve efficiency.
- If necessary, consult with a professional HVAC technician to ensure that the existing ductwork system is compatible with the flexible ductwork you plan to install.
By assessing the existing ductwork infrastructure, you’ll be able to make informed decisions and ensure that your new flexible ductwork integrates seamlessly with the existing system.
Assembling The Flexible Ductwork System
Assembling the flexible ductwork system is a crucial step in ensuring optimal airflow and ventilation in any building. In this section, we will discuss the two key aspects of assembling the system: connecting the flexible ducts and securing connections with appropriate fasteners.

Connecting the flexible ducts
When it comes to connecting the flexible ducts, it is essential to ensure a tight and secure connection to prevent any air leaks. Follow these steps to connect the flexible ducts:
- Place one end of the flexible duct over the collar or connector from the supply or return plenum.
- Gently stretch the other end of the duct and slide it over the collar or connector from the register or diffuser.
- Ensure the duct is fully seated on both ends, creating a snug fit.
By carefully following these steps, you can establish a seamless connection between the flexible ducts and the plenum or register, allowing for efficient airflow throughout the system.
Securing connections with appropriate fasteners
Securing the connections between the flexible ducts and other components is crucial to prevent any movement or disconnection that could compromise the system’s efficiency. To ensure secure connections, use appropriate fasteners such as:
- Sheet metal screws: These screws provide strong and reliable fastening for ductwork connections. Use them to secure the ends of the flexible ducts to the collars or connectors.
- Nylon or metal zip ties: These ties are useful for securing the flexible duct to the collar or register. Make sure to tighten them sufficiently to maintain a secure connection.
- Foil tape: Foil tape is an excellent option for sealing any small gaps or leaks along the connections. Apply it generously to ensure an airtight seal.
Remember, it’s vital to choose the appropriate fasteners based on the materials used and the specific requirements of your flexible ductwork system. This will ensure a secure and long-lasting connection that minimizes air leakage and maximizes the system’s performance.
Sealing And Insulating The Ductwork
Importance of Proper Sealing and Insulation
When it comes to installing flexible ductwork, one of the most crucial steps is sealing and insulating the ductwork properly. This step is essential for several reasons:
- Reducing Energy Loss: Properly sealed and insulated ductwork prevents air leakage, ensuring that the conditioned air from your HVAC system reaches its intended destination without any wastage. This not only helps to maintain a comfortable indoor temperature but also reduces energy consumption and, ultimately, lowers utility bills.
- Improving Indoor Air Quality: By sealing and insulating the ductwork, you can prevent pollutants, dust, and allergens from entering the duct system and circulating throughout your space. This not only ensures better indoor air quality but also promotes a healthier living environment, especially for people with respiratory conditions.
- Enhancing System Efficiency: When ductwork is properly sealed and insulated, it allows the HVAC system to operate at its optimal efficiency. By minimizing air leaks and reducing heat transfer, your system doesn’t have to work as hard to achieve the desired temperature, resulting in improved performance and longevity.
Methods for Sealing and Insulating the Ductwork
Sealing and insulating flexible ductwork can be done using various methods, depending on the specific needs of your installation. Here are a few effective techniques:
- Weatherstripping: Use weatherstripping tape or mastic sealant to seal any gaps or joints in the flexible ductwork. This helps to prevent air leakage and improve the overall efficiency of your HVAC system.
- Insulation Wrap: Wrap the ductwork with insulation material, such as fiberglass or foam, to reduce heat transfer and prevent condensation. This insulation layer acts as a barrier, keeping the conditioned air at the desired temperature during transportation.
- Duct Sealing Tape: Use specialized duct sealing tape to secure any connections or seams in the ductwork. This tape is designed to withstand temperature changes and provide a long-lasting seal, ensuring that air doesn’t escape or enter the system at these points.
It’s worth mentioning that proper installation techniques, such as avoiding excessive bends and kinks in the ductwork, also contribute to the effectiveness of sealing and insulation. Taking the time to seal and insulate your flexible ductwork can make a significant difference in terms of energy efficiency, indoor air quality, and system performance.
Mounting And Supporting The Flexible Ductwork
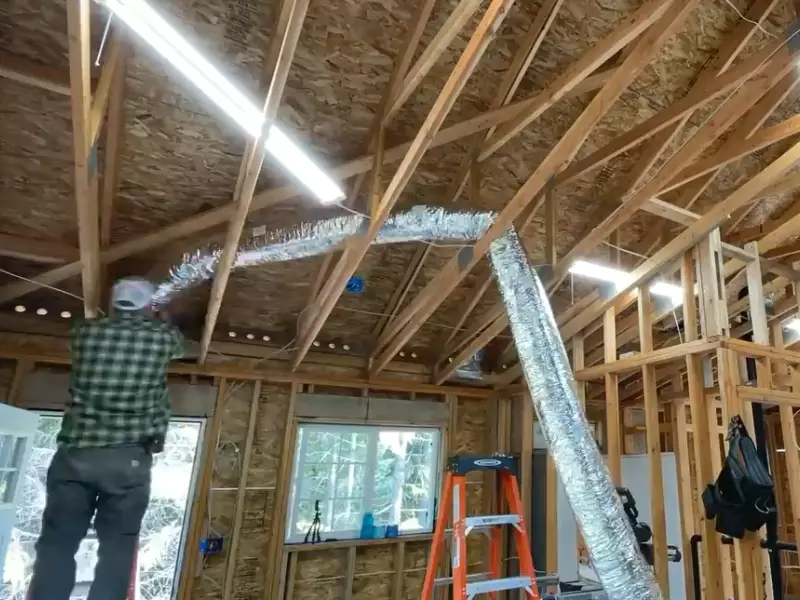
Proper mounting and supporting of flexible ductwork is crucial for efficient and effective HVAC systems. Not only does it ensure the smooth flow of air, but it also helps prevent sagging, kinking, and noise issues. In this section, we’ll explore the importance of choosing the right mounting and support options, as well as techniques for securing the ductwork properly.
Choosing the right mounting and support options
When it comes to mounting and supporting flexible ductwork, you have several options to consider. Each option has its advantages and it’s essential to choose the right one for your specific installation needs. Here are a few popular choices:
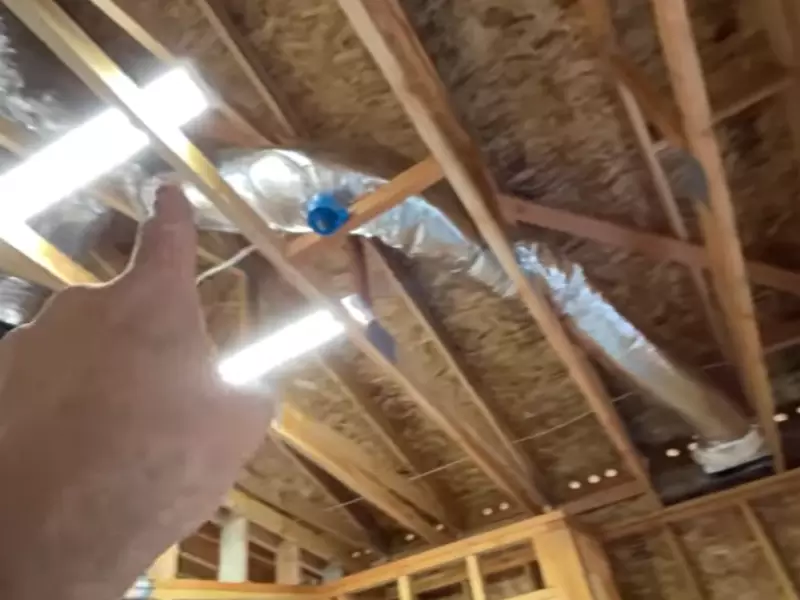
- Hanging straps: These are adjustable straps made of metal or nylon that suspend the ductwork from the ceiling or other structural components. They are easy to install and provide sturdy support.
- Duct clamps: These clamps secure the ductwork to adjacent surfaces, such as walls or floor joists. They are available in various sizes and materials, including galvanized steel or nylon.
- Metal banding: Similar to duct clamps, metal banding is a versatile option that can be used to secure ductwork to walls or other surfaces. It is highly durable and resistant to corrosion.
Techniques for properly securing the ductwork
Once you’ve chosen the right mounting and support options, it’s crucial to use proper techniques to secure the flexible ductwork. This helps to avoid any potential issues down the line. Here are some techniques to consider:
- Use appropriate tension: When using hanging straps or duct clamps, ensure that they are tightened enough to provide adequate support but not overly tight, which could restrict airflow or deform the ductwork.
- Secure at regular intervals: Depending on the size and weight of the ductwork, you’ll want to secure it at regular intervals to prevent sagging. The required spacing can vary; however, a good rule of thumb is to secure it every 4-5 feet.
- Avoid sharp bends: Sharp bends can cause air turbulence and decrease airflow efficiency. Use gradual curves or elbows when changing direction to maintain a smooth airflow path.
Remember, each installation may have specific requirements, so it’s essential to consult manufacturer guidelines and local building codes to ensure compliance. By choosing the right mounting and support options and implementing proper securing techniques, you’ll have a well-installed flexible ductwork system that functions optimally for years to come.
Connecting The Flexible Ductwork To The Hvac System
Connecting the Flexible Ductwork to the HVAC System
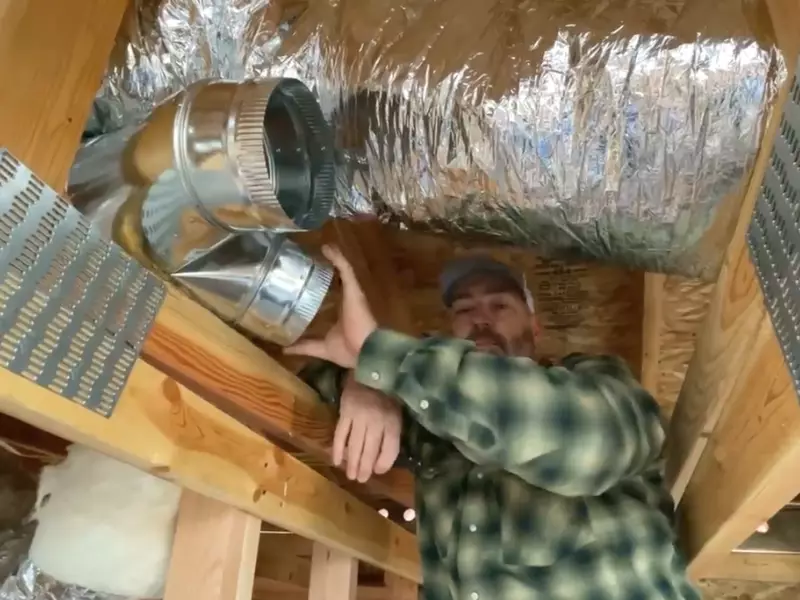
Once you have properly aligned your flexible ductwork with the desired vents and outlets throughout your space, the next crucial step is connecting it to the HVAC system. This step ensures that the conditioned air is distributed efficiently and effectively to each area of your home or office. In this section, we will discuss the two essential aspects of connecting the flexible ductwork to the HVAC system: aligning the ductwork with the HVAC system and properly attaching the ductwork to the system.
Aligning the ductwork with the HVAC system
Before you begin connecting the flexible ductwork to the HVAC system, it is essential to ensure proper alignment. Alignment is crucial as it ensures that there are no kinks or bends in the ductwork, allowing for smoother airflow and preventing any potential air leaks. Here are the steps to follow when aligning the ductwork with the HVAC system:
- Inspect the ductwork: Carefully examine the flex ducts for any damages or deformities that may hinder proper alignment. Replace any damaged sections to ensure optimal performance.
- Measure and cut: Measure the necessary length of the flex duct required to connect to the HVAC system. Use a sharp utility knife to cut the ductwork to the desired length, ensuring that the cut remains clean and even.
- Secure connection points: Take the cut flex duct and attach it to the HVAC system’s supply and return plenums or air handler. Ensure that the ductwork aligns properly with the connection points by using appropriate connectors or collars.
Properly attaching the ductwork to the system
Now that you have aligned the flexible ductwork with the HVAC system, it is time to proceed with properly attaching the ductwork to the system. Proper attachment guarantees a secure and airtight connection, crucial for maintaining optimal airflow. Follow these steps to ensure a successful attachment:
- Prep the connection points: Clean the HVAC system’s connection points and remove any debris or obstructions that could compromise the airtight seal. Smooth the edges of the connection points to ensure a snug fit.
- Use appropriate fasteners: Depending on the type of connection points and ductwork material, select the appropriate fasteners. Common options include metal screws, nylon straps, or adhesive tapes designed specifically for HVAC installations.
- Secure the ductwork: Wrap the connection points with foil-backed tape or mastic sealant to create an airtight seal. Ensure that you cover all the gaps and seams thoroughly to prevent any air leakage.
By properly aligning the ductwork with the HVAC system and ensuring a secure attachment, you can effectively distribute conditioned air throughout your space. This not only improves the performance of your HVAC system but also enhances comfort and energy efficiency. Follow these steps carefully, and you’ll be well on your way to a successful installation of flexible ductwork.
Conducting A Thorough Inspection
Before you begin the installation process of flexible ductwork, it is crucial to conduct a thorough inspection of your existing system. This inspection will help identify any potential issues that may interfere with the proper functioning of the ductwork. By taking the time to check for leaks or loose connections and assess air flow and ventilation, you can ensure a seamless installation process and optimal performance of your HVAC system. Let’s dive deeper into each aspect of the inspection.
Checking for any leaks or loose connections
To start, it is important to carefully examine your current ductwork for any leaks or loose connections. These issues can significantly impact the efficiency of your HVAC system and result in wasted energy and increased utility bills. Here’s how you can thoroughly inspect your ductwork:
- Visually inspect the ducts: Examine the ducts for visible signs of leaks, such as gaps, holes, or disconnected sections. Pay close attention to areas where ducts connect to each other or to vents.
- Feel for air leaks: Run your hand along the ducts while the HVAC system is operating to feel for any air leaks. Pay attention to any noticeable drafts or air escaping from the ductwork.
- Use smoke or incense test: Light a stick of incense or a smoke pencil near the ducts to observe if the smoke is pulled into the system or if it escapes through any leaks. This can help identify hidden leaks that may not be easily visible.
- Inspect connections: Check all connections to ensure they are properly secured. Tighten any loose connections and seal them if necessary using a suitable duct tape or mastic sealant.
Assessing air flow and ventilation
Another vital aspect of the inspection is assessing the air flow and ventilation within your HVAC system. Proper air flow is essential for ensuring that your home is adequately cooled or heated. Here are some steps to follow when assessing air flow and ventilation:
- Observe air registers and vents: Check if the air registers and vents are clean and free from any obstructions, such as furniture or debris. Ensure that they are fully open and not blocked.
- Check for consistent airflow: Turn on your HVAC system and go room to room to feel if each area receives adequate airflow. If there are any rooms that seem to lack sufficient airflow, there may be issues with the ductwork.
- Examine dampers: Inspect the dampers within your duct system to ensure they are functioning correctly. Dampers control the airflow to different areas of your home and should be adjusted accordingly.
By conducting a thorough inspection, you can detect potential issues before the installation process begins. This allows you to rectify any problems and ensure a smooth installation of flexible ductwork. Remember, a well-inspected and properly installed ductwork system contributes to the overall efficiency and performance of your HVAC system.
Testing The Ductwork Performance
Testing the ductwork performance is a crucial step in the installation process of flexible ductwork. By ensuring that the ducts are functioning properly, you can prevent any potential airflow issues and improve the overall efficiency of your HVAC system. In this section, we will explore the importance of air flow and pressure testing and the techniques involved.
Understanding the importance of air flow and pressure testing
Testing the air flow and pressure within the ductwork is essential for ensuring that the system is operating at its optimal level. It helps identify any potential leaks, blockages, or deficiencies that may affect the performance of the HVAC system. Through proper testing, you can address these issues and enhance the overall efficiency, comfort, and air quality in your living or working space.
Techniques for testing the ductwork performance
1. Visual inspection
Before conducting any formal tests, start with a visual inspection of the ductwork. Look for any obvious signs of damage, such as sagging, disconnected joints, or holes. This will help identify any significant issues that can be addressed before proceeding with testing.
2. Airflow testing
One of the primary tests for ductwork performance is airflow testing. This is typically done using a tool called an anemometer, which measures the air velocity flowing through the ducts. By checking the airflow at various points along the system, you can identify any discrepancies and determine if any adjustments need to be made.
3. Pressure testing
Pressure testing involves assessing the air pressure within the ductwork. This test helps identify potential leaks or blockages by pressurizing the system and monitoring any fluctuations or drops in pressure. Types of pressure tests include the blower door test, which measures the overall airtightness of the building, and the duct leakage test, which focuses specifically on the ductwork.
4. Smoke testing
In some cases, smoke testing may be used to identify any leaks within the ductwork. Smoke is introduced into the system, and any visible signs of smoke escaping indicate areas that require sealing or repair. This technique can be particularly useful for detecting small leaks that may not be easily noticeable during other tests.
5. Thermal imaging
Thermal imaging cameras can be used to identify any hot or cold spots along the ductwork system. These spots can indicate areas of inefficiency or possible insulation problems. By addressing these issues, you can improve the overall performance and energy efficiency of your HVAC system.
6. Data logging
Data logging involves the use of sensors and instruments to record and analyze data over an extended period. This technique allows for a comprehensive assessment of the system’s performance and helps identify any recurring issues or trends. By analyzing the collected data, you can make informed decisions on any necessary adjustments or repairs.
Regular Maintenance For Optimal Performance
Regular maintenance of your flexible ductwork is vital to ensure optimal performance and efficiency. By implementing a few simple maintenance tasks, you can extend the lifespan of your ductwork and improve the air quality in your home or office. In this section, we will explore two essential maintenance tasks: cleaning and replacing filters, and inspecting for any damages or wear and tear.
Cleaning and Replacing Filters
One of the most critical aspects of maintaining your flexible ductwork is regularly cleaning and replacing the filters. Over time, dirt, dust, and other contaminants can accumulate in the filters, reducing the airflow and forcing your HVAC system to work harder. By cleaning or replacing the filters every 30 days, you can keep the air flowing smoothly and maintain optimal performance.
To clean the filters, gently remove them from their designated location and rinse them with warm water. Use a soft brush to remove any stubborn debris, and allow the filters to air dry completely before placing them back into the system. If the filters are damaged or worn out, it’s best to replace them with new ones. Remember to check the manufacturer’s instructions for the recommended filter type and size. Ensuring your filters are clean and in good condition not only improves the air quality in your space but also minimizes the strain on your HVAC system, potentially reducing energy consumption.
Inspecting for Any Damages or Wear and Tear
In addition to regular filter maintenance, it’s essential to inspect your flexible ductwork for any damages or signs of wear and tear. Over time, these ducts may become torn, crushed, or infiltrated by pests, which can lead to air leaks and reduced efficiency. It’s recommended to inspect your ductwork at least once a year or whenever you notice a decrease in airflow or unusual noises from the system.
Start by visually inspecting the ducts for any visible damages such as holes, cracks, or loose connections. Be sure to check the insulation surrounding the ducts as well. If you identify any issues, it’s crucial to address them promptly to prevent further damage and maintain optimal performance. For minor damages, you may be able to use duct tape or mastic sealant to repair the area. However, significant damages or extensive wear and tear may require professional assistance to ensure proper repairs.
By conducting regular maintenance tasks such as cleaning and replacing filters and inspecting for damages or wear and tear, you can ensure that your flexible ductwork operates at its best. This not only enhances the performance of your HVAC system but also promotes a healthier and more comfortable environment for everyone in your space.
Troubleshooting Common Issues
Installing flexible ductwork can significantly improve the efficiency and effectiveness of your HVAC system. However, as with any installation process, there can be challenges along the way. In this section, we will discuss some common issues that may arise during the installation of flexible ductwork and provide practical solutions to address them.
Identifying and fixing leaks
One of the most common issues with flexible ductwork is leaks. These leaks can occur due to improper installation, wear and tear, or even rodent damage. Not only can leaks result in energy loss and reduced efficiency, but they can also lead to poor indoor air quality.
To identify leaks in your ductwork, you can perform a simple visual inspection. Look for any visible damage, loose connections, or gaps in the ducts. Additionally, an HVAC professional can use specialized tools, such as a smoke pencil or an infrared camera, to detect leaks that may be hidden from plain sight.
Once leaks are identified, it’s essential to fix them promptly to restore optimal performance. Here are some steps you can take to address ductwork leaks:
- Sealing with mastic or foil tape: Use mastic, a flexible adhesive, or foil tape specifically designed for HVAC systems to seal the leaks. Apply the sealant over the leaks, ensuring complete coverage. This will help create an airtight seal and prevent further leaks.
- Replacing damaged sections: If a particular section of the ductwork is severely damaged or torn, it may be necessary to replace that section entirely. Measure the dimensions accurately, and ensure the replacement duct matches the existing system.
Addressing poor air flow or hot/cold spots
Poor air flow or the presence of hot/cold spots in your home can be indicators of issues with your flexible ductwork. These issues may arise due to improper installation, obstructions in the ducts, or even a duct sizing that doesn’t match your HVAC system’s requirements.
To address these problems and restore balanced air circulation, you can take the following steps:
- Check for obstructions: Inspect the entire ductwork system for any obstructions such as debris, insulation, or even pests. Clear any obstructions to ensure a smooth flow of air through the ducts.
- Inspect and adjust dampers: Dampers help regulate airflow in different sections of your home. Ensure that these dampers are open fully or adjusted correctly to balance the air distribution.
- Consider duct resizing: If your duct sizing is significantly different from the requirements of your HVAC system, it may be necessary to resize or modify the ductwork. Consult an HVAC professional to determine the appropriate sizing for optimal air flow and temperature distribution.
By addressing these common issues promptly, you can ensure that your flexible ductwork operates efficiently, providing consistent air flow and temperature throughout your home.
Importance Of Proper Installation And Maintenance
The proper installation and maintenance of flexible ductwork is crucial for ensuring the efficient functioning of your HVAC system. Without proper installation, your ductwork may have leaks, kinks, or other issues that can lead to a variety of problems, including reduced airflow, decreased energy efficiency, and compromised indoor air quality.
Recap of key points
- Proper installation ensures efficient functioning of HVAC system.
- Improper installation can lead to reduced airflow and energy efficiency.
- Compromised indoor air quality is another consequence of improper installation.
Final thoughts on the significance of professional installation
It is evident that professional installation of flexible ductwork is of utmost importance. Hiring a professional ensures that the ductwork is installed correctly, with a focus on minimizing leaks, ensuring proper insulation, and optimizing airflow. A professional installer has the knowledge and experience to select the right materials and techniques, resulting in a system that operates at its peak performance.
Furthermore, professional installers can also provide valuable maintenance guidance, such as regular inspections and cleaning, to ensure the longevity and efficiency of your HVAC system. Regular maintenance helps to identify and address any issues before they escalate and cause major disruptions or costly repairs.
Frequently Asked Questions Of How To Install Flexible Ductwork
What Are The 4 Rules For Flexible Ducts?
The 4 rules for flexible ducts include ensuring proper installation, avoiding excessive bends, maintaining proper support, and preventing damage from sharp objects. It is crucial to follow these guidelines to ensure optimal performance and efficiency of the duct system.
How Should Flex Duct Be Installed?
To properly install flex duct, follow these guidelines:
1. Plan the layout before installation.
2. Use smooth bends and minimize twisting.
3. Support the duct every 4-5 feet.
4. Seal all connections with appropriate tape or mastic.
5. Avoid placing ducts in areas with high heat or moisture.
What Do You Hang Flex Duct With?
The flex duct is typically hung with metal straps or hangers. These provide support and ensure the duct stays in place.
How Far Should You Run Flex Duct?
Flex duct should be run as short as possible to minimize airflow resistance and improve HVAC system performance. Keeping the length under 25 feet is typically recommended, but consult with a professional for specific requirements.
Conclusion
Flexible ductwork is a crucial component for efficient HVAC systems, and knowing how to install it correctly is essential. By following the steps outlined in this blog post, you can ensure a seamless installation process and optimize the airflow in your space.
Remember to carefully measure and cut the ductwork, use appropriate connectors, and secure it properly. With the right techniques, you’ll be able to enjoy a well-functioning ductwork system that enhances the comfort and energy efficiency of your home or office.
So, get started and make the most out of your HVAC system!