To install an electric baseboard heater with a wall thermostat, follow these steps:
- Turn off the power to the circuit where the baseboard heater will be installed.
- Mount the baseboard heater to the wall and connect the wiring.
- Connect the thermostat to the wiring and mount it on the wall.
- Turn on the power and test the heater and thermostat for proper operation.
Are you considering installing an electric baseboard heater with a wall thermostat? It’s a simple process that can provide efficient heating in any room. By following a few steps, you can have your heater up and running in no time.
In this guide, we’ll walk you through the installation process, ensuring that your baseboard heater and thermostat work together to keep your space warm and comfortable. So let’s get started with the installation process and make your home cozy during the colder months.
Energy-Efficient And Cost-Effective Heating Solution
Are you tired of high energy bills during the winter months? Looking for a more efficient and cost-effective heating solution for your home? Look no further than an electric baseboard heater with a wall thermostat. This combination not only helps you save money on your energy bills but also provides precise temperature control in each room.
Lower energy consumption compared to other heating systems
When it comes to energy efficiency, electric baseboard heaters are a step ahead of other heating systems. Unlike traditional forced-air systems that need to heat the entire house, electric baseboard heaters focus on heating individual rooms, allowing you to save energy and only heat the areas you need. This targeted heating approach can result in significant energy savings, especially if you have rooms that are rarely used or empty.
Moreover, electric baseboard heaters are extremely effective at retaining heat. They use convection currents to circulate warm air, ensuring an even distribution of heat in the room. This means you can set the thermostat at a lower temperature without compromising on comfort, further reducing your energy consumption.
Precision temperature control with a wall thermostat
One of the key benefits of installing an electric baseboard heater with a wall thermostat is the precision temperature control it offers. With a wall thermostat, you can easily adjust the temperature in each room according to your comfort level. This enables you to create personalized heating zones in your home, ensuring everyone can enjoy the perfect temperature.
The wall thermostat allows you to program your heating schedules, so you can automatically lower the temperature when you’re away or asleep, and raise it before you wake up or return home. This level of control not only adds convenience but also helps to optimize energy usage, resulting in additional cost savings.
Another advantage of a wall thermostat is its accuracy. These thermostats can maintain a stable temperature within a narrow range of your desired setting, preventing any drastic temperature fluctuations. This not only enhances your comfort but also prevents unnecessary energy consumption.
In conclusion, installing an electric baseboard heater with a wall thermostat is an energy-efficient and cost-effective heating solution for your home. The lower energy consumption compared to other heating systems, coupled with the precision temperature control provided by the wall thermostat, makes it an ideal choice for anyone looking to save money while staying cozy during the colder months.
Easy Installation And Flexibility
Installing an electric baseboard heater with a wall thermostat is a great way to add warmth and comfort to any room in your home. With easy installation and flexibility, this heating system offers an efficient and convenient way to ensure every corner of your house stays cozy. In this guide, we will discuss the steps involved in setting up this heating system, highlighting its advantages and how it can be installed without the need for complex ductwork or installations.
No Ductwork or Complex Installations Required
One of the biggest advantages of an electric baseboard heater with a wall thermostat is that it doesn’t require any complicated ductwork or complex installations. Unlike traditional heating systems, which may involve extensive renovations to accommodate ducts and vents, electric baseboard heaters can be easily installed in any room or area of your house, without the need for major structural changes.
Typically, electric baseboard heaters are installed along the perimeter of a room, near the baseboard. This placement allows for efficient heat distribution throughout the space. Rather than relying on a forced-air system, which can be difficult to retrofit or install in older homes, electric baseboard heaters provide direct radiant heat that warms the objects and people in the room.
Since these heaters are considered “zone heaters,” you have the flexibility to heat specific rooms or areas of your home independently. This means you can adjust the temperature according to your specific needs and maximize energy efficiency by only heating the rooms you are using. Whether it’s your bedroom, living room, or home office, an electric baseboard heater with a wall thermostat provides customizable warmth at your fingertips.
Can be Installed in Any Room or Area of the House
Another key advantage of electric baseboard heaters with wall thermostats is their versatility. These heaters can be installed in any room or area of the house, allowing you to create a comfortable living space wherever you need it the most.
Whether you’re looking to add supplemental heat to a chilly basement, create a cozy atmosphere in your home office, or warm up your family room during the colder months, electric baseboard heaters can meet your heating needs. They are particularly useful in rooms that are not adequately served by the central heating system or where additional warmth is desired.
Thanks to their compact size and discreet design, electric baseboard heaters blend seamlessly with any interior decor. You can choose from a variety of styles and finishes to complement your existing furnishings and fixtures. With their low-profile appearance, these heaters can be installed without taking up valuable wall space, leaving you with more room for arranging your furniture or adding decorative elements to the walls.
The installation process is straightforward and can be completed by following a few simple steps. Before you proceed with the installation, ensure you have the necessary tools and equipment, including a circuit tester, wire connectors, a screwdriver, and wire cutters. Also, make sure to switch off the power at the breaker panel to ensure your safety during the installation process.
Overall, the ease of installation and flexibility of electric baseboard heaters with wall thermostats make them an attractive heating solution for both new construction projects and retrofitting existing homes. Whether you’re looking to improve the comfort of your home or reduce energy costs, this heating system offers a practical and efficient option that delivers warmth and convenience to every corner of your house.
Silent And Even Heat Distribution
Introduction
Are you tired of noisy and uneven heating systems? Look no further, as installing an electric baseboard heater with a wall thermostat can solve all your heating woes. With its silent and even heat distribution, this heating system provides a comfortable and cozy atmosphere for your home. Say goodbye to disruptive sound and chilly spots as this system works quietly to maintain consistent warmth throughout the room.
Noise-free operation
Gone are the days of clunky radiators and buzzing heating systems that disturb your peace. With an electric baseboard heater and a wall thermostat, you can enjoy peace and tranquility in your home. These heaters are designed to operate silently, ensuring a noise-free environment. Whether you are reading a book, watching a movie, or enjoying a quiet evening, you won’t be bothered by any unwanted noise from your heating system.
Provides consistent warmth throughout the room
One of the major benefits of installing an electric baseboard heater with a wall thermostat is the consistent warmth it offers. These heaters distribute heat evenly throughout the room, avoiding any cold spots or uneven temperature zones. You can finally bid farewell to the discomfort of sitting in one area of the room where the heat is concentrated. With this system, you can enjoy the warmth in every corner of your space, allowing for a cozy and welcoming atmosphere.
Measure The Room And Calculate Heating Requirements
Determine the square footage of the room
Before installing an electric baseboard heater with a wall thermostat, it’s essential to measure the room and calculate the heating requirements accurately. One of the first steps in this process is determining the square footage of the room. This information will help you determine the appropriate wattage for the heater to effectively heat the space.
To measure the square footage of the room, follow these simple steps:
- Measure the length and width of the room using a tape measure. For irregularly shaped rooms, measure the length and width of each separate area.
- Write down the measurements in feet or inches.
- Multiply the length by the width to calculate the square footage of each separate area.
- If you have multiple areas, add up the square footage of each area to get the total square footage of the room.
For example, if the room is 10 feet long and 12 feet wide, the square footage would be 120 square feet (10 x 12 = 120).
Use heating load calculations to determine the wattage required
Once you have determined the square footage of the room, the next step is to use heating load calculations to determine the wattage required for the electric baseboard heater. Heating load calculations take into account factors such as the insulation of the room, the desired temperature, and the climate to ensure that the heater can effectively warm the space.
While the calculations can be complex, you can use a simplified formula to get an estimate of the wattage required:
Wattage = Square Footage x Heating Factor
The heating factor is a value typically provided by the manufacturer or found in heating load calculation tables. It takes into account the factors mentioned earlier and provides a guideline for selecting the appropriate wattage. For example, if the heating factor is 10, and the square footage of the room is 120, the wattage required would be 1200 watts (10 x 120 = 1200).
Keep in mind that this formula provides a rough estimate, and it’s always recommended to consult with a professional if you have specific heating needs or requirements for your room.
By measuring the room and calculating the heating requirements accurately, you can ensure that your electric baseboard heater with a wall thermostat will provide efficient and comfortable heating for your space.
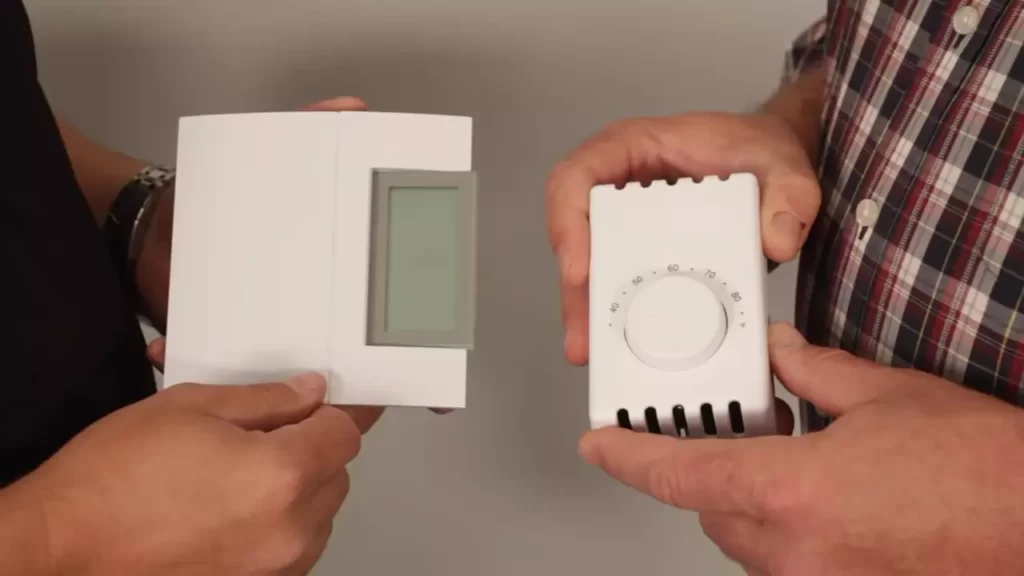
Choose The Right Electric Baseboard Heater And Wall Thermostat
When it comes to installing an electric baseboard heater with a wall thermostat, it is important to choose the right equipment that will not only provide efficient heating but also complement the aesthetics of your room. In this section, we will discuss two key factors to consider when selecting your electric baseboard heater and wall thermostat: the size and design of the heater, and the compatibility of the thermostat for temperature control.
Consider the size and design of the heater to fit the room aesthetics
The size and design of your electric baseboard heater are crucial in ensuring it blends seamlessly with the overall aesthetics of your room. A bulky or unattractive heater may disrupt the visual appeal you have worked hard to create. Therefore, pay attention to the dimensions of the heater and choose one that will fit harmoniously within the available space.
Additionally, consider the design and finish of the heater. Many manufacturers offer a range of options, from sleek and modern designs to more traditional styles. By selecting a heater that complements your room’s decor, you can create a cohesive look that adds to the overall ambiance.
Here are some key points to keep in mind:
- Measure the available space and select a heater that will fit comfortably without overpowering the room.
- Choose a design and finish that aligns with your room’s style, whether it be contemporary, minimalist, or classic.
- Consider the color options available as well, ensuring the heater seamlessly integrates with the existing color palette of the room.
Select a compatible wall thermostat for temperature control
Temperature control is an essential aspect of any heating system, and choosing a compatible wall thermostat is vital for achieving optimal comfort. The thermostat allows you to set and adjust the temperature according to your preferences, ensuring the room remains cozy without wasting excess energy.
When selecting a wall thermostat, keep the following points in mind:
- Check the specifications of the electric baseboard heater to ensure compatibility with the thermostat. Different systems may require specific thermostat models.
- Consider features such as digital displays, programmable settings, and remote control options for added convenience and flexibility.
- Ensure the thermostat has the required voltage capacity to handle the electric baseboard heater’s power load effectively.
- Review customer reviews and ratings to gauge the overall performance and reliability of the thermostat.
By choosing the right electric baseboard heater and wall thermostat, you can enhance both the functionality and aesthetic appeal of your room. Take the time to carefully consider the size, design, and compatibility of the equipment, and enjoy a heating system that not only keeps you warm but also complements your room’s decor perfectly.
Gather The Necessary Tools And Materials
When it comes to installing an electric baseboard heater with a wall thermostat, one of the first steps is to gather all the necessary tools and materials. This ensures that you have everything you need before you begin the installation process. By having all the required tools and materials on hand, you can save time and frustration, and ensure a smooth installation process.
List of tools:
- Screwdrivers
- Wire cutters
- Wire strippers
- Needle-nose pliers
- Electrical tape
- Stud finder
- Level
Materials needed:
- Electric baseboard heater unit
- Wall thermostat
- Mounting brackets and screws
- Electrical wiring
- Wire nuts
- Wire staples
- Thermostat backplate
- Cable connectors
Steps to gather tools and materials:
- Make sure you have a set of screwdrivers, including a flathead and a Phillips-head screwdriver.
- Grab a pair of wire cutters and wire strippers, as you’ll need them for cutting and stripping the electrical wires.
- Get a pair of needle-nose pliers for bending and twisting wires as necessary.
- Have some electrical tape on hand to secure and insulate the exposed wires.
- Use a stud finder to locate the wall studs for secure mounting of the baseboard heater.
- Get a level to ensure the baseboard heater and thermostat are installed straight.
- Make sure you have all the required materials, including an electric baseboard heater unit and a wall thermostat.
- Get the necessary mounting brackets and screws to secure the heater unit to the wall.
- Have enough electrical wiring to connect the heater unit and thermostat.
- Gather wire nuts to securely connect the wires together.
- Grab wire staples to secure the electrical wiring to the wall or baseboard.
- Get a thermostat backplate for mounting the thermostat to the wall.
- Lastly, have cable connectors to protect the electrical connections and ensure safety.
With all the tools and materials gathered, you can now move on to the next steps of the electric baseboard heater installation process. Make sure all the tools are in good condition and the materials are of high quality for a successful installation.
Turn Off The Power
Before you begin the installation process for your new electric baseboard heater with a wall thermostat, it is crucial to turn off the power to ensure your safety. Operating on live electrical wires can be extremely dangerous and can result in serious injuries. By following these simple steps, you can ensure that the power is completely turned off before you start working.
Locate the circuit breaker for the room and switch it off
The first step is to locate the circuit breaker for the room where you will be installing the electric baseboard heater. The circuit breaker acts as a safety mechanism that controls the flow of electricity to specific areas of your home. By switching off the circuit breaker, you will disconnect the power supply to the room, allowing you to work safely.
Start by finding the electrical panel box in your home, which is usually located in the basement, utility room, or garage. Open the panel box and consult the circuit breaker directory, which provides a list of which breakers control different areas of your home. Locate the breaker that corresponds to the room where you will be installing the electric baseboard heater.
To switch off the circuit breaker, locate the switch that corresponds to the room and flip it to the “off” position. This will cut off the power supply to the room, ensuring that no electricity is flowing through the electrical wires while you work on the installation.
It is important to note that if you are unsure which circuit breaker controls the room, you may need to shut off the power to the entire house to ensure your safety. Wiring can vary, and it’s better to be safe than sorry when it comes to working with electricity.
Once you have successfully turned off the circuit breaker for the room, it is recommended to double-check if the power is indeed switched off. You can do this by attempting to turn on a light switch or plug in a device to an outlet in the room. If there is no power, then the circuit breaker has been successfully turned off, and you can proceed to the next steps of the installation process.
Turning off the power is an essential step in installing an electric baseboard heater with a wall thermostat. By following these instructions and ensuring that the power is completely turned off, you can work safely and avoid any potential electrical hazards.
Mount The Baseboard Heater
Mounting the baseboard heater is an essential step in the installation process. Proper placement and secure attachment will ensure that the heater functions efficiently and effectively. In this section, we will discuss how to identify the correct wall location for installation and how to use mounting brackets or screws to secure the heater unit.
Identify the correct wall location for installation
Before mounting the baseboard heater, it is crucial to identify the correct wall location. Here are a few factors to consider:
- Power source proximity: Ensure that the wall chosen is near the power source to avoid excessive wiring or the need for extension cords.
- Clearance: Make sure there is ample clearance around the heater, as specified in the manufacturer’s guidelines, to ensure proper airflow and heat distribution.
- Obstructions: Check for any obstructions such as furniture, curtains, or wall fixtures that may hinder the heater’s performance or access for maintenance.
Once you have identified the appropriate wall location, it’s time to proceed with mounting the baseboard heater.
Use mounting brackets or screws to secure the heater unit
To securely install the baseboard heater, you can either use mounting brackets or screws. Follow these steps:
- Using mounting brackets:
- Position the baseboard heater against the wall at the desired location.
- Mark the spot where the mounting brackets should be attached to the wall.
- Secure the brackets to the wall using screws and a screwdriver, ensuring they are level and properly aligned.
- Slide the baseboard heater onto the mounting brackets until it sits securely.
- Using screws:
- Hold the baseboard heater against the wall, aligning it with the previously identified location.
- Using a drill, create pilot holes in the wall at the marked spots for the screws.
- Securely fasten the baseboard heater to the wall by driving the screws through the pre-drilled holes.
- Ensure that the heater is securely attached and level.
Always refer to the manufacturer’s instructions for the specific mounting requirements of your baseboard heater model. Following these guidelines will help ensure a safe and efficient installation.
Connect The Wiring And Thermostat
When installing an electric baseboard heater with a wall thermostat, it’s essential to connect the wiring and thermostat correctly. Following the manufacturer’s instructions for electrical connections is crucial to ensure safety and proper functionality. In this guide, we’ll walk you through the process of connecting the heater to the wall thermostat using appropriate wiring.
Follow the manufacturer’s instructions for electrical connections
Before starting the wiring process, it’s essential to carefully read and understand the manufacturer’s instructions. Each baseboard heater model might have specific requirements and guidelines for the electrical connections. These instructions will provide you with valuable insights into the necessary tools, wire sizes, and safety precautions.
Connect the heater to the wall thermostat using the appropriate wiring
Once you’ve familiarized yourself with the manufacturer’s instructions, you can begin the wiring process. Here are the steps you need to follow:
- Turn off the power: Before starting any electrical work, make sure to turn off the power to the circuit you’ll be working on. This step is crucial to prevent any accidents or injuries.
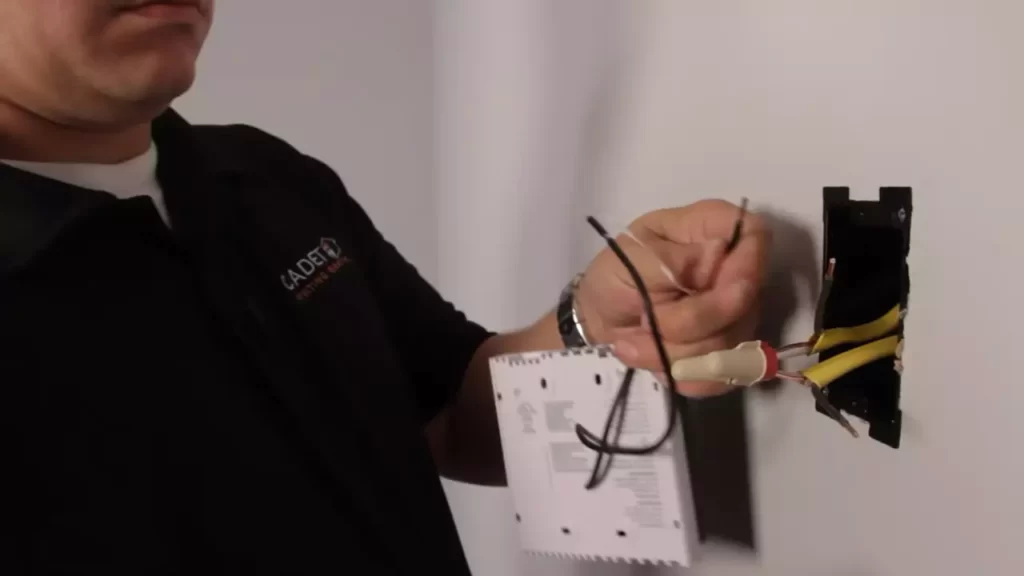
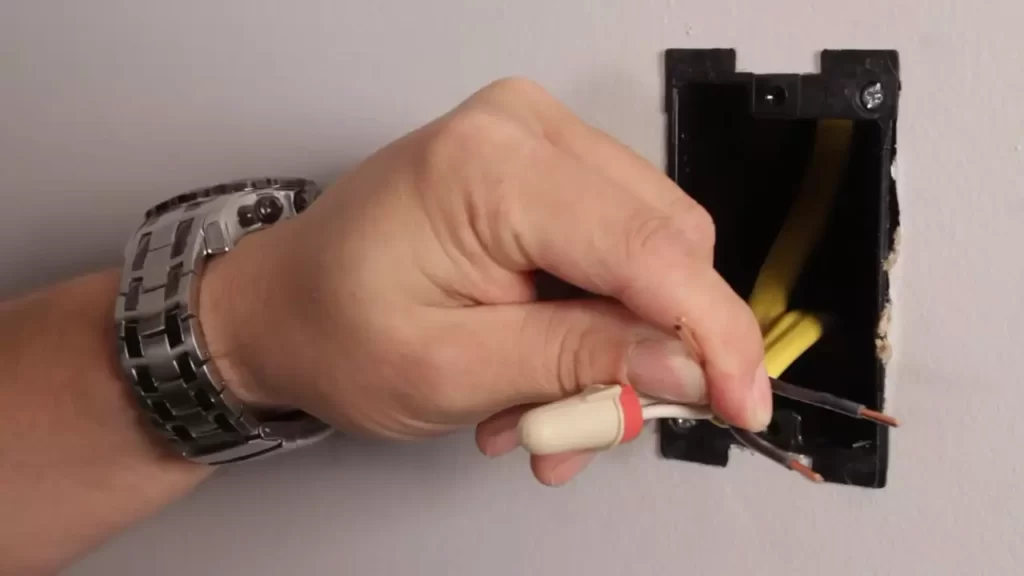
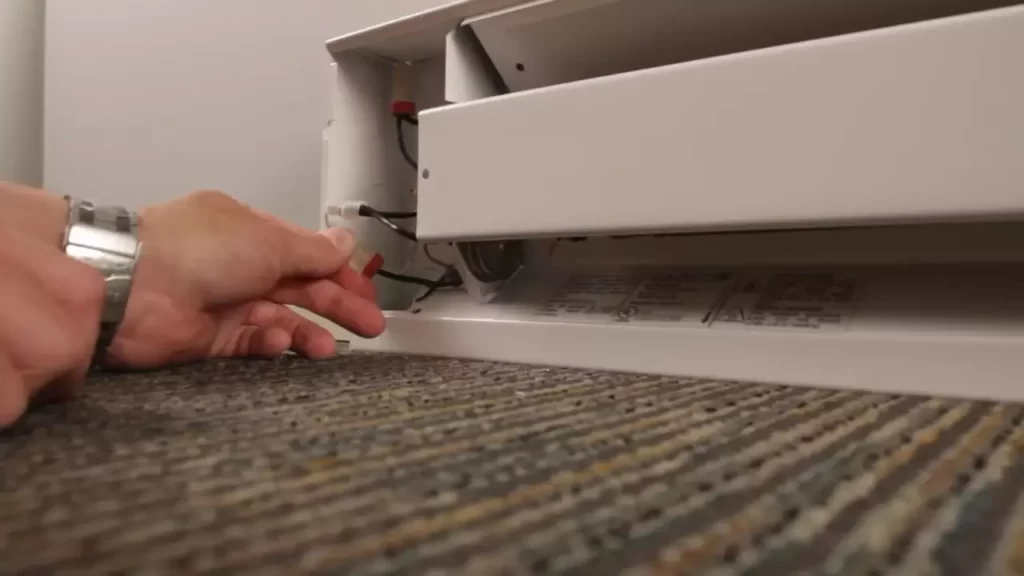
- Identify the supply wires: Locate the supply wires coming from the electrical panel. These wires will provide the power to the baseboard heater. Typically, there will be two supply wires, a black one (hot) and a white one (neutral).
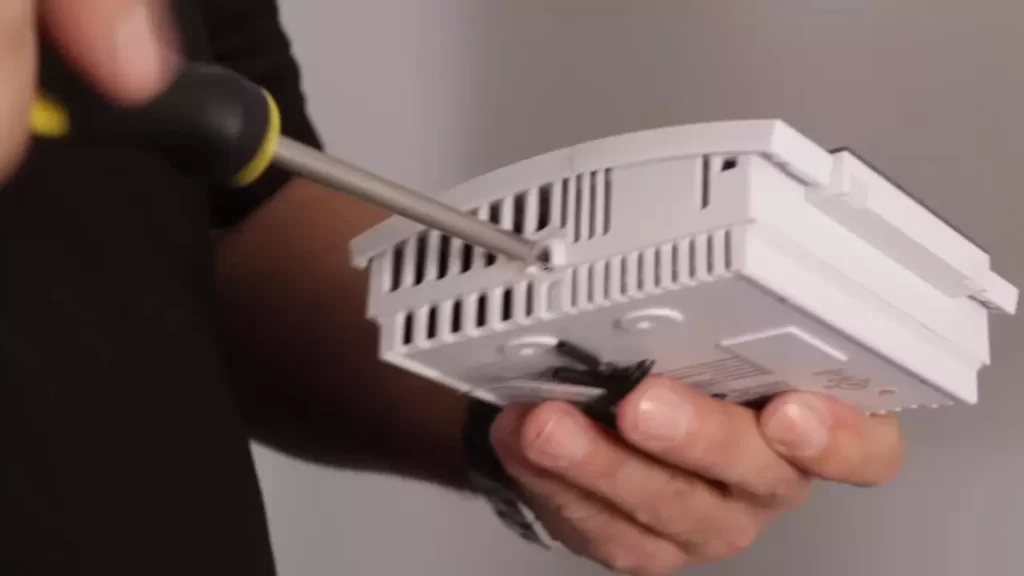
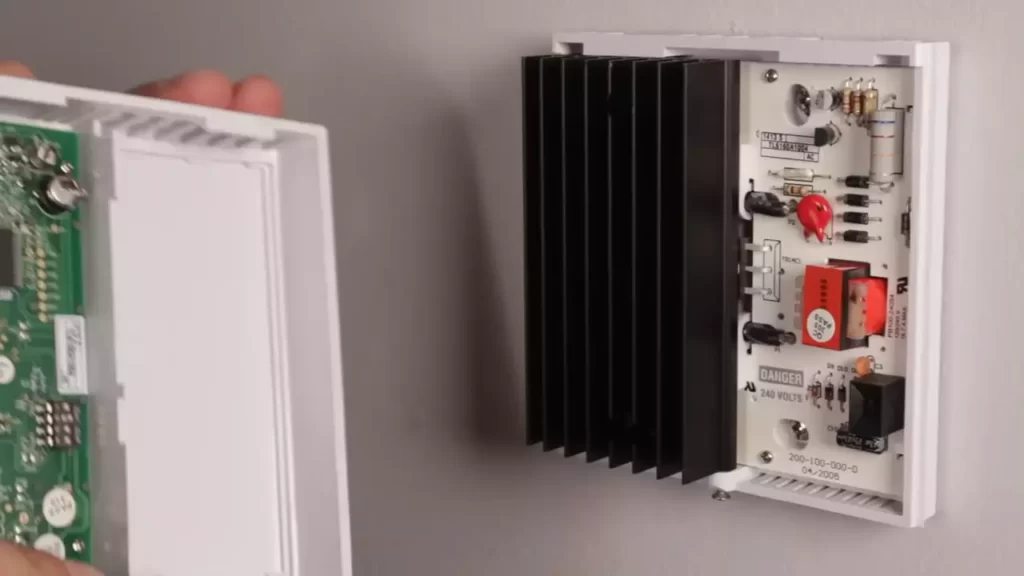
- Remove the baseboard heater’s junction box cover: In order to access the wiring connections, remove the junction box cover located at one end of the baseboard heater. Set the cover aside in a safe place.
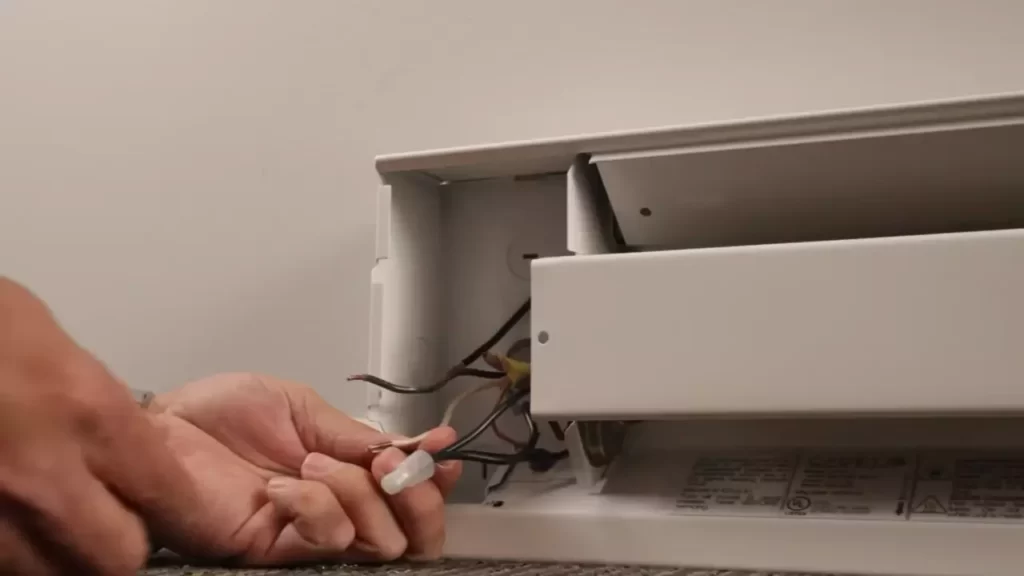
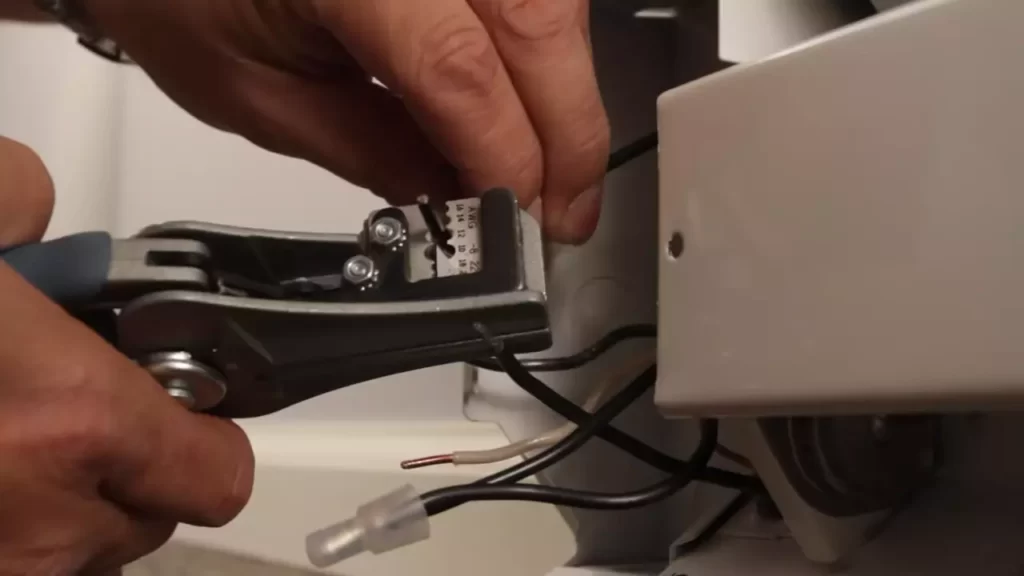
- Connect the supply wires to the heater: Using appropriate wire connectors, connect the black supply wire to the black heater wire and the white supply wire to the white heater wire. Make sure the connections are secure and insulated.
- Connect the heater wires to the wall thermostat: Now, it’s time to connect the heater wires to the wall thermostat. Depending on the thermostat model and wiring configuration, you may have different colored wires. Consult the thermostat’s manual to identify which wires correspond to the heater connections.
- Secure the wires and replace the junction box cover: Once all the connections are made, carefully tuck the wires into the junction box and secure them with appropriate wire clamps. Finally, place the junction box cover back onto the baseboard heater.
Following these steps will ensure a proper and safe connection between the electric baseboard heater and the wall thermostat. Remember to double-check each connection and verify that all electrical components are secured and insulated. If you’re unsure about any step or have any doubts, it’s always best to consult a qualified electrician for assistance. With the wiring and thermostat properly connected, your electric baseboard heater will be ready to provide you with cozy warmth during the colder months.
Test The Installation And Ensure Proper Functionality
Once you have successfully installed the electric baseboard heater with a wall thermostat, it is crucial to test the installation and ensure that everything is functioning properly. This step is essential to make sure that you can enjoy a warm and comfortable living space without any issues. In this section, we will go through two important steps to test the installation: turning on the power and checking if the heater is working, and verifying that the thermostat controls the temperature accurately.
Turn on the power and check if the heater is working
After completing the installation, it’s time to turn on the power and check if the heater is functioning as it should. Follow these simple steps to ensure a proper test:
- Locate the main power switch for your electric baseboard heater. It is usually located near the electrical panel or at the end of the baseboard unit.
- Ensure that the main power switch is in the “off” position before proceeding.
- Turn the main power switch to the “on” position and listen for any sounds indicating that the heater is receiving power.
- Observe the baseboard unit closely and check if the heating element starts to warm up. You should feel a gentle flow of warm air coming from the heater.
- Make sure to carefully inspect the heater for any signs of damage, such as melted wires or unusual smells. If you notice anything out of the ordinary, turn off the power immediately and seek professional assistance.
Verify that the thermostat controls the temperature accurately
Next, it is crucial to verify that the wall thermostat accurately controls the temperature and allows you to adjust the level of warmth according to your preference. Follow these steps to ensure proper functionality:
- Set the thermostat to a specific temperature that you desire for the room.
- Wait for a few minutes and monitor if the baseboard heater starts to adjust its output to reach the desired temperature.
- Use a separate thermometer to measure the actual temperature in the room and compare it to the temperature set on the thermostat.
- If the temperature displayed on the thermostat matches the actual temperature in the room, it means that the thermostat is functioning accurately.
- Repeat this process with different temperature settings to ensure that the thermostat consistently controls the temperature as expected.
By testing the installation and ensuring proper functionality of the electric baseboard heater with the wall thermostat, you can have peace of mind knowing that your heating system is working efficiently and effectively. If you encounter any issues during the test or notice any discrepancies, it is advisable to consult a professional electrician to diagnose and resolve the problem.
Heater Not Working Or Heating Insufficiently
If you’ve recently installed an electric baseboard heater with a wall thermostat and you’re facing issues with it not working or not heating up enough, there are a few potential causes that you can check for. In this article, we’ll cover the steps to troubleshoot the problem and get your heater back up and running effectively. Let’s dive in!
Check the power supply and wiring connections
The first step in troubleshooting an electric baseboard heater is to ensure that it has a consistent power supply. Check if the circuit breaker or fuse connected to the heater is functioning properly by flipping it off and then back on. If this doesn’t resolve the issue, you may need to inspect the wiring connections.
Inspect both the power supply wiring and the internal connections of the baseboard heater. Make sure that all the connections are secure and tight. If you notice any loose or damaged wires, you’ll need to repair or replace them accordingly. Using a voltage tester, check if power is reaching the heater. If not, it may be necessary to consult a professional electrician for further assistance.
Verify that the thermostat is set correctly
Incorrect thermostat settings can also lead to a heater not working or heating insufficiently. Start by ensuring that the thermostat is set to the desired temperature and heating mode. If the thermostat has a battery, check if it needs to be replaced. Low battery levels can interfere with the proper functioning of the thermostat.
Next, confirm that the thermostat is securely connected to the baseboard heater and the wiring is correctly installed. Double-check that the wires are properly connected to the corresponding terminals on both the thermostat and the heater itself. Loose or improperly connected wires can disrupt the heating process.
If everything appears to be set correctly but the heater is still not working as desired, you can try calibrating the thermostat. Follow the manufacturer’s instructions on how to calibrate the thermostat to accurately reflect the room temperature. This adjustment can help the heater provide more consistent and effective heating.
By checking the power supply and wiring connections, as well as verifying the thermostat settings, you can troubleshoot common issues that may arise with an electric baseboard heater. Remember to prioritize your safety throughout the troubleshooting process and seek professional assistance if needed.
We hope these steps have helped you resolve the issue with your electric baseboard heater! Stay warm this winter!
Uneven Heat Distribution In The Room
In a perfect world, your electric baseboard heater would distribute heat evenly throughout the room, creating a comfortable and cozy environment. However, it’s not uncommon to experience uneven heat distribution, where certain areas of the room may be warmer or cooler than others. Uneven heat distribution can be frustrating and even negate the purpose of installing a baseboard heater in the first place.
Ensure proper positioning and clearance around the heater
One of the common causes of uneven heat distribution in a room is improper positioning of the baseboard heater. It is essential to ensure that the heater is installed in an optimal location for maximum heat distribution. Here are some tips to ensure proper positioning and clearance:
- Position the heater against an exterior wall: Place the baseboard heater against an exterior wall to ensure efficient heat transfer. Exterior walls tend to be colder, and positioning the heater on these walls will help distribute heat evenly throughout the room.
- Avoid obstructing furniture: Ensure that there are no large furniture pieces obstructing the heater. Furniture can block the airflow and prevent heat from spreading evenly. Additionally, keeping furniture away from the heater will reduce the risk of fire hazards.
- Provide clearance from curtains and drapes: Curtains and drapes can act as barriers and trap heat around the baseboard heater. Ensure there is enough clearance between the heater and window treatments to allow proper airflow.
- Leave adequate space below the heater: Allow at least six inches of clearance between the baseboard heater and the floor. This clearance will ensure that the heated air can circulate freely and prevents any potential hazards.
- Keep the top of the heater clear: Do not place any objects on top of the baseboard heater. This will allow heat to disperse evenly and prevent any potential fire risks.
Check for obstructions or blocked airflow
Blocked airflow is another factor that contributes to uneven heat distribution in a room. It’s important to ensure that the baseboard heater has unobstructed airflow. Here are some steps to check for obstructions:
- Remove anything blocking the heat vents: Make sure that there are no objects obstructing the vents on the baseboard heater. These vents allow heated air to flow into the room. Ensure they are clean and free from any dust or debris.
- Check that the baseboard heater is level: Ensure that the heater is installed evenly and levelly against the wall. If the heater is not level, it can impact the airflow and result in uneven heat distribution.
- Inspect the room for other obstructions: Look for any other potential obstructions in the room that may block the airflow from the baseboard heater. This includes furniture, rugs, or other objects that might hinder the smooth circulation of warm air.
- Consider using a fan: If you find that the airflow is still not sufficient, you can use a fan to help distribute the heated air more evenly throughout the room. Place the fan in a strategic position to assist in spreading the warm air.
By following these tips for proper positioning and ensuring unobstructed airflow around your electric baseboard heater, you can minimize uneven heat distribution and create a more comfortable living environment.
Noisy Operation Or Unusual Smells
Inspect the heater for any loose components or debris
If you’re experiencing a noisy operation or unusual smells from your electric baseboard heater, it’s important to inspect the unit for any loose components or debris. Over time, the vibrations from the heater can cause screws or other parts to become loose, leading to rattling noises or strange smells. By carefully examining the heater, you can identify any potential issues that may be causing the problem.
Start by turning off the power to the heater and allowing it to cool down completely. Once it’s safe to touch, visually inspect the unit, looking for any loose screws, brackets, or covers. Use a screwdriver to tighten any loose screws and ensure that all components are secure. Pay close attention to the baseboard unit itself, as it can sometimes become loose from the wall over time.
In addition to loose components, debris can also cause noisy operation or strange smells. Dust, dirt, or other particles can accumulate inside the unit and interfere with its normal functioning. Carefully clean the interior of the heater using a vacuum cleaner or a soft brush. Be sure to remove any visible debris and check the air vents for any blockages that may be causing restricted airflow.
| Inspecting the heater for loose components or debris: |
| – Turn off power and allow to cool down |
| – Visually inspect for loose screws, brackets, or covers. |
| – Tighten any loose screws and ensure all components are secure. |
| – Clean the interior of the heater using a vacuum cleaner or soft brush. |
| – Remove any visible debris and check air vents for blockages. |
Clean or tighten any loose parts and check for burning odors
If you’ve identified any loose parts during your inspection, it’s important to clean or tighten them. Loose components can create additional noise and potentially result in further damage to the heater. Use a screwdriver or appropriate tools to tighten any loose screws, brackets, or covers that you found. Make sure everything is securely fastened to prevent any future issues.
After addressing any loose parts, it’s essential to check for any burning odors. Unusual smells can indicate overheating or other electrical issues. If you notice a burning odor, immediately turn off the heater and avoid using it until you can identify and resolve the problem. It’s wise to consult a professional electrician or the manufacturer for assistance.
Regular maintenance and inspection can help prevent noisy operation or unusual smells from your electric baseboard heater. By keeping the unit clean and ensuring all components are secure, you can enjoy efficient and worry-free heating in your home.
| Cleaning or tightening loose parts and checking for burning odors: |
| – Clean or tighten any loose parts you found during the inspection. |
| – Check for burning odors. |
| – If a burning odor is present, turn off the heater immediately and seek professional help. |
| – Regularly maintain and inspect your electric baseboard heater. |
Regular Cleaning And Dusting
Regular cleaning and dusting of your electric baseboard heater is essential to ensure its optimal performance and prolong its lifespan. Over time, dust and debris can accumulate on the heater fins and casing, hindering the heat output and potentially causing overheating. By following a few simple steps, you can keep your baseboard heater clean and in top condition.
Remove Dust and Debris from the Heater Fins and Casing
- Turn off the power to the baseboard heater at the circuit breaker to avoid any electrical hazards.
- Carefully inspect the heater fins and casing for any visible dirt, dust, or debris accumulation.
- Using a soft-bristle brush or a vacuum with a brush attachment, gently clean and remove the dust and debris from the fins and casing.
- Avoid using abrasive materials or sharp objects that may damage the delicate fins.
Vacuum or Wipe Down the Surface Regularly
- Regularly vacuum or wipe down the surface of the baseboard heater to remove any loose dirt or dust.
- For vacuuming, use a soft brush attachment to prevent scratching the surface.
- If wiping down, use a microfiber cloth dampened with water or a mild cleaning solution.
- Ensure the heater is turned off and completely cooled down before cleaning.
By incorporating regular cleaning and dusting into your maintenance routine, you can keep your electric baseboard heater running efficiently and effectively. This not only helps to maintain a comfortable and cozy living environment but also minimizes the risk of any potential hazards associated with a dirty or clogged heater. Make it a habit to clean your baseboard heater regularly, and you’ll enjoy its warmth and reliability for years to come.
Check For Any Signs Of Damage Or Wear
Inspect the heater for cracks, dents, or loose parts
Before proceeding with the installation of an electric baseboard heater with a wall thermostat, it is crucial to check for any signs of damage or wear on the unit. Conducting a thorough inspection ensures that the heater is safe to use and guarantees optimal performance.
Here are the steps to inspect the heater for cracks, dents, or loose parts:
- Begin by visually examining the exterior of the baseboard heater. Look for any visible cracks, dents, or other forms of damage.
- Inspect the heating element carefully. Check for any signs of overheating, discoloration, or corrosion. These may indicate a malfunction or potential electrical issues.
- Make sure to examine the thermostat connections. Check for loose wires or damaged terminals that could affect the unit’s functionality.
- Check the front cover and end caps of the heater. Look for any cracks or missing parts. These can affect the heater’s overall performance and safety.
- If the baseboard heater has a ventilation grill, ensure that it is intact and not blocked by debris. Proper ventilation is crucial for efficient heat distribution.
If you find any cracks, dents, or loose parts during the inspection, it is essential to address them before proceeding with the installation. Failure to do so may result in further damage or potential hazards.
Replace any damaged components or hire a professional for repairs
If you encounter any damaged components during the inspection, it is recommended to replace them with new ones. Operating an electric baseboard heater with damaged parts can compromise its performance and pose safety risks.
However, if you are uncertain about replacing the damaged components yourself, it is advisable to hire a professional for repairs. Professionals have the expertise and knowledge to handle electrical systems safely. They can ensure that the heater is installed correctly and functioning optimally.
Remember, the safety of your home and loved ones should be a top priority. By checking for signs of damage or wear before installing an electric baseboard heater with a wall thermostat, you are taking the necessary steps to maintain a safe and efficient heating system.
Monitor Energy Usage And Efficiency
One of the key benefits of installing an electric baseboard heater with a wall thermostat is the ability to monitor energy usage and efficiency. By keeping track of your energy consumption and heating costs, you can make informed decisions about how to optimize your heating system for maximum efficiency and cost savings.
Keep track of energy consumption and heating costs
A great way to monitor your energy usage and heating costs is to keep a log. This log will help you to see patterns and trends in your energy consumption and identify any spikes or anomalies that may be driving up your heating costs.
Here’s how you can keep track of energy consumption and heating costs:
- Create a spreadsheet or use an energy monitoring app to record your daily or monthly energy consumption.
- Make a note of any changes in your heating settings, such as temperature adjustments or usage patterns.
- Compare your energy consumption with the corresponding heating costs on your utility bills.
- Identify any areas where you can make adjustments to optimize efficiency and reduce costs.
Adjust temperature settings and usage patterns to optimize efficiency
Once you have a clear understanding of your energy consumption and heating costs, you can adjust your temperature settings and usage patterns accordingly to optimize efficiency.
Here are some tips for optimizing efficiency:
- Lower the thermostat temperature when you’re away from home or during times when you don’t need as much heat.
- Program your wall thermostat to automatically adjust the temperature according to your daily schedule.
- Ensure that your baseboard heaters are not obstructed by furniture or other objects, as this can reduce their efficiency.
- Consider using a space heater or zone heating in rooms that are not frequently used, rather than heating the entire house.
By adjusting your temperature settings and usage patterns, you can optimize your electric baseboard heater for efficiency, while still maintaining a comfortable living environment.
Remember: The key to optimizing efficiency is to find the right balance between comfort and energy savings.
Frequently Asked Questions For How To Install Electric Baseboard Heater With Wall Thermostat
How To Connect A Thermostat To An Electric Baseboard Heater?
To connect a thermostat to an electric baseboard heater, follow these steps:
1. Turn off the power to the heater.
2. Remove the cover of the thermostat.
3. Connect the thermostat wires to the corresponding heater wires.
4. Replace the thermostat cover.
5. Turn on the power and test the thermostat settings.
Do Electric Baseboard Heaters Need Their Own Circuit?
Yes, electric baseboard heaters typically require their own dedicated circuit. This allows them to draw the necessary power without overloading the circuit. It is important to consult a qualified electrician to ensure proper installation and safety.
Can You Hook Up All Baseboard Heaters To One Wall Mounted Thermostat?
Yes, you can connect all baseboard heaters to one wall-mounted thermostat for convenient temperature control throughout your space.
What Kind Of Thermostat Do I Need For the Electric Baseboard Heater?
An electric baseboard heater requires a line voltage thermostat designed specifically for that purpose.
Conclusion
To sum up, installing an electric baseboard heater with a wall thermostat is a straightforward process that can enhance the efficiency and comfort of your home. By following the step-by-step instructions provided in this blog post, you can ensure a safe and proper installation.
Remember to double-check your electrical connections, adjust the thermostat settings based on your needs, and enjoy the benefits of a cozy and controlled heating system. Stay warm and save energy!