Installing crown moulding with corner blocks is a straightforward process that adds elegance to your home’s decor. To install, attach the corner blocks to the wall with adhesive, then measure and cut the moulding to fit between them, securing it with brad nails.
Understanding Crown Moulding And Corner Blocks
When it comes to adding a touch of elegance and sophistication to your home’s interior, crown moulding is an excellent choice. Crown moulding is a decorative trim that is installed along the top of walls where they meet the ceiling. It adds visual interest and can help to create a polished and finished look in any room.
What is Crown Moulding and its purpose?
Simply put, crown moulding is a decorative trim that is installed at the junction of the wall and ceiling. It adds a touch of tradition and elegance to any room and can significantly enhance the visual appeal of your home’s interior. The main purpose of crown moulding is to create a smooth transition between the wall and the ceiling, hiding any imperfections and creating a cohesive look.
Exploring the Benefits of Using Corner Blocks
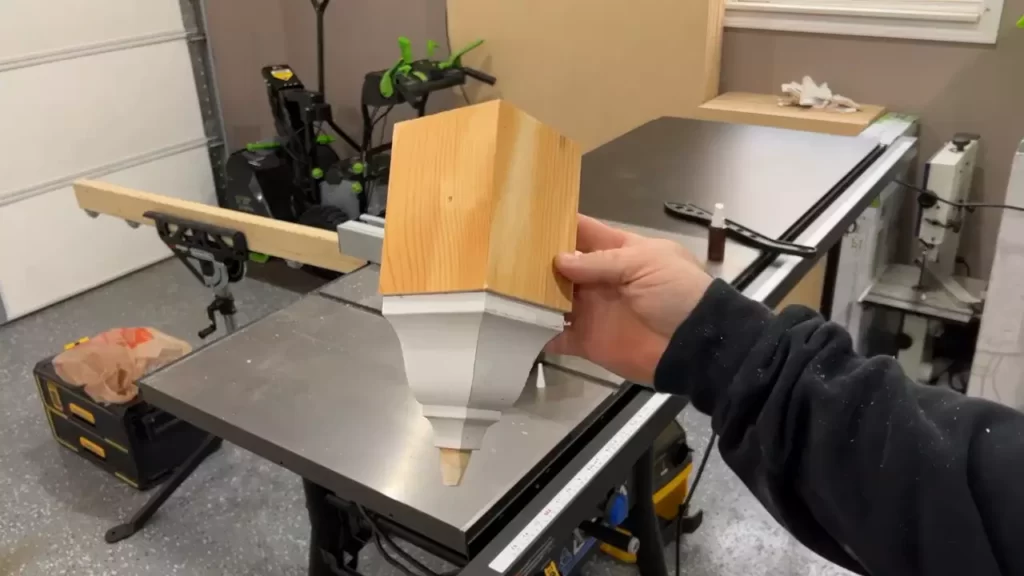
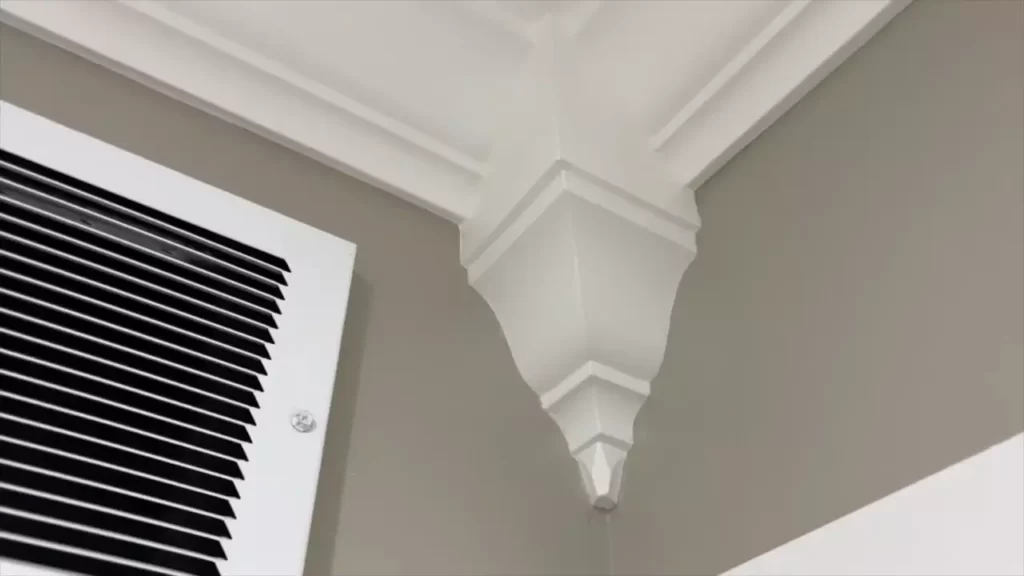
When it comes to installing crown moulding, corner blocks are a popular choice. Corner blocks are pre-made pieces that are used to create seamless transitions at the corners of the room. They are designed to fit perfectly with the crown moulding pieces, eliminating the need for miter cuts or complex calculations.
Here are some of the benefits of using corner blocks:
- Simplifies installation: Using corner blocks can simplify the installation process significantly. Instead of having to measure and cut the moulding at precise angles, you can simply attach the corner blocks and fit the crown moulding pieces into place. This not only saves time but also reduces the chances of making mistakes.
- Provides a professional finish: Corner blocks ensure that the corners of the crown moulding are neatly finished and seamlessly integrated. This creates a professional and polished look that adds to the overall aesthetic appeal of the room.
- Allows for flexibility: Using corner blocks provides more flexibility in terms of design and style choices. You can choose from a variety of corner block designs, including decorative options that enhance the visual appeal of the crown moulding.
Overall, using corner blocks with crown moulding simplifies the installation process, provides a professional finish, and allows for greater design flexibility. If you want to add an elegant touch to your home’s interior, consider installing crown moulding with corner blocks for a seamless and stylish look.
Preparing For Installation
Before you can install crown moulding with corner blocks, it is important to properly prepare for the installation process. This involves gathering the necessary tools and materials and accurately measuring and calculating the length of the crown moulding. By following these steps, you can ensure a smooth and successful installation.
Tools and Materials Required
To install crown moulding with corner blocks, you will need the following tools and materials:
| Tools | Materials |
|---|---|
|
|
Measuring and Calculating the Crown Moulding Length
Accurate measurements are essential to ensure that your crown moulding fits precisely with the corner blocks. Follow these steps to measure and calculate the crown moulding length:
- Start by measuring the length of each wall where the crown moulding will be installed. Use a tape measure and record the measurements.
- Next, add up the lengths of all the walls to determine the total length of the crown moulding needed. Make sure to account for any corners or angles where the moulding will need to be cut.
- When calculating the total length, it’s a good idea to add a small percentage for waste and mistakes. This will ensure you have enough moulding to complete the project without running out.
- After calculating the total length, it’s time to purchase the crown moulding. Make sure to buy a little extra in case of any errors or accidents during the installation process.
By carefully measuring and calculating the crown moulding length, you can avoid any unnecessary delays or setbacks during the installation process. This will help to ensure a seamless and professional finish for your crown moulding with corner blocks.
Cutting And Preparing The Crown Moulding
Installing crown moulding with corner blocks can add a touch of elegance and sophistication to any room. But before you can start installing the moulding, it’s important to cut and prepare it properly. This step is crucial to ensure a seamless and professional-looking installation. In this section, we will discuss two key aspects of cutting and preparing crown moulding: using a miter saw to make accurate angle cuts and properly sanding and finishing the moulding.
Using a Miter Saw to Make Accurate Angle Cuts
When it comes to cutting crown moulding, using a miter saw is essential for achieving precise and accurate angle cuts. Here’s how you can do it:
- Measure and mark the desired length of the moulding using a tape measure and pencil.
- Position the moulding upside down on the miter saw, with the bottom of the moulding against the fence and the ceiling edge facing downwards.
- Adjust the miter saw to the desired angle for your corner, typically 45 degrees for most corners.
- Carefully align the marked line with the blade, ensuring that the moulding is held securely in place.
- Gently lower the blade to make the cut, applying a steady and controlled motion.
- Repeat this process for each piece of moulding, ensuring that the angles are cut correctly for each corner.
By following these steps and using a miter saw, you can ensure that your crown moulding will fit perfectly at each corner, creating a seamless and polished look.
Properly Sanding and Finishing the Crown Moulding
Once you have cut the crown moulding, it’s important to properly sand and finish it to create a smooth and flawless surface. Here are some tips to help you achieve the best results:
- Start by using a medium-grit sandpaper to remove any rough edges or imperfections.
- Gently sand the entire surface of the moulding, following the grain, until it feels smooth to the touch.
- Switch to a fine-grit sandpaper to further refine the surface, removing any remaining roughness.
- After sanding, wipe down the moulding with a clean, damp cloth to remove any dust or debris.
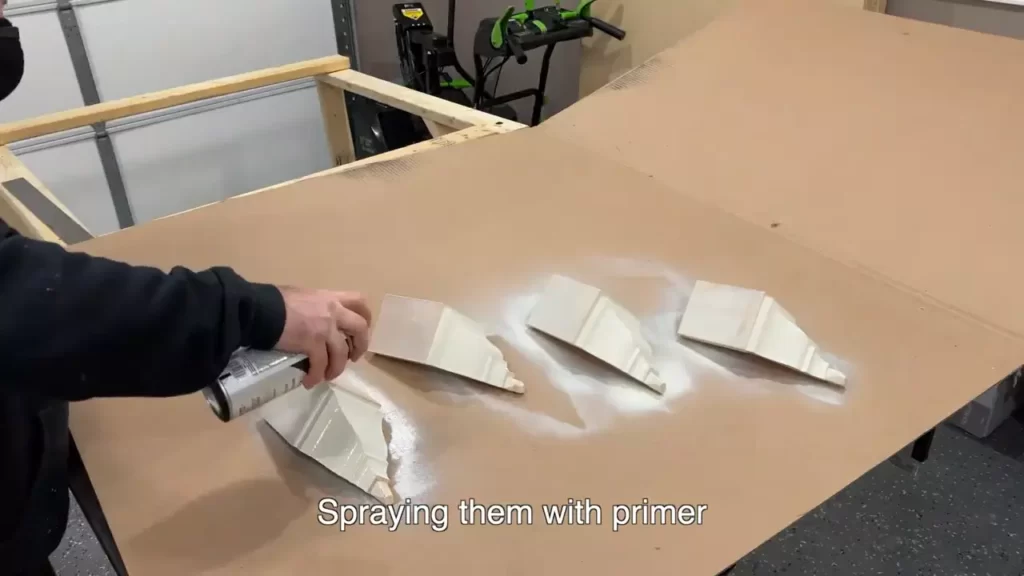
- Apply a coat of primer to the moulding, allowing it to dry completely before moving on to the next step.
- Finally, apply a high-quality paint or stain of your choice to enhance the appearance of the moulding and protect it from wear and tear.
By taking the time to properly sand and finish your crown moulding, you can enhance its overall look and ensure its longevity.
Installing The Corner Blocks
One of the key elements in achieving a professional and polished look when installing crown moulding is properly securing the corner blocks. Corner blocks not only provide a clean transition between two walls but also simplify the installation process by eliminating the need to miter the moulding at the corners. In this section, we will discuss two crucial steps: determining the placement and marking of the corner blocks, as well as attaching them securely to the wall.
Determining the Placement and Marking of Corner Blocks
Before proceeding with the installation, it is essential to determine the location of the corner blocks accurately. Here’s a step-by-step guide on how to accomplish this:
- Measure the height of the wall: Begin by measuring the height of the wall from the floor to the ceiling. Make sure to take accurate measurements as any discrepancy can affect the alignment of the corner blocks.
- Divide the height by the size of the corner blocks: Determine the size of the corner blocks you are using. Divide the height of the wall by the size of the corner blocks to calculate the number of blocks required. Remember to round up or down to ensure an even distribution.
- Mark the desired placement: With the number of corner blocks determined, make a light pencil mark on the wall indicating the desired placement of each block. Ensure the marks are level by using a spirit level.
Attaching Corner Blocks to the Wall Securely
Now that you have determined the placement and marked the position of the corner blocks, it’s time to securely attach them to the wall. Follow these steps to ensure a sturdy and professional installation:
- Prepare the corner blocks: Before attaching them to the wall, check the edges of the corner blocks for any irregularities or rough surfaces. Sand them down if needed to ensure a smooth and professional finish.
- Apply adhesive: Apply a generous amount of construction adhesive to the back of each corner block. This will provide a strong bond between the block and the wall. Be sure to follow the manufacturer’s instructions regarding drying time and curing.
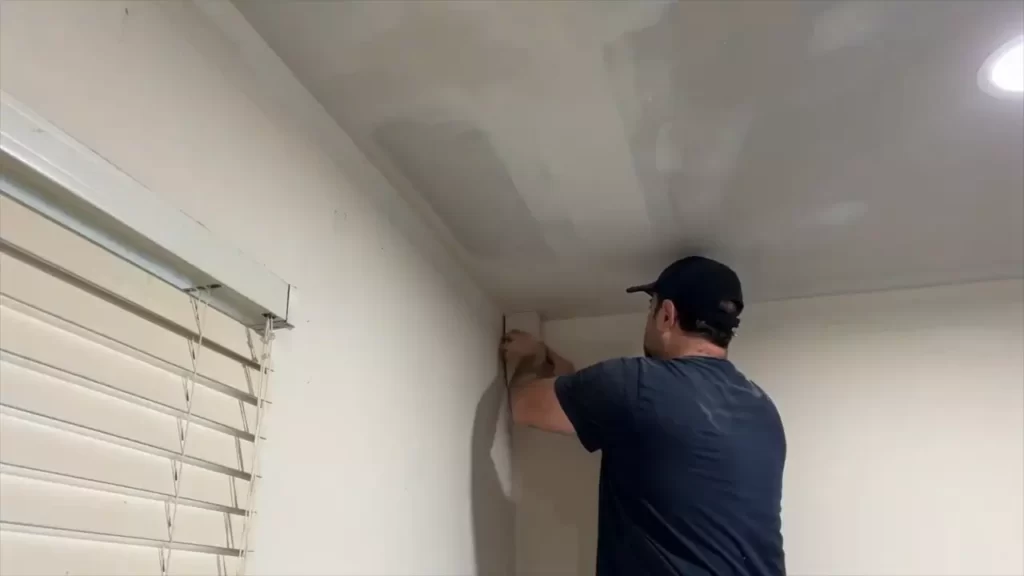
- Press firmly and adjust: Once adhesive has been applied, press each corner block firmly against the wall, aligning it with the marked placement. Ensure they are level and square using a spirit level. Make any necessary adjustments before the adhesive sets.
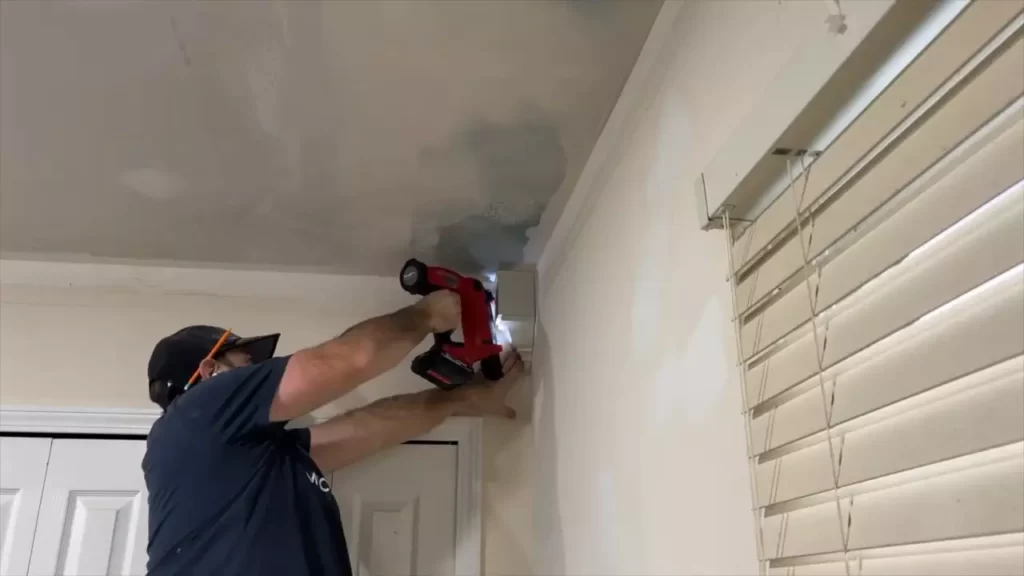
- Secure with finishing nails: For additional stability, secure the corner blocks to the wall by driving finishing nails through the centre of each block. Countersink the nails slightly and fill the holes with wood putty for a seamless finish.
By following these steps, you can successfully install crown moulding with corner blocks. The corner blocks not only add visual interest to your space but also simplify the installation process, making it accessible for DIY enthusiasts and professionals alike. Achieve the elegance and sophistication of crown moulding while saving time and effort with this convenient method.
Measuring And Cutting Crown Moulding For Corners
When it comes to installing crown moulding with corner blocks, one of the most critical steps is measuring and cutting the moulding for corners. This is where precise measurements and accurate cuts can make all the difference in achieving a clean and professional-looking installation.
Understanding Inside and Outside Corner Cuts
To begin, it’s essential to understand the difference between inside and outside corner cuts when measuring and cutting crown moulding. Inside corners are the corners that face inward, while outside corners are the corners that face outward.
For inside corners, you will need to make miter cuts where the two pieces of moulding meet at a 90-degree angle. The angle of the miter cut will be half of the total angle formed by the two intersecting walls. For example, if the corner forms a 90-degree angle, each miter cut will be at a 45-degree angle.
On the other hand, outside corners require coping cuts to create a seamless joint. Coping involves cutting along the profile of one piece of moulding to fit it precisely against the other piece. This technique ensures a tight fit and eliminates any unsightly gaps or overlaps.
Precisely Cutting Crown Moulding for Each Corner
Once you understand the concept of inside and outside corner cuts, the next step is to make precise cuts for each corner. Here’s a step-by-step guide:
- Start by measuring the length of the wall where the crown moulding will be installed. Add a couple of inches to account for any errors or miscalculations.
- Use a miter saw to make the necessary cuts for inside corners, following the calculated angles. Remember to position the moulding correctly to ensure that the inside edge is against the saw fence.
- For outside corners, make a rough cut using a miter saw with the moulding held upside down. Use a coping saw to carefully cut along the profile of the moulding. Take your time to achieve a precise fit.
- After cutting the moulding pieces for each corner, dry-fit them to check the accuracy of the cuts. Make any adjustments or recuts if necessary.
By taking the time to measure accurately and cut precisely for each corner, you can achieve a seamless and professional-looking installation of crown moulding with corner blocks. Remember to double-check your measurements and cuts before securing the moulding in place.
Installing The Crown Moulding With Corner Blocks
Crown moulding adds a touch of elegance and sophistication to any room. While installing crown moulding may seem challenging, using corner blocks can simplify the process and give your project a professional finish. In this guide, we will walk you through the steps to properly align and secure your crown moulding with corner blocks.
Properly Aligning the Crown Moulding with the Corner Blocks
Step 1: Measure and cut your crown moulding: Start by measuring the length of the wall where the crown moulding will be installed. Using a miter saw, cut the moulding at a 45-degree angle to create clean and precise corners. Make sure to account for the length of the corner blocks when taking your measurements.
Step 2: Position the corner blocks: Place the corner blocks in the desired locations where the moulding will meet at the corners. It’s essential to ensure that the corner blocks are positioned evenly and align perfectly with the wall.
Securing the Crown Moulding to the Wall and Corner Blocks
Step 3: Apply adhesive: Using a construction adhesive, apply a generous amount to the back of each corner block and the ends of the crown moulding. This will help to create a strong bond between the moulding and the corner blocks, ensuring long-lasting stability.
Step 4: Attach the corner blocks: Press the corner blocks firmly against the wall, making sure they are aligned with the desired corners. Use a level to ensure they are straight and adjust if necessary. Let the adhesive dry according to the manufacturer’s instructions before proceeding.
Step 5: Secure the crown moulding: Apply adhesive along the back of the crown moulding where it will be attached to the wall. Press the moulding firmly against the wall and the corner blocks, ensuring a tight fit. Use finish nails to further secure the moulding into place. Countersink the nails using a nail punch and fill the holes with wood putty for a seamless finish.
Step 6: Sand and paint (optional): Sand any rough edges and imperfections on the moulding and corner blocks. Then, paint or stain the crown moulding to match your desired aesthetic. This step will enhance the overall appearance of your project and provide a polished look.
By using corner blocks to install crown moulding, you can achieve a professional and visually appealing finish. Follow these steps carefully to ensure the moulding is properly aligned and securely attached, resulting in a stunning addition to your home’s interior.
Filling And Finishing Touches
When it comes to adding elegance and style to your home, crown moulding with corner blocks is a popular choice. These decorative pieces can transform any room, giving it a classic and timeless look. Once you have installed the crown moulding and corner blocks, it’s time to focus on the filling and finishing touches. This step is crucial to achieving a seamless finish that will make your crown moulding and corner blocks look like they were professionally installed.
Filling Nail Holes and Seams for a Seamless Finish
Now that you have installed your crown moulding and corner blocks, it’s time to conceal any visible nail holes and seams. This will create a seamless finish that enhances the overall appearance of the moulding. Here’s how you can do it:
- Start by filling the nail holes with a wood filler that matches the color of your crown moulding. This will help the filled holes blend in seamlessly with the rest of the moulding.
- Using a putty knife, apply the wood filler to the nail holes, ensuring that they are completely filled. Smooth the filler over the surface, removing any excess.
- Allow the wood filler to dry according to the manufacturer’s instructions. Once dry, use fine-grit sandpaper to gently sand down the filled areas until they are smooth and flush with the surrounding moulding.
- Inspect the seams between the crown moulding and the corner blocks. If there are any visible gaps, use a caulk gun to fill them with a paintable caulk. Apply a thin bead of caulk along the seam, then use a damp cloth or your finger to smooth it out and remove any excess.
Sanding and Painting the Crown Moulding and Corner Blocks
After you have filled the nail holes and seams, it’s time to sand and paint the crown moulding and corner blocks. Follow these steps for a professional-looking finish:
- Begin by sanding the entire surface of the crown moulding and corner blocks with medium-grit sandpaper. This will help smooth out any rough edges or imperfections.
- After sanding, use a tack cloth to remove any dust or debris from the surface. This will ensure that the paint adheres properly to the moulding.
- Apply a coat of primer to the crown moulding and corner blocks. This helps create a smooth base for the paint and improves its durability.
- Allow the primer to dry completely before applying the paint. Choose a high-quality paint that complements the style and color scheme of your room.
- Use a brush or roller to apply an even coat of paint to the crown moulding and corner blocks. Start from one end and work your way to the other, ensuring that the paint is applied evenly and smoothly.
- Allow the paint to dry according to the manufacturer’s instructions. Apply a second coat if necessary, following the same technique as before.
Once the paint is dry, step back and admire your beautifully installed and finished crown moulding with corner blocks. The filling and finishing touches are essential in achieving a seamless look that will enhance the overall aesthetic of your space.
Tips And Troubleshooting
When it comes to installing crown moulding, using corner blocks can add a touch of elegance and make the process easier. However, like any home improvement project, there are common mistakes to avoid and potential issues to troubleshoot. In this section, we will discuss some important tips to ensure a successful installation, as well as how to troubleshoot uneven walls or gaps between the moulding and corner blocks.
Common Mistakes to Avoid during Installation
Installing crown moulding with corner blocks requires attention to detail and precision. To ensure a smooth installation, it is important to avoid these common mistakes:
- Not measuring accurately: Proper measurement is crucial when it comes to installing crown moulding. Take the time to measure the walls, corner blocks, and moulding pieces carefully. Even a small miscalculation can result in gaps or uneven corners.
- Not preparing the walls: Before installing the corner blocks and moulding, make sure the walls are clean, smooth, and free of any dirt or debris. This will help the adhesive or nails adhere properly and create a solid foundation.
- Incorrect cutting of the moulding: Cutting the moulding at the wrong angle or length can lead to visible gaps or uneven joins. Double-check your measurements and use precision tools to ensure accurate cuts.
- Not using proper adhesive or nails: Choosing the right adhesive or nails is essential for a secure and long-lasting installation. Always follow the manufacturer’s instructions and use suitable materials for your project.
- Failure to prime and paint: Before installing the moulding, it is advisable to prime and paint it. This will not only enhance its appearance but also protect it from potential damage or wear over time.
Troubleshooting Uneven Walls or Gaps between Moulding and Corner Blocks
Uneven walls or gaps between the moulding and corner blocks can be frustrating but can typically be resolved with the following troubleshooting steps:
- Check the corners: Ensure that the corner blocks are properly aligned and installed. If they are not in the correct position, adjust them accordingly before proceeding with the installation.
- Fill gaps with caulk: If there are small gaps between the moulding and corner blocks, use caulk to fill them in. Apply the caulk carefully, following the manufacturer’s instructions, and smooth it out for a seamless finish.
- Use shims for uneven walls: If your walls are not perfectly straight or even, you can use shims to level the moulding. Place the shims between the moulding and the wall in the areas where there are gaps, and secure them with adhesive or nails.
- Sand and repaint: In some cases, unevenness or gaps may be noticeable even after troubleshooting. In such situations, you may need to sand down any high spots or fill larger gaps with wood filler. Once the necessary repairs are made, repaint the moulding to achieve a cohesive look.
By keeping these tips in mind and knowing how to troubleshoot common issues, you can confidently install crown moulding with corner blocks and achieve a professional and polished result. Enjoy the elegance and beauty that crown moulding adds to your home!
Additional Design Ideas And Inspiring Examples
When it comes to adding crown moulding to your home, using corner blocks can elevate the style and design of any room. Not only do they provide a seamless transition between walls and ceilings, but they also add a touch of elegance to your space. In this section, we’ll explore different crown moulding styles and finishes, as well as showcase stunning examples of crown moulding with corner blocks designs. Get ready to be inspired!
Exploring Different Crown Moulding Styles and Finishes
When it comes to crown moulding, there is a wide range of styles and finishes to choose from. The right choice will depend on the overall aesthetic you wish to achieve in your space. Here are a few popular options to consider:
- Traditional Crown Moulding: This style features classic, symmetrical curves and is often made of wood or plaster. It adds a timeless charm to any room, especially those with a more traditional or vintage-inspired design.
- Modern Crown Moulding: If you have a contemporary or minimalist interior, modern crown moulding is the perfect choice. It typically features clean lines and geometric shapes, enhancing the sleek and streamlined look of your space.
- Elegant Crown Moulding: For a touch of luxury and sophistication, consider choosing an elegant crown moulding style. This may include ornate details, such as intricate patterns or floral motifs, which can transform a room into a grand and opulent space.
- Rustic Crown Moulding: If you prefer a more natural and cozy atmosphere, rustic crown moulding is the way to go. This style often incorporates wood with a distressed or reclaimed look, adding warmth and character to your space.
Showcasing Stunning Crown Moulding with Corner Blocks Designs
Mixing crown moulding with corner blocks can create breathtaking designs that become the focal point of any room. Here are some inspiring examples to ignite your creativity:
Example 1: Classic EleganceIn this living room, a traditional crown moulding with corner blocks was used to create a stunning frame around the ceiling. The intricate details of the moulding combined with the corner blocks add a touch of opulence and sophistication, making this space truly elegant. |
Example 2: Modern SimplicityIn a contemporary dining area, a modern crown molding with corner blocks was employed to bring a sleek and minimalist touch. The clean lines of the moulding, paired with the corner blocks, create a seamless transition between the walls and ceiling, adding a subtle architectural element to the room. |
Example 3: Rustic CharmA rustic crown moulding with corner blocks can instantly transform a plain bedroom into a cozy retreat. The combination of the distressed wood moulding and the corner blocks brings a touch of rustic charm and adds character to the space, creating a warm and inviting ambiance. |
|
No matter the style or finish you choose, incorporating crown molding with corner blocks is a surefire way to enhance the beauty and elegance of your home. Let your imagination run wild, and create a space that truly reflects your personal style!
Frequently Asked Questions Of How To Install Crown Moulding With Corner Blocks
How Do You Use Corner Blocks For Crown Molding?
To use corner blocks for crown molding, first measure and mark the precise location for each block in the corners. Apply adhesive to the backs of the blocks and press them firmly onto the wall surface. Next, install the crown molding, cutting it at 45-degree angles to fit around the corner blocks.
Finally, secure the molding in place using nails or screws.
How Do You Install Base Molding Corner Blocks?
To install base molding corner blocks, follow these steps:
1. Measure and cut the base molding at a 45-degree angle.
2. Apply adhesive to the back of the corner block.
3. Press the corner block firmly against the wall and ensure it is level.
4. Nail the base molding to the wall, making sure it is flush with the corner block.
5. Repeat the process for all corners.
Do You Need Corner Pieces For Crown Molding?
Yes, corner pieces are necessary for crown molding installation. They help to join the molding at inside and outside corners, giving a seamless and professional finish to the overall look.
How Do You Fill A Gap Between Crown Molding And Ceiling?
To fill a gap between crown molding and the ceiling, use a caulk gun and paintable caulk. Apply a thin line of caulk along the gap, smoothing it out with a putty knife. Let it dry, then paint over it to blend with the molding and ceiling.
Conclusion
To successfully install crown moulding with corner blocks, follow the steps detailed in this blog post. By utilizing corner blocks, you can achieve a professional and polished look while simplifying the installation process. Remember to carefully measure and cut your moulding pieces and use adhesive for secure placement.
With a little patience and attention to detail, you can enhance the elegance and charm of any space. Don’t be afraid to tackle this DIY project and elevate your home’s interior design. Happy installing!
