To install carpet without a stretcher, you can use the “double-sided carpet tape” method for a secure and efficient installation. By applying the tape on the edges and along the seams, you can ensure that the carpet stays in place without the need for a stretcher.
Carpet installation is a task that often requires the use of specialized tools, including a stretcher. However, in certain situations, you may not have access to a stretcher or prefer an alternative method. Fortunately, there is a solution – installing carpet without a stretcher.
This article will provide you with a step-by-step guide to using the “double-sided carpet tape” method, which can achieve a secure and professional-looking installation without the need for a stretcher. Whether you’re a DIY enthusiast or simply facing budget constraints, this method offers a practical and effective solution for installing carpet.
Materials Needed
Before you begin installing carpet without a stretcher, it’s important to gather all the necessary materials. Having everything you need at hand will make the installation process a lot smoother and more efficient. Here are the materials you’ll need:
Carpet
The first and most obvious material you’ll need is the carpet itself. Make sure to choose a carpet that suits your style and fits the dimensions of the room you’re carpeting. Measure the area carefully to ensure you get the right amount of carpet.
Double-sided carpet tape
To secure the carpet in place without a stretcher, you’ll need double-sided carpet tape. This adhesive tape is strong enough to hold the carpet firmly to the floor without the need for stretching. Make sure to choose a high-quality tape that is suitable for the type of carpet you’re installing.
Knee kicker
A knee kicker is a specialized tool used in carpet installation. It helps you stretch the carpet in tight corners and along the edges of the room. While you won’t be using a stretcher in this method, a knee kicker will still be useful for achieving a flush finish.
Carpet trim
Carpet trim, also known as transition strips, is used to cover the edges of the carpet where it meets other types of flooring, such as tile or hardwood. This not only gives your carpet installation a professional look but also prevents any fraying or damage to the carpet edges.
Utility knife
A utility knife is an essential tool for cutting the carpet to size. It allows you to make precise cuts, ensuring a neat and accurate installation. Make sure to have extra blades on hand, as they can dull quickly when cutting through thick carpet material.
Measuring tape
Accurate measurements are crucial when installing carpet without a stretcher. Use a measuring tape to measure the dimensions of the room and determine how much carpet you’ll need. Double-check your measurements to avoid any unnecessary waste or shortages.
Straightedge
A straightedge, such as a long level or a carpenter’s square, is useful for ensuring straight and clean cuts when trimming the carpet. It helps you maintain straight lines along walls and edges, giving your installation a professional finish.
Now that you have gathered all the necessary materials, you’re ready to proceed with the carpet installation process. Follow the steps carefully, and soon you’ll have a beautifully installed carpet without the need for a stretcher.
Measuring And Preparing The Room
Before diving into the installation process, it’s crucial to properly measure and prepare the room for installing carpet without a stretcher. Taking accurate measurements will ensure that you have enough carpet to cover the entire space, while preparing the room will provide a clean and seamless surface for the carpet to be laid on. In this section, we’ll cover the essential steps for measuring the room dimensions accurately, marking the center of the room, removing any existing carpet or flooring, repairing any damages on the subfloor, and cleaning the subfloor thoroughly.
Measuring the Room Dimensions Accurately
The first step in installing carpet without a stretcher is to measure the room dimensions accurately. This will help you determine the amount of carpet you’ll need and how it should be cut. To measure the room, follow these steps:
- Begin by measuring the length of the room. Use a tape measure and measure from one wall to the opposite wall. Write down the measurement.
- Next, measure the width of the room. Again, use a tape measure and measure from one wall to the opposite wall. Write down the measurement.
- To ensure accuracy, it’s recommended to measure the room in multiple areas, particularly if the room has irregular dimensions. Take note of any variations in measurements.
Marking the Center of the Room
Once you have measured the room dimensions accurately, the next step is to mark the center of the room. This will help you align the carpet properly during installation. To mark the center of the room, follow these steps:
- Measure the length of the room and divide it by 2 to find the midpoint. Mark this point with a pencil or tape.
- Measure the width of the room and divide it by 2 to find the midpoint. Mark this point as well.
- The intersection of the length midpoint and the width midpoint will be the center of the room. Mark it clearly so that it is easily visible during installation.
Removing Any Existing Carpet or Flooring
If there is any existing carpet or flooring in the room, it needs to be removed before installing the new carpet. Follow these steps to remove any existing carpet or flooring:
- Start by removing any furniture or objects from the room to create a clear space for work.
- Use a utility knife to cut the existing carpet into manageable sections.
- Roll up each section of carpet and remove it from the room.
- If there is any underlying padding or underlayment, remove it as well.
- If there are any nails or staples sticking out of the subfloor, remove them to create a smooth surface.
Repairing Any Damages on the Subfloor
Prior to installing the new carpet, it’s important to inspect the subfloor for any damages and make necessary repairs. Here’s how to repair any damages on the subfloor:
- Walk around the room and carefully examine the subfloor for any holes, cracks, or uneven areas.
- If you find any small holes or cracks, fill them with wood filler or a suitable patching compound. Smooth out the surface and allow it to dry.
- If there are more significant damages, such as rotten or weakened areas, consider replacing the affected sections of the subfloor.
Cleaning the Subfloor Thoroughly
Before installing the carpet, it’s crucial to clean the subfloor thoroughly. This will ensure that the carpet adheres properly and prevent any potential issues in the future. Follow these steps to clean the subfloor:
- Remove any dust, dirt, or debris from the subfloor using a broom or vacuum cleaner.
- Inspect the subfloor for any leftover adhesive residue or stains. If present, use an appropriate adhesive remover or cleaning solution to remove them.
- Allow the subfloor to dry completely before proceeding with the carpet installation.
By taking the time to measure the room accurately, mark the center, remove existing flooring, repair damages on the subfloor, and clean it thoroughly, you’ll set a solid foundation for installing carpet without a stretcher. These preparatory steps will ensure a smooth and successful installation process, and ultimately, a beautifully carpeted room.
Cutting And Securing The Carpet
When it comes to installing carpet without a stretcher, one important step is cutting and securing the carpet. This involves unrolling and positioning the carpet, cutting it to fit the room dimensions, placing double-sided carpet tape along the edges, using a knee kicker to stretch and secure the carpet, and finally trimming any excess with a utility knife.
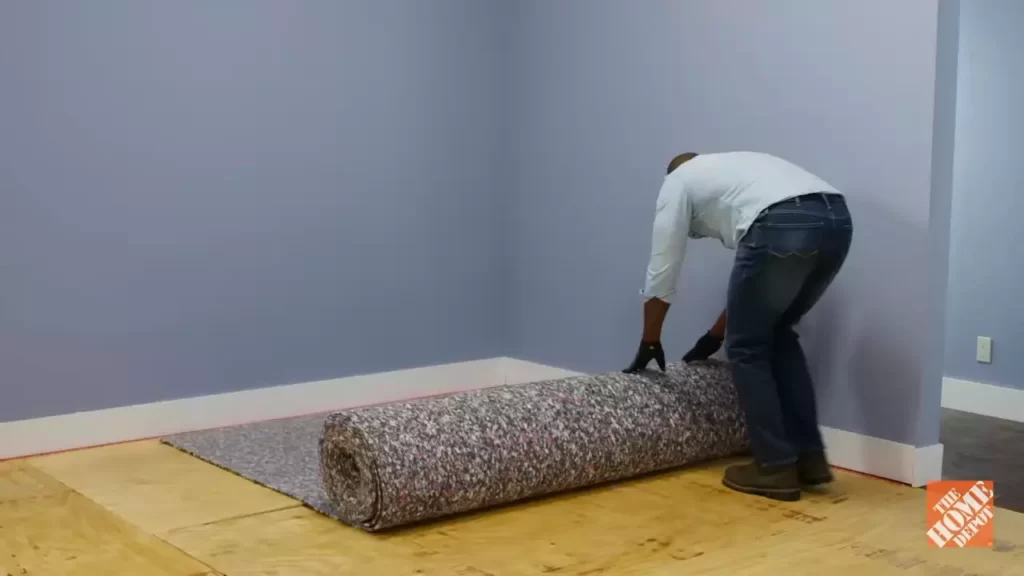
Unrolling and positioning the carpet
To begin, unroll the carpet in the room where it will be installed. Position it in a way that allows for easy access to all edges and corners. Make sure the carpet is flat and free from any wrinkles or folds. Smooth it out with your hands or a carpet roller to ensure it lays evenly on the floor.
Cutting the carpet to fit the room dimensions
Once the carpet is nicely positioned, it’s time to cut it to fit the room dimensions. Start by measuring the length and width of the room. Make sure to leave a few inches of extra carpet on each side to allow for adjustments and precise trimming later on. Use a straightedge and a sharp utility knife to make clean and straight cuts along the marked dimensions.
Placing double-sided carpet tape along the edges
After cutting the carpet to the right size, it’s crucial to secure it with double-sided carpet tape along the edges. This adhesive tape will help keep the carpet in place and prevent it from shifting or moving over time. Apply the tape along the perimeter of the room, leaving a small gap between the wall and the carpet to allow for stretching and tucking later on.
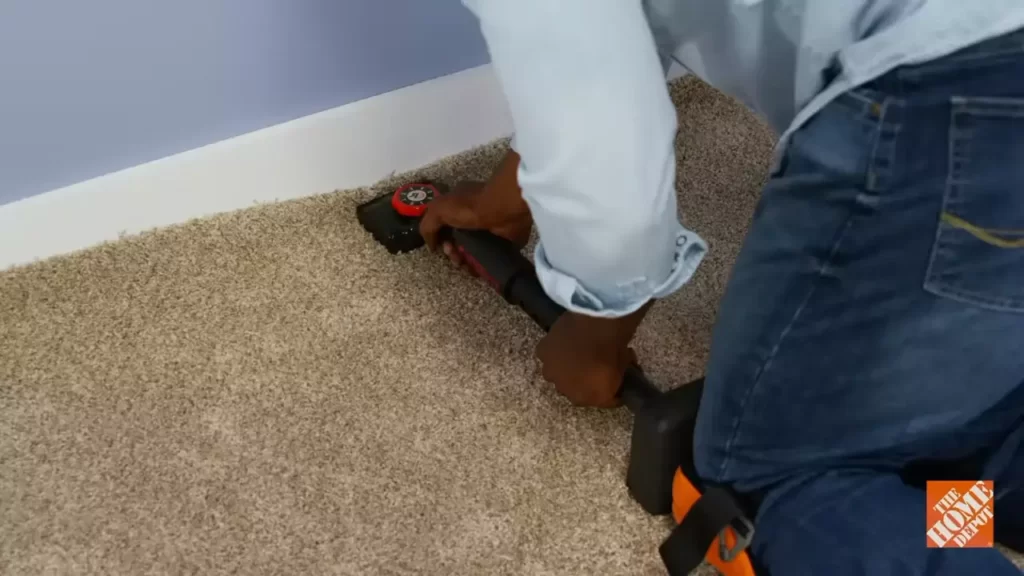
Using a knee kicker to stretch and secure the carpet
Now it’s time to use a knee kicker, a specialized tool used for stretching and securing the carpet. Begin by positioning the knee kicker about six inches from the wall, placing the padded end against the carpet near the edge. Apply force by hitting the padded end with your knee, which will stretch the carpet and hook it into the tack strip.
Trimming excess carpet with a utility knife
Lastly, you’ll want to trim any excess carpet using a sharp utility knife. Push the blade of the knife along the baseboard, cutting away the excess carpet material. Be careful to avoid cutting into the baseboard or damaging the carpet itself. Trim the carpet as close to the edge as possible to achieve a clean and polished look.
By following these steps to cut and secure the carpet without a stretcher, you’ll be able to install carpet in your room smoothly and effectively. Remember to take your time and be cautious during each step to achieve the best results.
Finishing Touches And Tips
Once you have successfully installed the carpet without a stretcher, it’s time to focus on the finishing touches to ensure a clean and seamless result. These tips will help you achieve a professional-looking installation that will last for years to come.
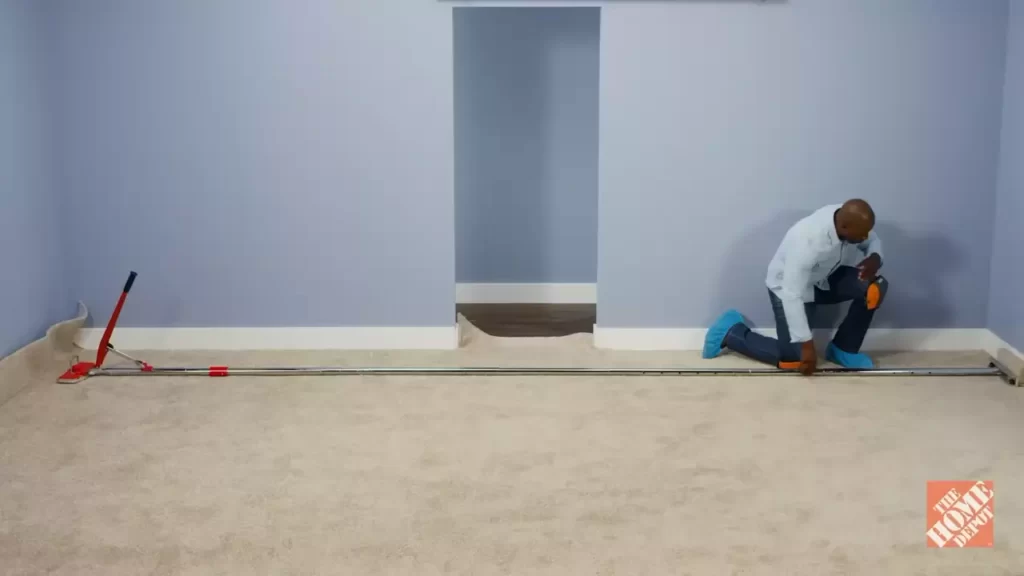
Securing the Carpet Trim Along the Edges
One crucial step in finishing the installation process is securing the carpet trim along the edges. This not only provides a neat and tidy appearance, but it also helps to keep the carpet in place and prevents it from fraying or unraveling over time.
To secure the carpet trim, you can use a hammer and finishing nails. Place the trim over the edge of the carpet, making sure it aligns properly. Then, gently hammer the nails into the trim and through the carpet, ensuring they are evenly spaced. Be careful not to hammer too hard, as it could damage the carpet fibers.
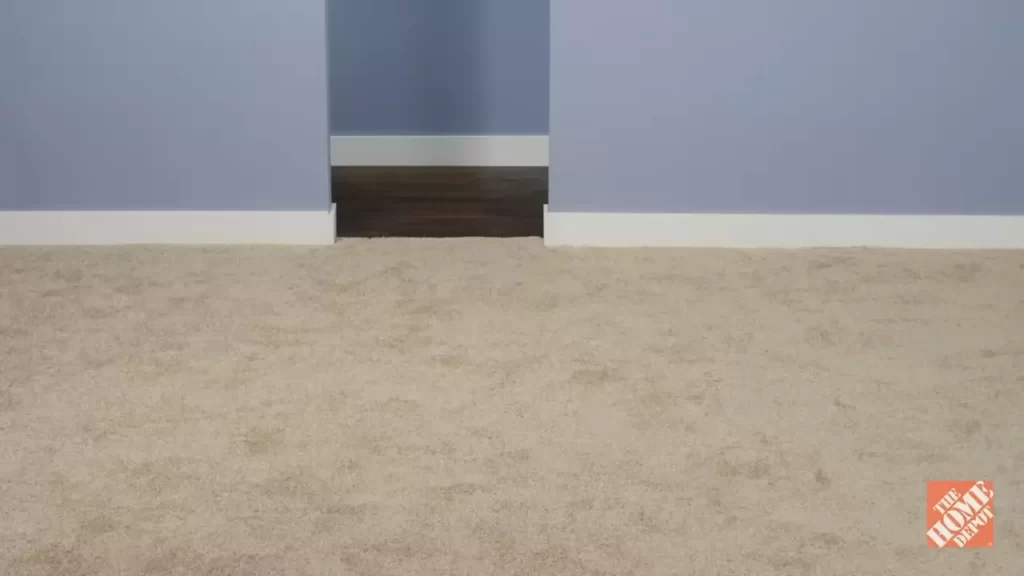
Tucking the Carpet Underneath the Trim
An additional step to achieve a seamless look is tucking the carpet underneath the trim. This technique involves tucking the excess carpet material beneath the trim, leaving no exposed edges or visible seams.
To tuck the carpet, use a putty knife or blunt object to gently push the edge of the carpet beneath the trim. Make sure to push it all the way to the wall, creating a tight and secure fit. Continue this process along the entire perimeter of the room, ensuring there are no loose or untucked areas.
Checking for Any Loose Spots and Readjusting if Needed
After completing the installation, it’s important to carefully inspect the entire carpet surface for any loose spots or areas that require readjustment. This will help prevent future issues such as wrinkling or bulging.
To check for loose spots, walk across the carpet in different directions, applying gentle pressure. Feel for any areas that give or move excessively, indicating that the carpet may not be secured properly. If you find any loose spots, take the time to readjust and secure them using the techniques mentioned earlier.
Maintaining the Carpet’s Condition with Proper Maintenance
Proper maintenance is key to preserving the condition and longevity of your newly installed carpet. Regular vacuuming, spot cleaning, and avoiding excessive moisture or heavy furniture can help keep your carpet looking fresh and pristine.
Make sure to follow the manufacturer’s guidelines for maintenance and cleaning, and address any spills or stains immediately to prevent permanent damage. With regular care, your carpet will continue to enhance your space for years to come.
Seeking Professional Help if Necessary
While installing carpet without a stretcher can be a feasible DIY project, it’s important to remember that some situations may require professional assistance. If you encounter any challenges or have concerns about the installation process, don’t hesitate to seek help from a professional carpet installer.
Professional installers have the experience, tools, and expertise to ensure a flawless installation, offering you peace of mind and a finished result that exceeds your expectations.
Frequently Asked Questions On How To Install Carpet Without A Stretcher
What Can I Use Instead Of Stretching Carpet?
You can use carpet tiles or adhesive carpet tape instead of stretching carpet. These alternatives provide a secure and durable option for installing carpet without the need for stretching.
How Do You Make A Homemade Carpet Stretcher?
To make a homemade carpet stretcher, start by gathering supplies like a length of 2×4 wood, nails, a hammer, and a power drill. Next, attach one end of the 2×4 to the wall and use the power drill to secure it.
Then, stretch the carpet over the 2×4, using the hammer and nails to secure it. Finally, trim any excess carpet and finish with base molding.
Is It Hard To Stretch Carpet Yourself?
Stretching carpet yourself can be challenging, but not impossible. Proper knowledge and tools are necessary for a successful DIY carpet stretching project.
How Do You Get Rid Of Bulges In Carpet?
To get rid of bulges in carpet, you can try these steps:
1. Start by identifying the cause of the bulge, such as loose carpet padding or improper stretching.
2. Use a knee kicker or power stretcher to stretch the carpet tightly, pulling it towards the walls.
3. If necessary, cut and reattach the carpet to remove any excess material.
4. Secure the carpet with a carpet stretcher or tack strips along the edges.
5. Finally, use a carpet trimmer to trim any excess carpet and create a smooth and flat surface.
Conclusion
Installing carpet without a stretcher is not as daunting as it may seem. By following the step-by-step guide provided in this blog post, you can successfully install carpet using simple tools and techniques. Remember to measure accurately, cut carefully, and secure the edges firmly for a professional-looking finish.
With a little patience and attention to detail, you’ll have a beautifully installed carpet that enhances the comfort and aesthetics of your space. Happy carpeting!