To install carpet stairs, first, measure and cut the carpet to fit each stair, then secure it in place using carpet tack strips and a carpet staple gun. Installing carpet on stairs can be a great way to add comfort and style to your home.
Whether you’re looking to replace old or worn-out carpet or want to install carpet for the first time, the process can seem daunting. However, with the right tools and a little bit of know-how, you can easily transform your stairs into a cozy and inviting space.
In this guide, we’ll walk you through the step-by-step process of installing carpet on your stairs. By following these instructions, you’ll be well on your way to creating a beautiful and functional staircase in no time. So let’s get started!
Choosing The Right Carpet For Stairs
When it comes to installing carpet on your stairs, choosing the right type of carpet is crucial. After all, stairs endure a high amount of foot traffic and wear and tear, so you need a carpet that can withstand the demands of daily use. Additionally, the carpet should complement your overall décor and add a touch of style to your home. So, let’s dive into the factors you should consider when selecting the perfect carpet for your stairs.
Consider Durability and Texture
One of the most important factors to consider when choosing carpet for stairs is its durability. As stairs tend to receive heavy foot traffic, it’s essential to opt for a carpet that is resilient and can handle constant use without showing signs of extensive wear and tear. Look for carpets with a high durability rating, such as those made from nylon or polypropylene.
Furthermore, paying attention to the texture of the carpet is crucial for both safety and comfort reasons. Smooth and plush carpets might feel luxurious underfoot, but they can become slippery and pose a hazard, especially on stairs. Instead, consider carpets with a textured surface or those featuring a low pile, which can provide more traction and reduce the risk of accidents.
Determine the Appropriate Carpet Pile Height
The pile height of the carpet refers to the length of the individual carpet fibers. When it comes to stairs, it’s important to select a carpet with a pile height that works well with the shape and structure of your stairs. Carpets with a low or medium pile height tend to be more suitable for stairs as they are easier to clean and maintain.
Additionally, shorter pile heights make it less likely for the carpet to show signs of matting and flattening over time, keeping them looking newer for longer.
Select a Color and Pattern That Complements Your Décor
Choosing the right color and pattern for your carpet might be a subjective decision, but it’s crucial to select options that complement your existing décor. Consider the overall color scheme in your home and opt for a carpet color that either blends in seamlessly or adds a pop of contrasting color. Additionally, think about the patterns that are already present in your space and select a carpet pattern that complements or enhances the visual appeal of the area.
Remember, when selecting a pattern for your carpet, it’s important to choose designs that won’t make the stairs appear visually narrow or busy. Simple patterns or solid colors are often great choices for stairs as they create a sense of continuity and simplicity.
Measuring And Preparing The Staircase
Before you begin installing carpet on your stairs, it’s crucial to measure and prepare the staircase properly. This will ensure a smooth and successful installation process. In this section, we’ll guide you through the steps of measuring each step, calculating the amount of carpet you’ll need, and clearing the staircase of any obstacles.
Measure the length and width of each step
Begin by measuring the length and width of each step individually. Measure from the back of the tread to the front of the nosing to determine the length. Use a measuring tape to get accurate measurements. Take note of any variations in dimensions between steps as this will affect your carpet-cutting process.
Calculate the amount of carpet needed
Once you have the measurements for each step, it’s time to calculate the amount of carpet you’ll need. This can be done by multiplying the length and width measurements of each step and adding them together. Don’t forget to include extra carpet for any landing areas at the top and bottom of the staircase.
To ensure you have enough carpet, it’s recommended to add at least 10% to your total calculation. This accounts for any mistakes, variations in dimensions, or waste during cutting and installation. It’s better to have extra carpet than run short during the process.
Clear the staircase of any obstacles
Before installing carpet on your stairs, it’s important to clear the staircase of any obstacles that may hinder the installation process. Remove any furniture, decorations, or objects that could get in the way or potentially damage the carpet. Ensure the stairs are clean, dry, and free from dust or debris.
If you notice any structural issues or loose parts on the staircase, it’s recommended to fix them before proceeding with the installation. This will ensure a stable and secure foundation for your new carpeted stairs.
By properly measuring and preparing your staircase, you’ll lay the foundation for a successful carpet installation. Taking accurate measurements, calculating the required carpet amount, and clearing any obstacles will help you achieve a professional and polished result.
Removing Old Carpet Tacks And Staples
When installing carpet on stairs, one of the most important steps is to remove the old carpet tacks and staples. These small, sharp objects can not only damage the new carpet but also pose a safety hazard. In this section, we’ll outline the process of removing these old carpet tacks and staples efficiently and effectively.
Use pliers or a pry bar to remove tacks and staples
To begin, gather the necessary tools for the job. You’ll need a pair of pliers or a pry bar, and a sturdy pair of work gloves to protect your hands. Start by identifying the location of the carpet tacks and staples on the stairs. They are typically found along the edges of the steps and in the center where the carpet is secured.
Once you’ve located the tacks and staples, use the pliers or pry bar to grip and pull them out. Apply steady pressure and pull in a straight upwards motion to ensure they come out cleanly without leaving any remnants behind. Be cautious not to damage the wood or the surrounding area as you remove them.
In some cases, the tacks and staples may be more firmly embedded in the wood. If this is the case, you can use the pry bar to gently pry them out. Position the pry bar beneath the tack or staple, and use it as leverage to lift it out of the wood. Exercise caution to avoid applying excessive force, as this can damage the wood underneath.
Fill any holes or imperfections in the wood
After removing all the old carpet tacks and staples from the stairs, it’s important to fill any holes or imperfections left behind. This step ensures a smooth, even surface for the new carpet installation. You can use a wood filler or a putty knife to fill in the holes.
Apply the wood filler evenly across the affected areas, making sure to press it firmly into the holes. Smooth out any excess filler using the putty knife, ensuring a seamless finish. Allow the filler to dry according to the manufacturer’s instructions before proceeding with the carpet installation.
By removing the old carpet tacks and staples and filling any holes or imperfections in the wood, you’re setting a solid foundation for your new carpet installation. This careful preparation will not only ensure a professional-looking result but also extend the lifespan of your carpet on the stairs.
Sanding And Smoothing The Stair Surface
Sanding and Smoothing the Stair Surface
When it comes to installing carpet stairs, sanding and smoothing the stair surface is a crucial step to ensure a flawless finish. By preparing the surface properly, you can create a level and smooth base for your carpet installation, ensuring long-lasting durability and a polished appearance. This step involves the use of sandpaper or an electric sander to remove any rough patches on the stair surface and filling in cracks or gaps with wood putty. Let’s explore how to tackle this process effectively, step by step.
Use sandpaper or an electric sander to remove rough patches
Before you begin sanding the stair surface, gather the necessary tools for the job. You will need sandpaper or an electric sander, depending on the size and condition of your stairs. Sandpaper with a medium grit (around 120-150) works well for general roughness, while a finer grit (around 220-240) is ideal for a smoother finish. Make sure to wear protective gloves and a dust mask to safeguard yourself from dust particles.
To begin, carefully sand the stairs using long, even strokes. Focus on areas that feel rough to the touch, such as splinters, bumps, or uneven spots. Sanding not only smooths out the surface but also helps to remove any old adhesive or remaining traces of previous carpeting. If you opt for an electric sander, make sure to move it in a consistent back-and-forth motion, taking care not to apply too much pressure on any particular area.
Fill in any cracks or gaps with wood putty
After sanding, inspect the stair surface for any cracks or gaps that need to be filled. Wood putty serves as an excellent filler material, providing a solid and smooth foundation for your carpet installation. Before applying the wood putty, it is advisable to clean the surface thoroughly to ensure optimal adhesion.
Using a putty knife, apply the wood putty into the cracks and gaps, ensuring it is evenly distributed. Scrape off any excess putty with the putty knife, creating a level surface. Allow the wood putty to dry completely according to the manufacturer’s instructions. Once dry, lightly sand the filled areas to smoothen them out, ensuring a seamless transition between each stair step.
By following these steps to sand and smooth the stair surface, you are ensuring a solid foundation for your carpet installation. Remember to take your time and be thorough in your sanding and filling process, as a well-prepared surface will contribute to an overall stunning look for your carpeted stairs.

Applying A Primer And Basecoat
Applying a primer and basecoat is an essential step when it comes to installing carpet stairs. These two layers create a solid foundation for the carpeting, ensuring better adhesion and even color distribution. By properly preparing the stairs with a primer and basecoat, you can guarantee a long-lasting and professional-looking finish that will enhance the overall appearance of your stairs.
Apply a primer to the stairs for better adhesion
A primer is a crucial component in the carpet installation process as it provides better adhesion between the stair surface and the carpet backing. Before applying the primer, make sure to thoroughly clean the stairs to remove any dirt, dust, or debris. This can be done using a vacuum cleaner or a damp cloth.
To apply the primer, follow these steps:
- Use a paintbrush or a foam roller to evenly coat the stairs with the primer.
- Work in small sections and ensure that the primer is applied in a thin, even layer.
- Allow the primer to dry completely as per the manufacturer’s instructions.
Applying a primer serves as a bonding agent between the stair surface and the basecoat layer, ensuring that the carpet adheres securely and remains in place for years to come.
Apply a basecoat to the stairs to ensure even color
A basecoat is the next step in the carpet installation process and is essential for achieving an even and uniform color on your stairs. The basecoat not only enhances the overall appearance but also provides a protective layer for the carpet, preventing it from wearing out prematurely.
To apply the basecoat, follow these steps:
- Choose a basecoat color that complements your desired carpet color.
- Using a paintbrush or a foam roller, apply the basecoat evenly on the primed stairs.
- Ensure that the basecoat is applied in thin layers, allowing each coat to dry before applying the next.
By applying a basecoat, you can achieve a consistent color throughout your carpet stairs. This step plays a vital role in giving your stairs a professional look and ensuring that your carpet installation job is a success.
By taking the time to apply a primer and basecoat, you can ensure a seamless and durable carpet installation on your stairs. These two layers provide the necessary foundation for better adhesion and even color distribution, resulting in a stunning and long-lasting finish. So, be sure not to skip this important step in your carpet installation process!
Cutting The Carpet To Size
Measure and mark the carpet for each step
Before cutting the carpet to size, it is crucial to accurately measure and mark each step. Measuring each step individually ensures a custom fit and a professional-looking finish. To begin, gather a measuring tape, straight edge, and a marker.
Start by measuring the width of the step horizontally from the edge of the riser to the edge of the tread. Take note of this measurement and move on to the next step. Repeat this process for each step, as dimensions may vary slightly.
After measuring, mark the dimensions on the back of the carpet using a marker or pencil. It’s a good idea to use a contrasting color that stands out against the carpet fibers. These markings will serve as a guide when cutting the carpet to ensure accuracy.
Use a utility knife or carpet cutter to cut the carpet
Once the carpet is accurately marked, it is time to cut it to size. A utility knife or a carpet cutter is ideal for this task, as it allows for precise cuts without damaging the fibers. To begin, follow these steps:
- Place a straight edge along the marking on the back of the carpet. This will serve as a guide for your cutting tool.
- Hold the knife or carpet cutter at a slight angle to create a beveled edge. This will make it easier to tuck the edges under the nosing for a neat and finished look.
- Apply gentle pressure and make a controlled cut along the straight edge. Be sure to follow the marking accurately to ensure the carpet fits each step perfectly.
- Continue this process for each step, using a fresh blade if necessary to maintain sharpness and precision.
Remember to take your time and work carefully when cutting the carpet. Rushing through this step may lead to jagged edges or inaccurate cuts, compromising the overall appearance of your carpeted stairs.
Now that you’ve learned how to measure and mark your carpet for each step and properly cut it to size, you’re ready to move on to the next step, which involves installing the carpet on the stairs.
Securing The Carpet On The Stairs
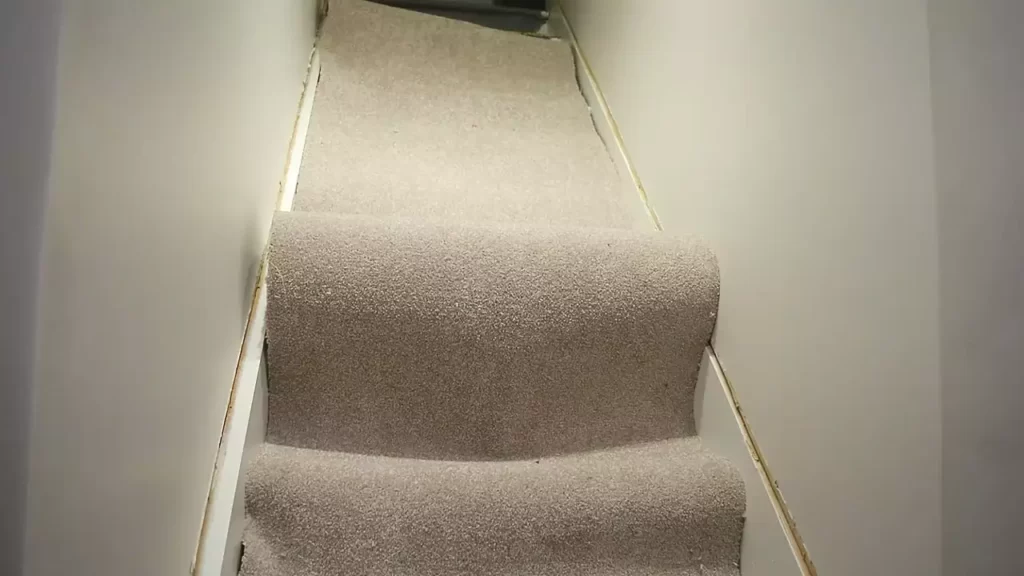
Start at the bottom and work your way up
To secure the carpet on the stairs, it’s important to start at the bottom and work your way up. This ensures that the carpet is secured tightly and reduces the risk of any loose or uneven areas. Starting at the bottom also allows you to easily trim the excess carpet at the top once you reach the top step. By working your way up, you can ensure a smooth and professional-looking installation.
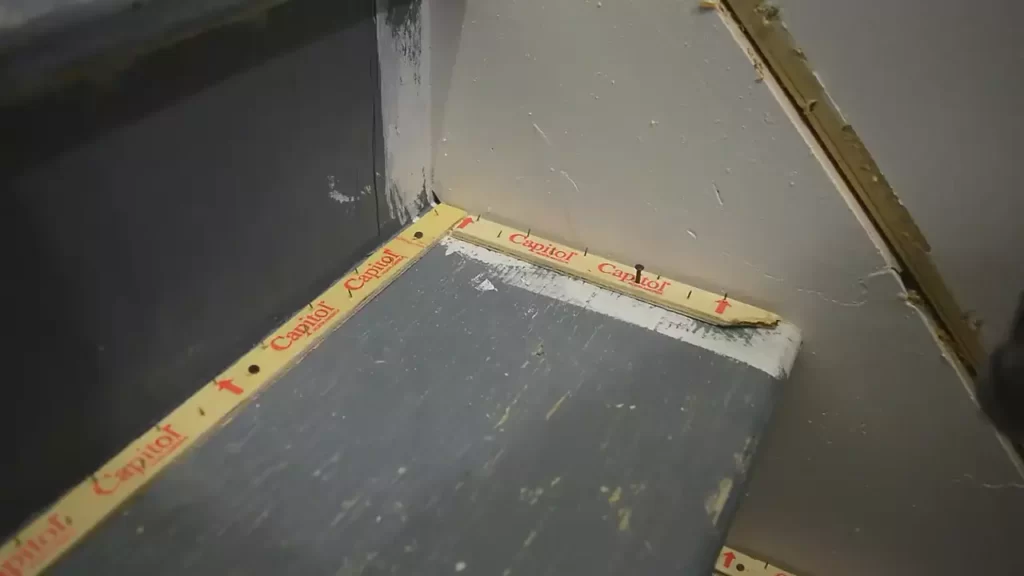
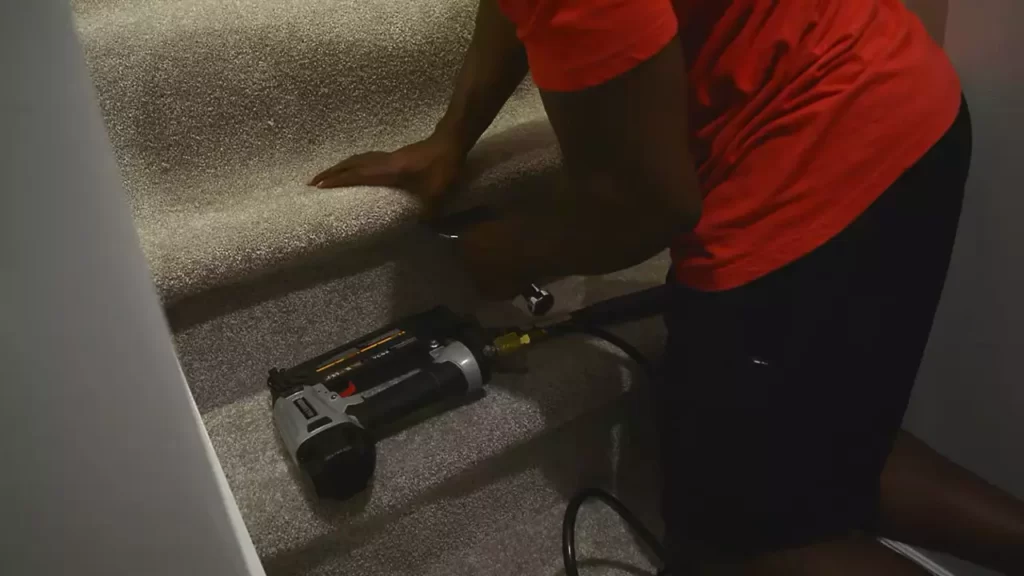
Use a staple gun or carpet tacks to secure the carpet
To secure the carpet on the stairs, you can use either a staple gun or carpet tacks. Both options are effective, and the choice depends on personal preference and the type of carpet you are working with. A staple gun is quick and easy to use, allowing you to secure the carpet firmly in place. On the other hand, carpet tacks offer a more traditional and secure method of installation.
If you decide to use a staple gun, make sure to use heavy-duty staples that are long enough to penetrate both the carpet and the underlying padding. Place the staples along the edges of the carpet, keeping them evenly spaced for a neat and tidy appearance.
If you prefer to use carpet tacks, you will need a hammer to drive the tacks into the wood of the stairs. Position the tacks along the edges of the carpet, ensuring that they are evenly spaced. Use a tack strip along the back of each step to provide added stability and to secure the carpet firmly in place.
Ensuring each H3 heading adheres to HTML syntax
| H3 Heading | HTML Syntax |
|---|---|
| Start at the bottom and work your way up | <h3>Start at the bottom and work your way up</h3> |
| Use a staple gun or carpet tacks to secure the carpet | <h3>Use a staple gun or carpet tacks to secure the carpet</h3> |
| Ensuring each H3 heading adheres to HTML syntax | <h3>Ensuring each H3 heading adheres to HTML syntax</h3> |
By following these steps and using either a staple gun or carpet tacks, you can securely install carpet on your stairs and achieve a professional-looking result. Remember to start at the bottom and work your way up to ensure a tight and even installation. Whether you choose a staple gun or carpet tacks, both methods will provide the necessary stability to keep the carpet in place for years to come. So go ahead and transform your stairs with a beautiful and comfortable carpet!
Trimming And Finishing The Edges
One of the final and most crucial steps in installing carpet stairs is trimming and finishing the edges. This step ensures that your newly installed carpet looks clean, neat, and professional. In this guide, we will walk you through the process of trimming the excess carpet with a utility knife and tucking and securing the edges.
Trim excess carpet with a utility knife
The first step in trimming and finishing the edges of your carpet stairs is to remove the excess carpet. Using a sharp utility knife, carefully trim the edges of the carpet to ensure a clean and precise finish. Here’s how you do it:
- Measure the area that needs trimming, leaving a small margin for adjustment.
- With the utility knife, make small, controlled cuts along the measured line. Take your time and be careful not to cut too much at once.
- Continue cutting until you have removed all the excess carpet.
Remember to keep the cuts straight and smooth to achieve a polished look. Take breaks as needed to avoid fatigue and mistakes.
Tuck and secure the edges of the carpet
Once you have trimmed the excess carpet, it’s time to tuck and secure the edges. This step is crucial in ensuring that your carpet stays in place and doesn’t come loose. Follow these steps to tuck and secure the edges:
- Starting at the topmost step, fold the carpet’s edge under itself and push it tightly against the stair’s riser.
- Using a carpet tucker or a flathead screwdriver, gently push the carpet into the gap between the riser and the tread. Ensure it is securely tucked in.
- Repeat this process for each step until you have finished tucking all the edges.
Make sure the carpet is evenly taut and all edges are securely tucked in. This will prevent wrinkling, bulging, and loose ends.
Finally, to further secure the edges, you can use a staple gun or carpet adhesive to secure the carpet to the stairs.
By following these steps, you can achieve a professional and finished look for your carpet stairs. Ensure that all edges are neatly trimmed and securely tucked in to enjoy your newly installed carpet for years to come.
Adding Safety Accessories
When it comes to installing carpet on stairs, ensuring safety is as important as achieving a stylish look. Adding safety accessories can provide an extra layer of protection and enhance the overall aesthetic appeal of your carpeted stairs. In this blog post, we will discuss two key safety accessories that you should consider incorporating into your carpet stair installation: stair rods or edge trim, and carpet adhesive on the edges.
Install Stair Rods or Edge Trim for Added Safety and Style
One way to enhance the safety and style of your carpet stairs is by installing stair rods or edge trim. Stair rods are decorative metal rods placed at the base of each step, securing the carpet in place and preventing it from slipping or becoming loose. They not only provide added safety by keeping the carpet in place, but they also add a touch of elegance and sophistication to your staircase.
If you prefer a more modern look, edge trim might be the perfect choice for you. Edge trim is a flexible strip that is attached to the edge of each step, providing a neat and finished appearance. It not only enhances the overall look of your carpeted stairs but also prevents tripping hazards by securing the carpet edges tightly. With a variety of colors and materials available, you can easily find an edge trim that complements your existing décor.
Consider Using Carpet Adhesive on the Edges for Extra Security
In addition to using stair rods or edge trim, another option to further enhance the safety of your carpet stairs is to apply carpet adhesive on the edges. Carpet adhesive is a specialized glue that secures the edges of the carpet firmly to each step, preventing any movement or lifting. This extra layer of security ensures that the carpet remains in place even under heavy usage or foot traffic.
When using carpet adhesive, it is important to follow the manufacturer’s instructions carefully. Apply a thin layer of adhesive to the edges of the carpet and press firmly to ensure proper bonding. Allow sufficient time for the adhesive to dry before allowing regular use of the stairs. This additional step will provide peace of mind and minimize the risk of accidents caused by loose carpeting on the stairs.
In conclusion, incorporating safety accessories is an essential part of installing carpet stairs. By installing stair rods or edge trim and considering the use of carpet adhesive on the edges, you can enhance the safety, durability, and aesthetic appeal of your carpeted stairs. So go ahead, take that extra step to make your stairs not only beautiful but safe for everyone in your home.
Cleaning And Maintaining Carpeted Stairs
Regularly vacuum the carpet to remove dirt and debris
Cleaning and maintaining carpeted stairs is essential to ensure they remain in good condition and continue to enhance the aesthetics of your home. One of the most important steps in keeping your carpeted stairs clean is regularly vacuuming them to remove dirt, debris, and allergens.
Here are some tips on how to effectively and efficiently vacuum your carpeted stairs:
- Start by removing any loose objects or debris from the stairs.
- Attach a small brush attachment to your vacuum cleaner to effectively clean the grooves and corners of the stairs.
- Begin at the top of the stairs and work your way down, vacuuming each step thoroughly.
- Make sure to pay special attention to high-traffic areas, as they tend to accumulate more dirt and debris.
- Use a back-and-forth motion to ensure you cover the entire surface of each step.
- For stubborn dirt or pet hair, you can use a bristle brush to loosen it before vacuuming.
- Repeat this process at least once a week or more frequently if needed, depending on the level of foot traffic on your stairs.
Regular vacuuming not only keeps your carpeted stairs looking clean and fresh, but it also helps to prolong the life of your carpet by preventing dirt particles from being ground into the fibers.
Address stains and spills immediately with appropriate cleaners
Accidents happen, and sometimes stains and spills occur on your carpeted stairs. It’s important to address these issues immediately to prevent them from setting in and becoming more difficult to remove. Here are some steps you can take:
- Blot the spill or stain gently with a clean, absorbent cloth or paper towel to remove as much liquid as possible.
- Avoid rubbing the stain, as this can cause it to spread and set into the carpet fibers.
- Identify the appropriate cleaner for the type of stain you are dealing with. For example, a water-based cleaner may be suitable for most stains, while a specialized carpet stain remover may be necessary for tougher stains such as ink or red wine.
- Read the instructions on the cleaner carefully and test it on a small, inconspicuous area of the carpeted stairs first to ensure it does not cause any damage or discoloration.
- Apply a small amount of the cleaner to the stained area using a clean cloth or sponge.
- Gently blot the stain, working from the outside in, until it is lifted from the carpet fibers.
- Rinse the area with clean water and blot it dry with a clean cloth or paper towel.
- Let the area air dry completely before allowing foot traffic on the stairs.
By addressing stains and spills promptly and using appropriate cleaners, you can maintain the pristine appearance of your carpeted stairs and prevent permanent damage.
Frequently Asked Questions On How To Install Carpet Stairs
Is Carpet Easy To Install On Stairs?
Yes, carpet is easy to install on stairs. It’s a simple process that can be done quickly and without much difficulty. With the right tools and some basic skills, you can have a beautiful carpeted staircase in no time.
How Do You Fit Stair Carpet Yourself?
To fit stair carpet yourself, start by measuring and cutting the carpet to fit each step. Attach the carpet using a carpet gripper and adhesive, making sure to smooth out any wrinkles. Lastly, trim the excess carpet and secure with carpet tacks or adhesive.
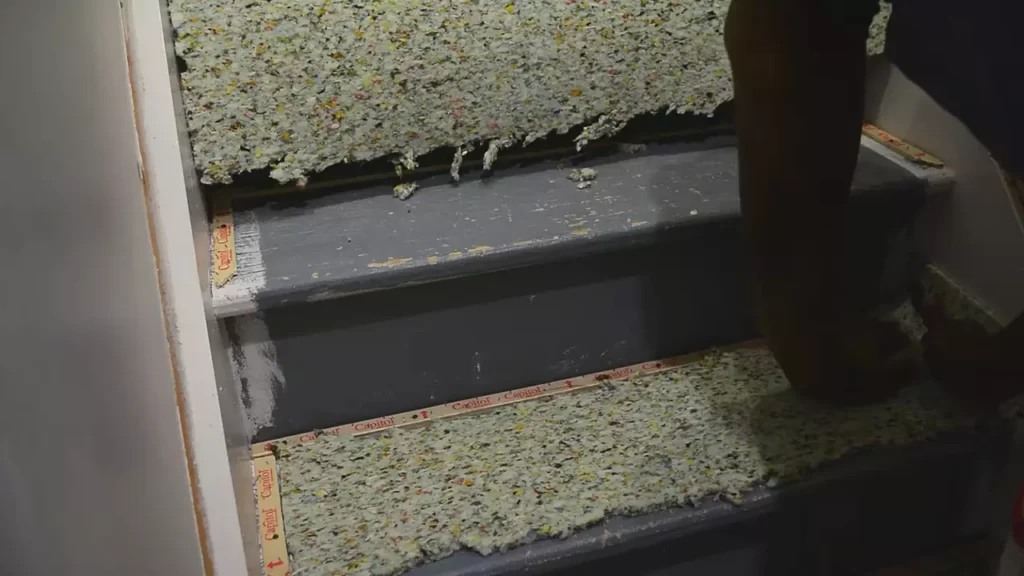
Do You Need Carpet Padding On Stairs?
Yes, carpet padding is necessary for stairs. It adds cushioning, reduces wear and tear, and provides a safer walking surface by reducing the risk of slipping. Padding also helps to dampen sound and extend the lifespan of the carpet on your stairs.
Which Way Should Carpet Pile Run On Stairs?
Carpet piles on stairs should run downward to prevent slipping and tripping hazards. It’s crucial for safety as the pressure applied while climbing or descending stairs can cause the carpet to shift. Installing carpet with proper pile direction ensures stability and reduces the risk of accidents.
Conclusion
Now you have the necessary knowledge and step-by-step instructions to successfully install carpet on your stairs. By following these guidelines, you can transform your staircase into a stylish and comfortable space. Remember to measure accurately, prepare the stairs properly, and take your time during the installation process.
With a little patience and effort, you can enjoy beautiful carpeted stairs that enhance the overall look and feel of your home. So, go ahead and get started on this rewarding DIY project – your feet will thank you!