To install cabinet shelves, measure and mark the desired height for the shelves, attach shelf brackets, and slide the shelves onto the brackets. When it comes to organizing your kitchen or storage space efficiently, cabinet shelves are a practical solution.
By installing cabinet shelves, you can maximize your storage capacity and keep everything neatly organized. In this guide, we will explain how to install cabinet shelves in a step-by-step process. With just a few tools and some basic skills, you’ll be able to add extra storage space to your cabinets in no time.
So, let’s get started and create a more organized and clutter-free space with cabinet shelves.
Understanding Your Shelving Needs
Before you dive into installing cabinet shelves, it’s important to understand your shelving needs. Assessing your storage requirements and identifying the items to be stored will help ensure that your cabinet shelves are tailored to your specific needs. Let’s take a closer look at these important considerations.
Assessing your storage requirements
Assessing your storage requirements is the first step in understanding your shelving needs. Take some time to think about what you plan to store in your cabinets and how much space you will need. Consider the size, weight, and quantity of items to determine how many shelves you’ll require.
To make this process easier, you can create a list of all the items you want to store and categorize them accordingly. This will help you visualize the amount of space needed for each category and plan your cabinet shelves accordingly.
In addition to quantity and size, it’s also important to consider accessibility. Think about how often you’ll need to access each item and prioritize their placement accordingly. Items that are used frequently should be easily accessible, while those that are seldom used can be stored on higher or lower shelves.
Once you have a clear idea of your storage requirements, you can move on to identifying the items to be stored.
Identifying the items to be stored
Identifying the items to be stored is crucial in determining the type and size of shelves you’ll need. Start by going through your belongings and making note of the items that will be stored in your cabinets. This could include dishes, glassware, pots and pans, pantry items, appliances, or any other kitchen essentials.
Once you have a comprehensive list of the items to be stored, you can group them based on size, shape, and usage. This will help you determine the type of shelving that will work best for each category of items.
For example, if you have a lot of tall items like cereal boxes or bottles, adjustable shelves may be a good option to accommodate their height. On the other hand, if you have many small items like spices or condiments, consider installing pull-out wire baskets for easy access.
It’s also important to consider any specialized storage needs you may have. If you have a collection of wine glasses, for instance, you may want to install glass racks or wine glass holders to keep them safe and organized.
By assessing your storage requirements and identifying the items to be stored, you’ll be well-equipped to install cabinet shelves that meet your specific needs. In the next section, we’ll focus on the actual installation process, so stay tuned!
Measuring Your Cabinet Space
Before you start installing cabinet shelves, it’s crucial to take accurate measurements of your cabinet space. This step is essential to ensure that the shelves fit perfectly and function effectively. When measuring your cabinet space, it’s important to consider the height, width, and depth of the area. Let’s explore each of these aspects in more detail:
Taking accurate measurements
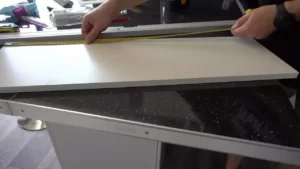
When it comes to measuring your cabinet space, precision is key. To start, gather a tape measure, pencil, and notepad to record your measurements accurately. Begin by measuring the height, width, and depth of the interior cabinet space. A helpful tip is to take multiple measurements at different points to ensure accuracy. Write down the measurements as you go along so that you can refer back to them later.
Considering height, width, and depth
The height, width, and depth are essential measurements to consider when installing cabinet shelves. To begin with, measure the height of your cabinet from the top to the bottom. This will give you an idea of the available vertical space for your shelves. Next, measure the width of your cabinet from one side to the other. This will determine the maximum width each shelf can be. Lastly, measure the depth of your cabinet from the back panel to the front. This measurement will determine how far the shelves can extend into the cabinet.
Once you have recorded these measurements, it’s important to evaluate how they align with your storage needs. Consider what items you plan to store on the shelves and whether the height, width, and depth measurements will accommodate them. Taking the time to evaluate these factors will ensure that your cabinet shelves are functional and tailored to your specific requirements.
As a final check, it’s always a good idea to refer back to your measurements before purchasing or constructing the shelves. Confirm that the measurements are accurate and double-check that your desired shelf dimensions align with the available space. This extra step can save you time and frustration down the line.
By taking accurate measurements and considering the height, width, and depth of your cabinet space, you can install cabinet shelves that perfectly fit your needs. So grab your tape measure and get started on creating organized and efficient storage solutions in your cabinets!
Selecting The Appropriate Shelf Material
When it comes to installing cabinet shelves, selecting the appropriate material is a crucial step in the process. The material you choose will not only impact the durability and functionality of your shelves but also the overall aesthetics of your cabinets. In this section, we will explore different material options and discuss how to assess durability and aesthetics.
Exploring different material options
There are several material options available for cabinet shelves, each with its own unique characteristics and benefits. Here are some commonly used materials:
- Solid Wood: Solid wood shelves are a popular choice due to their natural beauty and durability. They are available in various wood species, including oak, maple, and cherry, offering different grain patterns and colors to match your cabinet style.
- Plywood: Plywood shelves are made by bonding multiple layers of wood veneer together, creating a strong and stable material. They are cost-effective and resistant to warping and shrinking, making them suitable for budget-friendly projects.
- Laminate: Laminate is a synthetic material made by layering a decorative surface onto a composite wood core. It is known for its easy maintenance and resistance to moisture and stains. Laminate shelves come in a wide range of colors and patterns, allowing you to achieve a customized look.
- Glass: For a touch of elegance and modernity, glass shelves can be a great option. They are easy to clean, reflect light, and create a sense of openness. Glass shelves are commonly used in display cabinets or to add a visual interest to sleek, contemporary designs.
While exploring these material options, keep in mind the style of your cabinets, your personal preferences, and the intended use of the shelves. Assessing durability and aesthetics will further assist you in making an informed decision.
Assessing durability and aesthetics
Durability and aesthetics are two important factors to consider when selecting the appropriate shelf material.
Durability:
Consider the following factors to determine the durability of different shelf materials:
- Strength: Choose a material that can withstand the weight of the items you plan to store on the shelves. Solid wood and plywood are generally strong and capable of handling heavy loads.
- Moisture resistance: If your cabinets are located in areas prone to moisture, such as the kitchen or bathroom, opt for materials like laminate or glass that are resistant to water damage.
- Scratch resistance: Some materials, like laminate, offer better scratch resistance than others. If your shelves will be subjected to frequent use or contact with sharp objects, consider this factor.
Aesthetics:
The appearance of your cabinet shelves can significantly impact the overall look and feel of your space. Consider the following factors when assessing aesthetics:
- Color and finish: Choose a material that complements the color scheme and style of your cabinets. For a classic and timeless look, solid wood is a popular choice.
- Texture and pattern: Some materials, like laminate, offer a variety of textures and patterns to add visual interest to your shelves. Consider your desired aesthetic and choose accordingly.
- Transparency: If you want to showcase certain items or create a sense of openness, glass shelves can be an excellent choice.
By carefully assessing the durability and aesthetics of different materials, you can ensure that the shelves you install in your cabinets not only meet your functional needs but also enhance the overall look of your space.
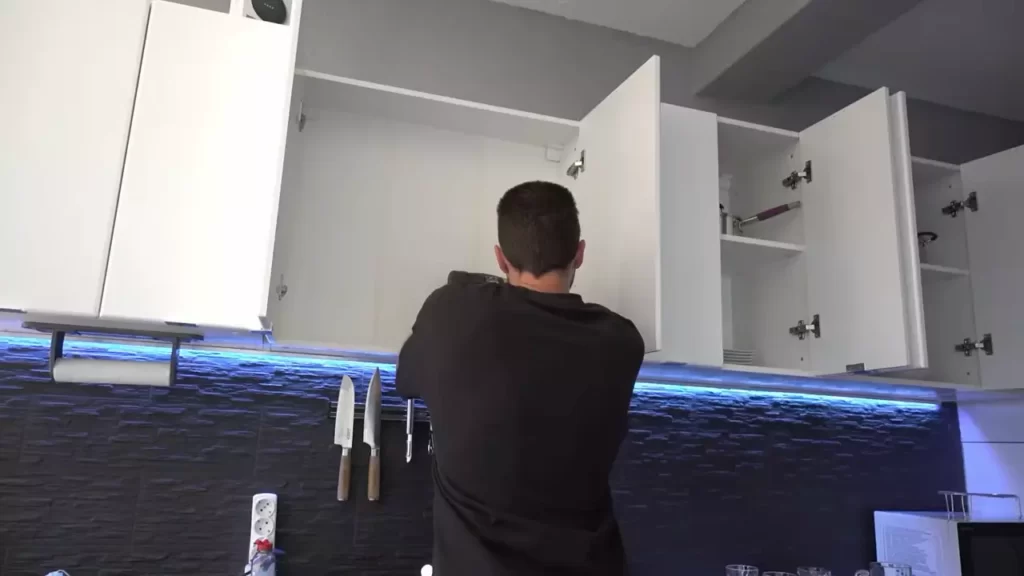
Clearing The Cabinet Space
Before you begin the process of installing cabinet shelves, it’s important to clear out the cabinet space to make room for the new shelves. This step will not only help you in organizing your belongings but also enable you to clean and prepare the cabinet properly. Follow these simple steps to clear the cabinet space efficiently:
Removing items from the cabinet
The first step in clearing the cabinet space involves removing all the items stored inside. Take out anything that is currently occupying the cabinet, including dishes, pots, pans, and food containers. Place them on a table or kitchen countertop for easy sorting later on.
Cleaning the cabinet surfaces
Once you have cleared out the cabinet, it’s time to clean the surfaces. Use a mild cleaner and a soft cloth or sponge to wipe down the inside of the cabinet, removing any dust, dirt, or stains that may have accumulated over time. Pay extra attention to corners and crevices, ensuring they are thoroughly cleaned.
If you encounter any stubborn stains or greasy residue, you can try using a vinegar-water solution or a gentle degreaser to help break them up. Remember to dry the cabinet surfaces completely before moving on to the next step.
A clutter-free and clean space is crucial for a successful cabinet shelf installation. By following these steps to clear and clean the cabinet space, you’ll be on your way to creating a more organized and functional kitchen.
Gathering The Necessary Tools And Supplies
Before you begin the installation process for your cabinet shelves, it’s important to gather all the necessary tools and supplies. This will ensure that you have everything you need on hand, making the installation process go smoothly and efficiently. Below, we’ve provided a checklist of the required tools and information on collecting screws, brackets, and other supplies.
Creating a Checklist of Required Tools
Having the right tools is essential when installing cabinet shelves. To ensure you don’t miss anything, create a checklist of all the tools you will need for the job. Here are some important tools to include:
- Cordless drill – For drilling pilot holes and driving screws.
- Measuring tape – To accurately measure the dimensions of your cabinet.
- Level – To ensure your shelves are installed straight.
- Pencil – To mark the position for drilling and positioning the shelves.
- Screwdriver – In case you need to tighten screws manually.
- Safety goggles – To protect your eyes from any potential debris or dust.
Collecting Screws, Brackets, and Other Supplies
In addition to the necessary tools, you will also need various supplies for installing cabinet shelves. These include screws, brackets, and other hardware. Here’s what you should consider:
| Supplies | Quantity |
|---|---|
| Screws | Enough to securely attach the brackets and shelves to the cabinet walls. |
| Brackets | As many as needed to support the weight of your shelves. |
| Shelf boards | Choose boards that fit the desired size and style for your shelves. |
| Anchors | If your cabinet walls are made of drywall, anchors may be needed for additional support. |
| Wood glue | Optional, but can provide extra stability for the shelves. |
Make sure to gather all the necessary screws, brackets, and other supplies before starting the installation process. This will prevent any unnecessary delays or interruptions as you work on your cabinet shelves.
Preparing The Shelves For Installation
Before installing cabinet shelves, it’s crucial to prepare them properly to ensure a seamless and long-lasting finish. This step-by-step guide will walk you through the necessary tasks to get your shelves ready for installation. By following these instructions, you’ll achieve professional-looking results while maximizing the lifespan of your cabinet shelves.
Sanding the edges for a smooth finish
One of the essential steps in preparing cabinet shelves for installation is sanding the edges to achieve a smooth finish. This process helps remove rough spots, splinters, and any imperfections on the wood surface. Here’s how to sand the edges effectively:
- Start by choosing a sandpaper with a medium grit, such as 100-150.
- Using smooth and even strokes, sand the edges of the shelves. Be sure to move in the same direction as the grain of the wood to avoid any damage.
- After sanding with the medium-grit sandpaper, switch to a finer grit, such as 220, for a more polished finish.
- Continue sanding until the edges of the shelves feel smooth to the touch and any roughness or unevenness is eliminated.
Applying a protective coating, if needed
Depending on the type of wood and its level of resistance to moisture and damage, it may be necessary to apply a protective coating to your cabinet shelves. Follow these steps to ensure adequate protection:
- Clean the shelves thoroughly, removing any dust or debris using a soft cloth or vacuum.
- Choose an appropriate protective coating for the type of wood you’re working with. This could include varnish, polyurethane, or wood sealant.
- Apply the protective coating evenly using a brush or a sponge, following the manufacturer’s instructions for drying time and application techniques.
- Allow the protective coating to dry completely before proceeding with the installation process.
By sanding the edges and applying a protective coating, you’ll ensure that your cabinet shelves are not only visually appealing but also well-prepared to withstand daily use and potential damage.
Determining Shelf Placement
When it comes to installing cabinet shelves, determining the perfect placement is crucial. The position of your shelves will not only affect the visual appeal of your cabinets but also their functionality. In this section, we will explore the key factors to consider when evaluating and determining the placement of cabinet shelves. From evaluating the desired positioning to keeping adequate spacing between shelves, we’ll cover it all.
Evaluating the desired positioning
Before you start installing cabinet shelves, it’s important to evaluate the desired positioning based on your specific needs and preferences. Take into account the items you plan to store on the shelves, their sizes, and accessibility. Consider whether you want your belongings to be within easy reach or if you prefer to prioritize aesthetic appeal.
To determine the ideal positioning, follow these steps:
- Measure the height of your items: Begin by measuring the tallest item you plan to store on the shelf. This will help you determine the necessary height between each shelf.
- Consider functionality: Think about the functionality of your shelves. For example, if you’re installing shelves in a kitchen cabinet, you may want to place frequently used items at eye level for easy access.
- Aesthetics: In addition to functionality, consider the overall aesthetics of your cabinets. Align the shelf positions with the design elements and symmetry of the cabinet doors.
Keeping adequate spacing between shelves
Once you’ve determined the desired positioning of your cabinet shelves, it’s essential to keep adequate spacing between them. This not only ensures efficient storage but also prevents any overcrowding or wasted space. Here are some guidelines to follow:
- Vertical spacing: Maintain sufficient vertical space between shelves to accommodate the height of your items. Leave at least 12-14 inches of space for taller items, and adjust accordingly for smaller items.
- Horizontal spacing: Consider the width of your items when determining the horizontal spacing between shelves. Leave enough room to easily access and remove items without any hindrance.
- Optimize space: Make the most of your cabinet’s storage potential by adjusting shelf heights to maximize the available space. If you have items of varying heights, consider adjustable shelves to provide flexibility.
By carefully evaluating the desired positioning and keeping adequate spacing between your cabinet shelves, you can create a functional and visually appealing storage solution for your belongings. Remember to take measurements, consider functionality and aesthetics, and optimize space to ensure the best placement for your shelves.
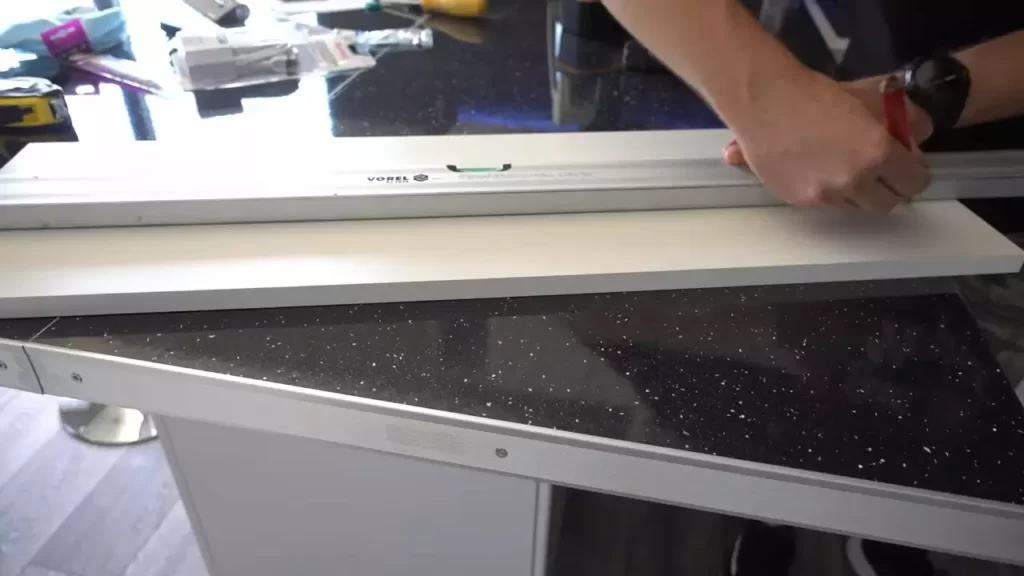
Marking The Drill Holes
Once you have measured and cut your cabinet shelves to the desired size, the next step in the installation process is marking the drill holes. Properly marking the spots for drilling is crucial to ensure the shelves are sturdy and aligned correctly. Follow these steps to ensure precise placement using a level and marking the spots for drilling.
Ensuring precise placement using a level
Before marking the drill holes, it is important to ensure that your cabinet shelves are level. A level is a tool that helps you determine if a surface is straight or balanced. By using a level, you can ensure that your shelves will be installed evenly and won’t cause any wobbling or instability.
Here’s how to ensure precise placement using a level:
- Place the level on top of the cabinet, along the edge where the shelf will be installed.
- Adjust the position of the shelf until the bubble in the level is centered between the two lines.
- Double-check the levelness by placing it at different points along the shelf’s length.
Once you have confirmed that your shelf is level, you can proceed to mark the spots for drilling.
Marking the spots for drilling
Accurately marking the spots for drilling is crucial to ensure the stability and functionality of your cabinet shelves. Here’s how you can mark the spots for drilling:
- Measure and mark the desired height for your shelf on the interior side panels of the cabinet.
- Using a measuring tape, measure and mark the position for the first drill hole.
- Repeat the process to mark the position for the remaining drill holes.
It is essential to ensure that you measure and mark the spots accurately. A slight miscalculation can lead to uneven shelves or shelves that do not fit properly within the cabinet. Take your time and double-check your measurements before proceeding.
Once you have marked all the spots for drilling, your cabinet shelves are ready for installation. In the next section, we will cover how to drill the holes and attach the shelves securely to your cabinets.
Drilling The Pilot Holes
When it comes to installing cabinet shelves, one crucial step is drilling pilot holes. These holes provide stability and prevent the shelves from splitting or cracking when screws are driven in. In this section, we will discuss the two key elements of drilling pilot holes: using an appropriate drill bit and drill, and creating pilot holes for stability.
Using an Appropriate Drill Bit and Drill
Choosing the right tools for drilling pilot holes is essential to ensure a smooth and successful installation. You will need a drill and a drill bit that match the size of the screws you plan to use. Using an undersized drill bit can result in difficulty driving the screws, while an oversized drill bit may cause the screws to become loose.
To determine the correct drill bit size, you can refer to the manufacturer’s guidelines or measure the diameter of the screw shaft. It’s important to choose a drill bit with a slightly smaller diameter than the screw to create a snug fit. This will provide optimal stability for the shelves.
Furthermore, using a cordless drill can add convenience and flexibility during the installation process. Cordless drills allow easy maneuverability without the restrictions of tangled cords, making it easier to reach tight spots and corners.
Creating Pilot Holes for Stability
Once you have prepared the appropriate tools, it’s time to create the pilot holes for stability. Pilot holes serve as a guide for the screws, ensuring they go in straight and true without causing any damage to the cabinet or shelves.
The size of the pilot hole is determined by the size of the screw. Generally, the diameter of the pilot hole should be slightly smaller than the screw’s outer diameter. This allows the screw to grip the wood tightly without splitting it. A good rule of thumb is to choose a drill bit that is approximately 80% of the screw diameter.
When creating the pilot hole, make sure to drill the hole to a depth that is slightly shorter than the length of the screw. This ensures that the screw will have enough grip without protruding through the other side of the wood surface.
It’s advisable to use a pilot hole counterbore to create a small recess at the surface of the wood. This recess allows the screw head to sit flush with the wood, resulting in a neat and professional finish.
By properly drilling pilot holes, you can ensure the stability and longevity of your cabinet shelves. Using the right drill bit and drill, along with creating the correct size and depth of pilot holes, will significantly enhance the overall installation process.
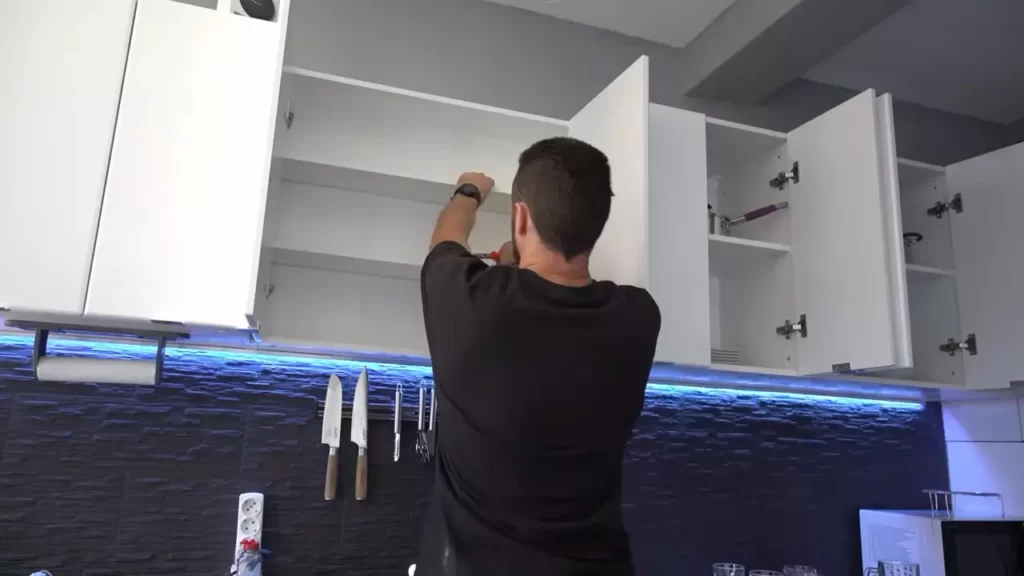
Securing The Shelves
Once you have carefully measured, cut, and painted your cabinet shelves, it’s time to secure them in place. Properly securing the shelves is crucial to ensure stability and prevent accidents. In this section, we will discuss the two common methods for securing shelves: attaching brackets or shelf supports.
Attaching brackets or shelf supports
Attaching brackets or shelf supports is a popular method used to secure cabinet shelves. Brackets or supports provide the necessary support to hold the weight of the items placed on the shelves. For this method, you will need brackets, screws, a drill, and a measuring tape.
- Start by measuring the desired height for your shelves. Use a measuring tape to ensure accuracy.
- Using a pencil, mark the height on both sides of the cabinet. This will serve as your guide for installing the brackets or supports evenly.
- Hold the bracket or shelf support against the cabinet wall, aligning it with the marked height. Make sure it is level using a spirit level.
- Once the bracket is in the correct position, use a drill to make pilot holes through the screw holes of the bracket into the cabinet wall. This will prevent the wood from splitting when you insert the screws.
- Secure the bracket tightly to the wall using screws. Repeat this process for each bracket required for your shelves.
- Place the shelf onto the brackets or supports, ensuring it rests securely. You may want to use a spirit level to double-check that the shelf is level.
Attaching brackets or shelf supports is a reliable method to secure your cabinet shelves, providing stability and peace of mind.
Ensuring a snug and secure fit
While attaching brackets or shelf supports is an effective method for securing shelves, it’s also crucial to ensure a snug and secure fit for each shelf. A proper fit will not only enhance the overall appearance of your shelves but also prevent any wobbling or sagging.
Here are some tips to ensure a snug and secure fit:
- Measure the width and depth of the cabinet accurately, allowing for any trim or molding.
- Cut the shelves slightly smaller than the measured dimensions to provide enough space for a snug fit.
- Test each shelf by placing it inside the cabinet. It should fit comfortably without any gaps or excess wobbling.
- If necessary, sand the edges of the shelf slightly to achieve a perfect fit.
- Once you are satisfied with the fit, secure the shelves using the chosen method, whether it be brackets, shelf supports, or other suitable hardware.
By ensuring a snug and secure fit, you can maximize the functionality and aesthetic appeal of your cabinet shelves.
Testing The Shelf Stability
After successfully installing the cabinet shelves, it’s important to ensure their stability. Testing the shelf stability is crucial to prevent any accidents or damage in the future. This step will give you peace of mind knowing that your shelves are securely in place. Let’s dive into how to test the shelf stability:
Applying pressure to check stability
To begin testing the shelf stability, apply gentle pressure to the middle of the shelf. This will help determine if the shelf is secure and can support the weight of your items. Use your hands or, if needed, a small object to apply the pressure. Observe if the shelf flexes or moves significantly when pressure is applied. A stable shelf will remain firm and steady without any noticeable movement.
Making adjustments if necessary
If you notice any instability or movement during the pressure test, it’s essential to make some adjustments. Start by checking the shelf brackets or hardware for any looseness. Tighten any loose screws or bolts that may be contributing to the instability. Additionally, check if the brackets are positioned correctly and securely attached to the cabinet walls or supports. Use a level to ensure the shelves are properly aligned. Making these adjustments will enhance the overall stability and prevent any potential issues.
If the shelf instability persists even after making adjustments, it might be necessary to consider alternative solutions such as reinforcing the shelf brackets or replacing them with sturdier ones. Safety should always be a top priority when it comes to installing cabinet shelves.
Remember, it’s better to address any potential issues with shelf stability before fully utilizing your shelves and placing heavy items on them. Testing the shelf stability is a quick and easy step that significantly contributes to the longevity and functionality of your cabinet shelves.

Organizing Your Cabinet Shelves
When it comes to organizing your cabinet shelves, it’s important to arrange items in a way that maximizes space and allows for easy access to everything you need. By implementing a few simple strategies, you can transform your cluttered cabinets into functional, organized spaces that make your daily routines a breeze. In this article, we will explore two key ways to organize your cabinet shelves: arranging items for easy access and using dividers or bins for organization.
Arranging items for easy access
Having a well-organized cabinet starts with arranging items in a way that allows you to find what you need quickly and effortlessly. Consider the following tips:
- Sort and categorize: Begin by sorting your items into categories, such as glasses, plates, bowls, or spices. This will help you see what you have and make it easier to locate specific items when you need them.
- Place frequently used items upfront: To make your daily routines more efficient, place the items you use most frequently at the front of your cabinet shelves. This way, you don’t have to dig through other items to find what you need.
- Stack and store vertically: Take advantage of vertical space by stacking items, such as plates or baking dishes, on top of each other. This not only saves space but also makes it easier to see and access each item.
- Label containers or shelves: If you store items in containers or boxes, labeling them can be a game-changer. Labels help you quickly identify what’s inside, saving you time and effort when searching for specific items.
Using dividers or bins for organization
Dividers and bins are fantastic tools for keeping your cabinet shelves organized and preventing items from shifting or becoming a disorganized mess. Consider the following approaches:
- Use adjustable dividers: Adjustable dividers are a versatile option that allows you to customize the space based on your storage needs. They are particularly useful for separating stacks of plates, cutting boards, or trays.
- Invest in clear bins: Clear bins are an excellent solution for grouping similar items together and maintaining a clean appearance. They are especially handy for storing snacks, small containers, or baking supplies.
- Utilize drawer inserts: If you have deep cabinet shelves, drawer inserts can help optimize space and keep items organized. These inserts are ideal for storing utensils, measuring cups, or small kitchen gadgets.
By applying these strategies, you can transform your cabinet shelves into well-organized spaces that make your life easier. Remember to declutter regularly to maintain your newly organized cabinets and enjoy the benefits of a functional and efficient kitchen.
Cleaning Up
Once you have successfully installed your cabinet shelves, it’s important to take the time to clean up the area and ensure everything is tidy. This final step will not only give your cabinets a polished look but also help to maintain their durability over time. In this section, we will discuss the necessary steps to clean up after installation.
Removing any debris or dust
The first step in the cleaning process is to remove any debris or dust that may have accumulated during the installation. This is crucial to ensure that your cabinets are free from any potential grime that could impact their functionality or appearance.
To effectively remove debris or dust, consider using a vacuum cleaner with a brush attachment. Start by vacuuming the interior of the cabinets, paying close attention to the corners and crevices where dust tends to accumulate. Then, move on to the exterior surfaces, including the doors and handles.
For hard-to-reach areas, such as corners or edges, you can use a soft-bristled brush or a toothbrush to gently loosen any stubborn debris. Be sure to brush in a circular motion to avoid scratching the cabinet surfaces.
Wiping down the cabinet surfaces
After removing any debris or dust, it’s time to give your cabinet surfaces a thorough wipe-down. This step will help to remove any remaining dust or fingerprints, leaving your cabinets looking clean and shiny.
Start by dampening a microfiber cloth with warm water. Avoid using harsh chemicals or abrasive cleaners, as they can damage the cabinet finish. Make sure to wring out any excess water to prevent dripping.
Begin wiping down the interior and exterior surfaces of the cabinets, paying attention to areas that are frequently touched, such as knobs or handles. Use gentle, circular motions to remove any dirt or grime.
If needed, you can add mild dish soap to the water for tougher stains or grease. However, it’s essential to rinse the cabinets thoroughly afterward to remove any soap residue.
Once you have finished wiping down the cabinet surfaces, use a dry microfiber cloth to remove any remaining moisture. This will prevent water spots or streaks from appearing on the cabinets.
By taking the time to properly clean up after installing your cabinet shelves, you can ensure that your cabinets not only look their best but also remain in excellent condition for years to come. Remember to always follow the manufacturer’s instructions and recommendations for cleaning and maintenance to preserve the longevity of your cabinets.
Frequently Asked Questions Of How To Install Cabinet Shelves
How Do You Secure Cabinet Shelves?
To secure cabinet shelves, follow these steps:
1. Use shelf clips or brackets for stability.
2. Install safety locks to prevent shelves from sliding out.
3. Consider adding adhesive shelf liners for extra grip.
4. Use anchoring devices to secure the cabinet to the wall.
5. Regularly check and tighten any loose screws or fittings to maintain stability.
How Do You Install Cabinet Shelf Pins?
To install cabinet shelf pins, follow these steps:
1. Measure and mark the desired shelf height.
2. Drill holes at the marked spots using an appropriate drill bit.
3. Insert the shelf pins into the drilled holes.
4. Test the pins for stability by placing a shelf on top.
5. Adjust the pins or holes if necessary.
How Do You Attach Shelves To The Side Of A Cabinet?
To attach shelves to the side of a cabinet, follow these steps:
1. Measure and mark the desired height for your shelves.
2. Use a level to ensure accuracy and draw a straight line.
3. Drill pilot holes into the cabinet side to avoid splitting.
4. Align the shelf brackets with the line and secure them using screws.
5. Place the shelves on top of the brackets. Done!
Can You Add Shelves To Kitchen Cabinets?
Yes, it is possible to add shelves to kitchen cabinets. Adding shelves can help you organize and maximize the storage space in your cabinets. You can hire a professional or DIY with the right tools and materials. Customizing shelves allows you to create a functional and efficient kitchen storage solution.
Conclusion
Installing cabinet shelves can significantly enhance the functionality and organization of your kitchen or any other storage space. By following these step-by-step instructions, you can successfully install cabinet shelves with ease. Remember to measure accurately, use proper tools, and secure the shelves firmly for long-lasting results.
With these skills, you can transform your cabinets into an efficient storage solution and make the most of your available space. So, roll up your sleeves and get ready to enjoy a clutter-free and organized living area. Happy installing!