To install bricks on a wall, start by preparing the surface by cleaning and applying a mortar bed. Then, stack the bricks in a desired pattern, spreading mortar between each layer.
Finally, fill in any gaps with mortar and let the bricks dry and set before applying any finishing touches.
Prepare The Wall For Brick Installation
When it comes to installing bricks on a wall, proper preparation is key to ensuring a successful and long-lasting installation. Before you start the installation process, it’s important to thoroughly prepare the wall to create a strong foundation for the bricks. This involves inspecting the wall for any damages or necessary repairs, as well as cleaning the wall to remove any dirt or debris.
Inspect the wall for any damages or necessary repairs
The first step in preparing the wall for brick installation is to carefully inspect it for any damages or necessary repairs. Check for any cracks, holes, or loose sections of masonry that may affect the stability of the wall. Any damages or repairs needed should be addressed before proceeding with the installation.
Clean the wall to remove any dirt or debris
Next, you’ll want to clean the wall to ensure it is free from any dirt, dust, or debris. This is important because a clean surface will allow the bricks to adhere properly and prevent any issues with the installation down the line.
Here are some steps you can take to clean the wall:
- Start by removing any loose dirt or debris using a stiff brush or broom. This will help to get rid of any larger particles that may be stuck to the wall.
- Next, fill a bucket with warm water and add a mild detergent or brick cleaner. Use a sponge or soft brush to scrub the wall with soapy water, focusing on any areas that are particularly dirty.
- Rinse the wall thoroughly with clean water to remove any soap residue. You can use a hose or a bucket of clean water and a sponge for this step.
- Allow the wall to dry completely before proceeding with the installation. This may take a few hours or even a day, depending on the weather conditions.
By inspecting the wall for damages and thoroughly cleaning it, you’ll be laying the foundation for a successful brick installation. Taking the time to properly prepare the wall will ensure a strong and durable finish that will last for years to come.
Tools And Materials You will Need
Before starting any construction project, it’s crucial to gather all the necessary tools and materials. This not only saves time but also ensures a smooth installation process. When it comes to installing bricks on a wall, having the right tools and materials at hand is essential for a successful outcome. In this section, we will provide you with a comprehensive list of the tools and materials you’ll need to properly install bricks on a wall. So, let’s get started.
List of Necessary Tools
When it comes to installing bricks on a wall, having the right tools can make all the difference. Here is a list of the tools you will need:
| S.No. | Tools |
|---|---|
| 1 | Trowel |
| 2 | Masonry hammer |
| 3 | Chisel |
| 4 | Jointer |
| 5 | Mason’s level |
| 6 | Masonry brush |
The trowel is used to spread mortar while the masonry hammer and chisel are used to make adjustments and cuts on the bricks. The jointer is essential for creating neat and uniform joints between the bricks. To ensure proper alignment and horizontal leveling, a mason’s level is necessary. Finally, a masonry brush is used to clean excess mortar from the bricks.
List of Necessary Materials
In addition to the tools, there are specific materials required for brick installation. Here is a list of the materials you will need:
- Bricks (choose the type and quantity depending on your project)
- Mortar mix
- Water
- Flashings
- Weep holes
- Expansion joint material
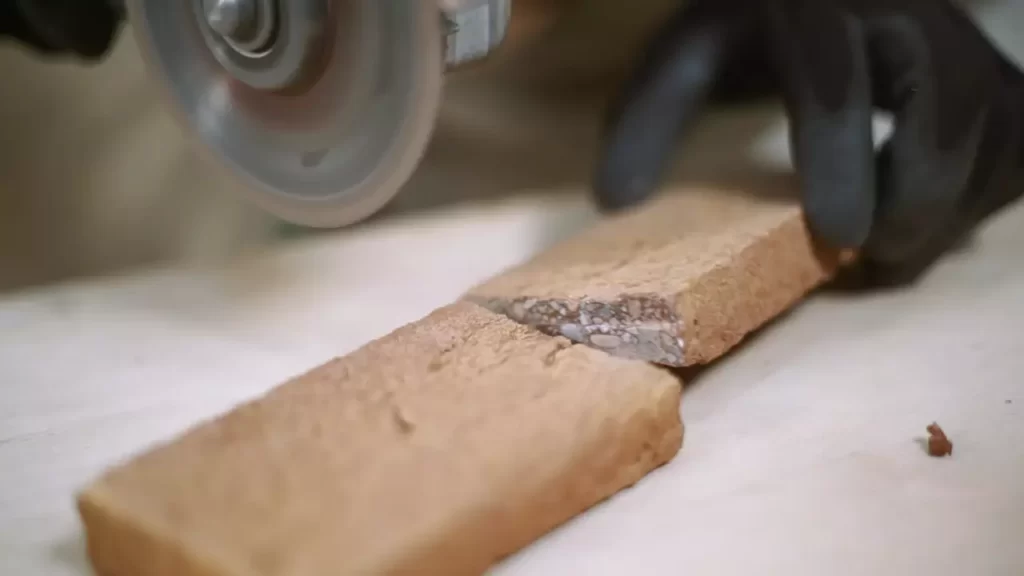
Bricks are the primary material used for building walls. Make sure to choose bricks that are suitable for your specific project, considering factors such as texture and strength. Mortar mix is used to bond the bricks together, and water is required to mix the mortar to the right consistency. Flashings are used to prevent water from entering the wall, while weep holes allow for proper drainage. Additionally, expansion joint material is used to accommodate the natural movement of the wall.
By having all the necessary tools and materials prepared before getting started, you can ensure a hassle-free brick installation process. It is crucial to be well-equipped with the right tools and quality materials, as this will directly impact the longevity and appearance of your brick wall.
Installing The First Row Of Bricks
When it comes to installing bricks on a wall, it is important to start with the first row. This initial row sets the foundation for the rest of the installation process. In this section, we will discuss the steps involved in installing the first row of bricks.
Establish a level and straight guideline
Before you begin laying the bricks, it is crucial to establish a level and straight guideline. This will act as a reference line and ensure that your bricks are installed in a straight line. To do this, you can use a spirit level and a chalk line. Simply mark your desired height from the ground and snap a chalk line along the wall using the level as a guide.
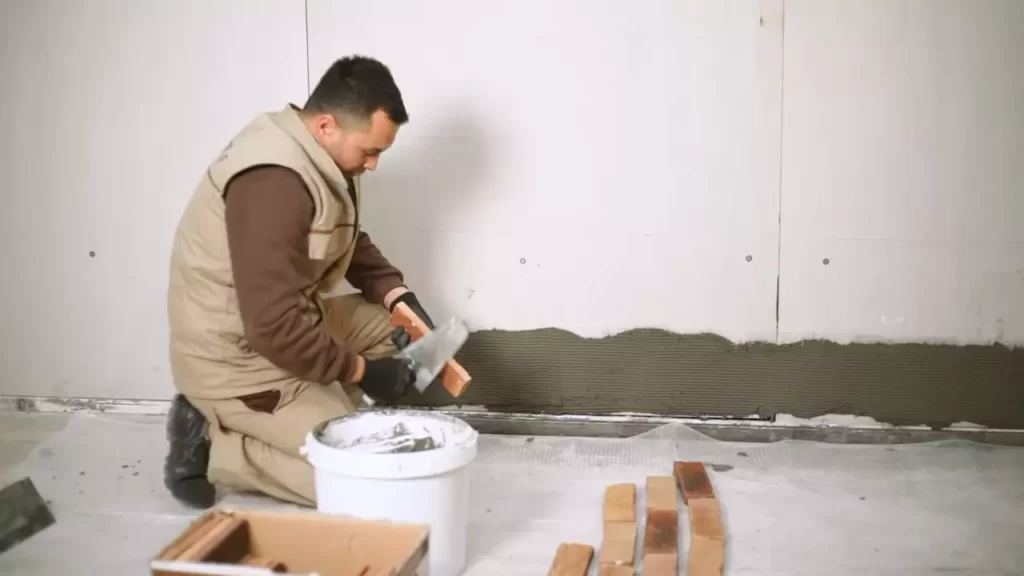
Mix and apply mortar to the wall
Once you have established the guideline, the next step is to mix and apply mortar to the wall. Mortar serves as the adhesive that holds the bricks together. To mix the mortar, follow the instructions provided by the manufacturer and make sure the consistency is firm but workable. Using a trowel, apply a layer of mortar directly onto the wall, covering roughly the area where the first row of bricks will be placed.
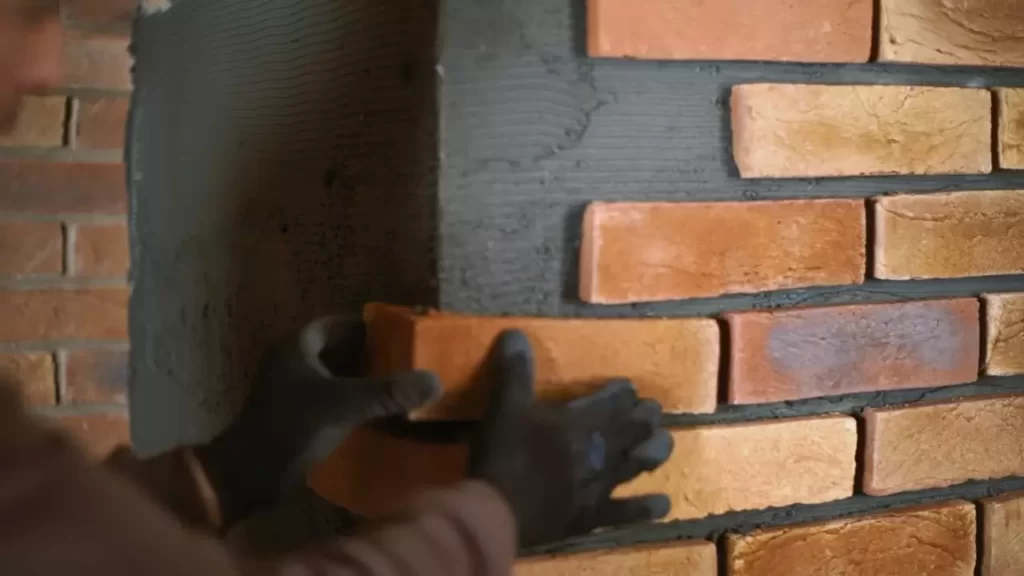
Place the bricks one by one, starting from the bottom
With the mortar in place, it’s time to start placing the bricks. Start from the bottom and work your way up. Take one brick at a time and apply a layer of mortar to its underside. Position the brick onto the wall, pressing it firmly into the mortar. Use a slight twisting motion to help secure its position. Repeat this process for each brick, ensuring that they are properly aligned and leveled with the guideline. Make sure to leave a small gap between each brick to accommodate for expansion and contraction.
Ensure proper alignment and spacing
As you lay each brick, it is important to check for proper alignment and spacing. Use a spirit level to ensure that the bricks are level both horizontally and vertically. Make any necessary adjustments by tapping gently with a rubber mallet. Additionally, use a jointer or a pointing trowel to create uniform spacing between the bricks. This will not only enhance the aesthetic appeal but also provide stability to the structure.
Adding Additional Rows Of Bricks
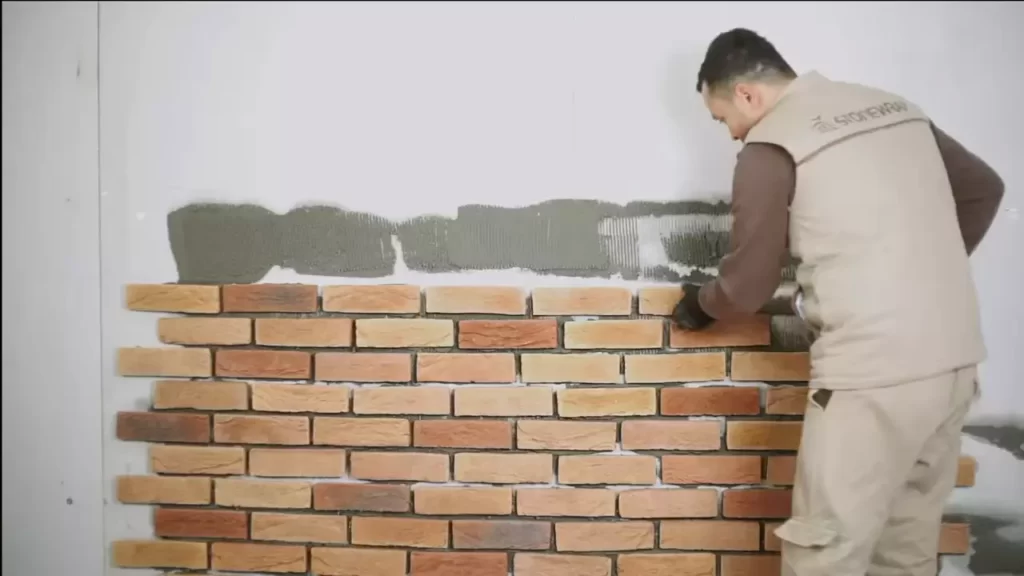
Continue applying mortar and placing bricks
Once you have successfully laid the first row of bricks on your wall, it’s time to move on to adding additional rows. This step is crucial to ensure a sturdy and visually appealing brick wall.
To get started, apply a layer of mortar on top of the first row of bricks using a trowel. Make sure to spread the mortar evenly and create a smooth surface to lay the next row of bricks on.
Use a brick spacer for consistent spacing
To achieve a professional and uniform look, it’s important to maintain consistent spacing between the bricks. This is where a brick spacer comes in handy. Place the spacer between each brick as you lay them, making sure they are evenly spaced.
The size of the spacer will vary depending on your desired spacing, but commonly used sizes range from 1/4 inch to 1/2 inch. By using a spacer, you’ll achieve a consistent and visually pleasing wall.
Check for level and plumb as you go
As you continue to add rows of bricks to your wall, don’t forget to check for both level and plumb. This is crucial for ensuring your wall is straight and upright.
Use a level to check for horizontal alignment and adjust the bricks as needed. Similarly, use a plumb line or a level to check for vertical alignment, making sure the bricks are perfectly upright. By regularly checking for level and plumb, you’ll avoid any potential alignment issues that may compromise the quality and aesthetics of your brick wall.
Consider brick patterns for aesthetic appeal
While functionality and structural integrity are important, the aesthetic appeal of your brick wall should not be overlooked. By considering different brick patterns, you can add visual interest and create a unique look for your wall.
Popular brick patterns include running bond, herringbone, and basket weave. Experiment with different patterns to find the one that best suits your taste and complements the overall design of your space. By incorporating a visually appealing brick pattern, you’ll elevate the aesthetic value of your wall and create a striking focal point.
Finishing Touches And Cleanup
Once you have successfully installed the bricks on the wall, it’s time to focus on the finishing touches and cleanup. This stage is crucial for achieving a polished look and ensuring the longevity of your brickwork. Follow these steps to complete the installation process:
Remove excess mortar
Before moving forward, it’s important to remove any excess mortar that may have squeezed out between the bricks during installation. This will not only enhance the overall appearance but also prevent potential damage to the bricks. Take a metal scraper or a trowel and carefully scrape away the excess mortar, ensuring that the surface is clean and smooth. Be cautious not to damage the mortar between the bricks.
Clean the bricks for a polished look
Now that the excess mortar has been removed, it’s time to clean the bricks and give them a polished appearance. Start by using a stiff-bristle brush to sweep away any loose debris or dirt on the surface. Then, create a solution of mild detergent and warm water. Dip a sponge or soft-bristle brush into the solution and gently scrub the bricks, working in small sections at a time. Rinse the bricks with clean water to remove any residue and allow them to air dry.
Allow sufficient time for the mortar to dry
Once the brick surface is clean, it’s important to allow sufficient time for the mortar to fully dry and set. The drying time can vary depending on various factors such as humidity and temperature. Generally, it’s recommended to wait at least 24 to 48 hours before proceeding with the next step. This will ensure that the mortar has enough time to cure properly and provide a strong bond between the bricks.
Apply brick sealer for added protection and longevity
To enhance the durability and longevity of your brickwork, consider applying a brick sealer. A brick sealer acts as a protective layer, preventing moisture penetration and inhibiting the growth of mold and mildew. Before applying the sealer, ensure that the bricks are completely dry. Use a brush or roller to evenly apply the sealer onto the brick surface, following the manufacturer’s instructions. Allow the sealer to dry completely before subjecting the bricks to any moisture or weathering.
By following these steps, you can achieve a professional and polished look for your brick installation while ensuring its longevity and protection. Remember to take your time and pay attention to detail during the finishing touches and cleanup process.
Troubleshooting And Maintenance Tips
After successfully installing bricks on your wall and creating a beautiful and sturdy structure, it’s important to address any issues that may arise and perform regular maintenance to ensure the durability of your brick wall. In this section, we will discuss common issues such as uneven bricks or mortar cracks and provide tips on how to address them effectively.
Addressing common issues like uneven bricks or mortar cracks
Despite your best efforts, you may encounter some common issues with your brick wall installation. These issues include uneven bricks and cracks in the mortar. It’s crucial to address them promptly to maintain the structural integrity and aesthetics of your wall.
Uneven bricks
If you notice uneven bricks on your wall, it’s important to address the issue promptly. Uneven bricks not only compromise the visual appeal but also weaken the structure of the wall. Here are a few steps to fix this problem:
- Identify the uneven bricks: Inspect your wall and take note of any bricks that appear out of alignment.
- Remove the uneven bricks: Carefully remove the misaligned bricks using a chisel and hammer. Be cautious not to damage the adjacent bricks.
- Reposition the bricks: Clean the area where the bricks were removed and apply a layer of mortar using a trowel. Then, carefully position the bricks in their correct alignment and press them firmly into place.
- Allow the mortar to cure: Let the mortar cure according to the manufacturer’s instructions before proceeding with further maintenance or finishing.
Mortar cracks
Cracks in the mortar can occur due to various factors such as settling, weather conditions, or improper installation. Here’s how you can address mortar cracks:
- Assess the cracks: Determine the severity and extent of the cracks in the mortar. If the cracks are minor, you can address them without major repairs.
- Clean the cracks: Use a wire brush or scraper to remove any loose debris or mortar from the cracks.
- Fill the cracks: Apply fresh mortar into the cracks using a pointing trowel, ensuring that the mortar fills the entire crack. Smooth the surface using the edge of the trowel.
- Finishing touches: After the mortar dries, inspect the repaired area and brush off any excess mortar. You can also use a damp cloth to wipe away any residue.
Regular maintenance to ensure the durability of the brick wall
In addition to addressing common issues, regular maintenance is crucial to ensure the long-term durability of your brick wall. Here are some essential maintenance tips:
- Inspect for damage: Regularly inspect your brick wall for any signs of damage, including cracks, loose bricks, or deterioration. Address these issues promptly to prevent further damage.
- Clean the wall: Remove dirt, grime, or moss from the surface of the wall using a mild detergent and a soft brush. Rinse with water and allow it to air dry.
- Repoint mortar joints: Over time, mortar joints may deteriorate. To maintain the strength of your brick wall, repoint the mortar joints by removing old mortar and replacing it with fresh mortar.
- Seal the bricks: Consider applying a brick sealer to protect your bricks from moisture and other elements. Consult a professional for the appropriate sealer and application process.
- Trim vegetation: Trim any vegetation near your brick wall, as plant growth can lead to moisture retention and potential damage.
By addressing common issues and performing regular maintenance, you can ensure the durability and beauty of your brick wall for years to come. Stay proactive and address any issues promptly to avoid further damage and costly repairs.
Frequently Asked Questions Of How To Install Bricks On A Wall
How Do You Attach Brick To A Wall?
To attach a brick to a wall, follow these steps:
1. Prepare the surface by cleaning and applying a bonding agent.
2. Mix mortar according to instructions and apply it to the wall.
3. Press the bricks firmly into the mortar, leaving a small gap for expansion.
4. Use a level to ensure they are straight and even.
5. Allow the mortar to dry, then fill any gaps with mortar.
How Do You Lay Bricks For Beginners?
To lay bricks as a beginner, follow these steps:
1. Prepare the area by clearing debris and leveling the ground.
2. Mix mortar following the instructions and spread it on the surface.
3. Place the bricks, using a trowel to apply mortar between each brick.
4. Ensure each brick is level and aligned using a spirit level.
5. Repeat the process, allowing enough time for the mortar to dry between layers.
How Do You Prepare A Wall For Brick?
To prepare a wall for brick, follow these steps:
1. Clean the wall thoroughly, removing any dirt or debris.
2. Repair any cracks or damages in the wall surface.
3. Apply a suitable mortar mix to create a level surface for the bricks.
4. Install a moisture barrier to prevent water damage.
5. Finally, lay out the brick pattern and start laying the bricks.
Can I Install Brick Over Drywall?
Yes, it is possible to install brick over drywall. However, there are certain guidelines to follow. Make sure the drywall is clean, dry, and in good condition. Use adhesive or mortar to securely attach the brick to the drywall. It is also recommended to consult with a professional for proper installation.
Conclusion
To sum up, installing bricks on a wall may seem like a daunting task, but with the right techniques, it can be easily accomplished. By following the step-by-step guide provided in this blog post, you can ensure a successful brick installation that enhances the beauty and durability of your wall.
Remember to gather the necessary materials, prepare the surface, lay the bricks with precision, and finish with a strong mortar. By mastering these techniques, you can transform any space into a stunning brick haven. Happy bricklaying!