To install a blower motor, first disconnect the power source. Then, remove the old blower motor and replace it with the new one.
When it comes to maintaining a properly functioning HVAC system, the blower motor plays a crucial role. However, there may be instances where the blower motor needs replacement. If you find yourself in this situation, it’s vital to know how to install a blower motor correctly.
By following a few steps, you can ensure a smooth installation process. We will guide you on how to install a blower motor in a concise and straightforward manner. So, let’s get started and learn the steps to install a blower motor effectively.
Required Tools And Materials
When it’s time to install a new blower motor, having the right tools and materials is essential to ensure a smooth and successful installation process. In this section, we will discuss the essential tools and materials you will need to complete the task effectively.
Essential Tools for the Installation Process
To get started with installing your blower motor, make sure you have these essential tools at your disposal:
| Tool | Description |
|---|---|
| Screwdriver | A flat-head or Phillips screwdriver will be necessary to remove any screws securing the old blower motor in place. |
| Socket Set | A socket set will come in handy for loosening and tightening bolts that hold the blower motor housing. |
| Multimeter | A multimeter allows you to test the electrical connections and ensure proper voltage output. |
| Wire Strippers | Wire strippers are essential for removing the insulation from the wires to make electrical connections. |
| Electrical Tape | Electrical tape is used to secure and insulate electrical connections. |
| Wire Connectors | Wire connectors are necessary for joining wires securely. |
| Protective Gloves and Eyewear | Always prioritize safety by wearing protective gloves and eyewear to prevent any injuries during the installation process. |
Make sure to have all these tools within easy reach before beginning the installation process. This will save you time and frustration, allowing you to complete the task efficiently.
Choosing the Right Blower Motor for Your Needs
Choosing the right blower motor for your needs is crucial to ensure optimal performance and longevity. Here are some factors to consider when selecting a blower motor:
- Motor Type: Determine if you need a direct-drive (connected directly to the fan) or belt-drive (connected with a belt) blower motor based on your system requirements.
- CFM Rating: Consider the Cubic Feet per Minute (CFM) rating of the blower motor to ensure it can provide adequate airflow for your HVAC system.
- Horsepower: Check the horsepower rating of the blower motor to ensure it can handle the workload required for your specific application.
- Compatibility: Verify that the blower motor is compatible with your HVAC system by consulting the manufacturer’s specifications or seeking professional advice.
- Energy Efficiency: Opt for an energy-efficient blower motor to reduce power consumption and save on utility bills.
By considering these factors, you can select the right blower motor that meets your needs in terms of performance, energy efficiency, and compatibility.
Now that you know the required tools and how to choose the right blower motor, you are ready to embark on the installation process confidently. Stay tuned for the next section of our blog post, where we will guide you through the step-by-step installation instructions.
Preparing For The Installation
Before you dive into the installation process of a blower motor, it is important to make sure you are well-prepared. This involves verifying the compatibility of the blower motor with your HVAC system and gathering the necessary information about your system. Taking these steps will help ensure a smooth and successful installation. Let’s break it down.
Verifying the compatibility of the blower motor with your system
First things first, you need to make sure that the blower motor you have is compatible with your HVAC system. Installing an incompatible blower motor may lead to inefficient performance or even damage to your system. To check compatibility, there are a few key factors to consider:
- The voltage requirements of your HVAC system: Ensure that the blower motor you have is compatible with the voltage of your system. This information can usually be found on your HVAC system or in the user manual.
- The horsepower rating of the blower motor: The horsepower rating should match the requirements of your system. Installing a blower motor with a lower horsepower could result in underperformance, while installing one with a higher horsepower may strain your system.
- The mounting style of the blower motor: Different HVAC systems require different mounting styles for blower motors. Check whether your system requires a direct-drive or belt-drive blower motor.
Gathering the necessary information about your HVAC system
In addition to verifying compatibility, it is crucial to gather the necessary information about your HVAC system before undertaking the installation. This information will help ensure that you have all the necessary equipment and tools at hand.
Here are some key pieces of information to gather:
- The make and model of your HVAC system: This information is typically found on the system itself or in the user manual. Knowing the make and model will help you find the right blower motor for your system.
- The dimensions of the blower motor space: Measure the space where the blower motor will be installed to ensure that the new motor will fit properly. This will save you from any last-minute surprises.
- The wiring diagram of your HVAC system: Familiarize yourself with the wiring diagram of your system. This will help you understand how to properly connect the blower motor during installation.
By verifying compatibility and gathering the necessary information, you’ll be well-prepared to install your blower motor. In the next section, we will guide you through the step-by-step installation process, ensuring your HVAC system runs efficiently and effectively.
Safety Precautions
Important safety measures to take before starting the installation
When it comes to installing a blower motor, safety should be your top priority. Taking necessary precautions ensures your well-being and prevents any potential accidents during the process. Here are some important safety measures you should take before you start the installation:
- Turn off the power: Before you begin, make sure to turn off the power supply to the blower motor. This will prevent any accidental electric shock or short circuits.
- Wear protective gear: Always wear the appropriate protective gear, such as gloves and safety glasses. This will protect you from any potential injuries and hazards that may arise during the installation.
- Check for gas leaks: If your blower motor is connected to a gas-powered system, check for any gas leaks before starting the installation. If you detect a gas leak, immediately shut off the gas supply and seek professional assistance.
- Keep the area well-ventilated: Ensure that the installation area is well-ventilated to avoid the build-up of any harmful gases or fumes. This will help provide a safer working environment.
- Secure the blower motor: Before you start handling the blower motor, ensure that it is securely held in place. This will prevent any accidental drops or injuries during the installation process.
Proper handling and disposal of old blower motor
Proper handling and disposal of the old blower motor is essential to ensure safety and environmental responsibility. Follow these guidelines for the proper handling and disposal of old blower motors:
- Disconnect power: Before you start handling the old blower motor, make sure to disconnect it from the power source. This will prevent any accidental electrical shock.
- Use protective gear: Wear gloves and safety glasses to protect yourself from any potential hazards while handling the old blower motor.
- Avoid exposing yourself to hazardous materials: Some old blower motors may contain hazardous materials such as lead, mercury, or other harmful substances. Take necessary precautions to avoid exposure; if in doubt, consult with local authorities for proper disposal methods.
- Follow local regulations: Check with your local authorities or waste management facilities for the proper disposal procedures for old blower motors. They may have specific guidelines to ensure proper recycling or disposal.
By following these safety precautions, you can ensure a smooth and safe installation process for your blower motor. Remember, if you are unsure about any step, it is always recommended to seek professional assistance to avoid any potential accidents or damage.
Removing The Old Blower Motor
Removing the old blower motor is an essential step in replacing or repairing your HVAC system. Whether you’re experiencing a malfunctioning motor or simply upgrading to a more efficient model, this guide will walk you through the process. In this section, we’ll cover shutting off the power to the HVAC system, locating and accessing the blower motor, and disconnecting electrical connections and removing mounting screws.
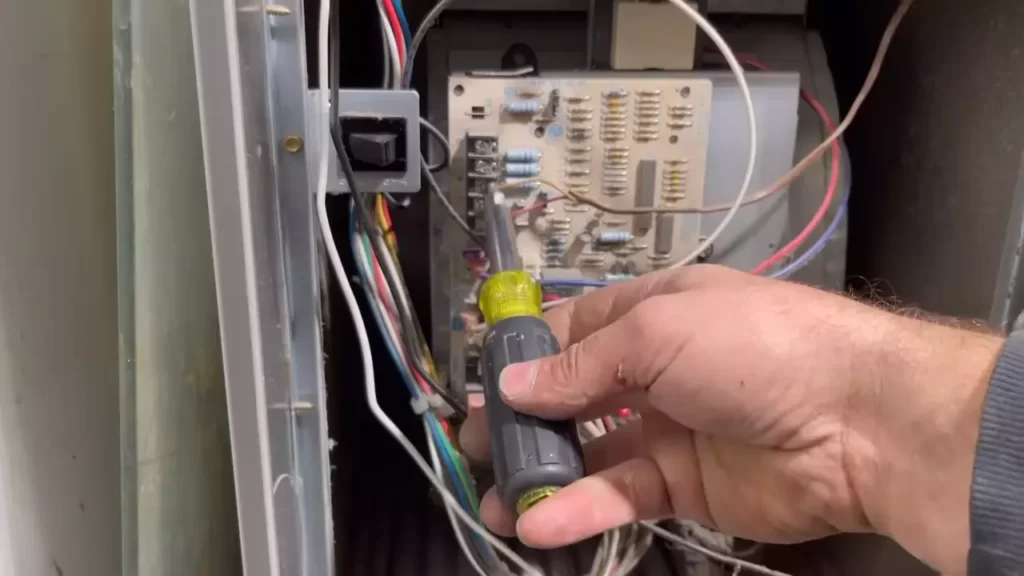
Shutting off the power to the HVAC system
Before you begin removing the blower motor, it’s crucial to shut off the power to the HVAC system to avoid any electrical accidents. Follow these steps:
- Locate your main electrical panel.
- Find the circuit breaker or fuse that controls the power to your HVAC system.
- Turn off the corresponding circuit breaker or remove the fuse.
By disconnecting the power, you’ll ensure a safe working environment and prevent any potential damage to yourself or the equipment.
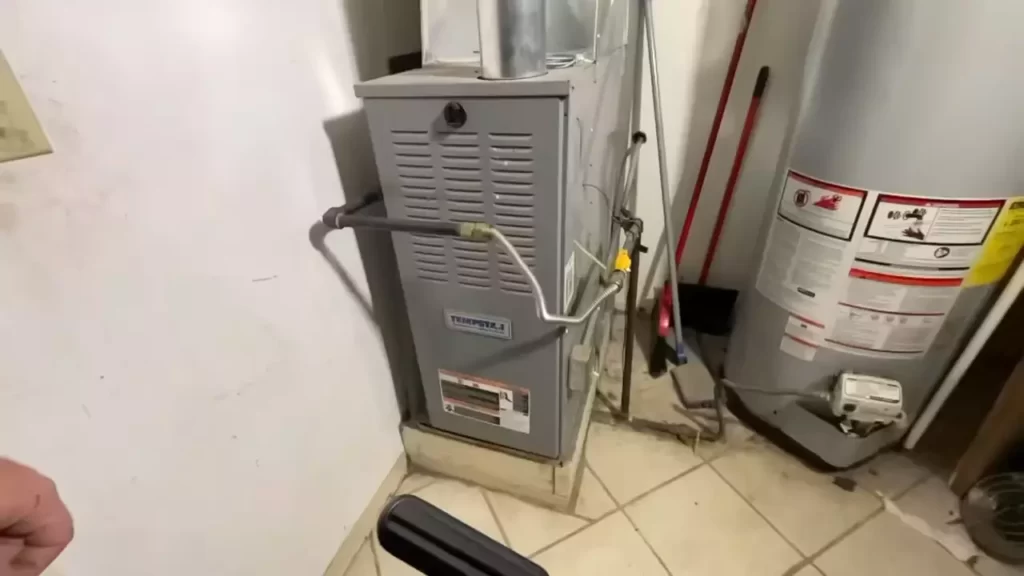
Locating and accessing the blower motor
Once you’ve turned off the power, locating and accessing the blower motor is the next step. Follow these guidelines:
- Consult your HVAC system’s manual to determine the exact location of the blower motor.
- Remove any access panels or covers that are obstructing the motor.
Remember to handle all components with care and ensure you have enough space to work comfortably.
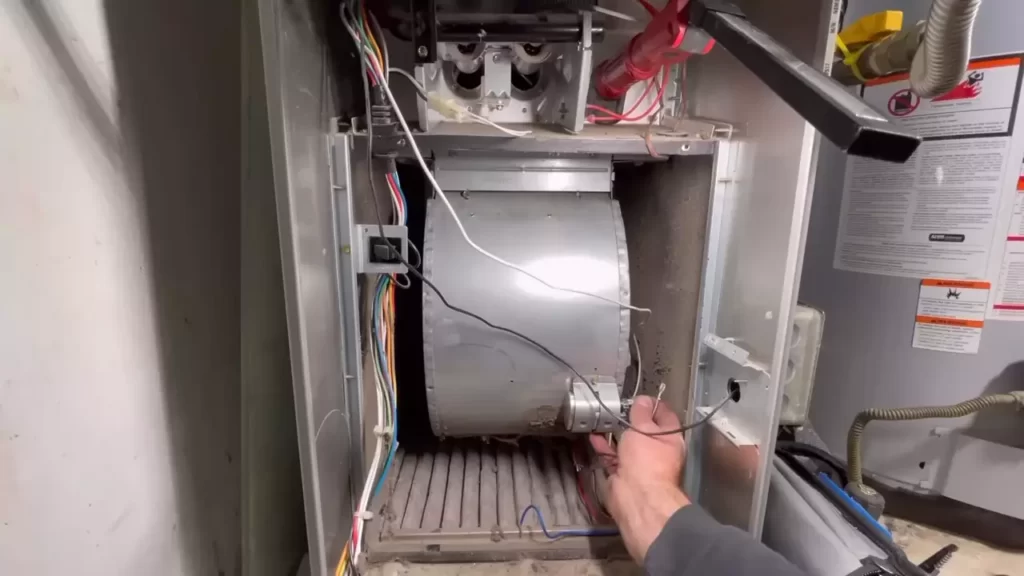
Disconnecting electrical connections and removing mounting screws
After accessing the blower motor, it’s time to disconnect the electrical connections and remove the mounting screws.
- Start by identifying the electrical connections attached to the motor.
- Using pliers or a screwdriver, carefully disconnect the electrical wires or connectors.
- Keep track of which wires are connected to which terminals to ensure a smooth reinstallation.
- Once all electricity has been disconnected, locate the mounting screws that secure the motor to the housing.
- Using the appropriate tool, such as a screwdriver or wrench, remove the mounting screws.
By following these steps, you’ll successfully remove the old blower motor and be one step closer to your HVAC system’s repair or upgrade.
Installing The New Blower Motor
Once you have removed the old blower motor, it’s time to install the new one. Follow these steps to ensure a secure and correct installation.
Ensuring the blower motor matches the specifications of the old one
Before installing the new blower motor, it’s important to ensure that it matches the specifications of the old one. Check the voltage, motor speed, rotation direction, and physical dimensions of the old blower motor. Refer to the manufacturer’s instructions or product manual to verify the specifications of the new blower motor. This will help prevent any compatibility issues and ensure that the new blower motor will function properly in your HVAC system.

Mounting the new blower motor securely
Once you have confirmed that the new blower motor matches the specifications of the old one, it’s time to mount it securely in place. Follow these steps:
- Position the new blower motor in the correct location. Refer to the manufacturer’s instructions or product manual for the recommended mounting position.
- Align the mounting holes of the blower motor with the corresponding holes in the blower assembly.
- Insert the mounting screws through the holes and tighten them securely using a screwdriver or wrench. Be careful not to overtighten the screws as it may damage the blower motor or housing.
By mounting the new blower motor securely, you ensure that it operates efficiently and reduces the risk of any vibrations or noise during operation.
Reconnecting electrical connections and fastening the mounting screws
With the new blower motor securely mounted, it’s time to reconnect the electrical connections and fasten the mounting screws. Follow these steps:
- Identify the electrical connections on the blower motor. Typically, these include the power supply wires and any control wires.
- Connect the corresponding wires from the HVAC system to the blower motor. Ensure that the connections are tight and secure.
- If there are multiple wires, consider labeling them to ensure correct reconnection.
- Once the electrical connections are secured, fasten the mounting screws further to stabilize the blower motor and prevent any movement or vibrations.
After completing these steps, double-check all connections and screws to ensure they are tightened properly. This will enhance the efficiency and performance of the blower motor in your HVAC system.
Congratulations! You have successfully installed the new blower motor in your HVAC system. Make sure to test the blower motor for proper functioning before closing any access panels or covers. If you encounter any issues or have doubts about the installation process, consult a professional HVAC technician for assistance.
Testing And Troubleshooting
Once you’ve installed the blower motor in your HVAC system, it’s important to test its functionality to ensure everything is working properly. In this section, we’ll cover how to turn on the power and test the blower motor, as well as common troubleshooting tips for any potential issues that may arise.
Turning on the power and testing the blower motor functionality
Before you can test the blower motor, you’ll need to turn on the power to your HVAC system. Make sure all the necessary switches and breakers are in the “on” position. Once the power is on, follow these steps to test the blower motor functionality:
- Set your thermostat to the “fan on” mode.
- Listen for any noises coming from the blower motor. A properly functioning motor should be relatively quiet.
- Observe the airflow coming from the vents. The blower motor should be producing a steady and strong airflow.
- If you notice any issues, such as a weak airflow or strange noises, it’s important to investigate further to identify and resolve the problem.
- Remember to turn off the power to your HVAC system once you’ve finished testing to avoid any accidents or damages.
Common troubleshooting tips for potential issues
While testing the blower motor, you may encounter some common issues that could affect its performance. Here are a few troubleshooting tips to help you identify and resolve these problems:
| Issue | Troubleshooting Tip |
|---|---|
| Weaker than usual airflow | Check the air filter and clean or replace it if necessary. A clogged filter can restrict airflow and put extra strain on the blower motor. |
| No airflow | Inspect the blower wheel for any obstructions or debris. Clear away anything that may be blocking the airflow. |
| Loud or unusual noises | Check the blower motor for any loose or damaged components. Tighten or replace any loose or damaged parts as needed. |
| Motor not running | Ensure that the power supply to the motor is connected properly. If the connection is secure, but the motor still isn’t running, it may need to be replaced. |
By following these testing and troubleshooting steps, you can ensure that your blower motor is functioning correctly and address any potential issues that may arise. Remember, if you’re unsure about any specific troubleshooting steps or don’t feel confident in your abilities, it’s always best to consult a professional HVAC technician to avoid any further complications or damages.
Maintenance Tips For Blower Motors
Regular maintenance of your blower motor is essential to ensure optimal performance and prevent any potential issues. By following a few simple maintenance tips, you can keep your blower motor running smoothly and efficiently. In this section, we will discuss two key aspects of blower motor maintenance: regular cleaning and lubrication, and signs that indicate the need for maintenance or replacement.
Regular cleaning and lubrication to ensure optimal performance
Cleaning your blower motor on a regular basis is crucial for maintaining its efficiency and preventing any build-up that could hinder its performance. Dust, dirt, and debris can accumulate over time, obstructing the airflow and reducing the motor’s effectiveness. Here are some guidelines for cleaning your blower motor:
- Start by turning off the power supply to the blower motor. This will ensure your safety during the cleaning process.
- Remove the blower motor access panel to gain access to the internal components.
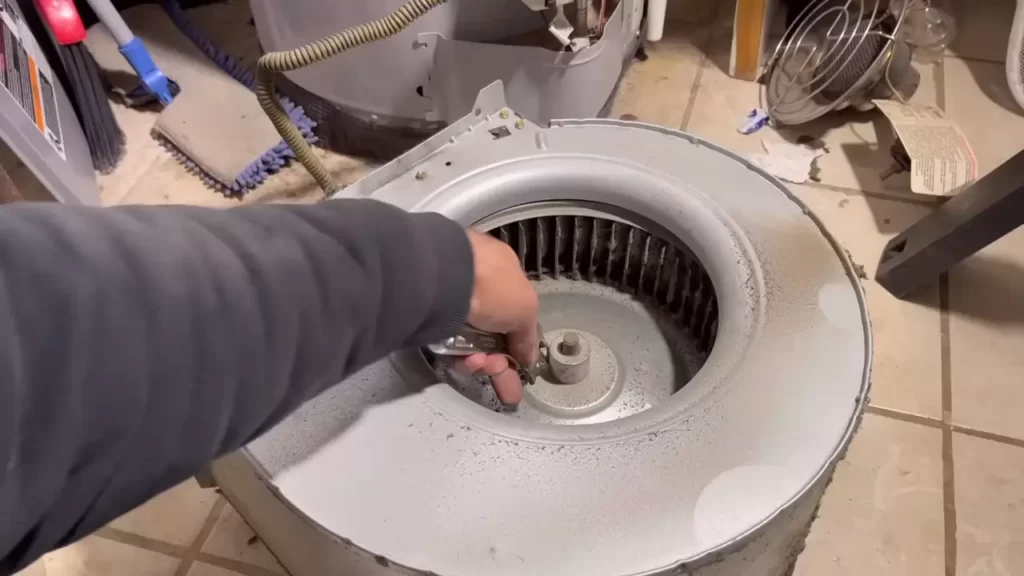
- Using a soft brush or a vacuum cleaner with a brush attachment, carefully remove any dust or debris from the motor, blades, and housing.
- Pay special attention to the fan blades, as they can accumulate dirt and affect the motor’s performance.
- Once cleaned, you can lubricate the motor’s bearings and other moving parts. Consult your manufacturer’s manual to identify the appropriate lubricant and follow the instructions for lubrication.
- After cleaning and lubrication, reassemble the blower motor and restore the power supply.
Signs that indicate the need for maintenance or replacement
It’s important to be aware of the signs that indicate your blower motor requires maintenance or may need to be replaced. Ignoring these signs can lead to further damage and inefficiency. Here are some common signs that should prompt you to take action:
- Unusual noises such as squeaking, grinding, or rattling coming from the blower motor. These noises may indicate worn-out bearings or loose components that require immediate attention.
- Decreased airflow from the vents, even when the blower motor is running. This could be a sign of a clogged air filter, a blocked duct, or a malfunctioning blower motor.
- Inconsistent or weak airflow coming from the vents. If you notice that some rooms in your house receive less air than others, it could be a sign that the blower motor is not distributing the air evenly.
- Frequent cycling on and off of the blower motor. If you observe that the blower motor is constantly turning on and off, it may indicate a problem with the motor or the thermostat.
- Increased energy consumption. If you notice a sudden spike in your energy bills without any other apparent cause, it could be due to an inefficient blower motor.
By paying attention to these signs and performing regular maintenance, you can prolong the lifespan of your blower motor and ensure it operates at its best. Remember that if you are unsure about any maintenance tasks or suspect serious issues with your blower motor, it’s always best to consult a professional HVAC technician.
Frequently Asked Questions For How To Install Blower Motor?
Is A Blower Motor Easy To Replace?
Yes, replacing a blower motor is relatively easy. It can be done quickly with basic tools and some mechanical knowledge. Consider consulting a professional if you are unsure or uncomfortable performing the task yourself.
How Much Is Labor To Install A Blower Motor?
The labor cost to install a blower motor can vary depending on the complexity of the installation and location. On average, expect to pay around $150 to $500 for labor. However, it is best to contact a professional HVAC technician for an accurate quote specific to your needs.
How Long Does It Take To Install A Blower Motor?
The installation of a blower motor generally takes around 1-2 hours. It is a relatively quick process carried out by a professional technician.
What Tools Do I Need To Replace A Blower Motor?
To replace a blower motor, you’ll need a few tools: a wrench, screwdriver, pliers, and a new blower motor. Make sure to disconnect the power before starting and follow the manufacturer’s instructions for removal and installation. It’s best to consult a professional if you’re unsure or uncomfortable with the process.
Conclusion
Installing a blower motor can be a straightforward task with the right knowledge and tools. By following the step-by-step instructions provided in this blog post, you can successfully install a blower motor in your HVAC system. Remember to take safety precautions and consult the manufacturer’s guidelines for specific instructions.
With patience and attention to detail, you can ensure smooth and efficient operation of your blower motor. Happy DIY-ing!