Install a bathroom fan without attic access by using a through-the-wall vent. This method allows you to ventilate the bathroom effectively without going into the attic.
Proper ventilation is crucial in a bathroom to prevent the buildup of moisture, mold, and unpleasant odors. While installing a bathroom fan is a common solution, it can become challenging if you don’t have attic access. A traditional bathroom fan installation requires accessing the attic and running ductwork.
However, fear not! There is still a way to install a bathroom fan without attic access – by using a through-the-wall vent. We will guide you through the steps necessary to install a bathroom fan without the need for attic access. So, let’s get started and ensure your bathroom is well-ventilated and comfortable for all users.
Assessing The Bathroom Layout
Before proceeding with the installation of a bathroom fan without attic access, it is crucial to conduct a thorough assessment of the bathroom layout. This will allow you to determine the best location for the fan and identify the access points for wiring and venting.
Determining the location for the bathroom fan
To ensure efficient ventilation and maximum effectiveness, it is important to choose an appropriate location for your bathroom fan. Consider the following factors when deciding on the placement:
- The proximity to the source of moisture: Install the fan as close as possible to the shower, bathtub, or toilet to effectively remove excess humidity.
- The layout of the bathroom: Take into account the overall size and shape of the bathroom. You want to ensure that the fan can adequately cover the entire space.
- The proximity to an exterior wall: If feasible, installing the fan near an exterior wall can simplify the venting process.
By carefully considering these factors, you can determine the optimal location for your bathroom fan, ensuring efficient moisture removal and a more comfortable bathroom environment.
Identifying access points for wiring and venting
Once you have determined the location for your bathroom fan, the next step is to identify the access points for wiring and venting. This will require careful examination of the bathroom’s walls and ceilings. Look for possible routes to connect the fan to a power source and to vent outside:
- Existing electrical outlets: Assess if there are nearby electrical outlets that can be tapped into to provide power for the fan. Consult with a certified electrician to ensure all wiring is done safely.
- Exterior walls or roof vents: Determine if there are existing venting options nearby. If not, you may need to create an access point by cutting through the wall or ceiling, taking care to avoid any electrical or plumbing components.
- The possibility of concealed spaces: In some instances, there may be concealed spaces within the bathroom walls or ceiling that can be used for wiring and venting purposes. A professional inspection may be needed to identify these hidden areas.
By identifying these access points, you can plan the installation process more effectively, ensuring proper wiring connections and appropriate venting for your bathroom fan.
Choosing The Right Type Of Bathroom Fan
Installing a bathroom fan without attic access can be a challenging task, but with the right type of fan, it can be easily accomplished. Before diving into the installation process, it is crucial to understand the different types of bathroom fans available in the market.
Understanding the different types of bathroom fans
When it comes to choosing a bathroom fan, you have several options to consider. Let’s take a closer look at the different types:
- Wall-mounted fans: These fans are installed directly into the exterior wall of the bathroom. They are a great option if you don’t have access to the attic.
- Ceiling-mounted fans: These fans are the most common type and are installed in the ceiling. They are suitable for bathrooms with attic access, but they can also be installed without attic access with the right techniques.
- Inline fans: Inline fans are installed in the ductwork, away from the bathroom itself. They are an ideal choice for bathrooms located away from exterior walls. With this type of fan, the noise level in the bathroom is significantly reduced.
- Window fans: These fans are installed directly into the window frame. They provide ventilation without the need for extensive installation. However, they are not suitable for all bathroom layouts.
Selecting a suitable fan for installation without attic access
Now that you have a better understanding of the different types of bathroom fans, it’s important to select a fan suitable for installation without attic access. When choosing a fan, consider the following factors:
- Size: Make sure to choose a fan that is appropriate for the size of your bathroom. A fan that is too small may not effectively remove moisture and odors.
- Noise levels: Look for a fan that operates quietly. This ensures a peaceful and relaxing bathroom experience.
- Energy efficiency: Opt for a fan that is energy-efficient. This not only helps to reduce your carbon footprint but also saves you money on your energy bills.
- Installation method: Consider the installation method required for the fan. If you do not have attic access, choose a fan that can be installed through the wall or a ceiling-mounted fan that can be installed without attic access.
By considering these factors, you can ensure that you select the right type of bathroom fan for installation without attic access. Remember to read the product specifications and consult with a professional if you are unsure about the installation process.
Gathering The Necessary Tools And Materials
Before starting the installation process for your bathroom fan without attic access, it’s crucial to gather all the necessary tools and materials. By gathering everything beforehand, you can ensure a smooth and efficient installation process. In this section, we will walk you through creating a checklist for fan installation and ensuring you have the right tools and materials for the job.
Creating a Checklist for Fan Installation
Having a checklist can be extremely helpful when it comes to organizing your fan installation project. It helps you keep track of all the important tools and materials needed, making sure you don’t miss anything. Here’s a simple checklist to get you started:
| Tools | Materials |
|---|---|
|
|
Ensuring you have the Right Tools and Materials
Once you have your checklist ready, it’s time to make sure you have all the tools and materials listed. Be sure to check each item off the list to guarantee you are fully prepared for the installation. Here are a few key points to remember:
- Check the compatibility of the bathroom fan with your bathroom’s size and ventilation requirements. Look for a fan that matches your bathroom’s square footage and airflow needs to ensure optimal performance.
- Measure the dimensions of your bathroom to determine the length of the vent duct and the type of wall cap or roof jack you will need.
- Inspect the existing wiring and electrical connections to determine if any upgrades or modifications are needed.
- Ensure you have the proper safety equipment, such as gloves, goggles, and a dust mask, to protect yourself during the installation.
- Double-check that you have all the necessary screws, nails, wire connectors, and other small items needed for the installation.
By ensuring you have the right tools and materials before starting the installation process, you can save valuable time and avoid the frustration of having to pause the project to gather missing items. Now that you have everything ready, let’s move on to the next step: preparing the installation area.
Preparing The Work Area
Before beginning the installation of a bathroom fan without attic access, it is essential to prepare the work area properly. This will ensure a smooth and efficient installation process. In this article, we will outline two crucial steps to prepare the work area: clearing the bathroom of obstacles and protecting surfaces from damage.
Clearing the bathroom of obstacles
Prior to installing the bathroom fan, it is important to clear the bathroom of any obstacles that may impede the installation process. Clearing the area will provide ample space for the installation and prevent any accidents or damage to existing fixtures. Here are some steps to follow:
- Remove any personal items: Take the time to remove all personal items such as toiletries, towels, and floor mats from the bathroom. This will ensure that nothing gets in the way during the installation.
- Secure loose objects: If there are any loose objects such as wall hangings or mirrors in the bathroom, make sure they are properly secured or temporarily removed. This will prevent them from falling and causing damage during the installation process.
- Clear the floor: Clearing the floor of any obstacles such as rugs or furniture is essential. This will provide a clear and safe work area for the installation process.
Protecting surfaces from damage
While installing a bathroom fan, it is crucial to protect surfaces from potential damage. Taking preventative measures will help maintain the integrity of your bathroom’s fixtures and finishes. Here’s what you can do to protect surfaces:
- Cover the bathtub or shower: During the installation process, it is advisable to cover the bathtub or shower with a protective sheet or tarp. This will safeguard these areas from any accidental damage, such as dropped tools or debris.
- Use drop cloths: Place drop cloths over the vanity, countertops, and floor to protect them from scratches or spills. This will provide an extra layer of protection.
- Apply painter’s tape: If there are any delicate surfaces, such as tiles or wallpaper, consider applying painter’s tape to protect them from accidental scratches or dings.
By following these simple steps to prepare the work area, you can ensure a hassle-free installation of a bathroom fan without attic access. Remember, preparation is key to a successful project!
Marking The Fan Placement
When it comes to installing a bathroom fan without attic access, marking the fan’s placement is a crucial step. This ensures that the fan is positioned correctly for optimal ventilation and effectiveness. In this section, we will guide you through the process of measuring and marking the fan’s location, as well as ensuring proper ventilation and distance from any obstructions.
Measuring and marking the fan’s location
First, measure the dimensions of your bathroom ceiling. This will allow you to determine the ideal location for your fan. In most cases, the fan should be installed in the center of the ceiling or just off-center if there are obstructions. Make sure to measure and mark this spot accurately.
Next, you will need to locate the joists in your ceiling. These support beams are crucial for securely installing the fan. Use a stud finder or other suitable method to identify the position of the joists. Mark these locations on the ceiling with a pencil or by attaching masking tape.
Once you have determined the fan’s placement and identified the joists, it’s time to mark the exact location for installation. Using the dimensions you measured earlier, mark the center of the fan’s housing on the ceiling. This will serve as a reference point for installation.
Ensuring proper ventilation and distance from obstructions
Proper ventilation is essential for the efficient operation of your bathroom fan. Ensure that there is sufficient air space around the fan to allow for proper airflow. Avoid installing the fan near any obstructions such as wall studs, plumbing, or electrical wires, as these can hinder its performance.
Additionally, it is important to consider the distance between the fan and any nearby vents or exhaust pipes. Keep a safe distance to avoid any interference in the ventilation system. This will ensure that the fan can effectively remove moisture and odors from the bathroom.
Furthermore, take into account the ceiling height when marking the fan’s placement. The fan should be installed at a height that allows for easy access and maintenance. Avoid placing it too close to the ceiling surface, as this can make it difficult to clean or replace components in the future.
To summarize, marking the fan’s placement involves measuring and marking the appropriate location on your bathroom ceiling. It is essential to ensure proper ventilation and distance from obstructions to maximize the fan’s efficiency. By following these steps, you can successfully install a bathroom fan without attic access.
Wiring The Bathroom Fan
Identifying power sources and safety precautions
Before you begin wiring the bathroom fan, it’s important to identify the power sources and take necessary safety precautions. Safety should always be your top priority when working with electricity. Here are a few steps to ensure a safe installation:
- Make sure to turn off the power to the bathroom circuit at the main electrical panel.
- Use a voltage tester to double-check that the power is off before proceeding.
- Wear safety gloves and goggles to protect yourself from any potential hazards.
- Ensure proper grounding of the electrical system.
Running the wiring to the point of installation
Once you have taken the necessary safety precautions, you can start running the wiring to the point of installation. Here’s what you should do:
- Determine the shortest and most direct route from the electrical panel to the bathroom fan location. This will help minimize the length of wiring needed.
- If possible, run the wiring through an unfinished basement, crawlspace, or any accessible areas to avoid wall and ceiling repairs.
- Drill holes through the joists or studs to pass the wiring through. Use protective plates where the wiring comes into contact with any sharp edges.
- Secure the wiring to the framing members using staples or clamps to prevent it from sagging or coming into contact with other objects.
- Leave enough excess wire at both ends to allow for easy connection.
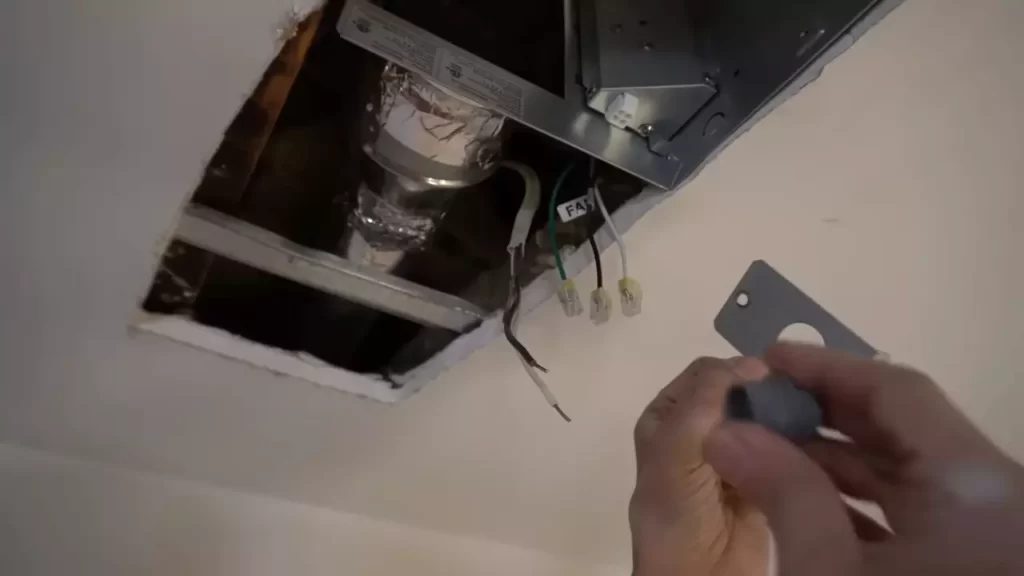
Connecting the fan to the electrical system
With the wiring in place, it’s time to connect the bathroom fan to the electrical system. Follow these steps:
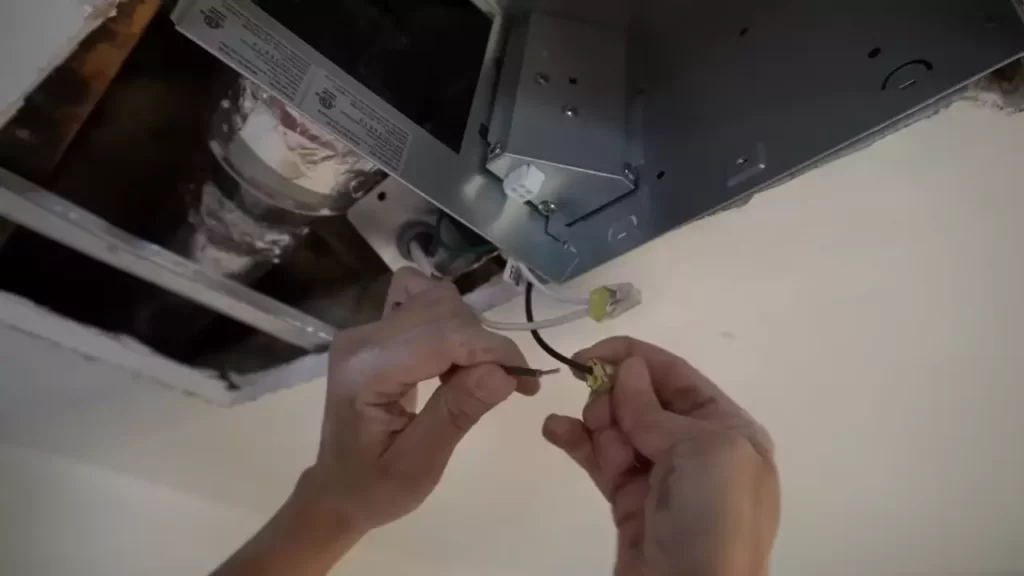
- Strip the insulation off the ends of the wiring to expose the copper conductors. You may need to use wire strippers for this.
- If the fan has a built-in junction box, attach the wires from the fan to the corresponding color-coded wires from the electrical system. Use wire connectors to secure the connections.
- If the fan does not have a junction box, you may need to install one. Follow the manufacturer’s instructions for proper installation.
- Once the connections are secure, gently push the wiring and the fan into the electrical box.
- Secure the fan to the framing members using the provided screws or brackets.
- Turn the power back on at the main electrical panel and test the fan to ensure it is working properly.
By following these steps and adhering to proper safety precautions, you can successfully wire a bathroom fan without attic access. Remember to consult the manufacturer’s instructions for any specific guidance related to your particular fan model.
Venting The Bathroom Fan
Determining the ideal venting route
Before you start installing a bathroom fan without attic access, it’s important to determine the ideal route for venting the fan. The goal is to ensure that the moist air from your bathroom is effectively exhausted to the outdoors. Here are a few steps to help you determine the best venting route:
- Assess the location of your bathroom fan and the exterior walls.
- Identify the shortest route from the fan to the exterior wall. A direct route will minimize the length of the ductwork, reducing the chances of air getting trapped and causing moisture issues.
- Consider the obstructions present, such as plumbing or electrical wires, that may affect your venting route. It’s important to avoid them to maintain the integrity of your home’s systems.
- Consult local building codes and regulations to ensure compliance. Codes may dictate the minimum distance required between the fan exhaust and windows, doors, or other openings.
Cutting a hole for the venting duct
Once you have determined the ideal venting route, the next step is to cut a hole for the venting duct. Follow these guidelines to ensure a proper installation:
- Choose the appropriate location on the exterior wall for the vent. It should be away from windows, entrances, and any obstructions that may hinder the airflow.
- Measure the diameter of the venting duct and mark the corresponding size on the exterior wall. This will guide you in cutting the hole.
- Use a reciprocating saw or a hole saw to carefully cut the hole according to the marked measurements.
- Remove any insulation or debris that may obstruct the opening.
Installing the venting duct and securing it properly
Once the hole is cut, it’s time to install the venting duct and secure it properly. Follow these steps to ensure a secure and efficient installation:
- Measure the length of the venting duct needed to run from the bathroom fan to the exterior wall. It’s important to use the appropriate size of duct to maintain proper airflow.
- Attach the venting duct to the fan using zip ties or metal straps, ensuring a tight and secure connection.
- Run the duct through the cut hole in the exterior wall, making sure it is straight and free from any kinks or bends that may restrict airflow.
- Secure the duct to the exterior wall using clamps or brackets, ensuring it is firmly attached.
- Seal any gaps or joints in the duct with duct tape or HVAC-approved sealant to prevent air leakage.
- Test the fan to ensure proper operation and check for any air leaks along the ductwork. Make any necessary adjustments or repairs.
By following these guidelines, you can successfully install a bathroom fan without attic access and ensure effective venting of moist air from your bathroom to the outdoors. Proper venting is essential to maintaining good indoor air quality and preventing moisture-related issues in your home.
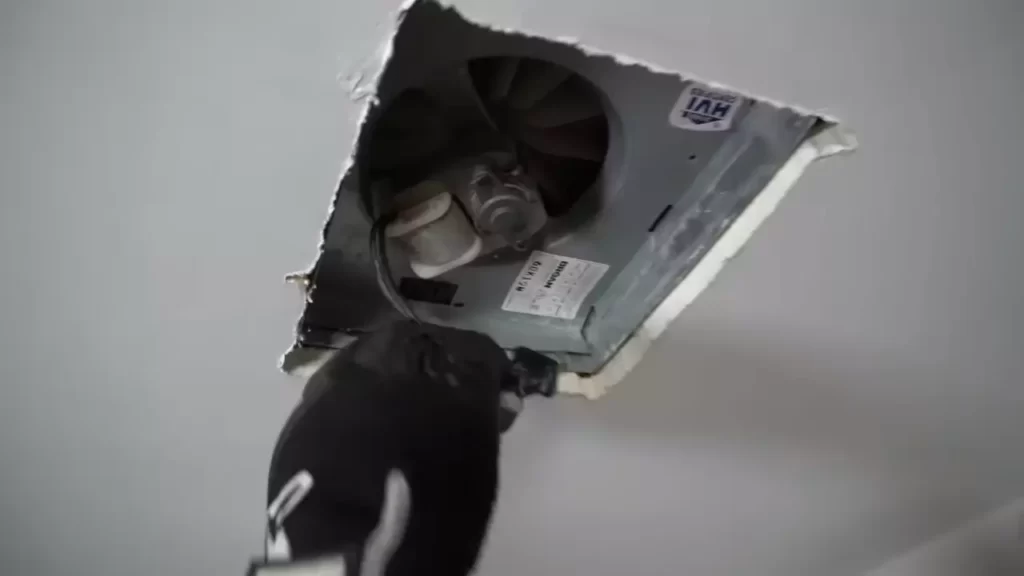
Mounting The Fan Unit
Once you have chosen the perfect spot for your bathroom fan and determined that you don’t have attic access, it’s time to start mounting the fan unit. This step-by-step guide will help you install the fan without any hassle.
Positioning the Fan in the Designated Area
The first step is to position the fan in the designated area of your bathroom. Make sure to follow the manufacturer’s instructions for the specific model you’re working with. Before proceeding, ensure you have all the necessary tools and materials:
- Measuring tape
- Pencil
- Screwdriver
- Drill
- Mounting brackets
- Screws
Start by measuring the dimensions of your fan unit and mark the desired location on the ceiling or wall. Use a measuring tape to ensure an accurate placement. Once you have determined the position, mark it with a pencil.
Next, using a drill, create pilot holes for the mounting brackets. Make sure to align the holes with the markings on the ceiling or wall. This will provide a secure base for your fan unit.
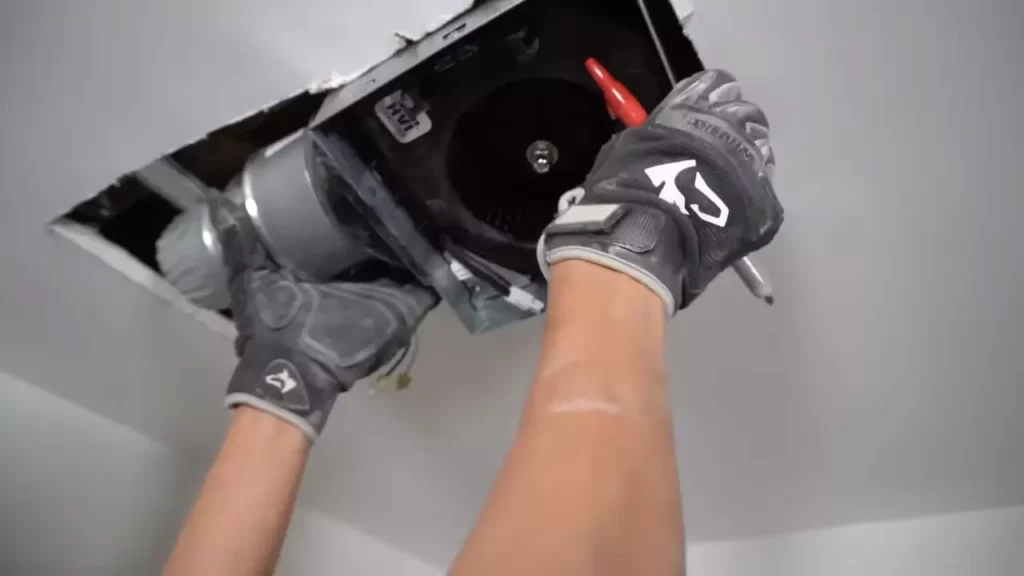
Securing the Fan Unit in Place
Now it’s time to secure the fan unit in place. Follow these steps:
- Attach the mounting brackets to the fan unit using screws. Make sure they are tightly fastened to prevent any movement or vibration.
- Align the mounting brackets with the pilot holes you created earlier.
- Gently push the fan unit towards the ceiling or wall while keeping it aligned with the markings. Make sure it fits snugly in place.
- Using a screwdriver, secure the mounting brackets to the ceiling or wall by inserting screws through the holes in the brackets.
Check for any loose connections or wobbling. If needed, adjust the position and tighten the screws accordingly. A properly mounted fan unit will ensure efficient ventilation and minimize noise.
Testing to Ensure Proper Placement and Functionality
After securing the fan unit in place, it’s important to test it to ensure proper placement and functionality. Follow these steps:
- Turn on the power to the bathroom fan.
- Stand back and observe the fan’s operation. Check for any abnormal noises, vibrations, or obstructions.
- Feel the airflow to ensure it is directed towards the desired area and is not obstructed by any nearby objects.
- If everything looks and feels in order, congratulations! You have successfully installed a bathroom fan without attic access.
In case you encounter any issues during the testing phase, recheck the mounting and wiring connections. Make sure all the connections are secure and properly aligned.
Remember, proper installation and regular maintenance of your bathroom fan are essential for a healthy and comfortable environment. Don’t forget to clean the fan periodically to keep it functioning efficiently.
Installing The Grille And Cover
Attaching the Grille to the Fan Unit
Now that you have installed the bathroom fan and made the necessary electrical connections, it’s time to attach the grille to the fan unit. The grille not only serves as a decorative cover but also helps to prevent any dust or debris from entering the fan. Here’s how you can easily attach the grille:
- Take the grille and align it with the mounting holes on the fan unit.
- Using the provided screws or fasteners, securely attach the grille to the fan unit. Make sure to tighten the screws evenly to ensure a snug fit.
- Give the grille a gentle tap or shake to ensure it is firmly attached and doesn’t come loose.
Once you have successfully attached the grille, you can move on to installing the cover to protect the fan and wiring.
Installing the Cover to Protect the Fan and Wiring
The cover is an essential component of the bathroom fan installation as it provides protection to both the fan unit and the wiring. Follow these steps to install the cover securely:
- Take the cover and position it over the fan unit, aligning it with the mounting holes.
- Secure the cover in place using the provided screws or fasteners. Be sure to tighten them evenly to ensure a proper seal.
- Double-check that the cover is securely fastened and doesn’t wobble or come off easily.
With the grille and cover in place, you have successfully completed the installation process! However, before wrapping up, it’s important to check for proper airflow and function to ensure the fan is working effectively.
Checking for Proper Airflow and Function
To confirm that your bathroom fan is functioning as it should, follow these steps:
- Turn on the fan and listen for any unusual noises or vibrations. A properly installed fan should operate smoothly and quietly.
- Place your hand near the grille to feel for the airflow. It should be noticeable and strong, indicating that the fan is effectively ventilating the bathroom.
- Observe the fan’s operation for a few minutes to ensure it runs continuously without any interruptions.
If you notice any issues such as weak airflow, excessive noise, or intermittent operation, it’s advisable to double-check your installation and make necessary adjustments or consult a professional if needed.
Cleaning Up And Testing The Bathroom Fan
Removing any debris and cleaning the work area
After successfully installing the bathroom fan without attic access, it’s essential to clean up any debris and ensure a tidy work area. Cleaning up not only makes the space more organized but also helps to prevent the accumulation of dirt and dust that could potentially affect the performance of the fan in the long run.
To remove any debris, start by disposing of packaging materials and any leftover screws or parts that are no longer needed. Use a vacuum cleaner or a broom to sweep away any dust or debris that may have accumulated during the installation process. Pay attention to corners and hard-to-reach areas where dust tends to settle.
Once the debris has been removed, take a damp cloth or a mild cleaning solution and wipe down the work area. This will help to eliminate any remaining dust and dirt, leaving the space clean and ready for use. Remember to also clean any tools or equipment that were used during the installation process, as this will help to prolong their lifespan and ensure they are ready for future use.
Conducting a final inspection and test of the installed fan
After cleaning up the work area, it’s time to conduct a final inspection and test of the installed bathroom fan. This step is crucial to ensure that the fan is operating correctly and effectively removing moisture and odors from the bathroom.
Start by visually inspecting the fan and surrounding area for any signs of damage or loose parts. Check that all screws and connections are secure and tighten them if necessary. If any damages or issues are identified, address them before proceeding with the test.
To test the fan, turn it on by flipping the switch or using the appropriate controls. Listen for any unusual noises or vibrations, which could indicate a problem with the fan’s motor or positioning. Ensure that the fan is operating smoothly and effectively removing air from the bathroom.
If accessible, use a piece of tissue or paper to hold near the fan to check if it is pulling air into the ventilation system properly. If the tissue is being sucked in, it indicates that the fan is working effectively. However, if the tissue remains stationary or is blowing away from the fan, there may be an issue with the fan’s airflow and further inspection or adjustments may be necessary.
Lastly, make sure to test any additional features of the bathroom fan, such as the built-in light or humidity sensor, if applicable. Ensure that these features are functioning as intended and adjust any settings accordingly.
By cleaning up the work area and conducting a thorough test, you can have peace of mind knowing that your installed bathroom fan is not only efficient but also ready to keep your bathroom fresh and ventilated for years to come.
Troubleshooting Common Issues
When it comes to installing a bathroom fan without attic access, there can be a few common issues that you may encounter. In this section, we will address these problems and provide troubleshooting solutions to help you successfully install your bathroom fan.
Addressing common problems during installation
During the installation process, you may encounter a few common problems. Let’s take a look at these issues and how to address them:
Troubleshooting fan noise
If you notice that your bathroom fan is making more noise than usual, there could be a few reasons behind it. Here are some troubleshooting steps you can take:
- Check for any loose screws or components. Sometimes, the fan unit might not be properly secured, leading to vibrations and noise. Tighten any loose screws to eliminate the noise.
- Inspect the fan blades for any debris or obstructions. Over time, dust and dirt can accumulate on the blades, causing the fan to make noise. Clean the blades using a soft brush or cloth to ensure smooth operation.
- Verify that the fan motor is functioning correctly. A faulty motor can produce unusual noises. If you suspect a motor issue, contact the manufacturer for repair or replacement.
Troubleshooting wiring issues
When dealing with electrical components, it is important to follow safety precautions. If you are experiencing wiring issues with your bathroom fan, here are some troubleshooting tips:
- Check the electrical connections to ensure they are secure and intact. Loose or faulty connections can disrupt the fan’s performance. If necessary, consult a licensed electrician to help with the wiring.
- Use a circuit tester to check if the power supply is reaching the fan. This will help identify any wiring issues in the circuit.
- Refer to the manufacturer’s wiring instructions and make sure you have followed them correctly. Improper wiring can cause malfunctions in the fan.
Troubleshooting air circulation issues
If you find that your bathroom fan is not effectively circulating the air, it is important to address this issue for proper ventilation. Below are some troubleshooting steps to improve air circulation:
- Check if the fan vent is clear of any obstructions. Debris or clogs in the vent can hinder the fan’s ability to pull in air. Clear out any blockages to allow proper air circulation.
- Ensure that the fan exhaust duct is properly installed and doesn’t have any kinks or bends. A restricted exhaust duct can limit the airflow, reducing the fan’s effectiveness.
- Consider upgrading to a more powerful bathroom fan if the current one is not providing sufficient air circulation. A higher cubic feet per minute (CFM) rating can improve ventilation in larger bathrooms or those with higher humidity levels.
By addressing these common issues during installation, you can ensure that your bathroom fan operates smoothly and efficiently. Troubleshooting fan noise, wiring, and air circulation problems will help maintain a comfortable and well-ventilated bathroom environment.
Maintaining And Caring For The Bathroom Fan
Regular cleaning and maintenance are crucial for keeping your bathroom fan in optimal working condition. Proper care will not only ensure that the fan functions effectively in removing excess moisture and preventing mold and mildew growth but also extend its lifespan. In this section, we will discuss some essential tips for maintaining and caring for your bathroom fan without attic access.
Regular Cleaning and Maintenance Tips
Regular cleaning is essential to prevent dust and debris from accumulating in your bathroom fan. Here are some cleaning and maintenance tips to keep your fan in top shape:
- Clean the fan cover: Start by removing the fan cover, which is usually held in place by screws or clips. Use a brush or a vacuum cleaner with a brush attachment to remove any dust or debris from the cover.
- Clean the fan blades: Carefully clean the fan blades using a damp cloth or a brush. Make sure to remove any dirt or grime that may have accumulated on them.
- Clean the housing: Use a vacuum cleaner to remove any dust or debris that may have collected in the fan housing. Be thorough in this step to ensure the fan works efficiently.
- Check and clean the vent: The vent, which is usually located on the exterior of your home, can also gather dust and debris over time. Inspect and clean the vent regularly to avoid any obstructions that may affect the fan’s performance.
Extending the Lifespan of the Fan through Proper Care
Your bathroom fan can last longer with proper care. Follow these tips to extend its lifespan:
- Regular maintenance: Perform regular cleaning and maintenance as outlined above to keep your fan functioning optimally.
- Avoid excessive moisture: Excess moisture can lead to the growth of mold and mildew, which can damage your fan. Use ventilation techniques, such as opening windows or running an exhaust fan, to reduce moisture levels in your bathroom.
- Replace worn-out parts: Keep an eye on the condition of your fan’s parts. If you notice any worn-out or damaged components, such as the motor or fan blades, replace them promptly to ensure the fan operates smoothly.
- Refer to the manufacturer’s guidelines: Always consult the manufacturer’s instructions specific to your bathroom fan model for any additional care and maintenance recommendations.
By following these regular cleaning and maintenance tips and taking proper care of your bathroom fan, you can ensure its longevity and continued effectiveness in keeping your bathroom well-ventilated and free from excess moisture.
Optional: Upgrading Your Bathroom Fan
Are you considering upgrading your existing bathroom fan? Upgrading your bathroom fan can significantly improve the air quality and ventilation in your bathroom, helping to eliminate excess moisture and prevent mold and mildew growth. In this section, we will explore advanced features and options to consider when upgrading your bathroom fan.
Exploring advanced features and options
When it comes to upgrading your bathroom fan, there are plenty of advanced features and options to choose from. These features can enhance the performance and functionality of your fan, ensuring optimal ventilation in your bathroom. Here are some key features to consider:
- Noise levels: Look for a fan with a low noise level. This is especially important if your bathroom is located near bedrooms or living areas, as you wouldn’t want the loud noise to disturb your household.
- CFM rating: CFM stands for cubic feet per minute, which measures the amount of air the fan can move. Consider the size of your bathroom when selecting a fan with an appropriate CFM rating. A higher CFM rating is generally recommended for larger bathrooms.
- Humidity sensor: A bathroom fan with a built-in humidity sensor can automatically detect moisture levels in the air and activate the fan when needed. This helps to prevent excessive condensation and moisture buildup.
- Timer function: A timer function allows you to set a specific duration for the fan to operate after you’ve left the bathroom. This can be useful for ensuring proper ventilation and reducing energy consumption.
- Lighting options: Some upgraded bathroom fans come with built-in lighting options, serving dual purposes. This can be an excellent space-saving solution, especially if your bathroom has limited lighting fixtures.
- Heater function: If you live in a colder climate or simply enjoy a warm bathroom, consider a fan with a heater function. This can provide additional comfort during the colder months.
Considerations for upgrading an existing bathroom fan
If you already have a bathroom fan and are looking to upgrade it to a newer model, there are a few considerations to keep in mind:
- Compatibility: Ensure that the new fan you choose is compatible with your existing venting system. Measure the dimensions of your current fan and compare them with the dimensions of the new fan to ensure a proper fit.
- Electrical requirements: Check the electrical requirements of the new fan to ensure that your bathroom’s electrical system can support it. If necessary, consult a professional electrician to assist with any necessary electrical upgrades.
- Installation: Upgrading an existing bathroom fan will require removing the old fan and installing the new one. Follow the manufacturer’s instructions carefully or consider hiring a professional to ensure a proper and safe installation.
- Venting: Assess the condition of your existing venting system. If it is outdated or inefficient, consider upgrading it along with the fan to ensure optimal ventilation and prevent any potential issues.
By considering these advanced features and upgrading considerations, you can make an informed decision when upgrading your bathroom fan. Remember to choose a fan that suits your specific needs and preferences, and ensure proper installation for maximum effectiveness. Upgrading your bathroom fan will not only improve air quality but also contribute to a more comfortable and enjoyable bathroom experience.
Frequently Asked Questions On How To Install Bathroom Fan Without Attic Access
How Do You Vent A Bathroom Fan Without Outside Access?
To vent a bathroom fan without outside access, you can use a ductless bathroom fan that recirculates air through a built-in filter. This eliminates the need for an external duct and allows for air purification within the bathroom. Additionally, portable fans with carbon filters can also be used for ventilation.
Can You Install A Ceiling Fan Without Attic Access?
Yes, you can install a ceiling fan without attic access. It will require extra steps, such as using a support brace or installing a fan-rated box. However, it’s best to consult a professional electrician for safe and proper installation.
Can I Install A Bathroom Fan Without Ductwork?
Yes, you can install a bathroom fan without ductwork. However, it is not recommended as ductwork is necessary to properly vent the moist air out of your bathroom, preventing mold and mildew growth. It is best to consult a professional for guidance on installing the appropriate ductwork for your bathroom fan.
How Do You Vent A Bathroom Fan Through The Wall?
To vent a bathroom fan through the wall, first, choose a suitable location on the wall. Then, using a drill, create a hole of appropriate size. Next, attach the vent pipe to the fan and insert it into the hole.
Secure the vent cap on the exterior side of the wall to prevent water infiltration. Finally, make sure the fan is properly connected and functioning.
Conclusion
Installing a bathroom fan without attic access may seem challenging, but with the right approach, it is definitely achievable. By utilizing methods such as the wall-mount fan installation or the remodeler’s guide, you can ensure proper ventilation and eliminate excess moisture in your bathroom.
Remember to plan ahead, gather the necessary tools, and follow the step-by-step instructions provided in this guide. Now, you can enjoy a well-ventilated bathroom without the need for attic access. Happy DIY-ing!