To install a baseboard inside corner, measure and cut the baseboard at a 45-degree angle, ensuring it fits snugly into the corner. Then, apply adhesive and nail or screw the baseboard into place.
Installing baseboard inside corners is a crucial step in finishing a room’s interior. Not only do baseboards serve as a decorative element, but they also protect the wall from scuffs and add a polished look. Whether you’re completing a professional project or tackling a DIY home improvement, knowing how to install baseboard inside corners is essential.
This guide will provide you with step-by-step instructions to help you achieve a flawless installation. By following these simple steps, you can create seamless, professional-looking corners that will enhance the overall appearance of your space.
Materials And Tools Required
About Baseboard Trim
Baseboard trim is a decorative molding that is installed along the bottom of a wall where it meets the floor. Not only does it provide a finished look to any room, but it also protects the wall from scuffs and damage. Installing baseboard trim can be a relatively easy DIY project with the right materials and tools. In this section, we will focus on the essential materials and tools required for installing baseboard trim inside corners.
Before you begin the installation process, it’s important to gather all the necessary materials and tools. Here’s a list of everything you’ll need:
Baseboard Trim
The first item you’ll need is the baseboard trim itself. Make sure to measure the length needed for each inside corner and purchase enough trim to cover the entire room. Baseboard trim comes in various styles and sizes, so choose one that complements your room’s decor.
Miter Saw
A miter saw is an essential tool for cutting precise angles in the baseboard trim. It allows you to make clean and accurate cuts, ensuring a seamless fit at the corners. Make sure to adjust the saw’s angle to 45 degrees for inside corners.
Measuring Tape
Accurate measurements are crucial for a successful baseboard trim installation. A measuring tape helps you determine the length needed for each piece of baseboard trim, ensuring a perfect fit. Measure twice to be certain before making any cuts.
Pencil
A pencil is necessary for marking the measurements and cutting lines on the baseboard trim. Use it to indicate where the cuts should be made, ensuring precision and avoiding any mistakes.
Coping Saw
A coping saw is used to create the detailed cuts required for baseboard trim inside corners. It allows you to trim the profile of one piece to fit neatly against the profile of another, resulting in a seamless and professional finish.
Wood Glue
Wood glue is essential for securing the baseboard trim to the wall. Apply a small amount to the back of each piece before nailing it in place to ensure a strong bond and prevent any movement over time.
Nail Gun
A nail gun is a time-saving tool that makes the installation process quicker and more efficient. It allows you to securely attach the baseboard trim to the wall, ensuring a tight fit. Remember to adjust the nail gun’s pressure to prevent any damage to the trim.
Sandpaper
Sandpaper is used to smooth any rough edges or imperfections in the baseboard trim. After making cuts or attaching the trim, use sandpaper to create a flawless finish for painting or staining.
Caulk
Caulk is used to fill any gaps or seams between the baseboard trim and the wall. It creates a seamless look and helps to prevent dust and debris from collecting in those areas. Choose a caulk color that matches the trim for a more cohesive appearance.
Paint
Finally, you’ll need paint to give your baseboard trim a finished look. Select a color that complements your room’s color scheme and apply a smooth coat of paint evenly over the trim. This step enhances the overall appearance and protects the wood from wear and tear.
By having these materials and tools on hand, you’ll be ready to tackle the installation of baseboard trim inside corners with confidence. Let’s move on to the next section to learn the step-by-step process of installing baseboard trim inside corners.
Measuring And Cutting The Baseboard
When it comes to installing baseboard in an inside corner, one of the essential steps is measuring and cutting the baseboard trim. This ensures that the baseboard fits perfectly in the corner and creates a professional-looking finish.
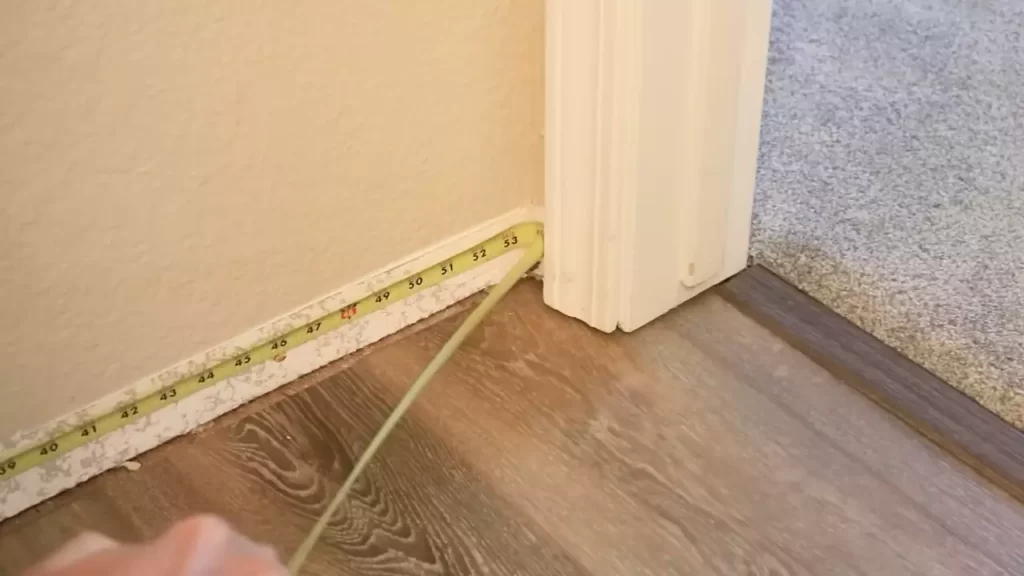
Measure the length of the wall where the inside corner will be installed.
The first step in installing the baseboard in an inside corner is to measure the length of the wall where the corner will be. Using a tape measure, measure from one end of the wall to the corner. It’s important to measure accurately to ensure the baseboard fits evenly along the wall.
Transfer the measurements onto the baseboard trim.
Once you have measured the length of the wall, it’s time to transfer those measurements onto the baseboard trim. Lay the baseboard trim flat on a work surface, and mark the measured length using a pencil or a marker. Make sure to mark both ends of the baseboard trim.
Use a miter saw to cut the baseboard at a 45-degree angle.
To create a clean and seamless inside corner, the baseboard trim needs to be cut at a 45-degree angle. This allows the baseboard to fit together neatly in the corner. Using a miter saw, line up the pencil or marker mark with the blade of the saw and carefully make the cut. Repeat the process for the other end of the baseboard trim, ensuring that both ends are cut at the same angle.
Cutting the baseboard at a 45-degree angle may seem daunting at first, but with a miter saw and proper measurements, you’ll be able to achieve a professional-looking inside corner. Remember to measure accurately, transfer the measurements onto the baseboard trim, and use a miter saw to make precise cuts. By following these steps, you’ll be one step closer to achieving a flawless baseboard installation.
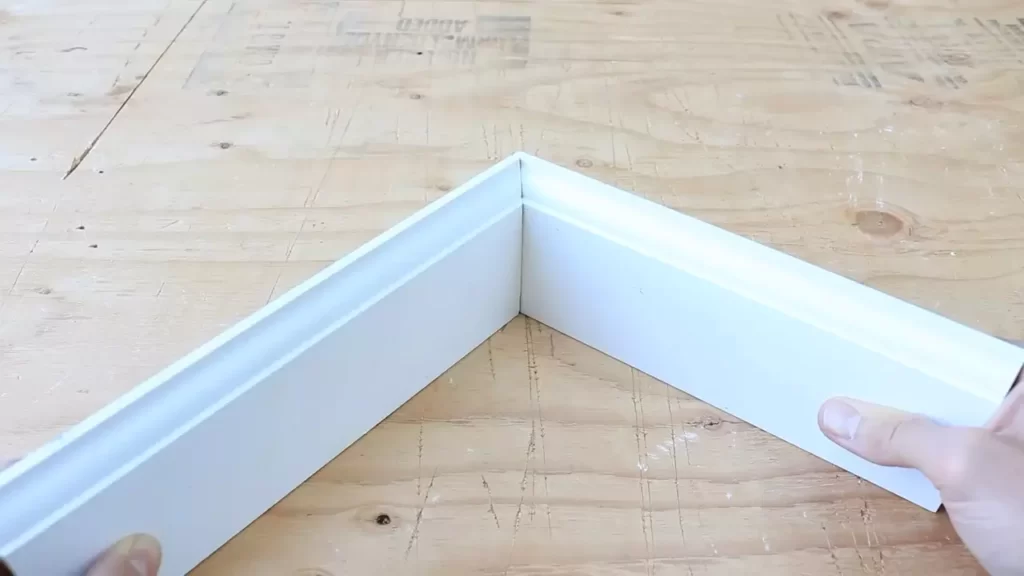
Coping The Baseboard
When it comes to installing baseboard inside corners, one important technique to master is coping the baseboard. Coping involves creating a tight and seamless fit between two pieces of baseboard by cutting along the profile of one piece.
Place the mitered end of the baseboard against the wall
To start, position the mitered end of the baseboard against the wall where it will meet the adjoining piece. Ensure that the baseboard is aligned properly and that the mitered corner is flush against the wall.
Use a coping saw to cut along the profile of the baseboard
A coping saw is a small, fine-toothed saw that is perfect for making detailed cuts. It allows you to follow the contour of the baseboard’s profile, creating a precise fit. Start by holding the coping saw at a slight angle and carefully cut along the profile of the baseboard.
Make sure to take your time and be patient with this step. A steady hand and slow, controlled movements will yield the best results. Follow the natural curves and angles of the baseboard’s profile, staying as close to the line as possible without cutting into it.
Sand the coped edge for a smooth fit
Once you have finished cutting along the profile of the baseboard, it’s time to sand the coped edge for a smooth fit. Use a fine-grit sandpaper or a sanding block to gently smooth out any rough edges or imperfections.
- Start by lightly sanding the surface of the coped edge, moving in a back-and-forth motion.
- Gradually increase the pressure as you sand, focusing on areas that need more smoothing.
- Continue sanding until the coped edge feels smooth to the touch and seamlessly fits against the adjoining piece.
Remember to always wear safety goggles and have a firm grip on the baseboard while using the coping saw and sanding it. By coping the baseboard, you can achieve a professional and visually appealing finish for your inside corners.
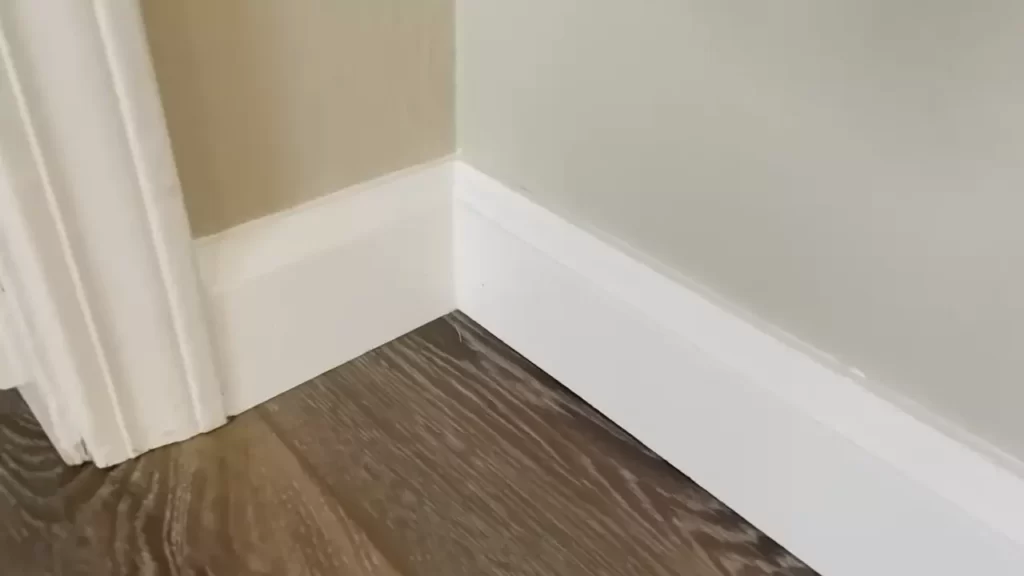
Installing The Baseboard
When it comes to giving your room a finished look, installing baseboards is an essential step. Not only do they hide the gaps between your walls and floor, but they also add a touch of elegance to your space. In this guide, we will walk you through how to install baseboards in the inside corners of your room, ensuring a seamless and professional result.
Apply wood glue to the back of the baseboard
To ensure a secure and durable installation, it is important to use wood glue. Apply a thin layer of wood glue to the backside of the baseboard. This will help create a strong bond between the baseboard and the wall, preventing any gaps or movement over time. Spread the glue evenly using a putty knife or a small brush.
Align the baseboard with the wall and press it firmly in place
Once the wood glue is applied, align the baseboard with the wall. Ensure that the top edge of the baseboard is flush with the wall surface. Press the baseboard firmly against the wall, making sure there are no gaps or spaces between the two. This will create a seamless transition from the wall to the floor.
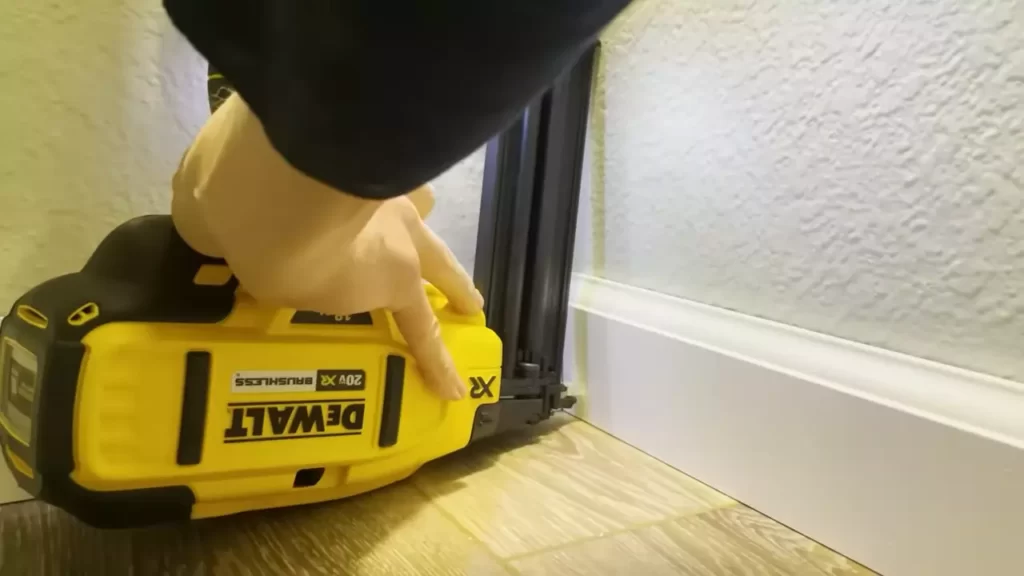
Secure the baseboard with a nail gun, placing nails at regular intervals
After aligning and pressing the baseboard in place, it’s time to secure it further. Using a nail gun, place nails at regular intervals along the length of the baseboard. This will provide additional support and keep the baseboard securely attached to the wall. Make sure to place the nails just above the floor level to hide them from view.
When securing the baseboard, it’s important to maintain a consistent spacing between the nails. A spacing of approximately 16 inches apart is recommended for optimal support. This will prevent any sagging or movement of the baseboard in the future.
Filling And Finishing
After the baseboard has been properly installed in the inside corner, it’s time to focus on filling any gaps, smoothing rough edges, and giving it a finished look. These final steps will ensure that your baseboard not only looks seamless but also functions effectively in providing a clean transition between the wall and the floor. Follow these simple steps to achieve a professional finish.
Fill any gaps between the baseboard and wall with caulk.
Take a close look at the inside corner where the baseboard meets the wall. If you notice any gaps or spaces, it’s essential to fill them with caulk. Caulk serves as a sealant, preventing any drafts, dust, or insects from entering your interior space. It also provides a smooth transition and an aesthetically pleasing finished appearance.
To fill the gaps with caulk, follow these steps:
- Identify the areas where the gaps are present.
- Prepare a caulk gun with a tube of paintable caulk.
- Cut the tip of the caulk tube at a 45-degree angle.
- Insert the caulk tube into the caulk gun.
- Apply a steady and even bead of caulk along the gap.
- Use your finger or a caulk smoothing tool to level and blend the caulk into the gap.
- Wipe away any excess caulk with a damp cloth.
- Allow the caulk to dry completely before moving on to the next step.
Use sandpaper to smooth any rough edges or imperfections.
Once the caulk has dried, inspect the baseboard for any rough edges or imperfections. Smooth these out using sandpaper to create a seamless finish. Sanding will also help to remove any burrs or splinters that may have occurred during the installation process.
To smooth rough edges or imperfections, follow these steps:
- Select sandpaper with a fine grit, such as 220 or higher.
- Gently sand the rough areas in the direction of the wood grain.
- Continue sanding until the surface feels smooth to the touch.
- Wipe away any dust or debris with a clean cloth.
Apply paint to the baseboard to match the surrounding walls.
Painting the baseboard is the final step in achieving a seamless and polished look. By applying paint that matches the surrounding walls, you can create a cohesive and unified appearance in the room.
To apply paint to the baseboard, follow these steps:
- Choose a high-quality paint that matches the color and finish of the walls.
- Use painter’s tape to protect the wall adjacent to the baseboard.
- Using a small paintbrush or a dedicated trim brush, apply an even coat of paint to the baseboard.
- Allow the paint to dry according to the manufacturer’s instructions.
- If necessary, apply a second coat of paint for better coverage and a more vibrant finish.
- Remove the painter’s tape carefully once the paint is completely dry.
By following these steps, you can ensure that your baseboard inside corner is impeccably finished. Not only will it blend seamlessly with the surrounding walls, but it will also provide a visually appealing and functional transition in your interior space.

Tips For A Professional Finish
When it comes to installing baseboard inside corners, attention to detail is key to achieving a professional finish. The following tips will help you ensure a seamless and precise installation.
Take your time measuring and cutting the baseboard for an accurate fit
Accuracy is crucial when it comes to installing baseboard inside corners. To achieve a professional finish, make sure to take your time measuring the walls and cutting the baseboard to fit each corner perfectly. Use a tape measure to measure the length of the wall and then transfer those measurements onto the baseboard. Be sure to account for any angles or irregularities in the wall by making accurate angle cuts.
Use a coping saw to ensure a clean and precise inside corner
One of the best ways to achieve a clean and precise inside corner is by using a coping saw. A coping saw allows you to cut along the profile of the baseboard, creating a snug fit when it meets the adjoining piece. This technique ensures a seamless look and eliminates unsightly gaps, giving your baseboard installation a professional finish.
Apply a thin line of caulk along the top edge of the baseboard for a seamless finish
To achieve a seamless finish, it’s essential to apply a thin line of caulk along the top edge of the baseboard. This will help fill in any small gaps or imperfections and create a smooth transition between the baseboard and the wall. Use a caulk gun to apply a consistent and even line of caulk, ensuring that it adheres properly. Once applied, use a damp cloth or your finger to smooth out the caulk and remove any excess for a flawless, professional look.
Frequently Asked Questions Of How To Install Baseboard Inside Corner
How Do You Cut Baseboard Inside Corners?
To cut baseboard inside corners, measure the length needed for one piece, making the cut at a 45 degree angle away from the face of the baseboard. Repeat for the other piece, making a 45 degree cut in the opposite direction.
Test the fit before securing the baseboard to the wall.
How Do You Cut Baseboard Inside Corners With A Miter Box?
To cut baseboard inside corners with a miter box, follow these steps:
- Measure and mark the angle on the baseboard.
- Set the miter box to the desired angle.
- Place the baseboard in the miter box at the marked angle.
- Cut the baseboard using a saw, following the miter box guides.
- Fit the cut baseboard pieces together for a perfect inside corner.
What Is The Correct Joint Used At An Inside Corner For Baseboard?
The correct joint used at an inside corner for the baseboard is called a miter joint.
Is It Better To Nail Or Glue Baseboards?
Nailing is generally preferred for baseboards. It provides a stronger and more secure attachment compared to glue. It also allows for easier adjustment and replacement if needed.
Conclusion
Installing baseboard inside corners can be a challenging task, but with the right techniques and equipment, it can be done smoothly. By following the step-by-step guide in this blog post, you will be able to achieve professional-looking results. Remember to measure and cut accurately, use appropriate tools, and ensure a snug fit.
With these tips, you’ll be able to create clean and seamless inside corners that add a polished touch to your home. Happy baseboard installation!