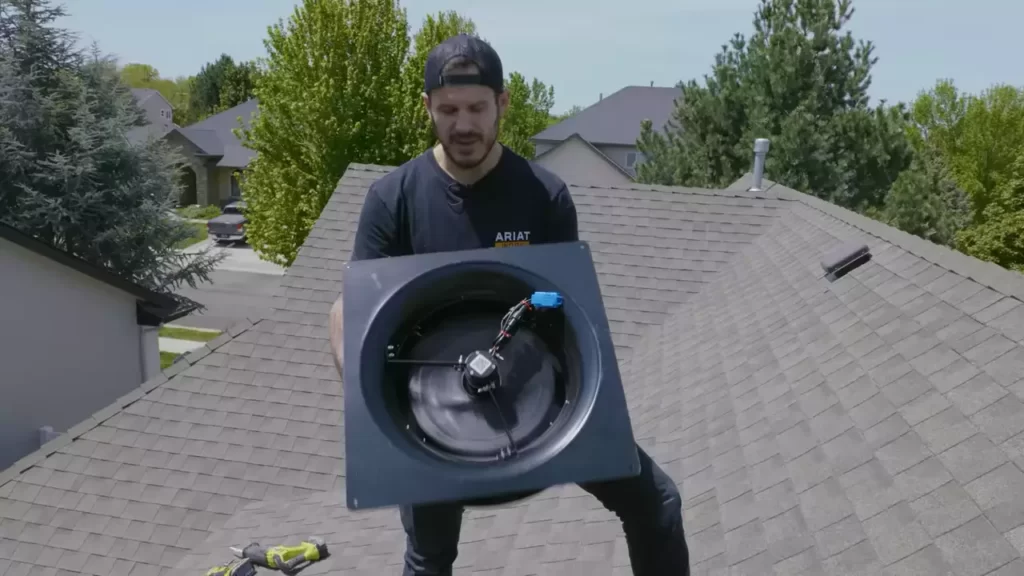
To install attic vents, start by measuring the area and choosing the appropriate vent size. Then, mark the vent location on the roof and cut the hole.
Finally, secure the vent in place with roofing nails and seal any gaps with caulk or roofing cement. Having proper ventilation in your attic is essential for maintaining a healthy and comfortable home. Attic vents play a crucial role in allowing air to circulate, preventing moisture buildup, reducing energy costs, and prolonging the lifespan of your roof.
Furthermore, proper installation is key to ensure the vents function effectively. We will discuss the step-by-step process of installing attic vents, enabling you to enhance the ventilation and overall condition of your attic space. By following these clear instructions, you can easily and efficiently install attic vents without any hassle.
The Importance Of Attic Ventilation
Having proper attic ventilation is crucial for maintaining a healthy and efficient home. Not only does it reduce moisture buildup and prevent mold growth, but it also increases energy efficiency, lowers utility bills, and extends the lifespan of your roof. In this section, we will explore the benefits of attic ventilation and understand why it is an essential aspect of your home.
Increase energy efficiency and reduce utility bills
By installing attic vents, you can significantly improve the energy efficiency of your home. During hot summer months, attics can become extremely hot, trapping heat and making your air conditioning system work harder to cool your home. This increased workload not only consumes more energy but also raises your utility bills. However, with proper attic ventilation, hot air can escape through the vents, reducing the temperature in your attic and relieving the strain on your cooling system.
Prevent moisture buildup and mold growth
Moisture buildup in your attic can lead to a variety of problems, including mold growth, wood rot, and structural damage. Without adequate ventilation, condensation can form on the surfaces in your attic, creating the perfect environment for mold to thrive. Installing attic vents allows air to circulate, removing excess moisture and reducing the likelihood of mold growth. By keeping your attic dry and well-ventilated, you can prevent costly repairs and maintain a healthy living space.
Extend the lifespan of your roof
A well-ventilated attic can significantly extend the lifespan of your roof. Without proper ventilation, heat buildup in the attic can cause shingles to deteriorate prematurely. Excessive heat can also warp and damage the underlying roofing materials, leading to leaks and costly repairs. By installing attic vents, you allow hot air to escape, reducing the temperature in the attic and protecting your roof from excessive heat. This helps preserve the integrity of your roof, saving you money in the long run.
Proper attic ventilation is essential for a healthy and efficient home. It not only increases energy efficiency and reduces utility bills but also prevents moisture buildup, mold growth, and extends the lifespan of your roof. By investing in attic ventilation, you can create a comfortable living environment while ensuring the longevity of your home’s structural components.
Different Types Of Attic Vents
Proper ventilation is essential for maintaining a healthy and energy-efficient home. Attic vents play a crucial role in keeping your attic well-ventilated, preventing moisture build-up, and extending the lifespan of your roof. There are several types of attic vents available on the market, each serving a unique purpose. In this section, we’ll explore three popular types of attic vents commonly used: soffit vents, ridge vents, and gable vents.
Soffit Vents
Soffit vents are installed along the underside of the eaves, allowing fresh air to enter the attic. They are usually made of aluminum or plastic and come in various shapes and sizes. Soffit vents work in combination with other attic vents, such as ridge vents or gable vents, to create a balanced airflow. These vents are particularly effective in homes with overhanging eaves, as they allow air to flow freely along the roofline.

Ridge Vents
Ridge vents are installed along the peak of the roof, running the entire length. These vents are typically made of metal or shingle-like materials and blend seamlessly with the roof’s design. Ridge vents are popular because they provide continuous ventilation along the entire roofline, allowing hot air to escape from the attic while drawing in cooler air from the soffit vents. This creates a natural airflow that helps regulate the temperature and humidity in the attic.
Gable Vents
Gable vents are installed on the gable ends of the attic. They are often constructed from wood or vinyl and come in different shapes and sizes to complement the overall aesthetics of your home. Gable vents provide additional cross-ventilation by allowing air circulation between the attic and the exterior. They work best when paired with other types of vents, such as soffit vents or ridge vents, to ensure proper airflow and prevent the build-up of heat and moisture.
Choosing the right type of attic vent for your home depends on various factors, including the climate, roof design, and personal preferences. It’s crucial to understand how each type of vent functions and how they work together as part of a ventilation system. By considering these factors and consulting with a professional, you can ensure that your attic is properly ventilated, leading to a more comfortable and energy-efficient home.
Assessing Your Attic Ventilation Needs
Before you start installing attic vents, it’s important to assess your attic ventilation needs. Proper attic ventilation is crucial for maintaining a comfortable living environment and protecting your home from damage caused by excess heat and moisture. In this section, we’ll walk you through the steps to determine the size of your attic and calculate the ventilation area required. We’ll also cover considerations for any existing vents.
Determine the Size of Your Attic
The first step in assessing your attic ventilation needs is to determine the size of your attic. This will help you determine the number and size of vents required to effectively ventilate your space. To measure the size of your attic, follow these simple steps:
- Measure the length and width of your attic space using a measuring tape.
- Multiply the length and width measurements together to calculate the total square footage of your attic.
For example, if your attic is 30 feet long and 20 feet wide, the total square footage would be 600 square feet.
Calculate the Ventilation Area Required
Once you have determined the size of your attic, you can calculate the ventilation area required. The general rule of thumb is to have at least 1 square foot of ventilation area for every 300 square feet of attic space. To calculate the ventilation area required, use the following formula:
Ventilation Area Required = Total Square Footage of Attic / 300
Continuing with our previous example of a 600 square foot attic, the ventilation area required would be:
Ventilation Area Required = 600 / 300 = 2 square feet
Based on this calculation, you would need at least 2 square feet of ventilation area in your attic.
Consider Any Existing Vents
Before installing new attic vents, it’s important to consider any existing vents you may have. Assess their condition and functionality to determine if they need to be replaced or if additional vents are needed to ensure adequate ventilation.
If you have existing vents, make sure they are evenly distributed throughout your attic to promote proper airflow. It’s also important to check for any blockages or obstructions that may restrict the airflow and address them accordingly.
By assessing your attic ventilation needs and understanding the size of your attic, calculating the ventilation area required, and considering any existing vents, you’ll be able to install attic vents that effectively ventilate your space and provide optimal airflow. Don’t underestimate the importance of proper attic ventilation, as it can help prolong the lifespan of your roof, prevent moisture damage, and maintain a comfortable living environment.
How To Install Soffit Vents
Gather the necessary tools and materials
To install soffit vents in your attic, you will need to gather some basic tools and materials. Here’s a list of what you will need:
- Tape measure
- Pencil
- Circular saw or jigsaw
- Safety goggles
- Gloves
- Utility knife
- Soffit vent
- Hex-head screws
- Drill/driver
- Exterior caulk
Measure and mark the vent installation location
Before cutting any holes, it’s essential to measure and mark the exact location where you want to install the soffit vent. Start by finding a suitable area on your soffit or eave where the vent will provide adequate ventilation for your attic space. Use a tape measure and pencil to mark the dimensions of the vent on the soffit.
Cut the hole and remove insulation if necessary
Once you have marked the location, it’s time to cut the hole for the soffit vent. Depending on the construction of your soffit, you may need to use a circular saw or jigsaw to make the cut. Remember to wear safety goggles and gloves to protect yourself during this step. If there is any insulation blocking the area, use a utility knife to carefully remove it.
Attach the soffit vent
With the hole cut and insulation removed, it’s time to attach the soffit vent. Place the vent into the hole and ensure it fits snugly. Using a drill/driver, secure the vent to the soffit by driving hex-head screws through the vent and into the wood. Make sure the vent is securely fastened to prevent any leaks or drafts.
Seal and secure the vent
To ensure optimal performance, it’s crucial to seal and secure the soffit vent. Apply a bead of exterior caulk around the edges of the vent to create a tight seal. This will help prevent moisture from entering your attic while directing airflow into the space. Finally, double-check that all screws are tight and secure.
Installing soffit vents is an important step in maintaining proper ventilation in your attic. Following these steps will help ensure a successful installation and enhance the overall energy efficiency of your home. Remember to always prioritize safety and consult a professional if you are unsure about any step of the process.
Tips For Installing Ridge Vents
Installing ridge vents in your attic is an essential step to improve ventilation and maintain a healthy home environment. Ridge vents are designed to allow hot air to escape from the attic while preventing the entry of moisture or pests. To ensure a successful installation, here are some tips to follow:
Gather the necessary tools and materials
Before you start the installation process, it is important to gather all the tools and materials you will need. This will save you time and frustration during the installation. Here is a list of the necessary tools and materials:
| Tools | Materials |
| – Safety goggles | – Ridge vent |
| – Gloves | – Roofing nails |
| – Measuring tape | – Roofing cement |
| – Chalk line | – Caulk gun |
| – Circular saw | – Roofing tar |
Determine the installation location
Next, you need to determine the best location for the ridge vent installation. The ridge vent should be placed at the peak of the roof, allowing it to effectively exhaust hot air. Measure the length of the ridge and mark the center point to ensure proper alignment during installation.
Cut the slot for the ridge vent
Using a circular saw, carefully cut a slot along the marked center line. Make sure to follow the manufacturer’s instructions regarding the size of the slot. It is important to wear safety goggles and gloves during this step to protect yourself from any potential hazards.
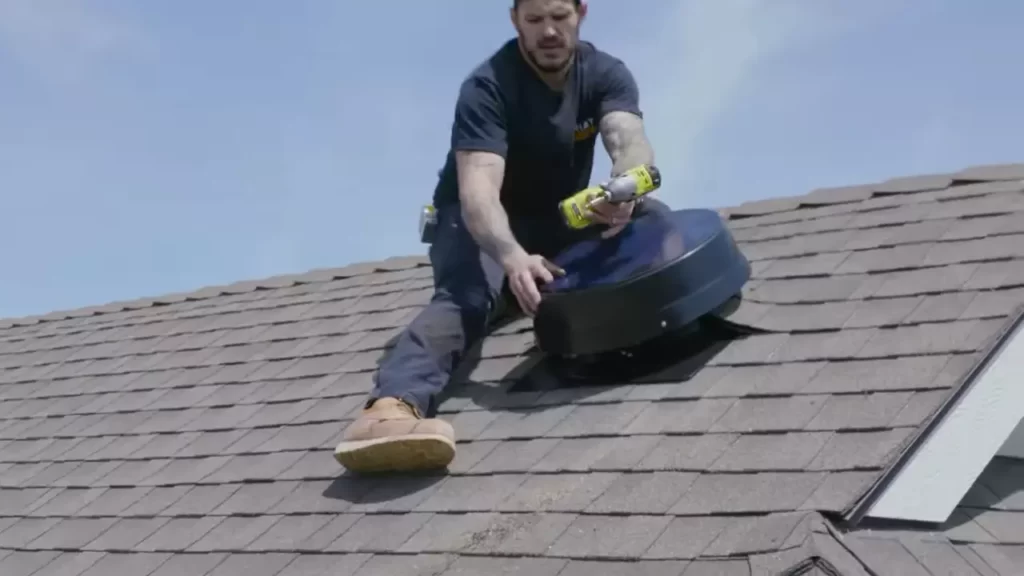
Install the ridge vent
Once the slot is cut, carefully place the ridge vent into position. Ensure that the vent is centered and aligned with the slot. Use roofing nails to secure the ridge vent in place, following the manufacturer’s recommendations for spacing and quantity of nails.
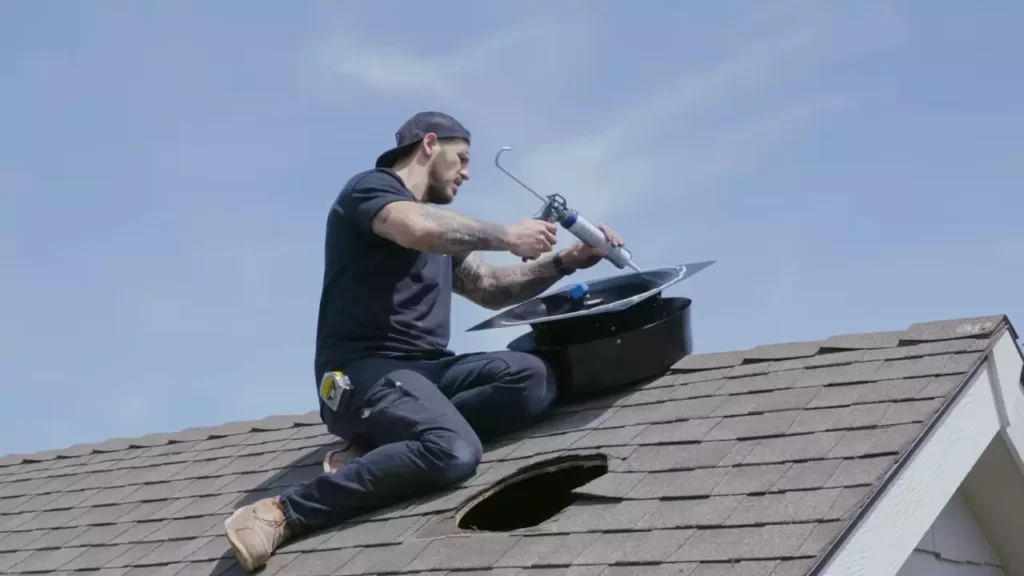
Seal and secure the vent
After the ridge vent is installed, it is crucial to seal and secure it properly to prevent any potential leaks. Apply roofing cement or roofing tar around the edges of the vent to create a watertight seal. Use a caulking gun to apply the sealant evenly.
In conclusion, installing ridge vents in your attic is a worthwhile investment for maintaining a healthy home environment. By following these tips, you can ensure a successful and effective installation. Remember to gather all the necessary tools and materials, determine the installation location, cut the slot carefully, install the ridge vent properly, and seal and secure it adequately. With these steps completed, you can enjoy improved airflow and ventilation in your attic.
Installing Gable Vents: Step-By-Step Guide
Gable vents are an essential part of attic ventilation systems, allowing hot air to escape and cool, fresh air to enter. Proper installation of gable vents is crucial to ensure effective air circulation in your attic space. In this step-by-step guide, we will walk you through the process of installing gable vents for optimal attic ventilation. Follow these instructions carefully to achieve the best results.
Determine the placement and size of the gable vent
The first step in installing gable vents is to determine the appropriate placement and size for your specific attic. Gable vents should be placed near the peak of the gable wall, where hot air tends to accumulate. Consider the size of your attic and the ventilation requirements to determine the number and size of vents needed.
It’s recommended to follow the 1:150 ratio, where one square foot of ventilation is required for every 150 square feet of attic floor space. Calculate the required vent size by dividing the attic floor area by 150. For example, an attic with a floor area of 1,000 square feet would require a total of 6.67 square feet of ventilation (1,000 / 150 = 6.67).
Mark the installation location
Once you have determined the size and number of gable vents needed, it’s time to mark the installation location on the gable wall. Use a measuring tape to find the middle point of the gable wall near the peak. Mark this point and measure the dimensions of your chosen vent to determine where the vent will be placed. Ensure that the vent does not interfere with any existing obstructions, such as roof trusses or electrical lines.
Cut the hole and remove any obstructions
With the installation location marked, it’s time to cut the hole for the gable vent. Use a reciprocating saw or jigsaw to carefully cut along the marked lines, following the dimensions of the vent. Take caution not to damage any structural elements of the gable wall.
If there are any obstructions, such as insulation or blocking, carefully remove them to ensure a clear pathway for air flow. It’s important to have a clean and unobstructed vent opening for proper ventilation.
Attach the gable vent
Once the hole is cut and any obstructions are removed, it’s time to attach the gable vent. Place the vent over the hole and align it with the gable wall. Use screws or nails suitable for the material of the gable wall to secure the vent in place. Make sure the vent is level and flush with the gable wall for a neat and professional installation.
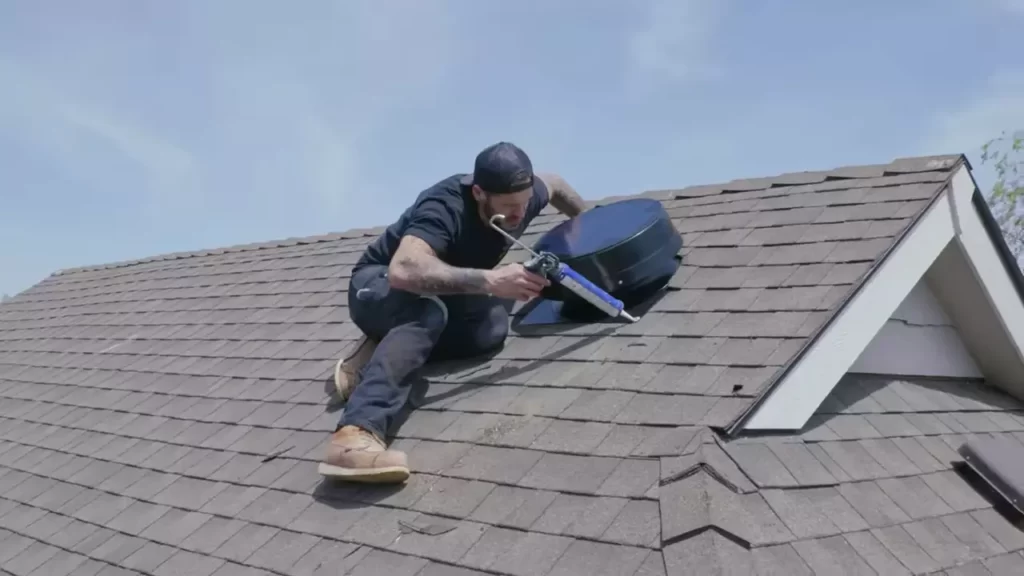
Secure and seal the vent
After attaching the gable vent, it’s essential to secure and seal it properly to prevent any water or debris from entering the attic. Use weather-resistant screws or nails to secure the vent firmly in place. Apply a suitable sealant around the edges of the vent to create a watertight seal. This will help to prevent any leakage and ensure the longevity of your gable vent.
In conclusion, by following these step-by-step instructions, you can successfully install gable vents in your attic and enhance its ventilation system. Proper installation of gable vents is crucial for maintaining a healthy and energy-efficient attic space. Remember to determine the appropriate placement and size, mark the installation location, cut the hole, remove any obstructions, attach the vent securely, and seal it properly. With these steps executed, you can enjoy the benefits of a well-ventilated attic for years to come.
Common Mistakes To Avoid
Proper installation of attic vents is crucial to maintain a well-ventilated and energy-efficient home. However, many homeowners make avoidable mistakes when it comes to installing attic vents. These mistakes can lead to ineffective ventilation, increased energy costs, and even damage to your home. In this article, we will explore the common mistakes to avoid when installing attic vents, ensuring that you get it right the first time.
Overlooking Proper Sizing and Placement
One of the most common mistakes homeowners make when installing attic vents is overlooking the importance of proper sizing and placement.
- Choosing the Wrong Size: Selecting the wrong size vents can severely impact their effectiveness. Vents that are too small may not provide sufficient airflow, while vents that are too large can cause draft issues. To determine the right size, consider the size of your attic space and consult a professional if needed.
- Improper Placement: Placing vents in the wrong location can hamper their function. Place your vents near the peak of the roof to facilitate the natural flow of hot air out of the attic. Avoid placing vents too close to the eaves, as this can create poor circulation and allow moisture to build up.
Inadequate Sealing and Insulation
Sealing and insulating attic vents is just as important as their installation. Failing to adequately seal and insulate your vents can lead to various issues:
- Air Leaks: Improper sealing can result in air leaks, allowing hot air from outside to enter your attic during summer months and warm air from inside to escape during winter months. This can put additional strain on your HVAC system and increase your energy bills.
- Pest Invasion: Insufficient insulation can create gaps and openings in your attic, providing an entry point for pests such as rodents, birds, and insects. These unwanted visitors can damage your insulation, wiring, and even spread diseases.
Neglecting to Clean and Maintain Vents
Once your attic vents are installed, proper maintenance is essential to keep them functioning optimally. Neglecting to clean and maintain your vents can lead to several problems:
- Dust and Debris Accumulation: Over time, dust, leaves, and other debris can accumulate in your vents, obstructing proper airflow. Regularly cleaning your vents will prevent this buildup and ensure consistent ventilation.
- Insect Nests: Unattended attic vents can attract insects looking for shelter. Regular inspections and cleaning will help you identify and remove any insect nests, preventing infestations.
By avoiding these common mistakes and paying attention to proper sizing, placement, sealing, insulation, and maintenance, you can ensure successful installation of attic vents. This will not only enhance the ventilation in your home but also save you money on energy bills and prevent potential damage to your property.
Maintaining Attic Vents
Proper maintenance of attic vents is essential to ensure they function effectively and prolong their lifespan. Regular inspections, cleaning, and checking for signs of moisture or mold growth are crucial steps in maintaining attic vents. By following these simple practices, you can prevent damage, blockages, and other issues that may compromise the ventilation in your attic.
Regularly inspect vents for damage and blockages
To keep your attic vents in optimal condition, it’s important to inspect them regularly for any signs of damage or blockages. Damaged vents can impede the airflow and prevent the ventilation system from effectively regulating the temperature and moisture levels in your attic.
During your inspection, look for any cracks, gaps, or broken components in the vents. Pay close attention to the vent covers as they can easily become damaged or misaligned. Additionally, check for any signs of obstructions such as debris, leaves, or animal nests that may be blocking the vents.
Clean vents to remove debris and dust
Cleaning your attic vents is an essential part of maintaining their functionality. Over time, debris, dust, and other particles can accumulate in the vents, obstructing the airflow and reducing their efficiency.
Start by removing the vent covers and inspecting them for dirt or debris. Clean the covers using a mild detergent and a soft brush. Once the covers are clean, use a vacuum or a brush to remove any debris or dust from the vent openings. Be careful not to damage the vents while cleaning.
Check for signs of moisture or mold growth
Moisture and mold growth in your attic can lead to various problems, including damage to the structural integrity of the building and health issues. Regularly checking for signs of moisture or mold growth around your attic vents is crucial to prevent these issues.
During your inspection, look for any discoloration, dampness, or musty odors around the vents. This can indicate the presence of moisture or mold. If you notice any signs of mold growth, it’s important to address the issue promptly by contacting a professional mold remediation specialist.
Remember, maintaining your attic vents is a vital part of ensuring proper ventilation in your home. By regularly inspecting your vents for damage and blockages, cleaning them to remove debris and dust, and checking for signs of moisture or mold growth, you can keep your attic well-ventilated and protect your home from potential issues.
Frequently Asked Questions On How To Install Attic Vents
How Do You Put A Vent In An Attic?
To install a vent in an attic, first choose a suitable location. Cut a hole in the roof or gable end, ensuring it is properly sized for the vent. Secure the vent into place using screws or nails. Seal around the edges to prevent leaks.
Test for proper ventilation.
How Many Vents Should I Have In My Attic?
You should have one vent for every 300 square feet of attic space. Having enough vents helps maintain proper airflow and prevents heat and moisture buildup. It’s important to consult with a professional to determine the exact number of vents needed for your specific attic size.
What Is The Most Effective Method Of Ventilating An Attic Is To Install?
The most effective method of ventilating an attic is to install roof vents. These vents help to improve air circulation and prevent the build-up of excess heat and moisture in the attic space. This can help to protect the roof and increase energy efficiency in the home.
What Happens If Attic Is Not Vented?
A non-vented attic can lead to excess heat and moisture buildup, causing a variety of problems. These include increased energy costs, mold growth, and potential damage to insulation and roofing materials. It’s important to ensure proper attic ventilation to prevent these issues and maintain a healthy home environment.
Conclusion
Installing attic vents is a crucial step in maintaining a well-ventilated and energy-efficient home. By improving airflow and reducing moisture buildup, attic vents can prevent issues like mold growth and heat buildup. With the simple steps outlined in this guide, you can easily install attic vents yourself and ensure a healthier living environment for you and your family.
Don’t overlook the importance of attic ventilation – it’s a small investment that can make a big difference in your home’s comfort and longevity.