To install attic stairs by yourself, follow these steps: measure the opening, purchase the right size stairs, locate the joists, mark the opening, cut the opening, attach the stairs, and secure them properly. Installing attic stairs is a DIY project that allows for easy access to and from your attic space.
With the right tools and a little bit of time, you can successfully install attic stairs on your own. In this guide, we will walk you through the process of installing attic stairs step by step, ensuring a safe and secure installation that will provide convenient access to your attic.
So, let’s get started!
Planning And Preparation
Planning and preparation are crucial when it comes to installing attic stairs by yourself. Before you begin this DIY project, it’s important to assess the attic space, choose the right type of attic stairs, and measure and mark the opening area. Let’s dive into each step:
Assessing the Attic Space
The first step in installing attic stairs is to assess the attic space. You’ll need to determine if there is enough headroom and clearance for the selected type of stairs. Here are a few key points to consider:
- Measure the distance between the floor and ceiling to ensure sufficient headroom. The minimum requirement is typically around 7 feet, but it may vary depending on the type of stairs and local building codes.
- Check for any obstructions such as HVAC systems, electrical wirings, or plumbing pipes that might hinder the installation process. It’s essential to have a clear path for the stairs.
- Take note of the available space in the attic for the stairs to unfold and extend. Make sure there is ample room to open and close the stairs without any restrictions.
Choosing the Right Type of Attic Stairs
Once you’ve assessed the attic space, the next step is to choose the right type of attic stairs. There are various options available in the market, each with its own advantages and considerations. Here are a few popular types:
- Pull-Down Stairs: These are the most common type of attic stairs and are typically affordable and easy to install. They fold up into the attic when not in use, maximizing space.
- Folding Stairs: Similar to pull-down stairs, folding stairs are straightforward to install. However, they unfold and extend differently, providing a unique aesthetic and functionality.
- Telescoping Stairs: Designed for compact spaces, telescoping stairs feature overlapping sections that slide in and out. They are ideal for tight attic openings.
- Spiral Stairs: If you’re looking for a stylish and space-saving option, spiral stairs are a great choice. They are visually appealing but may require more complex installation.
Measuring and Marking the Opening Area
After selecting the type of attic stairs, it’s time to measure and mark the opening area for the installation. Here’s how to do it:
- Measure the dimensions of the attic stairs to determine the opening size needed. Refer to the manufacturer’s instructions for specific measurements.
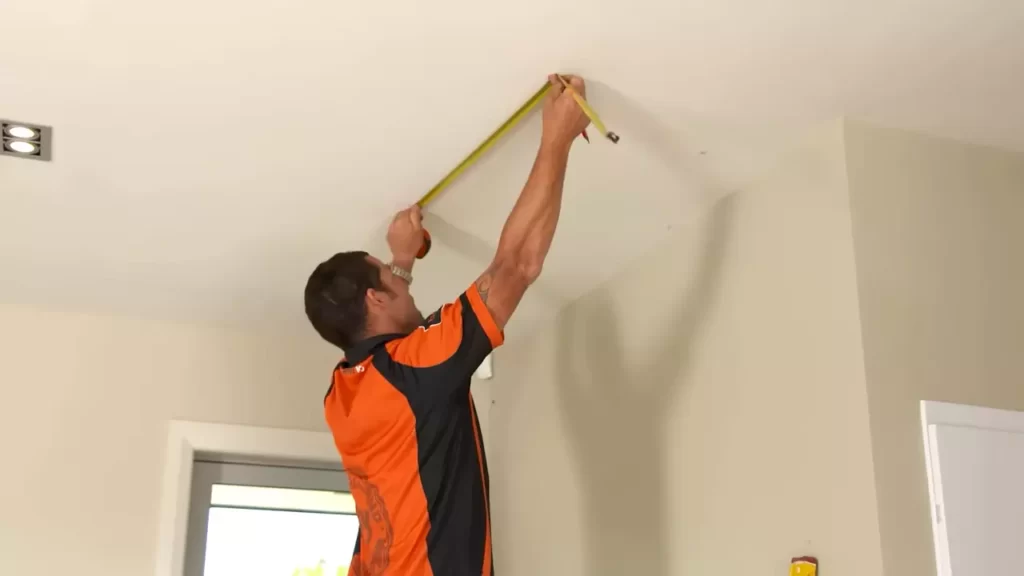
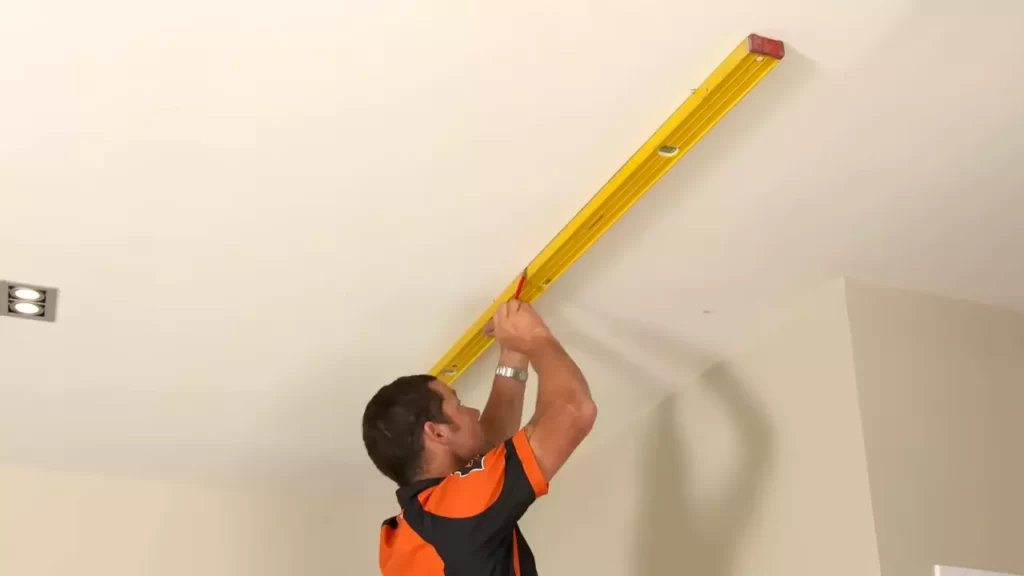
- Using a tape measure and a level, mark the outline of the opening on the ceiling. Ensure the markings are accurate and aligned properly.
- Double-check the measurements before moving forward. It’s crucial to have precise markings to avoid any issues during installation.
By following these steps for planning and preparation, you’re on your way to install attic stairs successfully. Assessing the attic space, choosing the right type of stairs, and measuring and marking the opening area are essential for a smooth DIY project. Stay tuned for the next steps of the installation process!
Gathering Tools And Materials
Gathering the necessary tools and materials is an essential step when it comes to installing attic stairs by yourself. Having the right tools and supplies at hand will streamline the process and ensure a successful installation. In this section, we will discuss the essential tools you will need, as well as the required materials and supplies for a smooth attic stair installation. Let’s dive in!
Essential Tools for Attic Stair Installation
Before you begin the installation process, it’s crucial to gather the necessary tools. Here are the essential tools you’ll need:
- A measuring tape: Ensure accurate measurements of the attic opening to determine the appropriate size of the stairs.
- A pencil: Marking the measurements and guidelines on the attic walls and floor will help you stay on track during the installation.
- A level: This will ensure that the stairs are properly aligned and positioned for safe and secure use.
- A power drill: You’ll need a drill to create pilot holes and screws to secure the stairs in place.
- A screwdriver: Use a screwdriver to tighten screws and connectors during the installation process.
- A saw: Depending on the material of the attic stairs, you may need a saw to cut them to the desired size.
- Safety goggles and gloves: Protect your eyes and hands from potential hazards during the installation.
- A ladder or step stool: These will assist you in reaching the attic and provide stability while working.
Required Materials and Supplies
In addition to the essential tools, you’ll also need various materials and supplies for a successful attic stair installation. Here’s a list of what you will require:
| Materials | Supplies |
|---|---|
|
|
By ensuring you have all the essential tools, materials, and supplies ready before starting the attic stair installation, you’ll be well-prepared and equipped to complete the task efficiently. With the right tools and materials at hand, you’ll be one step closer to enjoying convenient and easy access to your attic space.
Removing Existing Ceiling Material
Before you can install attic stairs, you need to take out any existing ceiling material in the area where the stairs will be placed. This can be a bit of a messy job, but with the right precautions and techniques, you can remove the material safely and efficiently.
Safety Precautions when Working with Ceiling Material
When it comes to working with ceiling material, safety should always be your top priority. Here are some important safety precautions to keep in mind:
- Wear protective gear, including goggles, gloves, and a dust mask, to protect yourself from dust and debris.
- Make sure to turn off the electricity to the area where you will be working. This will help prevent any accidents or mishaps.
- Use a sturdy ladder or scaffolding to reach the ceiling safely. Make sure the ladder is placed on a stable surface and is secured properly.
- If you are unsure about the stability of the ceiling or if it contains asbestos, it is best to consult a professional before attempting to remove the material.
Removing Drywall or Plaster Ceiling
Depending on the type of ceiling material you have, the removal process will vary. If you have drywall or plaster ceiling, follow these steps to remove it:
- Start by scoring the surface of the material with a utility knife. This will make it easier to remove.
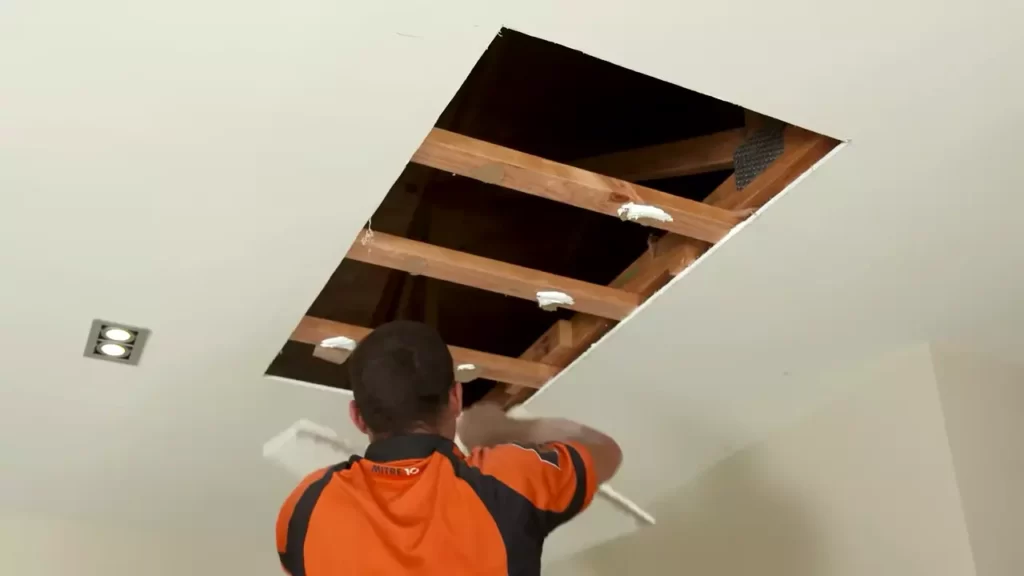
- Use a pry bar or a crowbar to gently pry the material away from the ceiling joists. Work slowly and carefully to avoid damaging the surrounding area.
- Once the material is loose, carefully remove it by hand or with the help of a partner. Dispose of it properly.
- Inspect the area for any remaining nails or screws and remove them to ensure a smooth surface for the installation of the attic stairs.
Keep in mind that removing ceiling material can be a dusty and messy job. Take your time and work methodically to minimize any damage or mess. Once the material is removed, you will be one step closer to installing your attic stairs and making better use of your attic space.
Framing The Opening
Installing attic stairs can provide easy access to your attic space, allowing you to make use of this valuable storage area. Framing the opening is an essential step in the installation process as it ensures a secure and stable foundation for your attic stairs. In this guide, we will walk you through the steps involved in framing the opening for attic stairs.
Preparing the Frame for Attic Stairs
The first step in framing the opening is to prepare the frame for the attic stairs. This involves measuring and marking the dimensions of the opening on the ceiling to ensure a precise fit. To do this, follow these steps:
- Locate the area where you want to install the attic stairs. Take into consideration any obstacles such as electrical wires or pipes that may need to be relocated.
- Measure the width and length of the opening. Make sure to double-check your measurements to ensure accuracy.
- Transfer these measurements onto the ceiling, using a pencil or marker, to outline the shape of the opening. Ensure that the lines are straight and parallel to the walls.
- Using a carpenter’s square, check the corners to ensure they are at right angles. This will help to ensure the frame is square and the stairs will fit properly.
Attaching Supports and Nails
Once the frame is prepared, it’s time to attach the supports and nails to provide stability and ensure the frame is secure. Follow these steps:
- Cut the framing lumber according to the measurements of the opening.
- Place one support piece along each side of the opening, ensuring it is flush with the ceiling.
- Secure the supports by nailing them into the ceiling joists using a hammer or nail gun. Be sure to use appropriate nails that are long enough to penetrate the ceiling joists.
- Place additional support pieces between the side supports, evenly spaced, to provide added stability.
- Using a level, check that the frame is plumb and level, making any necessary adjustments by adding shims.
- Secure the frame further by toenailing nails at an angle through the supports and into the ceiling joists.
- Inspect the frame to ensure it is sturdy and well-supported before proceeding with the installation of the attic stairs.
With the frame properly framed and supported, you are now ready to begin the next steps in the installation process. Framing the opening is a crucial step in ensuring a successful and secure installation of attic stairs, so it’s important to take the time to do it correctly. By following these steps, you’ll be well on your way to enjoying convenient access to your attic space.
Installing Attic Stairs
Installing attic stairs is a great way to make your attic more accessible and utilize the space in your home more efficiently. Whether you want to use the attic for storage or as an additional living area, having a set of attic stairs can make a big difference. The best part is, you can install attic stairs yourself with a few tools and basic DIY skills.
Assembling the Attic Stairs Components
Before you start installing attic stairs, you need to assemble the necessary components. Here are the steps to follow:
- Step 1: Unpack the attic stair kit
Start by unpacking the attic stair kit and familiarizing yourself with the components. Make sure you have all the necessary parts, including the ladder, frame, hinges, and hardware.
- Step 2: Read the instructions
Take the time to read the instructions carefully. Familiarize yourself with the assembly process and any safety precautions you need to follow.
- Step 3: Assemble the ladder
Start by assembling the ladder according to the instructions. This typically involves attaching the ladder steps to the rails and securing them in place. Make sure each step is secure and level.
- Step 4: Attach the frame
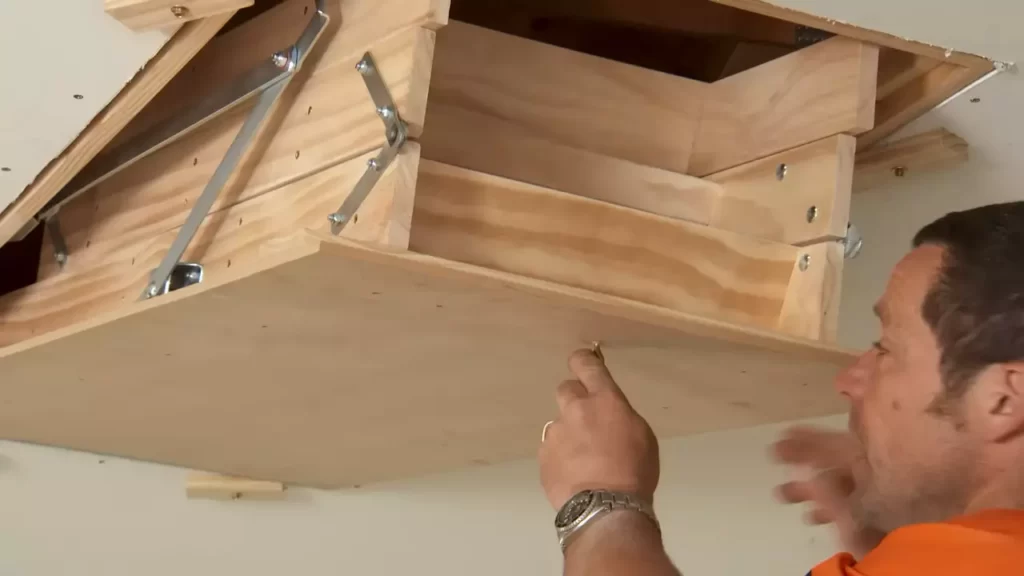
Once the ladder is assembled, you can attach it to the frame. Position the frame in the attic opening and secure it to the surrounding structure using screws or nails.
Attaching the Stairs to the Frame
Once you have assembled the attic stairs components, it’s time to attach the stairs to the frame. Here’s what you need to do:
- Step 1: Position the stairs
Position the stairs in the opening and make sure they are centered. Use shims if needed to ensure a level and secure fit.
- Step 2: Attach the hinges
Once the stairs are in position, attach the hinges. Follow the manufacturer’s instructions to secure the hinges to both the stairs and the frame.
- Step 3: Test the movement
After attaching the hinges, test the movement of the stairs. Make sure they open and close smoothly without any obstructions or difficulties.
- Step 4: Secure the stairs
Once you are satisfied with the movement of the stairs, secure them in place using screws or bolts. Ensure that the stairs are securely attached to the frame for safety.
By following these simple steps, you can successfully install attic stairs on your own. Remember to prioritize safety throughout the process and take your time to ensure a proper and secure installation. With your newly installed attic stairs, you’ll have easy access to your attic and maximize the use of this valuable space in your home.
Securing And Finishing
Once you have successfully installed your attic stairs, it’s important to focus on securing and finishing the project to ensure safety and enhance the look of your attic space. This involves reinforcing the staircase for stability and insulating and sealing the opening.
Reinforcing the Staircase for Stability
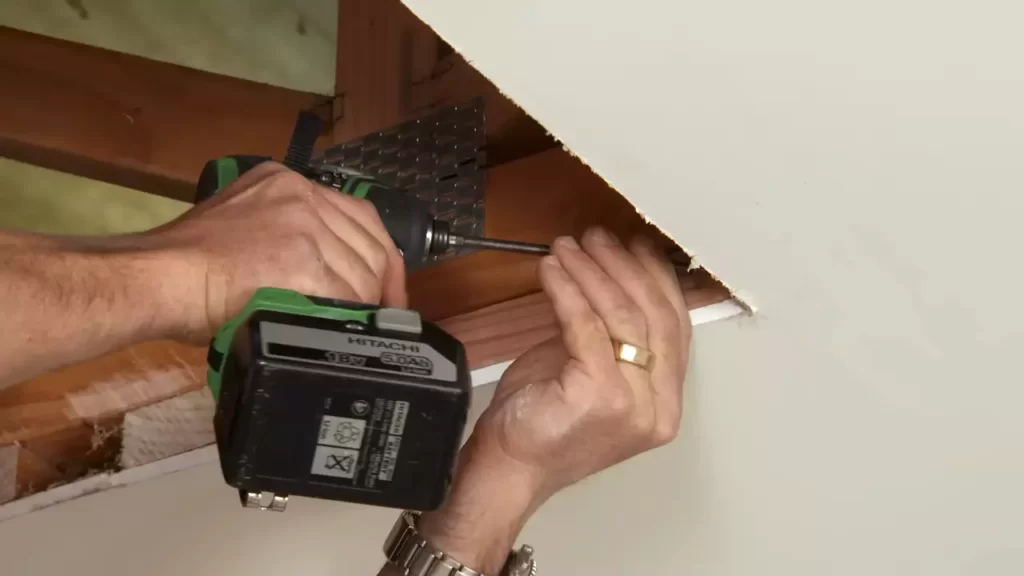
To ensure that your attic stairs are stable and secure, it’s crucial to reinforce them properly. Here are a few steps you can take to reinforce the staircase:
- 1. Install additional braces: If your attic stairs came with braces, make sure to install them according to the manufacturer’s instructions. These braces provide extra support and stability for the stairs.
- 2. Add a support beam: In some cases, it may be necessary to add a support beam beneath the staircase for added strength. This is particularly important if you have a heavy-duty attic stairs or if you plan on frequently using the stairs.
- 3. Check for any loose connections: Take the time to inspect all connections and fasteners on the staircase. Tighten any loose screws or bolts to ensure that everything is securely in place.
- 4. Test the stability: Before considering the project complete, test the stairs to ensure that they are stable and do not wobble. If you notice any instability, go back and reinforce the stairs until they are secure.
Insulating and Sealing the Opening
Proper insulation and sealing of the attic stairs opening are essential to prevent heat loss, air leakage, and unwanted drafts. Here’s what you should do to insulate and seal the opening:
- 1. Insulate the attic side: Use insulation material such as fiberglass batts or foam boards to insulate the attic side of the opening. Cut the insulation to fit tightly and ensure that there are no gaps.
- 2. Seal the edges: Apply weatherstripping or foam tape along the edges of the attic stairs opening to create an airtight seal. This will prevent air leakage and keep the desired temperature in your home.
- 3. Insulate the door or hatch: If your attic stairs have a door or hatch, make sure to insulate it as well. Use insulation material to cover the door or hatch and secure it tightly to prevent heat loss or gain.
- 4. Check for any gaps or cracks: Carefully inspect the entire attic stairs opening for any gaps or cracks that may need to be sealed. Use caulk or expanding foam to fill in these gaps and cracks.
By reinforcing the staircase for stability and properly insulating and sealing the opening, you can ensure that your attic stairs are safe, energy-efficient, and aesthetically pleasing. Take the time to complete these finishing touches, and enjoy easy access to your attic space for years to come.
Testing And Maintenance
Proper testing and maintenance of attic stairs are crucial for their functionality and longevity. Performing regular inspections and following a maintenance routine will ensure that your attic stairs remain in good working condition, providing safe access to your attic whenever needed. In this section, we will discuss how to verify the stairs’ functionality and the steps to maintain them for long-term use.
Verifying the Stairs’ Functionality
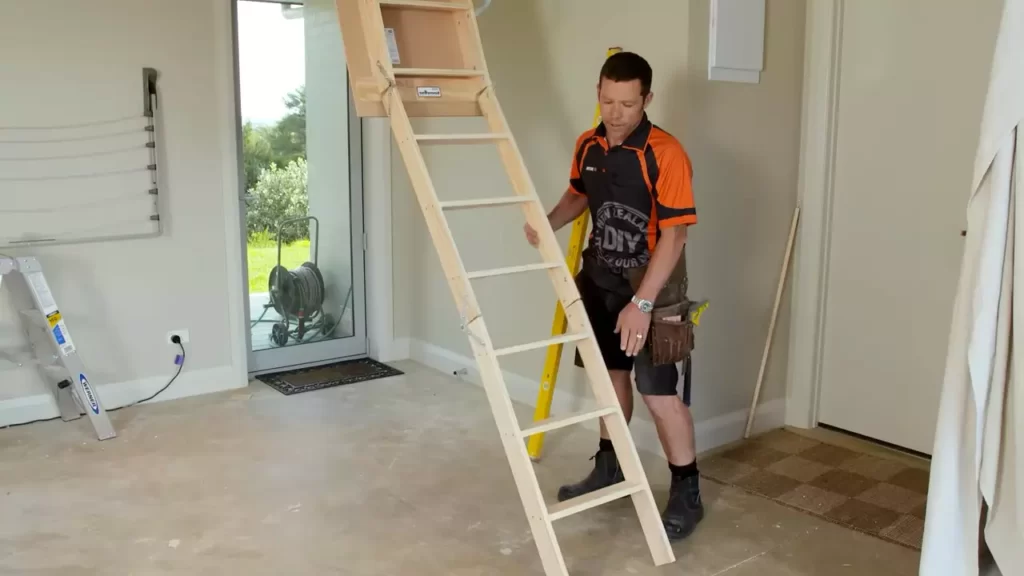
Before relying on your attic stairs, it’s important to verify their functionality to ensure they can be used safely. Here are the steps to follow:
- Check for any visible damage: Inspect the stairs for any visible signs of damage such as cracks, bends, or missing parts. Any noticeable damage should be repaired or replaced before use.
- Test the operation: Open and close the stairs several times to test their smooth operation. Ensure that the stairs can be easily extended and retracted without any hitches or obstructions.
- Examine the hinges and springs: Inspect the hinges and springs for any signs of wear and tear. Lubricate them if necessary to ensure smooth movement and prevent rust or corrosion.
- Check the locking mechanism: Ensure that the locking mechanism engages and disengages properly. It should latch securely when the stairs are in use and release easily when they need to be folded and closed.
By following these steps, you can verify the functionality of your attic stairs and identify any issues that need to be addressed before regular use.
Maintaining Attic Stairs for Longevity
To prolong the lifespan of your attic stairs and keep them in optimal condition, regular maintenance is essential. Here are some tips to help you maintain your attic stairs:
- Keep the stairs clean: Regularly remove dust, debris, and dirt that may accumulate on the stairs and the surrounding area. This will prevent build-up that could hinder the smooth operation of the stairs.
- Lubricate moving parts: Apply lubricant to the hinges, springs, and any other moving parts of the stairs. This will reduce friction, prevent rust, and ensure smooth and quiet operation.
- Inspect for wear and tear: Periodically check for any signs of wear and tear, such as loose screws or damaged components. Tighten any loose screws and replace worn-out or damaged parts promptly.
- Ensure proper insulation: Insulate the attic area around the stairs to prevent drafts and energy loss. Proper insulation will also help regulate temperature and humidity levels in the attic.
Maintaining your attic stairs on a regular basis will help extend their lifespan and reduce the need for major repairs or replacements. By following these maintenance tips, you can keep your attic stairs in excellent condition for years to come.
Additional Tips And Considerations
Installing attic stairs can be a challenging task, but with the right knowledge and preparation, you can successfully complete the job on your own. In addition to following the step-by-step instructions provided earlier in this guide, there are a few additional tips and considerations that can help make the installation process smoother and safer.
Safety Precautions during Installation
When it comes to any DIY project, safety should always be your top priority. Installing attic stairs involves working at heights and handling heavy materials, so taking the necessary safety precautions is essential. Here are some important tips to keep in mind:
- Wear protective gear: Always wear safety goggles, gloves, and a dust mask to protect yourself from any potential hazards during installation.
- Secure the ladder: Before climbing up to the attic, make sure the ladder is stable and securely positioned on a level surface.
- Use a spotter: It’s a good idea to have someone nearby to assist you and offer support while you are working on installing the stairs.
- Follow weight restrictions: Ensure that the attic stairs you are installing can support your weight and any additional load.
- Properly store tools: When not in use, safely store your tools to prevent any accidents or injuries.
Common Challenges and How to Overcome Them
Even with careful planning and preparation, you may encounter some challenges during the installation process. Here are a few common issues that DIYers face when installing attic stairs and how to overcome them:
| Challenge | Solution |
|---|---|
| Tight space in the attic: | Measure the available space accurately and choose a compact attic stair design that fits within the dimensions. |
| Misaligned or uneven stairs: | Check the levelness of the staircase frequently during installation and make adjustments as needed to ensure proper alignment. |
| Difficulties with cutting the opening: | Use a stud finder to locate any obstacles before cutting the ceiling and plan the opening carefully. Consider hiring a professional if you are unsure about the cutting process. |
| Insufficient support for the stairs: | If the existing framing doesn’t provide enough support, add additional framing and bracing to ensure the stairs are secure and stable. |
| Electricity and plumbing obstructions: | If there are electrical wires or plumbing pipes in the way, consult a professional to safely reroute them before proceeding with the installation. |
By being aware of these potential challenges and having the necessary skills or professional assistance, you can overcome any obstacles that may arise during the installation of your attic stairs.
Frequently Asked Questions Of How To Install Attic Stairs By Yourself
How Do You Install Stairs In An Attic?
To install stairs in an attic, follow these steps:
1. Measure the space available and ensure it meets building code requirements.
2. Choose the type of stairs that best suits your needs, such as folding, pull-down, or spiral stairs.
3. Purchase the stairs and any necessary installation materials.
4. Read and follow the manufacturer’s instructions for installation carefully.
5. Secure the stairs in place, making sure they are sturdy and safe for use.
How Much Should I Charge To Install Attic Stairs?
The cost to install attic stairs varies depending on several factors such as location, materials, and complexity. Generally, you can expect to pay between $200 to $600 for professional installation services. To get an accurate estimate, it’s best to contact local contractors who can provide specific quotes based on your needs.
What Is The Alternative To Attic Stairs?
The alternative to attic stairs is a pull-down attic ladder, which is convenient for accessing the attic. It is lightweight, easy to install, and helps save space compared to permanent stairs. Pull-down attic ladders are commonly used in homes without a full-size staircase leading to the attic.
Can You Install An Attic Ladder Between Joists?
Yes, you can install an attic ladder between joists. However, it is important to ensure proper support and stability for the ladder. It is recommended to consult with a professional or follow the manufacturer’s instructions for safe installation.
Conclusion
Installing attic stairs by yourself can be a rewarding and cost-effective solution for accessing your attic space. By following the step-by-step instructions provided in this blog post, you can successfully install attic stairs without the need for professional help. Remember to prioritize safety throughout the process and double-check your measurements and calculations.
With the right tools, materials, and a bit of patience, you can create a convenient and functional access point to your attic. Start your DIY project today and enjoy the benefits of easy attic access.
