Installing architectural roofing shingles is a simple process. In this video, you will learn how to install architectural roofing shingles step-by-step.
Benefits Of Architectural Roofing Shingles Video
Installing architectural roofing shingles can greatly enhance the durability and longevity of your roof, providing lasting protection for your home. With a video tutorial that demonstrates the proper installation process, you can easily learn how to upgrade your roof with architectural shingles, ensuring a durable and long-lasting solution for your roofing needs.
Enhanced durability and longevity
Architectural roofing shingles are designed to withstand harsh weather conditions and provide exceptional durability. Unlike traditional shingles, architectural shingles are made with multiple layers of material, creating a strong and resilient roofing solution. The enhanced durability of these shingles ensures that your roof can withstand the test of time, protecting your home for years to come.
Greater resistance to wind and hail damage
One of the key benefits of architectural roofing shingles is their greater resistance to wind and hail damage. The multiple layers of material used in architectural shingles offer enhanced protection against high winds and impact from hail, reducing the risk of damage to your roof. By following a step-by-step video tutorial for installation, you can ensure that your shingles are properly secured, providing additional protection against wind and hail.
Improved aesthetics and curb appeal
Architectural shingles not only provide functional benefits but also offer an improved aesthetic appeal to your home. These shingles are available in a wide range of colors, styles, and textures, allowing you to choose the perfect design that complements your home’s architecture. By installing architectural shingles using a video tutorial, you can achieve a professional-looking result, enhancing the curb appeal of your home.
So, whether you’re looking to improve the durability and longevity of your roof, enhance its resistance to wind and hail damage, or simply elevate the overall look of your home, architectural roofing shingles are an excellent choice. By following a comprehensive video tutorial, you can easily learn how to install these shingles yourself, saving you time and money on professional installation.
Tools And Materials Needed For Installing Architectural Roofing Shingles Video
Installing architectural roofing shingles can seem like a daunting task, but with the right tools and materials, you can tackle the job with confidence. In this video tutorial, we will walk you through the step-by-step process of installing architectural roofing shingles, highlighting the essential tools and materials you will need to complete the project successfully.
Hammer
One of the most crucial tools you will need for installing architectural roofing shingles is a hammer. This versatile tool will be used to secure the shingles in place by driving roofing nails into the roof deck. Ensure that you have a sturdy hammer with a comfortable grip to make the installation process more efficient and less tiring.
Roofing Nails
Roofing nails are specifically designed for securing shingles to the roof deck. They have a larger head, ensuring that the shingles remain firmly in place, even during extreme weather conditions. Make sure to use the appropriate length and gauge of roofing nails recommended by the manufacturer to ensure optimal performance.
Utility Knife
A utility knife is an indispensable tool for cutting and trimming the architectural roofing shingles. Whether you need to trim shingles to fit around corners or openings, or you need to make precise cuts along the edges, a sharp utility knife will be your best friend throughout the installation process.
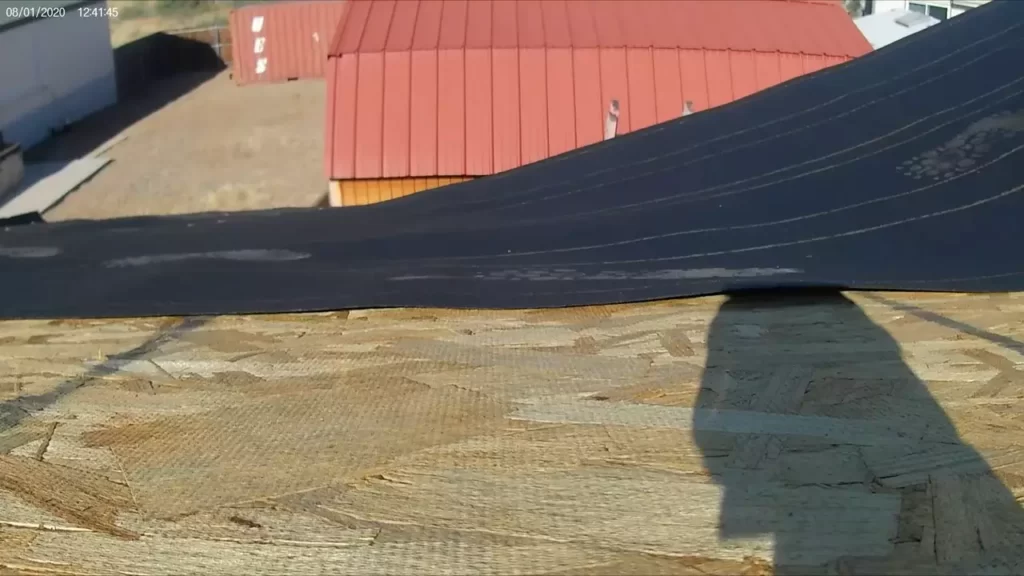
Roofing Felt
Roofing felt serves as an additional layer of protection for your roof deck. It acts as a moisture barrier, preventing any water or condensation from seeping through and damaging the underlying structure. Make sure to choose high-quality roofing felt that is compatible with architectural roofing shingles to ensure proper installation and long-lasting performance.
Roofing Adhesive
Roofing adhesive is used to provide extra adhesion and sealing between shingles and other roof components. It helps to prevent any water penetration and adds an extra layer of protection against wind uplift. When selecting a roofing adhesive, ensure that it is compatible with the architectural roofing shingles you are installing and follow the manufacturer’s instructions for proper application.
Architectural Roofing Shingles
The star of the show, architectural roofing shingles, will be the main material you will install to create a durable and visually appealing roof. These shingles are designed to mimic the look of traditional slate or cedar shake, adding depth and texture to your roof. Choose high-quality architectural roofing shingles that are resistant to weathering, impact, and UV rays, ensuring that your roof will stand the test of time.
By having these essential tools and materials on hand, you will be well-equipped to tackle the installation of architectural roofing shingles. Be sure to follow safety guidelines and manufacturer instructions throughout the process for a successful and long-lasting roof.
Safety Precautions To Take Before Installing Architectural Roofing Shingles Video
The safety precautions to take before installing architectural roofing shingles video are crucial to ensure a smooth and accident-free installation process. By following these precautions, you can protect yourself, your team, and the integrity of the roof. In this guide, we will walk you through the key safety measures you need to abide by before commencing the installation process.
Wearing Appropriate Safety Gear
When working on roofs, it is essential to prioritize safety by wearing the necessary protective gear. Here are some items you should have:
- Hard Hat: Protects your head from falling objects and potential injuries.
- Safety Glasses: Shields your eyes from debris and prevents eye injuries.
- Gloves: Helps maintain a firm grip and protects your hands from cuts and abrasions.
- Safety Harness: Provides fall protection and ensures you can move safely on the roof.
- Non-Slip Shoes: Ensures stability and reduces the risk of slipping or falling.
Ensuring a Stable and Secure Work Surface
Before starting the shingle installation process, you should ensure that the work surface is stable and secure. Here are some steps to take:
- Clear the Area: Remove any debris, tools, or equipment from the roof to create a safe and clutter-free workspace.
- Inspect the Roof: Carefully examine the roof for any existing damage or issues. Look for loose shingles, weak spots, or unstable structures that may compromise safety during the installation process.
- Secure Ladders: Ensure that your ladder is positioned securely and stabilized against the roof. Check that the ladder is in good condition and can support your weight.
- Use Roof Brackets: Install roof brackets or planks to create secure footholds while working on steep roofs. This will provide stability and prevent accidents.
Inspecting the Roof for Any Existing Damage or Issues
Prior to installing architectural roofing shingles, it is essential to thoroughly inspect the roof for any visible damage or underlying issues. Here’s what you should look for:
- Missing or Damaged Shingles: Replace any missing or damaged shingles to ensure a secure and watertight roof.
- Roof Leaks: Detect and repair any leaks on the roof before proceeding with the installation process.
- Water Damage: Identify signs of water damage such as stains or discoloration on the roof. Address these issues to prevent further deterioration.
- Mold or Mildew: Remove any mold or mildew present on the roof surface to maintain a healthy and durable roofing system.
By taking these safety precautions, you can mitigate potential risks and ensure a safe installation process. Remember to prioritize your safety and the safety of your team members throughout the project.
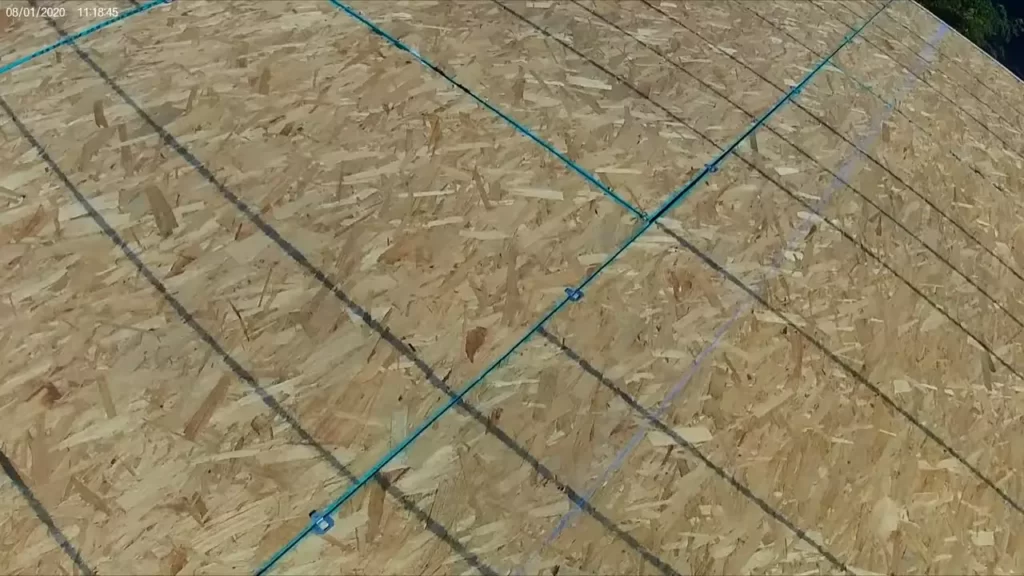
Step 1: Preparing The Roof Surface
Before installing architectural roofing shingles, it’s important to properly prepare the roof surface. This step ensures a solid foundation and helps to maximize the lifespan of your new roof. In this guide, we will walk you through the three essential tasks for preparing the roof surface: clearing the roof of debris, repairing any damaged areas, and installing roofing felt as a base layer.
Clearing the Roof of Debris
Before you can begin any roofing project, it’s crucial to clear the roof of debris. This includes removing any loose shingles, leaves, branches, and other materials that may hinder the installation process. By thoroughly cleaning the roof, you create a clean and smooth surface for the shingles to adhere to.
Repairing any Damaged Areas
Once the roof is free from debris, it’s time to inspect for any damaged areas that require repair. Replace any cracked or missing shingles, as these can compromise the effectiveness of the new roofing system. Additionally, inspect the roof for any signs of water damage or rot, addressing these issues before moving forward.
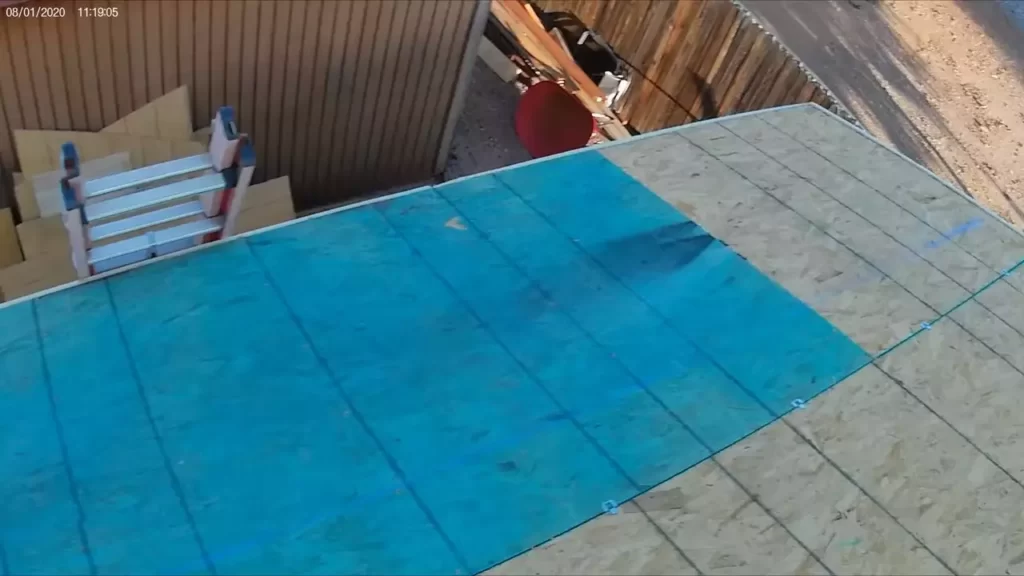
Installing Roofing Felt as a Base Layer
After clearing the roof and making necessary repairs, it’s time to install roofing felt as a base layer. Roofing felt provides an extra layer of protection against moisture and helps to create a weatherproof barrier. To install the roofing felt, follow these steps:
- Measure the roof area and cut the roofing felt into manageable sections.
- Starting at the bottom edge of the roof, unroll the first section of the roofing felt and align it with the edge.
- Secure the roofing felt using roofing nails, spacing them approximately 6 inches apart along the edges and 12 inches apart in the center.
- Continue installing the roofing felt, overlapping each section by approximately 2 inches to ensure a watertight seal.
- Once the entire roof surface is covered with roofing felt, trim any excess material using a utility knife.
By following these steps and ensuring the proper installation of roofing felt, you create a solid foundation for architectural roofing shingles and help to protect your home from the elements.
Step 2: Installing The Starter Shingles
Determining the Placement of the Starter Shingles
In order to install architectural roofing shingles correctly, it is crucial to begin with the proper placement of the starter shingles. These starter shingles form the foundation for the rest of the shingles, ensuring a smooth and secure installation.
To determine the placement of the starter shingles, you need to consider a few key factors. Firstly, it is important to align the bottom edge of the starter shingles with the bottom edge of the roof deck. This ensures that the entire roof is properly covered and protected from the elements.
Additionally, you should measure and mark the recommended offset for each row of shingles. This offset will vary depending on the specific manufacturer’s instructions, so be sure to consult the installation guide provided with the shingles. By following these guidelines, you can achieve an aesthetically pleasing and structurally sound roof.
Securing the Starter Shingles in Place
Once you have determined the placement of the starter shingles, it is time to secure them in place. This involves using roofing nails or staples to attach the shingles to the roof deck.
Start by positioning the first starter shingle in the designated spot, making sure it is properly aligned with the roof edge. Using a hammer or nail gun, drive the nails or staples through the designated nail line, which is typically marked on the shingle itself.
As you proceed with the installation, ensure that each subsequent starter shingle overlaps the previous one by the recommended amount, as specified in the manufacturer’s instructions. This overlap creates a protective barrier against water infiltration, preventing potential leaks and damage to the roof.
Continue securing the starter shingles along the entire length of the roof edge, making sure they are tightly fastened and properly aligned. Remember to maintain the recommended offset between rows, ensuring a symmetrical and professional appearance.
By following these steps, you can successfully install the starter shingles and lay the foundation for the rest of the architectural roofing shingles. This crucial step sets the stage for a durable and visually appealing roof that will withstand the test of time.
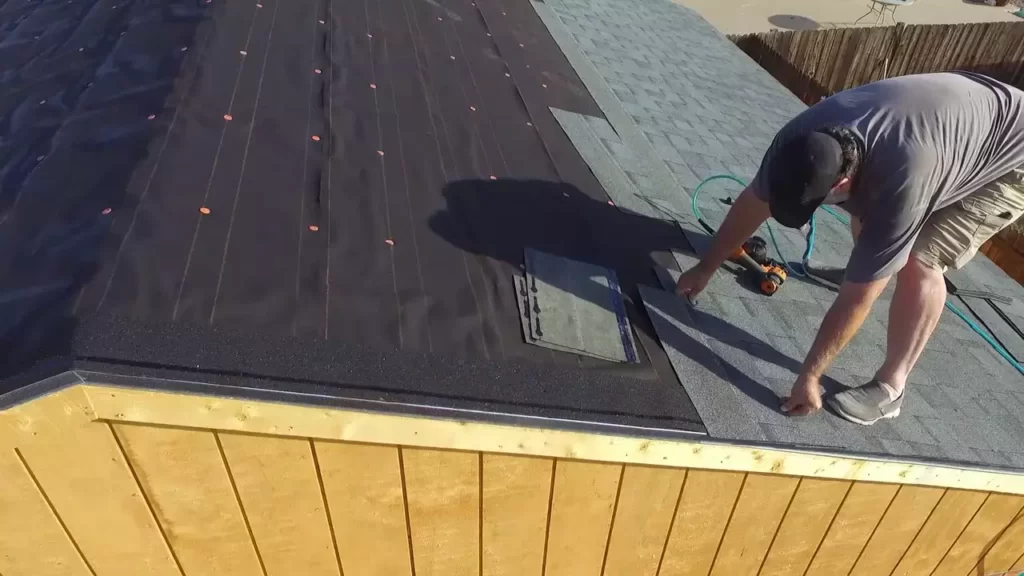
Step 3: Applying The Architectural Shingles
Determining the layout and pattern of the shingles
Before applying the architectural shingles, it is crucial to determine the layout and pattern that will best suit your roof’s aesthetics and functionality. This step involves carefully planning how the shingles will be arranged to achieve the desired look and ensure proper water drainage.
To determine the layout, start by measuring the roof’s dimensions and identifying any areas that may require special attention, such as valleys, ridges, or chimneys. This will help you accurately estimate the number of shingles you’ll need for the installation.
Once you have your measurements, consider the pattern of the shingles. Architectural shingles come in different shapes, sizes, and designs. You can choose from classic rectangular or innovative geometric patterns to add visual interest to your roof. Take into account the overall architectural style of your home and aim for a pattern that complements it.
Cutting and fitting the shingles as needed
After determining the layout and pattern, it’s time to cut and fit the architectural shingles to ensure a precise and professional finish. This step requires careful attention to detail to ensure the shingles fit snugly and seamlessly, preventing any gaps that might compromise the roof’s integrity.
To cut the shingles, use a sharp utility knife or specialized roofing tools. Measure and mark the desired shape and size on the shingle’s backside, then carefully cut along the lines. Take extra care when cutting around obstacles such as vents or chimneys, ensuring a tight fit around them.
When fitting the shingles, start from the bottom edge of the roof and work your way up, overlapping each shingle according to the manufacturer’s instructions. Ensure that the shingles are properly aligned, straight, and parallel to the roof’s edge. Trim any excess overhang as you go along for a neat and uniform appearance.
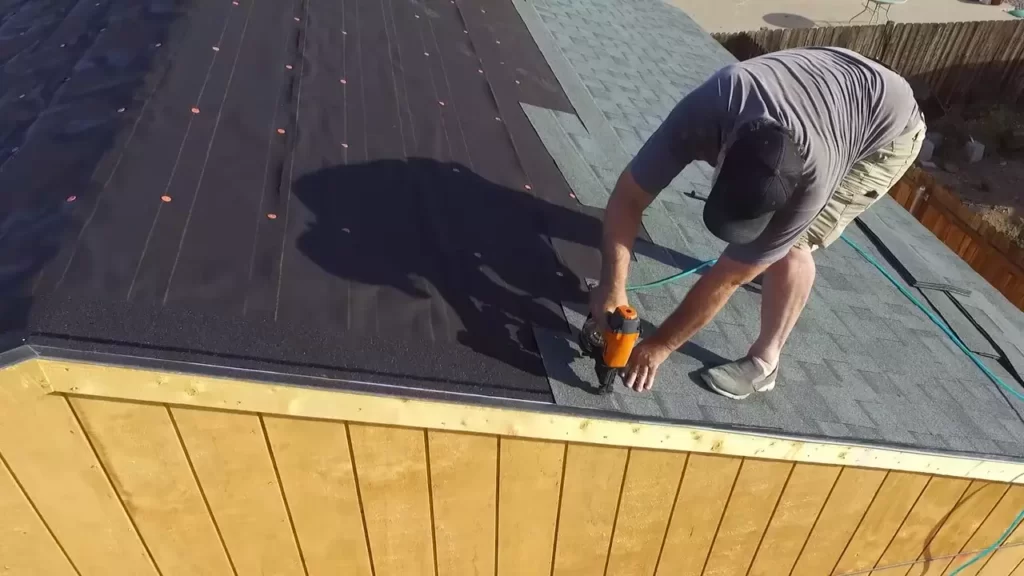
Securing the shingles with roofing nails
Securing the architectural shingles with roofing nails is the final step in the installation process, ensuring the shingles stay in place and withstand various weather conditions over time. Properly securing the shingles will prevent them from lifting or being damaged by strong winds or heavy rain.
When securing the shingles, use roofing nails specifically designed for this purpose. Place the nails in the designated nail strip area of each shingle, driving them into the roof deck at the predefined locations. Be careful not to overdrive the nails, as this can cause damage to the shingles or compromise their effectiveness.
It’s important to space the nails properly according to the manufacturer’s guidelines. Typically, this means placing nails along the top edge of each shingle and additional nails on the sides to ensure maximum hold. Following the recommended nail spacing and pattern will ensure the shingles remain securely fastened.
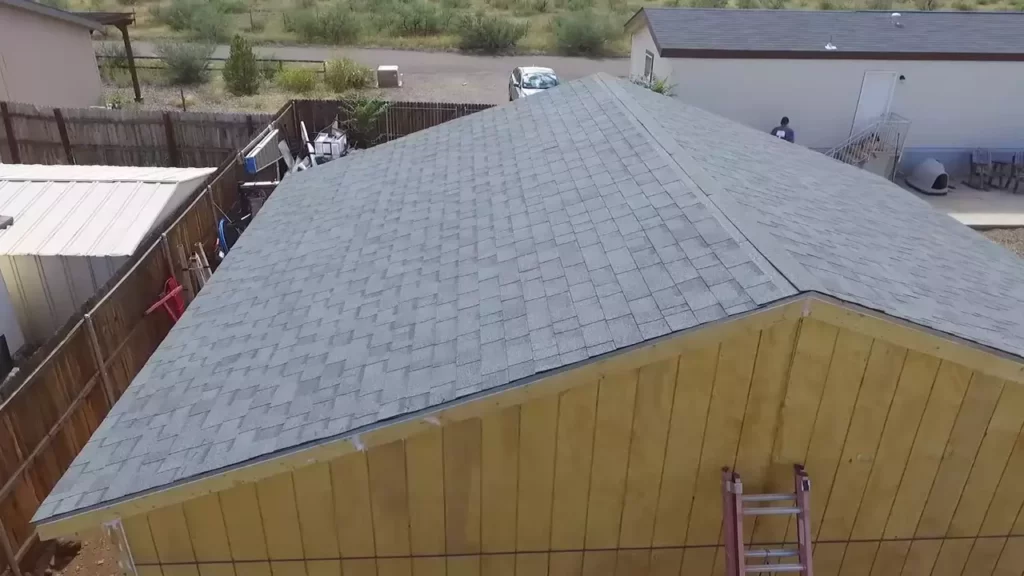
Continue securing the shingles row by row until the entire roof surface is covered. Double-check for any loose or raised shingles and adjust as needed. Once completed, the roof will have a strong and visually appealing structure that will provide long-lasting protection for your home.
Step 4: Installing Ridge Caps And Ventilation
After successfully installing the architectural roofing shingles on your roof, it’s time to move on to the next crucial step – installing the ridge caps and ensuring proper ventilation. Ridge caps play a vital role in protecting the roof’s peak from potential leaks and water damage.
Additionally, proper ventilation is essential for maintaining the longevity and effectiveness of your roofing system. In this step-by-step guide, we will walk you through the process of placing and securing the ridge caps and ensuring adequate ventilation for your roof.
Placing and Securing the Ridge Caps
Placing and securing the ridge caps is an essential part of the installation process as it provides protection to the vulnerable ridge area where two roof slopes meet. Follow the steps below to ensure a secure and durable ridge cap installation:
- Start by measuring the length of the ridge and cut the ridge caps to fit accordingly. Make sure to leave a small overhang on both ends for a clean and finished look.
- Carefully position the first ridge cap at one end of the roof ridge, aligning it with the shingles. Fix it in place using roofing nails, ensuring the nails are driven through the shingles and into the roof decking.
- Continue placing the ridge caps along the entire length of the ridge, overlapping each piece by at least two inches. This overlap will provide a watertight seal and prevent any moisture from seeping through.
- Secure each ridge cap with roofing nails, ensuring they are spaced evenly and adequately driven into the roofing material. The number of nails required may vary depending on the manufacturer’s recommendations.
- Once all the ridge caps are securely in place, ensure that they are aligned properly with the shingles and there are no visible gaps or unevenness. This attention to detail will ensure a seamless and aesthetically pleasing finish.
Ensuring Proper Ventilation for the Roof
Proper ventilation is crucial for maintaining the health and longevity of your roof. It helps prevent excess heat and moisture build-up, which can lead to various roofing issues. Follow these steps to ensure proper ventilation:
- Check with your roofing manufacturer or consult a professional to determine the appropriate ventilation system for your roof type and climate.
- Install ridge vents along the entire length of the ridge, ensuring they are properly aligned and centered.
- For best results, pair the ridge vents with soffit vents to create a continuous airflow system. Soffit vents are typically installed along the eaves of your roof.
- Make sure that there are no obstructions such as insulation blocking the airflow through the vents. This will allow fresh air to enter the attic space and hot air to escape, maintaining a balanced temperature.
- Regularly inspect and clean the vents to prevent any debris buildup that could hinder proper airflow.
By following these steps, you can ensure the proper installation of ridge caps and ventilation for your architectural roofing shingles. Not only will this provide protection and durability but also contribute to the overall efficiency and longevity of your roofing system.
Avoiding Common Mistakes During The Installation Process
Proper installation of architectural roofing shingles is crucial for ensuring the longevity and functionality of your roof. However, many homeowners and DIY enthusiasts often run into issues due to common mistakes made during the installation process. To help you avoid these pitfalls, we have compiled a list of the most frequently encountered errors and provided practical tips on how to steer clear of them.
Overdriving Nails
One of the most prevalent mistakes when installing architectural roofing shingles is overdriving nails. While it may seem logical to drive the nails deep into the shingle, this can actually compromise their effectiveness and cause potential leaks in the future. Overdriven nails can tear the shingle material, creating gaps and allowing water to seep through.
To prevent this, make sure to drive the nails in a way that leaves a small space between the shingle and the roof deck. This allows for proper expansion and contraction of the shingle, reducing the chances of damage.
Not Properly Aligning or Sealing the Shingles
Another common mistake during installation is failing to align and seal the shingles correctly. Improper alignment can result in an uneven appearance and weaken the overall structure of the roof. Additionally, neglecting to seal the shingles adequately can leave them vulnerable to wind uplift and water infiltration.
To ensure proper alignment, take the time to measure and mark guidelines on the roof surface before laying the shingles. Use a straight edge or chalk line to maintain a consistent alignment throughout the installation process. When it comes to sealing, be sure to apply an appropriate roofing sealant to each shingle tab, creating a watertight barrier that offers enhanced resistance against the elements.
Neglecting Proper Ventilation
A crucial aspect often overlooked during the installation process is proper ventilation. Inadequate ventilation can lead to a buildup of moisture, which can cause the shingles to deteriorate, leading to premature aging and potential damage to the underlying structure. To prevent this, it is important to ensure that your roof has proper ventilation vents installed. These vents allow for the exchange of air, reducing the risk of moisture buildup and promoting optimal roof performance. By neglecting proper ventilation, you run the risk of compromising the lifespan of your architectural roofing shingles and incurring costly repairs down the line.
By avoiding these common mistakes during the installation process, you can ensure that your architectural roofing shingles are correctly installed and provide long-lasting protection for your home. Remember to drive the nails properly, align and seal the shingles diligently, and prioritize proper ventilation. Taking the necessary steps to avoid these pitfalls will not only save you time and money but also provide peace of mind knowing that your roof is built to withstand the elements for years to come.
Maintaining And Extending The Lifespan Of Architectural Roofing Shingles Video
When it comes to protecting your home from the elements, your roof plays an essential role. Architectural roofing shingles are not only durable and aesthetically pleasing but also provide an extra layer of protection for your home.
To ensure your roofing system’s longevity and maintain its functionality, regular maintenance and care are necessary. In this video guide on how to install architectural roofing shingles, we will also cover the important steps to maintain and extend the lifespan of these shingles.
Regular roof inspections and maintenance
Regular roof inspections are crucial in detecting any potential issues early on and addressing them promptly. By conducting routine inspections, you can identify problems such as loose or damaged shingles, cracks in the flashing, or clogged gutters. These issues, if left untreated, can lead to more significant damage to your roof and even interior water leakage. Therefore, it is essential to schedule inspections at least once a year, preferably in spring and fall, before and after severe weather seasons.
During inspections, pay close attention to any signs of wear and tear, leaks, or loose shingles. By addressing these issues promptly, you can prevent further damage and extend the lifespan of your architectural roofing shingles.
Cleaning the roof to prevent moss and debris buildup
Another vital aspect of maintaining your architectural roofing shingles is keeping your roof clean and free from moss and debris buildup. Over time, moss and debris can accumulate on your roof, often causing moisture retention and potential damage to the shingles. Regular cleaning can help preserve the integrity of the shingles, preventing premature deterioration.
To clean your roof effectively:
- First, ensure your safety by using proper personal protective equipment.
- Remove any loose debris such as leaves, twigs, and branches by hand or with a blower.
- Use a mild detergent solution or specialized roof cleaning products to eliminate moss and other organic growth.
- Gently scrub the affected areas with a soft-bristle brush to avoid damaging the shingles.
- Rinse the roof thoroughly with clean water, ensuring all detergent or cleaning solution is removed.
- Consider installing zinc or copper strips along the roof ridge to inhibit moss and algae growth in the long term.
By regularly cleaning your architectural roofing shingles, you can prevent moss and debris buildup, maintaining their integrity and extending their lifespan.
Addressing any issues promptly to prevent further damage
In the event of any issues, such as loose or damaged shingles, leaks, or signs of wear and tear, it is crucial to address them promptly to prevent further damage. Delaying repairs can result in more extensive damage, higher repair costs, and even compromised structural integrity.
If you notice any problems during your routine inspections or while cleaning your roof, it is recommended to consult a professional roofing contractor. They have the expertise to assess the situation accurately and recommend the appropriate solutions, whether it’s a simple repair or a complete shingle replacement.
Remember, addressing any issues promptly and proactively can significantly contribute to maintaining and extending the lifespan of your architectural roofing shingles, keeping your home safe and protected for years to come.
Frequently Asked Questions On How To Install Architectural Roofing Shingles Video
What Is The Proper Way To Install Architectural Shingles?
To properly install architectural shingles, follow these guidelines:
1. Start by removing the old roof and inspecting the roof deck.
2. Install an underlayment to protect against water damage.
3. Place the shingles in a staggered pattern, starting from the bottom and working your way up.
4. Secure the shingles with nails and ensure they are properly aligned.
5. Finish by adding ridge caps to provide additional protection.
How Do You Start The First Row Of Architectural Shingles?
To start the first row of architectural shingles, align the first shingle with the edge of the roof, making sure it overhangs slightly. Nail it in place, following the manufacturer’s instructions. Repeat this process for subsequent shingles, overlapping each one to create a water-tight seal.
Are Architectural Shingles Harder To Install?
Architectural shingles are not hard to install. They are designed to be durable and easy to work with. The installation process is similar to regular shingles, and with proper guidance, it can be done by anyone with basic roofing skills.
So, no need to worry about the difficulty level!
What Goes Under Architectural Shingles?
Architectural shingles are typically installed over a layer of roof underlayment, which acts as a moisture barrier. This underlayment can be made of synthetic materials, metal, or traditional felt paper.
Conclusion
Installing architectural roofing shingles can seem daunting, but with the right guidance, it becomes a manageable task. By following the steps outlined in this video, you can successfully install roofing shingles and enhance the aesthetic appeal of your home. Remember to prioritize safety and consult a professional if necessary.
With these insights, you are well on your way to achieving a beautiful and durable roof.