To install an RV air conditioner, start by determining the right spot for the unit and securing it in place. Next, connect the electrical wiring and make sure all connections are secure.
Installing an RV air conditioner is essential for ensuring a comfortable and enjoyable travel experience on the road. Whether you’re embarking on a long road trip or planning to spend some quality time in your RV, a properly installed air conditioner is crucial for maintaining a cool and cozy interior.
However, tackling this task requires some careful consideration and attention to detail. From choosing the right location for the unit to ensuring a secure installation, each step plays a vital role in the overall effectiveness and longevity of the system. We will guide you through the process of installing an RV air conditioner, providing you with the knowledge and confidence to complete the task successfully. So, let’s dive in and discover how to install an RV air conditioner without any hassle.
Essential Tools And Materials For Installing An RV Air Conditioner
Installing an RV air conditioner can greatly enhance your comfort while traveling or camping in your recreational vehicle. To ensure a successful installation, it is important to have the right tools and materials on hand. In this section, we will discuss the essential items you’ll need for installing an RV air conditioner.
Understanding the specific requirements for your RV model
Before you begin the installation process, it’s crucial to understand the specific requirements and specifications of your RV model. Different RVs may have different electrical systems, ventilation setups, and available space for the air conditioner unit. Research your RV model’s user manual or consult the manufacturer’s website to gather the necessary information.
Once you have a good understanding of your RV’s requirements, you can proceed to gathering the essential tools and materials.
Properly measuring the available space for the air conditioner
Measuring the available space for your RV air conditioner is essential to ensure proper installation. Both the rooftop unit and the inside space need to be measured accurately in order to fit the air conditioner properly. Here are the steps you should follow:
- Climb onto the roof of your RV and locate the area where the air conditioner will be installed. Measure the dimensions of this area, including the length, width, and height.
- Next, go inside your RV and measure the corresponding area where the air conditioner unit will be installed. Make sure to account for any obstructions such as cabinets or vents that may limit the available space.
- Compare the measurements from both the rooftop area and the inside space to ensure that your chosen air conditioner unit will fit properly.
By accurately measuring the available space, you can avoid the hassle of returning or exchanging an incompatible air conditioner unit.
Tools and materials checklist
Now that you understand your RV’s requirements and have measured the available space, it’s time to gather the necessary tools and materials. The following checklist will help ensure you have everything you need:
| Tools | Materials |
|---|---|
| – Screwdriver | – RV air conditioner unit |
| – Wrench | – Mounting gasket or foam tape |
| – Drill | – Butyl tape or caulk |
| – Hole saw or jigsaw | – Electrical wiring |
| – Wire strippers and crimpers | – Mounting hardware |
| – Level | – Ducting and vents (if needed) |
Having these tools and materials on hand will ensure a smooth installation process and save you from any last-minute trips to the hardware store.
Remember, proper installation of an RV air conditioner is crucial for optimal performance. By understanding your RV’s requirements, accurately measuring the available space, and gathering the essential tools and materials, you’ll be well on your way to enjoying a cool and comfortable journey in your RV.
Steps To Take Before Removing The Old Air Conditioner
Before removing the old air conditioner in your RV, there are a few important steps you need to take to ensure a smooth and safe installation process. These steps include powering off the RV’s electrical system and emptying any water from the old unit. By following these precautionary measures, you can avoid potential accidents and make the installation of the new RV air conditioner a breeze.
Powering off the RV’s electrical system
To begin, it is crucial to power off the RV’s electrical system before removing the old air conditioner. This step is essential to prevent any electrical mishaps or injuries during the installation process. Here’s how you can effectively power off the electrical system:
- Step 1: Locate the main power panel in your RV. Typically, it can be found in a convenient and accessible location.
- Step 2: Open the panel cover by removing the screws or latches, if necessary.
- Step 3: Identify the breaker that controls the air conditioning unit and flip it to the “off” position.
- Step 4: Double-check that the breaker is in the “off” position by confirming that the air conditioner is no longer running.
By following these steps, you can guarantee that the electrical power to the old air conditioner is completely cut off, minimizing any potential hazards during the removal process.

Emptying any water from the old unit
Another crucial preparatory step is to empty any water from the old air conditioner. Water can accumulate within the unit over time, and failing to remove it before removal can result in leaking or damage. Follow these simple steps to properly empty the water:
- Step 1: Locate the drainage point of the old air conditioner. This is usually at the bottom or rear of the unit.
- Step 2: Place a large bucket or container underneath the drainage point to catch the water.
- Step 3: Release the water by opening the drain valve or removing the plug, allowing it to flow into the container.
- Step 4: Wait until all water has been expelled from the unit before proceeding with the removal.
Draining the water from the old air conditioner is essential to prevent any leakage or damage to your RV during the removal process. By taking this precautionary step, you can ensure a smooth transition to installing the new air conditioner.
Steps To Remove The Old Air Conditioner
Removing the old air conditioner from your RV is an important step before installing a new one. Not only does it ensure a smooth installation process, but it also allows you to inspect the rooftop unit for any signs of damage or wear. In this section, we will guide you through the necessary steps to remove the old air conditioner from your RV, starting with accessing the rooftop unit.
Accessing the Rooftop Unit
The first step in removing the old air conditioner is gaining access to the rooftop unit. To do this, follow these steps:
- Using a stable and secure ladder, carefully climb onto the RV roof.
- Locate the air conditioner unit and clear any debris or obstacles around it.
- Inspect the unit for any visible screws or bolts securing it to the roof.
Once you have completed these steps, you are ready to move on to disconnecting the electrical and refrigerant lines.
Disconnecting the Electrical and Refrigerant Lines
Before removing the old air conditioner, it is crucial to disconnect the electrical and refrigerant lines. This ensures the safe removal of the unit without causing any damage or leaks. Follow these steps to disconnect the lines:
- Switch off the RV’s main power supply or disconnect it from an external power source.
- Locate the electrical wires connected to the air conditioner and carefully disconnect them. Make sure to label each wire for easy reconnection.
- Next, identify the refrigerant lines and use an appropriate tool to safely detach them. Be prepared for a small amount of refrigerant to escape when disconnecting the lines.
- Once you have disconnected the electrical and refrigerant lines, proceed to remove the bolts securing the unit to the roof.
Removing the Bolts Securing the Unit to the Roof
In order to remove the old air conditioner, you need to remove the bolts that secure it to the roof of your RV. Follow these steps:
- Using the appropriate tools, carefully unscrew and remove each bolt one by one.
- Place the bolts in a safe location, such as a container or bag, to prevent them from getting lost.
- Once all the bolts have been removed, gently lift the old air conditioner off the roof and set it aside.
With the old air conditioner now removed, you are ready to proceed with the installation of a new RV air conditioner. Make sure to clean the rooftop area thoroughly before proceeding to ensure a secure and efficient installation.
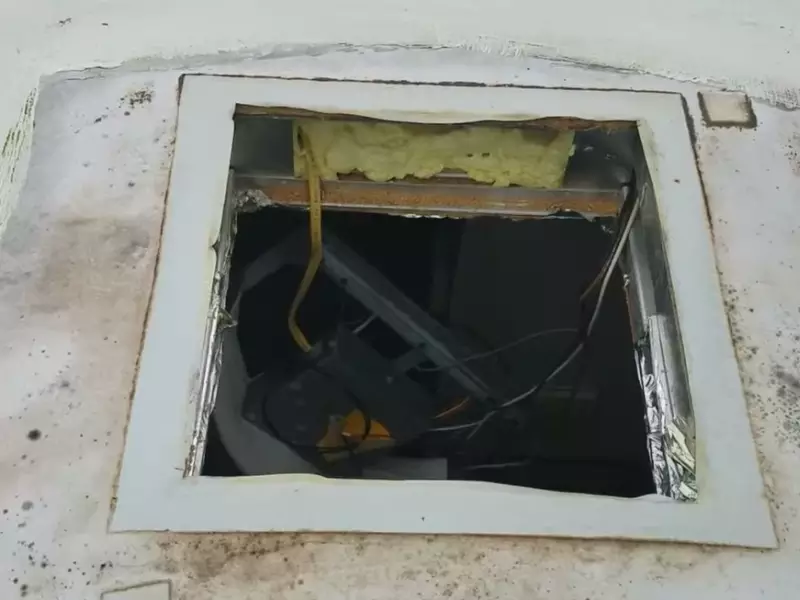
Preparing The Installation Area
Cleaning the roof surface where the new air conditioner will be mounted
Before installing a new RV air conditioner, it is crucial to properly clean the roof surface where it will be mounted. This ensures a secure and stable installation, minimizing the risk of any issues down the road. Here’s how you can clean the roof surface:
- Start by removing any loose debris such as leaves, branches, or dirt from the area. You can use a broom or a soft-bristle brush to gently sweep away the debris.
- Next, use a mild detergent mixed with water to clean the roof surface. Avoid using harsh chemicals or abrasive cleaners as they can damage the roof material. Instead, opt for a gentle cleaner that won’t leave residue or cause discoloration.
- Dip a sponge or soft cloth into the cleaning solution and gently scrub the roof surface. Focus on any areas with stains or grime, ensuring to cover the entire installation area.
- Rinse off the cleaning solution using clean water. You can use a garden hose to spray the roof surface thoroughly, removing any soap residue in the process.
- After rinsing, allow the roof surface to dry completely before proceeding with the installation. Check for any remaining dirt or debris that may have been missed during the cleaning process, and remove it if necessary.
Removing any debris or obstructions from the area
Prior to installing a new RV air conditioner, it’s essential to ensure that there are no obstructions or debris in the installation area. This guarantees a proper and unobstructed fit for the air conditioner. Here are the steps to remove any debris or obstructions:
- Carefully inspect the installation area for any objects such as sticks, branches, or leaves. Remove any large debris by hand, ensuring that the area is clear and obstacle-free.
- Use a vacuum cleaner or a broom to sweep away any remaining dirt or smaller debris that may be present in the area. Pay attention to corners and edges, ensuring a thorough cleaning.
- If there are any obstructions such as vent covers or other accessories in the installation area, remove them temporarily. This provides a clean and smooth surface for the air conditioner to be mounted.
- Inspect the area once again to ensure it is thoroughly cleaned and free from any debris or obstructions. This step is vital to guarantee a secure and proper installation of the RV air conditioner.
By taking the time to clean the roof surface and remove any debris or obstructions, you lay the foundation for a successful RV air conditioner installation. These steps ensure a clean, stable, and unobstructed environment for the air conditioner to be mounted, minimizing the risk of any potential issues. Now that you have prepared the installation area, you can move on to the next steps of the installation process.
Preparing The Electrical System
When it comes to installing an RV air conditioner, one of the most important steps is to properly prepare the electrical system. This ensures that the air conditioner functions optimally and safely. In this section, we will discuss the necessary steps to upgrade and ensure the adequacy of your RV’s electrical system for the new air conditioner.
Upgrading the Electrical System if Necessary
If your RV’s electrical system is outdated or unable to handle the power requirements of the new air conditioner, it may be necessary to upgrade it. Upgrading the electrical system involves upgrading the wiring, circuit breakers, and possibly the power inlet.
Before you begin, it’s crucial to consult your RV’s owner manual or contact a professional to determine the power requirements of your new air conditioner. Once you have this information, you can proceed with upgrading the electrical system as needed.
Ensuring that the Wiring is Adequate for the New Air Conditioner
The wiring in your RV plays a critical role in delivering power to your air conditioner. It is vital to ensure that the existing wiring is adequate to handle the increased power demand of the new air conditioner.
Here are some steps you can take to ensure that the wiring is sufficient:
- Inspect the existing wiring: Start by visually inspecting the wiring to check for any visible damages or signs of wear and tear. If you notice any frayed wires or loose connections, it’s essential to replace or repair them.
- Check wire gauge: The gauge of the wiring determines its capacity to carry electrical current. Refer to the manufacturer’s guidelines or consult a professional to determine the appropriate wire gauge for your air conditioner.
- Upgrade the wiring if necessary: If the existing wiring is not up to par, it’s crucial to upgrade it. This may involve installing thicker gauge wires or rewiring the entire electrical system. It’s recommended to hire a professional electrician for this task to ensure it is done correctly.
Remember, the integrity of your RV’s electrical system is essential for the safe and efficient operation of your air conditioner. Taking the time to upgrade and ensure the adequacy of the wiring will provide you with peace of mind and uninterrupted cooling during your RV adventures.

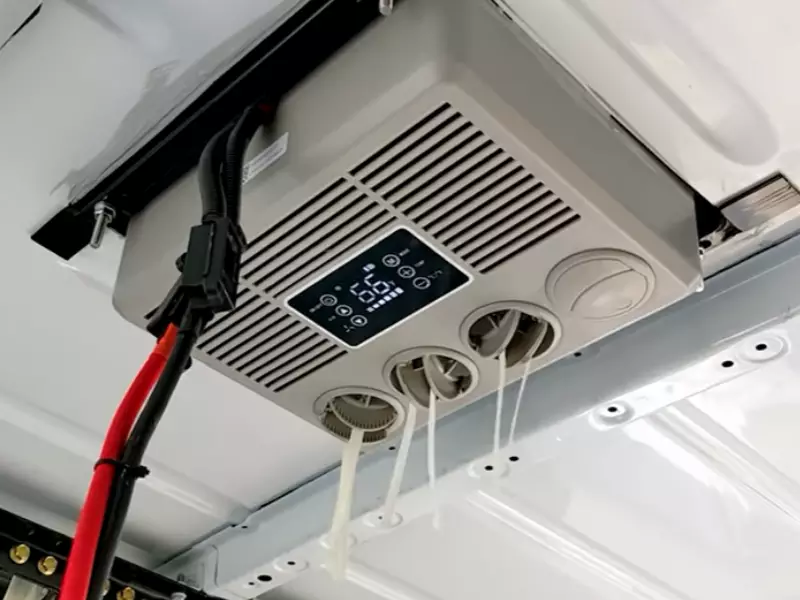
Mounting The New Air Conditioner
Once you have chosen the perfect RV air conditioner for your needs, it’s time to install it on the roof of your vehicle. Mounting the new air conditioner properly is crucial to guarantee its efficiency and prevent any future issues. In this section, we will guide you through the process of securing the unit to the roof using the provided hardware and ensuring a proper seal to prevent leaks.
Securing the unit to the roof using the provided hardware
To ensure a sturdy installation, it is essential to secure the new air conditioner to the roof of your RV using the hardware provided with the unit. Follow these steps to accomplish this:
- Position the air conditioner on the roof, making sure it is placed correctly and centered on the opening.
- Once the air conditioner is properly positioned, secure it by using the provided bolts or screws. Make sure to align the holes on the unit’s base with those on the roof.
- Tighten the bolts or screws evenly, using a wrench or screwdriver. This will help distribute the pressure evenly and ensure a secure fit.
- Check that the unit is tightly secured and does not move or wobble. If it is not stable, double-check the bolts or screws to ensure they are properly tightened.
Ensuring a proper seal to prevent leaks
Once the air conditioner is securely mounted, it is vital to create a proper seal to prevent any water leaks. Follow these steps to ensure an effective seal:
- Apply a sealant or caulk around the edges of the unit where it meets the roof. This will create a watertight seal and prevent any water from seeping into the RV.
- Make sure that the sealant is evenly applied and covers all gaps or spaces between the unit and the roof.
- Allow the sealant to dry completely, following the instructions provided by the manufacturer.
- Once dried, inspect the seal for any cracks or gaps. If any are found, reapply the sealant to ensure its effectiveness.
By securing the air conditioner and creating a proper seal, you can enjoy a worry-free and efficient cooling system for your RV. Following these steps will not only guarantee a successful installation but also help prevent any potential issues in the future. Now that the unit is securely mounted, the next step is to connect it to the RV’s electrical system, which we will guide you through in the next section.
Connecting The Electrical And Refrigerant Lines
Properly wiring the new air conditioner to the RV’s electrical system
Once you have securely installed the new RV air conditioner unit on your recreational vehicle, the next step is to properly connect the electrical and refrigerant lines. In this section, we will focus on the important task of wiring the new air conditioner to your RV’s electrical system. This is a crucial step in ensuring that the air conditioner functions properly and efficiently. Follow these steps to ensure a safe and effective electrical connection:
- First, ensure that the power to your RV is turned off before working on any electrical connections. This is important for your safety and to avoid any electrical mishaps during the installation process. Do not attempt to work on live electrical connections.
- Refer to the manufacturer’s instructions provided with your RV air conditioner unit to locate the electrical connection points. These may vary depending on the make and model of your air conditioner.
- Identify the specific wires that need to be connected. Typically, you will have a red wire (positive) and a black wire (negative) that need to be linked to the corresponding wires in your RV’s electrical system. To ensure a secure connection, it is advisable to use appropriate wire connectors or electrical crimp connectors.
- Strip a small portion of the insulation from the ends of the wires to expose the bare conductor. Ensure that the exposed wires are clean and free from any corrosion or damage. If necessary, use a wire stripper tool to remove the insulation.
- Using your manufacturer-provided wiring diagram or instructions, match the wires of the air conditioner to the corresponding wires in your RV’s electrical system. Connect the positive (red) wire of the air conditioner to the positive (red) wire of your RV, and the negative (black) wire of the air conditioner to the negative (black) wire of your RV.
- Secure the connections using appropriate wire connectors or electrical crimp connectors. Ensure that the connections are tight and do not have any loose wires. Loose connections can lead to poor electrical performance or even electrical hazards.
- Once the electrical connections are secure, carefully insulate the connections using electrical tape or heat shrink tubing. This will provide an extra layer of protection and prevent any short circuits or electrical shocks.
- After completing the electrical wiring, double-check all the connections to ensure they are properly secured and insulated. Close any access panels or compartments that were opened during the installation process.
Connecting the refrigerant lines to the new unit
Connecting the refrigerant lines to your new RV air conditioner is the next step in the installation process. Proper installation of the refrigerant lines is crucial for the efficient cooling performance of your air conditioner. Follow these steps to ensure a successful connection:
- Start by locating the refrigerant lines on your RV air conditioner unit. Typically, you will find two lines: a smaller line known as the liquid line (usually marked with a red cap) and a larger line known as the suction line (usually marked with a blue cap).
- Remove the caps from the refrigerant lines and inspect the lines for any damage or debris. Clean the ends of the lines using a rag or a small brush to ensure they are free from any dirt or obstruction. It is important to have clean and undamaged refrigerant lines for proper functioning.
- Apply a thin layer of refrigerant oil to the O-ring located on the end of the refrigerant lines. This will help create a proper seal and prevent any refrigerant leaks.
- Carefully insert the liquid line into the corresponding connection port on the air conditioner unit. Ensure that the line is properly aligned and seated securely.
- Repeat the previous step for the suction line, ensuring that it is correctly connected to the appropriate port on the air conditioner unit.
- Once both refrigerant lines are securely connected, fasten any locking mechanisms or fittings provided with your air conditioner unit. These will help ensure a tight and leak-free connection.
- Inspect the connections to ensure they are properly secured. Any loose connections can result in refrigerant leaks and decreased cooling performance.
- Finally, check the refrigerant lines for any signs of leaks by applying a bubble solution or a refrigerant leak detector around the connections. If any leaks are detected, recheck the connections and make any necessary adjustments. It is crucial to have a leak-free refrigerant line system for optimal cooling efficiency.
By following these steps carefully and adhering to the manufacturer’s instructions, you can successfully connect the electrical and refrigerant lines of your new RV air conditioner unit. Taking the time to ensure proper connections will lead to optimal cooling performance and a comfortable RV experience, even during the hottest summer days.
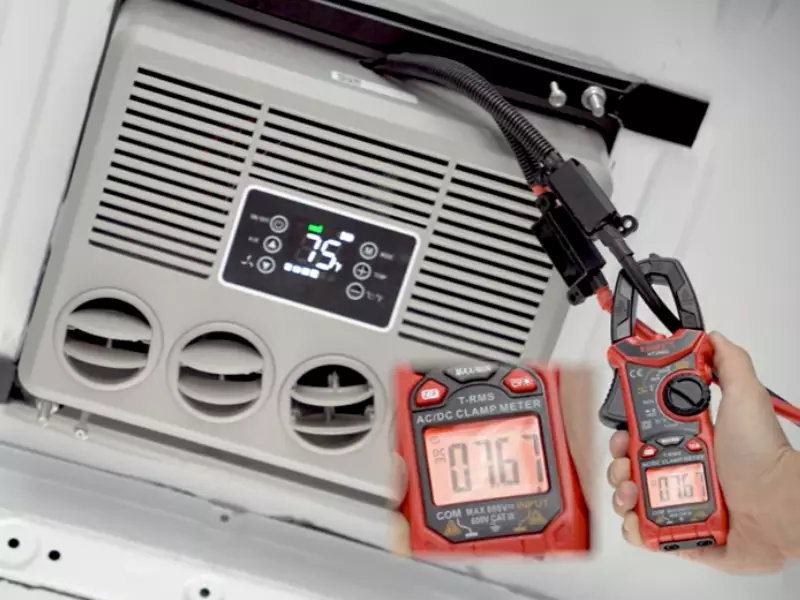
Testing The New Air Conditioner
Testing the new air conditioner is a crucial step in ensuring that it is working properly and providing optimal cooling performance. This will not only help you identify any issues or problems before they become major concerns but also give you the opportunity to adjust the settings for optimal comfort.
In this section, we will discuss the two key aspects of testing the new air conditioner: checking for proper functionality and cooling performance, and adjusting settings for optimal comfort.
Checking for proper functionality and cooling performance
Before you can enjoy the refreshing cool air from your new RV air conditioner, it is important to confirm that it is functioning properly. Here’s a step-by-step guide to checking for proper functionality:
- Power supply: Firstly, make sure that the RV is connected to a stable power supply. Plug your RV into a reliable power source or use a generator if you are camping off-grid.
- Power on: Once you have ensured a stable power supply, switch on the air conditioner. Listen carefully for any unusual noises like rattling or grinding, as these may indicate a problem with the unit.
- Airflow check: Feel the airflow coming from the vents to see if it is strong and consistent. In case you feel weak airflow or notice any obstructions, check the vents and clear any blockages. Blocked vents can impede the system’s ability to cool the RV effectively.
- Temperature drop: After a few minutes of operation, feel the air coming out of the vents and check for a significant drop in temperature. Ideally, you should experience a noticeable decrease in temperature compared to the ambient temperature of the RV.
- Drainage: Verify that the condensation is being properly drained. Check if the condensate drain line is not blocked and that water is flowing freely. This will prevent water accumulation and potential damage to your RV.
Adjusting settings for optimal comfort
Once you have confirmed the functionality and cooling performance of your new air conditioner, it’s time to make some adjustments for optimal comfort. Follow these steps to ensure you make the most of your RV air conditioner:
- Thermostat setting: Adjust the thermostat to your desired temperature. Set it to a comfortable level that suits your preferences. Keep in mind that setting it too low can lead to excessive energy consumption.
- Fan speed: Choose the appropriate fan speed based on your cooling needs. Higher fan speeds tend to cool the RV faster but may result in more noise. Experiment with different speeds to find the balance between cooling effectiveness and noise level.
- Air distribution: Check the airflow direction and adjust the louvers accordingly. This will help evenly distribute the cool air throughout the RV for enhanced comfort.
- Clean filters: Regularly clean or replace the air filters to ensure optimum performance. Dirty filters can obstruct airflow, reduce cooling efficiency, and even lead to system malfunctions.
Remember, testing the new air conditioner and adjusting the settings for optimal comfort are vital steps to enjoy a cool and comfortable RV experience. By following these steps, you can ensure that your air conditioner works efficiently and provides the desired cooling performance, making your RV adventures even more enjoyable.
Sealing And Securing The Installation
Once you have successfully positioned and mounted your RV air conditioner, the next crucial step is to ensure a proper seal and secure installation. This will not only prevent any potential leaks but also guarantee the optimal functioning of your unit. In this section, we will discuss two essential steps for sealing and securing your RV air conditioner installation:
Applying Sealant Around the Unit to Prevent Leaks
One of the major concerns when it comes to installing an RV air conditioner is the potential for water leaks. To prevent this, it is crucial to apply a quality sealant around the unit.
Here’s how you can do it:
- Clean the area around the installation site to ensure it is free from any dirt or debris.
- Apply a bead of RV roof sealant around the base of the unit, ensuring complete coverage.
- Smooth out the sealant with a putty knife to achieve an even and secure seal.
Remember, the sealant acts as a barrier against water penetration, so it is essential to apply it generously and evenly.
Tightening the Bolts and Ensuring a Secure Installation
In addition to applying sealant, it is vital to tighten the bolts and ensure a secure installation of the RV air conditioner. This step guarantees that the unit remains in place and functions optimally without any unnecessary vibrations or movements.
Follow these steps to tighten the bolts:
- Using a suitable wrench, tighten the bolts that secure the unit to the roof or ceiling.
- Go through each bolt and ensure they are all tightened securely.
- If necessary, utilize an adjustable wrench or pliers to provide additional tightening.
Ensuring a secure installation will not only prevent any potential damage to the unit but also improve its overall performance and longevity.
By following these steps and properly sealing and securing your RV air conditioner installation, you can enjoy a comfortable and hassle-free camping experience, regardless of the outside temperature.
Frequently Asked Questions On How To Install An RV Air Conditioner
Can You Add An Air Conditioner To An RV?
Yes, you can add an air conditioner to your RV. It is a common upgrade that can provide comfort during hot weather.
How Do Rv Air Conditioning Units Get Power?
RV air conditioning units are powered through the RV’s electrical system when connected to a power source or generator. The electricity runs the compressor and fan, cooling and circulating the air inside the RV.
How Many Amps Does It Take To Start An RV Air Conditioner?
An RV air conditioner typically requires around 15 to 20 amps to start up.
How Much Power Do You Need To Run An RV Air Conditioner?
An RV air conditioner typically requires around 13,500 BTU of power to cool the vehicle effectively.
Conclusion
Installing an RV air conditioner may seem like a daunting task, but with the right guidance, it can be a straightforward process. By following the steps outlined in this blog post, you can ensure a smooth installation and enjoy a cool and comfortable ride on your next adventure.
Remember to gather all the necessary tools and materials, read the manufacturer’s instructions carefully, and take your time during the installation process. With patience and attention to detail, you’ll have your RV air conditioner up and running in no time.
Happy travels!