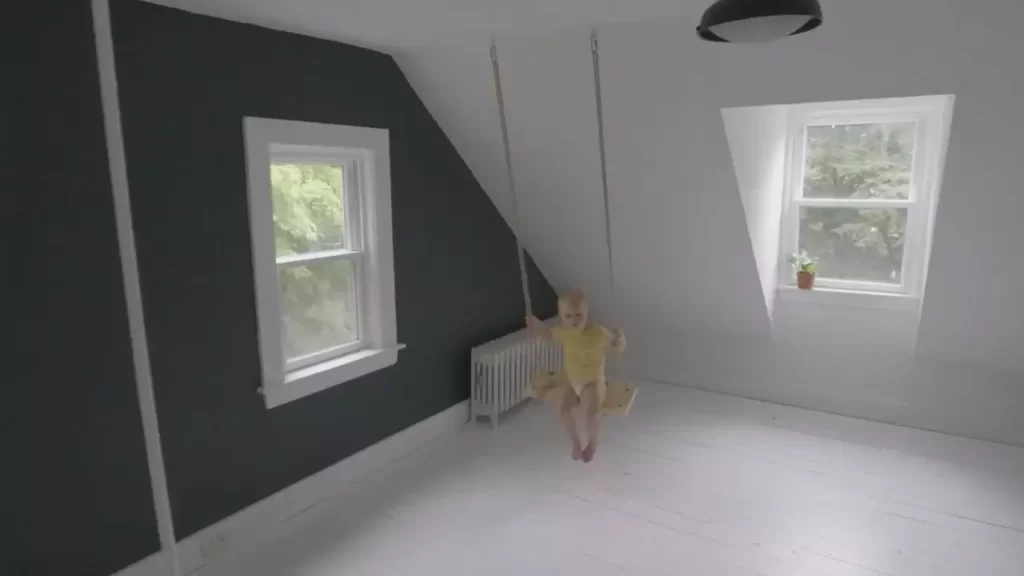
To install an indoor swing, first, identify a sturdy overhead support beam. Then, attach the swing securely using the appropriate hardware.
Adding an indoor swing to your home can be a fun and unique way to enhance your space and bring joy to both children and adults alike. Whether you want to create a cozy reading nook, a playful spot for kids, or simply a relaxing hangout, installing an indoor swing can be a great solution.
However, knowing how to properly install an indoor swing is crucial to ensure safety and prevent accidents. We will provide you with a step-by-step guide on how to install an indoor swing, allowing you to enjoy the benefits of this unique and enjoyable addition to your home.
Factors To Consider When Selecting An Indoor Swing
Installing an indoor swing can be a delightful addition to any home. Not only does it provide a unique and fun experience, but it also adds a touch of playfulness to the ambiance. However, before you rush into buying an indoor swing, it’s crucial to consider a few factors to ensure you select the right one that suits your needs and space. Let’s take a look at three important factors to keep in mind when choosing an indoor swing: location and space requirements, weight capacity and safety considerations, and design and aesthetic appeal.
Location and Space Requirements
When looking to install an indoor swing, the first factor to consider is the location and space it requires. You’ll want to ensure that you have enough room in your home to accommodate the swing comfortably. Measure the available space, taking into account the height, width, and depth requirements of the swing model you are considering.
Some indoor swings can be installed in doorways or under ceilings, while others may require a dedicated room or larger area to operate. Keep in mind that you’ll need ample space for swinging motion and for individuals to move around without obstacles. It’s also crucial to check the swing’s clearance, ensuring that there is enough distance between the swing and surrounding walls or furniture.
Weight Capacity and Safety Considerations
Another important factor to consider is the weight capacity and safety features of the indoor swing. Determine the maximum weight limit of the swing and ensure it can accommodate the intended users. It’s essential to factor in not only the weight of the individuals using the swing but also any additional weight added through accessories or attachments.
Moreover, safety considerations play a vital role in selecting the right indoor swing. Look for models that come with sturdy frames, secure hanging mechanisms, and durable materials. Ensure that the swing is designed to handle the swinging motion without any risk of tipping over or becoming unstable. Additionally, consider features such as safety straps or harnesses to provide added protection, especially for children.
Design and Aesthetic Appeal
While the functionality and safety of the swing are essential, it’s also important to choose an indoor swing that complements your home’s design and aesthetic. Consider the style, color, and materials used in the swing’s construction to ensure it fits seamlessly with your existing decor. A swing with a visually appealing design can enhance the overall look and feel of the space while adding an element of visual interest.
Take into account the different design options available, such as traditional wooden swings, modern metal designs, or hammock-style swings. Think about the overall ambiance you want to create and choose a swing that aligns with your vision.
Types Of Indoor Swings
Installing an indoor swing can be a fun and exciting way to add a unique touch to your home decor. Whether you’re looking for a traditional fabric swing, a wooden swing, or even a hammock, there are a variety of options to choose from. In this section, we’ll explore the different types of indoor swings and how to install them.
Traditional Fabric Swings
Fabric swings are a popular choice for indoor swings due to their comfort and versatility. They are typically made from durable fabrics such as canvas or nylon and come in various designs and colors to match your personal style. Installing a fabric swing is relatively simple and requires a few basic tools.
Here’s a step-by-step guide on how to install a traditional fabric swing:
- Find a suitable location: Choose a sturdy beam or ceiling joist to hang your swing from. It should be able to support the weight of the swing and the person using it.
- Measure and mark: Measure the distance between the hanging points of your swing and mark the exact spots on the ceiling or beam.
- Drill pilot holes: Using a drill and a small drill bit, create pilot holes at the marked spots on the ceiling or beam.
- Install eye hooks: Screw eye hooks into the pilot holes until they are securely in place.
- Attach the swing: Using the provided hardware, attach the swing to the eye hooks. Make sure it is properly secured before use.
- Test the swing: Give the swing a gentle test swing to ensure it is properly installed and feels stable.
Wooden Swings
Wooden swings can add a rustic and natural touch to your indoor space. They are typically made from sturdy wood such as oak or teak and are known for their durability. Installing a wooden swing might require some additional tools and materials, but the end result is worth it.
Here’s a step-by-step guide on how to install a wooden swing:
- Choose a suitable location: Find a strong beam or ceiling joist to hang your wooden swing from.
- Measure and mark: Measure the distance between the hanging points of your swing and mark the exact spots on the ceiling or beam.
- Drill pilot holes: Using a drill and a small drill bit, create pilot holes at the marked spots on the ceiling or beam.
- Install eye bolts: Insert eye bolts into the pilot holes and tighten them securely.
- Attach the swing: Using strong chains or ropes, attach the swing to the eye bolts. Ensure that the chains or ropes are properly secured and provide enough clearance for swinging.
- Test the swing: Give the swing a gentle test swing to make sure it is stable and functions properly.
Hammocks
If you’re looking for a more relaxing and laid-back option, a hammock might be the perfect choice for your indoor swing. Hammocks provide a cozy and comfortable spot to unwind and can be easily installed in your home.
Here’s a step-by-step guide on how to install a hammock:
- Find a suitable location: Look for two sturdy anchor points, such as walls or beams, where you can hang your hammock.
- Measure and mark: Measure the distance between the anchor points and mark the spots where you will install the hammock hooks or hardware.
- Install hooks or hardware: Depending on the type of hammock you have, use appropriate hooks or hardware to securely attach the hammock to the anchor points.
- Attach the hammock: Once the hooks or hardware are in place, attach the ends of the hammock to them, making sure it is taut and level.
- Test the hammock: Give the hammock a gentle test sit to ensure it is properly installed and provides a comfortable experience.
With these different types of indoor swings, you can find the perfect one to suit your style and create a cozy and inviting space in your home. Whether you choose a fabric swing, wooden swing, or hammock, follow the installation instructions carefully to ensure a safe and enjoyable swinging experience.
Measuring The Space
Installing an indoor swing can be a fun and unique addition to any home. Whether you’re looking to create a cozy reading nook or provide a fun play area for children, measuring the space is an essential first step. By determining the suitable height and width, as well as ensuring proper clearance from walls and furniture, you can ensure a safe and enjoyable swinging experience. In this guide, we’ll explore these important considerations in detail.
Determining the suitable height and width
When installing an indoor swing, it’s crucial to determine the suitable height and width of the swing. This will ensure that the swing is comfortable and safe to use. Before taking any measurements, consider the intended users of the swing. If it’s primarily for children, it should be at a height that allows their feet to touch the ground when seated. On the other hand, if the swing is for adults or a mixed-age group, a higher height may be more suitable.
Start by measuring the height of the ceiling from the floor. This will give you an idea of how much vertical space you have available. Remember to account for any hanging mechanisms or attachments that may add to the overall height of the swing. Next, determine the desired width of the swing. Consider the amount of space you have available and ensure that there is enough room for the swing to move freely without hitting any walls or furniture.
Ensuring proper clearance from walls and furniture
Once you have determined the suitable height and width for your indoor swing, it’s important to ensure proper clearance from walls and furniture. This will prevent any accidents or damage to your surroundings. Start by measuring the distance from the swing’s hanging location to the nearest walls or furniture. Make sure there is enough space for the swing to swing back and forth without hitting anything. It’s also important to consider the arc of the swing and ensure that there is sufficient space in all directions.
If the swing is intended for use in a small room with limited space, you may need to rearrange furniture or choose a different location to ensure proper clearance. Remember to account for any additional space needed for swinging motion as well.
Installing an indoor swing can be a fun and rewarding project. By measuring the space and considering factors such as suitable height, width, and proper clearance, you can create a safe and enjoyable swinging experience for yourself and your family. So grab a measuring tape and get started on transforming your space into a swing-friendly haven!
Assessing The Ceiling
Before installing an indoor swing, it’s crucial to assess the condition and suitability of your ceiling. This step is essential to ensure the safety and stability of your swing. In this section, we will explore two key aspects of assessing the ceiling: checking for a strong and sturdy ceiling structure and identifying the ceiling material.
Checking for a strong and sturdy ceiling structure
First and foremost, you need to examine whether your ceiling is capable of supporting the weight and movement of an indoor swing. A weak or compromised ceiling structure can lead to accidents and damage. To determine the strength of your ceiling, follow these steps:
- Step 1: Locate a joist – A joist is a horizontal structural member that supports the ceiling. Use a stud finder or tap the ceiling to identify the joist’s position.
- Step 2: Measure distance – Measure the distance between joists to ensure your indoor swing will be properly supported. Typically, the distance between joists is 16 to 24 inches.
- Step 3: Observe any signs of damage – Look for any cracks, sagging, or water damage on the ceiling. If you notice any signs of structural issues, it’s essential to address them before proceeding with the installation.
By carefully examining your ceiling’s structure, you can ensure that it is strong enough to support your indoor swing without compromising safety.
Identifying the ceiling material
The second aspect of assessing the ceiling is identifying the material it is made of. Ceilings can be constructed from various materials, such as concrete or drywall, each requiring specific installation considerations. Here’s how you can identify your ceiling material:
| Concrete Ceiling | Drywall Ceiling |
|---|---|
| Concrete ceilings are solid and durable but may require special tools and techniques for installation. To identify if you have a concrete ceiling, look for a solid, unyielding surface. | Drywall ceilings are more common and easier to work with. They consist of gypsum boards screwed to wooden frames. To identify a drywall ceiling, tap the ceiling surface. If it sounds hollow, it’s likely made of drywall. |
Knowing the material of your ceiling will help you choose the appropriate installation method and tools for your indoor swing. It’s crucial to ensure a secure and reliable attachment that matches the specific characteristics of your ceiling.
In conclusion, assessing the ceiling is a vital step in installing an indoor swing. By checking for a strong structure and identifying the ceiling material, you can ensure a safe and successful installation. Take the time to assess your ceiling properly, and you’ll be enjoying your indoor swing in no time!
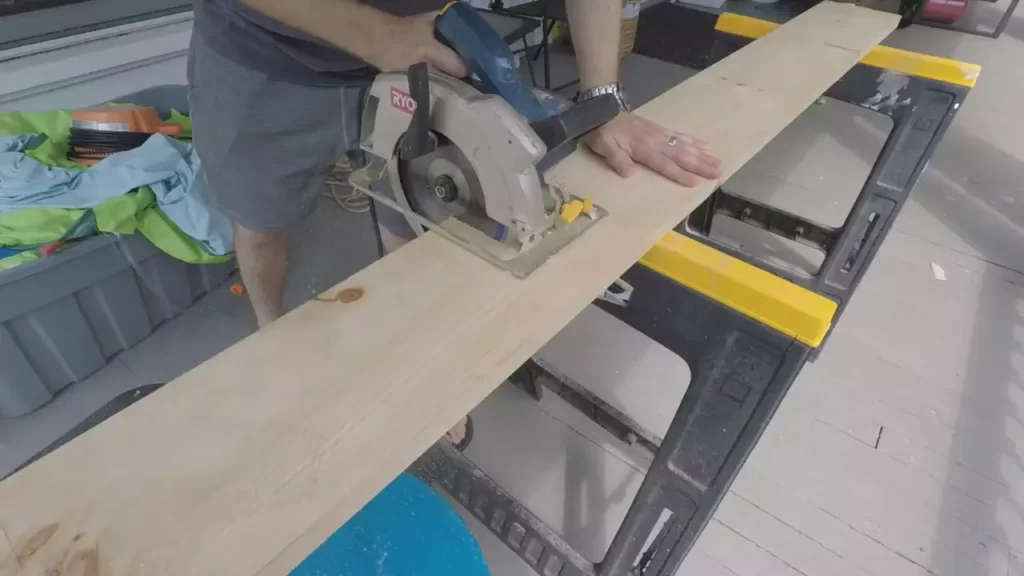
Gathering The Necessary Tools And Materials
Before you can embark on the exciting adventure of installing an indoor swing, it’s essential to gather all the necessary tools and materials. Having everything on hand will make the installation process smoother and more efficient, allowing you to enjoy your swing in no time. In this section, we’ll discuss the tools and materials you’ll need to complete the job.
Stud Finder
A stud finder is an invaluable tool when it comes to installing an indoor swing. It helps you locate the sturdy beams or posts in the wall or ceiling where you can securely anchor your swing. Without a stud finder, it can be challenging to determine the most suitable location for your swing, leading to potential safety hazards.
Drill
A drill is another essential tool required for installing an indoor swing. It allows you to create the necessary holes in the wall or ceiling for attaching screws and hooks securely. Ensure that your drill is in good working condition and equipped with the appropriate drill bits for the materials you will be drilling into.
Screws and Hooks
To properly secure your indoor swing, you will need screws and hooks designed to hold the weight and provide stability. Choose high-quality, durable screws and hooks that are suitable for the surface you will be installing them on. If you are unsure about which screws and hooks to use, consult with a hardware professional to ensure you select the right ones for your specific swing and installation location.
Rope or Chains
The type of suspension system you choose for your indoor swing will depend on personal preference and the overall aesthetic you wish to achieve. Whether you opt for traditional rope or sturdy chains, make sure they are strong enough to support the weight of the swing and provide a safe and secure connection. Consider the length and adjustability of the rope or chains to ensure the swing is at the ideal height for enjoyment.
Gathering these necessary tools and materials is a crucial first step in installing an indoor swing. With everything prepared and ready to go, you’ll be well-equipped to tackle the following steps with ease and confidence. So, let’s dive in and create a cozy and whimsical spot in your home that will bring joy to both children and adults alike!
Finding The Ideal Spot For The Swing
Installing an indoor swing can transform your space into a fun and whimsical retreat. But before you start drilling holes and hanging ropes, you need to find the ideal spot for your swing. This involves considering factors such as the central and visually appealing location, natural light, and room traffic flow. Let’s dive into how you can identify the perfect spot for your indoor swing.
Identifying a Central and Visually Appealing Location
When it comes to choosing the right spot for your indoor swing, it’s essential to identify a central and visually appealing location. This will not only make your swing a focal point in the room but also create a sense of balance and harmony in the overall décor.
To find an ideal location, consider the following:
- Assess the size and layout of your room. Look for a space that can accommodate the swing comfortably without overwhelming the room.
- Choose a spot that allows for easy access and movement around the swing. Avoid placing it in a congested area where people might bump into it.
- Consider the existing furniture and decorative elements in the room to ensure that the swing complements the overall aesthetic.
- Keep in mind the height requirements of your swing. Make sure there is enough clearance above and around the swing to prevent any accidents.
Considering Natural Light and Room Traffic Flow
In addition to the central location, it is important to take into account natural light and room traffic flow when finding the ideal spot for your indoor swing.
Here are a few factors to consider:
- Observe how the natural light enters the room throughout the day. Choose a spot where the swing will be bathed in warm, natural light, creating a cozy and inviting atmosphere.
- Avoid placing the swing in a spot where it will obstruct the flow of traffic in the room. Your swing should be a delightful addition to the space, not a hindrance.
- If possible, position the swing near a window or a source of natural light. This will not only enhance the aesthetic appeal but also provide a comfortable and relaxing spot for swinging.
By considering these factors when finding the ideal spot for your indoor swing, you can create a captivating and functional addition to your space. Take the time to carefully assess your room, natural light, and traffic flow, and find a location that will make your indoor swing a true centerpiece.

Locating Ceiling Joists
Using a stud finder to locate the ceiling joists
Before installing an indoor swing, it’s crucial to locate the ceiling joists to ensure a secure and safe installation. One of the most efficient ways to find the joists is by using a stud finder. This handheld device can accurately detect changes in density behind your ceiling, indicating the presence of a joist. Here’s how you can use a stud finder to locate the ceiling joists:
- Choose a good-quality stud finder and ensure it has fresh batteries. This will help maintain its accuracy during the search.
- Starting from one side of the room, power on the stud finder and hold it against the ceiling.
- Slowly move the stud finder in a straight line across the ceiling, while keeping it level. The device will emit a sound or light up when it detects a joist.
- Once you identify a joist, mark the spot on the ceiling using a pencil or masking tape.
- Continue the process, moving parallel to the first line, until you have covered the entire area where you plan to install the indoor swing.
- Take note of the spacing between the joists, as this will be essential when it comes to securely attaching the swing hardware.
Marking the spots for installation
Once you have located the ceiling joists using a stud finder, it’s time to mark the spots for the swing installation. Ensuring accurate markings will prevent any mistakes or mishaps during the installation process. Here’s how you can mark the spots for installation:
- Start by measuring the desired distance from the walls or any other obstacles. This will depend on the size of the swing and the available space in your room.
- Using a ruler or measuring tape, mark the distance on the ceiling using a pencil or masking tape.
- Repeat this process for each joist, ensuring that the markings are aligned and evenly spaced.
- Double-check the accuracy of your markings before proceeding to install the swing hardware.
By using a stud finder to locate the ceiling joists and marking the spots for installation accurately, you are well on your way to successfully installing an indoor swing. Remember to always prioritize safety and follow the manufacturer’s instructions for the specific swing model you have chosen. With proper installation, you can create a unique and enjoyable space where both children and adults can swing their stress away.
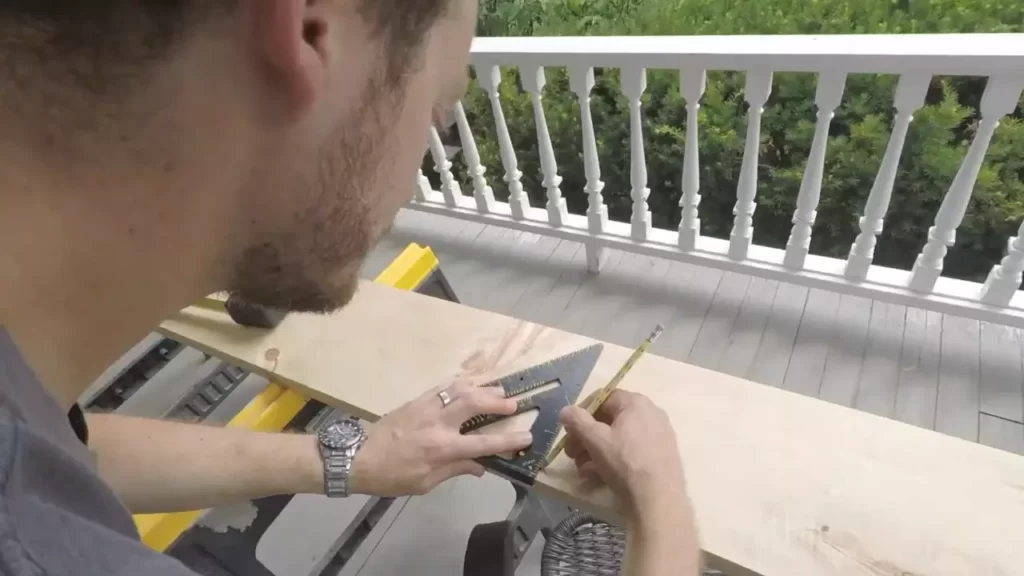
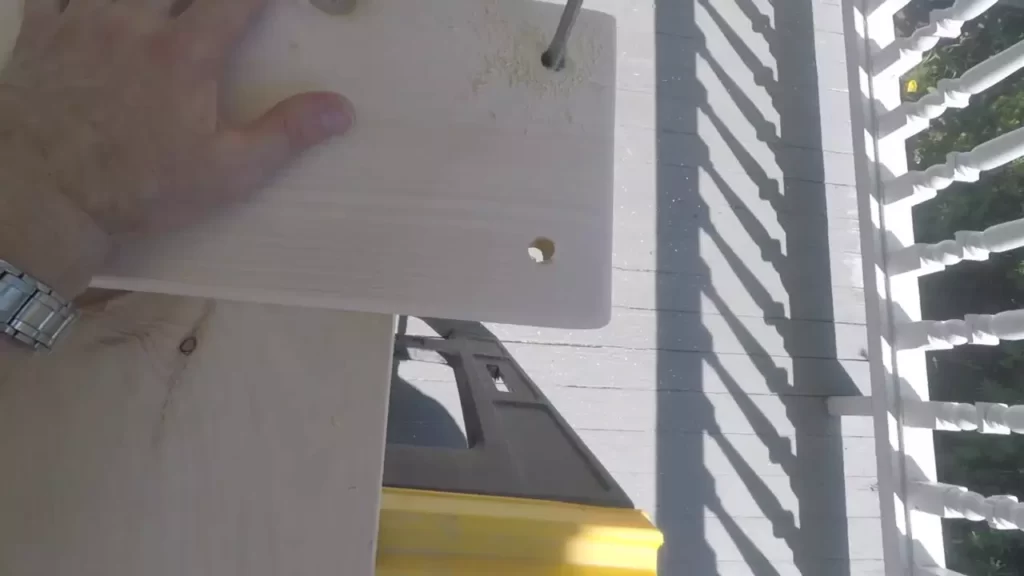
Preparing The Swing Hardware
Installing an indoor swing can add a touch of whimsy and fun to any home. It provides a unique and relaxing spot for both children and adults to enjoy. However, before you start swinging away, you need to properly prepare the swing hardware. This step ensures that your swing is safe, secure, and ready for hours of enjoyment. In this section, we will guide you through the process of assembling the necessary hardware components and securing the ropes or chains to the swing.
Assembling the necessary hardware components
Before you can install your indoor swing, you need to gather and assemble all the necessary hardware components. Make sure you have the following items:
- A sturdy and strong swing seat
- Ropes or chains (choose high-quality materials like nylon or stainless steel for durability)
- S-hooks or carabiners for attaching the ropes or chains to the swing seat and ceiling anchor
- Ceiling anchor (consult a professional if you are unsure about the type of anchor suitable for your ceiling)
Once you have collected all the hardware components, it’s time to assemble them. Start by attaching the ropes or chains to the swing seat. Ensure that the ropes or chains are properly secured and that there are no sharp edges that could cause injury. Double-check that all the connections are tight and secure.
Securing the ropes or chains to the swing
Properly securing the ropes or chains to the swing is crucial for safety. Here are the steps to follow:
- Measure the distance between the swing seat and the ceiling anchor point. Make sure the ropes or chains are long enough to provide a comfortable swinging experience.
- Attach one end of each rope or chain to the designated holes or hooks on the swing seat. Use strong knots or secure carabiners to ensure a reliable connection.
- Locate the ceiling anchor point and fasten the other end of each rope or chain to it. Again, use secure knots or carabiners to ensure stability.
- Test the swing for stability by giving it a gentle push. If there is any wobbling or instability, reinforce the connections or consult a professional for assistance.
It’s important to note that the integrity of your swing’s hardware is key to its long-term use. Regularly inspect the ropes, chains, knots, and other fastenings for signs of wear or damage. Replace any worn-out or weakened components immediately to maintain the safety of your swing.
By diligently preparing your swing’s hardware, you can ensure a safe and enjoyable swinging experience for yourself and your loved ones. With the necessary hardware components assembled and the ropes or chains securely fastened to the swing, you’re now ready to move on to the next step of installing your indoor swing. Stay tuned for our next guide!
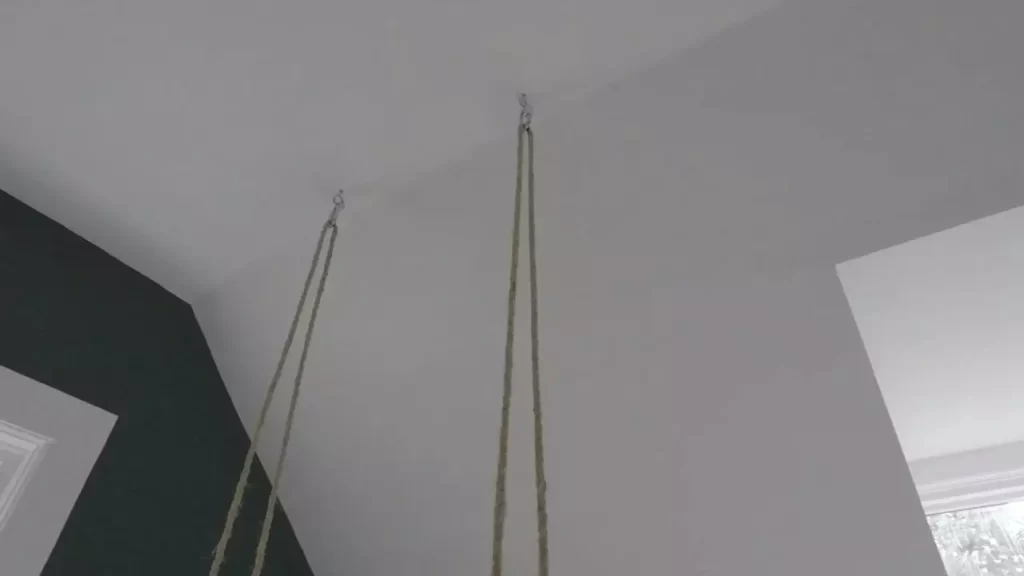
Anchoring The Swing To The Ceiling
One of the most important steps in installing an indoor swing is ensuring that it is securely anchored to the ceiling. This not only ensures the safety of anyone using the swing but also prevents any damage to your ceiling or the swing itself. In this section, we will guide you through the process of anchoring your swing to the ceiling, step by step.
Drilling pilot holes for the hooks or screws
Before you can install the hooks or screws to secure your swing to the ceiling, it is crucial to drill pilot holes. These holes will serve as a guide and prevent the wood or drywall from splitting when the screws or hooks are inserted. To drill pilot holes:
- Measure and mark the desired locations: Determine where you want to install the hooks or screws in the ceiling. Make sure you choose a sturdy area, such as a ceiling joist, to ensure maximum support.
- Select the appropriate drill bit: Choose a drill bit that matches the diameter of the hooks or screws you will be using. This ensures a snug fit.
- Secure the drill bit: Attach the drill bit to your drill securely, ensuring it is centered.
- Drill the pilot holes: Place the drill bit on the marked location and apply gentle pressure as you drill straight into the ceiling. Take caution not to drill too deep.
Installing the hooks or screws securely in the ceiling joists
Once you have drilled the pilot holes, it is time to install the hooks or screws securely into the ceiling joists. Properly anchoring the swing is crucial to its stability and safety. Here’s how to do it:
- Choose the appropriate hooks or screws: Select hooks or screws that are specifically designed for ceiling installation. These should be strong, durable, and suitable for the weight capacity of your swing.
- Align the hooks or screws with the pilot holes: Insert the hooks or screws into the pilot holes and make sure they align properly. Use gentle force to guide them in but avoid forcing them.
- Tighten the hooks or screws: Use the appropriate tools, such as a screwdriver or wrench, to tighten the hooks or screws securely into the ceiling joists. Ensure they are firmly in place and do not wobble.
By following these steps, you can confidently anchor your swing to the ceiling, providing a secure and enjoyable experience for everyone who uses it. Remember to always double-check the stability of the swing and periodically inspect the hooks or screws for any signs of loosening or damage. With proper installation and maintenance, your indoor swing will bring hours of fun and relaxation for years to come.
Securing The Swing
Securing the swing is a crucial step in ensuring the safety and stability of your indoor swing. By following these simple steps, you can securely attach the ropes or chains to the hooks or screws and adjust the height and levelness of the swing.
Attaching the ropes or chains to the hooks or screws
First and foremost, identify the appropriate location to install the hooks or screws. Ensure that the area has strong support, such as a reinforced ceiling joist or beam. Once you have identified the ideal location, follow these instructions:
- Drill pilot holes into the ceiling joist or beam to prevent splitting.
- Screw in the hooks or screws securely, making sure they are flush with the ceiling.
- Attach the ropes or chains to the hooks or screws. If using ropes, make sure to tie secure knots to prevent any slippage. If using chains, use S-hooks to connect the swing to the chains.
- Ensure that the ropes or chains are securely fastened and that there is no excessive slack.
- Perform a safety check by applying pressure to the swing to ensure it is stable and the attachments are secure.
Adjusting the height and levelness of the swing
After the swing is securely attached, it’s important to adjust the height and levelness to ensure optimal comfort and safety. Follow these steps to do so:
- Adjust the length of the ropes or chains by tying appropriate knots or using adjustable chains.
- Make sure the swing is at a comfortable height from the ground. It should neither be too high nor too low, keeping in mind the safety of the users.
- Check the levelness of the swing by using a leveler. Ensure that the swing is evenly balanced and not tilted in any direction.
- Tighten any loose screws or connections if necessary.
By effectively securing the swing and adjusting its height and levelness, you can enhance the safety and enjoyment of your indoor swing experience. Follow these steps diligently to create a secure and stable environment for hours of swinging fun!
Ensuring Safe Usage
When installing an indoor swing, safety should be your top priority. To ensure safe usage of your indoor swing, it is crucial that you follow certain guidelines and regularly inspect the swing for any wear and tear. Here are two critical aspects to consider:
Checking Weight Capacity and Restrictions
One of the most important factors to consider before installing an indoor swing is checking its weight capacity. Each swing has a specific weight limit, and exceeding it can pose a serious safety risk. To ensure that the swing can safely support the weight of the intended users, check the manufacturer’s guidelines. This information is usually provided in the swing’s manual or on the packaging.
In addition to the weight capacity, there may also be certain restrictions in terms of height or age. It is crucial to abide by these restrictions to prevent accidents or injuries. Make sure to clearly communicate these restrictions to everyone who will be using the swing.
Regularly Inspecting the Swing for Wear and Tear
Over time, indoor swings can experience wear and tear, which can compromise their safety. To prevent accidents and injuries, it is essential to regularly inspect the swing for any signs of damage. Ensure that all the hanging hardware is secure and not worn out. Check the ropes or chains for fraying or weakening. Inspect the seat and ensure it is free from any cracks or breaks.
Develop a routine for inspecting the swing. Consider doing a visual inspection before each use, looking for any visible signs of wear or damage. Once a month, perform a more detailed inspection, checking all the components thoroughly. If you notice any issues, suspend use of the swing immediately and either repair or replace the damaged parts.
A well-maintained indoor swing is safer and provides a better user experience. By regularly inspecting the swing, you can catch any potential problems early on and address them promptly.
Maintenance And Cleaning
Maintenance and cleaning are crucial aspects of keeping your indoor swing in top condition. Regular care ensures that your swing remains safe and enjoyable for years to come. In this section, we will discuss how to clean the swing fabric or wooden surfaces and lubricate any moving parts for smooth operation.
Cleaning the swing fabric or wooden surfaces
Cleaning the swing fabric or wooden surfaces not only keeps them looking their best but also helps prolong their lifespan. Follow these steps to ensure effective cleaning:
- Remove any loose debris: Before cleaning, remove any loose dirt, dust, or leaves from the swing fabric or wooden surfaces using a soft brush or a handheld vacuum cleaner.
- Prepare a cleaning solution: Mix a mild detergent or gentle cleanser with warm water in a bucket or basin. Avoid using harsh chemicals or abrasive cleaners as they may damage the material.
- Spot cleaning: Dip a sponge or soft cloth into the cleaning solution and gently scrub any stains or spots on the swing fabric or wooden surfaces. Be careful not to overly saturate the fabric or wood.
- Rinse: After spot cleaning, rinse the swing fabric or wooden surfaces with clean water to remove any remaining residue. Ensure that the fabric or wood is thoroughly rinsed and moisture-free.
- Dry: Allow the swing fabric or wooden surfaces to air dry completely. Avoid direct sunlight as it may cause fading or warping.
Lubricating any moving parts for smooth operation
Keeping the moving parts of your indoor swing well lubricated is essential for smooth operation and to prevent any unnecessary squeaking or sticking. Here’s how you can lubricate the moving parts:
- Identify the moving parts: Take a moment to identify the hinges, joints, or any other moving components of your indoor swing that may require lubrication.
- Select the appropriate lubricant: Use a lubricant specifically designed for the materials used in your swing. Consult the manufacturer’s recommendations or seek expert advice if necessary.
- Apply the lubricant: Apply a small amount of lubricant to the moving parts, ensuring even coverage. Use a rag or cloth to wipe away any excess lubricant.
- Test the swing: Once the lubricant has been applied, gently test the swing to ensure smooth and effortless movement. Make any necessary adjustments or reapply lubricant as needed.
Frequently Asked Questions Of How To Install An Indoor Swing
How Do You Support An Indoor Swing?
To support an indoor swing, you can use a sturdy ceiling beam or a specially designed swing frame. Ensure the support structure is securely installed and can bear the weight. Be mindful of the swing’s height clearance and provide ample space around it to prevent accidents.
How Do You Install An Indoor Swing Chair?
To install an indoor swing chair, follow these steps:
1. Pick a sturdy spot and ensure there’s enough space.
2. Locate a ceiling stud or use a heavy-duty anchor for support.
3. Install the swing hooks or eye bolts securely into the ceiling.
4. Attach the swing chair’s ropes or chains to the hooks.
5. Ensure proper balance and test the swing chair before use.
How To Build An Indoor Swing?
To build an indoor swing, follow these steps:
1. Choose a sturdy location and install hooks or eye bolts.
2. Measure and cut ropes or chains for the swing’s height.
3. Securely attach the ropes or chains to the hooks or eye bolts.
4. Attach the seat using knotting techniques or hardware.
5. Test the swing’s stability and adjust as needed. Enjoy swinging indoors!
How Do You Install A Child Swing On The Ceiling?
To install a child swing on the ceiling, first locate a secure beam. Drill pilot holes into the beam using a stud finder. Install eye screws into the pilot holes. Attach the swing to the eye screws using strong and secure hooks or carabiners.
Ensure everything is safely installed before use.
Conclusion
Installing an indoor swing can be a fun and rewarding DIY project that adds a unique touch to your home decor. By following the step-by-step guide in this blog post, you can easily create a safe and secure space for relaxation and play.
Whether you choose a sturdy ceiling-mounted swing or a freestanding option, the key is to ensure proper installation and regular maintenance. So grab your tools and get ready to swing into a world of fun and relaxation in the comfort of your own home.