To install an air conditioner in a wall, you need to follow a step-by-step process that involves measuring the wall opening, preparing the unit, securing it in place, and connecting the electrical components. (Introduction) Installing an air conditioner in a wall can be a practical and space-saving solution for cooling specific areas of your home or office.
Unlike window units, wall-mounted air conditioners are seamlessly integrated into the wall, providing a clean and sleek appearance. Whether you’re looking to cool a single room or add supplemental cooling to an existing system, knowing how to properly install an air conditioner in a wall is crucial.
This guide will take you through the necessary steps to ensure a successful installation, from measuring the wall opening to connecting the electrical components. So, let’s dive in and learn how to install an air conditioner in a wall efficiently.
Choosing The Right Location For Your Air Conditioner
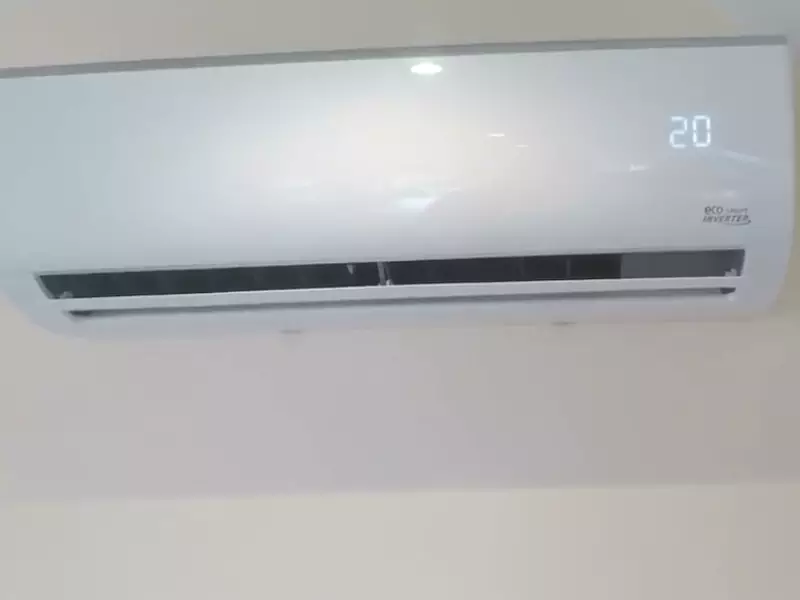
When it comes to installing an air conditioner on a wall, one of the most important considerations is choosing the right location. The placement of your air conditioner can greatly impact its performance and efficiency. In this section, we will discuss how to assess the space and layout, considerations for proper airflow, and determine the location and height of your air conditioner.
Assessing the space and layout
Before the installation process begins, it is crucial to assess the space and layout of the room where the air conditioner will be installed. Start by measuring the dimensions of your wall to ensure that it can accommodate the unit. Additionally, take note of any obstacles such as electrical outlets or furniture that may obstruct the airflow and affect the cooling performance.
Considerations for proper airflow
Proper airflow is essential for the optimal functioning of your air conditioner. You want to ensure that the cool air is distributed evenly throughout the room. To achieve this, consider the following:
- Keep the air conditioner away from curtains, drapes, or any objects that may obstruct the airflow.
- Avoid installing the unit near heat sources such as direct sunlight, stoves, or large appliances that generate heat.
- Allow sufficient space for the air to circulate around the unit, typically recommended by the manufacturer.
By taking these considerations into account, you can ensure that your air conditioner operates efficiently and provides consistent cooling.
Determining the location and height
Now that you have assessed the space and airflow considerations, it is time to determine the ideal location and height for your air conditioner. Here are some guidelines to help you with this decision:
- Choose a location that provides easy access for maintenance and filter cleaning.
- Consider the noise level of your air conditioner and place it away from areas where excessive noise would be bothersome, such as bedrooms or living rooms.
- Install the unit at a height that allows for efficient cooling while considering the ease of use for adjusting temperature or fan settings.
By carefully selecting the location and height for your air conditioner, you can maximize its performance and ensure that it meets your cooling needs.
Measuring And Preparing The Opening
When it comes to installing an air conditioner in a wall, taking accurate measurements and preparing the opening are crucial steps to ensure a successful installation. In this section, we will guide you through the process of measuring the area, gathering the necessary tools and materials, as well as clearing the area and ensuring safety precautions.
Taking Accurate Measurements
The first step in installing an air conditioner in a wall is to take accurate measurements of the opening. This will ensure that the air conditioner fits properly and operates efficiently. Here’s how you can do it:
- Measure the height, width, and depth of the air conditioner unit. Make sure to measure the actual unit, not just the packaging dimensions.
- Take precise measurements of the opening in the wall where you plan to install the air conditioner. Measure the height, width, and depth of the opening, and make note of any obstructions such as vents or electrical outlets that might affect the installation.
- Once you have the measurements, use a level to ensure that the opening is plumb and square. This will help ensure a proper fit for the air conditioner.
- Take additional measurements of the clearances required by the manufacturer for proper airflow. These clearances are important for the air conditioner to function effectively and prevent overheating.
Gathering Necessary Tools and Materials
Now that you have accurate measurements of the opening, it’s time to gather the necessary tools and materials for the installation. Here’s a list of what you’ll need:
| Tools | Materials |
|---|---|
|
|
Clearing the Area and Ensuring Safety Precautions
Before starting the installation, it’s important to clear the area where the air conditioner will be installed and take necessary safety precautions. Here’s what you should do:
- Remove any obstacles or furniture that may be in the way of the installation.
- Ensure that there are no electrical wires or pipes running through the wall where you’ll be installing the air conditioner. If there are, it’s best to call a professional to relocate them before proceeding.
- Make sure to turn off the power to the room where the air conditioner will be installed. This will prevent any accidents or electrical mishaps during the installation process.
- Wear appropriate protective gear, such as gloves and safety glasses, to protect yourself from any potential hazards.
By following these steps and adhering to the necessary safety precautions, you’ll be well-prepared to install an air conditioner in a wall. In the next section, we will guide you through the actual installation process, ensuring a cool and comfortable environment in your space.

Mounting The Bracket On The Wall
Installing an air conditioner in a wall can provide efficient cooling and an aesthetic appeal to any room. One crucial step in this process is mounting the bracket on the wall. This step ensures that the air conditioner is securely held in place and functions optimally. In this section, we will guide you through the necessary steps to align the bracket with the chosen location, mark and drill pilot holes, and securely fasten the bracket to the wall.
Aligning the bracket with the chosen location
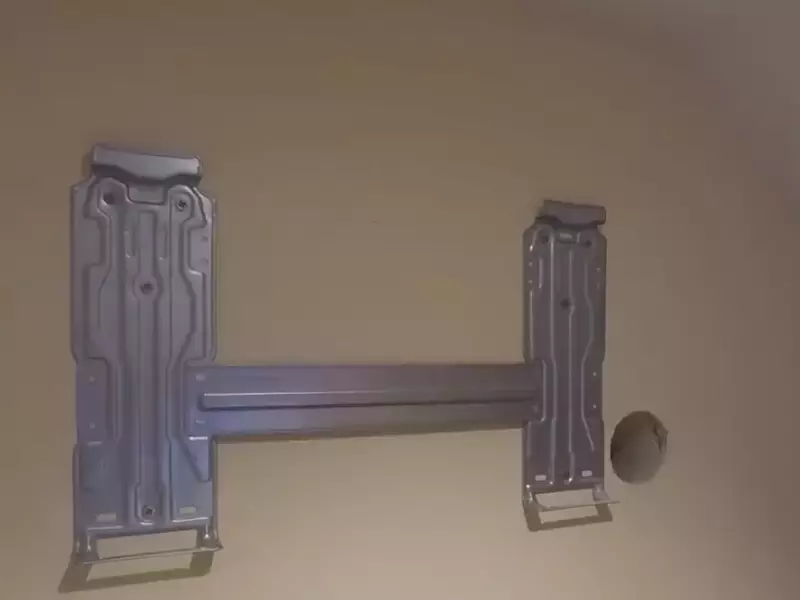
Before installing the bracket, it’s important to choose the optimal location on the wall for your air conditioner. Make sure it is close to a power source and away from any obstructions such as furniture or curtains. Once you have selected the ideal spot, follow these steps to align the bracket correctly:
- Use a level to ensure that the chosen location is perfectly straight.
- Hold the bracket against the wall, making sure it is parallel to the floor.
- Adjust the position if needed, until the bracket is aligned correctly.
Marking and drilling pilot holes
Once the bracket is properly aligned, it’s time to mark and drill pilot holes. These holes will act as guides for securely mounting the bracket to the wall. Follow these steps:
- Using a pencil, mark the screw hole positions on the wall through the bracket’s pre-drilled holes.
- Double-check the alignment of the bracket before proceeding.
- Using an appropriate drill bit size, carefully drill pilot holes at the marked positions.
- Make sure to drill the holes to the appropriate depth, according to the air conditioner manufacturer’s instructions.
Securing the bracket firmly to the wall
Once the pilot holes are drilled, it’s time to secure the bracket firmly to the wall. Follow these steps:
- Insert the appropriate screws into the pilot holes, ensuring they are long enough to provide a secure attachment.
- Tighten the screws using a screwdriver or drill, but be careful not to overtighten and damage the bracket or wall.
- Double-check the bracket’s alignment and stability after securing it to the wall.
- If necessary, use wall anchors for added stability, especially if the wall material is not strong enough to support the weight of the air conditioner.
By following these steps to mount the bracket on the wall correctly, you are laying the foundation for a successful air conditioner installation. With the bracket securely in place, you can proceed to install the air conditioner and enjoy cool, comfortable air in your space.
Inserting The Sleeve Into The Wall
Inserting the sleeve into the wall is a crucial step in the installation process as it provides the foundation for your air conditioner unit. Follow these steps to ensure a proper and secure fit.
Creating an Opening for the Sleeve:
Before inserting the sleeve, you need to create an opening in the wall. Here’s how you can do it:
- Identify the desired location for your air conditioner unit and measure the dimensions of the sleeve.
- Using a stud finder, locate and mark the position of any studs in the wall. You’ll want to avoid these when creating the opening.
- With safety goggles and gloves on, carefully cut through the drywall using a reciprocating saw or a keyhole saw. Start from the marked position and work your way around to create a rectangular or square-shaped opening.
- Remember to check the manufacturer’s instructions for specific dimensions and clearance requirements for the sleeve. This will help you create an appropriately sized opening.
Placing the Sleeve into the Opening:
Once you’ve created the opening, it’s time to place the sleeve in position. Follow these steps:
- Clean any debris or loose materials from the opening to ensure a clean and secure fit.
- Position the sleeve within the opening, making sure it aligns properly and sits flush against the wall.
- Check the level of the sleeve using a carpenter’s level. Adjust as necessary to ensure a perfectly straight and plumb installation.
- Once the sleeve is level, secure it in place by driving screws through the pre-drilled holes on the flange of the sleeve. Make sure the screws penetrate into the studs or other suitable anchoring points.
- Double-check the level and alignment of the sleeve after securing it to ensure it hasn’t shifted in the process.
Leveling and Securing the Sleeve Properly:
Proper leveling and securing of the sleeve is essential to prevent any air leaks or structural issues. Follow these additional steps:
- Check the level of the sleeve again, both horizontally and vertically, using a carpenter’s level. Adjust if needed.
- Use shims or other leveling devices to fine-tune the positioning of the sleeve, ensuring it remains level and plumb in all directions.
- Secure the sleeve further by adding additional screws or fasteners as recommended by the manufacturer. This will help strengthen the installation and prevent any potential movement.
By following these steps diligently, you can successfully insert the sleeve into the wall of your air conditioner unit. Remember to refer to the manufacturer’s instructions for any specific guidance related to your particular model
Proper Electrical Wiring And Connections
When installing an air conditioner in a wall, one of the most critical aspects is ensuring proper electrical wiring and connections. This step is crucial for the safe and efficient operation of the unit. In this section, we will discuss the necessary steps to follow when dealing with electrical wiring and connections for your air conditioner installation.
Turning off the main electrical supply
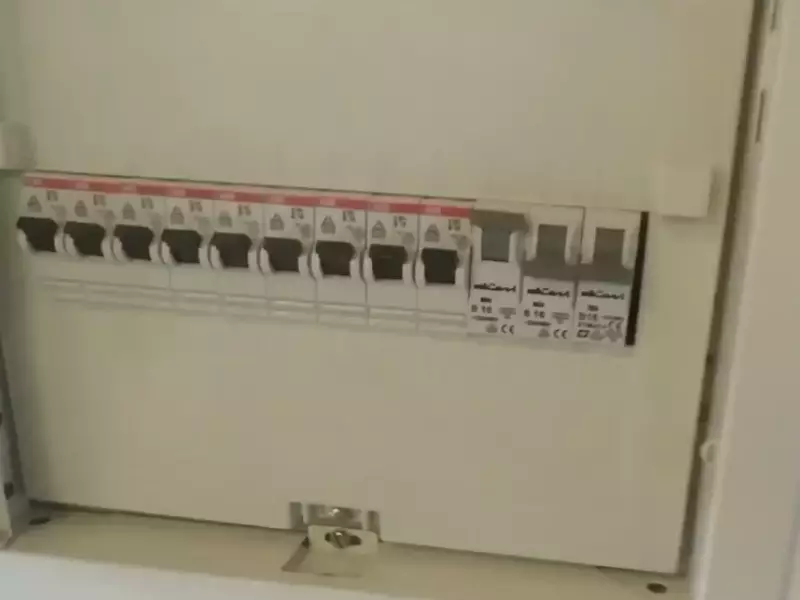
Before starting any electrical work, it is imperative to turn off the main electrical supply to avoid any risk of electric shock or short circuits. Locate the main electrical panel in your home and switch off the relevant circuit breaker or remove the appropriate fuse. Take note that some installations may require a professional electrician to handle the disconnection process.
Selecting the correct wiring method
When it comes to selecting the wiring method for your air conditioner unit, it is essential to adhere to the electrical code requirements and manufacturer’s guidelines. There are generally two options available:
- Non-metallic sheathed cable (Romex): This type of wiring is commonly used for residential applications. It consists of insulated wires wrapped in a flexible plastic jacket, providing protection against mechanical damage. Ensure that the Romex cable used is of the appropriate gauge and has the necessary grounding.
- Metallic conduit: If your local electrical code requires the use of metallic conduit, it is crucial to follow the guidelines for proper installation. Metallic conduit offers superior protection against physical damage and can be used in various environmental conditions.
Connecting the wires to the air conditioner unit
Once you have selected the correct wiring method, the next step is to connect the wires to the air conditioner unit. It is essential to consult the installation manual provided by the manufacturer for specific instructions. Generally, you will find three sets of wires that need to be connected:
- Power supply wires: These wires are responsible for delivering electricity to the air conditioner unit. Identify the wires labeled as ‘line’ or ‘power’ and connect them to the corresponding terminals on the unit.
- Neutral wire: The neutral wire completes the electrical circuit and ensures proper functioning. Connect the neutral wire to the terminal indicated as ‘N’ or ‘neutral’.
- Ground wire: The ground wire provides a safety mechanism to divert electrical faults. Connect the ground wire to the terminal marked as ‘G’ or ‘ground’.
Ensure that each wire connection is secure and tightly fastened, using wire nuts or terminal screws provided with the air conditioner unit. Avoid leaving any exposed wires or loose connections, as they can lead to electrical hazards or equipment malfunction.
By following these steps, you can ensure proper electrical wiring and connections for your wall-mounted air conditioner installation. Remember to consult a professional if you are unsure about any part of the process or if your local electrical code requires it. Keeping safety as a priority, you can enjoy the cool comfort provided by your air conditioner with peace of mind.
Installation And Alignment Of The Air Conditioner
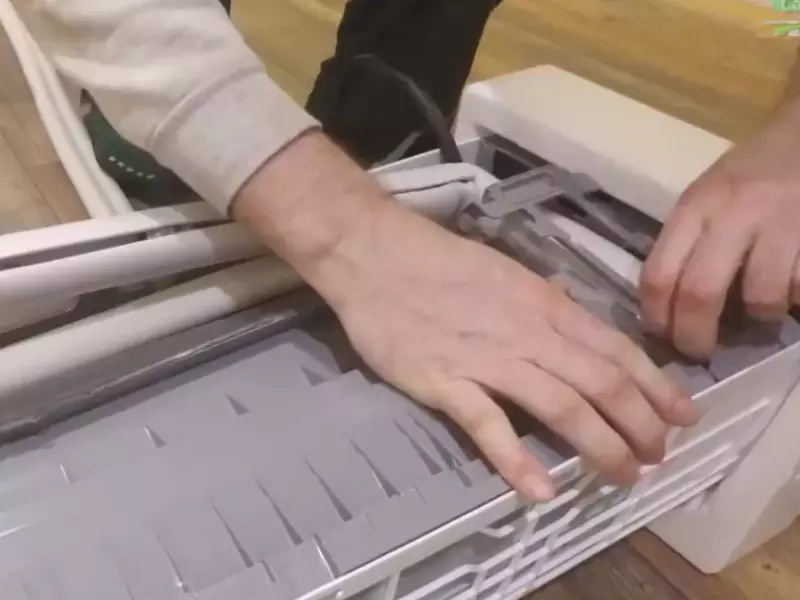
Installing an air conditioner in a wall can be a daunting task, but with the right guidance, it can be a breeze. One of the key steps in the installation process is ensuring proper fit and alignment. In this section, we will guide you through the process of sliding the unit into the sleeve, ensuring a proper fit and alignment, and securing the air conditioner to the bracket.
Sliding the unit into the sleeve
Once you have prepared the wall for the installation, it’s time to slide the air conditioner unit into the sleeve. Before doing so, carefully read the manufacturer’s instructions to ensure you are following the correct steps for your specific model.
Here’s how to slide the unit into the sleeve:
- Start by removing any protective coverings or packaging materials from the unit.
- Lift the air conditioner and align it carefully with the opening of the sleeve.
- Slowly slide the unit into the sleeve, making sure it is level and centered.
- Take your time and make any necessary adjustments to ensure a perfect fit.
Ensuring a proper fit and alignment
Once the unit is in the sleeve, it’s critical to ensure a proper fit and alignment to maximize functionality and energy efficiency. Follow these steps to ensure a proper fit:
- Check for any gaps between the unit and the sleeve. Gaps can result in air leakage and reduced efficiency, so it’s important to address them.
- Use a level to ensure the unit is perfectly horizontal. Adjust the unit if necessary by adding or removing shims.
- Check the alignment of the unit with the opening in the wall. It should be centered and flush with the wall.
- Inspect the insulation around the unit to ensure it is properly installed and seals any gaps.
Securing the air conditioner to the bracket
Once the unit is properly aligned, it’s time to secure it to the bracket for added stability. Follow these steps to secure the air conditioner:
- Locate the mounting holes on the sides of the unit and align them with the corresponding holes in the bracket.
- Insert the mounting screws through the holes and tighten them using a screwdriver or a drill, being careful not to overtighten.
- Double-check the alignment of the unit after securing it to the bracket to ensure it hasn’t shifted during the installation.
By following these steps, you can ensure a successful installation and alignment of your air conditioner in a wall. Proper installation and alignment not only improve the performance of the unit but also help maintain its longevity. Take your time, follow the manufacturer’s instructions, and enjoy the cool comfort that your newly installed air conditioner brings.
Testing The Air Conditioner
Once you have successfully installed the air conditioner into a wall, it is important to test its functionality to ensure it is running efficiently. This testing phase allows you to identify any issues or irregularities early on, preventing potential problems down the line. In this section, we will cover the necessary steps to test an air conditioner installed in a wall, under the following H3 headings adhering to HTML syntax:
Powering on the unit and checking for functionality
To start the testing process, power on the air conditioner unit by using the designated power switch or remote control. Listen carefully for any unusual sounds, such as buzzing or rattling, which may indicate a problem.
Next, ensure that the air conditioner fan is running smoothly. Place your hand near the grill to feel the airflow. If there is no air coming out, check the air filters to see if they are dirty and need cleaning or replacing. Clean filters allow for optimal air circulation, ensuring cooler air output.
Adjusting the settings and testing different modes
Once the air conditioner is running properly, you can proceed to adjust the settings and explore the different modes it offers. Experiment with the temperature settings, starting from the highest to the lowest, to confirm that the air conditioner is following your commands accurately.
Additionally, test each available mode, such as cooling, heating, fan-only, and dehumidifying. This way, you can ensure that the air conditioner is functioning correctly in each mode and that the desired temperature is achieved accordingly.
Verifying proper cooling and airflow
Finally, it is crucial to verify that the air conditioner is providing the necessary cooling and airflow to effectively cool the room. Run the air conditioner for a sufficient amount of time, such as thirty minutes, to allow it to reach its full cooling capacity.
Check for any areas in the room that are not being cooled adequately. If you notice any inconsistencies, such as warm spots or weak airflow, there might be an issue with the air conditioner’s positioning, obstructed vents, or clogged filters. Address these and make the necessary adjustments to optimize the cooling and airflow performance.
Sealing And Insulating The Gaps
When installing an air conditioner in a wall, sealing and insulating the gaps is a crucial step to ensure the proper functioning of the unit. Filling any gaps between the sleeve and wall, insulating the area to prevent drafts and energy loss, and checking for any air leaks are important measures that will not only improve the efficiency of your air conditioner but also help you save on energy costs. In this section, we will guide you through these steps to help you make sure your air conditioner is properly sealed and insulated.
Filling any gaps between the sleeve and wall
The first step in sealing and insulating your air conditioner is to fill any gaps between the sleeve and the wall. These gaps can allow hot or cold air to escape, reducing the unit’s efficiency. To fill the gaps, you can use a high-quality sealant or caulk specifically designed for air conditioning installations. Apply the sealant generously around the edges of the sleeve, making sure to cover any gaps or openings. Smooth out the sealant with a putty knife or your fingers to create a tight and seamless seal. Allow the sealant to dry completely before moving on to the next step.
Insulating the area to prevent drafts and energy loss
Insulating the area around the air conditioner is essential to prevent drafts and energy loss. This can be done by using insulation foam or fiberglass insulation. Start by measuring the dimensions of the space between the sleeve and the wall. Cut the insulation material to fit the measurements and place it snugly in the gaps.
Make sure to cover all sides, top, and bottom of the sleeve to create a barrier against air leakage. Additionally, you can use foam or rubber gaskets to seal any remaining gaps around the edges of the sleeve. This added insulation will not only improve the cooling efficiency of your air conditioner but also reduce noise and provide optimal comfort.
Checking for any air leaks and making necessary adjustments
Once you have sealed and insulated the gaps, it is important to check for any air leaks and make necessary adjustments. Turn on the air conditioner and carefully inspect the area around the sleeve and wall. Run your hand along the edges, feeling for any drafts or air leakage. If you detect any leaks, apply additional sealant or insulation foam to those areas. It is crucial to ensure that the unit is properly sealed to avoid wasting energy and to maintain the desired temperature. Repeat this process until no air leaks are detected and the unit operates efficiently.
By sealing and insulating the gaps when installing an air conditioner in a wall, you can enhance its performance and energy efficiency. Properly filled gaps, thorough insulation, and checking for air leaks are essential steps to ensure that your air conditioner operates optimally, saving energy and providing comfort in your space.
Frequently Asked Questions For How To Install An Air Conditioner on a Wall
Can You Install A Wall Air Conditioner Yourself?
Yes, you can install a wall air conditioner yourself. However, it is important to follow the manufacturer’s instructions carefully to ensure proper installation. If you are unsure or not experienced with electrical work, it is recommended to hire a professional for installation to ensure safety and efficient operation.
How Much Does It Cost To Put An AC in A Wall?
The cost of installing an AC in a wall can vary depending on factors such as the size of the unit and the complexity of the installation. On average, you can expect to pay between $500 and $2,500 for installation.
Can You Install A Window AC unit on a Wall?
Yes, you can install a window AC unit on a wall. It requires cutting a hole and ensuring proper support and insulation. However, it’s important to consult with experts to ensure safety and proper installation.
How Are Wall Mounted Air Conditioners Installed?
Wall mounted air conditioners are installed by attaching a mounting bracket to the wall, securing the unit to the bracket, and connecting it to electrical and drainage systems. Professional installation is recommended to ensure correct placement and proper function.
Conclusion
Installing an air conditioner in a wall may seem daunting, but with the right steps, it can be a relatively easy process. By following the guidelines mentioned in this blog post, you’ll be able to ensure a smooth installation process.
Remember to measure accurately, choose the right location, and hire a professional if needed. With a properly installed air conditioner, you can enjoy a comfortable and cool environment in your home all summer long.
