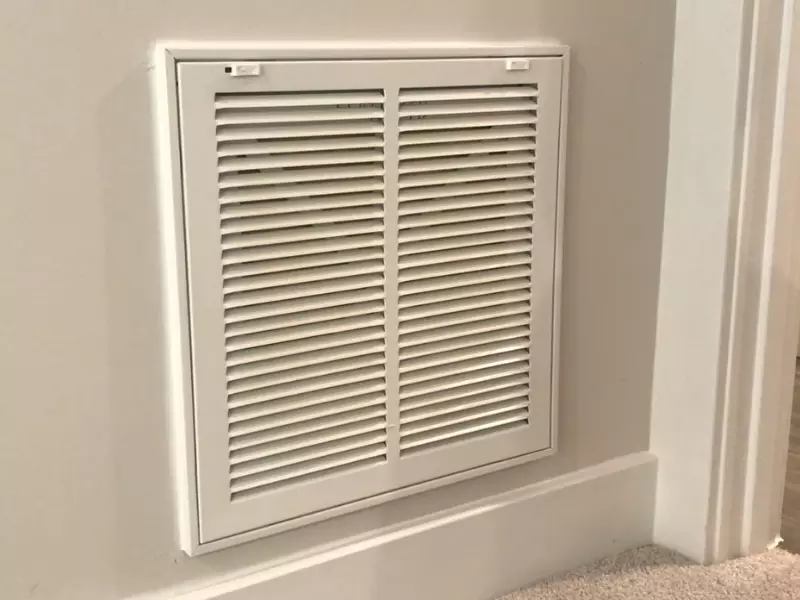
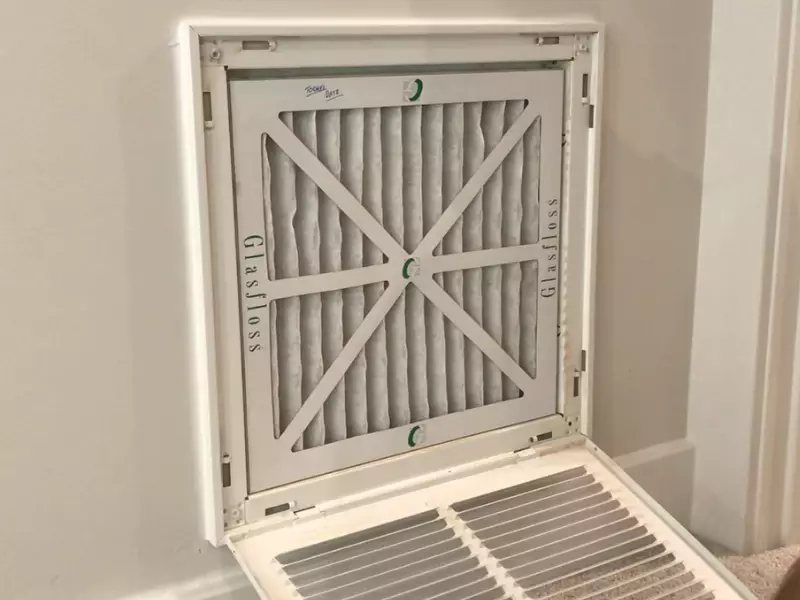
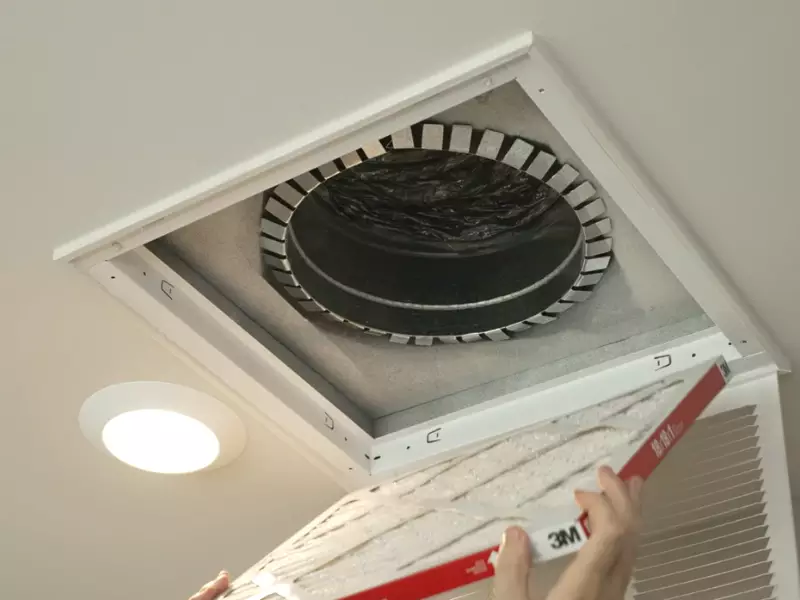
To install an air filter in a wall, first locate the air return grille on the wall. Then, remove the grille and insert the air filter into the slot behind it.
Choosing The Right Air Filter For Your Wall Unit
When it comes to maintaining the air quality in your home, installing an air filter in your wall unit is a crucial step. Not only does it help to keep the air clean and fresh, but it also prevents the accumulation of dust, allergens, and other pollutants. However, choosing the right air filter for your wall unit is equally important. In this section, we will discuss the importance of selecting the correct air filter and the factors to consider when making your decision.
Importance of selecting the correct air filter
When it comes to selecting an air filter for your wall unit, the importance cannot be overstated. A good air filter not only improves the indoor air quality but also enhances the overall performance and efficiency of your wall unit. By capturing particles and pollutants, it prevents them from circulating in your home and potentially causing health issues. Moreover, a properly selected air filter can even extend the lifespan of your wall unit by minimizing dirt and debris buildup within its components.

Factors to consider when choosing an air filter
Filtration efficiency
The filtration efficiency of an air filter is a vital factor to consider. It determines the filter’s ability to trap and remove airborne particles of various sizes. Air filters with higher filtration efficiency are capable of capturing smaller particles, including dust mites, pollen, pet dander, and other allergens. Look for air filters with a high Minimum Efficiency Reporting Value (MERV) rating, as they offer better filtration and improved air quality.
Airflow
Adequate airflow is crucial for optimal performance of your wall unit. This factor plays a significant role in maintaining a balanced indoor environment. When selecting an air filter, make sure to choose one that allows sufficient airflow while effectively capturing airborne particles. Restricting the airflow excessively can strain your wall unit, leading to decreased efficiency and increased energy consumption.
Size compatibility
When it comes to air filters, one size does not fit all. Each wall unit has its own filter size specifications. Before purchasing an air filter, ensure that it is compatible with your wall unit’s dimensions. Using an ill-fitting filter can leave gaps, compromising its effectiveness and allowing pollutants to bypass the filter.
Filter lifespan
The lifespan of an air filter varies depending on factors such as the level of pollution in your area, the number of occupants in your home, and the overall air quality. It is essential to choose an air filter that has a decent lifespan. Changing the filter regularly ensures efficient air filtration and prevents clogging, which can strain your wall unit. Check the manufacturer’s recommendations for the filter lifespan and create a maintenance schedule accordingly.
By considering these important factors, you can choose the right air filter for your wall unit. Remember, selecting an appropriate air filter not only improves indoor air quality but also contributes to the efficiency and longevity of your wall unit, ultimately creating a healthier and more comfortable living environment for you and your family.
Steps To Measure And Prepare Your Wall Unit
Installing an air filter in your wall unit is a simple yet essential step in maintaining good indoor air quality. By properly measuring and preparing your wall unit, you can ensure that your air filter fits snugly and efficiently removes unwanted particles from the air. In this section, we will guide you through the necessary steps to measure and prepare your wall unit for the air filter installation.
Measuring the dimensions of your wall unit
Before purchasing an air filter, it is crucial to measure the dimensions of your wall unit. This step ensures that you select a filter that perfectly fits your unit, maximizing its effectiveness. To measure the dimensions, follow these easy steps:
- Locate a measuring tape or ruler.
- Measure the width, height, and depth of your wall unit.
- Write down the measurements for future reference.
Identifying the filter slot location
Each wall unit has a designated filter slot where the air filter should be inserted. Locating this slot is necessary to ensure proper installation. To identify the filter slot location:
- Refer to your wall unit’s manufacturer’s manual for guidance.
- Inspect your wall unit for any visible slots or compartments.
- If in doubt, consult a professional technician or contact the manufacturer for assistance.

Cleaning the filter slot area
Before inserting a new air filter, it is essential to clean the filter slot area to remove any dirt, dust, or debris that may have accumulated over time. Here’s how to clean the filter slot area effectively:
- Gently remove the existing air filter (if any) from the slot, following the manufacturer’s instructions.
- Use a vacuum cleaner or a soft brush to remove dust and debris from the slot.
- Wipe the slot with a damp cloth to ensure it is clean and free from any remaining particles.
Gathering necessary tools for installation
Before installing the air filter, gather the necessary tools to ensure a smooth and efficient installation process. Here are some essential tools you may need:
| Tools | Description |
|---|---|
| Screwdriver | To remove the wall unit’s cover if necessary. |
| Measuring tape or ruler | To measure the dimensions of your wall unit. |
| Vacuum cleaner or soft brush | To clean the filter slot area. |
| Damp cloth | To wipe the filter slot area. |
By following these steps and gathering the necessary tools, you can effectively measure and prepare your wall unit for the air filter installation. Taking the time to properly prepare your wall unit ensures optimal performance, cleaner air, and a healthier living environment.
Installing The Air Filter In Your Wall Unit
Proper installation of an air filter in your wall unit is crucial for maintaining clean and healthy indoor air quality. A clean air filter not only ensures efficient operation of your unit but also helps in removing dust, allergens, and pollutants, resulting in improved air circulation and a more comfortable living environment.
Removing the old filter (if applicable)
If you are replacing an existing air filter, start by locating the access panel. This panel is usually situated on the front or side of the wall unit. Remove any screws or fasteners holding the panel in place, and carefully slide the panel out.
Inserting the new filter correctly
Before inserting the new filter, take note of its dimensions. This information can be found on the filter frame or in the user manual. To ensure correct insertion, match the dimensions and labeling on the new filter with the old one.
Once you have the correct filter, carefully slide it into the designated slot inside the unit. Make sure to follow the directional arrows on the filter, as this ensures proper airflow. Double-check that the filter fits snugly without any gaps or air leaks.
Securing the filter in place
To prevent the filter from accidentally sliding out of position, it is important to secure it. This can be done by using the provided clips or latches on the access panel. If your unit does not have clips or latches, you can use adhesive strips or tape to keep the filter in place.
Verifying proper installation
After securing the filter, return the access panel to its original position and fasten any screws or fasteners. Ensure that the panel is securely closed.
To verify proper installation, turn on your wall unit and check for any unusual noises or vibrations. Observe the airflow coming from the vents – it should be consistent and free from any restrictions. If you notice any issues, recheck the filter to ensure it is correctly installed.
Regular maintenance is essential to keep your air filter functioning optimally. It is recommended to replace the air filter every 1 to 3 months, depending on the manufacturer’s guidelines and the air quality of your surroundings. By following these steps and replacing your air filter as needed, you can enjoy cleaner, healthier air and prolong the lifespan of your wall unit.

Tips For Proper Maintenance And Replacement
Regular cleaning and maintenance schedule
Regular cleaning and maintenance of your air filter is crucial to ensure optimal performance and clean air throughout your home or office. By following a consistent cleaning schedule, you can extend the lifespan of your filter and avoid any potential issues caused by a clogged or dirty filter.
A good rule of thumb is to clean your air filter every 30 days or once a month. However, this timeline can vary depending on factors such as the level of air pollution in your area, the presence of pets, and the number of occupants in your space. If you notice that the filter appears visibly dirty or if there is a decrease in air quality, it may be necessary to clean it more frequently.
Cleaning your air filter is a relatively simple process and can be done in a few easy steps. Start by turning off your HVAC system to prevent any accidental damage. Remove the filter from the wall unit and gently vacuum both sides to remove any dust and debris. If the filter is particularly dirty, you can wash it with mild soap and water, ensuring that it is completely dry before reinstalling.
Signs that indicate the need for filter replacement
While regular cleaning can help maintain your air filter’s efficiency, there may come a time when replacement is necessary. It’s important to be aware of the signs that indicate the need for a new filter to ensure the air quality in your space remains at its best.
One of the telltale signs that a filter needs to be replaced is a noticeable decrease in airflow. If you notice that your HVAC system is not providing the same level of air circulation as before, it may be a sign that the filter is clogged and restricted airflow. Another indicator is an increase in dust and allergens in your home. If you find yourself constantly dusting furniture or experiencing allergy symptoms, it could be because the filter is no longer effectively trapping particles.
Steps to properly replace the filter
When it’s time to replace the air filter in your wall unit, follow these steps to ensure a proper installation:
- Start by turning off the HVAC system to prevent any potential damage.
- Locate the filter compartment in your wall unit. It is typically located behind a vent cover or grille.
- Remove the cover or grille to access the filter compartment.
- Take note of the size and type of filter that is currently installed. This information is usually labeled on the filter frame or the unit itself.
- Purchase a replacement filter that matches the size and type of the old filter. It’s important to use the correct size filter to ensure a proper fit and maximum effectiveness.
- Carefully remove the old filter from the compartment and dispose of it properly.
- Insert the new filter into the compartment, making sure it is aligned properly with the airflow direction indicated on the filter.
- Replace the cover or grille, ensuring it is securely fastened.
- Turn on the HVAC system and monitor its performance to ensure proper airflow and improved air quality.
Resources for purchasing replacement filters
When it comes to purchasing replacement filters for your wall unit, there are several options available. Here are a few resources to consider:
- Local HVAC stores: Visit your local heating and cooling supply stores to find a wide range of filters suitable for your wall unit. The staff can also provide guidance on choosing the right filter for your specific needs.
- Online retailers: Online marketplaces and websites dedicated to HVAC supplies offer a convenient way to browse and purchase replacement filters. Be sure to specify the correct dimensions and type when ordering.
- Manufacturer websites: Check the official websites of the manufacturer of your wall unit for authorized replacement filters. This ensures compatibility and quality.
By following these tips for proper maintenance and replacement, you can ensure your air filter in the wall unit is always in top condition, providing clean and fresh air for you and your loved ones.

Troubleshooting Common Problems
Installing an air filter in the wall is a smart decision to improve the air quality in your home. However, like any other household appliance, it can encounter some common problems that may affect its performance. In this section, we will address these issues and provide solutions to help you troubleshoot and resolve them.
Filter compatibility issues
One of the most common problems you may encounter when installing an air filter in the wall is filter compatibility. It’s essential to ensure that the filter you purchase is compatible with your unit. When installing a new filter, check the specifications recommended by the manufacturer to determine the right size and type of filter that fits your unit.
If you are unsure about the compatibility of the filter, refer to the user manual or contact the manufacturer for guidance. Using the wrong filter can lead to inadequate filtration and may even damage your unit.
Airflow restriction problems
Airflow restriction is another common issue that affects the performance of an air filter in the wall. When the air filter becomes clogged with dirt, dust, and debris, it can restrict the airflow, making your unit less efficient in filtering the air.
To address this problem, regularly inspect and clean or replace the air filter as recommended by the manufacturer. This will help maintain optimal airflow and ensure proper filtration. Additionally, keeping the surrounding area clean and free from obstructions can also help prevent airflow restriction.
Filter bypass or gaps
Another issue that may arise when installing an air filter in the wall is filter bypass or gaps. If the filter does not fit snugly or there are gaps between the filter and the wall, air may bypass the filter, reducing its effectiveness. This can result in poor indoor air quality and increased allergens in your home.
To address this problem, carefully inspect the filter installation and make sure it fits securely in the wall without any gaps. If necessary, you can use weatherstripping or adhesive foam tape to seal any gaps and ensure a tight fit. This will help prevent air bypass and ensure that all air passes through the filter for effective filtration.
Addressing unusual odors or allergies
If you notice unusual odors or experience increased allergies despite having an air filter in the wall, there may be underlying issues that need to be addressed. It could be due to mold growth, pet dander, or other contaminants in your HVAC system.
In such cases, it is recommended to consult a professional to inspect and clean your HVAC system thoroughly. They can identify and address any issues that may be causing the odors or allergies. Regular maintenance and cleaning of your HVAC system can help prevent these problems and keep the air filter performing optimally.
Frequently Asked Questions Of How To Install Air Filter On Wall
Which Way Does An Air Filter Go In The Wall?
Insert the air filter into the wall with the arrow pointing in the direction of airflow.
How Do You Install A Wall Air Conditioner Filter?
To install a wall air conditioner filter, locate the filter compartment on your unit. Open the compartment and remove the old filter. Insert the new filter, making sure it is properly aligned. Close the compartment and ensure it is securely closed.
Enjoy clean and fresh air from your air conditioner.
Do You Put Filters In Wall Vents?
Yes, it is recommended to put filters in wall vents. Filters help to improve air quality by trapping dust, allergens, and other particles before they enter your home or building. Regularly changing or cleaning the filters can help maintain a healthy and clean environment.
Should There Be An Air Filter In The Return?
Yes, there should be an air filter in the return. Air filters help trap dust, allergens, and other particles, improving air quality and protecting your HVAC system.
Conclusion
Installing an air filter in your wall is a simple and effective way to improve the air quality in your home. By following the step-by-step instructions in this blog post, you can easily ensure that the air you and your family breathe is clean and free from pollutants.
Regularly replacing your air filter will not only promote better health but also extend the lifespan of your HVAC system. Don’t neglect the importance of a properly installed and maintained air filter – it’s an investment in your well-being.
