Installing an AC unit in a wall requires careful steps to ensure proper functionality and compatibility with your wall structure. In this guide, we will outline the precise steps necessary to successfully install an AC unit on your wall.
Choosing The Right Location For Your AC Unit
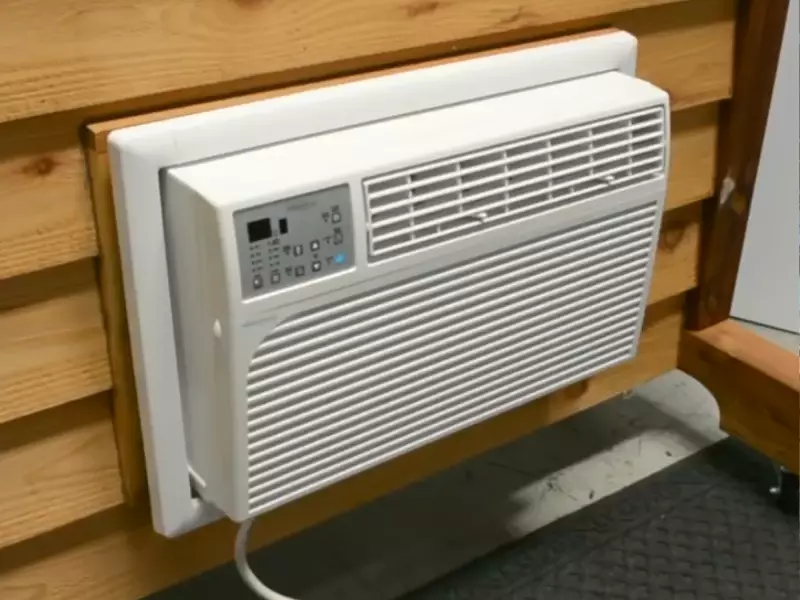
When installing an AC unit on your wall, choosing the right location is crucial. The placement of your AC unit not only affects its performance but also the overall comfort of your space. To ensure optimal cooling and energy efficiency, there are several factors to consider when selecting the ideal location for your AC unit. Additionally, measuring the area accurately will help you ensure a proper fit and prevent any installation complications.
Factors to Consider
Before installing your AC unit in the wall, take into account the following factors:
- Optimal Airflow: Ensure that the chosen location allows for unrestricted airflow. Proper airflow is essential for the unit’s effectiveness in cooling the space and preventing any energy wastage.
- Distance from Obstructions: Keep the AC unit away from any obstructions such as furniture, curtains, or other objects that could impede airflow. Clearing the area around the unit will facilitate better air circulation and efficient cooling.
- Noise Level: Consider the noise produced by the AC unit. If you plan to install it in a bedroom or a study, opt for a location that minimizes noise disruption. This will ensure a quieter and more peaceful environment.
Ideal Placement Considerations
When it comes to finding the perfect spot for your AC unit, keep the following placement considerations in mind:
- Wall Material: Take note of the wall material to determine the feasibility of installation. Some materials may require additional support or reinforcement to securely hold the unit in place.
- Exterior Wall: Installing the AC unit on an exterior wall is generally preferred as it allows for easier access to the outside for venting purposes. Venting out hot air efficiently enables the unit to cool the room effectively.
- Sun Exposure: Consider the amount of sunlight the chosen location receives. If possible, avoid placing the AC unit in direct sunlight as it can impact the unit’s performance and increase energy consumption.
- Room Size: Evaluate the size of the room and the cooling capacity of the AC unit. Ensure that the chosen location provides even distribution of cool air throughout the entire space.
Measuring the Area for Installation
Before proceeding with the installation, it is essential to measure the area accurately. This will help you determine whether the AC unit will fit properly and prevent any potential complications.
Here’s a simple step-by-step guide to measuring the area:
- Measure the width, height, and depth of the AC unit to ensure adequate space for installation.
- Measure the dimensions of the wall where the AC unit will be placed. Ensure that the wall can accommodate the unit without any protrusions or obstructions.
- Consider the required clearance for maintenance and servicing. Allow enough space around the unit to easily access filters, coils, and other essential components for cleaning and maintenance.
- If needed, consult the manufacturer’s specifications to ensure the measurements align with the unit’s requirements.
By carefully considering these factors and taking accurate measurements, you can confidently choose the right location and install your AC unit in the wall effectively.
Preparing For Ac Unit Installation
Installing an AC unit in the wall can be a cost-effective and space-saving solution for cooling your home. However, it is important to properly prepare for the installation process to ensure smooth and hassle-free execution. In this section, we will discuss the necessary tools and materials you will need, safety precautions to take, and how to check for any electrical requirements. Let’s dive in!
Gathering necessary tools and materials
Before you begin the installation process, it is crucial to gather all the necessary tools and materials. This will help you avoid any delays or interruptions during the installation. Below is a list of items you will typically need:
| Tools | Materials |
|---|---|
|
|
Make sure you have all the tools and materials listed above before moving forward with the installation.
Safety precautions
When it comes to any home improvement project, safety should always be a top priority. Before you begin installing the AC unit, consider the following safety precautions:
- Turn off the power: Before you even think about touching any electrical components, make sure to turn off the power from the main circuit breaker.
- Wear protective gear: Protect yourself by wearing gloves, safety goggles, and appropriate clothing.
- Use proper lifting techniques: AC units can be heavy, so it is important to lift with your legs, not your back, to prevent injury.
- Work with a partner: Having someone assist you during the installation can provide an extra set of hands and ensure safer handling of heavy equipment.
- Follow manufacturer instructions: Always refer to the manufacturer’s instructions for specific safety guidelines and installation procedures.
By following these safety precautions, you can minimize the risk of accidents or injuries during the installation process.
Checking for any electrical requirements
Prior to installing the AC unit, it is crucial to check for any electrical requirements to ensure proper functioning. Here’s what you need to do:
- Review the electrical specifications of the AC unit: Check the unit’s manual or specifications sheet to identify the voltage and amperage requirements.
- Inspect your electrical panel: Locate the circuit breaker that will supply power to the AC unit and ensure it can handle the required amperage.
- Hire a professional electrician if needed: If your electrical panel cannot accommodate the AC unit’s requirements, it is best to consult a licensed electrician to upgrade your electrical system.
- Consider additional electrical outlets: If your electrical panel is sufficient, but the AC unit will be located far from an existing outlet, you may need to install additional outlets.
Taking the time to check for electrical requirements will save you from potential problems and ensure the efficient and safe operation of your AC unit.
By gathering the necessary tools and materials, following safety precautions, and checking for any electrical requirements, you are well-prepared to proceed with the installation process. In the next section, we will discuss the steps involved in installing the AC unit in the wall. Stay tuned!
Step-By-Step Guide To Installing An Ac Unit In The Wall
Welcome to our step-by-step guide on installing an AC unit in the wall. Installing an AC unit in the wall can be a great way to keep your home cool and comfortable during the hot summer months. Whether you’re looking to replace an existing AC unit or installing one for the first time, this guide will walk you through the process.
Removing the Exterior Cover
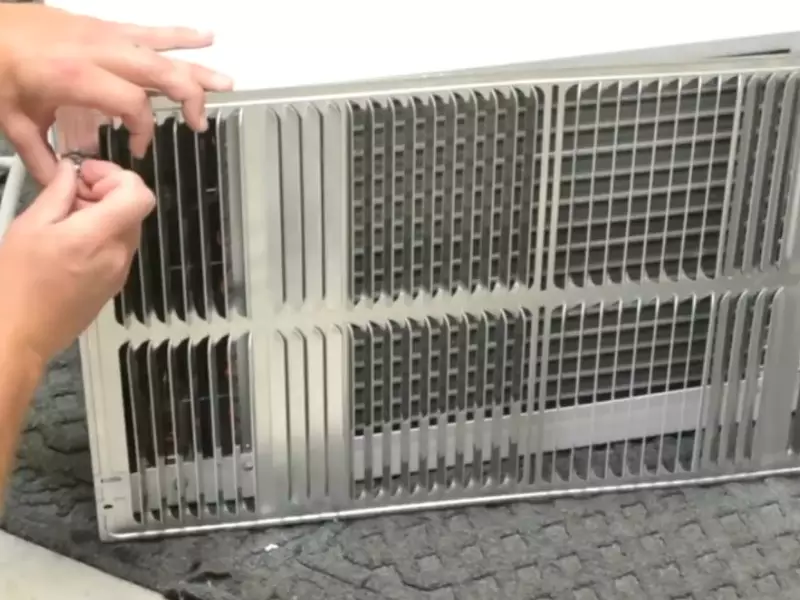
The first step in installing an AC unit in the wall is to remove the exterior cover. This cover protects the unit from the elements and needs to be taken off to access the interior components. To remove the cover, follow these steps:
- Ensure that the AC unit is turned off and disconnected from any power source.
- Locate the screws that hold the cover in place.
- Using a screwdriver, carefully unscrew the screws and set them aside.
- Gently lift the cover off the unit, taking care not to damage any of the components.
Once the cover is removed, you will have clear access to the inside of the AC unit.
Marking the Wall for the Unit
After removing the exterior cover, the next step is to mark the wall for the unit. This ensures that the unit is properly aligned and centered within the wall. Follow these steps to mark the wall:
- Measure the dimensions of the AC unit.
- Using a pencil, mark the top and bottom edges of the unit on the wall.
- Draw a straight line connecting the two pencil marks to create a reference line for the unit.
This reference line will serve as a guide when installing the unit in the wall.
Drilling the Necessary Holes
With the wall marked, the final step is to drill the necessary holes for the AC unit. These holes will allow for proper installation and secure placement. Follow these steps to drill the necessary holes:
- Using a drill, select the appropriate drill bit size for the mounting brackets.
- Align the drill bit with the pencil marks on the reference line.
- Apply steady pressure and drill the holes into the wall.
- Once the holes are drilled, remove any excess debris from the wall.
Now that the necessary holes are drilled, you are ready to install the AC unit in the wall.
In conclusion, the process of installing an AC unit in the wall involves removing the exterior cover, marking the wall for the unit, and drilling the necessary holes. Following these steps will ensure a successful installation and keep your home cool and comfortable.
Installing The AC Unit
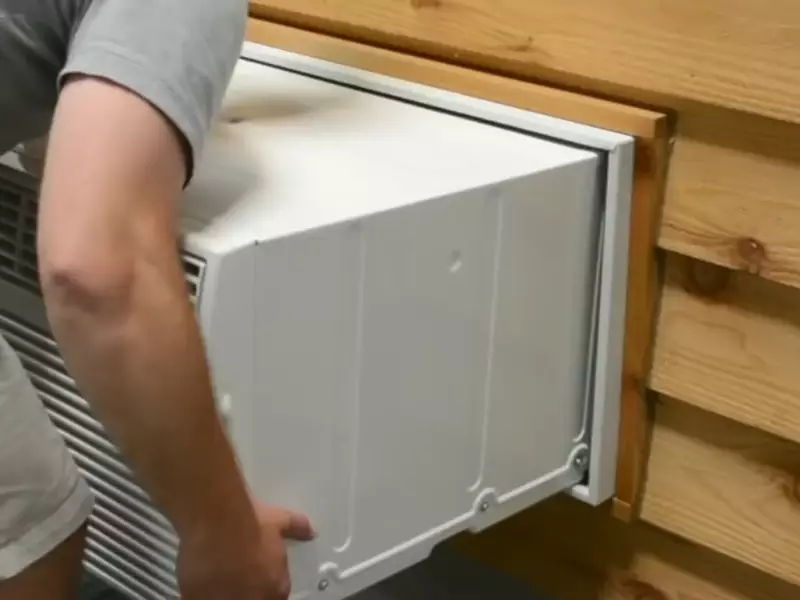
Installing an AC unit in the wall can be a daunting task, but with the right tools and a little know-how, it can be a straightforward process. In this section, we will walk you through the steps to mount the unit onto the wall, connect the electrical wiring, and secure the unit in place.
Mounting the unit onto the wall
The first step in installing the AC unit is to mount it onto the wall. Follow these steps to ensure a secure and stable installation:
- Choose a suitable location on the wall where the unit will be installed. Ensure that the wall can support the weight of the unit and that there is enough clearance for proper airflow.
- Using the mounting brackets provided with the unit, attach them securely to the wall. Make sure to use proper anchors and screws to ensure stability.
- Place the unit onto the mounting brackets and secure it in place using the screws provided. Double-check that the unit is level and properly aligned.
Connecting electrical wiring
Once the unit is mounted onto the wall, the next step is to connect the electrical wiring. Follow these steps to safely connect the wires:
- Turn off the power to the room where the AC unit will be installed. This can usually be done by flipping the circuit breaker.
- Remove the front panel of the unit to access the electrical wiring connections.
- Identify the wires marked for connection, usually labeled as “line” and “load.” Strip the ends of these wires to expose the copper.
- Connect the corresponding wires from the unit to the electrical supply. Ensure that the wires are securely connected and tightened.
Securing the unit in place
Once the unit is mounted and the electrical wiring is connected, the final step is to secure the unit in place. Follow these steps to ensure the AC unit is securely fastened:
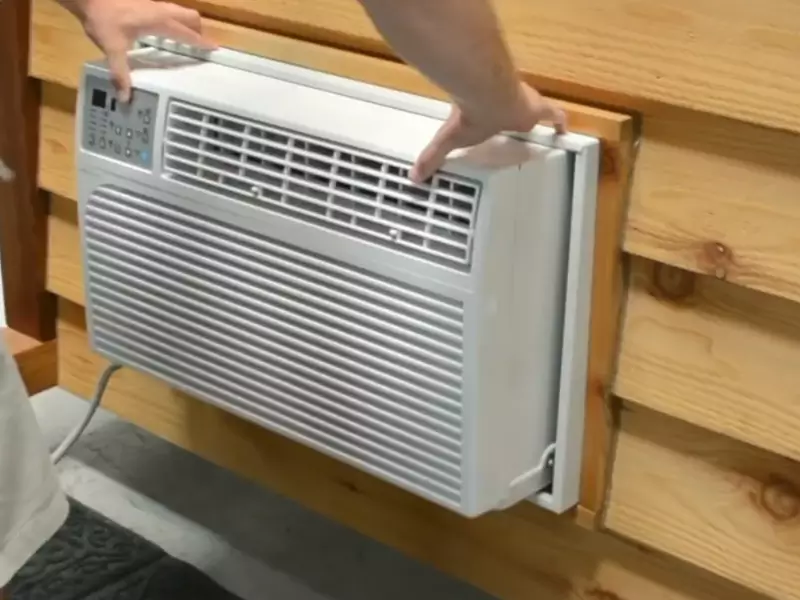
- Using a screwdriver, tighten the screws securing the unit to the mounting brackets. Make sure the unit is firmly attached and doesn’t wobble.
- Apply weatherproof sealant around the edges of the unit to help prevent air leakage.
- Once everything is securely in place, turn on the power and test the AC unit to ensure it is working properly.
By following these steps, you can successfully install an AC unit in the wall. Remember to refer to the manufacturer’s instructions for any specific installation requirements and safety considerations.
Testing And Adjusting The Ac Unit
Once you have successfully installed your AC unit in the wall, it is crucial to test and adjust it properly to ensure optimal performance. This involves powering on the unit, adjusting settings and temperature, and checking for proper airflow and cooling. By following these steps, you can ensure that your AC unit is functioning efficiently and providing you with the desired comfort.
Powering on the unit
To power on your AC unit, locate the power button or switch on the unit’s control panel. Press or flip the switch to turn on the unit. If your AC unit has a remote control, make sure the batteries are properly inserted and use it to power on the unit.
Once the unit is powered on, you should hear the sound of the compressor and the fan starting to operate. Listen for any unusual noises such as clicking or grinding, which could indicate a problem that needs to be addressed.
Adjusting settings and temperature
After powering on the AC unit, it is time to adjust the settings and temperature according to your preferences and the current weather conditions. Most AC units have a control panel or display that allows you to set the desired temperature, fan speed, and mode (cooling, heating, or fan-only).
Use the arrow buttons or knobs on the control panel to increase or decrease the temperature. Set the fan speed to your preferred level, whether it’s low, medium, or high. If your unit has multiple modes, such as a “sleep mode” or “eco mode,” consider using them to optimize energy efficiency.
Checking for proper air flow and cooling
Proper air flow and cooling are essential for the efficient operation of your AC unit. Start by checking if the air filters are clean and free from debris. Dirty filters can restrict air flow and reduce cooling performance. If needed, remove the filters and clean or replace them according to the manufacturer’s instructions.
Next, stand in front of the AC unit and feel the airflow. It should be strong and steady. If the airflow feels weak or uneven, there may be a blockage or a problem with the unit’s fan or ductwork. In such cases, it is recommended to contact a professional technician for assistance.
Finally, place a thermometer near the AC unit to measure the temperature of the cooled air. The temperature should drop steadily as the AC unit runs, indicating that the cooling process is working effectively. If you notice any significant temperature fluctuations or inconsistencies, it may be necessary to have the AC unit serviced or adjusted.
By thoroughly testing and adjusting your AC unit, you can ensure that it is properly functioning and providing you with the cool and comfortable air you desire. Regular maintenance and periodic check-ups are also essential to keep your AC unit in optimal condition for years to come.
Maintenance And Troubleshooting Tips
One of the crucial aspects of owning an AC unit is the regular maintenance and troubleshooting that comes with it. This not only helps prolong the lifespan of your unit but also ensures optimal performance. In this section, we will explore some essential maintenance tasks and common troubleshooting issues, along with the steps to fix them.
Cleaning the Unit Regularly
Regularly cleaning your AC unit is imperative to keep it running efficiently. Dust, dirt, and debris can accumulate and hinder its performance. Here are the steps to clean your AC unit effectively:
- Start by turning off the power to the unit to avoid any accidents.
- Use a soft brush or vacuum cleaner to remove dirt and debris from the exterior of the unit.
- Carefully remove the front cover or grille and clean the condenser fins using a fin comb or brush.
- Inspect the evaporator coils and remove any dirt or mold using a foaming coil cleaner.
- Don’t forget to clean or replace the drain pan to prevent clogging.
- Finally, clean or replace the fan blades for optimal airflow.
Changing Filters
Clean air filters are essential for maintaining good air quality and efficient airflow. Here’s how you can change the filters in your AC unit:
- Identify the location of the air filters, usually found behind the front cover or on the side of the unit.
- Turn off the power to the unit.
- Remove the old filter and dispose of it properly.
- Inspect the new filter and ensure it fits securely in its designated slot.
- Reinstall the front cover and turn the power back on.
Common Issues and How to Fix Them
Despite regular maintenance, AC units can sometimes encounter issues. Here are some common problems you may face and steps to troubleshoot them:
1. Unit Not Cooling Properly
When your AC unit fails to cool the room as expected, check the following:
- Ensure the temperature settings are correctly adjusted.
- Inspect and clean the air filters to remove any blockage.
- Check if there are any leaks in the refrigerant lines and get them fixed.
- Examine the condenser coils for dirt or damage and clean or repair them accordingly.
2. Strange Noises
If you notice unusual noises coming from your AC unit, try these troubleshooting steps:
- Check for any loose parts or connections and tighten them if necessary.
- Examine the fan blades for any debris or damage.
- If the noise persists, it is advisable to contact a professional technician for further diagnosis.
3. Unit Not Turning On
In case your AC unit fails to turn on, follow these troubleshooting steps:
- Check if the power supply is turned on and if there is an active power source.
- Inspect the circuit breaker and ensure it is not tripped.
- Examine the thermostat batteries and replace them if necessary.
- If the issue persists, it is recommended to contact a qualified technician for assistance.
By following these maintenance and troubleshooting tips, you can ensure your AC unit works efficiently and enjoy a comfortable environment all year round. Remember, if you face any complications that you can’t fix yourself, it’s always best to seek professional help.
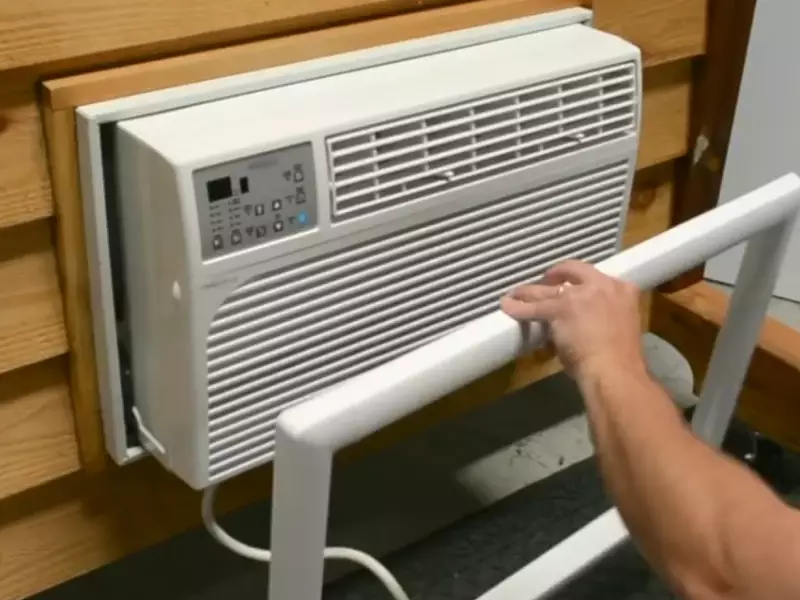
Ensuring Proper Insulation
Installing an AC unit in the wall can greatly improve the comfort of your home, especially during the hot summer months. But in order to maximize its efficiency and keep your energy bills in check, proper insulation is crucial. Ensuring proper insulation not only prevents air leakage but also helps maintain a constant temperature inside your home. In this section, we will discuss three essential steps to ensure proper insulation for your wall-mounted AC unit.
Sealing any gaps or openings
One of the first things to consider when installing an AC unit in the wall is sealing any gaps or openings around the unit. Even the smallest gaps can allow drafts and outside air to infiltrate your home, leading to energy wastage and a loss of cooling efficiency. To seal these gaps, you can use weather-stripping or caulk. Apply the weather-stripping or caulk along the perimeter of the unit, ensuring a tight seal. This will help prevent any air leakage and maintain the desired temperature inside your home.
Insulating the exterior of the unit
Insulating the exterior of the AC unit is another crucial step to ensure proper insulation. The exterior of the unit can be insulated with foam insulation panels or insulating foam spray. Foam insulation panels can be cut to fit the dimensions of the unit and then attached to the wall surrounding the unit. Insulating foam spray can be applied directly to any gaps or openings around the unit. This additional layer of insulation helps to further prevent drafts and air leakage, keeping your home comfortable and energy-efficient.
Preventing drafts and air leakage
When it comes to proper insulation, preventing drafts and air leakage is paramount. Apart from sealing gaps and insulating the exterior, there are a few other steps you can take to ensure maximum insulation. Firstly, check for any cracks or openings in the wall where the unit is mounted and seal them with caulk or weather-stripping. Secondly, ensure that the unit is properly sealed to the wall by using mounting brackets and screws. Lastly, consider using insulation foam or weather-stripping on the interior wall around the unit to create a tight seal. These measures will help prevent air leakage, keeping your home cool and your energy bills under control.
By following these three steps of sealing any gaps or openings, insulating the exterior of the unit, and preventing drafts and air leakage, you can ensure proper insulation for your wall-mounted AC unit. Proper insulation not only enhances the efficiency of your AC unit but also helps create a comfortable living environment while keeping your energy bills in check.
Final Tips And Considerations
As you near the end of your HVAC project, there are a few final tips and considerations that can help ensure a smooth and successful installation of your new AC unit in the wall. By keeping these factors in mind, you can optimize energy efficiency, know when to call a professional, and ensure regulatory compliance and permits.
Energy-saving tips
When it comes to cooling your home, energy efficiency is a top priority. By following these energy-saving tips, you can not only reduce your carbon footprint but also save on your monthly utility bills:
- Seal any air leaks: Inspect the area around the AC unit and plug any gaps or cracks in the wall. This will prevent cool air from escaping and hot air from entering.
- Proper insulation: Ensure the wall where the AC unit will be installed is well-insulated. Good insulation will help maintain the desired temperature inside your home.
- Programmable thermostat: Install a programmable thermostat to regulate the temperature automatically. This will help optimize energy usage and prevent unnecessary cooling.
- Regular maintenance: Schedule routine maintenance checks to keep your AC unit running efficiently. Clean or replace the air filters as recommended by the manufacturer.
When to call a professional
While installing an AC unit in the wall can be a DIY project for some homeowners, there are situations that call for professional assistance. Consider contacting a licensed HVAC technician if you encounter any of the following scenarios:
- Complex installation: If the installation process involves intricate electrical wiring or structural modifications, it is best to leave it to the experts.
- Safety concerns: If you are unsure about handling refrigerant or dealing with the electrical components, it is safer to rely on professionals who are trained in handling these aspects.
- Warranty protection: Having a professional install your AC unit can ensure that the warranty remains valid. Improper installation may void the manufacturer’s warranty.
Regulatory compliance and permits
Before proceeding with the installation, it is crucial to research and comply with local regulations and obtain the necessary permits. Failure to do so may result in fines or issues when selling your home in the future. Here are some key points to consider:
| Regulatory Compliance | Permits |
|---|---|
| Check local building codes and regulations applicable to your area. | Contact your local building department to inquire about the permits required for AC installation. |
| Ensure the installation meets safety standards and guidelines provided by the manufacturer. | Submit the necessary paperwork and pay any applicable fees to obtain the required permits. |
| If you are part of a homeowners association (HOA), make sure the AC unit installation complies with their regulations as well. | Display the permit in a visible location as required by your local building department. |
By adhering to the above tips, you can wrap up the installation process smoothly and confidently. Remember to prioritize energy efficiency, seek professional help when needed, and stay compliant with local regulations. With your newly installed AC unit in the wall, you’ll be ready to enjoy a cool and comfortable indoor environment.
Frequently Asked Questions On How To Install AC Unit In Wall
Can You Put An Ac Unit In A Wall?
Yes, you can install an AC unit on a wall. It’s a convenient option, especially when you have limited space. Make sure to choose a wall that can support the weight of the unit and hire a professional for proper installation to ensure optimal performance and safety.
How Do You Install A mounted AC unit?
Installing a wall mounted AC unit is easy. First, choose the right location on the wall. Next, use a stud finder to locate the studs and mark them. Then, drill holes and install the mounting brackets. After that, attach the unit to the brackets and secure it.
Lastly, connect the power and test the unit.
Can I Install Wall AC without a Sleeve?
No, it is not recommended to install a wall AC without a sleeve. It provides support and insulation, ensuring proper fitting and preventing air leaks. It is essential for the efficient and safe operation of the air conditioner. Always use a sleeve when installing a wall AC.
How Much Does It Cost To Install A In Wall Air Conditioner?
The cost of installing an in-wall air conditioner varies depending on several factors. Generally, you can expect to spend around $500 to $1,500 for the installation, which includes the cost of the unit, labor, and any additional materials needed.
Conclusion
Installing an AC unit in the wall doesn’t have to be a daunting task. By following these simple steps, you can easily enjoy the benefits of a cool and comfortable living space. From selecting the right location to securely mounting the unit, every aspect has been covered in this guide.
So, go ahead and confidently embark on your DIY AC installation journey. Stay cool!
