To install an AC filter for optimal airflow, locate the air intake grill, remove the old filter, and insert the new filter securely. Maintaining proper airflow is crucial for the efficiency and longevity of your AC system.
Without adequate airflow, the system may struggle to cool your home effectively, resulting in increased energy usage and potential damage. By following these simple steps, you can ensure that your AC filter is installed correctly and that it allows for unrestricted air passage, optimizing the performance of your cooling system.
Preparing For Ac Filter Airflow Installation
Installing an AC filter airflow is an important step in ensuring the optimal performance of your air conditioning system. By maintaining a clean and unblocked filter, you can enhance the airflow, improve the quality of air, and prolong the lifespan of your AC unit. In this section, we will discuss the importance of AC filter airflow and provide a step-by-step guide to help you prepare for the installation. Let’s get started!
Importance of AC Filter Airflow
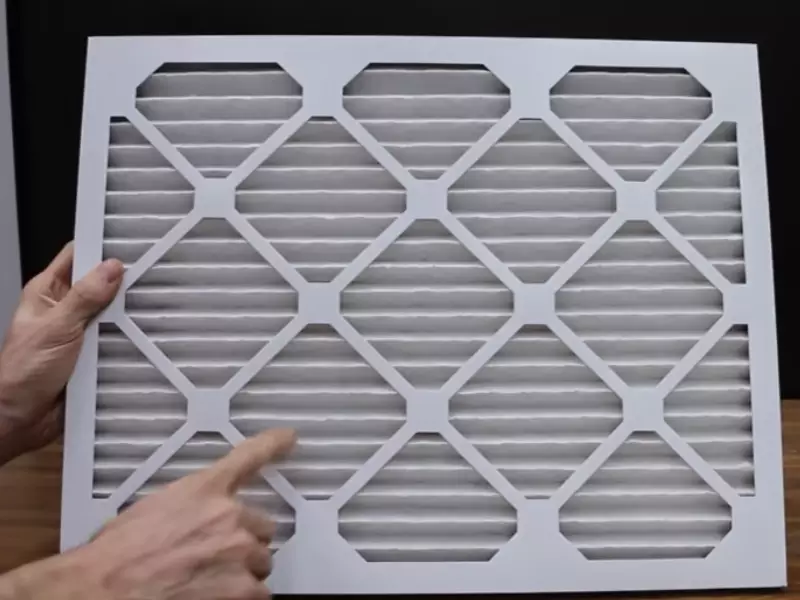
The AC filter airflow plays a crucial role in maintaining a healthy and comfortable indoor environment. Here are some primary reasons why AC filter airflow is essential:
- Enhanced Cooling Efficiency: A clean filter allows for better airflow, ensuring that cool air can circulate freely throughout your home. This helps your air conditioner operate more efficiently and cool your space effectively.
- Improved Air Quality: The AC filter helps to trap dust, dirt, pollen, and other allergens from entering your living space. With proper airflow, the filter can efficiently capture these particles, providing you with cleaner and healthier air to breathe.
- Extended AC Lifespan: When the filter is clogged or dirty, it forces your AC system to work harder to maintain the desired temperature. This extra strain can lead to increased wear and tear on the components, potentially shortening the lifespan of your air conditioner. With proper filter airflow, you can help prolong the life of your AC unit.
Tools and Materials Required
Before you begin the installation process, gather the necessary tools and materials to ensure a smooth and hassle-free experience. Here’s what you’ll need:
| Tools | Materials |
|---|---|
|
|
Choosing the Right Filter Size
When it comes to choosing the right filter size for your AC unit, it’s crucial to ensure compatibility to optimize its performance. Here are the steps to help you determine the correct filter size:
- Measure the Existing Filter: Use a tape measure to determine the dimensions of your current filter. Measure the length, width, and thickness accurately.
- Refer to the Manual: Consult your air conditioner’s manual or manufacturer’s specifications to find the recommended filter size for your unit.
- Check the Filter Frame: Examine the filter frame in your AC unit. It may have a label or indicator that indicates the appropriate filter size.
- Consult a Professional: If you’re uncertain or unable to determine the correct filter size, it’s always advisable to seek assistance from an HVAC professional.
By following these steps, you can ensure that you select the right filter size for your AC unit, allowing for proper airflow and optimal performance.
Now that you understand the importance of AC filter airflow, have gathered the necessary tools and materials, and know how to choose the right filter size, you are well-prepared to proceed with the AC filter installation process. In the next section, we will guide you through the actual installation steps. Stay tuned!
Checking And Understanding The AC System
Locating the air filter in your AC system
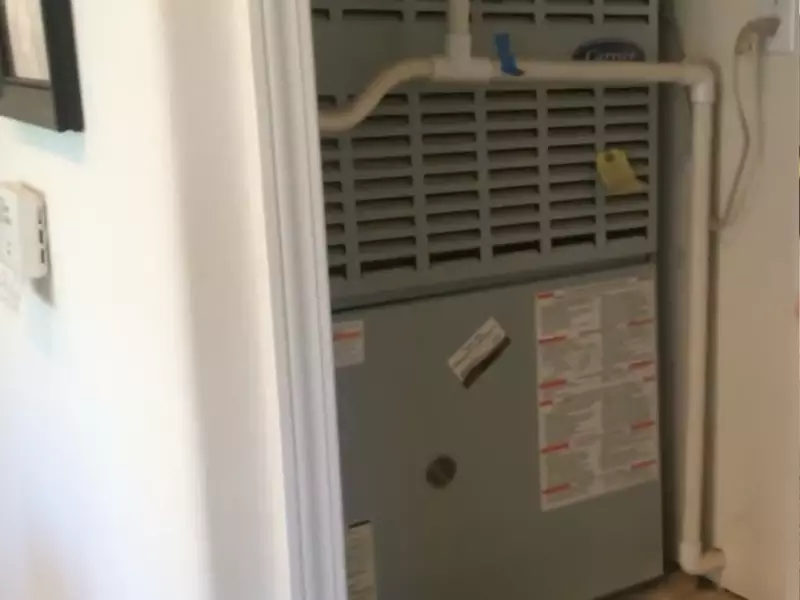
Before you can install a new air filter and ensure proper airflow in your AC system, it’s important to find the location of the existing filter. The air filter is typically located in the blower compartment of your AC unit or in the return air duct. In most central air conditioning systems, you’ll find the air filter nestled behind a removable panel on the air handler or situated near the blower motor. It’s essential to refer to your AC unit’s manual or consult with a professional if you’re unable to locate the air filter on your own.
Understanding the different types of air filters
When it comes to air filters for your AC system, there is a variety of options available in the market. It’s crucial to understand the different types to ensure you choose the one that best suits your needs. Here are the most common types of air filters:
| Type | Description |
| Fiberglass Filters | These filters are cost-effective and capture larger particles, such as dust and debris, but may not be as effective in capturing smaller particles. |
| Pleated Filters | Pleated filters have a larger surface area, allowing them to capture a higher number of particles, including smaller ones. They also offer better filtration and improved airflow. |
| HEPA Filters | High-Efficiency Particulate Air (HEPA) filters are the most effective at capturing tiny airborne particles, including pollen, pet dander, and bacteria. These filters provide exceptional indoor air quality but may restrict airflow if not regularly maintained. |
Identifying the correct airflow direction
Before installing a new air filter, it’s essential to determine the correct airflow direction. Most air filters have an arrow indicating the direction of airflow. This arrow should point towards the blower motor or the air handler. Installing the filter in the wrong direction can hinder the efficiency of your AC system and impede proper airflow. Ensure the arrow on the filter aligns with the airflow direction, allowing air to flow freely through the filter and into your AC system.
By checking and understanding the AC system, you can locate the air filter, choose the right type of filter, and ensure the correct airflow direction. These steps are vital for maintaining a well-functioning AC system and improving the quality of indoor air. Once you’ve completed these checks and made the necessary adjustments, you’ll enjoy improved cooling efficiency and cleaner, fresher air in your home.
Removing And Replacing The Old Air Filter
When it comes to maintaining the performance of your air conditioning system, one crucial step is to regularly clean or replace the air filter. A clogged or dirty air filter can restrict airflow, causing your AC system to work harder and less efficiently. In this section, we will guide you through the process of removing and replacing the old air filter, ensuring optimal airflow and improved air quality in your home.
Shutting off the power to the AC system
The first step before removing the old air filter is to shut off the power to your AC system. This is to ensure your safety during the process. Locate your AC system’s electrical panel and switch off the circuit breaker that controls the AC unit. This will prevent any accidental activation while you are working on the filter.
Removing the access panel to access the air filter
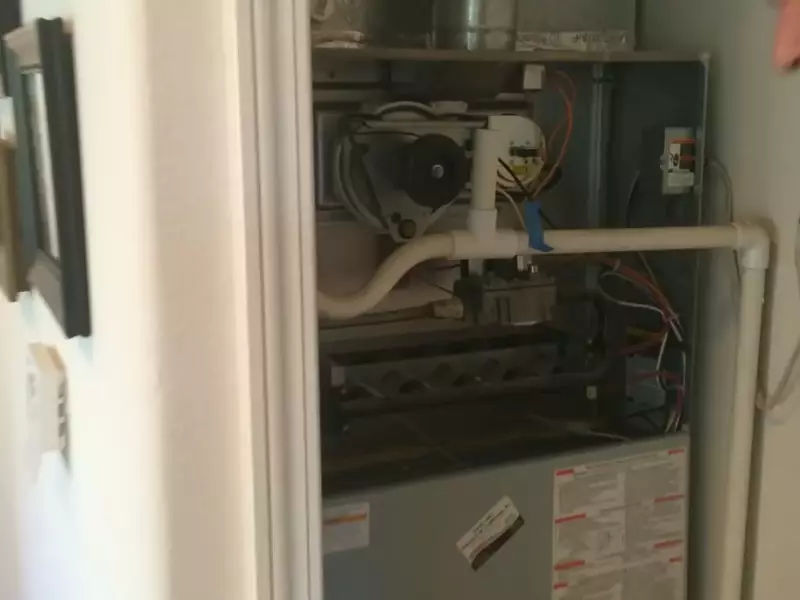
Once the power is switched off, locate the access panel on your AC system. This panel is usually situated near the blower compartment or air handler. Use a screwdriver or the appropriate tool to remove the screws securing the panel in place. Keep these screws in a safe place as you will need them later to secure the new filter.
Carefully removing the old air filter
With the access panel removed, you will now have direct access to the old air filter. Carefully pull out the old filter, taking note of its size and orientation. Ensure that you handle the filter with care to avoid distributing any accumulated dust or debris. To protect yourself from potential allergens, it is recommended to wear gloves and a mask.
Cleaning the filter housing if necessary
If you notice any dirt or debris inside the filter housing, it is advisable to clean it for optimal performance. Using a vacuum or a damp cloth, carefully remove any particles or contaminants from the housing. Ensure that the housing is completely dry before proceeding to the next step.
Installing the new air filter
Now it’s time to install the new air filter. Take the replacement filter, making sure it matches the size and type recommended by your AC system manufacturer. Insert the filter into the same position from which you removed the old one, ensuring it is aligned correctly with the arrows or instructions labeled on the filter.
Pro tip: If you’re unsure about the correct filter size or type for your AC system, consult the owner’s manual or contact a professional HVAC technician for assistance.
Securing the access panel and restoring power
Once the new filter is properly installed, it’s time to secure the access panel back in place. Retrieve the screws that were removed earlier and use them to fasten the panel securely. Make sure everything is tightly secured before turning the power back on.
After following these steps, you have successfully removed and replaced the old air filter in your AC system. By maintaining a clean and efficient air filter, you can enjoy improved airflow, better energy efficiency, and cleaner air in your home.
Remember to regularly inspect and clean or replace your air filter according to the manufacturer’s recommendations to ensure the ongoing performance of your AC system.
Installing The New Air Filter
Selecting the appropriate air filter type and size
When it comes to installing a new air filter, one of the first things you need to do is select the appropriate air filter type and size. Not all air filters are created equal, and choosing the right one for your particular HVAC system is crucial for optimal performance. Before making a purchase, refer to your HVAC system’s user manual or consult with a professional to determine the recommended type and size of filter. This information will guide you in selecting a filter that effectively captures pollutants, allergens, and debris while allowing for proper airflow.
Ensuring the correct airflow direction
Once you have selected the right air filter, it is essential to ensure the correct airflow direction. Most air filters are designed with arrows indicating air flow direction, so take a moment to locate these arrows before installing the filter. The arrows should point towards the blower motor, indicating the direction in which the cleaned air will flow. Placing the filter in the wrong direction can disrupt the airflow and reduce the effectiveness of your HVAC system.
Placing the new filter into the housing
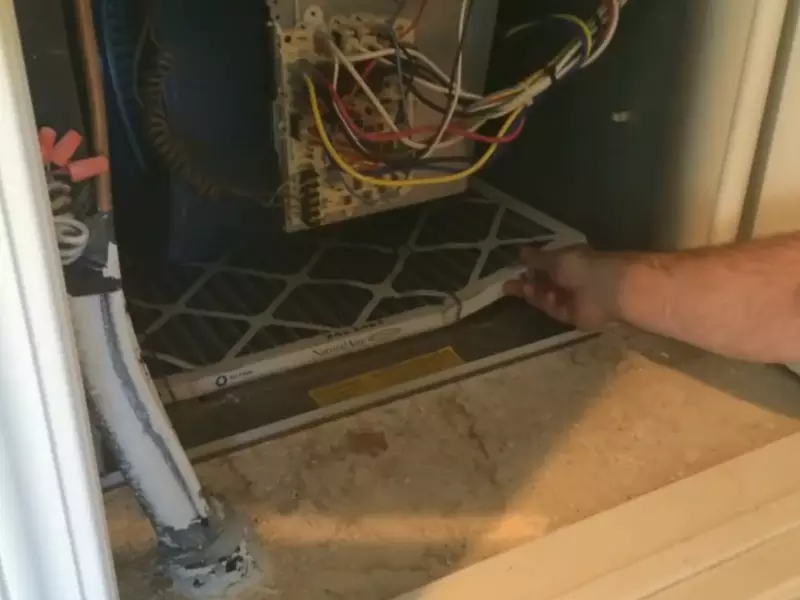
Now that you have confirmed the airflow direction, it’s time to place the new filter into the housing. Start by removing the access panel, typically located near the air handler. This panel provides you with access to the filter housing. Carefully slide out the old filter and dispose of it properly. Take a moment to clean the filter housing of any dust or debris before inserting the new filter.
Line up the arrows on the new filter with the airflow direction arrows on the filter housing. Gently slide the filter into place, ensuring it fits snugly. Make sure there are no gaps or loose edges that could allow unfiltered air to bypass the filter.
Securing the access panel back in place
Once you have successfully placed the new filter into the housing, it’s time to secure the access panel back in place. Carefully align the panel with the designated slots or hinges and firmly press it until it snaps shut. Ensure that the panel is securely fastened to prevent air leakage and maintain proper filtration.
By following these simple steps, you can easily install a new air filter and ensure proper airflow in your HVAC system. Regularly replacing your air filter not only improves indoor air quality but also helps your HVAC system run efficiently, potentially reducing energy costs. Remember to check your filter regularly and replace it as needed to keep your home’s air clean and your system operating at its best.
Maintaining A Proper Air Filter Schedule
Regular maintenance of your AC filter is essential for ensuring proper airflow and improving the overall efficiency of your air conditioning system. One important aspect of maintaining a proper air filter schedule is timely replacement or cleaning of the filters. In this article, we will discuss the importance of regular filter replacement, setting reminders for filter replacement, and tips for cleaning reusable filters to optimize your AC’s airflow.
Importance of Regular Filter Replacement
Regular filter replacement is crucial for maintaining clean and healthy indoor air quality. Over time, air filters accumulate dust, pollen, pet dander, and other airborne particles. If neglected, these contaminants can clog the filter, causing restricted airflow and decreased AC performance. Moreover, a dirty filter can harbor mold and bacteria, which can lead to respiratory issues and allergies.
To ensure your AC system functions optimally, it’s vital to replace the air filter at recommended intervals. Most manufacturers suggest replacing the filter every 30 to 90 days, depending on factors like air quality, usage, and the type of filter. By promptly replacing the filter, you improve the system’s airflow, prevent potential damage, and extend the lifespan of your AC unit.
Setting Reminders for Filter Replacement
It’s easy to forget about replacing the air filter amidst our busy schedules. However, setting reminders can help you stay on track and prevent unnecessary inconvenience. There are several ways you can keep track of when your AC filter needs replacement:
- Use a smartphone app or calendar to set recurring reminders every 30 to 90 days.
- Attach a small note to your thermostat or near your AC unit to visually remind you.
- Mark your future filter replacement dates in a visible spot on your monthly planner or wall calendar.
By adopting these simple strategies, you’ll be able to maintain a consistent air filter replacement schedule and ensure the efficient performance of your air conditioning system.
Tips for Cleaning Reusable Filters
If you have a reusable air filter, it’s essential to clean it regularly to remove accumulated dirt and debris. Cleaning your filter not only improves airflow but also saves you money on frequent replacements. Follow these steps to clean a reusable filter:
- Turn off your AC unit and locate the filter.
- Remove the filter from the system.
- Rinse the filter gently with water to remove loose dirt and debris.
- Soak the filter in a mixture of mild detergent and water for 15-20 minutes.
- Gently scrub the filter with a soft brush to remove any remaining dirt.
- Rinse the filter thoroughly with clean water to remove any soap residue.
- Allow the filter to air dry completely before reinserting it into the AC unit.
By regularly cleaning your reusable filter, you ensure unrestricted airflow and maintain the efficiency of your AC system.
In conclusion, maintaining a proper air filter schedule is vital for optimal AC performance. Regular filter replacement and cleaning help improve airflow, extend the lifespan of your air conditioning unit, and promote clean indoor air quality. Don’t overlook the importance of timely maintenance, and follow the suggestions above to ensure your AC system operates smoothly.
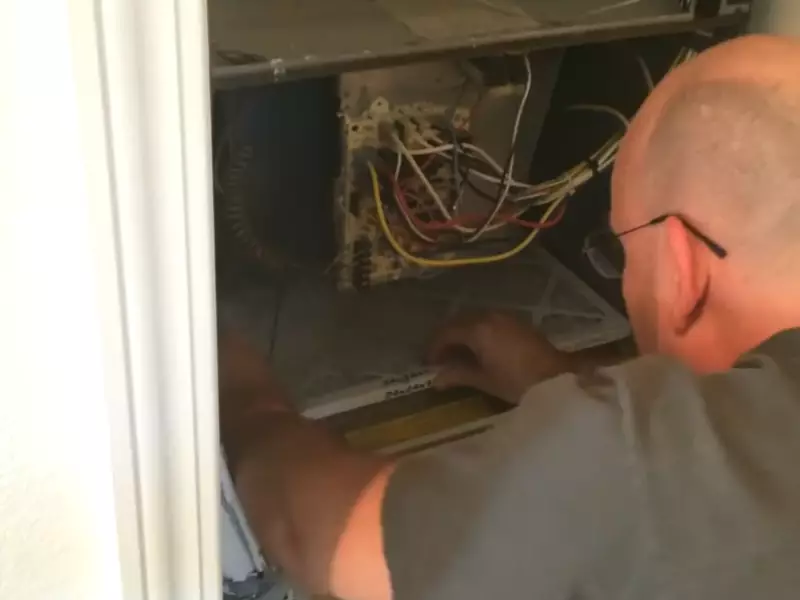
Improving Ac Filter Airflow Efficiency
Proper airflow in your air conditioning system is essential for efficient cooling and optimal performance. One of the key factors that can affect airflow is the AC filter. When the air filter is dirty or clogged, it restricts the airflow, forcing your AC to work harder and consume more energy. In this section, we will discuss three effective ways to improve your AC filter airflow efficiency.
Checking for Airflow Obstructions
Regularly checking for airflow obstructions is crucial to ensure proper functioning of your AC system. Start by inspecting the air vents and registers throughout your home. Make sure they are not blocked by furniture, curtains, or other objects. These obstructions can restrict the airflow and prevent your AC from cooling efficiently.
Next, check the condition of your AC filter. If it is dirty or clogged with dust, pet hair, or debris, it’s time for a replacement. A dirty filter not only decreases air quality but also hinders airflow. Refer to your manufacturer’s guidelines to determine how often you should change your AC filter. Remember: a clean filter is crucial for optimal airflow and energy efficiency.
Sealing Air Leaks in the Ductwork
Air leaks in the ductwork can significantly impact your AC filter airflow efficiency. When there are leaks, cool air can escape before reaching the intended areas. This decreases the system’s overall performance and forces it to work harder, resulting in higher energy consumption and reduced comfort.
To identify air leaks, inspect your ductwork for any visible gaps, cracks, or loose connections. Seal these openings using foil tape or mastic sealant, ensuring a tight seal. Additionally, consider insulating your ducts, especially if they are located in unconditioned spaces such as attics or crawl spaces. Insulation helps maintain the desired temperature throughout the ductwork, reducing energy loss and enhancing airflow efficiency.
Upgrading to a Higher MERV-rated Filter
If you want to enhance your AC filter airflow efficiency, consider upgrading to a filter with a higher Minimum Efficiency Reporting Value (MERV) rating. The MERV rating indicates the filter’s ability to trap particles of different sizes. While a lower MERV rating allows more air to flow through, it may not effectively capture smaller particles, resulting in decreased air quality.
However, before upgrading, it’s essential to check your AC system’s compatibility with higher MERV-rated filters. Some systems may not be designed to handle the additional airflow restriction caused by high-efficiency filters. If your system is compatible, opt for a filter with a higher MERV rating to improve both airflow and air quality.
In conclusion, enhancing your AC filter airflow efficiency is crucial to optimize cooling performance and energy usage. Regularly check for airflow obstructions, seal air leaks in the ductwork, and consider upgrading to a higher MERV-rated filter. By implementing these steps, you can ensure proper airflow, improve air quality, and extend the lifespan of your AC system.
Troubleshooting And Tips For Optimal Air Flow
Ensuring a smooth and constant flow of air through your AC system is crucial for maintaining a comfortable and healthy indoor environment. However, there are times when your AC filter may impede the airflow, resulting in reduced cooling efficiency and potential damage to your system. In this section, we will explore common problems with AC filter airflow and provide you with troubleshooting tips to improve air flow.
Common problems with AC filter airflow
When it comes to AC filter airflow, there are a few common problems that you may encounter:
- Clogged filter: Over time, your AC filter can become clogged with dust, dirt, and debris, restricting the flow of air. This can lead to reduced cooling capacity and decreased air quality.
- Poor filter placement: Incorrectly installing or positioning your AC filter can also impede air flow. Filters should be securely in place and correctly aligned with the air handler to ensure optimal performance.
- Inadequate filter size: Using a filter that is too small for your AC system can restrict airflow. The filter should be properly sized to effectively capture dust and other particles while allowing for unrestricted air flow.
Troubleshooting tips for improved airflow
If you’re experiencing issues with your AC filter airflow, here are some troubleshooting tips to consider:
- Inspect and clean the filter: Regularly check your AC filter for dirt and debris. If it appears dirty or clogged, it’s time for a cleaning or replacement. Cleaning the filter can be as simple as rinsing it with water and allowing it to dry thoroughly before reinserting it into the system. For disposable filters, replace them as recommended by the manufacturer.
- Check for proper filter placement: Ensure that your AC filter is properly installed and aligned with the air handler. If you’re unsure, refer to your system’s manual or contact the manufacturer for guidance.
- Upgrade to a higher efficiency filter: Consider changing to a higher efficiency filter that is designed to capture smaller particles without sacrificing air flow. This can help improve air quality while maintaining optimal performance.
- Clean the air vents and ducts: Dust and debris can accumulate in the air vents and ducts, restricting air flow. Regularly clean these areas to remove any obstructions and improve air flow throughout your space.
- Maintain regular system maintenance: Schedule regular maintenance checks with a professional HVAC technician to ensure that your AC system is running efficiently. They can inspect the filter, clean the components, and identify any potential issues that may be affecting airflow.
Consulting a professional if issues persist
If you have followed the troubleshooting tips provided and are still experiencing issues with your AC filter airflow, it may be time to consult a professional. An HVAC technician will have the expertise to diagnose and resolve any underlying issues that may be impeding the airflow in your system. Don’t hesitate to reach out for help to ensure your AC system is operating optimally and providing you with the comfort you deserve.
Frequently Asked Questions Of How To Install AC Filter Airflow
Is There A Correct Way To Put In An Ac Filter?
Yes, there is a correct way to put in an AC filter. To do it right, follow these steps:
1. Turn off the AC unit.
2. Locate the filter slot, usually near the blower motor.
3. Remove the old filter.
4. Insert the new filter, making sure it is positioned correctly.
5. Turn on the AC unit.
What Happens If Air Filter Is Backwards?
Installing an air filter backward can decrease performance and cause damage. It blocks airflow, reducing engine power and efficiency. This can result in poor fuel economy, increased emissions, and potential engine damage. Properly installing the air filter is crucial for optimal engine performance.
Which Way Does Filtrete Air Filter Go?
The Filtrete air filter should be inserted with the arrow pointing towards the HVAC system.
Which Way Does The Arrow Go On A Furnace Filter?
The arrow on a furnace filter should point toward the furnace or air handler. It indicates the correct direction of airflow and ensures the proper function of the HVAC system.
Conclusion
Maintaining proper airflow in your AC system by installing an air filter is crucial for efficient operation and clean indoor air. By following the simple steps outlined in this guide, you can ensure that your AC filter is correctly installed.
Regularly replacing and cleaning the filter will not only improve your system’s performance but also enhance your overall indoor air quality. Remember, a well-maintained AC system translates to lower energy costs and exceptional comfort in your home. So, don’t neglect this important task and enjoy the benefits of a properly functioning AC system.
