To install a window AC unit in a mobile home, follow these steps: choose the right size unit, measure the window opening, assemble the brackets, place the unit in the window, secure it with the brackets, and seal any gaps. Installing a window AC unit in a mobile home is a straightforward process that can help keep your home cool during hot summer months.
By following these steps, you’ll ensure that the unit is properly installed and functioning efficiently. We’ll provide a detailed guide on how to install a window AC unit in a mobile home, including tips and precautions to consider. So let’s get started and learn how to bring comfort to your mobile home with a window AC unit.
Factors To Consider When Selecting A Window Ac Unit
When it comes to keeping your mobile home cool and comfortable during the hot summer months, a window AC unit can be a cost-effective and convenient option. However, selecting the right unit for your mobile home can be quite overwhelming. To help you make an informed decision, consider the following factors:
Size and Cooling Capacity
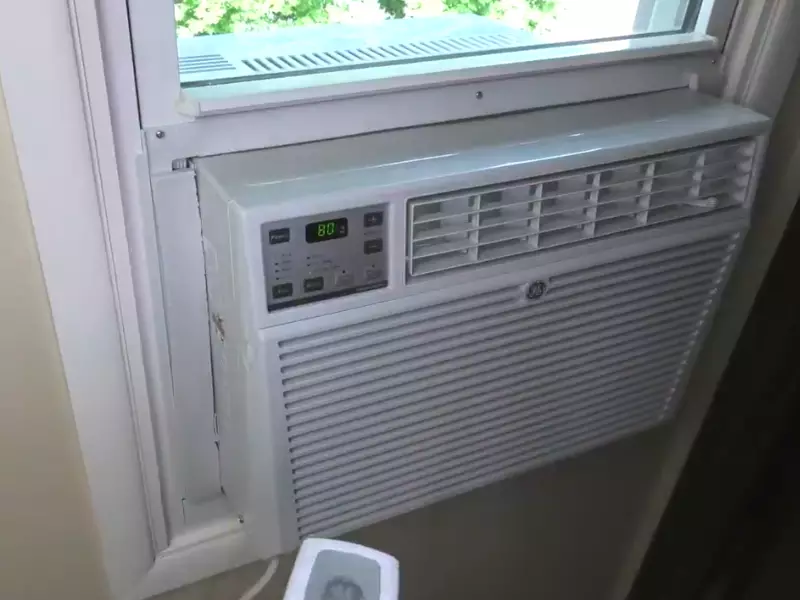
One of the first things to consider when selecting a window AC unit for your mobile home is the size and cooling capacity. The unit should be able to effectively cool the space without being too big or small. Here are some key points to keep in mind:
- Measure your window: Take accurate measurements of the window where you plan to install the AC unit. This will help you determine the maximum width and height the unit can be.
- Match the BTU: The cooling capacity of an AC unit is measured in British Thermal Units (BTUs). Make sure to choose a unit with a BTU rating suitable for the size of your mobile home. A unit with too low a BTU rating may struggle to cool the space, while a unit with too high a BTU rating may result in excessive energy consumption. As a general guideline, for a mobile home with an area between 100-300 square feet, a unit with 5,000-7,000 BTUs should be sufficient.
- Consider space limitations: Keep in mind any space limitations you may have, such as window sills, curtains, or furniture that could obstruct the installation or proper functioning of the unit.
Energy Efficiency Ratings
Energy efficiency is an important consideration when selecting a window AC unit for your mobile home. Choosing an energy-efficient unit can not only help save on electricity bills but also reduce your carbon footprint. Look for units with high Energy Efficiency Ratio (EER) ratings. The higher the EER rating, the more energy-efficient the unit is. Additionally, keep an eye out for Energy Star certified units, as they meet strict energy efficiency guidelines set by the U.S. Environmental Protection Agency.
Additional Features and Functions
While size, cooling capacity, and energy efficiency are key factors to consider, it’s also worth exploring additional features and functions that can enhance your overall comfort and convenience. Here are a few examples:
- Programmable thermostat: A unit with a programmable thermostat allows you to set specific temperatures for different times of the day, helping you save energy and maintain a comfortable indoor climate.
- Multiple fan speeds: Units with multiple fan speeds give you the flexibility to adjust the airflow according to your preference and cooling needs.
- Remote control: Having a remote control allows you to conveniently adjust settings without needing to physically access the unit.
- Filter indicator: Look for units with a filter indicator that alerts you when the filter needs to be cleaned or replaced for optimal performance.
By considering these factors and choosing a window AC unit that suits your mobile home’s specific needs, you can ensure a cooling solution that is efficient, effective, and provides you with lasting comfort throughout the summer season.
Ensuring Compatibility With A Mobile Home
Ensuring compatibility with a mobile home is crucial when installing a window AC unit. Mobile homes have specific requirements and considerations that differ from traditional homes. To ensure a successful installation, it’s important to understand the window types in mobile homes, measure the window opening accurately, and check the electrical capacity. Let’s delve into each of these factors in detail.
Understanding Window Types in Mobile Homes
Mobile homes may have different window types compared to traditional homes, so it’s important to familiarize yourself with these variations. There are typically three common window types found in mobile homes:
- Vertical Sliding Windows: This type of window opens and closes vertically, with one sash sliding up and the other sliding down. Measure the width and height of the opening carefully to ensure a proper fit for your AC unit.
- Horizontal Sliding Windows: These windows slide horizontally along a track, allowing for easy opening and closing. Pay attention to the dimensions to make sure the AC unit will fit the window correctly.
- Awning Windows: Awning windows are hinged at the top and open outward from the bottom, providing both ventilation and protection against rain. Take accurate measurements to determine if an awning window can accommodate your AC unit.
Measuring the Window Opening
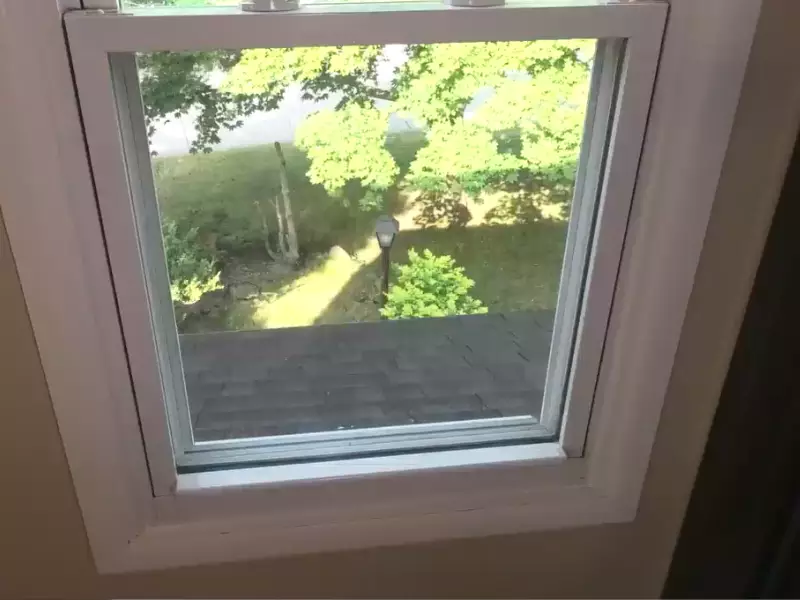
Accurate measurements of the window opening are crucial to ensure a proper fit for your window AC unit. Follow these steps to measure the window opening correctly:
- Measure the width of the window opening from left to right at three different points: the top, middle, and bottom. Take note of the smallest measurement.
- Measure the height of the window opening from the top to the bottom at three different points: the left, middle, and right. Again, record the smallest measurement.
- With these measurements in hand, verify that the dimensions of your chosen window AC unit are smaller than the smallest width and height measurements you recorded.
By taking accurate measurements, you can ensure a proper fit for your window AC unit and avoid any installation complications.
Checking the Electrical Capacity
Before installing a window AC unit in a mobile home, it’s crucial to check the electrical capacity. In many cases, mobile homes have electrical systems with limited capacity, so it’s essential to ensure that adding a window AC unit won’t overload the circuit. Follow these steps to check the electrical capacity:
- Locate the circuit breaker panel in your mobile home.
- Determine which circuit is designated for the window where you plan to install the AC unit.
- Check the amperage rating of the designated circuit and compare it to the power requirements of your chosen window AC unit. The amperage rating should be clearly labeled on the circuit breaker.
- If the amperage rating of the circuit breaker matches or exceeds the power requirements of the AC unit, you can proceed with the installation. If the circuit does not meet the requirements, you may need to consult an electrician to upgrade the electrical system or choose a different location for the AC unit.
By ensuring the electrical capacity is sufficient, you can avoid potential electrical issues and ensure the safe and efficient operation of your window AC unit.
Clearing The Window Area
Before installing a window AC unit in your mobile home, it’s important to clear the window area to ensure a smooth and efficient installation process. This involves removing curtains and blinds as well as cleaning the window frame. By following these steps, you’ll create a clean and suitable environment for your window AC unit.
Removing Curtains and Blinds
The first step is to remove any curtains and blinds that may be obstructing the installation area. Begin by pulling back the curtains and securing them to the sides using curtain ties or clips. If your curtains have hanging hardware, detach it from the window frame. This will allow for better access to the window area.
If you have blinds, gently raise them to their highest position and secure them in place. Then, locate the brackets that hold the blinds in place and carefully remove them. Keep the hardware in a safe place, as you may need it when reinstalling the blinds later.
Cleaning the Window Frame
Once the curtains and blinds have been cleared, it’s time to clean the window frame to ensure a proper seal. Start by using a vacuum cleaner or a brush attachment to remove any loose dirt or debris from the window sill and frame. You can also use a damp cloth to wipe away any dust or grime.
After cleaning the window frame, inspect it for any signs of damage or decay. Look for cracks, rotting wood, or any other issues that may compromise the installation of your window AC unit. If you notice any problems, it’s best to address them before proceeding with the installation.
If the window frame is in good condition, measure its dimensions to ensure compatibility with your window AC unit. Refer to the manufacturer’s instructions for the recommended window size for your specific model.
By clearing the window area, removing curtains and blinds, and cleaning the window frame, you are taking the necessary steps to prepare your mobile home for the installation of a window AC unit. Once this is done, you’ll be ready to proceed to the next steps of the installation process.
Assessing The Mobile Home Structure
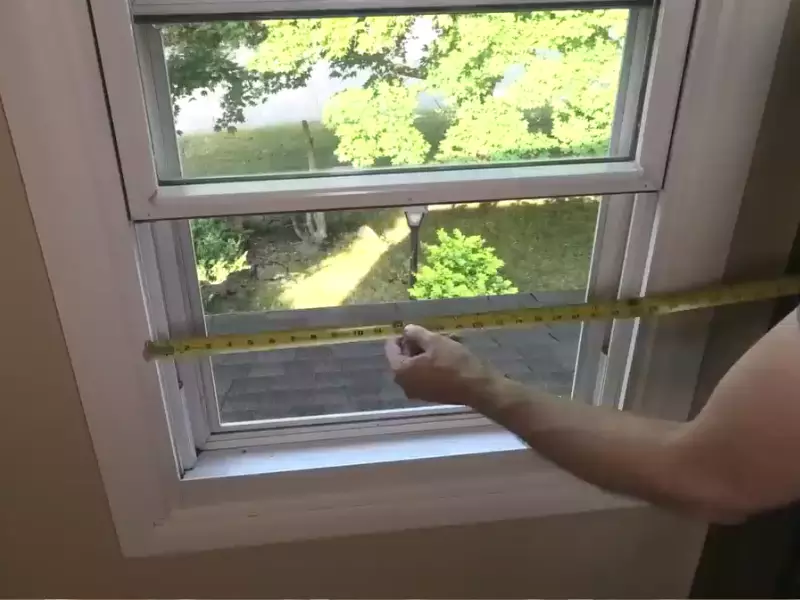
Before installing a window AC unit in your mobile home, it is crucial to assess the structure to ensure it can accommodate the weight and size of the unit. By inspecting the window frame and structure, you can identify any potential issues and take necessary steps to reinforce the window opening if needed. This assessment will help ensure a secure and stable installation, allowing you to enjoy the cool breeze without any concerns.
Inspecting the Window Frame and Structure
The first step in assessing the mobile home structure is to thoroughly inspect the window frame and surrounding structure. Look for any signs of damage or wear that could compromise the integrity of the installation. Take note of any cracks, rot, or weak areas that may need to be addressed before proceeding. It is essential to have a stable and structurally sound base for your window AC unit.
If you notice any significant issues with the window frame or structure, it is recommended to consult with a professional contractor or an experienced technician. They will be able to assess the severity of the damage and provide guidance on the necessary repairs or reinforcements.
Reinforcing the Window Opening if Necessary
In some cases, the existing window opening may not be strong enough to support the weight of a window AC unit. Reinforcing the window opening is crucial to ensure the safety and stability of the installation. There are a few methods you can use to reinforce the window opening:
- Install window brackets or supports: These brackets or supports can be attached to the window frame or surrounding structure to provide additional strength and stability.
- Use plywood or metal plates: Adding a layer of plywood or metal plates around the window opening can distribute the weight of the AC unit and reinforce the structure.
- Consult a professional for custom solutions: If the window opening requires extensive reinforcement, it is best to consult with a professional who can recommend custom solutions tailored to your specific mobile home.
By reinforcing the window opening, you can ensure that your window AC unit is securely installed and reduces the risk of any structural damage. It is important to follow the manufacturer’s recommendations and guidelines when reinforcing the window opening to guarantee a safe and effective installation.
Remember, a thorough assessment of the mobile home structure and reinforcement of the window opening, if necessary, are essential steps in the process of installing a window AC unit. By taking these precautions, you can enjoy a cool and comfortable living space while ensuring the structural integrity of your mobile home.
Positioning The Unit And Mounting Brackets
Installing a window air conditioning unit in a mobile home can be a simple and effective way to keep your living space cool during the hot summer months. One important step in this process is properly positioning the unit and installing sturdy mounting brackets to ensure a secure fit. In this section, we will discuss the key factors to consider when determining the location inside the mobile home, as well as how to mark and install the mounting brackets for maximum stability.
Determining the Location Inside the Mobile Home
Before you can install the window AC unit, it’s essential to determine the ideal location inside your mobile home. Choosing the right spot will not only provide efficient cooling but also ensure proper airflow throughout the room. Here are a few considerations to keep in mind:
- Identify a window that is not obstructed and allows for easy access to the exterior.
- Ensure there is enough space for the air conditioner unit, both horizontally and vertically.
- Avoid any windows that are directly facing direct sunlight, as this may lead to overheating and decreased efficiency.
- Choose a window that is near an electrical outlet to avoid the need for additional extension cords.
Marking the Mounting Bracket Placement
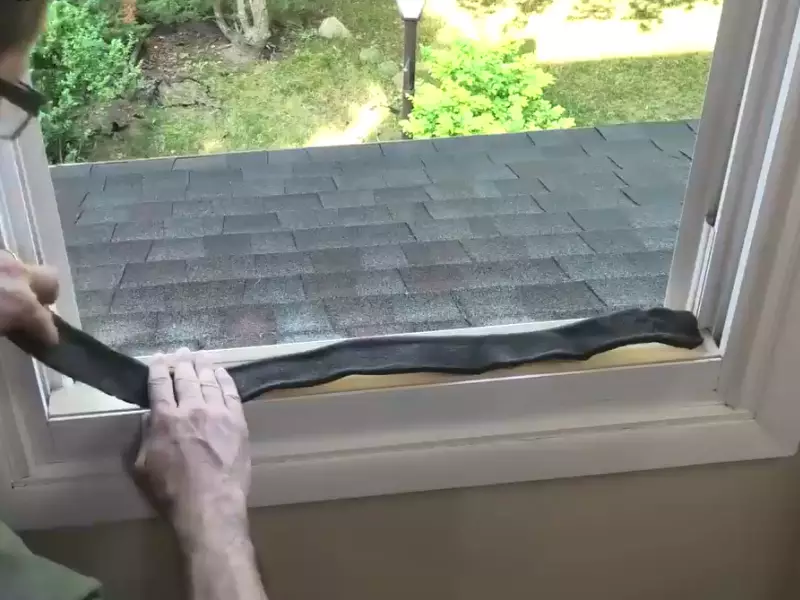
Once you have selected the ideal window for your AC unit, it’s time to mark the placement of the mounting brackets. These brackets will provide crucial support and stability for the unit. Here’s how to proceed:
- Carefully measure the width of the window opening to ensure an appropriate fit for the mounting brackets.
- Using a pencil or marker, mark the desired height for the brackets on both sides of the window frame.
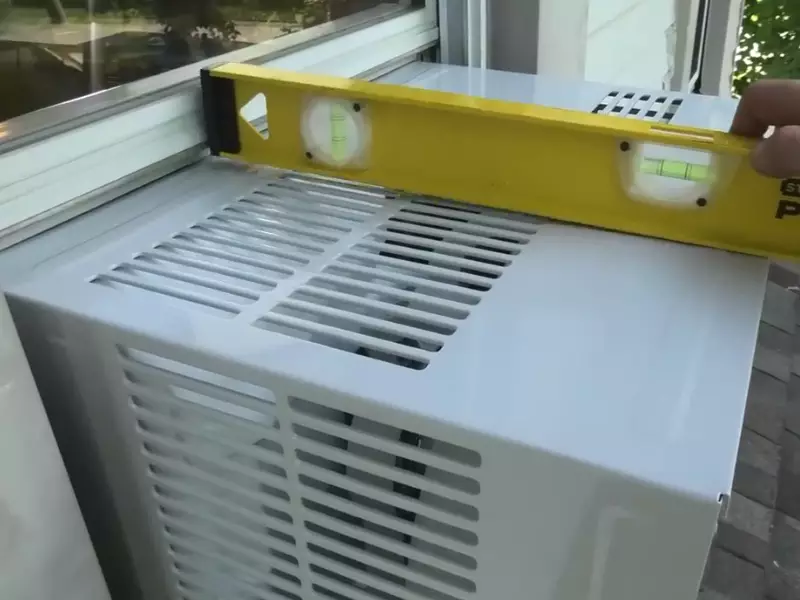
- Ensure that the marks are level and aligned with each other, as this will prevent any imbalance or tilting of the unit.
- Double-check the measurements and alignment before proceeding to the installation of the mounting brackets.
Installing the Mounting Brackets
Now that you have marked the placement of the mounting brackets, it’s time to install them securely. Follow these steps for a proper installation:
- Align the pre-drilled holes in the brackets with the marked positions on the window frame.
- Using suitable screws or bolts, attach the brackets firmly to the window frame, ensuring they are level and tightly secured.
- Repeat the process for both sides of the window to ensure symmetrical and stable positioning.
- Once the brackets are securely installed, double-check their alignment and stability before proceeding to mount the AC unit.
By correctly positioning the unit and securely installing the mounting brackets, you can enjoy a cool and comfortable living space throughout the summer months. Take the time to assess the optimal location and carefully follow the steps outlined above, ensuring a hassle-free installation process inside your mobile home.
Inserting The Ac Unit Into The Window Opening
One of the crucial steps in installing a window AC unit in a mobile home is properly inserting the unit into the window opening. This step requires careful maneuvering and positioning to ensure a secure fit. Follow the steps below to successfully complete this process.
Tilting the AC Unit into Position
Before inserting the AC unit into the window opening, it’s important to tilt it into position. This will make the installation process easier and minimize the risk of damaging the unit or the window. To tilt the unit correctly, follow these steps:
- Ensure the AC unit is turned off and unplugged from the power source.
- Place the AC unit on a stable surface near the window, ensuring it is faced in the right direction.
- Gently tilt the AC unit backward, keeping a firm grip on it to prevent it from falling.
- Slowly position the tilted AC unit near the window opening.
- Make sure there is enough space for the unit to fit without any obstructions.
Securing the Unit in Place
Once the AC unit is properly tilted into position near the window opening, the next step is to secure it firmly in place. This will prevent any movement or potential accidents during operation. Follow these guidelines to secure the unit:
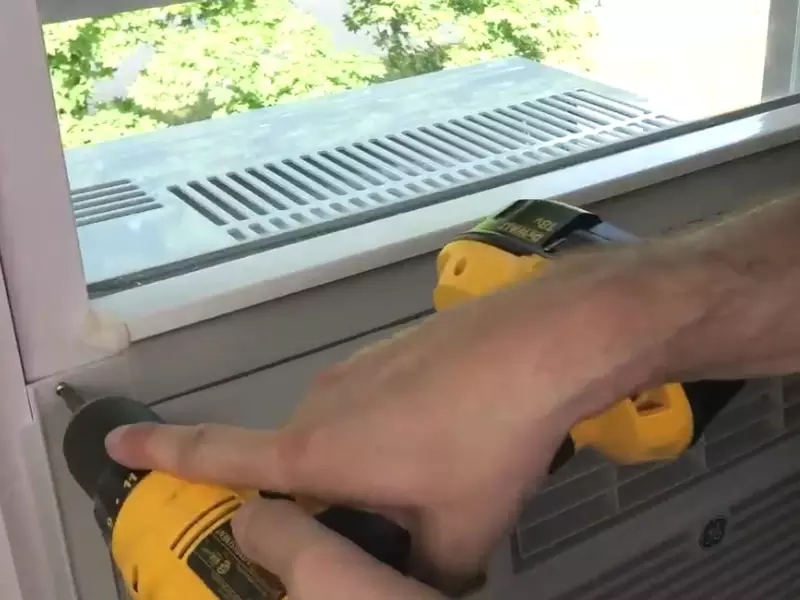
- Locate the mounting brackets that came with your AC unit. These brackets will be used to secure the unit to the window.
- Attach the mounting brackets to the window frame. Make sure to position them at a level that aligns with the AC unit’s bottom part.
- Place the AC unit carefully into the window opening, ensuring it rests securely on the brackets.
- Extend the side panels on both sides of the unit to fill any gaps between the unit and the window.
- Tighten the mounting screws on the brackets to hold the unit firmly in place.
- Double-check that the AC unit is stable and well-balanced once secured.
Following these steps will help you successfully insert a window AC unit into the window opening of your mobile home. It’s essential to pay close attention to the correct positioning and secure installation of the unit to ensure optimal functionality and safety. With the AC unit properly installed, you can enjoy a comfortable and cool environment in your mobile home during those hot summer months.
Sealing And Insulating The Window
Properly sealing and insulating the window of your mobile home is essential for efficient cooling and saving energy when you install a window AC unit. By taking the time to seal any gaps and insulate the window, you can ensure that your unit works optimally without any air leaks. In this section, we will discuss three key steps: applying foam insulation tape, sealing any gaps with silicone, and insulating the window with weatherstripping.
Applying Foam Insulation Tape
One of the first steps in sealing and insulating your window is to apply foam insulation tape. This tape is designed to block any air leaks and create a tight seal between the window frame and the AC unit. To apply the foam insulation tape, follow these simple steps:
- Measure the length and width of your window frame to determine the required length of the foam insulation tape.
- Cut the foam insulation tape according to the measurements, ensuring that it fits accurately along the edges of the window frame.
- Peel off the backing from the foam insulation tape and carefully press it onto the window frame, making sure it adheres firmly.
- Repeat this process for all sides of the window frame to ensure complete insulation.
Sealing any Gaps with Silicone
In addition to foam insulation tape, another effective method of sealing your window is to use silicone. Silicone sealant is flexible and durable, making it perfect for filling in any gaps or cracks. Follow these steps to seal any gaps with silicone:
- Inspect your window for any visible gaps or cracks. Pay close attention to the area around the frame and the edges of the window.
- If you find any gaps, clean the area with a damp cloth to remove any dirt or debris.
- Load a tube of silicone sealant into a caulking gun and carefully apply a bead of silicone along the gap or crack, ensuring complete coverage.
- Smooth out the silicone using a caulk smoothing tool or your finger, ensuring a neat and even finish.
- Allow the silicone to dry completely according to the manufacturer’s instructions before continuing with the installation of your window AC unit.
Insulating the Window with Weatherstripping
Weatherstripping is a fantastic solution for insulating your window against drafts and air leaks. It is available in various materials, such as rubber, foam, and vinyl, and can be easily applied along the edges of the window. Here’s how to insulate the window with weatherstripping:
- Measure the length and width of the window frame to determine the required length of weatherstripping.
- Cut the weatherstripping to the appropriate size, ensuring a snug fit along each side of the window.
- Peel off the adhesive backing from the weatherstripping and carefully press it onto the window frame, making sure it adheres firmly.
- Repeat this process for all sides of the window, ensuring complete coverage.
By following these three steps – applying foam insulation tape, sealing any gaps with silicone, and insulating the window with weatherstripping – you can effectively seal and insulate your window in a mobile home. This will not only improve the efficiency of your window AC unit but also enhance your overall cooling experience.
Wiring The Ac Unit To The Electrical Supply
Once you have properly mounted your window AC unit in your mobile home, the next step is to connect the unit to the electrical supply. This is an essential part of the installation process, as it ensures that the AC unit receives the power it needs to cool your home effectively. In this section, we will discuss the steps you need to follow to wire your AC unit to the electrical supply.
Following Manufacturer’s Instructions
Before beginning the wiring process, it is crucial to carefully read and understand the manufacturer’s instructions. These instructions provide specific guidance on how to connect the power cord of your AC unit to the electrical supply. They may also contain important safety precautions that you need to be aware of.
When following the manufacturer’s instructions, make sure to take note of any specific wiring diagrams or guidelines they provide. Pay attention to any warnings or cautions regarding electrical connections or the use of extension cords. Manufacturers know their products best, so adhering to their instructions will ensure a safe and successful installation.
Connecting the Power Cord
Once you are familiar with the manufacturer’s instructions, you can proceed with connecting the power cord of your AC unit to the electrical supply. Here is a step-by-step guide on how to do it:
- Locate the power cord of your AC unit.
- Identify the appropriate electrical outlet or socket near the window where the unit is installed.
- Ensure that the electrical supply is turned off before connecting the power cord.
- Plug the power cord into the electrical outlet securely.
- Inspect the power cord and ensure there are no frayed or damaged wires.
- If necessary, use electrical tape to secure any loose or exposed wires.
- Once the power cord is connected, turn on the electrical supply and test the AC unit to ensure it is functioning properly.
It’s important to note that connecting the power cord should always be done with safety in mind. If you are unsure or uncomfortable working with electrical connections, it is recommended to seek assistance from a qualified electrician.
By following the manufacturer’s instructions and connecting the power cord correctly, you can ensure that your window AC unit in your mobile home receives the necessary electrical supply to keep you cool and comfortable during hot summer days.
Testing The Ac Unit And Adjusting Settings
Turning on the Power
Before you can begin testing your newly installed window AC unit, you need to make sure the power is turned on. Start by locating the power switch, usually located at the front or side of the unit. It is typically labeled with an “On/Off” or a power symbol. Ensure that the unit is plugged into a working electrical outlet and that the power cord is securely connected.
Once you have confirmed the power source, flip the switch to the “On” position. You may hear a slight humming sound as the unit powers on. This is normal and indicates that the compressor and fan have started running.
Setting Temperature and Fan Controls
After turning on the power, it’s time to adjust the temperature and fan controls to create a comfortable indoor environment. Locate the temperature control panel on the face of the unit. The temperature control is typically labeled with a range of temperatures, such as 60°F to 90°F. Adjust the temperature to your desired setting by turning the dial or pressing the up and down buttons.
In addition to temperature control, window AC units also come with fan speed options. These options allow you to adjust the airflow coming out of the unit. Most window AC units offer at least two fan speeds: low and high. Select the desired fan speed by using the fan speed control located near the temperature control panel. Choosing a low fan speed will provide a quieter operation, while a high fan speed will maximize the airflow.
Remember to give the unit some time to reach the desired temperature. It may take a few minutes for the unit to cool down the room, especially if the temperature outside is extremely hot.
It is essential to make sure that the temperature and fan controls are properly set to ensure optimal performance and energy efficiency.
Common Issues And Solutions
Installing a window AC unit in a mobile home can provide much-needed relief from the scorching summer heat. However, like any other appliance, these units can encounter some common issues that can affect their performance and efficiency. In this section, we will explore three common issues that you may encounter when installing a window AC unit in your mobile home, along with their solutions.
Insufficient Cooling
One of the most frustrating issues you may face with your window AC unit is insufficient cooling. This can be due to several reasons, such as improper installation, a dirty air filter, or a malfunctioning compressor. Here are some solutions:
- Ensure proper installation: Make sure that the unit is properly installed according to the manufacturer’s instructions. Check for any gaps or openings around the unit that may be letting hot air in.
- Clean or replace the air filter: A dirty air filter can restrict airflow, reducing the cooling effectiveness of the unit. Clean or replace the filter regularly to maintain efficient cooling.
- Check the compressor: If the unit is still not cooling properly, the compressor may be malfunctioning. In such cases, it is best to consult a professional technician to diagnose and fix the issue.
Water Leakage
Another common issue that can occur with window AC units is water leakage. This can lead to damage to your mobile home’s interior and can be a sign of a more significant problem. Here are some solutions:
- Clean the drainage system: Over time, the drain line or pan may become clogged with dirt, dust, or debris, causing water to back up and leak. Regularly clean the drainage system to prevent blockages and ensure proper water flow.
- Check the window seal: A faulty window seal can allow rain or condensation to seep into your mobile home, causing water leakage. Inspect the window seal and replace it if necessary to prevent water from entering.
- Consult a professional: If the issue persists or the leakage is severe, it is essential to seek the help of a professional technician who can identify and repair the underlying problem.
Noisy Operation
Noisy operation is another common issue that can disrupt your comfort and peace of mind. Window AC units can produce excessive noise due to loose parts, a faulty fan motor, or vibrations. Here are some solutions:
- Tighten loose parts: Check for any loose screws or bolts and tighten them using the appropriate tools. This can help reduce rattling noises caused by loose components.
- Inspect the fan motor: A malfunctioning fan motor can cause loud noises during operation. If you suspect an issue with the motor, it is advisable to contact a professional technician to inspect and repair it.
- Use vibration pads: Placing anti-vibration pads or rubber mats under the unit can help absorb vibrations and reduce noise. This simple solution can make a significant difference in the overall noise level.
By addressing these common issues and implementing the suggested solutions, you can ensure that your window AC unit in your mobile home functions optimally, providing you with efficient cooling, preventing water leakage, and reducing noise for a comfortable living environment.
Maintenance Recommendations
Cleaning the AC Unit Regularly
Cleaning your window AC unit regularly is crucial to maintain its efficiency and extend its lifespan. Over time, dust, dirt, and debris can accumulate on the unit’s coils, reducing its ability to cool effectively. To ensure optimal performance, follow these steps for cleaning your window AC unit:
- 1. Turn off the AC unit: Before cleaning, make sure to turn off the unit and unplug it from the power source. Safety should always be a top priority when working with electrical appliances.
- 2. Remove the front panel: Most window AC units have a removable front panel that gives you access to the filters and coils. Carefully detach the front panel and set it aside.
- 3. Clean the filters: The filters are crucial for capturing dust and debris from the air. Remove the filters and rinse them under running water to remove any accumulated dirt. If the filters are heavily soiled, they may need to be replaced. Note that some window AC units have reusable filters that can be washed and reinserted.
- 4. Clean the coils: Use a soft brush or vacuum cleaner with a brush attachment to gently remove any dirt or dust from the coils. Pay close attention to the fins, as they can be easily damaged. If the coils are excessively dirty, you may consider using a coil cleaner spray. Remember to follow the manufacturer’s instructions when using any cleaning agents.
- 5. Reassemble the unit: Once the filters and coils are clean and dry, reinsert them into the AC unit. Ensure that everything is properly aligned and secure before reattaching the front panel.
- 6. Exterior cleaning: Lastly, wipe down the exterior of the unit with a damp cloth to remove any dust or grime. This not only enhances the appearance but also helps prevent dirt from entering the internal components.
Replacing Filters and Coils
Replacing the filters and coils of your window AC unit is essential for maintaining optimal air quality and efficiency. Over time, filters can become clogged with dirt and debris, impeding the airflow and reducing cooling performance. Here’s how you can replace the filters and coils:
- Determine the type and size of filters: Check the manufacturer’s instructions or the existing filters to identify the correct type and size for replacements. It’s important to use the recommended filters for compatibility and efficiency.
- Purchase replacement filters: Visit your local hardware store or order the replacement filters online. Ensure you have the correct measurements and specifications to find the right filters.
- Turn off the AC unit: To avoid any accidents or electrical issues, turn off the AC unit and unplug it from the power source before replacing the filters and coils.
- Remove the old filters: Open the front panel of the AC unit and carefully remove the old filters. Take note of the filter orientation to install the new ones correctly.
- Install the replacement filters: Insert the new filters into the designated slot, ensuring they fit tightly and securely. Follow any specific instructions provided by the manufacturer.
- Replace damaged coils: If your window AC unit’s coils are damaged or malfunctioning, it’s best to consult a professional HVAC technician. They will be able to assess the situation and repair or replace the coils as needed.
Proper maintenance of your window AC unit is vital for its performance and longevity. Cleaning the unit regularly, replacing filters, and servicing any damaged coils are essential steps to ensure efficient and effective cooling in your mobile home. By following these maintenance recommendations, you can enjoy cool and comfortable air throughout the hot summer months. Remember, for any complex issues, it’s always advisable to seek professional assistance from an HVAC technician.
Frequently Asked Questions On How To Install A Window AC Unit In A Mobile Home
Can You Put An AC Unit on A Mobile Home?
Yes, you can install an AC unit on a mobile home. It’s important to choose a unit specifically designed for mobile homes to ensure proper fit and functionality. Hiring a professional for installation is recommended to ensure safety and efficiency.
Can You Install A Window Ac Unit Yourself?
Yes, you can install a window AC unit yourself. It is a simple process that requires basic tools and following the provided instructions. Ensure the unit fits securely and is properly sealed to prevent any leaks.
How Do You Properly Install A Window AC Unit?
To properly install a window AC unit, follow these steps:
1. Choose a suitable window location.
2. Clean the area and secure the mounting brackets.
3. Place the unit in the window and ensure a tight fit.
4. Connect the unit to a power source and secure it in place.
5. Test the AC unit to ensure it’s working correctly.
How Big An AC Unit Do I Need For My Mobile Home?
To determine the AC unit size for your mobile home, consider the square footage and insulation level. Generally, 1 ton of cooling capacity is needed for every 500 square feet of space. However, factors like climate and sun exposure may require a larger unit.
It’s best to consult with an HVAC professional for accurate sizing.
Conclusion
Installing a window AC unit in a mobile home can provide efficient cooling and comfort during hot summer months. By following the step-by-step guide provided in this blog post, you can successfully install the unit without any complications. Remember to choose a suitable location, measure the window correctly, secure the unit, and seal any gaps.
Ensure proper maintenance to prolong the lifespan of your AC unit. Stay cool and enjoy the benefits of a well-functioning air conditioner in your mobile home!
