To install a wifi thermostat, follow the manufacturer’s instructions and connect it to your home’s wifi network for remote control and monitoring. With the advancement of technology, wifi thermostats have become a popular choice for homeowners looking to enhance their heating and cooling systems.
Gone are the days when you had to manually adjust the temperature on your thermostat. Now, with a wifi thermostat, you can control and monitor your home’s temperature from anywhere using your smartphone or computer. Installing a wifi thermostat may seem daunting, but it’s actually a fairly simple process.
We will guide you through the steps to install a wifi thermostat in your home. So, let’s get started!
Choosing The Right Wifi Thermostat For Your Home
Factors to consider when selecting a wifi thermostat
Choosing the right wifi thermostat for your home is a decision that can greatly enhance your level of comfort and convenience. With so many options on the market, it’s essential to consider a few important factors to ensure that you make the right choice. Taking into account the compatibility with your HVAC system and the energy-saving features of the thermostat can help you find the perfect fit for your home. Let’s dive into these factors in more detail.
Compatibility with your HVAC system
Before purchasing a wifi thermostat, it’s crucial to check if it is compatible with your home’s HVAC system. This is because different thermostats are designed to work with specific heating and cooling systems. The last thing you want is to buy a thermostat that isn’t compatible and then face compatibility issues or even damage to your system.
To determine compatibility, start by identifying the type of HVAC system you have, such as a central air conditioner, heat pump, or furnace. Then, check the specifications provided by the manufacturer of the wifi thermostat you are considering. Look for information on compatibility with your specific type of system. Additionally, check if the thermostat requires a C-wire for power, as not all HVAC systems have this feature.
Energy-saving features to look for
One of the primary advantages of installing a wifi thermostat is the potential for energy savings. Look for energy-saving features that can help reduce your utility bills while contributing to a greener and more sustainable home.
Some key energy-saving features to consider include:
- Programmability: Opt for a thermostat that allows you to create a personalized schedule for heating and cooling based on your daily routine. This feature enables you to automatically adjust the temperature based on occupancy, saving energy when no one is home.
- Smart temperature sensors: Look for a wifi thermostat that utilizes multiple sensors to detect temperature variations in different areas of your home. This enables the thermostat to intelligently regulate the temperature based on the occupancy and specific comfort needs of each zone, preventing unnecessary cooling or heating.
- Learning capabilities: Some wifi thermostats have the ability to learn your temperature preferences over time, adapting to your needs without requiring constant manual adjustments. This feature can optimize energy usage by automatically adjusting the temperature to your desired comfort level.
- Usage reports and insights: Certain wifi thermostats offer detailed usage reports and insights, allowing you to track your energy consumption patterns. By identifying trends and areas of improvement, you can make informed decisions to conserve even more energy.
By considering these factors when selecting a wifi thermostat for your home, you can ensure that you make a well-informed decision. Take the time to research and compare different options, and remember to prioritize compatibility with your HVAC system and seek out energy-saving features. A wifi thermostat with the right mix of features can not only make your life more convenient but also contribute to a more energy-efficient and comfortable home environment.
Preparing For Installation
Before you begin installing your wifi thermostat, it’s important to prepare yourself and your space for the installation process. This section will guide you through the necessary steps to get ready for a successful installation. Let’s get started!

Gathering necessary tools and equipment:
First things first, gather all the tools and equipment you’ll need to complete the installation. Having everything ready beforehand will help streamline the process and prevent any unnecessary delays. Here’s a list of the essential items you’ll need:
| Tools | Equipment |
|---|---|
|
|
Turning off power to the HVAC system:
Prior to removing your existing thermostat, it’s crucial to ensure the power to the HVAC system is turned off. This step is necessary to prevent any electrical mishaps and keep yourself safe during the installation process. Follow these simple steps to turn off the power:
- Locate the circuit breaker panel in your home.
- Identify the circuit breaker that controls the HVAC system.
- Switch the circuit breaker to the “off” position to cut off the power supply to the HVAC system.
- Double-check that the power is indeed off by testing the thermostat and ensuring it does not respond.
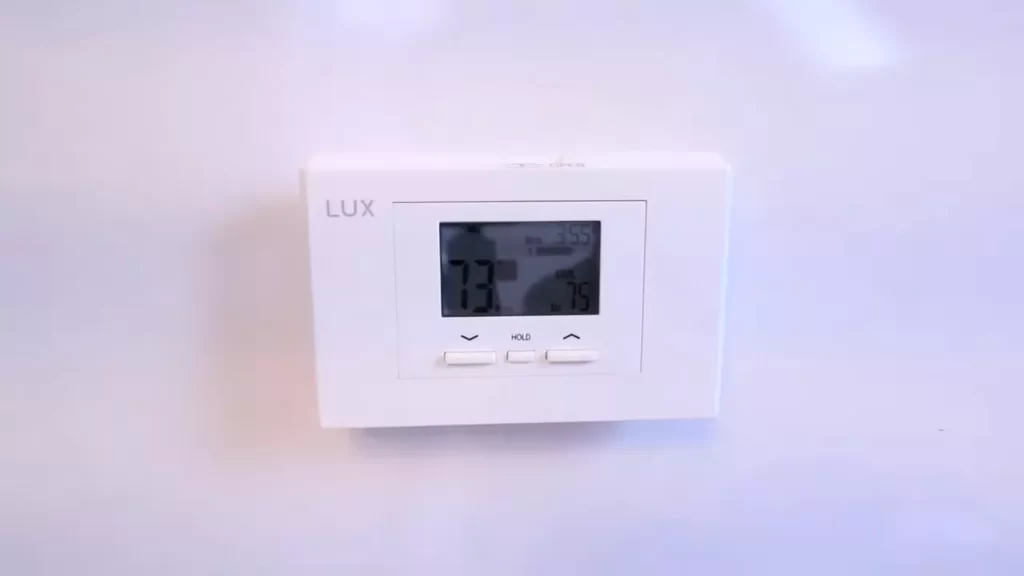
Removing the existing thermostat:
Once the power is turned off, it’s safe to remove the existing thermostat from the wall. Carefully follow these steps to ensure a successful removal:
- Remove the thermostat cover by gently pulling it away from the wall.
- Using a screwdriver, loosen the screws securing the thermostat to the wall plate.
- Gently pull the thermostat away from the wall to expose the wiring.
- Take a picture or make note of the existing wiring connections for reference when connecting the new thermostat.
- Disconnect the wires from the terminals by loosening the screws and pulling the wires out.
- Once all the wires are disconnected, carefully remove the old thermostat from the wall.
Congratulations! You’ve successfully prepared for the installation of your wifi thermostat. With the necessary tools gathered, power turned off, and the existing thermostat removed, you’re now ready to proceed with the installation process. The next section will guide you step-by-step through the installation itself, so stay tuned!
Wiring The New Thermostat
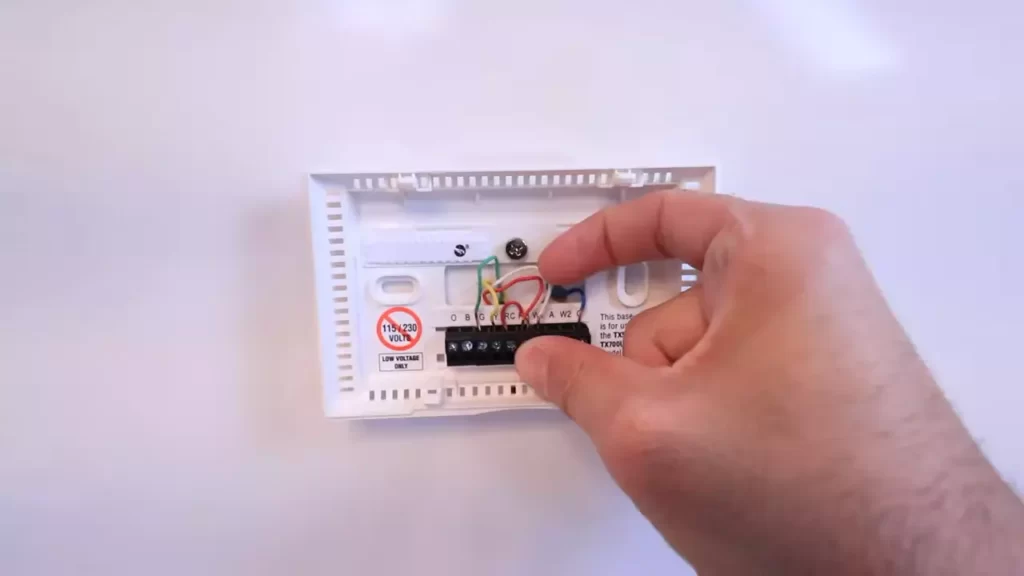
Identifying and labeling the wires
Before you can connect the wires to your new wifi thermostat, it’s important to identify and label each wire correctly. This will ensure that you connect them to the correct terminals on the new thermostat and avoid any confusion or mistakes. Start by turning off the power to your HVAC system at the circuit breaker to ensure your safety.
When identifying the wires, you may come across different colors such as red, white, green, yellow, and so on. It’s essential to know what each wire represents. Here’s a quick reference guide to help you identify the most common wires:
| Wire Color | Function |
|---|---|
| Red (R) | Power from the transformer |
| White (W) | Heating system |
| Green (G) | Fan control |
| Yellow (Y) | Cooling system |
Using colored sticky labels or a marker, label each wire according to its function. This simple step will help you during the installation process and make any future troubleshooting much easier.
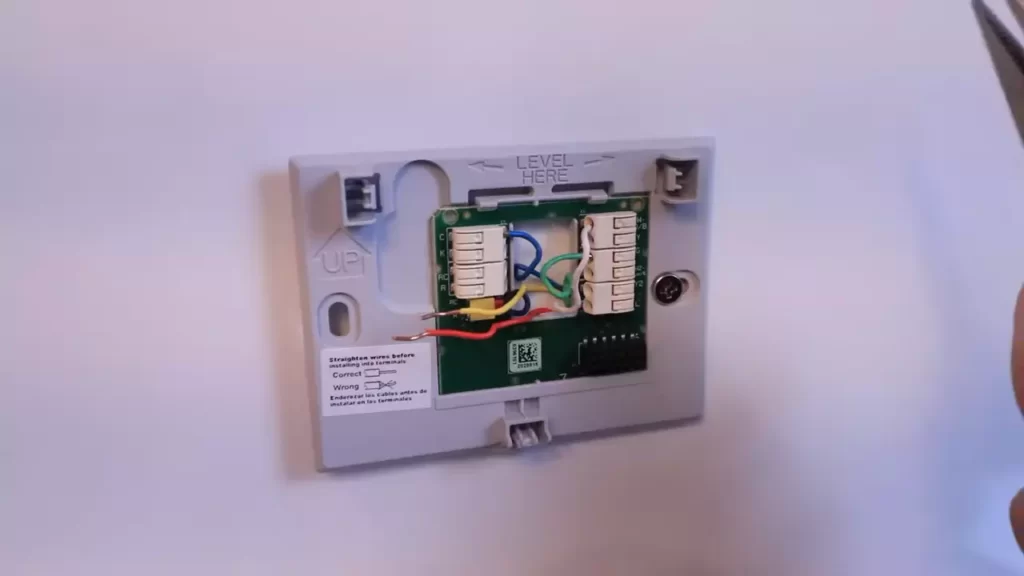
Connecting the wires to the new thermostat
Once you have properly identified and labeled the wires, you can proceed to connect them to your new wifi thermostat. The system you have will determine how many wires you’ll be dealing with. General guidelines for connecting the wires are as follows:
- Start by removing the cover of your new thermostat to expose the terminal screws.
- Loosen the screws on the terminals but do not remove them completely.
- Take the labeled wire that corresponds to the first terminal and wrap it around the screw in a clockwise direction.
- Tighten the screw to secure the wire in place.
- Repeat this process for each wire, ensuring that none of the bare wire is exposed beyond the terminal.
Remember to refer to your thermostat’s user manual to confirm the exact terminal designations and wiring requirements for your specific model. It’s important to follow the manufacturer’s instructions to ensure proper functionality and prevent any potential damage to your HVAC system.
Properly mounting the thermostat to the wall
Now that you have successfully connected the wires, it’s time to mount your new thermostat to the wall. Follow these steps to ensure a secure installation:
- Choose a suitable location for your thermostat, preferably on an interior wall away from direct sunlight and drafts.
- Using a level, ensure that the mounting plate is straight before securing it to the wall using screws.
- Once the mounting plate is secure, attach the thermostat base to the plate using the provided screws or locking mechanism.
- Make sure the thermostat is level and tight against the wall.
By properly mounting your thermostat, you’ll ensure accurate temperature readings and efficient performance. Remember to refer to your thermostat’s user manual for any specific instructions or additional steps.
Now that you have successfully wired and installed your new wifi thermostat, you can move on to the next steps in the installation process. Stay tuned for our next blog post on how to set up and configure your thermostat for maximum comfort and energy savings.
Connecting To Wifi
Once you’ve successfully installed your wifi thermostat and it’s ready to be connected to your home network, the next step is to connect it to your wifi. This process allows you to control your thermostat remotely and take advantage of the convenience and energy savings it provides. In this section, we will guide you through the steps to access the thermostat’s wifi settings, enter your wifi network information, and connect it to your home network.
Accessing the thermostat’s wifi settings
Before you can connect your wifi thermostat to your home network, you need to access its wifi settings. Here’s how:
- Locate the thermostat’s control panel or display screen.
- Press the menu button or navigate to the settings menu.
- Look for an option that says “Wifi” or “Network Settings.”
- Select the wifi option to access the wifi settings.
By following these steps, you will be able to access the wifi settings of your thermostat and proceed to the next step.
Entering your wifi network information
Now that you have accessed the wifi settings of your thermostat, it’s time to enter your wifi network information. Here’s what you need to do:
- Locate your wifi network name (SSID) and password. This information is usually provided by your internet service provider (ISP) and can be found on the router or in the documentation they have provided.
- In the wifi settings of your thermostat, look for an option to enter the SSID (wifi network name) and password.
- Use the keypad or touchscreen on the thermostat to input the SSID and password.
- Double-check the information you have entered to ensure it is correct.
By following these steps, you will have successfully entered your wifi network information into the thermostat’s settings.
Connecting the thermostat to your home network
Now that you have entered your wifi network information, it’s time to connect your thermostat to your home network. Follow these steps:
- After entering the wifi network information, look for an option that allows you to connect or save the settings.
- Select the connect or save option to initiate the connection process.
- Wait for the thermostat to establish a connection with your home network. This may take a few moments.
- Once the connection is established, you should see a confirmation message or indicator on the thermostat’s display screen.
Congratulations! You have successfully connected your wifi thermostat to your home network. Now you can enjoy the convenience of controlling your thermostat remotely and optimizing your home’s energy usage.
Configuring The Thermostat Settings
Setting up the thermostat schedule
One of the key features of a wifi thermostat is the ability to set up a personalized schedule for when your home heating or cooling system should run. This can help you save energy and money by ensuring that your HVAC system only operates when you need it to. To configure the thermostat schedule, follow these steps:
- Access the thermostat settings by navigating to the menu on the device or through the corresponding mobile app.
- Select the “Schedule” option to begin setting up your desired temperature adjustments throughout the day.
- Choose the days of the week to customize the schedule for your comfort needs.
- Specify the desired temperature for each time period. For example, you may want to set a higher temperature during your waking hours and a lower temperature while you’re away or asleep.
- Save your schedule and make any necessary adjustments for weekends or other unique situations.
Adjusting temperature settings and preferences
Customizing the temperature settings on your wifi thermostat allows you to create a comfortable indoor environment that aligns with your preferences and saves energy at the same time. Here’s how you can adjust temperature settings:
- Access the thermostat settings and navigate to the “Temperature” or “Settings” section.
- Select the desired temperature units (Fahrenheit or Celsius) according to your preference.
- Specify the target temperature for heating and cooling modes separately.
- Some thermostats offer the option to fine-tune the temperature swing or differential, which determines the range within which the HVAC system turns on or off.
- Save your temperature settings and monitor them periodically to ensure your comfort and energy-saving goals are being met.
Enabling and using additional features (e.g., geofencing)
Wifi thermostats often come with advanced features that enhance convenience and energy efficiency. One such feature is geofencing, which utilizes your smartphone’s GPS to automatically adjust the temperature settings based on your location. Follow these steps to enable and utilize additional features:
- Access the thermostat settings and locate the “Geofencing” or “Smart Home” section.
- Enable the geofencing feature and grant the necessary permissions on your smartphone.
- Set up the desired radius from your home within which the thermostat should start adjusting the temperature.
- Utilize the mobile app to specify the temperature adjustment preferences when you leave or return home.
- Enjoy the convenience and energy savings that geofencing provides as it automatically optimizes your home’s climate control based on your movements.
Checking For Power And Connectivity
Verifying proper power supply to the thermostat
Before installing a wifi thermostat, it is crucial to ensure that there is a proper power supply to the device. This step is vital as the thermostat needs a reliable electricity source to function efficiently. The last thing you want is to install the thermostat only to find out later that it is not receiving power. Follow the steps below to verify the power supply:
- Start by turning off the power to your HVAC system at the circuit breaker or electrical panel.
- Next, remove the cover of the existing thermostat, exposing the wiring behind.
- Using a voltage tester, check for voltage across the wires. The tester should display a voltage reading, typically ranging from 24 to 30 volts.
- If there is no voltage reading, it indicates that there may be an issue with your power supply. In such cases, it is advisable to consult a professional electrician to resolve the power supply problem before proceeding with the wifi thermostat installation.
Verifying the power supply to the thermostat ensures that it is ready to receive commands and operate effectively.
Troubleshooting wifi connectivity issues
One of the benefits of a wifi thermostat is the ability to remotely control and monitor your home’s temperature. However, ensuring a stable wifi connection is crucial for this feature to work seamlessly. Here are some troubleshooting steps you can follow if you encounter wifi connectivity issues:
- Check that your home’s wifi network is active and functioning correctly by attempting to connect other devices to it.
- Ensure that the thermostat is in range of the wifi router. Thick walls or long distances can cause weak signals and hinder connectivity.
- If the thermostat is not connecting to the wifi network, try restarting your router. Sometimes, a simple reboot can resolve connectivity issues.
- Verify that the wifi credentials you’re entering on the thermostat are correct. Typos or incorrect passwords can prevent successful connections.
- Ensure that there are no other electronic devices nearby that may interfere with the wifi signal, such as cordless phones or microwaves.
By troubleshooting wifi connectivity, you can ensure that your wifi thermostat remains connected to your network, allowing you to control your home’s temperature with ease.
Resetting the thermostat if needed
If you are experiencing issues with your thermostat, such as unresponsive buttons or erratic behavior, it may be necessary to perform a reset. Resetting the thermostat can help resolve software glitches or restore it to its default settings. Follow the steps below to reset your thermostat:
- Locate the reset button on your thermostat. It is usually a small pinhole button located at the back or bottom of the device.
- Using a paperclip or a small pointed object, press and hold the reset button for about 10 seconds.
- Release the reset button and wait for the thermostat to reboot. This process may take a few minutes.
- After the reset, follow the manufacturer’s instructions to reconnect the thermostat to your wifi network and reconfigure any personalized settings.
Resetting the thermostat can help resolve any software or configuration issues, allowing you to enjoy smooth operation and control over your home’s temperature.
Resolving Compatibility Problems
One of the crucial steps when installing a wifi thermostat is ensuring compatibility with your HVAC system. While these modern devices offer convenience and efficiency, they may not always work seamlessly with older heating and cooling systems. However, fret not! We’ve got you covered with some simple steps to address and resolve compatibility issues. Let’s dive right in.
Addressing compatibility issues with the HVAC system
The first step to resolving compatibility problems is to assess whether your wifi thermostat is compatible with your HVAC system. Check the compatibility specifications mentioned by the thermostat manufacturer. Look for any specific requirements such as voltage compatibility, system type, or wiring configurations. Cross-check this information with your HVAC system’s documentation or consult the manufacturer if needed.
Installing compatibility modules or adapters if necessary
If your wifi thermostat is not directly compatible with your HVAC system, don’t worry. Many thermostat manufacturers provide compatibility modules or adapters to bridge the gap. These modules act as intermediaries, allowing the wifi thermostat to communicate with your heating and cooling system seamlessly. Refer to the user manual or the manufacturer’s website to identify the suitable compatibility module for your specific use case. Install it following the provided instructions, ensuring proper wiring and connections.
Seeking professional assistance when needed
In some instances, compatibility issues may require expert intervention. If you find yourself unsure about the compatibility or installation process, it’s always a wise decision to seek professional assistance. HVAC technicians have the knowledge and expertise to handle complex compatibility problems. They can help you identify any potential issues, suggest appropriate solutions, and ensure a smooth and successful installation. Investing in professional help not only saves you time and effort but also provides peace of mind that compatibility issues are resolved correctly.
Remember, addressing compatibility problems when installing a wifi thermostat is crucial for optimal performance and functionality. Take the time to research and understand the compatibility requirements, install compatibility modules or adapters when necessary, and don’t hesitate to seek professional assistance if needed. By resolving compatibility issues, you can enjoy the full benefits of your wifi thermostat, including energy savings, convenience, and control over your home’s heating and cooling system.
Common Installation Mistakes And How To Avoid Them
Not properly labeling or connecting the wires
One of the most common mistakes people make when installing a Wifi thermostat is not properly labeling or connecting the wires. This can lead to incorrect temperature readings or even damage the thermostat altogether. To avoid this, take the time to label each wire according to its corresponding terminal on the old thermostat before disconnecting it.
Once you have labeled the wires, take note of their colors and their corresponding letters or numbers. Make sure to do your research or consult the thermostat’s installation guide to determine which terminal each wire should be connected to on the new thermostat.
Here are a few tips to remember when connecting the wires:
- Switch off the power: Before you start connecting and disconnecting any wires, it’s crucial to turn off the power to the thermostat. This will prevent any electrical accidents or damage to the wires or thermostat. Locate the main circuit breaker and switch off the power to the HVAC system.
- Secure connections: When connecting the labeled wires to the terminals on the new thermostat, make sure each connection is secure. Loose connections can result in poor performance or intermittent functionality. Use a screwdriver to tighten the screws on each terminal, ensuring a snug fit without over-tightening.
- Double-check the connections: Once you have connected all the wires, double-check each connection to make sure they are correctly seated in their respective terminals. This simple step can prevent any potential issues or malfunctions.
- Test the thermostat: After ensuring all the wires are properly connected, it’s time to test your newly installed Wifi thermostat. Switch on the power to the HVAC system and the thermostat, then follow the manufacturer’s instructions for setting up and configuring the thermostat through the accompanying smartphone app or web interface.
Forgetting to turn off power before installation
Forgetting to turn off the power before installing a Wifi thermostat is another common mistake that can result in electrical accidents or damage to the thermostat itself. To avoid this, always switch off the power to the thermostat and HVAC system at the main circuit breaker before starting the installation process.
Here’s a step-by-step guide to follow:
- Locate the main circuit breaker: In most homes, the main circuit breaker can be found in the electrical panel or utility room. Open the panel door and look for the switch labeled for the HVAC system.
- Switch off the power: Once you have located the HVAC system switch, flip it to the “off” position. This will cut off the power supply to the thermostat and ensure a safe installation process.
- Verify the power is off: To be absolutely certain the power is off, try adjusting the temperature settings on the old thermostat to see if the HVAC system responds. If the system remains inactive, you can proceed with the installation.
Over-tightening the thermostat to the wall
Over-tightening the thermostat to the wall during installation is another common mistake that can lead to damage or misalignment. When securing the thermostat to the wall, it’s important to strike the right balance of being securely fastened without excessive force.
Here are a few tips to avoid over-tightening the thermostat to the wall:
- Use the right tools: Select a screwdriver that matches the specifications of the screws provided with the thermostat. This will ensure a secure fit without the risk of stripping the screws or damaging the wall.
- Gently tighten the screws: Begin by loosely attaching the thermostat to the wall using the provided screws. Once the thermostat is in place, gradually tighten the screws using a steady amount of force. Avoid applying excessive pressure or torque.
- Check for proper alignment: After securing the thermostat to the wall, check if it is level and aligned. Use a spirit level if necessary to ensure accuracy. If adjustments are needed, loosen the screws slightly, make the necessary adjustments, and tighten them back while keeping the thermostat properly aligned.
By avoiding these common installation mistakes, you can ensure a smooth and successful installation of your Wifi thermostat. Take your time, follow the steps carefully, and consult the thermostat’s installation guide for any specific instructions or recommendations.
Enjoying The Benefits Of A Wifi Thermostat
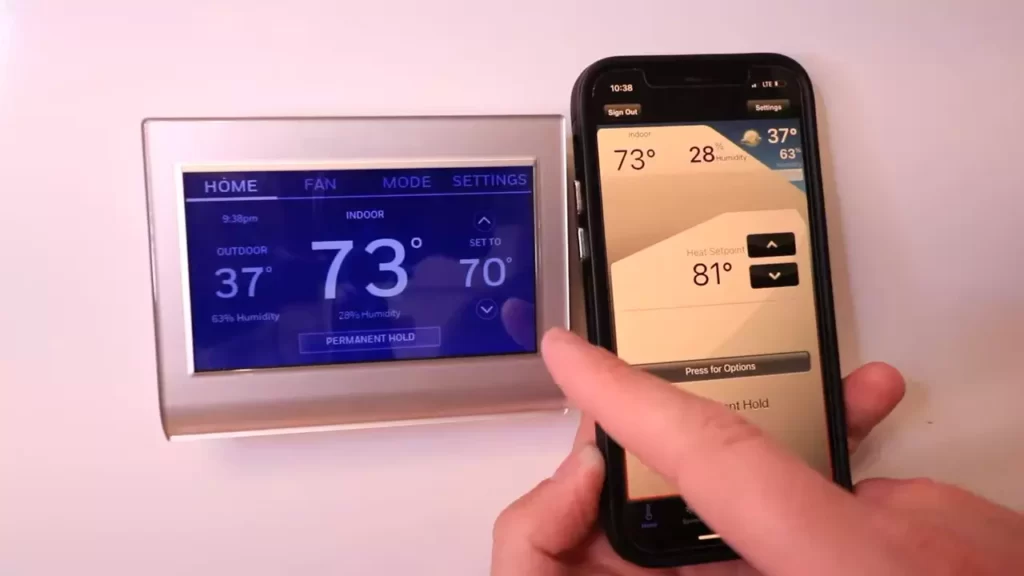
Remote access and control of your HVAC system
One of the major advantages of installing a wifi thermostat is the ability to have remote access and control over your HVAC system. With just a few taps on your smartphone or tablet, you can easily adjust the temperature of your home, no matter where you are.
Whether you’re running late from work or simply want to come back to a cozy home after a vacation, having remote access to your thermostat gives you the convenience and flexibility to make your home comfortable at any time.
Saving energy and reducing utility bills
A wifi thermostat can significantly help you save energy and reduce your utility bills. By having the ability to control your home’s temperature settings from anywhere, you can ensure that your HVAC system is working efficiently, avoiding unnecessary energy consumption.
In addition, many wifi thermostats come with advanced features such as programmable schedules and learning capabilities, allowing you to optimize your heating and cooling settings based on your daily routines. These smart features enable you to avoid wasting energy by cooling or heating an empty home, ultimately leading to savings on your monthly utility bills.
Customizing your home’s comfort settings
With a wifi thermostat, you have the power to customize your home’s comfort settings according to your preferences. Whether you prefer a cooler sleeping environment or a warmer living room in the evening, you can easily create personalized temperature schedules to match your lifestyle. Additionally, some wifi thermostats offer room-specific sensors, allowing you to adjust the temperature of individual rooms to ensure optimal comfort for everyone in your household. Say goodbye to compromising on the temperature and say hello to a home that caters to your unique comfort needs.
Frequently Asked Questions On How To Install A Wifi Thermostat
Can I Install Wifi Thermostat Myself?
Yes, you can install a WiFi thermostat yourself. It is a simple process that doesn’t require professional help. Just follow the provided instructions carefully for a successful installation.
Do I Need An Electrician To Install A Wireless Thermostat?
Yes, you will need an electrician to install a wireless thermostat. They have the expertise to properly connect the thermostat to your HVAC system and ensure it functions correctly.
Does A Wifi Thermostat Need To Be Hardwired?
No, a WiFi thermostat does not need to be hardwired. It connects to your home’s WiFi network for remote control and monitoring.
Can I Install A Home Thermostat Myself?
Yes, you can install a home thermostat yourself. It’s a simple process requiring basic tools and following the manufacturer’s instructions. Just ensure you turn off power, correctly wire the thermostat, and program it correctly. However, if you’re unsure or uncomfortable, it’s best to consult a professional.
Conclusion
Installing a wifi thermostat is a straightforward process that can greatly improve your home’s energy efficiency and comfort. By following the steps outlined in this blog post, you can easily replace your old thermostat with a smart, wifi-enabled one. With its ability to be controlled remotely and tailored to your specific needs, a wifi thermostat offers convenience and savings.
Upgrade your thermostat today and start enjoying the benefits it brings to your home.