To install a whiteboard, first, choose a suitable location on the wall. Then, using a level and screws, mount the whiteboard securely in place.
The Importance Of A Whiteboard In Different Settings
A whiteboard is an essential tool that can be installed in various settings to enhance communication and collaboration. Whether it’s for educational purposes, business meetings, or personal use, whiteboards offer numerous benefits that make them an invaluable addition to any setting.
The benefits of using a whiteboard for communication and collaboration
Whiteboards provide a dynamic and interactive platform for communication and collaboration. Here are some of the key benefits of using a whiteboard:
- Visual representation: Whiteboards allow information to be presented visually, making it easier for people to understand and remember. By utilizing colors, illustrations, and diagrams, complex ideas can be broken down into more comprehensible chunks.
- Real-time editing: Unlike traditional boards, whiteboards allow for quick and easy revisions. Ideas can be modified, erased, and rearranged without leaving any trace, facilitating a seamless and dynamic collaboration process.
- Enhanced engagement: Whiteboards encourage active participation, as they provide an interactive platform for brainstorming, problem-solving, and idea sharing. This fosters a vibrant and inclusive environment, where everyone’s contributions are valued.
- Efficient communication: With a whiteboard, complex information can be presented concisely. Whether it’s illustrating concepts in a classroom, delivering a presentation in a boardroom, or organizing tasks in a personal workspace, whiteboards enable clear and effective communication.
Whiteboard applications in education, business, and personal use
The versatility of whiteboards allows them to be utilized in a wide range of settings. Let’s explore some of the specific applications in education, business, and personal use:
| Education | Business | Personal Use |
|---|---|---|
|
|
|
The versatility of whiteboards makes them suitable for various situations. From classrooms and conference rooms to home offices and creative spaces, whiteboards help facilitate effective communication, foster collaboration, and enhance productivity.
Choosing The Right Whiteboard For Your Needs
When it comes to enhancing collaboration and productivity in meetings or classrooms, having a whiteboard is essential. However, with the variety of options available in the market, it can be overwhelming to choose the right whiteboard for your needs. In this article, we will explore the factors you should consider when selecting a whiteboard, such as size, material, and mounting options. Additionally, we will compare traditional whiteboards, glass whiteboards, and interactive whiteboards, so you can make an informed decision.
Factors to consider when selecting a whiteboard
Before purchasing a whiteboard, it’s important to consider a few factors that will greatly impact its functionality and effectiveness in your specific setting.
Size
The first factor to consider is the size of the whiteboard. Determine the available wall space and the number of people who will be using the whiteboard simultaneously. A larger whiteboard is suitable for larger rooms or classrooms, while a smaller whiteboard may be sufficient for smaller spaces or individual use.
Material
Another crucial aspect is the material of the whiteboard. There are primarily three options: traditional whiteboards, glass whiteboards, and interactive whiteboards.
Traditional Whiteboards
Traditional whiteboards, also known as melamine whiteboards, have been the go-to option for years. These whiteboards have a smooth melamine surface that is durable and easy to write on. They are generally the most affordable option and come in various sizes to suit your needs. However, keep in mind that traditional whiteboards may be prone to staining or ghosting if not properly cleaned.
Glass Whiteboards
If you are looking for a sleek and modern option, consider a glass whiteboard. Glass whiteboards offer a stylish and professional look that complements any office or workspace. They are resistant to staining and ghosting, and with their non-porous surface, they are effortless to clean. Glass whiteboards also have a longer lifespan compared to traditional whiteboards. However, it’s worth mentioning that they are generally more expensive.
Interactive Whiteboards
For a highly interactive and dynamic experience, interactive whiteboards are the way to go. These futuristic whiteboards allow you to interact with the content using touch-sensitive technology. You can write, draw, and even control a computer or multimedia content directly from the board. Interactive whiteboards often come with additional features like built-in speakers and the ability to save and share your work digitally. However, this advanced technology comes at a higher price point.
Comparing traditional whiteboards, glass whiteboards, and interactive whiteboards
To summarize the differences between these whiteboard options:
| Traditional Whiteboards | Glass Whiteboards | Interactive Whiteboards | |
|---|---|---|---|
| Material | Melamine | Glass | Various materials |
| Durability | Durable, but prone to staining and ghosting | Highly durable and resistant to staining | Highly durable and long lifespan |
| Cleaning | Requires regular cleaning to avoid ghosting | Easy to clean with a non-porous surface | Easy to clean with touch-sensitive technology |
| Price | Most affordable option | More expensive than traditional whiteboards | Higher price point |
- Traditional whiteboards are suitable for those on a budget and in need of a basic writing surface.
- Glass whiteboards offer a stylish and modern appearance, with easy maintenance.
- Interactive whiteboards provide advanced features and interactivity, but come with a higher cost.
By considering the factors mentioned above and understanding the differences between traditional whiteboards, glass whiteboards, and interactive whiteboards, you can now make an educated decision on choosing the right whiteboard that best suits your needs. Remember, the right whiteboard can significantly enhance collaboration, brainstorming, and learning experiences!
Planning The Installation Process
Before installing a whiteboard, it is crucial to plan the installation process carefully. This will ensure that the whiteboard is positioned in the most optimal location and that the surface it is mounted on is properly prepared for installation. In this article, we will guide you through the planning stage of the installation process, including assessing the room and determining the best location for the whiteboard, as well as considering the surface and preparing it for installation.
Assessing the room and determining the optimal location for the whiteboard
The first step in planning the installation process is to assess the room where the whiteboard will be installed. Take a moment to consider the following:
- The size of the room: Determine how much wall space is available for the whiteboard and ensure it will fit without obstructing any windows, doorways, or other important elements.
- The purpose of the whiteboard: Consider the primary use of the whiteboard. Is it for classroom instruction, brainstorming sessions, or business meetings? This will help you determine the ideal location within the room.
- The viewing angle: Think about the viewing angle for the intended audience. Ensure that the whiteboard is easily visible from all parts of the room, ensuring effective communication and collaboration.
- The lighting conditions: Take note of the natural and artificial lighting in the room. Avoid installing the whiteboard in direct sunlight, as it can cause glare and make it difficult to see the content.
Considering the surface and preparing it for installation
Once you have determined the optimal location for the whiteboard, it is vital to consider the surface it will be mounted on and prepare it properly. Here are some important steps to follow:
- Clean the surface: Make sure the wall is clean and free from any dirt, dust, or debris. Use a mild detergent solution and a soft cloth to gently clean the surface, ensuring a clean and smooth mounting area.
- Check the condition of the wall: Inspect the wall for any cracks, holes, or other imperfections. If necessary, patch any damaged areas with spackling compound and sand it smooth before proceeding with the installation.
- Choose the right mounting hardware: Depending on the type of wall and the weight of the whiteboard, select the appropriate mounting hardware. It is essential to use sturdy anchors and screws that can support the weight of the whiteboard.
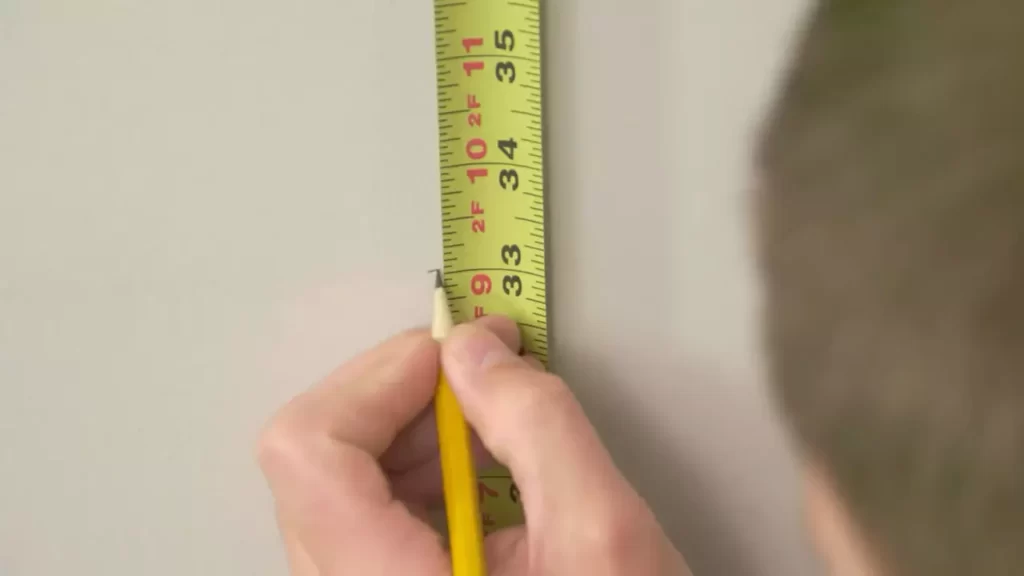
- Measure and mark the installation area: Use a tape measure and a level to mark the desired installation height and width of the whiteboard. This will ensure that it is mounted straight and level.
By carefully assessing the room and considering the surface, you can ensure a successful whiteboard installation. Taking the time to plan the installation process will not only result in a professional and functional whiteboard setup, but it will also enhance the overall visual appeal of the room.
Step-By-Step Whiteboard Installation Guide
Installing a whiteboard is a simple and effective way to enhance productivity and collaboration in any space. Whether you’re setting up a classroom, office, or even a home workspace, a whiteboard can be a valuable addition. In this step-by-step guide, we’ll walk you through the process of installing different types of whiteboards. From wall-mounted options to freestanding and interactive models, we’ve got you covered. Let’s get started!

Gathering the necessary tools and materials
Before you begin, make sure to gather all the tools and materials you’ll need for the installation. Having everything ready will ensure a smooth and efficient process.
Here’s a list of the tools and materials you’ll likely need:
| Tools | Materials |
|---|---|
|
|
Installing wall-mounted whiteboards
Wall-mounted whiteboards are a popular choice for many spaces due to their versatility and easy installation. Follow these steps to install your wall-mounted whiteboard:
- Choose the desired location on the wall. Ensure it is at a comfortable height and easily visible for everyone.
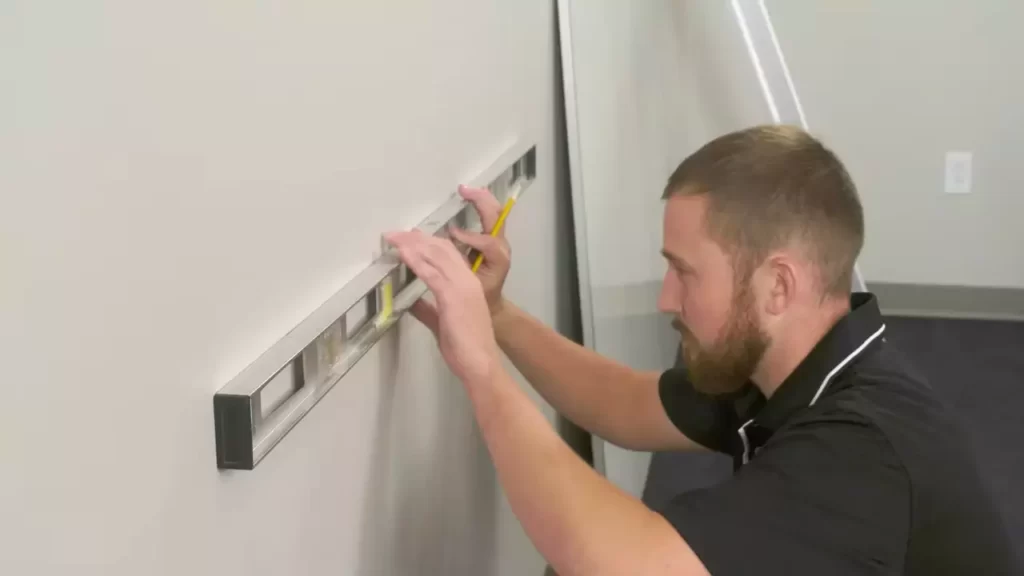
- Measure and mark the position where you want to mount the whiteboard. Use a level to ensure it is perfectly straight.
- Using a power drill, create holes at the marked positions. Insert anchors into the holes to provide stability.
- Attach the whiteboard mounting brackets to the wall using screws. Make sure they are securely fastened.
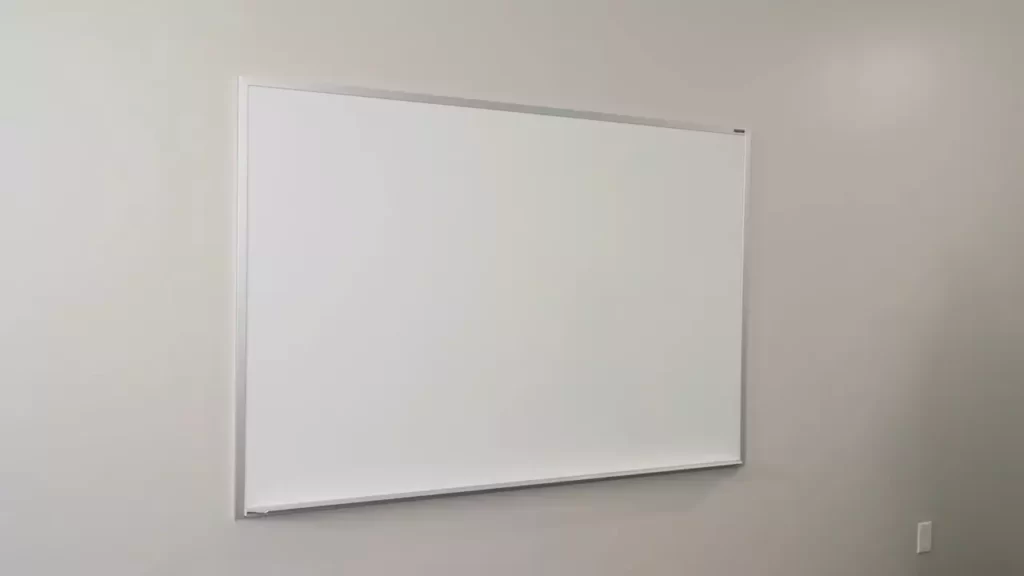
- Place the whiteboard onto the mounting brackets. Check that it is level and adjust if necessary.
Once the whiteboard is securely in place, you’re ready to start utilizing its benefits!
Installing freestanding whiteboards
Freestanding whiteboards are an excellent option if you need a portable and versatile solution. Follow these steps to install your freestanding whiteboard:
- Choose a suitable location for your freestanding whiteboard. Ensure there is enough space and a flat surface to support it.
- Place the whiteboard in the desired location and adjust its position until it is level and stable.
- If your freestanding whiteboard comes with locking wheels, make sure to engage them to prevent any accidental movement.
Installing a freestanding whiteboard is as easy as that. Now you can move it around as needed, making collaboration a breeze in any part of your workspace!
Installing interactive whiteboards
Interactive whiteboards offer advanced features that facilitate engaging presentations and dynamic collaboration. Follow these steps to install your interactive whiteboard:
- Choose the ideal location for your interactive whiteboard, keeping in mind factors such as visibility, access to power outlets, and clearance for any interactive components.
- Consult the manufacturer’s instructions for specific mounting requirements. They may provide specific brackets or mounting systems for your interactive whiteboard.
- Follow the provided instructions to mount the interactive whiteboard securely to the wall or other designated surface.
- Ensure all necessary cables and connections are made appropriately.
- Calibrate and set up the interactive whiteboard according to the manufacturer’s instructions. This step is essential to ensure optimal performance.
With your interactive whiteboard properly installed and calibrated, you’re ready to harness its interactive capabilities and take your presentations to the next level!
Whiteboard Maintenance And Care
Maintaining and properly caring for your whiteboard is essential to ensure its longevity and optimal performance. By following a few simple steps, you can keep your whiteboard surface clean and free from common issues like ghosting and staining. In this section, we will discuss proper cleaning techniques and materials as well as troubleshooting tips for addressing common whiteboard problems.
Proper cleaning techniques and materials to maintain the whiteboard’s surface
To maintain your whiteboard’s surface and prevent it from becoming dull or stained, it is important to use the right cleaning techniques and materials. Follow these steps to keep your whiteboard looking brand new:
- Use a dry cloth or eraser: Start by wiping the surface of the whiteboard with a dry, clean cloth or whiteboard eraser. This will help remove any loose debris or dry erase marker residue.
- Use a whiteboard cleaning solution: For more stubborn stains or ghosting, you can use a commercial whiteboard cleaning solution or make your own by mixing a small amount of water with vinegar. Apply the solution to a soft cloth and gently wipe the surface.
- Avoid abrasive materials: Avoid using abrasive materials such as scrub brushes or rough sponges, as they can damage the whiteboard surface.
- Regularly clean the eraser: Clean your whiteboard eraser regularly by rinsing it with water and allowing it to air dry. This will prevent the eraser from transferring dirt or marker residue back onto the whiteboard surface.

Troubleshooting common issues like ghosting or staining
Even with proper maintenance, you may still encounter common issues like ghosting or staining on your whiteboard surface. Here are some troubleshooting tips to help you address these problems:
| Issue | Troubleshooting Tip |
|---|---|
| Ghosting | If ghosting occurs, try using a whiteboard cleaner or isopropyl alcohol to remove the residue. Apply the cleaner to a soft cloth and gently rub the affected area in a circular motion. |
| Staining | To tackle stains, create a paste by mixing baking soda with water. Apply the paste to the stained area and gently scrub with a soft cloth or sponge. Rinse with water and dry the surface thoroughly. |
By following these maintenance and troubleshooting tips, you can ensure that your whiteboard remains in excellent condition and provides a clean surface for your ideas, presentations, and brainstorming sessions.
Enhancing The Whiteboard Experience
Installing a whiteboard in your home or office can significantly enhance your productivity and creativity. It provides a large and visible space to brainstorm, organize ideas, and collaborate with others. But to truly elevate your whiteboard experience and make the most of this versatile tool, there are a few accessories and creative techniques worth exploring.
Accessories and tools that can be used with whiteboards
When setting up your whiteboard, it’s essential to consider the accessories and tools that can enhance its functionality. Here are a few items to keep in mind:
- Markers: Choose high-quality markers that offer vibrant colors and smooth writing. This will make your content more visually appealing and legible.
- Erasers: Invest in a good eraser to wipe away your notes and sketches effortlessly. Look for options that are designed specifically for whiteboards, as they are more effective in removing dry-erase ink.
- Magnetic features: Consider adding magnetic features to your whiteboard, such as magnetic strips or clips. These allow you to easily attach important documents, photos, and other materials, turning your whiteboard into a versatile display space.
Creative ways to use whiteboards for brainstorming and organizing ideas
While whiteboards excel at their core function of being a writing surface, they also offer countless creative possibilities for brainstorming and organizing ideas. Here are a few innovative techniques to make the most out of your whiteboard:
- Mind mapping: Create mind maps on your whiteboard to visually connect ideas and concepts. Start with a central topic in the middle and branch out to related subtopics. This technique can help you analyze complex problems and generate new ideas.
- Timeline visualization: Use your whiteboard to create timelines, whether for project management, historical events, or personal goals. Draw horizontal lines and write dates or milestones along the timeline to get a better overview of your progress and deadlines.
- Storyboarding: If you’re working on a creative project like writing a book or planning a video, use your whiteboard as a storyboard. Use different sections to sketch out scenes, write key plot points, or visualize character development.
- Collaborative brainstorming: Whiteboards are perfect for group brainstorming sessions. Encourage participants to contribute their ideas, and use different colored markers to distinguish between different participants. This fosters a collaborative environment and sparks creativity.
By utilizing these accessories and techniques, you can take your whiteboard experience to the next level. Whether you’re using it for personal organization or group collaboration, the possibilities are endless. Let your creativity flow, and let the whiteboard be your canvas for ideas and innovation.
Inspiring Collaboration With Whiteboards
Whiteboards are an essential tool for promoting collaboration in various settings, including classrooms and meeting rooms. The interactive nature of whiteboards encourages engagement, brainstorming, and creativity among participants. In this article, we will explore how whiteboards can inspire collaboration, and how integrating technology enhances productivity in these spaces.
Promoting a collaborative environment using whiteboards in classrooms and meeting rooms
Whiteboards play a significant role in creating a collaborative environment in classrooms and meeting rooms. When utilized effectively, whiteboards provide a platform for sharing ideas, visualizing concepts, and collaborating on various projects. Here are some ways in which whiteboards promote collaboration:
- Encouraging active participation: Whiteboards invite participants to actively engage by allowing them to contribute their thoughts and ideas visually. Whether it’s a group brainstorming session or a class discussion, whiteboards provide a shared space for everyone to participate and collaborate.
- Fostering creativity: The blank canvas of a whiteboard stimulates creativity. It allows individuals to think outside the box, sketch diagrams, and illustrate concepts, resulting in innovative ideas and solutions.
- Improving communication: Whiteboards aid in improving communication by visually representing concepts and ideas. Participants can easily understand and follow discussions when information is displayed on a whiteboard, leading to clearer and more effective communication.
In conclusion, whiteboards serve as a catalyst for collaboration by promoting active participation, fostering creativity, and improving communication in classrooms and meeting rooms.
Integrating technology with interactive whiteboards for enhanced collaboration and productivity
Integrating technology with interactive whiteboards takes collaboration to the next level. By combining the traditional whiteboard concept with modern technology, teams and classrooms can benefit from enhanced collaboration and productivity. Here are some ways in which technology integration enhances collaboration:
- Real-time collaboration: With interactive whiteboards, multiple participants can contribute simultaneously, regardless of their physical location. This allows for seamless real-time collaboration, boosting productivity and efficiency.
- Easy access to digital resources: Interactive whiteboards offer the ability to access digital resources directly, such as websites, videos, and interactive educational materials. This saves time and encourages exploration, enriching the collaborative experience.
- Effortless organization and sharing: Interactive whiteboards allow for easy organization and sharing of content. Users can save, export, or share their work with others, ensuring that ideas and information are readily accessible to all participants.
Incorporating technology into whiteboard experiences creates a dynamic space where collaboration thrives and productivity soars.
Customizing And Personalizing Your Whiteboard
Aside from being a functional tool for brainstorming, planning, and organizing ideas, a whiteboard can also be a canvas for your creativity. Customizing and personalizing your whiteboard not only adds a personal touch but also enhances its visual appeal. In this section, we will explore different ways to make your whiteboard uniquely yours.
Adding decorations and visual elements to make the whiteboard more visually appealing
To make your whiteboard stand out and reflect your personality and style, consider adding decorations and visual elements. These elements can range from inspirational quotes to vibrant border designs that add an element of visual interest to your whiteboard.
One way to decorate your whiteboard is by using washi tape. Washi tape is a type of decorative tape available in various patterns and colors. You can apply washi tape along the edges of your whiteboard to create a border or use it to create shapes and patterns on the surface of the whiteboard. This simple addition instantly adds a pop of color and visual appeal to your space.
Another option for adding visual elements is to use stickers or decals. There are a wide variety of stickers available, ranging from motivational quotes to whimsical illustrations. Choose stickers that resonate with you and your goals, and strategically place them on your whiteboard to add a touch of personality.
If you’re feeling particularly creative, consider using dry-erase markers to draw or doodle directly on the whiteboard. Whether it’s intricate patterns, fun illustrations, or mind maps, these hand-drawn elements not only personalize your whiteboard but also serve as useful visual aids for your ideas and thoughts.
Using different colors and styles of markers to enhance the aesthetics
Markers are an essential tool for writing and drawing on a whiteboard, but they can also serve as a means to enhance the aesthetics of your whiteboard. Different colors and styles of markers can be used to add visual interest and make your whiteboard more engaging.
Consider using a variety of marker colors to differentiate and categorize your ideas. Assigning a specific color to each category or project can make it easier to visually identify and organize information on the whiteboard. For example, you could use green markers for upcoming events, blue markers for brainstorming sessions, and red markers for urgent tasks.
In addition to different colors, you can also experiment with different marker styles, such as chisel tips or fine tips. The chisel tips allow for broader strokes, making them ideal for outlining and highlighting important points. On the other hand, fine-tipped markers enable precision and are perfect for writing detailed notes or creating intricate designs.
With a multitude of marker options available, you have the freedom to mix and match colors and styles to create visually appealing and organized content on your whiteboard.
Frequently Asked Questions For How To Install A Whiteboard
How Do You Attach A Whiteboard To A Cubicle Wall?
To attach a whiteboard to a cubicle wall, follow these steps:
1. Clear the area where you want to mount the whiteboard.
2. Measure the desired height and position on the wall.
3. Use a drill to create holes for the mounting brackets.
4. Attach the brackets to the wall using screws.
5. Hang the whiteboard on the brackets securely.
How Do You Hang A Whiteboard Without Drilling?
Hang a whiteboard without drilling by using adhesive hooks or strips specifically designed for hanging objects on walls. Make sure to clean the wall surface thoroughly before applying the adhesive. Press the hooks or strips firmly onto the wall and allow the adhesive to set.
Mount the whiteboard onto the hooks or strips following the manufacturer’s instructions.
Do You Need A Stud To Hang A Whiteboard?
Yes, you need a stud to hang a whiteboard securely. Using a stud ensures that the whiteboard stays in place without falling down.
How Do You Install A Whiteboard In A Classroom?
To install a whiteboard in a classroom, first determine the ideal location. Then, ensure the wall is clean and flat. Use a level to mark the board’s height and width. Securely mount the brackets or hangers as per manufacturer instructions.
Finally, attach the whiteboard to the brackets and make sure it is level.
Conclusion
Installing a whiteboard doesn’t have to be complicated or time-consuming. By following these simple steps, you can easily set up a whiteboard in your desired location. Remember to choose the right type of whiteboard and gather all the necessary tools before beginning the installation process.
With a bit of patience and careful attention to detail, you’ll have a functional whiteboard that enhances your productivity or creativity in no time. Happy installing!