To install a wall furnace, first, choose a suitable location within your home. Then, carefully mount the furnace on the wall using the provided brackets and secure it in place.
Once the furnace is securely mounted, connect and seal the gas supply line, ensuring there are no leaks. Finally, connect the furnace to the electrical supply and test it to ensure proper functioning. Wall furnaces provide an efficient and space-saving heating solution for small to medium-sized rooms.
Installing a wall furnace is a straightforward process that can be accomplished with a few basic tools and some careful planning. By following the steps outlined in this guide, you can quickly and easily install a wall furnace in your home and enjoy the benefits of cozy warmth throughout the colder months. Whether you are replacing an old unit or adding a new heating source, this installation guide will assist you in successfully setting up a wall furnace in your desired location. So, let’s dive in and learn how to install a wall furnace step by step.
Choosing The Right Location
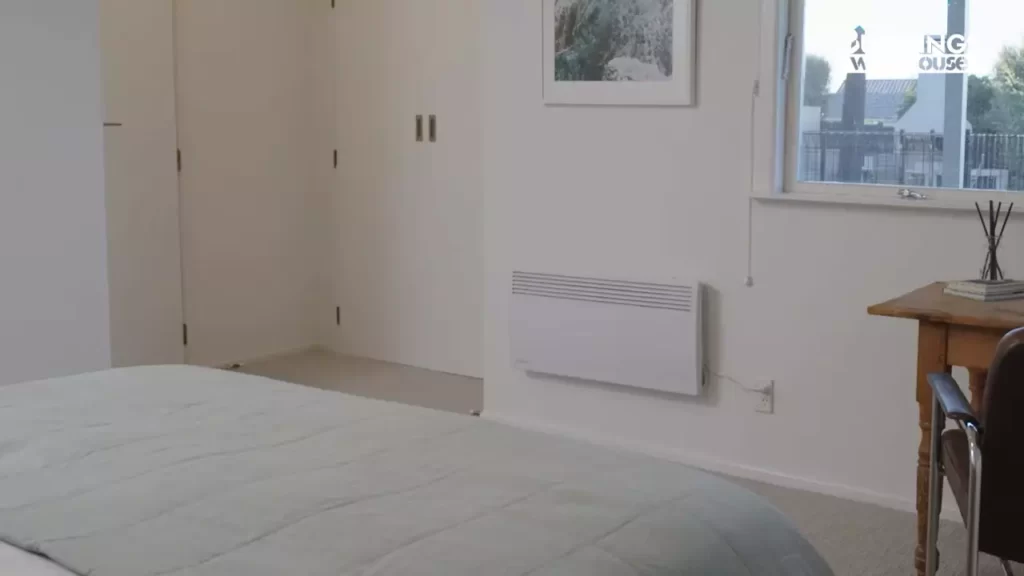
When it comes to installing a wall furnace, one of the most crucial steps is selecting the right location. The placement of your wall furnace plays a significant role in its efficiency and effectiveness. This is why it’s important to carefully assess the available space and determine the appropriate wall for installation.
Factors to consider when selecting a location for your wall furnace installation
Assessing the available space and determining the appropriate wall for installation requires a thoughtful evaluation of several factors. By considering these factors, you can ensure that your wall furnace is optimally placed to provide maximum comfort and energy efficiency.
1. Structural Integrity
Prior to installing your wall furnace, it is crucial to assess the structural integrity of the chosen wall. The wall must be able to support the weight of the furnace and any necessary venting. Ensure that the wall is made of durable material that can handle the installation without any compromises to its stability.
2. Accessibility
Another important factor to consider is the accessibility of the chosen wall. The wall furnace should be conveniently located in an area that allows for easy access. This will facilitate maintenance and troubleshooting, ensuring any future repairs or inspections can be carried out with ease.
3. Clearance Requirements
Wall furnaces typically require a specific amount of clearance space around them to ensure safe operation. Check the manufacturer’s guidelines for the recommended clearance requirements. This information will help you determine if the selected wall can provide the necessary clearance distance from other objects and structures.
4. Venting Options
Consider the venting options available for your wall furnace installation. Depending on the model and type of furnace, you may have different venting options, such as through-the-wall or direct venting. Ensure that the chosen wall allows for the desired venting configuration.
5. Proximity to Gas and Electrical Connections
Take into account the proximity of the chosen wall to gas and electrical connections. The wall furnace will require a fuel source, such as natural gas or propane, as well as an electrical connection for powering its various components. Ensuring the wall is within reach of these essential connections will simplify the installation process.
6. Heating Distribution
Consider how the heat generated by the wall furnace will distribute throughout your space. The chosen wall should be in a location that allows for even and efficient distribution of the heated air. This will maximize the heating capabilities of your wall furnace and ensure optimal comfort throughout the room or area.
Taking into account these factors when selecting a location for your wall furnace installation will greatly contribute to its long-term performance and customer satisfaction. By carefully evaluating the available space and considering the necessary requirements, you can ultimately choose a location that ensures the optimal operation and effectiveness of your wall furnace.
Proper Sizing And Capacity
Installing a wall furnace is an excellent way to provide efficient heating for a specific space in your home. However, to ensure optimal performance and energy efficiency, it is crucial to choose the right size and capacity for your wall furnace. Understanding the heating requirements of the space and calculating the necessary heating capacity will help you make an informed decision. Let’s dive into the details.
Understanding the heating requirements of the space
Before you start calculating the heating capacity, it is essential to assess the heating requirements of the space where you intend to install the wall furnace. Factors such as the size of the area, insulation, windows, and ceiling height all play a role in determining the heating needs.
To get a clearer understanding, ask yourself the following questions:
- What is the square footage of the room?
- Are there any large windows or poorly insulated areas?
- What is the height of the ceiling?
- Are there any other sources of heat in the room?
How to calculate the necessary heating capacity for your wall furnace
Once you have evaluated the heating requirements of the space, you can proceed with calculating the necessary heating capacity for your wall furnace. It is crucial to choose a furnace that can adequately heat the room without overworking or underperforming. Here’s a simple method to help you determine the ideal capacity:
- Calculate the cubic footage of the room by multiplying the square footage by the ceiling height.
- Consider the room’s insulation. For well-insulated areas, multiply the cubic footage by 20 BTUs (British Thermal Units). For average insulation, multiply by 25 BTUs. And for poorly insulated spaces, multiply by 30 BTUs.
- Take into account any additional factors that may affect the heating requirements. For example, if the room has large windows or high ceilings, you may need to add extra capacity.
- Compare the calculated heating capacity with the specifications provided by different wall furnace models. Choose a furnace that offers a capacity within the range of your calculated value.
Remember, it is better to slightly oversize the furnace capacity than to undersize it. This ensures that your wall furnace can handle the heating demands of the space efficiently.
By understanding the heating requirements of the space and properly calculating the necessary heating capacity, you can confidently select the right wall furnace for your needs. A correctly sized and properly installed wall furnace will keep your space comfortably warm, providing you with efficient heating throughout the colder months.
Gathering The Necessary Tools And Materials
Before starting the installation process for your wall furnace, it’s important to gather all the necessary tools and materials. This will ensure a smooth and efficient installation, saving you time and effort in the long run. In this section, we will discuss the essential tools needed for the installation process, as well as the required materials.
Essential tools needed for the installation process
Having the right tools on hand is crucial for a successful wall furnace installation. Here are the essential tools you’ll need:
- Tape measure: This will help you accurately measure the dimensions of the wall where the furnace will be installed, ensuring a proper fit.
- Stud finder: A stud finder is necessary to locate the studs in the wall. The furnace will need to be securely mounted to the studs for stability and safety.
- Power drill: You’ll need a power drill to create the necessary holes in the wall for mounting brackets and venting.
- Adjustable wrench: An adjustable wrench will come in handy for tightening and securing nuts, bolts, and other fasteners during the installation process.
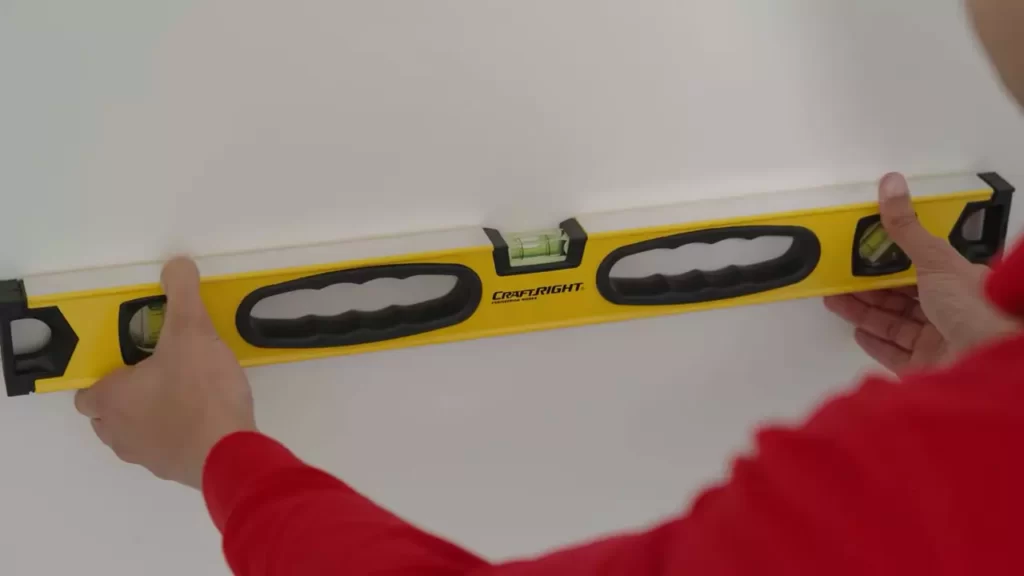
- Level: A level is necessary to ensure the furnace is installed straight and level. This will prevent any issues with the functioning or appearance of the unit.
Required materials for proper wall furnace installation
In addition to the necessary tools, you’ll also need specific materials for a proper wall furnace installation. Here are the materials you’ll require:
| Materials | Description |
|---|---|
| Wall furnace unit | The wall furnace unit itself is, of course, the main component needed for installation. Choose a unit that suits your heating needs and the dimensions of your space. |
| Mounting brackets | Mounting brackets are necessary to secure the furnace to the wall. Ensure that the brackets are sturdy and compatible with the specific wall furnace unit you have chosen. |
| Venting components | Depending on the type of wall furnace you’re installing, you may need various venting components. This could include vent pipes, elbows, and termination caps. It’s important to carefully follow the manufacturer’s instructions for the specific venting requirements of your unit. |
| Screws and fasteners | Screws and fasteners are needed to attach the mounting brackets to the wall and secure other components of the installation. Be sure to use the appropriate size and type of screws for your specific wall type (e.g., drywall, masonry). |
| Thermostat | A thermostat is essential for controlling the temperature of the wall furnace. Choose a compatible thermostat that suits your heating needs and preferences. |
By gathering all the necessary tools and materials in advance, you’ll be well-prepared for a successful wall furnace installation. Next, we will move on to the actual installation process, where we will guide you step-by-step through the procedures.
Ensuring Safety Precautions
When it comes to installing a wall furnace, it is crucial to prioritize safety every step of the way. By taking proper safety measures, you can ensure a secure and efficient installation process. In this section, we will discuss the important safety measures that you should follow, including tips for handling gas and electrical connections safely.
Important safety measures to follow during the installation process
Installing a wall furnace involves working with gas and electrical connections, so it is important to prioritize safety. Here are some important safety measures to follow during the installation process:
- Ensure that the installation area is well-ventilated and free from any flammable materials.
- Turn off all gas and electrical connections before starting the installation.
- Wear protective gear, such as gloves and safety glasses, to prevent any injuries during the installation.
- Read and thoroughly understand the manufacturer’s instructions before proceeding with the installation.
- Make sure that the wall where you intend to install the furnace is structurally sound to handle the weight of the unit.
- If you are not confident in your abilities, it is advisable to seek professional help for the installation.
Tips for handling gas and electrical connections safely
Working with gas and electrical connections can be hazardous, but by following these tips, you can ensure a safe installation:
- When working with gas connections, make sure to check for any leaks by applying a soapy water solution to the connections. If you notice any bubbles, there is a leak, and you should immediately turn off the gas supply.
- Ensure that all gas connections are securely tightened with the appropriate tools.
- When handling electrical connections, turn off the power supply to the area where you will be working.
- Use insulated tools and avoid touching any exposed wires.
- Follow the manufacturer’s instructions for connecting the electrical wires, ensuring that each wire is properly secured.
- After completing the installation, double-check all connections to ensure they are secure and properly tightened.
By adhering to these safety precautions, you can minimize the risks associated with installing a wall furnace and enjoy a safe and comfortable heating solution for your home.
Step-By-Step Installation Guide
If you’re looking to add a wall furnace to your home, you may be wondering how to go about installing it yourself. Don’t worry, with this step-by-step installation guide, you’ll soon have your new wall furnace up and running. We’ll cover all the necessary steps, from preparing the wall for installation to securely mounting the furnace and connecting it to the ventilation and gas or electrical supply.
Preparing the wall for installation
Before you begin the installation process, it’s important to prepare the wall properly. This involves cleaning the area where the furnace will be installed and patching any holes or imperfections. By starting with a clean and smooth surface, you’ll ensure a secure and stable installation.
Here’s what you need to do:
- Clean the wall thoroughly using a mild detergent and a soft brush or cloth. Remove any dirt, dust, or grease that may be present.
- Patch any holes or cracks in the wall using a suitable patching compound. Smooth out the surface and allow it to dry completely according to the manufacturer’s instructions.
- If necessary, sand the patched area to create an even surface. Wipe away any dust or debris before proceeding.
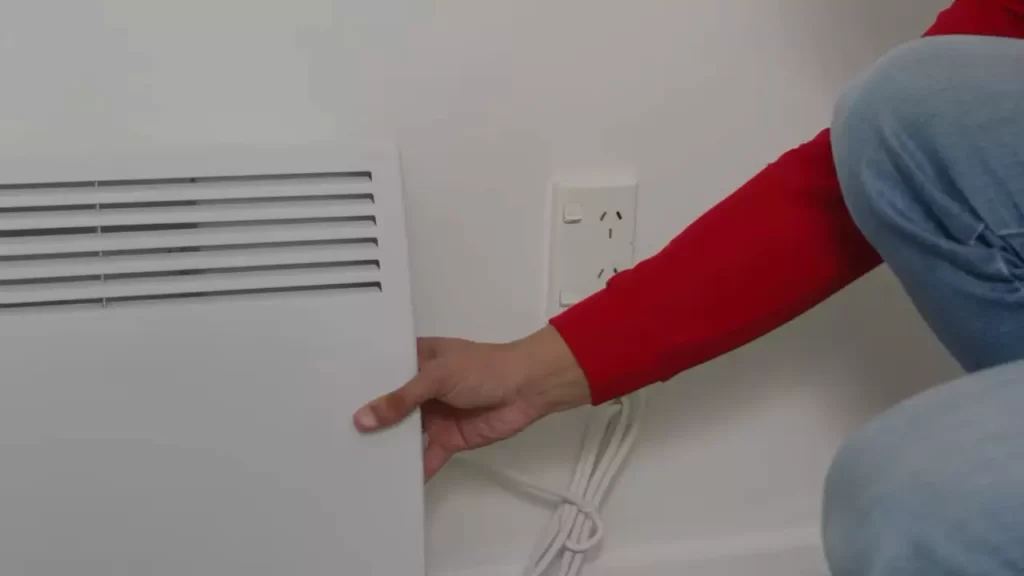
Mounting the wall furnace securely and connecting it to ventilation and gas or electrical supply
Once the wall is prepared, it’s time to mount the wall furnace securely and make the necessary connections. This step is crucial to ensure safe and efficient operation of the furnace. Follow these steps:
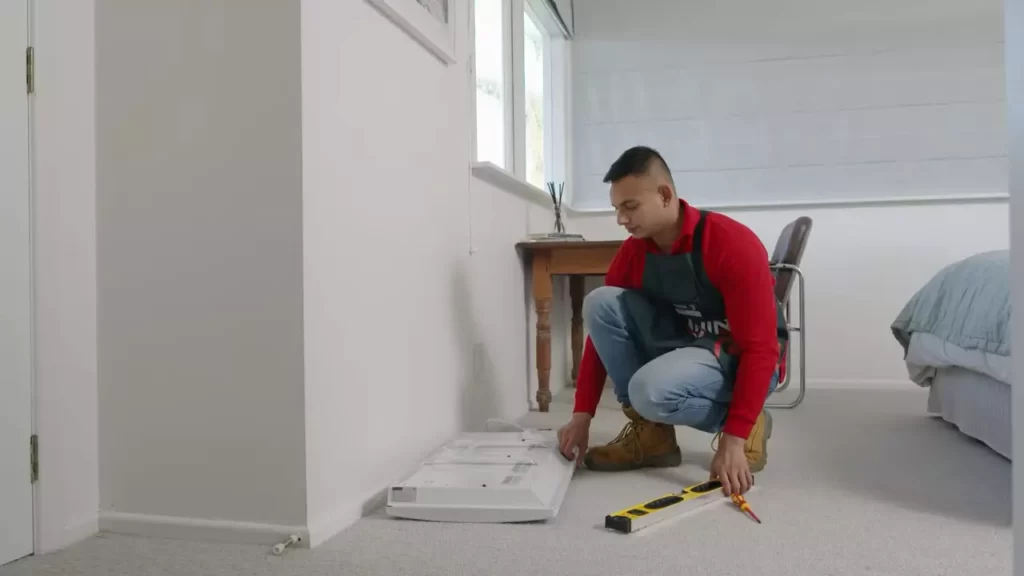
- Review the manufacturer’s instructions to determine the best location for mounting the wall furnace. Take into account any guidelines or requirements regarding clearances, ventilation, and accessibility.
- Using a level, mark the exact position and height where the furnace will be mounted on the wall. Double-check the measurements to ensure accuracy.
- Securely attach the mounting bracket or brackets to the wall, using the appropriate screws or anchors for your wall type.
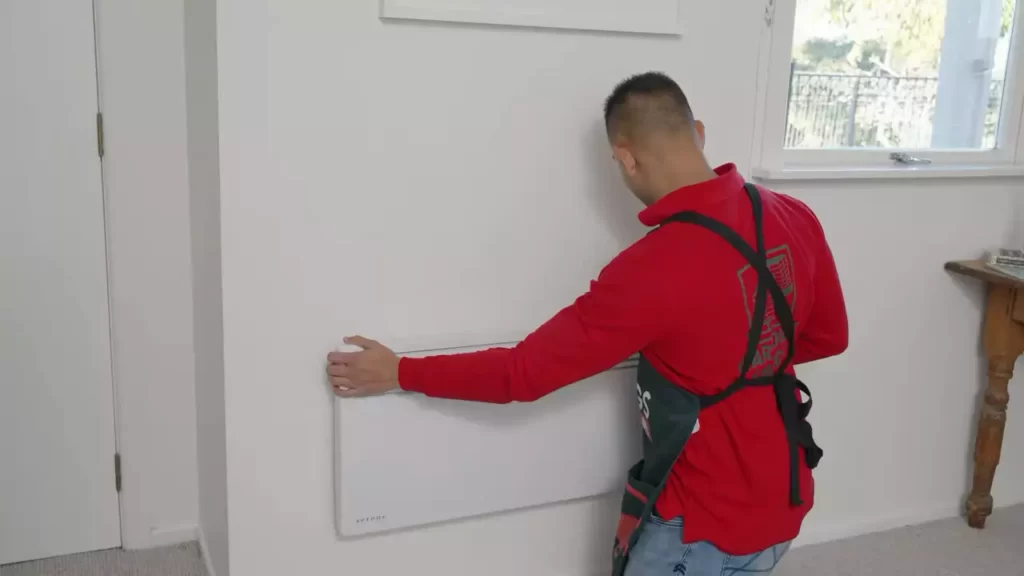
- Lift the wall furnace onto the mounting bracket, aligning it with the marked position. Ensure that it is level and secure it in place according to the manufacturer’s instructions.
- Connect the ventilation system to the wall furnace, ensuring a proper fit and seal. Follow the manufacturer’s guidelines for the specific type of venting required.
- For gas-powered furnaces, carefully connect the gas supply line to the appropriate connection on the furnace, ensuring a tight and secure fit. If your furnace is electric, consult the manufacturer’s instructions for proper electrical connection.
Remember to refer to the manufacturer’s instructions throughout the installation process, as specific steps and requirements may vary depending on the model and type of wall furnace. With these steps, you’ll be one step closer to enjoying the warmth and comfort of your newly installed wall furnace.
Conducting Ventilation And Gas/Electrical Connections
When installing a wall furnace, ensuring proper ventilation and making the necessary gas or electrical connections are crucial steps that should not be overlooked. These steps are essential for the safe and efficient operation of your wall furnace. In this section, we will guide you through the process of installing the ventilation system and connecting your wall furnace to the gas supply or electrical wiring.
Installing the ventilation system for proper exhaust
To ensure the proper exhaust of combustion gases from your wall furnace, it is important to install a ventilation system. This system will help remove any potentially harmful gases, such as carbon monoxide, from your home. Follow these guidelines to install the ventilation system correctly:
- Start by locating a suitable area on an exterior wall to install the vent termination. Choose a location that is clear of any obstructions and allows the exhaust gases to disperse easily.
- Next, measure and mark the position for the vent pipe entry point on the exterior wall. Make sure to consult the manufacturer’s instructions for the required distance from windows, doors, and other sources of combustion air.
- Drill a hole through the marked point on the exterior wall using a suitable drill bit size as recommended by the manufacturer. Ensure the hole is level and straight.
- Insert the vent pipe into the drilled hole, making sure it fits securely and tightly. Use weatherproof caulking or sealant to seal any gaps around the vent pipe entry point to prevent drafts or moisture from entering your home.
- Connect the vent pipe to the wall furnace by following the manufacturer’s instructions. It is important to use the specified vent pipe type and size for your wall furnace model.
- Finally, secure the vent pipe in place using brackets or clamps as recommended by the manufacturer. Ensure the vent pipe is adequately supported to prevent sagging or detachment.
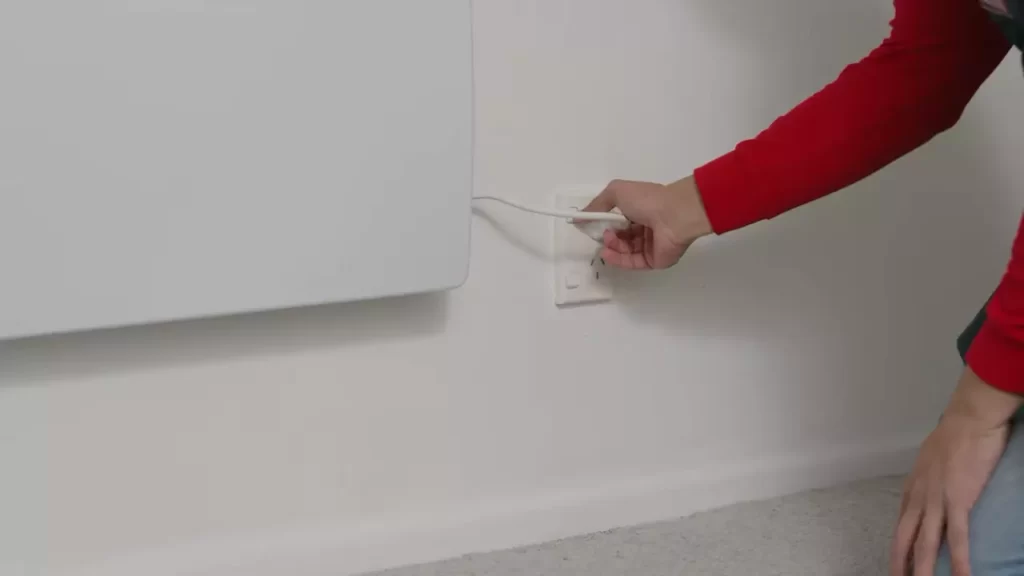
Connecting the wall furnace to the gas supply or electrical wiring
Whether your wall furnace operates on gas or electricity, it is essential to make the proper connections to ensure its functionality. Follow the instructions below to connect your wall furnace:
Connecting to the gas supply:
- Locate the gas supply line near the installation area. Ensure the gas supply is turned off before proceeding with any connections.
- Attach a shut-off valve to the gas supply line. This valve will allow you to control the flow of gas to the wall furnace.
- Connect the gas supply line to the shut-off valve using a suitable adapter or connector. Ensure a tight and secure connection by using a wrench or pliers.
- Follow the manufacturer’s instructions to connect the gas line from the shut-off valve to the wall furnace. Use the recommended fittings and check for any gas leaks by applying a soapy water solution to the connections. If bubbles appear, tighten the connections further or seek professional assistance.
- Once the connections are secure and leak-free, turn on the gas supply and test the wall furnace for proper operation.
Connecting to the electrical wiring:
- Identify the electrical panel or power source suitable for connecting your wall furnace.
- Turn off the power supply to the designated circuit or area before proceeding with any electrical connections.
- Run appropriate electrical wiring from the electrical panel to the location of the wall furnace. Follow local electrical codes and guidelines to ensure safe and proper installation.
- Ensure the electrical wiring is appropriately sized and compatible with the voltage requirements of your wall furnace. Consult the manufacturer’s instructions for specific details.
- Make the necessary electrical connections as instructed by the manufacturer, ensuring proper grounding and wire connections. If you are not confident in your electrical skills, it is recommended to hire a licensed electrician to perform this step.
- Once the electrical connections are complete, restore the power supply and test the wall furnace to ensure proper functionality.
By conducting the ventilation and gas/electrical connections correctly, you can ensure the safe and efficient operation of your wall furnace. Following the manufacturer’s instructions and consulting professionals when needed will help you achieve a successful installation.
Testing And Troubleshooting
Once you have successfully installed your wall furnace, it is essential to conduct a thorough system test to ensure proper functioning. Testing your wall furnace will help you identify any potential issues and address them promptly, ensuring that your new heating system is working efficiently and effectively. Additionally, troubleshooting common issues that may arise during installation can help you tackle any problems that may prevent your wall furnace from operating optimally.
Conducting a thorough system test to ensure proper functioning
To conduct a system test for your newly installed wall furnace, follow these steps:
- Check the power supply: Ensure that your wall furnace is properly connected to a power source and that the electrical circuit breaker is in the “ON” position. A lack of power supply can prevent the wall furnace from operating.
- Adjust thermostat settings: Set the thermostat to a desired temperature and monitor if the wall furnace turns on and off accordingly. This will help you determine if the thermostat is functioning correctly.
- Inspect vents and ductwork: Examine the vents and ductwork to ensure there are no obstructions or blockages that may impede the airflow. Proper ventilation is essential for the wall furnace to distribute the warm air effectively.
- Check for unusual noises: Listen for any unusual noises coming from the wall furnace during operation. Unusual sounds like rattling or grinding may indicate a mechanical issue that needs to be addressed.
- Test the safety features: Familiarize yourself with the safety features of your wall furnace, such as the automatic shut-off and carbon monoxide detectors. Ensure that these features are functioning correctly to guarantee the safety of your home.
By conducting a thorough system test, you can identify any potential issues early on and take the necessary steps to address them. This proactive approach will help ensure that your wall furnace operates efficiently and provides optimal heating performance throughout your home.
Troubleshooting common issues that may arise during installation
During the installation process, you may encounter common issues that can affect the performance of your wall furnace. Here are some troubleshooting tips to help you resolve these problems:
| Issue | Troubleshooting |
|---|---|
| The wall furnace does not turn on |
|
| The wall furnace produces insufficient heat |
|
| Unusual noises coming from the wall furnace |
|
By troubleshooting these common issues during installation, you can address them promptly and ensure that your wall furnace operates without any hindrances. Regular maintenance and immediate attention to problems will help maximize the lifespan and efficiency of your wall furnace, ensuring a comfortable and cozy home environment.
Finalizing The Installation
Cleaning up the Installation Area
Once you have successfully installed your wall furnace, it is important to clean up the installation area to ensure a safe and tidy finish. Leaving debris or tools lying around can be hazardous and diminish the overall aesthetics of your newly installed unit. Here are a few steps to follow when cleaning up:
- Remove any packaging material or protective covers from the wall furnace.
- Dispose of all the installation debris, such as scraps of insulation or packaging materials.
- Use a damp cloth to wipe down the exterior of the wall furnace and remove any dust or dirt.
- Check the surrounding area for any remaining tools or equipment and store them appropriately.
Providing Maintenance Tips to Ensure Long-Term Performance and Efficiency
Proper maintenance is crucial for ensuring the long-term performance and efficiency of your wall furnace. By following these maintenance tips, you can maximize the lifespan of your unit and minimize the need for repairs:
- Regularly inspect the wall furnace for any signs of damage, such as cracks or leaks.
- Keep the area around the wall furnace clear of any obstructions or flammable materials.
- Change the air filter according to the manufacturer’s instructions or at least once every three months.
- Ensure proper ventilation by keeping the air intake and exhaust vents clean and unobstructed.
- Check the thermostat settings to ensure optimal temperature control.
Regular Cleaning and Maintenance of the Wall Furnace
In addition to general maintenance, regular cleaning of the wall furnace is essential for its proper functioning. Here are a few cleaning tasks you should perform on a regular basis:
- Turn off the power to the wall furnace before cleaning.
- Remove the front panel and gently vacuum or brush away any dust or debris.
- Inspect the burner assembly and clean it if necessary, following the manufacturer’s instructions.
- Wipe down the exterior of the wall furnace with a damp cloth or mild cleaning solution, avoiding any electrical components.
- Replace the front panel and restore power to the wall furnace.
Recommended Schedule for Professional Servicing
While regular cleaning and maintenance can prolong the life of your wall furnace, it is also recommended to schedule professional servicing on a regular basis. This ensures that any potential issues or concerns are addressed by qualified technicians. Here is a recommended schedule for professional servicing:
| Time Frame | Service |
|---|---|
| Yearly | Inspect and clean the wall furnace |
| Every 3-5 years | Perform a thorough inspection of the exhaust vent and chimney |
| Every 5-7 years | Check and replace any worn-out parts or components |
Following this recommended servicing schedule will help ensure the continued performance and efficiency of your wall furnace, as well as provide peace of mind knowing that a professional has thoroughly checked and maintained your unit.
Frequently Asked Questions Of How To Install A Wall Furnace
Can I Install A Wall Heater Myself?
Yes, you can install a wall heater yourself. However, it is important to follow manufacturer instructions, ensure proper ventilation, and adhere to local building codes. If you are unsure or uncomfortable with the process, it is recommended to hire a professional for the installation.
Are Wall Furnaces Good?
Wall furnaces are an excellent heating choice. They provide efficient and consistent heat, making them good for warming specific areas. Their compact design saves space and they are easy to install. With proper maintenance, wall furnaces can be a reliable and cost-effective heating option.
How Do You Install A Wall Heater?
To install a wall heater, follow these steps: 1. Choose the location for the heater. 2. Turn off the power and remove any existing heaters or fixtures. 3. Attach the wall mounting bracket. 4. Connect the electrical wiring. 5. Secure the heater to the bracket and turn on the power.
Enjoy the warmth!
Do Wall Furnaces Need A Vent?
Yes, wall furnaces need a vent. Vents are necessary to allow the release of combustion gases and to ensure proper airflow for efficient operation. A vent also helps to prevent the buildup of harmful gases, such as carbon monoxide, in the living space.
Conclusion
Installing a wall furnace can seem like a daunting task, but with the right knowledge and tools, it can be easily accomplished. By following the step-by-step instructions outlined in this blog post, you can confidently complete the installation process on your own.
Remember to prioritize safety, consult the manufacturer’s guidelines, and seek professional help if needed. With your new wall furnace, you can enjoy a cozy and warm space all winter long. So go ahead, take on this project and experience the benefits of a well-heated home.