To install a ventless gas fireplace, first, check if your area allows ventless installations. Then, choose a location and prepare the space by clearing debris and ensuring proper ventilation.
Choosing The Right Location For Your Ventless Gas Fireplace
When it comes to installing a ventless gas fireplace, one of the most important decisions you’ll need to make is choosing the right location. This crucial step ensures that your fireplace not only functions efficiently but also complements the overall aesthetic of your space. In this article, we’ll explore considerations for placement, safety precautions, and ventilation requirements to help you make an informed decision.
Considerations for placement
Before you dive into the installation process, it’s essential to consider a few factors to determine the perfect spot for your ventless gas fireplace. By carefully assessing these aspects, you can ensure optimal heat distribution and an inviting ambiance:
- The size and layout of the room: It’s crucial to choose a location that allows for sufficient spacing around the fireplace. Consider the room size and layout to determine whether a centrally located fireplace or one in a corner would be more suitable.
- The proximity to flammable materials: Safety should always be a top priority when choosing a location. Ensure that your ventless gas fireplace is at a safe distance from any flammable materials, such as curtains, furniture, or paper.
- The availability of a gas connection: Your chosen location should have easy access to a gas line for the fireplace’s fuel supply. If you don’t have an existing connection, it’s advisable to consult a professional installer.
Safety precautions for location
When installing a ventless gas fireplace, it’s crucial to prioritize safety. To create a safe environment, consider the following precautions while choosing the location:
- Away from doors and windows: Avoid placing the fireplace near doors or windows, as drafts can affect combustion and compromise the heating efficiency.
- Avoid high traffic areas: Choose a location where the fireplace won’t disrupt foot traffic. This helps prevent accidental bumps and ensures everyone’s safety.
- Clearance from combustible materials: Ensure there is ample clearance between the fireplace and any combustible materials. Refer to the manufacturer’s guidelines for specific clearance requirements.
Ventilation requirements
Ventless gas fireplaces are designed to operate without venting to the outside. However, proper ventilation is still crucial to maintain good air quality within your living space. Here are a few ventilation requirements to keep in mind:
- Room size and ventilation capacity: Verify that the size of the room aligns with the recommended ventilation capacity of the fireplace. This ensures that the air is efficiently circulated, reducing the potential for carbon monoxide build-up.
- Adequate fresh air supply: Ventless gas fireplaces require an adequate supply of fresh air for proper combustion and ventilation. If the room is relatively airtight, consider installing a dedicated air vent or cracking open a window.
- Regular maintenance and inspection: To ensure the ongoing effectiveness of your ventless gas fireplace, it’s essential to schedule regular maintenance and inspection. This helps identify and address any potential issues before they become safety concerns.
By carefully considering these placement considerations, safety precautions, and ventilation requirements, you can confidently proceed with the installation of your ventless gas fireplace. Always consult the manufacturer’s guidelines and, if necessary, seek assistance from a professional installer to ensure a seamless and safe installation process.
Preparing For Installation
Before installing a ventless gas fireplace, it is important to properly prepare the area to ensure a smooth and safe installation process. This involves gathering the necessary tools and materials, measuring and marking the placement area, and clearing the area of any obstructions. By following these steps, you can be well-prepared and ready to install your ventless gas fireplace with ease.
Gathering Necessary Tools and Materials
To begin the installation process, it is crucial to gather all the necessary tools and materials. Having everything on hand will save you time and prevent delays during the installation. Here’s a list of the essential tools and materials you’ll need:
| Tools | Materials |
|---|---|
|
|
Measuring and Marking the Placement Area
Once you have all the necessary tools and materials, the next step is to accurately measure and mark the placement area for your ventless gas fireplace. This ensures proper alignment and prevents any mistakes during the installation process. Follow these steps to measure and mark the placement area:
- Use a tape measure to determine the exact dimensions of the fireplace you will be installing.
- Mark the dimensions on the wall using a pencil or marker. This will serve as your guide during the installation.
- Make sure the marked area is free from any electrical wiring, plumbing, or other potential obstacles. Safety is paramount.
Clearing the Area of Obstructions
Before installing your ventless gas fireplace, it is crucial to clear the area of any obstructions that may hinder the installation process or pose a safety risk. Here are some steps to follow:
- Remove any furniture, decorations, or other objects that are in the way.
- Ensure there are no curtains, drapes, or other flammable materials near the installation area.
- Clean the area thoroughly to remove any dust, dirt, or debris that may interfere with the installation process.
- Ensure proper ventilation in the room to allow for the safe operation of the ventless gas fireplace.
By properly preparing for the installation of your ventless gas fireplace, you can ensure a smooth and successful process. Gathering the necessary tools and materials, measuring and marking the placement area accurately, and clearing the area of any obstructions will set you up for a hassle-free installation. Now that you’ve completed the preparation stage, you’re ready to move on to the next step – installing the ventless gas fireplace.
Evaluating Existing Gas Lines And Connections
In order to install a ventless gas fireplace, it is important to properly evaluate your existing gas lines and connections. This step is crucial to ensure the safety and efficiency of your fireplace. By thoroughly checking for existing gas lines, assessing if any modifications are needed, and ensuring proper gas line connections, you can enjoy a seamless installation process and peace of mind.
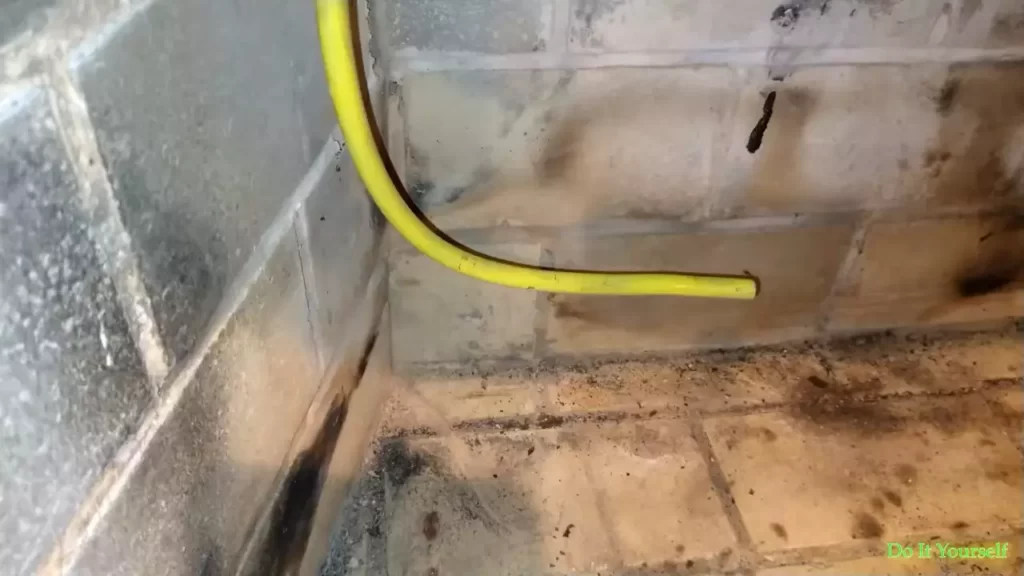
Checking for existing gas lines
Prior to installing a ventless gas fireplace, you need to determine if there are existing gas lines in your home. This can be done by examining your gas meter or contacting your utility provider. If you already have a gas-powered appliance, such as a stove or furnace, there is a high probability that there are gas lines present.
Additionally, you can visually inspect your home’s interior to identify any gas pipes or vents. They are typically made of metal and run along the walls or ceilings. If you are uncertain, it is advisable to seek professional assistance to accurately identify and locate existing gas lines.
Assessing if any modifications are needed
Once you have identified the presence of gas lines, the next step is to assess if any modifications are required. This is crucial to ensure that your ventless gas fireplace can be safely connected to the existing gas supply.
One important consideration is the capacity of your existing gas line. Ventless gas fireplaces typically require a specific gas pressure and flow rate for optimal operation. If your current gas line is unable to meet these requirements, it may be necessary to upgrade or modify the gas supply system.
Additionally, check if your gas line is accessible and located in close proximity to the area where you plan to install the fireplace. If it is not, you may need to extend the gas line or consider alternative placement options to ensure a proper connection.
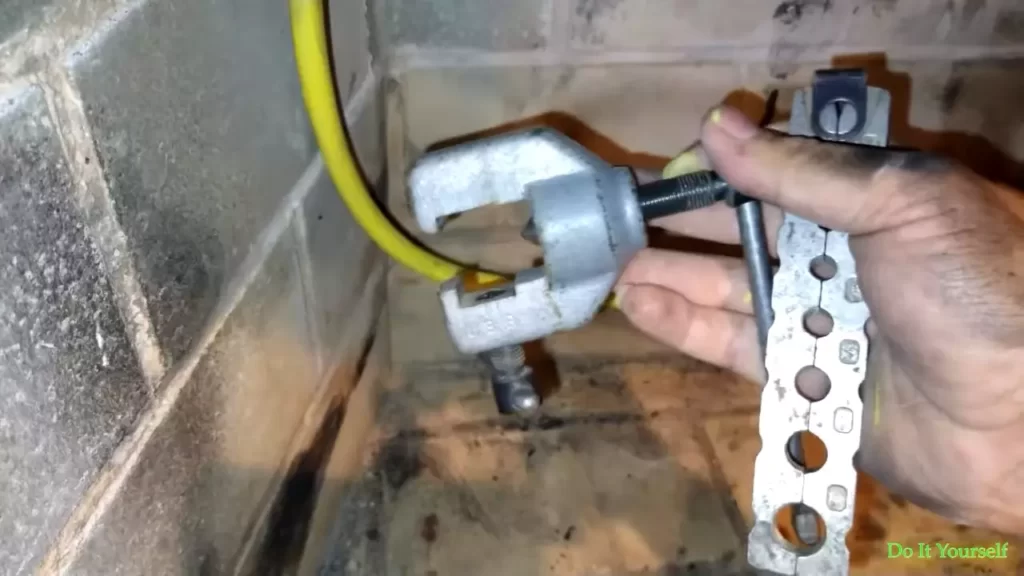
Ensuring proper gas line connections
Proper gas line connections are crucial for the safe and efficient operation of your ventless gas fireplace. When connecting your fireplace to the existing gas line, it is important to adhere to all safety regulations and manufacturer guidelines.
Ensure that all gas connections are tight and secure, with no leaks present. Use high-quality gas fittings and appropriate sealing materials, such as Teflon tape or pipe dope, to create a reliable and leak-free connection. Inspect the gas line for any signs of damage or wear, and replace any faulty components before proceeding with the installation.
If you are unsure about any aspect of connecting the gas line, it is highly recommended to consult a professional plumber or gas technician. They have the expertise and experience to ensure a proper and safe connection between your ventless gas fireplace and the gas supply.
By thoroughly evaluating your existing gas lines and connections, you can ensure a smooth and successful installation of your ventless gas fireplace. Take the time to check for existing gas lines, assess if any modifications are needed, and ensure proper gas line connections. This will not only guarantee your fireplace’s efficient operation but also provide you with peace of mind.
Prepping The Installation Area
Before installing a ventless gas fireplace, it is crucial to properly prepare the installation area. This step ensures a safe and efficient installation process while protecting the surrounding surfaces from any potential damage. There are three essential aspects to consider: clearing the surrounding area, protecting floors and walls, and installing fire-resistant materials.
Clearing the surrounding area
When preparing the installation area, the first step is to clear the surrounding area. This ensures that there is enough space to work comfortably and safely. Remove any furniture, décor items, or other obstructions that may impede the installation process. Clearing the surrounding area not only facilitates the installation but also reduces the risk of accidental damage to nearby objects.
Protecting floors and walls
The next crucial step in prepping the installation area is to protect the floors and walls from any potential damage. Covering the floor with a sturdy drop cloth or cardboard helps prevent scratches, spills, or debris from causing any harm to the surface. Additionally, placing protective coverings on nearby walls or surfaces can safeguard them from accidental scuffs or scratches. Taking these precautions will ensure that your flooring and walls remain in pristine condition throughout the installation process.
Installing fire-resistant materials
Installing fire-resistant materials is imperative to maintain the safety of your home when installing a ventless gas fireplace. Before proceeding with the installation, carefully inspect the surrounding area to identify any potential fire hazards. Install fire-resistant materials such as non-combustible backer boards or heat-resistant insulation to create a barrier between the fireplace and flammable materials. This protective measure minimizes the risk of accidental fires and provides peace of mind for you and your household.
Assembling And Positioning The Gas Fireplace
Assembling and Positioning the Gas Fireplace
Installing a ventless gas fireplace in your home can provide warmth and add a touch of elegance to any room. Assembling and positioning the gas fireplace correctly is crucial to ensure optimal performance and safety. In this section, we will discuss the step-by-step process of unboxing and inspecting the parts, connecting the gas valve, and mounting the fireplace securely.
Unboxing and Inspecting the Parts
- Begin by unboxing the ventless gas fireplace carefully.
- Inspect each part for any signs of damage or defects.
- Check the glass doors, ceramic logs, grate, and other components for cracks or chips.
- Ensure that all necessary hardware, such as screws and brackets, are included.
- Contact the manufacturer if you notice any issues to resolve them before proceeding with the installation.
- Read the instruction manual thoroughly, familiarizing yourself with the components and their functions.
- Keep all the parts organized and within reach for easy installation.
Connecting the Gas Valve
- Locate the gas valve on the ventless gas fireplace.
- Carefully connect the gas supply line to the gas valve, ensuring a tight fit.
- Use a wrench to secure the connection, but avoid over-tightening to prevent damage.
- Inspect the gas line for any leaks by applying a solution of soapy water.
- If you notice bubbles forming, there is a leak.
- Immediately turn off the gas supply and consult a professional to fix the issue.
- Once the connection is secure and leak-free, double-check the manufacturer’s instructions to ensure that you have properly connected the gas valve.
Mounting the Fireplace Securely
Properly securing the ventless gas fireplace is essential for safety and stability.
- Identify a suitable location for the fireplace, considering factors such as proximity to a gas line and proper ventilation.
- Choose the appropriate mounting method based on the manufacturer’s instructions and the available options.
- Some ventless gas fireplaces require wall mounting, while others may be freestanding or built into an existing structure.
- Follow the manufacturer’s guidelines to mount the fireplace securely.
- Use the supplied brackets, screws, or other hardware to secure the fireplace to the wall or other supporting structure.
- Ensure that the mounting is level and stable.
- Double-check the stability of the fireplace by gently pushing and shaking it.
- If it feels loose or unstable, adjust the mounting until it is secure.
By carefully following these steps for assembling and positioning your ventless gas fireplace, you can enjoy the warmth and ambiance it brings while ensuring the safety of your home and loved ones.
Securing The Ventless Gas Fireplace
Securing your ventless gas fireplace is crucial to ensure not only its stability but also the safety of everyone in your home. By following these steps, you can securely install your fireplace, granting you peace of mind and a cozy atmosphere.
Installing Brackets or Mounting Supports
The first step in securing your ventless gas fireplace is installing brackets or mounting supports. This will provide a sturdy foundation for your fireplace, preventing any accidental dislodging or movement. To do this:
- Identify the ideal location for the brackets or mounting supports. Make sure it is a sturdy wall that can support the weight of the fireplace.
- Use a stud finder to locate the wall studs. Mark these points for reference.
- Attach the brackets or mounting supports to the wall using screws. Make sure they are firmly secured to the wall studs for maximum stability.
- Double-check the alignment of the brackets or mounting supports to ensure they are level and evenly spaced. This will help distribute the weight of the fireplace evenly.
Ensuring Stability and Safety
Once the brackets or mounting supports are securely in place, it’s essential to ensure the stability and safety of your ventless gas fireplace. Consider the following:
- Inspect the brackets or mounting supports to ensure they are tightly secured to the wall. If any screws or fasteners are loose, tighten them as necessary.
- Verify that the fireplace is flush and level against the brackets or mounting supports. Adjust as needed to achieve a snug fit.
- Check for any gaps or spaces between the fireplace and the wall. If there are any, use shims or spacers to fill them to maintain stability.
- Make sure all connections, such as gas lines and electrical wiring, are properly connected and secured. Any loose or exposed wires should be addressed immediately to prevent any hazards.
Testing for Proper Alignment
After securing your ventless gas fireplace, it’s crucial to test for proper alignment to ensure optimal performance. Here’s how:
- Turn on the fireplace and observe the flames. They should be evenly distributed and centered within the firebox. If the flames appear lopsided or off-center, adjust the fireplace’s position to achieve a balanced flame pattern.
- Check for any unusual noises, such as rattling or vibrating. These could indicate an alignment issue or loose components. Address any concerns promptly to prevent further complications.
- Monitor the fireplace for any signs of overheating or excessive heat buildup. Ensure that there is sufficient ventilation around the fireplace to prevent any safety hazards.
By following these steps and taking the necessary precautions, you can securely install a ventless gas fireplace in your home. Remember, if you have any doubts or concerns during the installation process, it’s always best to consult a professional for assistance.
Connecting To The Gas Supply
Connecting your ventless gas fireplace to the gas supply is a crucial step in the installation process. This ensures that your fireplace functions properly and safely, providing you and your loved ones with a warm and cozy environment. In this section, we will cover the key aspects of connecting your fireplace to the gas supply, including checking the gas line specifications and conducting a leak test.
Checking the gas line specifications
Before you begin connecting your ventless gas fireplace to the gas supply line, it is essential to check the gas line specifications. This step ensures compatibility and proper functioning of your fireplace. Here are the key aspects to consider:
- Gas type: Determine whether your gas fireplace is compatible with natural gas or propane. This information is typically specified in the manufacturer’s instructions or product documentation.
- Gas line capacity: Confirm that your gas supply line can handle the required gas flow rate of the fireplace. Check the specifications provided by the fireplace manufacturer and compare them to the capacity of the existing gas line.
- Gas pressure: Assess the gas pressure requirements specified by the fireplace manufacturer. Ensure that the gas supply pressure meets the necessary standards. If it doesn’t, consult a professional plumber or gas technician to make any required adjustments.
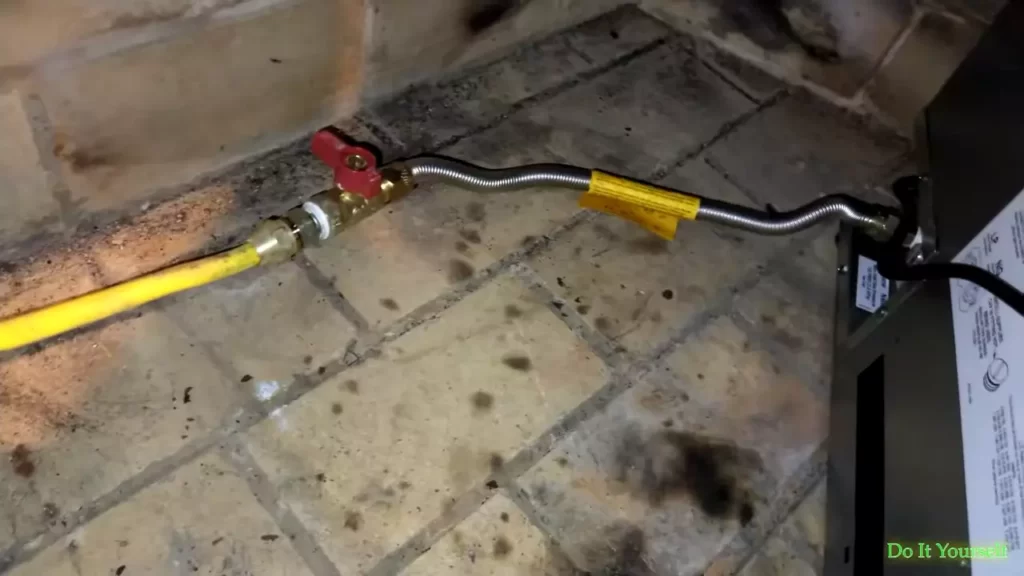
Connecting the fireplace to the gas supply line
Once you have verified the gas line specifications, you are ready to connect your ventless gas fireplace to the gas supply line. Follow these steps:
- Locate the gas supply line: Identify the existing gas supply line that will provide fuel to your fireplace. It is typically found near your heating system or utility room.
- Shut off the gas supply: Before making any connections, ensure that the gas supply is turned off. This can usually be done by turning the gas valve to the “off” position.
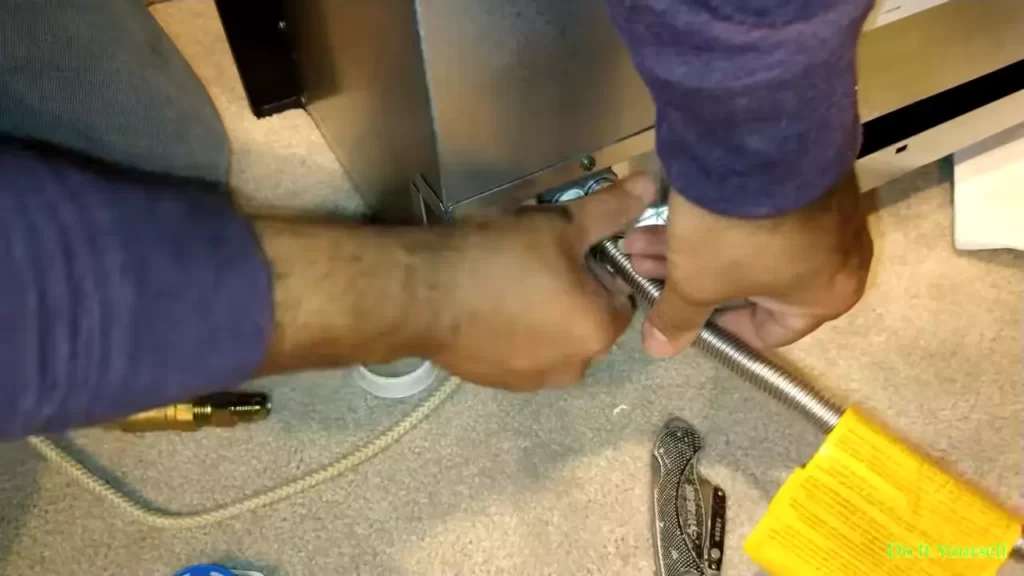
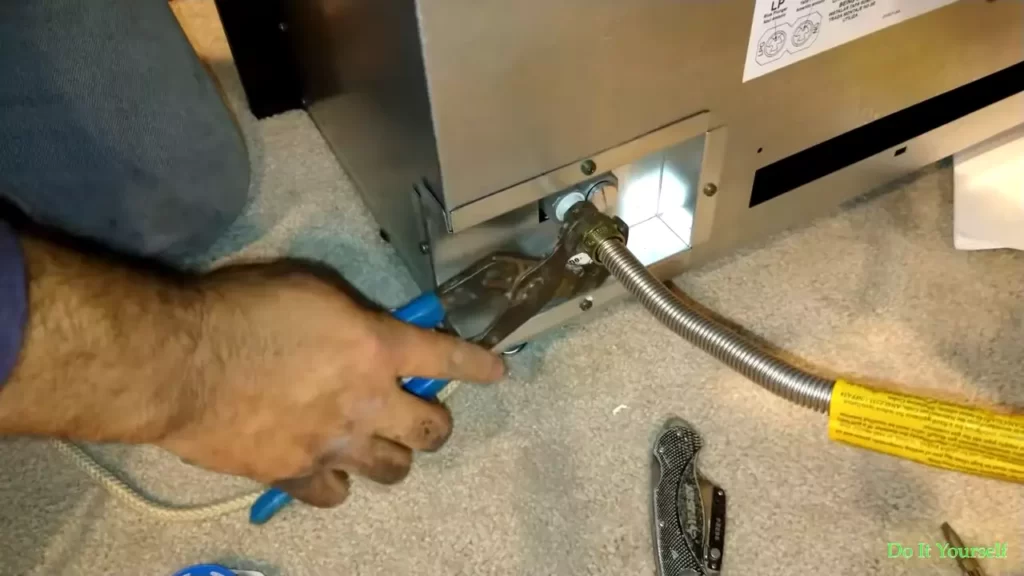
- Prepare the connection: Attach a flexible gas connection line to the gas valve of the fireplace. Make sure to use a connector that is specifically designed for gas appliances and meets local building codes.
- Tighten the connections: Use an appropriate wrench to securely tighten the connections between the gas line and the fireplace’s gas valve. Ensure there are no leaks, and the connection is snug.
- Double-check the connections: Once the connections are tightened, visually inspect them to ensure they are properly secured and aligned.
Conducting a leak test
Safety is vital when working with gas appliances. After connecting your ventless gas fireplace to the gas supply line, it is crucial to conduct a leak test to ensure there are no gas leaks. Follow these steps:
- Apply a gas leak detection solution: Apply a small amount of gas leak detection solution (a soap and water mixture) to the gas connections.
- Observe for bubbles: Check the connections for any bubbles forming. If you notice bubbles, it indicates a gas leak. In such cases, immediately turn off the gas supply and consult a professional technician to address the issue.
- Ensure proper ventilation: As you conduct the leak test, it is important to have proper ventilation in the room to prevent any gas buildup.
- Regularly check for leaks: After the initial installation, periodically check for gas leaks as part of your routine maintenance. This helps ensure the ongoing safety and efficient operation of your ventless gas fireplace.
By following these steps and adhering to safety protocols, you can successfully connect your ventless gas fireplace to the gas supply line. It is essential to prioritize safety throughout the installation process and seek professional assistance if needed. Enjoy the warmth and ambiance provided by your new gas fireplace!
Installing The Ventless Gas Fireplace Surround
Once you have chosen and installed your ventless gas fireplace, the next step is to install the surround. The surround not only enhances the appearance of your fireplace, but it also provides a layer of protection and insulation. In this section, we will guide you through the process of installing the ventless gas fireplace surround, from choosing the right material to securing it to the wall.
Choosing the right surround material
When it comes to choosing the right surround material for your ventless gas fireplace, there are a few factors to consider. You want to select a material that is not only aesthetically pleasing but also durable and fire-resistant. Here are some popular options:
- Stone: Stone surrounds are a classic choice, offering a timeless and elegant look. They can be made from natural stone, such as marble or granite, or manufactured stone veneer.
- Tile: Tile surrounds offer endless design possibilities, as they come in a wide variety of colors, patterns, and sizes. Ceramic, porcelain, or glass tiles are commonly used for fireplace surrounds.
- Wood: Wood surrounds provide a warm and rustic feel to your fireplace. You can choose from different types of wood, such as oak, pine, or cherry, depending on your preferred style.
- Metal: For a modern and sleek look, metal surrounds are an excellent choice. Stainless steel or brushed nickel can give your fireplace a contemporary and urban feel.
Consider the overall style and decor of your room when selecting a surround material to ensure it complements the existing design. Once you have chosen the material, it’s time to move on to measuring and cutting the surround pieces.
Measuring and cutting the surround pieces
Before cutting any materials, it’s crucial to measure the dimensions of your fireplace accurately. Use a measuring tape to determine the height, width, and depth of the fireplace opening. Take into account any obstacles, such as mantels or protruding structures, that may affect the measurements.
Once you have the measurements, transfer them to the chosen surround material. Depending on the material you selected, you may need specific tools for cutting. For instance:
- Stone: Use a wet saw or diamond blade to cut stone tiles or veneer. Follow the manufacturer’s instructions for safety and precision.
- Tile: A tile cutter or wet saw is necessary for cutting ceramic, porcelain, or glass tiles. Take precautions when using these tools, as they involve sharp blades and water.
- Wood: A miter saw or circular saw can be used to cut wood surrounds. Remember to wear appropriate safety gear and follow proper cutting techniques.
- Metal: If you are working with metal surrounds, a metal-cutting saw or angle grinder equipped with a metal-cutting blade will be required.
Always double-check your measurements before making any cuts to avoid costly mistakes. Take your time and proceed with caution while cutting the surround pieces.
Securing the surround to the wall
Once you have cut all the surround pieces to the correct size, it’s time to secure them to the wall. Before installation, ensure that the wall surface is clean and free of debris. Follow these steps to properly secure the surround:
- Apply adhesive: Depending on the material, apply a suitable adhesive to the back of each surround piece. Follow the manufacturer’s instructions for the recommended adhesive type and application method.
- Position the surround pieces: Carefully place each piece onto the wall, starting with the bottom piece and working your way up. Ensure they are aligned properly and level.
- Secure with fasteners: Use appropriate fasteners, such as screws or nails, to secure the surround pieces to the wall. Position the fasteners discreetly to avoid visible holes or damage to the surround material.
Refer to the manufacturer’s instructions for specific guidelines on securing the surround, as different materials may have varying installation requirements.
By following these steps, you can successfully install the ventless gas fireplace surround, adding the perfect finishing touch to your fireplace and creating a cozy and inviting ambiance in your living space.
Testing And Finalizing The Installation
Once all the connections and attachments have been properly installed, it’s time to test your ventless gas fireplace and finalize the installation. This crucial step ensures that your fireplace will operate safely and effectively. In this section, we will go over the necessary steps to test the connections, adjust the flame, and review all safety guidelines to ensure a successful installation.
Checking all connections and attachments
Before testing the flame, it is essential to check all the connections and attachments of your ventless gas fireplace. This will help identify any loose fittings or potential leaks that may cause issues later on. Here’s a quick guide:
- Inspect the gas supply line: Examine the gas supply line for any damages or visible leaks. Ensure that the line is securely connected to the gas valve.
- Check the shut-off valve: Make sure the shut-off valve is in the open position to allow gas flow to the fireplace. If closed, turn it on.
- Review the sealant: Inspect the sealant used on the connections for any gaps or signs of wear. If necessary, reapply sealant to ensure a proper seal.
By carefully checking all connections and attachments, you can prevent potential gas leaks and ensure the safe operation of your ventless gas fireplace.
Testing the flame and adjusting settings
Once the connections and attachments have been checked, it’s time to test the flame and adjust the settings of your ventless gas fireplace. Follow these steps to ensure a perfect flame:
- Turn on the fireplace: Use the designated switch or remote control to turn on the fireplace. Confirm that the gas is flowing properly.
- Observe the flame: Pay close attention to the appearance of the flame. It should be steady and blue, indicating efficient combustion. If the flame is unsteady or has a yellow or orange color, it may signify a problem.
- Adjust the air intake: If the flame is not steady, you may need to adjust the air intake control. Consult the manufacturer’s guidelines to locate the air intake and make necessary adjustments.
- Set the desired temperature: If your ventless gas fireplace has temperature control, set it to your preferred level. Ensure that the temperature sensor is working correctly.
Testing the flame and adjusting the settings allow you to create a cozy and comfortable atmosphere while ensuring the fireplace operates efficiently.
Reviewing safety guidelines
Prioritizing safety is crucial when it comes to operating a ventless gas fireplace. Take the time to review and adhere to all safety guidelines provided by the manufacturer. Here are some key points to consider:
- Keep flammable objects away: Maintain a safe distance between the ventless gas fireplace and any flammable materials such as curtains, furniture, or paper.
- Install carbon monoxide detectors: As an additional safety measure, install carbon monoxide detectors in the room to detect any potential leaks.
- Perform regular maintenance: Schedule regular inspections and cleaning to remove dust and debris that may obstruct the flame or cause malfunction.
- Do not leave the fireplace unattended: Always remember to turn off the fireplace when leaving the room to prevent accidents.
By adhering to safety guidelines, you can enjoy the warmth and ambiance of your ventless gas fireplace with peace of mind.
Maintaining Your Ventless Gas Fireplace
Proper maintenance is essential to ensure the efficient and safe operation of your ventless gas fireplace. By following a few simple steps, you can keep your fireplace clean and in good working condition for years to come. In this section, we will discuss the key aspects of maintaining your ventless gas fireplace, including cleaning and debris removal, regular inspections and maintenance, as well as troubleshooting common issues.
Cleaning and Debris Removal
Regular cleaning of your ventless gas fireplace is crucial to maintain its aesthetic appeal and ensure proper function. Over time, dust, dirt, and debris can accumulate on the exterior surfaces and obstruct the vents, potentially hampering the performance of the fireplace. Here are some steps to follow for effective cleaning and debris removal:
- Start by turning off the fireplace and allowing it to cool completely.
- Remove any loose debris or ashes from the firebox using a small brush and dustpan.
- Wipe the exterior surfaces of the fireplace with a soft cloth or sponge dampened with mild soap and water. Avoid using abrasive cleaners or harsh chemicals that can damage the finish.
- For stubborn stains or buildup, use a non-abrasive cleaner specifically designed for fireplaces. Follow the manufacturer’s instructions for application and use.
- Gently vacuum the vents and any accessible interior areas using a soft brush attachment. This will help remove any dust or debris that may be blocking the airflow.
- Inspect and clean the glass panel or screen using a glass cleaner suitable for fireplaces. Wipe it down with a lint-free cloth to remove any streaks.
Regular Inspections and Maintenance
Performing regular inspections and maintenance tasks can help identify potential issues before they turn into major problems. Here are some important steps to consider:
- Inspect the burner and ignition system for any signs of wear or damage. Look for loose connections, rust, or debris that could affect the performance.
- If your ventless gas fireplace has a pilot light, check if it is lit and burning steadily. If not, follow the manufacturer’s instructions to relight it safely.
- Examine the gas lines and connections for any leaks or cracks. Apply a mixture of soapy water to the fittings, and if you see bubbles forming, it indicates a gas leak. In such cases, contact a qualified technician to address the issue.
- Ensure that the venting system is clear and free from obstructions. Clear away any debris or objects that might hinder the ventless fireplace’s airflow.
- Test the carbon monoxide detector and smoke alarms regularly to ensure they are functioning correctly. Replace the batteries as needed.
- Refer to the manufacturer’s recommendations for any additional maintenance tasks specific to your ventless gas fireplace model.
Troubleshooting Common Issues
Even with regular maintenance, occasional issues may arise with your ventless gas fireplace. Here are some common problems you might encounter and the steps to troubleshoot them:
| Issue | Troubleshooting Steps |
|---|---|
| The fireplace does not ignite | Check if the gas supply is turned on. Ensure that the pilot light is lit and the ignition system is functioning correctly. |
| Uneven flame or improper heating | Clean the burner and remove any buildup or debris that may be affecting the gas flow. Adjust the flame height and pattern according to the manufacturer’s instructions. |
| Unusual odors or smells | Ensure proper ventilation by keeping the area around the fireplace free from obstructions. If the odor persists, contact a professional to check for gas leaks. |
| Excessive soot or blackened glass | Clean the burner, vents, and glass panel to remove any soot or debris. Adjust the air shutter to achieve the correct air-to-fuel ratio. |
| Frequent pilot light extinguishment | Check for drafts or excessive air movement around the fireplace. Make sure the ventless gas fireplace is installed in a suitable location away from open windows or doors. |
By following these maintenance tips and troubleshooting steps, you can ensure that your ventless gas fireplace operates smoothly and efficiently, providing warmth and ambiance to your space.
Frequently Asked Questions Of How To Install A Ventless Gas Fireplace
Is It Hard To Install A Ventless Gas Fireplace?
Installing a ventless gas fireplace is not difficult. Its installation doesn’t require any chimney or venting system, making it relatively easy. Simply connect the unit to a gas line and follow the manufacturer’s instructions for safe installation. Enjoy the convenience and warmth of a ventless gas fireplace without the hassle.
How Much Does It Cost To Install A Ventless Gas Fireplace?
The cost of installing a ventless gas fireplace varies based on factors like size, features, and location. Generally, you can expect to spend around $500 to $3,000. However, it’s best to consult with a professional for an accurate estimate.
Do I Need To Open The Flue For Ventless Gas Fireplace?
No, ventless gas fireplaces do not require the opening of a flue. They are specifically designed to operate without a chimney or vent, as they are designed to burn clean and produce a minimal amount of exhaust. However, it is important to follow the manufacturer’s instructions for safe and proper operation.
Do You Need A Gas Line For A Ventless Gas Fireplace?
Yes, a ventless gas fireplace does not require a gas line. It operates using natural gas or propane, which is supplied through a tank or line directly to the fireplace.
Conclusion
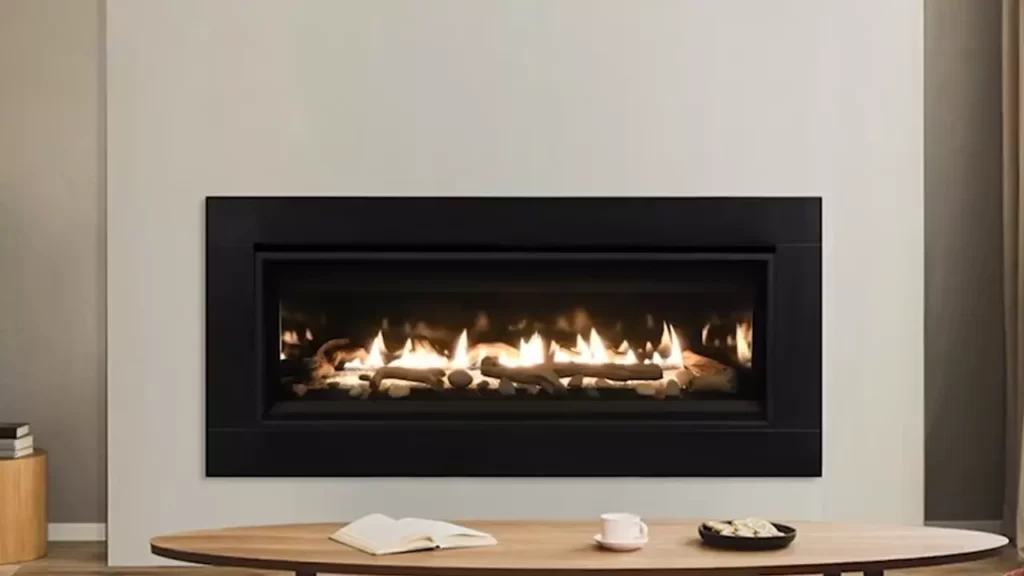
Installing a ventless gas fireplace can provide warmth and ambiance to your home without the need for a chimney or vent. By following the steps outlined in this guide, you can successfully install a ventless gas fireplace and enjoy its benefits.
Remember to prioritize safety and consult a professional if you are unsure about any aspect of the installation process. With proper care and maintenance, your ventless gas fireplace can be a wonderful addition to your home for years to come.