To install a vented propane heater, you will need to follow specific steps for safe and effective operation. In this guide, we will provide step-by-step instructions on how to install a vented propane heater in your home or business.
A vented propane heater is an excellent heating option that can provide warmth and comfort during the colder months. It is essential to install the heater correctly to ensure proper ventilation and prevent any potential hazards. By following these guidelines, you can enjoy the benefits of a vented propane heater with peace of mind.
Choosing The Suitable Location For The Vented Propane Heater
When it comes to installing a vented propane heater, one of the most crucial steps is choosing the suitable location for its installation. The location plays a significant role in both the efficiency and safety of the heater. In this section, we will explore the factors to consider when selecting the installation spot for your vented propane heater.
Factors to Consider When Selecting the Installation Spot
In order to ensure the optimal performance and longevity of your vented propane heater, taking into account the following factors is essential:
Sufficient Ventilation
Vented propane heaters require adequate ventilation to safely carry away the exhaust gases generated during combustion. Therefore, it is imperative to choose a location that allows sufficient air circulation. Ideally, the heater should be placed in an area with access to an external wall or through the roof to ensure proper venting.
Proximity to Gas Supply
Another crucial factor to consider is the proximity to the gas supply. The location should be easily accessible to the fuel source, as it will determine the efficiency and ease of refueling the heater. A nearby gas supply helps minimize the chances of fuel leaks and simplifies maintenance tasks.
Clearance Requirements
Propane heaters typically have specific clearance requirements. These measurements specify the minimum distance that should be maintained between the heater and surrounding objects for safety reasons. This includes walls, furniture, windows, and combustible materials. Consult the manufacturer’s guidelines to ensure compliance with these clearance requirements.
Structural Considerations
Considering the structural integrity of the installation spot is crucial. Ensure that the chosen location can support the weight of the vented propane heater. This is especially important if you plan to mount the heater on a wall or ceiling. If in doubt, consult a professional to assess and reinforce the structural support if needed.
User Convenience
Finally, don’t overlook the ease of use and convenience. Install the heater in a location that allows for convenient operation and access to controls. This includes considering the proximity to the area that needs to be heated and the convenience of adjusting temperature settings.
By considering these factors when selecting the installation spot for your vented propane heater, you can ensure both its effective performance and the safety of your living space.
Preparing The Installation Area
Before installing a vented propane heater, it’s crucial to properly prepare the installation area. This includes clearing the area and ensuring proper ventilation. By taking these steps, you can ensure a safe and efficient installation that will provide you with cozy, warm comfort during the chilly months.
Clearing the area and ensuring proper ventilation
First and foremost, you need to clear the area where the vented propane heater will be installed. Remove any obstructions, furniture, or objects that could potentially interfere with the heater’s venting system.
Additionally, it’s vital to ensure proper ventilation to prevent the buildup of harmful gases. Adequate ventilation allows for the safe and efficient operation of the vented propane heater. The following steps will help you ensure proper ventilation:
Step 1: Check the existing ventilation system
Start by checking if your home already has a ventilation system in place. This may include an existing chimney or venting system for other appliances in your home. Ensure that these existing systems are in good working condition and can accommodate the vented propane heater.
Step 2: Choose a suitable location
Next, choose a suitable location for your vented propane heater. Ideally, it should be near an exterior wall to allow for the installation of a vent pipe. Ensure that the chosen location provides a clear path for the vent pipe to exit the building without any obstacles or blockages.
It’s also crucial to keep in mind that the heater should be installed at a safe distance from any flammable materials or surfaces. Consult the manufacturer’s guidelines for specific clearance requirements.
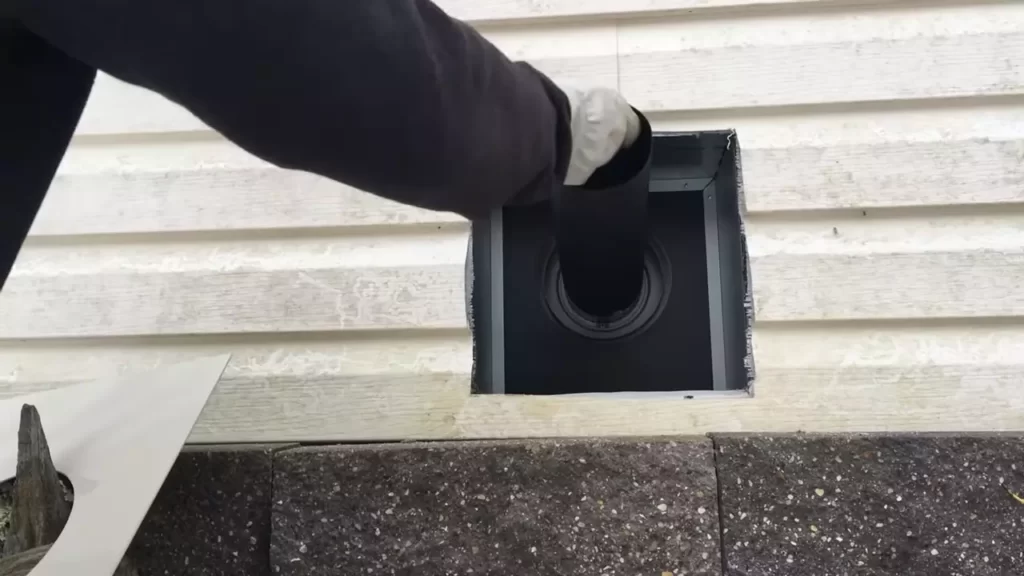
Step 3: Install proper vent pipe
Once you’ve selected the location, it’s time to install the vent pipe. The vent pipe will carry the exhaust gases safely outside your home. It’s important to choose the right type and size of vent pipe recommended by the manufacturer.
Ensure that the vent pipe is properly sealed and secured to prevent any leaks. Any connections or joints in the vent pipe should be securely fastened following the manufacturer’s instructions.
Step 4: Test the ventilation system
After installing the vent pipe, it’s crucial to test the ventilation system. This involves checking for any gas leaks, ensuring proper airflow, and verifying that the exhaust gases are effectively being expelled outside. Follow the manufacturer’s instructions to perform these tests and make any necessary adjustments.
By properly preparing the installation area, including clearing the area and ensuring proper ventilation, you can ensure a safe and efficient installation of your vented propane heater. Remember to carefully follow the manufacturer’s guidelines for specific instructions relevant to your particular heater model.

Measuring And Marking
Before you start installing a vented propane heater, it is important to measure and mark the appropriate height and position for the heater. Accurate measurements and markings will ensure that the heater is installed safely and efficiently. In this section, we will guide you through the process of determining the appropriate height and position for your vented propane heater.
Determining the Appropriate Height
When determining the height at which to install your vented propane heater, there are a few key factors to consider. The first factor is the manufacturer’s recommendations. Refer to the heater’s instruction manual or specifications to find the recommended height range for installation. This will provide you with a baseline to work from.
Next, consider the purpose of the heater and the area it will be heating. If you are installing the heater in a large space with high ceilings, you may want to position it higher to effectively distribute heat throughout the room. On the other hand, if you are installing the heater in a smaller room with lower ceilings, a lower installation height may be more appropriate to ensure optimal heating.
Take into account any clearance requirements specified by the manufacturer or local building codes. These requirements typically include minimum distances from combustible materials, walls, and ceilings. Adhering to these clearance requirements is essential for safety and proper functioning of the heater.
Lastly, consider the convenience of access and maintenance when determining the height. It is important to install the heater at a height that allows for easy access to controls, filters, and vents. This will facilitate regular maintenance and ensure the longevity of your vented propane heater.
Determining the Appropriate Position
In addition to the height, the position of your vented propane heater is another crucial factor to consider. When determining the position, start by identifying the area where the heater will be most effective in providing heat. Consider factors such as drafts, air circulation, and the location of windows and doors. Placing the heater in a position that maximizes heat distribution and minimizes heat loss will optimize its efficiency.
Position the heater away from combustible materials such as furniture, curtains, and carpets, as well as flammable substances. This will reduce the risk of fire and ensure safe operation. If you plan to permanently mount the heater on a wall or ceiling, ensure that the mounting surface is sturdy and can support the weight of the heater.
Once you have determined the appropriate height and position for the vented propane heater, mark the location using a marker or tape measure. Double-check the measurements to ensure accuracy before proceeding with the installation.
By effectively measuring and marking the appropriate height and position for your vented propane heater, you can ensure safe and efficient installation. In the next section, we will cover the steps to prepare for installation, including gathering the necessary tools and materials.
Assembling The Vent System
Connecting the vent pipes and fittings
Connecting the vent pipes and fittings is a crucial step in properly installing a vented propane heater. This ensures that the combustion byproducts are safely and efficiently expelled from your space. Here’s a step-by-step guide on how to do it:
- Start by familiarizing yourself with the vent pipe and fittings provided with your propane heater. Make sure you have all the necessary components, including straight sections, elbows, tees, and termination caps.
- Plan the layout of your vent system. Consider the manufacturer’s recommendations for the required clearance from combustible materials and any local building codes. It’s essential to follow these guidelines to ensure a safe installation.
- Begin by assembling the vent pipes. Connect each section securely using the appropriate fittings. It’s important to ensure a tight and secure fit to prevent any leakages. You may need to use clamps or screws to hold the pipes and fittings together.
- If your vent system includes elbows, use them to navigate around obstacles or to achieve the desired direction. Elbows help in creating a smooth flow of exhaust gases.
- Once you have connected all the pipes and fittings, carefully inspect the entire vent system for any gaps or loose connections. Make any necessary adjustments to ensure a proper fit.
- Next, attach the termination cap to the end of the vent pipe. This cap helps prevent backdrafts and keeps pests out.
- Finally, double-check your work to ensure everything is properly connected and secured. Any gaps or loose connections could compromise the effectiveness and safety of your vented propane heater.
By following these steps and ensuring a proper connection, you can assemble a vent system for your propane heater that effectively channels the combustion byproducts outside your space, keeping it warm and safe. Make sure to consult the manufacturer’s instructions and local building codes for any specific requirements related to your vented propane heater.
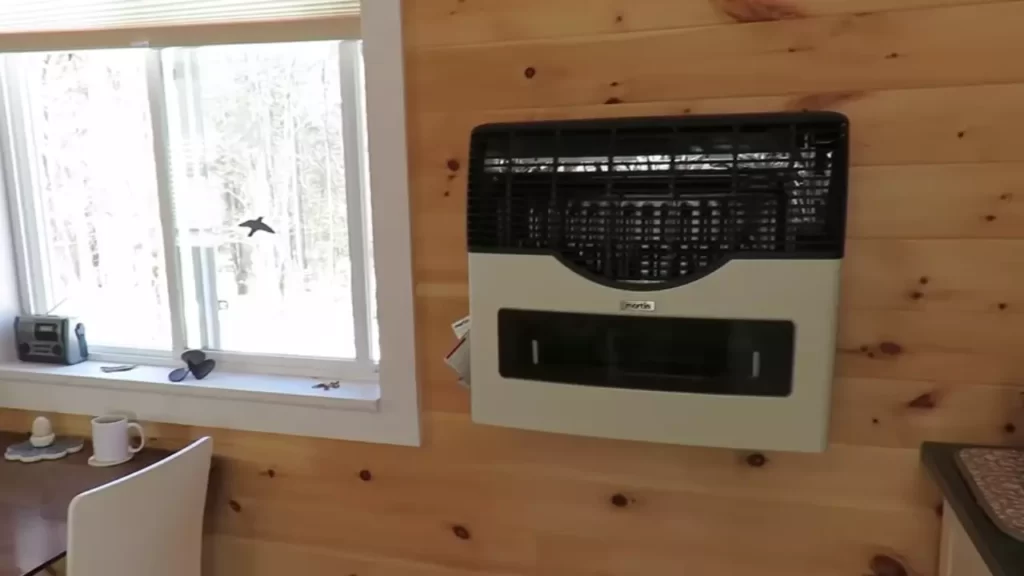
Mounting The Heater
One of the most important steps in installing a vented propane heater is properly mounting it to the wall or ceiling. This ensures that the heater is secure and stable, minimizing any risks or hazards. In this section, we will walk you through the process of securing the heater and provide you with some tips to make the installation smoother.
Securing the Heater to the Wall or Ceiling
When it comes to mounting a vented propane heater, it is essential to choose a sturdy location that can support the weight of the unit. Here are the steps to secure the heater to the wall or ceiling:
- Begin by selecting the appropriate location for the heater. Ensure that it is close to a propane supply line and has enough clearance from any combustible materials.
- Next, mark the positions for the mounting brackets on the wall or ceiling. Use a level to ensure that the brackets are perfectly aligned.
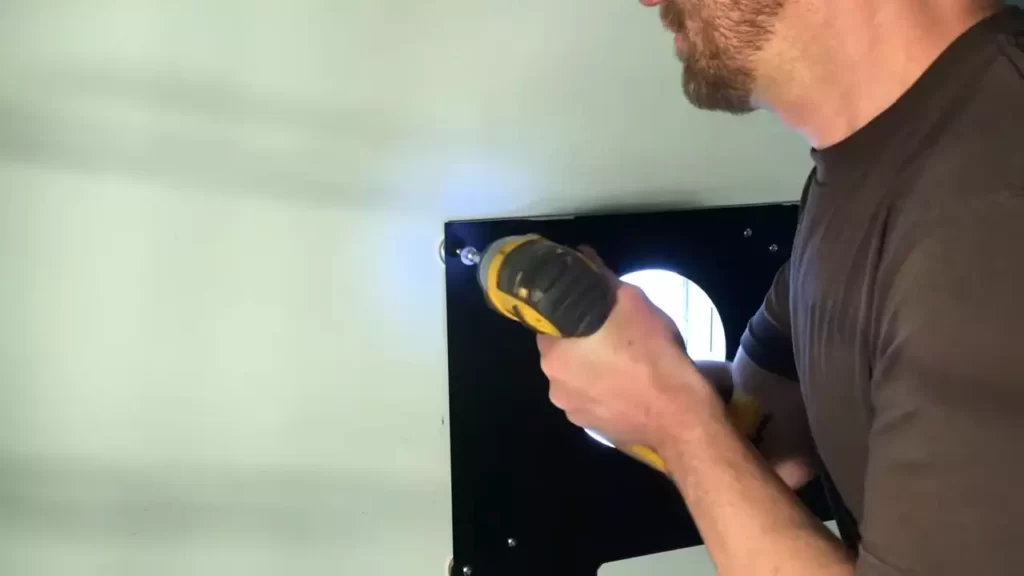
- Drill pilot holes at the marked positions. Make sure to use the appropriate size of drill bit for the type of mounting hardware provided with the heater.
- Attach the mounting brackets to the wall or ceiling using suitable screws or bolts and secure them tightly.
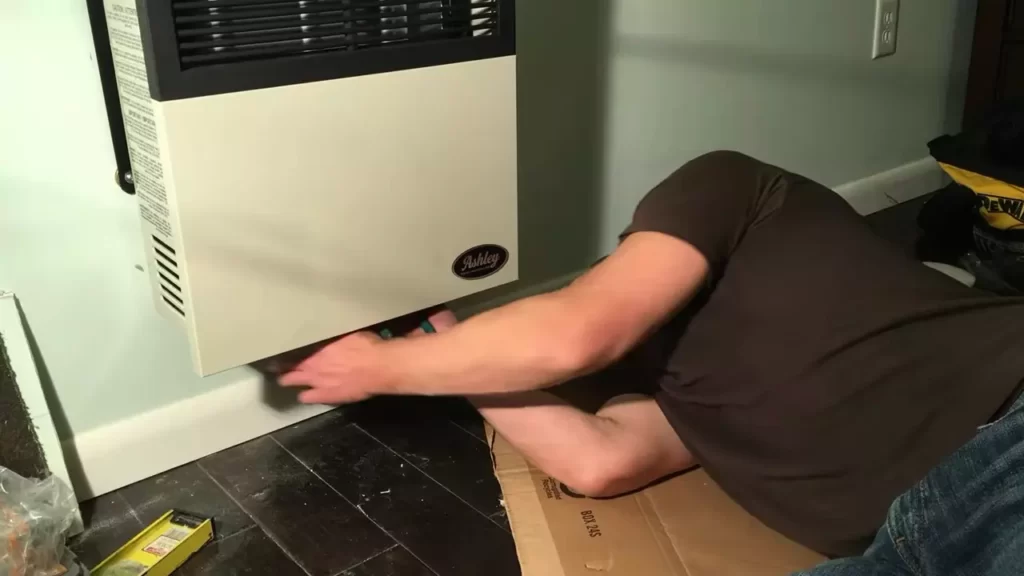
- Place the heater onto the mounting brackets and align it properly. Ensure that the heater is level before proceeding to the next steps.
- Using the provided screws or bolts, attach the heater to the mounting brackets. Make sure to follow the manufacturer’s instructions to ensure a secure fit.
Remember, proper mounting is crucial for the safe and efficient operation of the vented propane heater. Take the time to double-check the stability of the installed heater before proceeding further.
Once you have securely mounted the heater to the wall or ceiling, you can move on to the next steps of the installation process. Stay tuned to our blog as we guide you through the remaining stages of installing a vented propane heater, including connecting the fuel line and properly venting the exhaust gases.
Connecting Propane Supply
When it comes to installing a vented propane heater, connecting the propane supply is a crucial step in ensuring the heater operates safely and efficiently. In this section, we will discuss the necessary steps to ensure a proper connection and highlight important safety measures that need to be followed.
Ensuring Proper Connection
Before connecting the propane supply to your vented heater, it’s important to gather all the necessary materials and verify their compatibility with propane. Here are some steps to follow:
- Inspect the propane supply line: Ensure that the propane supply line is in good condition, free from any cracks, leaks, or damages. If any issues are detected, it’s advisable to replace the line before proceeding with the connection.
- Identify the appropriate connectors: Check the heater’s manual to determine the type and size of connectors required. It’s vital to acquire the correct fittings to create a secure and leak-free connection.
- Apply pipe thread sealant: To prevent gas leaks, apply a suitable pipe thread sealant to the male threads of the propane supply line. This will help create a tight seal when connecting the fittings.
- Attach the connectors: Carefully connect the propane supply line to the designated inlet on the heater using the appropriate connectors. Ensure that each connection is tightened properly, but avoid over-tightening, as it may damage the fittings.
Safety Measures
While connecting your vented propane heater, it’s crucial to prioritize safety. Here are some safety measures to keep in mind:
- Ensure proper ventilation: Make sure your installation location has sufficient ventilation to prevent the accumulation of harmful gases such as carbon monoxide. Consult the manufacturer’s guidelines to determine the required clearances for safe installation.
- Check for gas leaks: After connecting the propane supply, conduct a leak test to ensure there are no gas leaks. Apply a solution of soapy water to all the connections and look for any bubbles forming, indicating a leak. If a leak is detected, immediately turn off the propane supply and address the issue before proceeding.
- Keep flammable materials away: Maintain a safe distance between the heater and any flammable materials. This includes furniture, curtains, paper, or anything that could potentially ignite and cause a fire hazard.
- Install a carbon monoxide detector: Invest in a quality carbon monoxide detector and install it near the heater. This will provide an extra layer of protection by alerting you to any dangerous levels of carbon monoxide in the air.
By following these proper connection steps and implementing necessary safety measures, you can confidently connect the propane supply to your vented heater and enjoy its warmth and efficiency without any concerns.
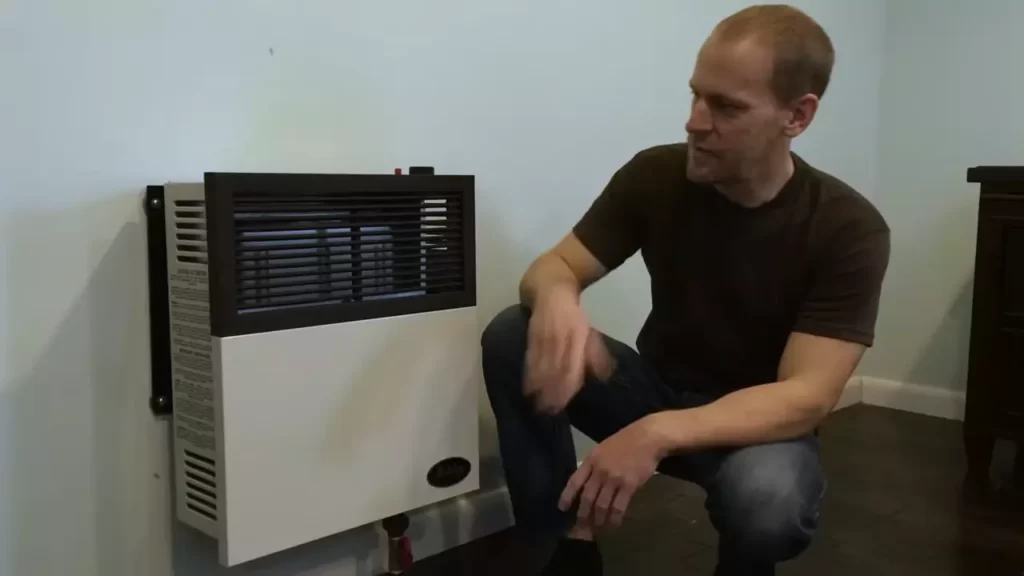
Testing The Installation
Once you have successfully installed your vented propane heater, it’s crucial to test its functionality and ensure there are no leaks. This step is essential in guaranteeing both your safety and the proper functioning of the heater. Follow the steps below to perform a thorough check:
Steps to check for leaks
One of the most critical aspects of testing a vented propane heater installation is detecting and resolving any possible gas leaks. To do this, follow these steps:
- Make sure all gas valves are closed: Before beginning the testing process, ensure that all valves connecting the heater to the propane tank are tightly closed. This will prevent gas from escaping during the inspection.
- Mix a solution of dish soap and water: In a spray bottle, create a solution of equal parts dish soap and water. Shake the bottle gently to mix the ingredients.
- Apply the solution to the connection points: Spray the solution onto the connections between the propane tank, hoses, and the heater. Pay close attention to the fittings and any visible seams where leaks may occur.
- Observe for bubbling or foaming: Watch the connection points closely for any sign of bubbles or foaming. If bubbles start to form, it indicates the presence of a gas leak.
- Tighten connections if necessary: If you spot any bubbles or foaming, gently tighten the connections using a wrench or pliers. Be careful not to overtighten, as this can damage the fittings.
- Reapply the solution and recheck for leaks: After tightening any connections, reapply the soapy solution and observe the area for any further signs of leakage.
- Consult a professional if leaks persist: If you are unable to resolve the gas leak on your own, it is important to seek the assistance of a professional technician. They will have the proper tools and expertise to fix the issue and ensure your installation is safe.
Ensuring proper functioning
In addition to checking for leaks, it is equally important to ensure that your vented propane heater is functioning correctly. Here are a few steps to follow:
- Check the pilot light: Make sure the pilot light is ignited and burning a steady, blue flame. If the flame is weak or flickering, it may indicate a problem that requires further investigation.
- Verify proper heat output: Turn on the heater to the desired temperature and observe if it is producing the expected amount of heat. If the output is insufficient or excessive, it may indicate a malfunction.
- Listen for unusual sounds: Pay attention to any unusual noises emanating from the heater, such as hissing or clanking. such sounds could indicate a mechanical issue, and it is advisable to consult a professional technician in such cases.
By following these steps to check for leaks and ensure proper functioning, you can rest assured that your vented propane heater installation is safe, effective, and ready to provide you with reliable warmth.
Troubleshooting Common Installation Issues
Solutions to overcome potential problems
Even with careful planning and execution, it’s not uncommon to encounter a few obstacles when installing a vented propane heater. However, with the right solutions, you can easily overcome these issues and ensure a successful installation.
Problem: Insufficient ventilation
If you notice that your vented propane heater doesn’t seem to be heating the room effectively or is emitting a strong odor, it’s possible that there’s inadequate ventilation. This can lead to the buildup of harmful gases, posing a safety risk.
To overcome this problem, make sure the ventilation kit is installed correctly. Double-check that the venting pipes are free from obstructions and properly connected. Additionally, ensure that any vents or openings in the room are not blocked to allow for proper air circulation.
Problem: Incorrect positioning
Another common issue during the installation of a vented propane heater is placing it in the wrong location. If the heater is not positioned properly, it may not distribute heat evenly or efficiently.
To address this problem, consider the size and layout of the room. The heater should be installed in an area where the heat can reach the desired space without any obstructions. Avoid placing it near curtains, furniture, or other potentially flammable materials. If needed, consult the manufacturer’s guidelines for recommended placement.
Problem: Ignition failure
Experiencing difficulties igniting the propane heater can be frustrating, especially when you’re relying on it for warmth. This problem can be caused by various factors, such as a clogged gas line or an issue with the ignition system.
First, ensure that the gas supply is turned on and that the propane tank is not empty. If the gas line is clogged, use a soft brush or compressed air to remove any debris. Additionally, inspect the ignition system for any loose connections or faulty components. If necessary, seek professional assistance to resolve the issue.
Problem: Incorrect gas pressure
If you notice that the flame from your vented propane heater is too low or too high, it could indicate an incorrect gas pressure. This can result from a malfunctioning regulator or an improper adjustment during installation.
To resolve this problem, use a manometer to measure the gas pressure and compare it to the manufacturer’s specified range. If the pressure is outside the recommended range, adjust the regulator accordingly. In case you’re unsure about performing the adjustment, it’s always best to contact a licensed technician to ensure safety.
By addressing these potential problems and applying the right solutions, you can ensure a successful installation of your vented propane heater. Remember, safety should always be the top priority, so don’t hesitate to seek professional assistance if needed.
Cleaning And Maintaining The Vented Propane Heater
Regular cleaning and maintenance of a vented propane heater is crucial to ensure its efficient performance and the safety of your space. By following these simple steps, you can keep your heater in optimal condition:
Regular maintenance to ensure efficient performance
To maintain the efficient performance of your vented propane heater, it is important to perform regular maintenance tasks. Here are some tips to keep in mind:
- Inspect the exterior: Regularly inspect the exterior of your heater for any signs of damage or wear. Check the vents, flue, and chimney to ensure they are not blocked by debris or obstructions.
- Clean the burner and pilot assembly: Over time, the burner and pilot assembly can accumulate dirt and debris, which can hinder the performance of your heater. Follow the manufacturer’s instructions to clean these components carefully.
- Check for gas leaks: It’s crucial to check for gas leaks regularly. Apply a mixture of soap and water to the gas line connections, regulator, and valve. If you notice any bubbles forming, it indicates a gas leak. In such cases, turn off the gas supply and contact a professional technician for assistance.
- Replace filters: Many vented propane heaters come equipped with air filters. These filters help trap dust and debris, preventing them from entering the heater. Check the filters regularly and replace them as necessary to ensure proper airflow and efficient performance.

Safety Tips For Operating The Heater
Precautions to take during usage to prevent accidents
When operating a vented propane heater, it is crucial to follow proper safety precautions to prevent accidents. Here are some essential tips to keep in mind:
- Read the manufacturer’s instructions: Before using the vented propane heater, carefully read and understand the manufacturer’s instructions. This will help you familiarize yourself with the specific safety guidelines and precautions for your particular model.
- Ensure proper ventilation: Vented propane heaters require adequate ventilation to operate safely. Always use the heater in a well-ventilated area to prevent the accumulation of carbon monoxide. Make sure there are no obstructions around the heater that could restrict airflow.
- Install a carbon monoxide detector: Carbon monoxide is a colorless and odorless gas that can be emitted from the combustion of propane. To ensure your safety, install a carbon monoxide detector in the room where you are using the heater. Test the detector regularly to ensure it is functioning correctly.
- Keep flammable materials away: Maintain a safe distance between the vented propane heater and any flammable materials, such as curtains, furniture, and paper. This will prevent the risk of fire accidents. The recommended distance is typically mentioned in the manufacturer’s instructions.
- Never leave the heater unattended: It is essential to never leave the heater unattended while it is in operation. Turn off the heater when you leave the room or go to bed to prevent any potential accidents or hazards.
- Regularly inspect the heater: Before each use, visually inspect the vented propane heater to ensure it is in good condition. Check for any signs of damage or leaks. If you notice any issues, do not use the heater and contact a professional for repair.
- Keep children and pets away: Make sure to keep children and pets at a safe distance from the vented propane heater at all times. The surface of the heater can become hot during operation and may cause burns or injuries.
By following these safety precautions, you can ensure the safe operation of your vented propane heater and minimize the risk of accidents or hazards. Always prioritize safety when using any heating appliance to create a warm and comfortable environment in your home.
Troubleshooting Common Operational Issues
Having a vented propane heater in your home can provide efficient and reliable heat during the colder months. However, like any other appliance, it may encounter common issues that can hinder its optimal performance. In this section, we will discuss how to identify and fix these problems, ensuring that your vented propane heater operates smoothly throughout the heating season.
How to identify and fix common issues while using the heater
1. The heater won’t ignite
If your vented propane heater fails to ignite, there could be a few potential causes:
- Check if the propane tank is empty or low on fuel.
- Inspect the pilot light to ensure it is lit. If not, follow the manufacturer’s instructions to relight it.
- Inspect the gas valve to ensure it is open properly.
2. Uneven heat distribution
If you notice inconsistent heat distribution from your vented propane heater, consider the following actions:
- Check for any obstructions blocking the airflow in the room.
- Ensure that the heater’s venting system is clean and free from any debris or blockages.
- Adjust the fan speed or heat output settings to achieve better heat distribution.
3. Continuous cycling
If your vented propane heater turns on and off too frequently, it may be due to:
- An improperly sized heater for your space. Make sure you have the appropriate size unit based on your room measurements.
- A malfunctioning thermostat. Check if the temperature is set correctly and consider replacing the thermostat if necessary.
- Blocked or dirty air filters. Clean or replace the filters regularly to ensure smooth operation.
4. Strange odors or noises
Unusual odors or noises coming from your vented propane heater should not be ignored. Here’s what you can do:
- Check for gas leaks by using a soapy water solution to locate any bubbles along the gas connections. If you detect a leak, turn off the gas supply immediately and contact a professional technician.
- Clean the burner assembly and ensure that it is free from debris or rust buildup.
- Inspect the fan motor and lubricate if necessary.
By addressing and resolving these common operational issues, you can ensure that your vented propane heater delivers the reliable and efficient heat you expect. Regular maintenance and troubleshooting will help prolong the lifespan of your heater and provide you with warmth and comfort throughout the colder months.
Frequently Asked Questions On How To Install A Vented Propane Heater
Should A Propane Heater Be Vented?
A propane heater should be vented to ensure the safe release of combustion byproducts, such as carbon monoxide, which can be harmful to human health. Venting allows for proper ventilation and prevents the buildup of these gases within the living space.
How Do You Vent A Propane Heater?
To vent a propane heater, you need to install a vent pipe that safely releases the combustion byproducts outside. Make sure the vent pipe is properly sized and has clear air passage. Keep the vent pipe away from windows and vents that could draw exhaust gases back inside.
Regularly inspect and clean the venting system to ensure it functions efficiently.
Can You Vent A Propane Heater Through The Wall?
Yes, you can vent a propane heater through the wall. It is a safe and common practice. Just make sure to follow the manufacturer’s instructions and hire a professional to ensure proper installation. Venting through the wall is a convenient option for propane heaters.
Do I Need To Vent A Vent Free Propane Heater?
No, vent-free propane heaters do not require venting. They are designed to burn cleanly and release minimal byproducts into the air. However, it’s important to ensure proper ventilation in the room to avoid any potential build-up of carbon monoxide and to follow the manufacturer’s guidelines for safe use.
Conclusion
Installing a vented propane heater can provide reliable and efficient heating for your space. With a few simple steps and precautions, you can successfully install a vented propane heater yourself. Remember to always follow manufacturer instructions and local safety regulations.
By properly installing a vented propane heater, you can enjoy a warm and cozy environment during the colder months. Stay safe and warm!