To install a trimmer line, simply follow these steps:
- Remove the trimmer head cover.
- Insert the trimmer line into the head, following the arrows for direction.
Gathering The Required Tools And Materials
Gathering the required tools and materials is an essential step in installing a trimmer line. By having everything you need at hand, you can ensure a smooth and efficient installation process. This section will guide you through determining the correct trimmer line size, gathering the necessary tools, and ensuring personal safety equipment.
Determining the correct trimmer line size
Before you start gathering the necessary tools, it’s crucial to determine the correct trimmer line size for your specific trimmer. The size of the trimmer line can vary depending on the model and brand of your trimmer. Refer to the user manual provided by the manufacturer or check the information on the trimmer head itself to find the appropriate line size.
Gathering the necessary tools
Once you’ve determined the correct trimmer line size, gather the following tools:
- A trimmer line of the appropriate size
- A trimmer head that is compatible with your trimmer
- A pair of gloves to protect your hands
- Safety glasses to shield your eyes from flying debris
- A flathead screwdriver or a trimmer head removal tool (if necessary)
- A pair of pliers for any additional adjustments
- A clean cloth to wipe off any dirt or debris
In addition to the tools, gather the following materials:
- A trimmer line replacement or a spool of trimmer line
- Clean water or a mild solvent for cleaning the trimmer head
Ensuring personal safety equipment
Prioritize your safety when working with a trimmer line. Ensure you have the following personal safety equipment:
- Safety goggles or glasses to protect your eyes from debris
- Gloves to safeguard your hands from cuts and blisters
- Appropriate clothing, such as long pants and closed-toe shoes, to protect your body
- Ear protection if your trimmer produces high noise levels
Removing The Old Trimmer Line
When it’s time to replace the trimmer line on your trimmer, it’s essential to remove the old line properly. This will ensure that the new line can be installed correctly, allowing you to efficiently trim your lawn or garden. In this section, we will go through the step-by-step process of removing the old trimmer line, starting with safely turning off the trimmer and ending with disassembling the trimmer head to access the line.
Safely turning off the trimmer
The first step in removing the old trimmer line is to ensure the trimmer is turned off safely. This will prevent any accidental injuries during the process. Follow these simple steps:
- Disconnect the spark plug wire: Locate the spark plug wire on the trimmer’s engine. Carefully detach it to cut off the power supply.
- Ensure the engine has cooled down: Wait for the engine to cool down completely before moving forward. This will prevent any burns or injuries.
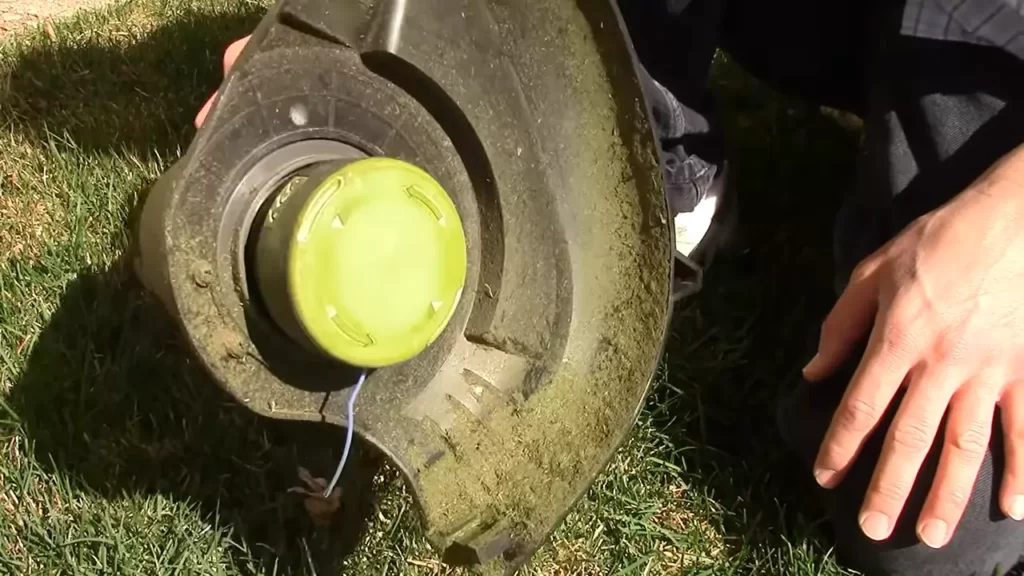
Removing the trimmer head
Now that the trimmer is safely turned off, it’s time to remove the trimmer head, which houses the old trimmer line. Follow these steps to accomplish this:
- Secure the trimmer head: Use a firm grip to hold the trimmer head in place.
- Rotate the trimmer head in the opposite direction: Most trimmers require you to turn the trimmer head counterclockwise to remove it. Check the user manual for specific instructions.
- Detach the trimmer head: Once you have rotated the trimmer head, carefully detach it from the trimmer.
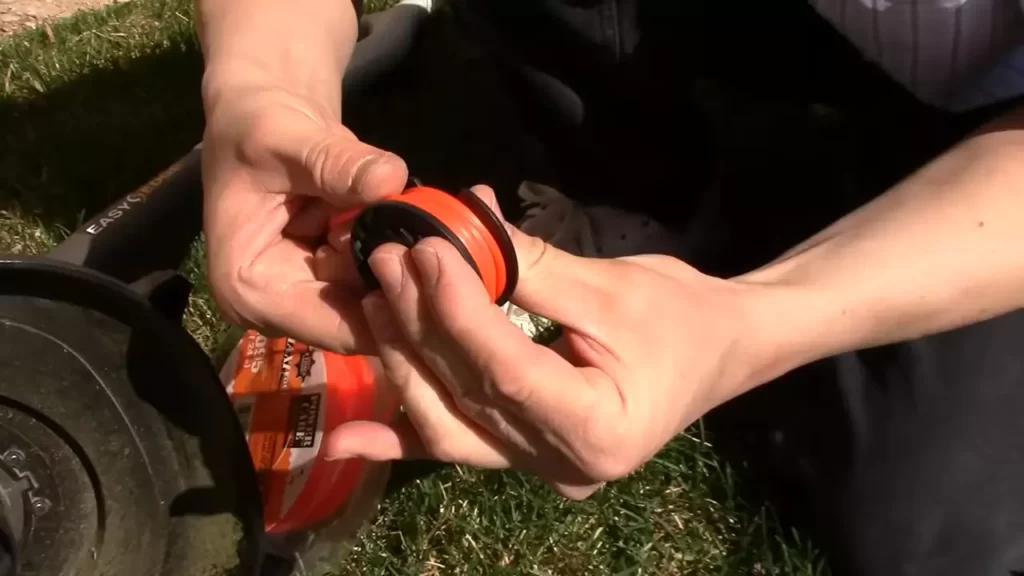
Disassembling the trimmer head to access the line
With the trimmer head successfully removed, it’s time to disassemble it to access the old trimmer line. Follow these steps to complete this process:
- Inspect the trimmer head: Take a moment to examine the trimmer head and locate the tabs or locks that hold it together.
- Unlock or release the tabs: Depending on the trimmer model, you may need to rotate or press the tabs to unlock or release them.
- Open the trimmer head: Once the tabs are unlocked or released, carefully open the trimmer head to reveal the old trimmer line.
- Remove the old trimmer line: Gently pull out the old trimmer line from the trimmer head. Note any areas that may require cleaning or maintenance.
Now that you have successfully removed the old trimmer line, you are ready to proceed with installing the new line. Stay tuned for our next section on how to install a trimmer line!
Installing The New Trimmer Line
Once you have determined the correct line winding direction, it’s time to install the new trimmer line onto your trimmer head. By following a few simple steps, you’ll have your trimmer ready for action in no time.
Determining the correct line winding direction
Before you can install the new trimmer line, it’s important to determine the correct line winding direction. Different trimmer heads may require different winding directions, so refer to your trimmer’s manual or manufacturer instructions to find the correct direction for your specific model. Once you’ve found the correct direction, make sure to remember it for future reference.
Cutting the trimmer line to the appropriate length
In order for your trimmer to function optimally, it’s crucial to cut the trimmer line to the appropriate length. Use a measuring tape or ruler to determine the desired length, keeping in mind that the length may vary depending on the type of trimming task you’ll be performing. Once you have the desired length, use a pair of sharp scissors or a trimmer line cutting tool to cut the line cleanly and evenly.
Inserting the line into the trimmer head
With your trimmer line cut to the appropriate length, it’s time to insert it into the trimmer head. Follow these steps to ensure a secure and proper installation:
- Locate the holes or notches on the trimmer head where the line will be inserted.
- Take one end of the trimmer line and insert it into one of the holes or notches, making sure it is securely held in place.
- If there are multiple holes or notches, repeat the previous step for each one, evenly distributing the trimmer line throughout the trimmer head.
- Make sure the trimmer line is positioned correctly and securely in the trimmer head, with no loose ends or excess line protruding.
- Once the line is properly inserted, secure the trimmer head according to the manufacturer’s instructions, ensuring it is tightly fastened.
By following these steps to install the new trimmer line, you’ll be ready to tackle your trimming tasks with ease and efficiency. Remember to always refer to your trimmer’s manual or manufacturer instructions for specific guidance and safety precautions.
Winding The Trimmer Line Onto The Spool
When it comes to installing a new trimmer line on your weed eater, winding the line evenly and tightly onto the spool is a crucial step. This ensures that the line feeds properly and cuts efficiently, allowing you to tackle even the toughest of weeds with ease. In this section, we will guide you through the process of winding the trimmer line onto the spool, step by step.
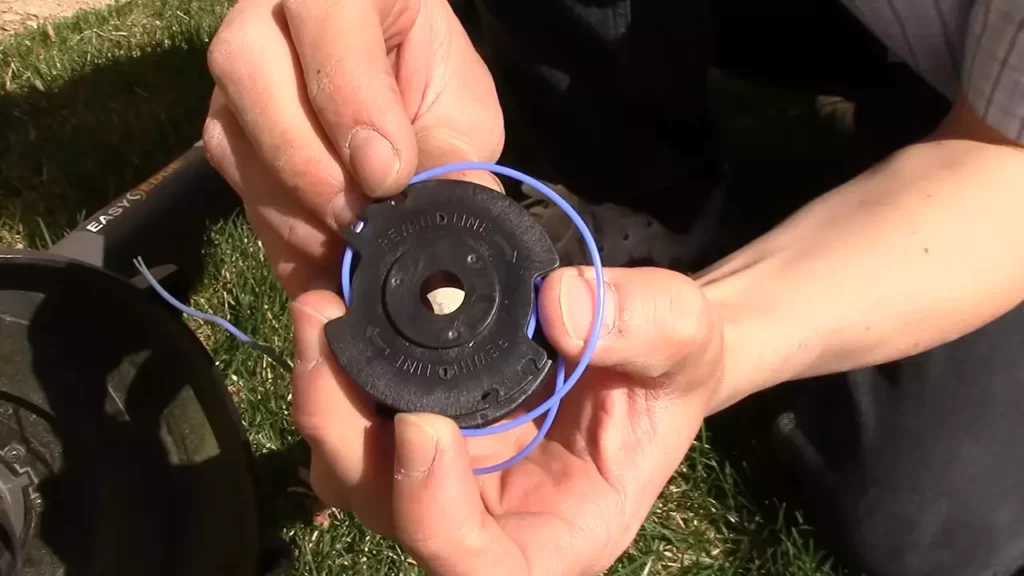
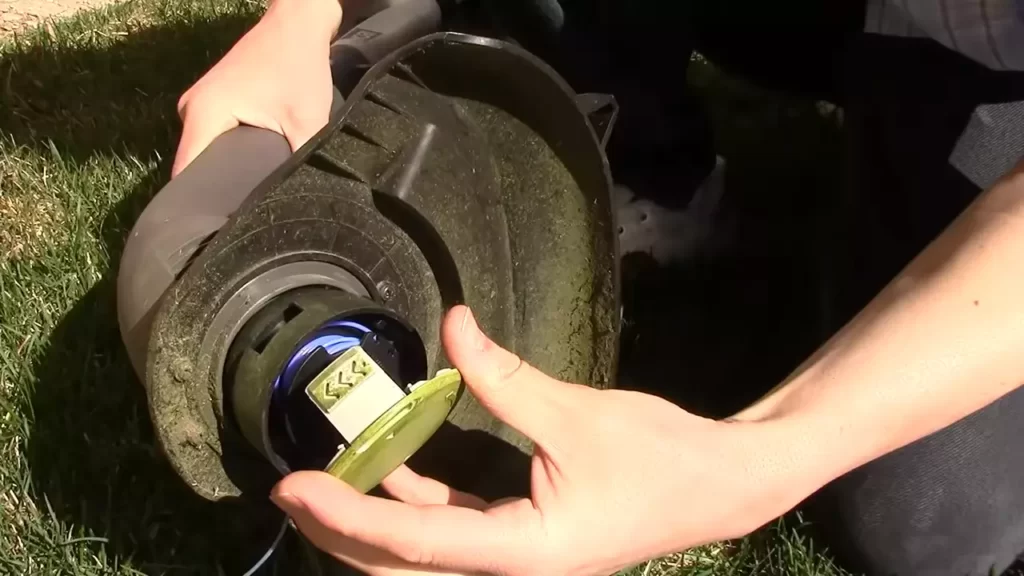
Aligning the line with the designated arrows
To begin, make sure you have the correct length and thickness of trimmer line for your specific weed eater model. The package will typically provide this information for you. Once you have the right line, locate the designated arrows on the spool. These arrows indicate the direction in which the trimmer line should be wound onto the spool. It’s important to align the line with these arrows to ensure proper fit and operation.
Winding the line evenly and tightly onto the spool
Next, it’s time to wind the trimmer line onto the spool. Start by holding the spool firmly in one hand, and with your other hand, insert the trimmer line into one of the anchor holes on the spool. Begin winding the line around the spool in the direction indicated by the arrows. Make sure to wind the line evenly, keeping the turns tight and snug. This will prevent the line from becoming tangled or loose during use.
If your spool has multiple anchor holes, continue winding the line, filling each hole until you have used the desired amount of line. Be sure not to overload the spool, as this can cause feeding issues and lead to line breakage. Refer to the user manual or consult the manufacturer’s guidelines to determine the ideal line length for your specific weed eater model.
Securing the line in place
After you have wound the trimmer line onto the spool, it’s important to secure it in place to prevent it from unraveling during operation. Many weed eater models have notches or grooves in the spool that allow you to lock the line into place. Insert the end of the trimmer line into one of these notches, making sure it is held securely. Give the line a gentle tug to ensure it is properly secured before moving on to the next step.
Now that the trimmer line is securely wound and in place on the spool, you are ready to reassemble the spool onto the trimmer head and get back to tackling those unruly weeds. Following these steps will help ensure a hassle-free installation and optimal performance from your weed eater.
Reassembling The Trimmer Head
Once you have successfully replaced the worn-out trimmer line with a new one, it’s time to reassemble the trimmer head. This step-by-step guide will walk you through the process, ensuring that you can get your trimmer back in action in no time.
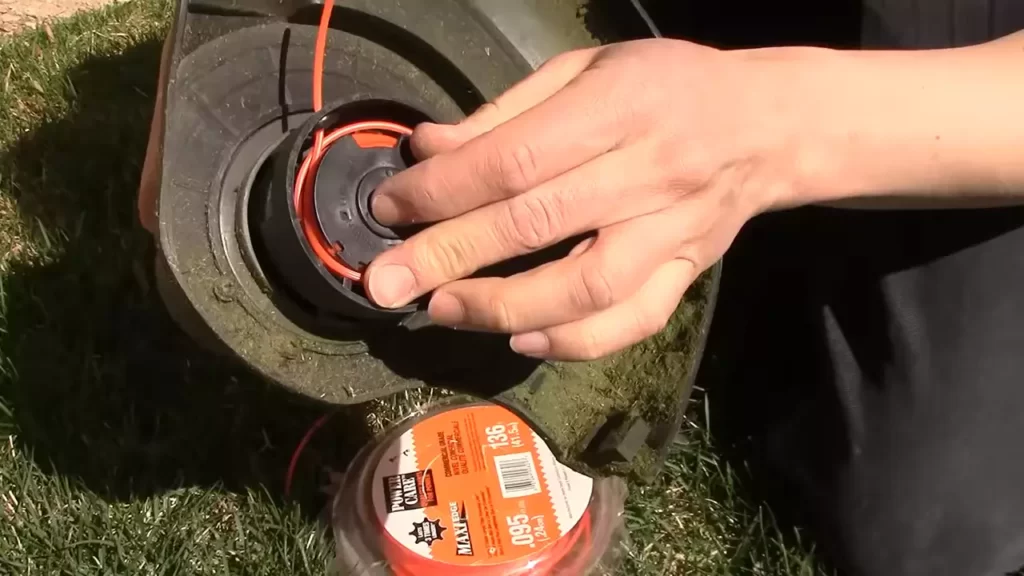
Placing the spool back into the trimmer head
Start by taking the newly wound spool and aligning it with the trimmer head. Ensure that the ends of the trimmer line extend out from the spool’s holes. Carefully place the spool inside the head, making sure it fits snugly. This ensures that the trimmer line dispenses properly during operation.
Reattaching the trimmer head to the trimmer
Next, it’s time to reattach the trimmer head to the trimmer. Align the tabs on the head with the corresponding slots on the trimmer body. Once properly aligned, insert the head into the trimmer body, applying firm pressure until it clicks into place. This secure attachment is crucial to ensure proper operation and prevent any accidents while trimming.
Ensuring proper alignment and tightness
With the trimmer head reattached, it’s essential to check for proper alignment and tightness. Grab the head firmly and try to wiggle it. There should be little to no movement. If the head feels loose, tighten it according to the manufacturer’s instructions. It’s vital to have a secure and stable trimmer head to ensure efficient trimming and prevent any potential damage to the trimmer or injury to the user.
Additionally, make sure the trimmer head is properly aligned with the trimmer shaft and sits perpendicular to the ground. This alignment ensures that the trimmer line cuts evenly and allows for a cleaner and more professional-looking trim.
Once you have completed these steps, congratulations! You have successfully reassembled the trimmer head and are ready to tackle your next trimming project. Remember, regular maintenance and proper installation of the trimmer line will not only extend the life of your trimmer but also ensure optimal performance every time.
Testing And Adjustments
Checking for any loose connections
Before testing the trimmer line, it’s important to check for any loose connections. Loose connections can prevent the trimmer line from operating effectively and can even be a safety hazard. To check for loose connections, follow these steps:
- Inspect the trimmer head and ensure that it is securely attached to the trimmer shaft. If it is loose, tighten the head using the appropriate tools.
- Check the trimmer line spool and make sure it is properly secured. If it is loose, tighten the spool according to the manufacturer’s instructions.
- Inspect the trimmer handle and ensure that it is securely attached to the shaft. If it feels loose, tighten the handle using the appropriate tools.
- Check the power source, whether it’s a battery or gas tank, and make sure it is securely attached to the trimmer. If it is loose, tighten the power source according to the manufacturer’s instructions.
Testing the trimmer to see if the line extends
Once you have checked for any loose connections, it’s time to test the trimmer line to see if it extends properly. Follow these steps to test the trimmer:
- Start the trimmer according to the manufacturer’s instructions. Ensure you are in a safe and open area to perform the test.
- Gently tap the trimmer head on the ground to activate the line extension. Observe whether the line extends as it should or if it is getting stuck.
- If the line extends properly, proceed to the next step. If the line is getting stuck or not extending at all, refer to the troubleshooting section in the trimmer’s user manual to find possible solutions.
Making any necessary adjustments for optimal performance
After testing the trimmer line, you may need to make some adjustments to ensure optimal performance. Follow these steps to make any necessary adjustments:
- Inspect the trimmer head and clean any debris or tangled line that may be causing issues. Use a brush or compressed air to remove any dirt or grass build-up.
- Check the trimmer line tension. If the line is too loose, it may not cut effectively. If it is too tight, it may cause the line to break easily. Adjust the tension according to the manufacturer’s instructions.
- If you notice that the trimmer line is wearing down quickly or becoming damaged easily, consider replacing it with a higher quality line. This can improve overall performance and durability.
- Regularly lubricate any moving parts of the trimmer to ensure proper operation. Consult the user manual for the appropriate lubrication method and intervals.
By following these steps for testing and making adjustments, you can ensure that your trimmer line is operating at its best, providing you with efficient trimming and a well-maintained yard. Remember to check for any loose connections, test the line extension, and make any necessary adjustments for optimal performance.
Maintenance And Troubleshooting Tips
Maintenance and Troubleshooting Tips
Proper maintenance of your trimmer line is essential to ensure its effectiveness and longevity. By regularly inspecting and replacing the trimmer line, cleaning the trimmer head to prevent clogs, and troubleshooting common trimmer line installation issues, you can keep your trimmer working efficiently and smoothly.
Regularly inspecting and replacing trimmer line
To ensure optimal performance, it is important to regularly inspect and replace the trimmer line. Over time, the line can become worn or damaged, reducing its cutting ability. Inspect the line for signs of wear and replace it when necessary.
Here are a few steps to inspect and replace the trimmer line:
- Turn off the trimmer and unplug it from the power source. Safety should always be a top priority.
- Remove the spool or head cover by following the manufacturer’s instructions.
- Inspect the trimmer line for any signs of wear, such as fraying or splitting. If the line is damaged, it is recommended to replace it with a new one.
- Measure the length of the existing trimmer line and ensure the replacement line is the same size.
- Cut the replacement line to the appropriate length, following the manufacturer’s guidelines.
- Insert the new trimmer line into the spool or head, following the manufacturer’s instructions.
- Secure the spool or head cover back into place.
Cleaning the trimmer head to prevent clogs
A clogged trimmer head can significantly impact the performance of your trimmer. Accumulated debris and grass clippings can hinder the line’s movement or cause it to break more easily. Regularly cleaning the trimmer head will help prevent clogs and maintain optimal cutting efficiency.
Here’s how you can clean the trimmer head:
- Turn off the trimmer and unplug it from the power source.
- Remove the spool or head cover, as instructed by the manufacturer.
- Using a clean cloth or brush, gently wipe away any debris or grass clippings from the trimmer head.
- Inspect the head for any signs of damage or blockages.
- If there are stubborn clogs, use a small tool, such as a toothpick or needle, to carefully remove the debris.
- Reassemble the trimmer head, ensuring it is securely in place.
Troubleshooting common trimmer line installation issues
Occasionally, you may encounter difficulties when installing trimmer line. Understanding common issues and how to troubleshoot them will save you time and frustration.
Here are some common trimmer line installation issues and how to troubleshoot them:
| Issue | Troubleshooting |
|---|---|
| The trimmer line keeps breaking | Ensure the line is the correct size and type for your trimmer. Check for any obstructions in the trimmer head that may be causing excessive strain on the line. Avoid hitting hard surfaces, as this may cause the line to break. |
| The trimmer line won’t advance | Check if the line is wound correctly on the spool. If not, rewind it following the manufacturer’s instructions. Ensure there are no tangles or knots in the line that may prevent it from advancing. |
| The trimmer line gets tangled inside the trimmer head | Inspect the trimmer head for any signs of damage or blockages. Remove any debris or tangled line. Check if the line is wound correctly on the spool, as improper winding can lead to tangling. |
By following these maintenance and troubleshooting tips, you can keep your trimmer line in top condition and ensure a smooth trimming experience every time.
Frequently Asked Questions Of How To Install A Trimmer Line
How Do I Put New Line On My Trimmer?
To put a new line on your trimmer, follow these steps:
1. Turn off the trimmer and unplug it for safety.
2. Locate the trimmer head and find the line-loading holes.
3. Insert the trimmer line into the line-loading holes until secure.
4. Pull the line through until both ends are even.
5. Reassemble the trimmer head and plug in your trimmer.
How Do You Put Line On A String Trimmer?
To put line on a string trimmer, follow these steps:
1. Turn off the trimmer and remove the cap from the trimmer head.
2. Cut a length of trimmer line that matches the recommended size for your trimmer.
3. Insert the line into the eyelets or holes on the trimmer head, following the arrows for direction.
4. Wind the line tightly and evenly onto the trimmer head.
5. Replace the cap and ensure it is securely tightened.
How Do You Wind Trimmer Line On A Spool?
To wind trimmer line on a spool, follow these steps:
1. Locate the arrows on the spool indicating the winding direction.
2. Insert the line into the anchor hole, leaving a small tail.
3. Start winding the line tightly in the direction indicated by the arrows.
4. Secure the line in a notch when finished.
5. Trim any excess line.
Does Trimmer Line Shape Matter?
Yes, the shape of the trimmer line matters. Different shapes are designed for specific tasks. Round lines are versatile and work well for general trimming. Square and serrated lines are more aggressive and better for tough vegetation. Twisted lines provide increased cutting power and are suitable for thicker grass.
Choose the shape that suits your trimming needs.
Conclusion
It is crucial to properly install a trimmer line to ensure optimal performance and efficiency. By following the step-by-step guide provided in this blog post, you can easily accomplish this task and maintain a well-maintained lawn or garden. Remember, regularly checking and replacing the trimmer line will keep your trimmer working smoothly for a longer duration.
So, go ahead, put these tips into practice, and enjoy the benefits of a neatly trimmed and manicured outdoor space.