To install a through the wall air conditioner, begin by measuring your wall opening and selecting a suitable unit. Then, assemble the necessary tools, including a stud finder, level, drill, and screwdriver.
Carefully follow the manufacturer’s instructions for mounting the unit securely, ensuring proper ventilation and that it is level. Finally, adjust the insulation and seal any gaps to prevent air leaks.
Factors To Consider Before Installing A Through The Wall Air Conditioner
Installing a through the wall air conditioner can be a great way to cool your space efficiently. However, before you jump into the installation process, there are a few important factors that you need to consider. These factors will not only ensure the effectiveness of your air conditioner but also make the installation process smoother. Take a look at the three key factors to consider before installing a through the wall air conditioner.
Determining the Suitable Location for Installation
One of the first things to consider is the suitable location for installing your through the wall air conditioner. Choosing the right location is crucial for the effectiveness and efficiency of the unit. To determine the suitable location:
- Identify a spot that is near a window or an outside wall. This will allow for proper ventilation and exhaust.
- Ensure that the location is away from direct sunlight or heat sources to prevent overheating of the unit.
- Consider the layout of the room and ensure that the air conditioner can provide adequate cooling throughout the space.
Selecting the Right Size and BTU Rating
Another significant factor to consider is selecting the right size and BTU rating for your through the wall air conditioner. This will directly impact the cooling capacity and efficiency of the unit. To select the right size and BTU rating:
- Measure the square footage of the room where the air conditioner will be installed.
- Refer to the manufacturer’s guidelines or consult an HVAC professional to determine the appropriate BTU rating based on the room size.
- Choosing a unit with a higher BTU rating than necessary can lead to excessive energy consumption, while a lower rating may not provide sufficient cooling.
Checking the Electrical and Wiring Requirements
Prior to installation, it is crucial to check the electrical and wiring requirements for your through the wall air conditioner. This will ensure the safety and functionality of the unit. When checking the electrical and wiring requirements:
| Step 1: | Verify that your electrical system can support the power requirements of the air conditioner. |
| Step 2: | Ensure that the wiring in your wall meets the specifications outlined by the manufacturer. |
| Step 3: | If necessary, hire a professional electrician to install a dedicated circuit and outlet for the air conditioner. |
By considering these factors before installing a through the wall air conditioner, you can ensure a successful installation that maximizes cooling efficiency and provides optimal comfort in your space.
Gathering The Necessary Tools And Materials
Before you begin the installation process for a through the wall air conditioner, it’s important to gather all the necessary tools and materials. This will ensure a smooth and efficient installation without any interruptions. Below, we’ve listed the tools and materials you’ll need to have on hand.
List of Tools Required
Having the right tools is essential to completing the installation properly. Here is a list of the tools you’ll need:
- Screwdriver (both Phillips and flathead)
- Drill
- Tape measure
- Level
- Pencil
- Utility knife
- Wire cutters
- Stud finder
- Adjustable wrench
- Hammer
- Safety goggles
- Gloves
Required Materials for Installation
In addition to the tools mentioned above, you’ll also need to gather the following materials for a successful installation:
- Through the wall air conditioner unit
- Wall sleeve (specific to the air conditioner model)
- Mounting bracket or frame
- Insulation foam
- AC power cord
- Screws and fasteners
- Weatherstripping
- Duct tape or foil tape
Make sure you have all these tools and materials prepped and ready before you begin the installation. Having everything on hand will save you time and prevent any unnecessary delays. Gather your tools and materials and get ready to install your through the wall air conditioner!
Measuring And Preparing The Wall For Installation
Measuring the Wall Opening
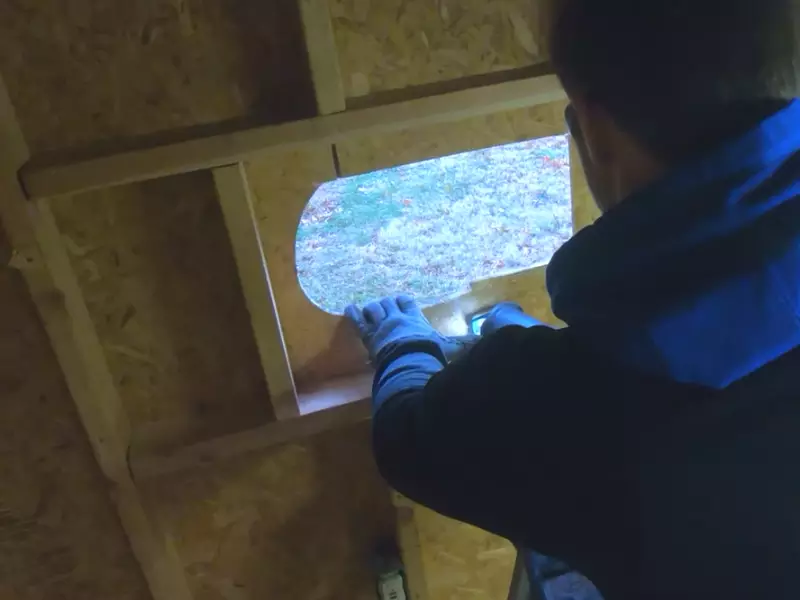
Before installing a through the wall air conditioner, it is crucial to accurately measure the wall opening. This will ensure that the unit fits snugly and functions optimally. Here are the steps to measure the wall opening:
Step 1: Start by measuring the height of the opening. Use a tape measure to measure from the floor to the top of the opening. Take precise measurements at multiple points and record the largest measurement. This will ensure that the air conditioner will fit properly without leaving any gaps.
Step 2: Next, measure the width of the opening. Use a tape measure to measure from one side of the opening to the other. Again, take precise measurements at multiple points and record the largest measurement. This will guarantee a perfect fit for the air conditioner.
Step 3: Once you have the height and width measurements, multiply them together to calculate the square footage of the wall opening. This will help you determine the appropriate size of the through the wall air conditioner that you should purchase.
Preparing the Wall Surface for Mounting
After measuring the wall opening, it is time to prepare the wall surface for mounting the through the wall air conditioner. Here are the essential steps:
- Step 1: Clean the wall surface where the air conditioner will be installed. Use a damp cloth to remove any dust, dirt, or debris. This will ensure a smooth and secure installation.
- Step 2: Inspect the wall for any cracks or damage. If you notice any cracks, it is essential to repair them before proceeding with the installation. Use a wall patching compound to fill in any cracks and smooth the surface. Allow the compound to dry fully before moving on.
- Step 3: Determine the location of the electrical outlet for the air conditioner. Make sure that it is easily accessible and meets the manufacturer’s requirements. If needed, hire a professional electrician to install the outlet in the desired location.
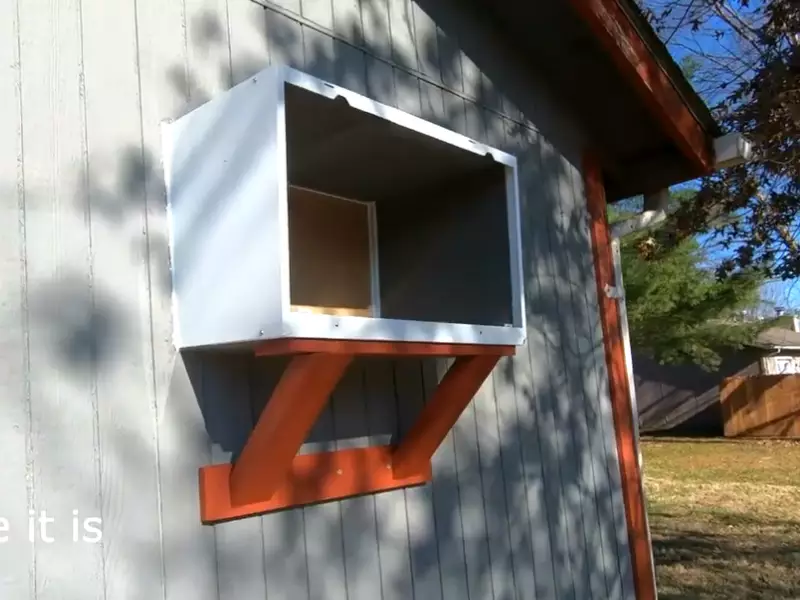
- Step 4: Consider installing a support bracket on the exterior side of the wall to provide extra stability for the air conditioner. Refer to the manufacturer’s instructions for the appropriate bracket and installation method.
By carefully measuring the wall opening and properly preparing the wall surface, you can ensure a seamless installation of your through the wall air conditioner. Following these steps will not only lead to a secure fit but also help in maximizing its cooling efficiency. So, grab your tape measure and get ready to enjoy a comfortable indoor environment.
Mounting The Air Conditioner Sleeve
Mounting the Air Conditioner Sleeve
Installing a through the wall air conditioner involves several steps, and one crucial step is mounting the air conditioner sleeve. The sleeve acts as a support for the air conditioner unit and helps to seal the wall opening. In this guide, we will walk you through the process of mounting the air conditioner sleeve, ensuring a secure and stable installation.
Inserting the Sleeve into the Wall Opening
To begin, you need to locate the wall opening where the air conditioner will be installed. Measure the dimensions of the sleeve and make sure the wall opening matches. If necessary, use a saw or a utility knife to adjust the opening size accordingly.
Once you have the proper measurements, carefully insert the sleeve into the wall opening. Take your time to align it properly and ensure that it fits snugly in the space. This will provide a solid foundation for the air conditioner unit and prevent any potential air leaks.
Securing the Air Conditioner Sleeve in Place
With the sleeve inserted into the wall opening, the next step is to secure it in place. This is crucial to ensure the stability and safety of the air conditioner unit.
One popular and effective method is to use support brackets. These brackets can be attached to the sides of the sleeve and then fastened to the wall using screws or bolts. Make sure to follow the manufacturer’s instructions when installing these brackets, as they may vary depending on the specific model of your air conditioner.
Another option is to use foam insulation strips. These strips can be applied along the edges of the sleeve to create a tight seal and provide additional support. Be sure to use strong adhesive to secure the strips in place.
It’s important to note that the specific steps for securing the air conditioner sleeve may vary depending on the make and model of your unit. Always refer to the manufacturer’s instructions for detailed guidance.
By following these steps, you can successfully mount the air conditioner sleeve, ensuring a secure and stable installation for your through the wall air conditioner. Remember to consult the manufacturer’s instructions throughout the process to ensure the best results possible.
Properly Installing The Air Conditioner Unit
Connecting the Electrical Wiring
When installing a through the wall air conditioner, one of the crucial steps is properly connecting the electrical wiring. This ensures that the unit functions efficiently and safely. Before beginning this step, make sure to turn off the power at the breaker panel to avoid any electrical accidents. Here’s a step-by-step guide on how to connect the electrical wiring:
- Remove the cover from the air conditioner unit to expose the wiring area.
- Locate the electrical terminal block on the unit. This is where the wires will be connected.
- Strip the insulation off the ends of the wires, exposing about 1 inch of bare wire.
- Connect the wires – the black wire to the black wire, the white wire to the white wire, and the green or copper wire to the ground screw.
- Use wire nuts to secure the connections. Make sure they are tight and secure.
- Reattach the cover onto the unit.
Positioning the Air Conditioner Unit in the Sleeve
Once the electrical wiring is connected, it’s time to position the air conditioner unit in the sleeve. This step ensures the unit is securely installed, allowing it to cool the room effectively. Here’s how to position the unit:
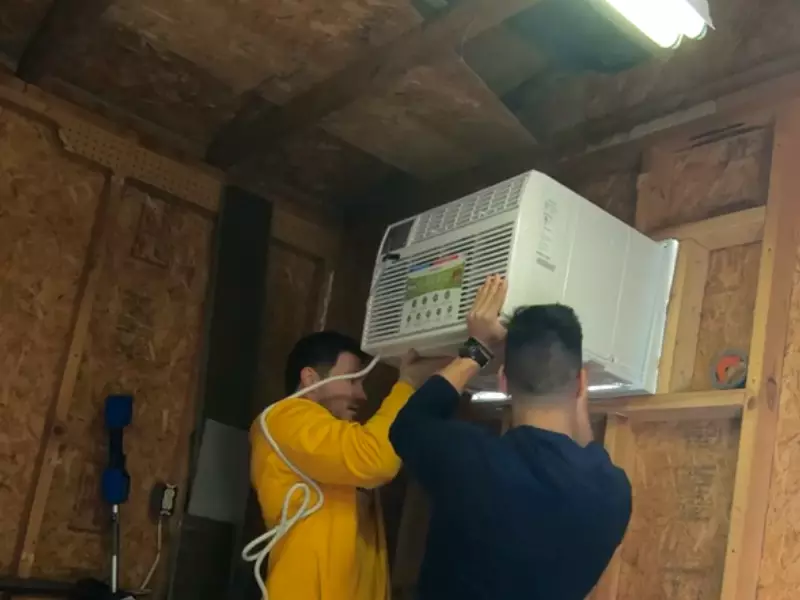
- Slide the unit into the sleeve, ensuring it is centered and level.
- Secure the unit to the sleeve using the provided mounting hardware.
- Check that the unit is snugly fit with no gaps or spaces around it.
- Test the unit by gently pushing it side to side. It should not move or slide within the sleeve.
Insulating the Gaps Around the Unit
Proper insulation is crucial for the through the wall air conditioner to operate efficiently. Insulating the gaps around the unit prevents warm air from entering the room, maximizing the cooling power. Follow these steps to properly insulate the gaps:
- Measure the space around the unit to determine the amount of insulation needed.
- Cut the insulation material – foam or weatherstripping – to the appropriate size.
- Place the insulation material around the gaps between the unit and the wall. Ensure a tight and secure fit.
- Check for any additional gaps or spaces and fill them with caulk or foam sealant.
- Make sure the insulation is not obstructing any important components of the unit, such as the vents or controls.
By following these three steps – connecting the electrical wiring, positioning the air conditioner unit in the sleeve, and insulating the gaps around the unit – you can properly install a through the wall air conditioner. This ensures optimal performance, energy efficiency, and long-term satisfaction with your cooling system.
Sealing The Gaps Around The Air Conditioner
Using Weatherstripping to Seal Gaps
One of the crucial steps in installing a through the wall air conditioner is sealing the gaps around the unit to ensure optimal performance and energy efficiency. Weatherstripping is an excellent solution for closing those small crevices that might occur due to uneven surfaces or imperfect installation.
To effectively use weatherstripping, you’ll need to follow these simple steps:
- Clean the surfaces: Before applying weatherstripping, make sure to clean the areas around the air conditioner thoroughly. Remove any dust, debris, or old caulking to ensure proper adhesion.
- Select the right weatherstripping material: Depending on the size and shape of the gaps, choose the appropriate weatherstripping material. There are various options available, such as foam tape, adhesive-backed rubber or silicone strips, or V-strip weatherstripping.
- Measure and cut: Carefully measure the length of the gaps around the air conditioner and cut the weatherstripping material accordingly. It’s crucial to ensure a precise fit to guarantee maximum efficiency.
- Apply the weatherstripping: Peel off the backing from the weatherstripping material and apply it directly to the gaps. Press firmly to ensure it adheres securely.
- Test for gaps: Once the weatherstripping is in place, check for any remaining gaps by running your hand along the edges of the air conditioner. If you feel any cool air escaping or detect any gaps, apply additional weatherstripping as needed.
By using weatherstripping, you can significantly reduce air leakage, prevent drafts, and improve the overall performance of your through the wall air conditioner.
Applying Caulk to Ensure a Tight Seal
In addition to weatherstripping, another effective method to seal the gaps around your through the wall air conditioner is by applying caulk. Caulk is a versatile sealant that can fill even larger gaps, providing an airtight seal and preventing air leakage.
Here’s how you can apply caulk to ensure a tight seal:
- Choose the right caulk: There are different types of caulk available, such as silicone or latex-based caulk. Consider the specific requirements of your installation and select the appropriate caulk for the best results.
- Prepare the area: Clean the surfaces around the air conditioner and remove any old caulk or debris. Use a scraper or putty knife to ensure a smooth and clean surface.
- Load the caulk gun: If you’re using caulk in a tube, load it into a caulk gun for easier application. Cut the tip of the caulk tube at a 45-degree angle to create an opening that matches the size of the gap.
- Apply the caulk: Hold the caulk gun at a slight angle and squeeze the trigger to apply a consistent bead of caulk along the gaps around the air conditioner. Move steadily and maintain a steady hand for an even application.
- Smooth the caulk: To ensure a neat finish, use a caulk smoothing tool or your finger to smooth the caulk along the gaps. This process not only improves the seal but also enhances the overall appearance.
- Allow time to dry: Follow the instructions provided with the caulk product to determine the drying time. It’s vital to allow the caulk sufficient time to fully cure and create a durable seal.
By applying caulk to seal the gaps around your through the wall air conditioner, you can enhance energy efficiency, reduce drafts, and improve the overall performance of your cooling system.
Testing And Adjusting The Air Conditioner
Once you have successfully installed your through the wall air conditioner, the next crucial step is to test and adjust its functionality to ensure optimal performance. Properly testing and adjusting your air conditioner will not only enhance your comfort but also prolong the lifespan of the unit. In this section, we will guide you through the process of testing and adjusting your newly installed through the wall air conditioner.
Checking for Proper Functionality
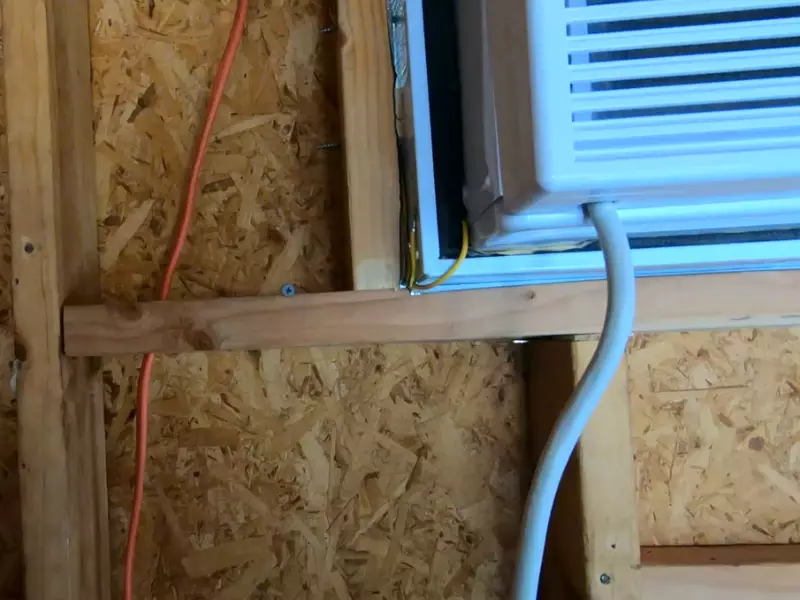
To begin, it’s important to check if your air conditioner is functioning properly. This will help you catch any potential issues early on and avoid further complications in the future. Here are some steps to follow:
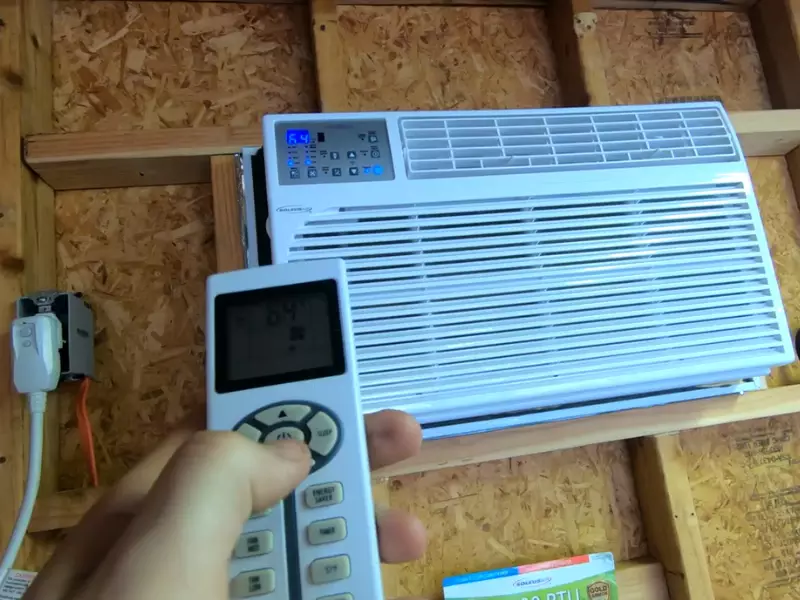
- Turn on your air conditioner by pressing the power button. Ensure that it powers up without any issues.
- Set your desired temperature on the thermostat and verify if the unit starts cooling your room accordingly.
- Check if cool air is coming out of the air vents. You can place your hand near the vent to feel the airflow. Additionally, inspect if the air conditioner is properly expelling warm air outside through the condenser.
- Listen for any unusual noises such as rattling or buzzing. If you hear any abnormal sounds, it might indicate a problem with the internal components. In such cases, it’s recommended to contact a professional for further inspection and repair.
Adjusting the Air Flow and Temperature Settings
To maximize the efficiency of your through the wall air conditioner, it’s crucial to adjust the air flow and temperature settings according to your preferences and the room’s requirements. Here are some steps to help you with the adjustment:
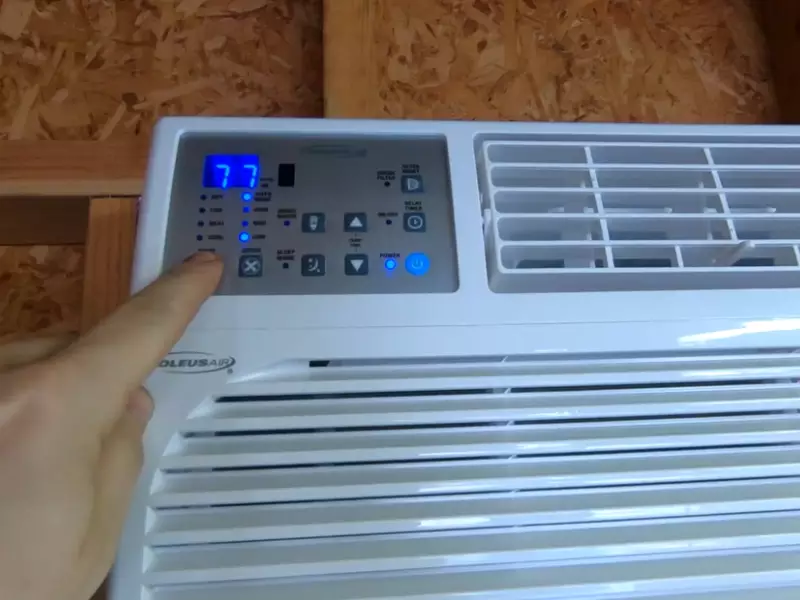
- Become familiar with the control panel of your air conditioner. Identify the buttons or knobs that allow you to adjust the fan speed, air direction, and temperature.
- To adjust the air flow, experiment with different fan speeds to find the most comfortable and efficient setting. Higher fan speeds result in quicker cooling, but they can also generate more noise.
- Next, adjust the air direction to ensure the cooled air is evenly distributed throughout the room. Many air conditioners allow you to control the direction of the air vents manually.
- Finally, fine-tune the temperature according to your comfort level. Gradually increase or decrease the temperature setting until you find the ideal balance.
- Remember to give the air conditioner some time to reach the desired temperature whenever you make adjustments. It may take a few minutes for the changes to take effect.
By regularly testing and adjusting the functionality of your through the wall air conditioner, you can enjoy a cool and comfortable living space throughout the hot summer months. Don’t forget to refer to your air conditioner’s user manual for specific instructions and troubleshooting tips. With proper maintenance and care, your through the wall air conditioner will keep you cool for years to come.
Maintaining The Through The Wall Air Conditioner
Cleaning and Changing the Air Filter Regularly
To maintain the efficiency and performance of your through the wall air conditioner, it is essential to clean and change the air filter on a regular basis. The air filter is responsible for capturing dust, dirt, and other pollutants in the air, preventing them from entering your home. Over time, this filter can become clogged and obstruct the airflow, making your air conditioner work harder and less effectively.
To clean the air filter, follow these simple steps:
- Turn off the air conditioner and unplug it from the power source.
- Locate the air filter, usually located behind a panel on the front or side of the unit.
- Remove the filter from its housing.
- If the filter is reusable, gently wash it with mild soap and water. Ensure it is completely dry before reinserting it into the unit.
- If the filter is disposable, replace it with a new one. Make sure to purchase the correct size and type recommended by the manufacturer.
- Reinsert the filter back into its housing, making sure it is securely in place.
By cleaning and changing the air filter regularly, you can improve the indoor air quality and extend the lifespan of your through the wall air conditioner.
Scheduling Professional Maintenance Checks
In addition to regular cleaning and filter changes, it is highly recommended to schedule professional maintenance checks for your through the wall air conditioner. These checks should be conducted by a qualified technician who can inspect the unit thoroughly and ensure that all components are functioning properly.
During a professional maintenance check, the technician will:
- Inspect the condenser coils and clean them if necessary. Dirty coils can reduce the efficiency of the unit.
- Check the refrigerant levels and recharge if needed. Low refrigerant levels can affect the cooling performance.
- Inspect the electrical connections and tighten any loose wires.
- Test the thermostat to ensure it is accurately sensing and controlling the temperature.
- Clean the fan blades to improve airflow.
- Lubricate any moving parts to reduce friction and noise.
- Check the overall condition of the unit and make any necessary repairs or recommendations.
By scheduling professional maintenance checks at least once a year, you can catch any potential issues early on and keep your through the wall air conditioner running smoothly and efficiently.
Common Installation Problems And How To Solve Them
Installing a through-the-wall air conditioner can provide you with a cost-effective and efficient cooling or heating solution. However, like any installation, it can encounter some common problems along the way. In this section, we will discuss the most common installation problems that you may face and provide simple solutions to help you troubleshoot them.
Leaks or Water Accumulation
One of the most common problems that can arise during the installation of a through the wall air conditioner is leaks or water accumulation. This issue can occur due to improper sealing, insufficient insulation, or a clogged drain line. Here’s what you can do to solve this problem:
- Inspect the unit for any gaps or cracks around the installation sleeve. Use weatherstripping or caulking to seal any openings and prevent air and water leakage.
- Ensure that the unit is properly insulated. Insufficient insulation can cause condensation and water accumulation. Use foam insulation tape or insulation panels to improve the insulation around the unit.
- Check the drain line for any clogs. A clogged drain line can cause water to back up and leak. Clear any blockages by using a small brush or an air compressor.
- If the problem persists, consider contacting a professional HVAC technician for further assistance. They can help identify the root cause of the issue and provide a suitable solution.
Inadequate Cooling or Heating
Another common issue that you may encounter during the installation of a through the wall air conditioner is inadequate cooling or heating. This problem can be caused by various factors such as incorrect sizing, improper placement, or a malfunctioning unit. To address this problem, follow these steps:
- Ensure that the unit is properly sized for the room. A unit that is too small will struggle to cool or heat the space effectively. Refer to the manufacturer’s guidelines or consult with an HVAC professional to determine the appropriate size for your room.
- Check the placement of the unit. Make sure that there are no obstructions such as curtains, furniture, or other objects blocking the airflow. Clear the area around the unit to allow for proper air circulation.
- Inspect the air filters regularly and clean or replace them as needed. Clogged or dirty filters can restrict airflow and reduce the unit’s efficiency. Refer to the manufacturer’s instructions for proper maintenance of the filters.
- If the problem persists, it may indicate a more complex issue such as a refrigerant leak or a malfunctioning compressor. In such cases, it is best to seek professional assistance to diagnose and repair the problem.
Noisy Operation or Vibration
A third common problem that can occur during the installation of a through the wall air conditioner is noisy operation or excessive vibrations. This can be attributed to factors such as loose components, improper installation, or a faulty fan motor. Here’s how you can address this issue:
- Inspect the unit for any loose or damaged components. Tighten any screws or bolts that may be causing the noise or vibration. Replace any worn-out parts if necessary.
- Ensure that the unit is securely installed in the wall sleeve. Loose installation can cause the unit to vibrate and produce noise. Double-check the mounting brackets and ensure they are properly tightened.
- Check the fan motor for any signs of damage or malfunction. A faulty fan motor can result in excessive noise. If needed, contact an HVAC professional to replace the motor.
- Consider using vibration pads or anti-vibration mounts to minimize vibrations and noise transmission.
By addressing these common installation problems and following the recommended solutions, you can ensure that your through the wall air conditioner operates efficiently and provides the desired cooling or heating for your space.
Frequently Asked Questions Of How To Install A Through The Wall Air Conditioner
How Are Through-The-Wall Air Conditioners Installed?
To install a through-the-wall air conditioner:
(1) measure and mark the wall,
(2) cut a hole to accommodate the unit,
(3) mount the air conditioner chassis and secure it,
(4) attach the sleeve and seal it properly,
(5) install the front cover.
Does A Through-The-Wall Air Conditioner Need A Sleeve?
Yes, a through-the-wall air conditioner requires a sleeve. The sleeve acts as a protective barrier between the air conditioner and the wall, ensuring a proper fit and preventing air leaks. It also helps with insulation and noise reduction.
Can You Install A Wall Air Conditioner Yourself?
Yes, you can install a wall air conditioner yourself. It is important to follow the manufacturer’s instructions and have the necessary tools. Ensure the wall is strong enough to support the unit, and properly seal any gaps. If you are unsure, it is recommended to hire a professional for installation.
Can You Install A Window Air Conditioner Through-The-Wall?
Yes, you can install a window air conditioner through the wall. It requires making a hole in the wall instead of using a window.
Conclusion
Installing a through the wall air conditioner can provide a comfortable and cool environment in your home. By following the step-by-step process outlined in this guide, you can easily complete the installation yourself. From preparing the wall and gathering the necessary tools, to safely mounting the unit and sealing any gaps, this comprehensive tutorial has covered all the essential aspects.
Now, you can enjoy the benefits of a properly installed through the wall air conditioner and beat the summer heat with ease.
