To install a tankless water heater electric, you need to follow specific steps. Here’s a concise guide detailing how to do it properly.
Tankless water heaters are becoming increasingly popular due to their energy-efficient nature and endless hot water supply. If you’re considering installing one in your home, it’s essential to understand the proper installation process to ensure optimal performance. We will provide you with a step-by-step guide on how to install a tankless water heater electric, so you can enjoy the benefits of this modern appliance while minimizing any potential issues.
From determining the suitable location to connecting the necessary plumbing and electrical components, we’ll cover all the key aspects of the installation process. By the end, you’ll have a clear understanding of how to successfully install a tankless water heater electric in your home.
Understanding The Basics Of Tankless Water Heaters
Tankless water heaters have gained immense popularity in recent years due to their energy efficiency and space-saving design. Unlike traditional water heaters that store and heat a large amount of water in a tank, tankless water heaters only heat water as it is needed, making them an excellent choice for energy-conscious homeowners.
Energy-efficient and space-saving solution
One of the key advantages of tankless water heaters is their energy efficiency. Traditional water heaters constantly heat and reheat stored water, resulting in a significant energy loss. In contrast, tankless water heaters only heat water when there is a demand, eliminating standby heat loss and reducing energy consumption by up to 30%.
Additionally, tankless water heaters are space-saving solutions for modern homes. Traditional water heaters with large storage tanks can take up a substantial amount of space in basements or utility rooms. Tankless water heaters, on the other hand, are compact and can be mounted on walls, saving valuable floor space.
Advantages over traditional water heaters
Tankless water heaters offer numerous advantages over their traditional counterparts. Let’s take a closer look at some of these benefits:
- Endless hot water supply: With a tankless water heater, you don’t have to worry about running out of hot water. The unit heats the water on-demand, providing an endless supply of hot water for your shower, dishwasher, or washing machine.
- Longer lifespan: Tankless water heaters typically have a longer lifespan compared to traditional water heaters. While traditional models generally last around 10-15 years, tankless units can last up to 20 years or more with proper maintenance.
- Reduced risk of leaks: With no storage tank to worry about, tankless water heaters greatly reduce the risk of leaks and water damage. This can save you from costly repairs and potential water-related issues in your home.
- Improved energy efficiency: As mentioned earlier, tankless water heaters are highly energy-efficient. By only heating water when needed, they minimize energy wastage and help lower your utility bills.
- Flexible installation options: Tankless water heaters offer flexibility when it comes to installation. They can be mounted on walls, saving space in your home, and can even be installed in multiple locations to provide hot water to specific areas, such as a bathroom or kitchen.
Understanding the basics of tankless water heaters is essential before you decide to install one in your home. Their energy efficiency, space-saving design, and numerous advantages over traditional water heaters make them an attractive choice for homeowners looking to upgrade their water heating system.
Determining The Proper Size For Your Needs
Calculating the Required Flow Rate
One of the first steps in determining the proper size for your tankless electric water heater is calculating the required flow rate. The flow rate refers to the amount of hot water you will need at any given time. To calculate this, you will need to consider the number of fixtures or appliances that will be using hot water simultaneously.
Here’s how you can estimate the required flow rate:
- Identify the fixtures and appliances: Make a list of all the fixtures and appliances that will be using hot water simultaneously. This can include showers, sinks, dishwasher, washing machine, etc.
- Check the flow rate of each fixture: Look for the flow rate specifications of each fixture or appliance. This can usually be found on the manufacturer’s website or product manual. Note down the flow rate in gallons per minute (GPM).
- Add up the flow rates: Add up the flow rates of all the fixtures and appliances. This will give you the total required flow rate.
For example, if you have a shower with a flow rate of 2 GPM, a sink with a flow rate of 1 GPM, and a dishwasher with a flow rate of 1.5 GPM, the total required flow rate would be 4.5 GPM.
Analyzing the Temperature Rise
After calculating the required flow rate, the next step is to analyze the temperature rise. The temperature rise is the difference between the incoming cold water temperature and the desired hot water temperature. This will help determine the necessary heating power of the tankless water heater.
Here’s how you can analyze the temperature rise:
- Measure the incoming cold water temperature: Use a thermometer to measure the temperature of the cold water that enters your home. Note down the temperature in degrees Fahrenheit.
- Determine the desired hot water temperature: Decide on the desired hot water temperature that you find comfortable. This is usually around 120 degrees Fahrenheit.
- Calculate the temperature rise: Subtract the incoming cold water temperature from the desired hot water temperature. The result will be the temperature rise.
For example, if the incoming cold water temperature is 50 degrees Fahrenheit and the desired hot water temperature is 120 degrees Fahrenheit, the temperature rise would be 70 degrees.
By calculating the required flow rate and analyzing the temperature rise, you can now make an informed decision about the proper size of the tankless electric water heater you need. Remember that it’s always better to err on the side of a slightly larger unit to ensure you have enough hot water during peak usage times.
Considering The Electrical Requirements
When installing a tankless water heater electric, it is crucial to consider the electrical requirements. This ensures that the heater will function properly and safely in your home. In this section, we will discuss two essential aspects: evaluating the existing electrical capacity and upgrading electrical wiring if necessary. Let’s dive in!
Evaluating the existing electrical capacity
Before installing a tankless water heater, it is vital to assess your home’s electrical capacity. This will help determine whether your current electrical system can handle the increased demands of a tankless unit.
Here are a few key considerations when evaluating your existing electrical capacity:
- Check the electrical panel: Take a look at your electrical panel to identify the available amperage and the number of empty circuit breaker slots. A tankless water heater typically requires a dedicated circuit with a specific amperage rating.
- Calculate the total load: Determine the total electrical load in your home to assess if there is enough capacity to accommodate the tankless water heater. This includes other appliances, lighting fixtures, and electronics that are connected to your electrical system.
- Consult an electrician: If you are unsure or lack electrical knowledge, it is advisable to consult a licensed electrician. They can accurately evaluate your electrical capacity and recommend any necessary upgrades.
Upgrading electrical wiring if necessary
In some cases, upgrading the electrical wiring may be necessary to accommodate a tankless water heater. This is especially true if your current electrical system does not meet the required specifications or if it is outdated and unable to handle the increased power demand.
Here are a few steps to consider when upgrading the electrical wiring:
- Check wire gauge: Ensure that the existing wiring meets the necessary wire gauge requirements for the tankless water heater. A licensed electrician can help determine if any rewiring is needed.
- Install appropriate wiring: If the existing wiring is insufficient, the electrician will install the appropriate wiring to meet the electrical demands of the tankless water heater.
- Upgrade the electrical panel: In some cases, upgrading your electrical panel may be necessary to accommodate the additional load. This ensures that your electrical system can handle the increased power requirements without any safety hazards.
Remember, it is crucial to hire a qualified electrician to handle any electrical upgrades. They have the expertise to ensure proper installation and compliance with electrical codes and regulations.
By carefully evaluating your existing electrical capacity and upgrading the wiring if necessary, you can ensure a smooth and safe installation of your tankless water heater electric.
Essential Tools For The Installation
Installing a tankless water heater electric can be a rewarding and cost-effective choice for your home. To ensure a smooth and successful installation process, it is crucial to have the right tools on hand. Here are the essential tools you will need:
Pipe wrench
A pipe wrench is an indispensable tool for any plumbing project, including the installation of a tankless water heater. It provides a firm grip and leverage to tighten or loosen pipes and fittings. Make sure to choose a pipe wrench that suits the size of the pipes you’ll be working with.
Screwdrivers
Screwdrivers are versatile tools that come in various sizes and types. For installing a tankless water heater electric, having both flathead and Phillips screwdrivers is essential. These will come in handy when connecting electrical wires, securing mounting brackets, or working with control panels.
Tubing cutter
A tubing cutter is a must-have tool for cutting and shaping copper or plastic pipes. When installing a tankless water heater electric, you may need to adjust the length of the pipes to fit the new equipment properly. A tubing cutter will help you achieve clean and precise cuts without damaging the pipes.
Electrical tester
Working with electricity requires extra precautions. An electrical tester, such as a voltage tester or a multimeter, is crucial for ensuring the safety and proper functioning of the electrical connections. Before making any electrical connections or modifications, always use an electrical tester to detect and confirm the presence of electrical power.
Drill
A drill is an essential tool for creating holes in walls or floors. You may need to mount the tankless water heater electric on a wall or anchor brackets or supports securely. Choose a drill with the appropriate size and power to handle the materials you’ll be drilling into.
Having these essential tools on hand will make your tankless water heater electric installation process easier and more efficient. Remember to use them responsibly and follow the manufacturer’s instructions for a successful installation. Now that you are equipped with the necessary tools, it’s time to get started on your tankless water heater electric installation project!
Required Materials For The Installation
Before you dive into installing a tankless water heater electric, it is crucial to have all the necessary materials at hand. This ensures a smooth and hassle-free installation process. Below are the essential items you will need for the installation:
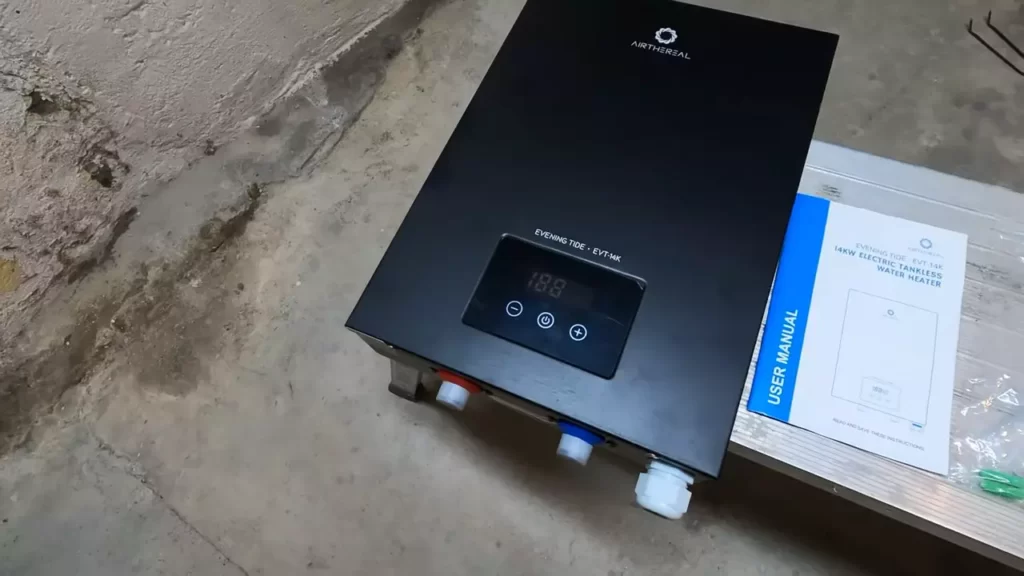
Tankless Water Heater Unit
The primary component of your tankless water heater installation is, of course, the tankless water heater unit itself. This compact device is designed to heat water on demand, eliminating the need for a bulky storage tank. When selecting a unit, consider factors such as the flow rate and temperature rise required for your household’s hot water needs.
Exhaust Pipe
Proper ventilation is crucial for the safe operation of your tankless water heater electric. An exhaust pipe is responsible for venting out the combustion byproducts. Depending on your specific installation requirements, you may need to choose between a PVC, stainless steel, or other approved exhaust pipe materials. Be sure to follow the manufacturer’s guidelines to ensure proper sizing and installation.
Water and Gas Line Connectors
In order to connect the tankless water heater to your home’s water and gas supply, you will need appropriate connectors. These connectors ensure a secure and leak-free connection. It is important to use materials and fittings that are approved for use with your tankless water heater unit. Check the manufacturer’s recommendations for the specific connector types and sizes needed.
Venting Materials
Proper venting of the tankless water heater is essential for the safe operation of the unit. Venting materials include pipes, elbows, adapters, and termination caps. The type of venting materials required will depend on the system’s specifications and your local building code requirements. It is crucial to follow the manufacturer’s instructions and consult with a professional if you are unsure about the correct venting materials for your installation.
Having these required materials before you start the tankless water heater installation process will help ensure a seamless and successful installation. Now that you are familiar with the essential components, it’s time to get your hands dirty and enjoy the benefits of endless hot water.
Checking For Proper Ventilation And Clearance
Checking for Proper Ventilation and Clearances
Installing a tankless water heater electric unit in your home not only saves space but also provides endless hot water on demand. However, it’s crucial to ensure proper ventilation and clearances to guarantee safe and efficient operation of the unit. In this section, we will discuss two essential aspects: ensuring sufficient clearance around the unit and optimizing ventilation for safe operation.
Ensuring sufficient clearance around the unit
Before installing your tankless water heater electric unit, it’s essential to check for sufficient clearance around the unit. This will not only help prevent potential fire hazards but also ensure proper operation and maintenance. Refer to the manufacturer’s instructions for specific clearance requirements, as they may vary depending on the model and brand.
Here are some general guidelines to consider:
- Ensure at least 12 inches of clearance is maintained between the top and sides of the unit and any combustible materials, such as walls or cabinets.
- Leave a minimum of 24 inches of clearance in front of the unit to allow for easy access during maintenance or repairs.
- Keep the surrounding area free from clutter or obstructions to facilitate proper airflow and prevent any potential damage to the unit.
Optimizing ventilation for safe operation
In addition to ensuring sufficient clearance, optimizing ventilation is crucial for the safe operation of your tankless water heater electric unit. Proper ventilation helps remove the combustion byproducts, such as carbon monoxide and allows fresh air to enter the combustion chamber.
Here are some key points to consider when optimizing ventilation:
- Follow the manufacturer’s recommendations for venting materials and installation requirements. These guidelines are designed to ensure safe and effective ventilation.
- Make sure the venting system is properly sized to handle the unit’s gas input and exhaust output. Improperly sized venting can lead to backdrafting, reduced efficiency, and potential safety hazards.
- Install a vent termination cap to prevent debris, bird nests, or small animals from entering the vent pipe.
- Regularly inspect the venting system for any signs of damage or blockage. If you notice any issues, promptly address them to maintain optimal ventilation.
By ensuring sufficient clearance around the unit and optimizing ventilation for safe operation, you can confidently install and use your tankless water heater electric unit with peace of mind. Always refer to the manufacturer’s instructions for specific requirements and consult a professional if you have any doubts or concerns.
Evaluating The Existing Plumbing And Electrical Setup
Before you begin the installation process of a tankless water heater electric, it is crucial to evaluate your existing plumbing and electrical setup. This step ensures that your new water heater will function efficiently and safely. Taking the time to inspect your pipes, fittings, electrical connections, and grounding will help you identify any issues that need to be addressed before installation. Let’s take a closer look at the important aspects to consider when evaluating your plumbing and electrical setup.
Inspecting pipes and fittings for leaks or damage
One of the first things you should do is examine your pipes and fittings to identify any potential leaks or damage. Leaky pipes can cause water damage to your home and potentially lead to more serious problems down the line.
Inspect each pipe carefully, looking for signs of corrosion, rust, or cracks. If you notice any leaks or damaged pipes, it is essential to have them repaired before installing the new water heater. You may need to contact a professional plumber to address any complex issues and ensure the safety and functionality of your system.
Verifying electrical connections and grounding
Next, you need to verify that your electrical connections and grounding are up to standard. Check each electrical connection to ensure they are tightly secured and properly insulated, minimizing the risk of electrical hazards. It is essential to follow the manufacturer’s guidelines and consult a qualified electrician to guarantee your water heater is correctly wired and the electrical supply meets the necessary requirements. Additionally, confirm that your water heater has proper grounding, which provides an additional layer of safety, protecting against electrical shock in the event of a malfunction.
Taking the time to assess your existing plumbing and electrical setup is vital when installing a tankless water heater electric. By inspecting your pipes and fittings for leaks or damage and verifying your electrical connections and grounding, you can ensure the optimal performance and safety of your new water heater. Remember, if you encounter any complex issues or are unsure about any aspect of the evaluation process, it is always best to consult professionals who specialize in plumbing and electrical systems to avoid any potential risks.
Shutting Off The Power And Water Supply
Before starting the installation process of a tankless water heater electric, it is crucial to ensure the safe shutdown of both the power and water supply. Taking these steps will not only protect you but also prevent any potential damage to your home’s plumbing and electrical systems.
Turning off the Electric Breaker and Gas Valve
To begin, locate your home’s electrical breaker panel. It is usually found in the basement, utility room, or garage. Open the panel and search for the breaker switch that controls your water heater. Look for the label indicating the water heater circuit or consult your electrical panel diagram.
Once you have identified the correct breaker switch, turn it off by flipping the switch to the “off” position. This action will cut off the electric power supply to the tankless water heater.
If your home has a gas-powered water heater, you will also need to shut off the gas valve to ensure safety. Look for a shut-off valve connected to the water heater and turn it to the “off” position. This step eliminates the flow of gas to the water heater, preventing any accidental ignition during the installation process.
Closing the Main Water Supply
After shutting off the power, you need to close the main water supply to the water heater. The main water shut-off valve is often located near the water meter or the entrance of your home, typically in a basement or utility room.
Locate the valve and turn it clockwise until it is fully closed. This action prevents the water supply from reaching the tankless water heater and allows you to work on the installation without any water flowing through the pipes.
It is also important to ensure that each faucet in your home is turned on to release any residual pressure. This step will help to drain any remaining water in the system and avoid potential leaks during the installation process.
By following these steps and shutting off both the power and water supply, you can proceed with the installation of your tankless water heater electric confidently. Remember, safety should always be your top priority when working with electricity and plumbing.
Remove The Old Water Heater And Preparing The Installation Area
Before installing a tankless water heater electric, it is important to properly remove the old water heater and prepare the installation area. This will ensure a smooth and hassle-free installation process. Follow the steps below to drain and disconnect the old water heater, as well as clear the space for the new unit.
Draining and Disconnecting the Old Water Heater
The first step in removing the old water heater is to drain it completely. This is necessary to prevent any water leaks during the removal process. Follow these simple steps to drain the old water heater:
- Turn off the power supply to the water heater from the main electrical panel. This will ensure your safety during the draining and disconnecting process.
- Locate the drain valve at the bottom of the water heater. Attach a hose to the drain valve and place the other end of the hose in a suitable drainage area, such as a floor drain or outdoors.
- Open the drain valve by turning it counterclockwise. This will allow the water to flow out through the hose.
- Once the water has completely drained, close the drain valve by turning it clockwise.
- Next, disconnect the power supply to the water heater by unplugging it from the electrical outlet or turning off the circuit breaker that supplies power to the unit.
- Lastly, disconnect the water supply lines connected to the water heater. Use a wrench to loosen the nuts that secure the water supply lines to the water heater. Once the nuts are loosened, you can easily detach the supply lines from the unit.
Clearing the Space for the New Unit
After draining and disconnecting the old water heater, it is important to clear the space where the new unit will be installed. Follow these steps to ensure a clean and organized installation area:
- Remove any obstacles or clutter surrounding the old water heater. This includes items stored near or on top of the unit.
- If there is a platform or stand supporting the old water heater, carefully remove it to make space for the new unit.
- Inspect the installation area for any signs of damage, such as water leaks or mold. If any issues are identified, address them before proceeding with the installation of the new water heater.
- Ensure that the installation area meets the manufacturer’s specified clearance requirements. This includes providing enough space for ventilation and accessing the unit for maintenance purposes.
- If necessary, clean the surrounding area to remove any dust, debris, or moisture that may interfere with the installation process or affect the performance of the new water heater.
By following the steps above to drain and disconnect the old water heater, as well as clearing the space for the new unit, you will be well-prepared for the installation of your tankless water heater electric. Next, we will move on to the installation process itself.
Mounting The Tankless Water Heater
Mounting the tankless water heater is a crucial step in the installation process. It ensures that the unit is securely and safely positioned in the appropriate location. In this section, we will cover two essential aspects of mounting the tankless water heater: choosing the appropriate location and securing the unit to the wall or floor.
Choosing the appropriate location
Choosing the right location for your tankless water heater is vital for optimal performance and longevity of the unit. Here are some key factors to consider:
- Accessibility: Make sure the unit is easily accessible for maintenance and repairs. It’s important to have enough space around the heater for technicians to work comfortably.
- Ventilation: Tankless water heaters require proper ventilation to operate efficiently. Ensure that the chosen location has adequate airflow and is not obstructed by any objects or furniture.
- Distance from fixtures: The closer the water heater is to the fixtures, the shorter the wait time for hot water. Consider placing it in a central location to minimize water wastage and delays in getting hot water.
- Electrical requirements: Keep in mind the proximity to an electrical outlet and the voltage needed for the unit. Check the manufacturer’s guidelines to ensure you meet the electrical requirements for your specific tankless water heater model.
Securing the unit to the wall or floor
Once you have determined the optimal location, it’s time to secure the tankless water heater. Follow these steps for a successful installation:
- Check the weight: Before mounting the unit, ensure that the chosen wall or floor can support the weight of the tankless water heater. Refer to the unit’s manual for the weight specifications.
- Use the correct brackets: Depending on the model, you may need specific brackets to secure the unit. Refer to the manufacturer’s instructions and use the recommended brackets to ensure proper installation.
- Position the unit: Carefully position the tankless water heater on the wall or floor, ensuring that it is level. Use a level tool to check the unit’s alignment.
- Mark the mounting points: Once the unit is level, mark the mounting points on the wall or floor using a pencil. This will guide you when attaching the brackets.
- Secure the brackets: Attach the brackets to the marked points, making sure they are tightly secured. Use suitable screws or bolts that are appropriate for your mounting surface.
- Attach the unit: Gently lift the tankless water heater and place it onto the brackets. Ensure that it is securely positioned and does not wobble or move.
By following these steps, you can mount your tankless water heater effectively, ensuring its stability and longevity. Remember to consult the manufacturer’s instructions for specific guidelines related to your unit, as installation requirements may vary.
Connecting The Water Supply And Gas Line
Once you have positioned your tankless water heater electric in the desired location and securely mounted it, it’s time to connect the water supply and gas line. This crucial step ensures that your water heater functions properly and provides hot water on demand. By following these easy-to-follow steps and paying attention to detail, you can complete this task without any issues.
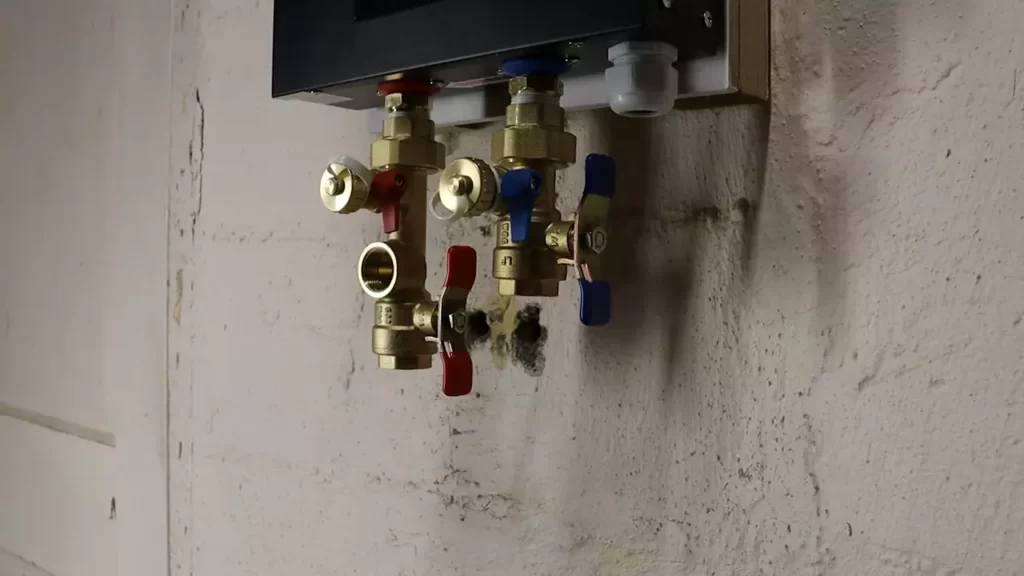
Installing the water and gas connectors
Start by identifying the appropriate connectors for both the water supply and gas line. These connectors should have been included in the tankless water heater electric package, so make sure to locate them before beginning. Once you have the connectors in hand, you can proceed with the installation process.
To install the water connector, begin by wrapping the plumber’s tape around the threaded end of the connector. This tape helps create a tight and secure seal to prevent leaks. After applying the tape, align the connector with the hot water outlet on the water heater, ensuring that the threads match. Using an adjustable wrench, tighten the connector onto the outlet until it is firmly in place. Take care not to overtighten as this may damage the threads.
Similarly, installing the gas connector requires attention to detail. Begin by wrapping the plumber’s tape around the threaded end of the gas connector to secure a tight seal. Next, align the connector with the gas inlet on the water heater, ensuring a proper match of the threads. Using an adjustable wrench, tighten the connector onto the inlet until it is snugly in place. Again, avoid overtightening to prevent any damage.
Making sure connections are tight and secure
After installing both the water and gas connectors, it is crucial to verify that the connections are tight and secure. This step ensures the proper functioning and eliminates the risk of any leaks or malfunctions. Take a moment to carefully inspect the connections and make sure that there are no visible gaps or loose parts.
If you notice any issues, such as leaks or loose fittings, immediately turn off the water and gas supply before making any adjustments. Then, you can reapply the plumber’s tape if necessary and securely tighten the connectors using an adjustable wrench. Always use caution and ensure that the connections are secure without being overtightened.
Taking the time to double-check the connections will give you peace of mind and guarantee that your tankless water heater electric operates as it should, providing you with reliable hot water whenever you need it.
Venting The Exhaust Gases Safely
When it comes to installing a tankless water heater electric, one of the most critical aspects is ensuring the safe venting of exhaust gases. Improper venting can lead to a buildup of harmful gases such as carbon monoxide, posing a serious health risk to you and your family. In this section, we will discuss how to determine the best exhaust vent location, as well as the proper installation and connection of the vent pipe.
Determining the Best Exhaust Vent Location
Determining the right location for your tankless water heater’s exhaust vent is crucial for proper ventilation and safety. Here are some important factors to consider:
- Check local building codes and regulations: Before starting the installation process, be sure to consult with your local building codes to understand any specific requirements regarding the placement of the exhaust vent.
- Consider the distance from windows and doors: It is essential to position the exhaust vent away from any windows, doors, or other openings to prevent exhaust gases from entering your home.
- Avoid obstructions: Ensure there are no obstructions, such as overhanging tree branches or nearby walls, that could impede the proper airflow of the exhaust gases.
- Choose an appropriate height: The exhaust vent should be installed at a height that allows the gases to safely disperse into the atmosphere without causing any inconvenience or potential harm.
Installing and Connecting the Vent Pipe
After determining the best location for your tankless water heater’s exhaust vent, you can proceed with installing and connecting the vent pipe. Follow these steps for a proper installation:
- Measure and cut the vent pipe: Using a measuring tape and a pipe cutter, measure the required length of the vent pipe and cut it accordingly.
- Attach the vent pipe to the heater: Connect the vent pipe to the exhaust outlet on the tankless water heater, ensuring a secure fit.
- Secure the vent pipe: Use appropriate brackets or straps to secure the vent pipe in place. This will prevent any unnecessary movement or vibrations that could compromise the venting system.
- Seal the joints: Apply high-temperature silicone or sealant on all joints and connections to ensure a tight seal and prevent any gas leaks.
In addition to these steps, it is crucial to follow the manufacturer’s instructions and guidelines for your specific tankless water heater model. Proper venting not only ensures the safe operation of your water heater but also contributes to its overall efficiency and performance. By adhering to these guidelines, you can enjoy the comfort and convenience of a tankless water heater while keeping your home and loved ones safe from potentially harmful exhaust gases.
Wiring And Powering Up The Unit
Once you have successfully mounted your tankless water heater electric, the next step is to connect the electrical wiring and power up the unit. This crucial process ensures that your tankless water heater functions efficiently and safely. In this section, we will walk you through the steps of connecting the electrical wiring and testing the unit’s electrical connections, ensuring a seamless installation process.
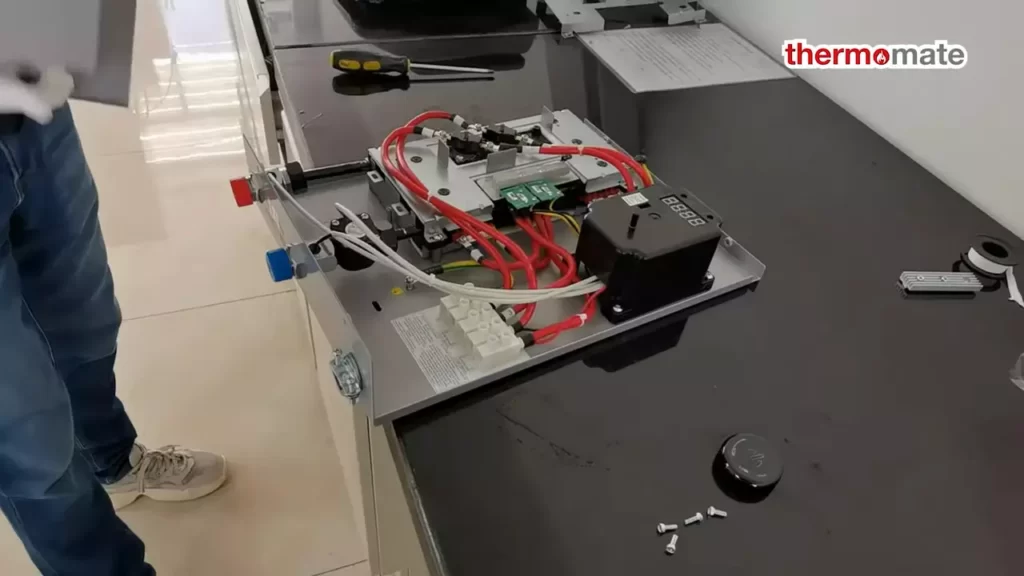
Connecting the electrical wiring
Before you begin, make sure you have turned off the power supply to the tankless water heater at the main circuit breaker. It is crucial to prioritize your safety during this step. Once you have confirmed that the power is off, you can follow these simple steps to connect the electrical wiring:
- Locate the terminal box on the tankless water heater unit. This box is typically positioned on the side of the unit and is where you will connect the electrical wiring.
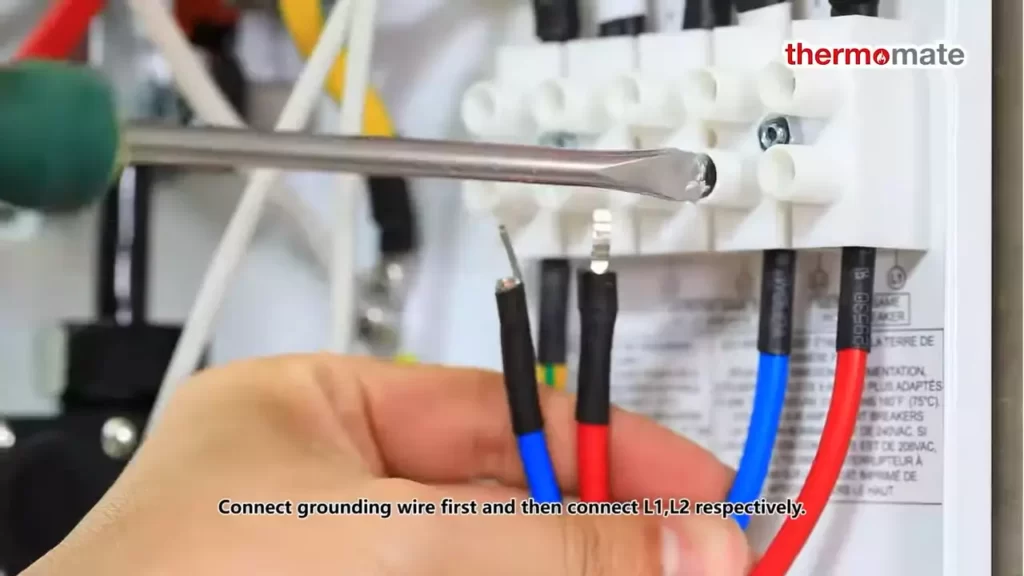
- Ensure that the wires from the power supply and the unit’s electrical wires are properly stripped and ready for connection. Take note of the color coding on both sets of wires.
- Carefully match the color-coded wires:
| Power Supply | Tankless Water Heater |
|---|---|
| Black (Hot) | Black (Hot) |
| White (Neutral) | White (Neutral) |
| Green or Bare (Ground) | Green or Bare (Ground) |
Make sure to securely connect each wire by twisting the corresponding color-coded wires together. You can then cover the connections with wire nuts, ensuring that they are snug and secure.
Testing the unit’s electrical connections
Once you have connected the electrical wiring, it is essential to test the unit’s electrical connections to ensure that everything is working correctly. Follow these steps to conduct a thorough test:
- Turn on the power supply to the tankless water heater at the main circuit breaker. Ensure that the power supply is stable and that there are no fluctuations.
- Verify that all the indicator lights on the tankless water heater are functioning correctly. Refer to the manufacturer’s manual for specific instructions on the indicator lights.
- Test the hot water flow by turning on a hot water faucet. Observe whether the tankless water heater is successfully heating the water to the desired temperature.
If you encounter any issues during the testing process, it is advisable to consult a professional electrician to resolve the problem. Ensuring that all the electrical connections are in working order guarantees the safe and efficient operation of your tankless water heater electric.

Testing And Troubleshooting
Now that you have successfully installed your tankless water heater electric, it’s time to move on to the crucial step of testing and troubleshooting. This step is essential to ensure that your new water heater is functioning correctly and provides you with hot water as expected. In this section, we will guide you through the process of turning on the water and checking for leaks, checking for adequate hot water flow, and troubleshooting common installation issues.
Turning on the water and checking for leaks
Once the tankless water heater electric has been installed, the first thing you need to do is turn on the water supply. To do this, locate the shut-off valve near the unit and turn it on fully. Keep an eye out for any leaks or dripping water. If you notice any leaks, it’s crucial to address them immediately to prevent potential damage.
In order to thoroughly check for leaks, you should inspect all the connections and joints carefully. Look for signs of moisture or water accumulation around the fittings. If you spot any leaks, tighten the connections if necessary or apply plumber’s tape or sealant to create a watertight seal.
Checking for adequate hot water flow
After ensuring that there are no leaks, the next step is to check for adequate hot water flow. Turn on the hot water faucet in a sink or shower nearest to the water heater. Allow the water to run for a few minutes and run your hand through the stream of hot water to check the temperature. The water should be consistently hot and without any fluctuations in temperature.
If you notice cold spots or temperature fluctuations in the hot water flow, there may be some issues with either the installation or the water heater unit itself. Double-check the installation instructions to make sure everything is set up correctly. If the problem persists, it may be necessary to consult a professional plumber or the manufacturer for further assistance.
Troubleshooting common installation issues
During the installation process, there can be some common issues that you may encounter. Here are a few troubleshooting steps to help you address these problems:
- No hot water: If you’re not getting any hot water, check the circuit breaker to ensure it is turned on. Additionally, verify that the electrical connections are properly made.
- Inconsistent water temperature: If you’re experiencing water temperature fluctuations, it could be due to incorrect wiring or incorrect temperature settings. Review the installation instructions and make the necessary adjustments.
- Low hot water flow: If your hot water flow is weak, verify that the water pressure is adequate. You may need to adjust the water pressure regulator or consult a professional plumber to address this issue.
- Strange noises: Unusual noises, such as rattling or popping sounds, could indicate mineral buildup in the heat exchanger or a loose component. Consider descaling the unit or contacting a professional for further examination.
By following these steps and troubleshooting common installation issues, you can ensure that your tankless water heater electric is installed correctly and functioning efficiently. Regular maintenance and periodic checks can help extend the lifespan of your water heater and ensure optimal performance.
Inspecting And Cleaning The Installation Area
Before installing a tankless water heater electric, it is crucial to thoroughly inspect and clean the installation area. This step ensures that the heater functions optimally and prevents any future issues that may arise. In this section, we will discuss the necessary steps to remove debris and clean the area, as well as ensure there are no leaks or loose connections.
Removing Debris and Cleaning the Area
In order to ensure a smooth installation process and the longevity of your tankless water heater, it is important to clear the area of any debris or obstructions. This includes:
- Removing any dust, dirt, or cobwebs that may have accumulated in the vicinity.
- Clearing away any loose objects or items that might hinder the installation process or potentially cause damage to the heater.
- Ensuring that the installation area is well-ventilated and free from any flammable materials that could pose a safety risk.
Ensuring No Leaks or Loose Connections
One of the most important aspects of installing a tankless water heater is ensuring that there are no leaks or loose connections that could compromise its performance or lead to potential hazards. Follow these steps to ensure a leak-free installation:
- Inspect all pipes and fittings that will be connected to the water heater. Look for any signs of wear, cracks, or damage.
- Tighten all connections securely, using the appropriate tools.
- Apply the plumber’s tape or pipe compound to all threaded connections, ensuring a watertight seal.
- Check for any leaks by turning on the water supply and observing the connections closely for any signs of dripping or moisture.
- If any leaks are detected, immediately shut off the water supply and address the issue before proceeding with the installation.
By inspecting and cleaning the installation area thoroughly, you can ensure a smooth and trouble-free installation of your tankless water heater electric. Taking the time to remove debris, clear obstructions, and ensure no leaks or loose connections will help optimize the performance and longevity of your water heater.
Restoring Power And Final Testing
Once you have completed the installation process, it’s time to restore the power and test your brand new tankless water heater electric. This final step ensures that everything is functioning as it should and that your hot water needs will be met efficiently. In this section, we will discuss how to turn on the electric breaker and gas valve, as well as how to run hot water to test the unit’s functionality.
Turning on the Electric Breaker and Gas Valve
Before you turn on the power, double-check that all electrical connections are secure. Now, locate the electric breaker panel in your home. It is usually found in the basement, utility room, or garage. Open the panel and locate the breaker labeled for your tankless water heater. Flip the breaker switch into the “on” position. This will restore power to your tankless water heater.
**Important**: Always read and follow the manufacturer’s instructions for your specific tankless water heater model. This will ensure a safe and proper installation.
Running Hot Water to Test the Unit’s Functionality
With the power restored, it’s time to test the functionality of your tankless water heater. Turn on a hot water faucet in your home, such as a bathroom sink or shower. Allow the water to run for a few minutes. Initially, it may take a bit longer for the hot water to reach the faucet since it needs to heat up. However, once the water starts flowing consistently and is hot, you can be confident that your tankless water heater is working properly.
If you notice any issues during this test, such as lukewarm water or fluctuations in temperature, it’s important to consult the troubleshooting section in your tankless water heater’s manual. Additionally, you may need to check the gas valve to ensure it is open and allowing the flow of gas to the water heater. For specific instructions, refer to the manufacturer’s guidelines.
By following these steps, you can successfully restore power to your tankless water heater electric and perform a final test to ensure its functionality. Enjoy the endless supply of hot water and the energy efficiency that comes with your new tankless water heater!
Frequently Asked Questions For How To Install A Tankless Water Heater Electric
Can I Install An Electric Tankless Water Heater Myself?
Yes, you can install an electric tankless water heater yourself. Just ensure that you follow the manufacturer’s instructions carefully. It’s important to have basic knowledge of electrical wiring and plumbing. If you’re not confident, it’s best to hire a professional to avoid potential risks and ensure proper installation.
What Is Required To Install An Electric Tankless Water Heater?
To install an electric tankless water heater, you’ll need the following:
1. Sufficient electrical supply to meet the heater’s requirements.
2. Proper circuit breaker and wiring capable of handling the heater’s power demand. 3. Adequate water supply and pressure.
4. Correctly sized water lines and fittings for installation.
5. Suitable location near a power source, water supply, and exhaust vent if required.
Can I Install A Tankless Hot Water Heater Myself?
Yes, you can install a tankless hot water heater yourself. However, it’s recommended to hire a professional plumber for safety and to ensure the installation is done correctly.
Does Electric Tankless Water Heaters Need To Be Vented?
Electric tankless water heaters do not need to be vented. Unlike gas-powered models, they do not produce combustion gases. As a result, they can be installed in a variety of locations, including small spaces. This makes them a convenient and flexible option for homeowners.
Conclusion
Installing a tankless water heater electric is a practical and efficient solution for your hot water needs. With the step-by-step guide provided in this blog post, you can easily navigate through the installation process. By following these instructions and safety precautions, you can enjoy the benefits of an instant and endless hot water supply while saving on energy consumption.
Don’t hesitate to make this upgrade and reap the rewards it offers.