To install a tank on a toilet, first, shut off the water supply, then remove the old tank by disconnecting the water supply line and unscrewing the mounting nuts. Next, position the new tank on the bowl, aligning the mounting holes, and secure it with the provided nuts.
Finally, reconnect the water supply line and turn on the water to check for any leaks. Properly installing a tank on a toilet is a straightforward process that can be done with a few simple steps. Whether you are replacing an old tank or installing a new one, it’s important to ensure a secure and leak-free connection.
We will guide you through the process of installing a toilet tank, from shutting off the water supply to checking for potential leaks. By following these steps, you can have your new tank installed efficiently and effectively, ensuring optimal functionality for your toilet. So, let’s dive in and learn how to install a tank on a toilet.
Understanding Different Tank Types And Sizes
When it comes to installing a tank on a toilet, understanding the different tank types and sizes is crucial. The tank is an essential component that stores and supplies water for flushing. In this section, we will explore two important factors: whether you should choose a two-piece or one-piece tank, and the differences between standard and compact tank sizes.
Two-piece vs. one-piece tanks
Two-piece and one-piece tanks are the two main options you have when it comes to choosing a toilet tank. Let’s take a closer look at their differences:
| Two-piece tanks | One-piece tanks |
|---|---|
|
|
Now that you understand the differences between two-piece and one-piece tanks, you can make an informed decision based on your preferences and budget.
Standard vs. compact tank sizes
The size of the toilet tank is also an important consideration. Here’s a comparison between standard and compact tank sizes:
| Standard tank sizes | Compact tank sizes |
|---|---|
|
|
Keep in mind the size of your bathroom and the available space when choosing between standard and compact tank sizes. Assess your needs and the suitability of each option before making a decision.
In conclusion, understanding the various tank types and sizes is vital when installing a toilet tank. By knowing the differences between two-piece and one-piece tanks as well as standard and compact tank sizes, you can select the best option for your bathroom in terms of functionality, space, and budget.
Tools Needed For The Installation Process
If you’re considering installing a tank on your toilet yourself, you’ll need a few basic tools to get the job done efficiently. Having the right tools on hand can make the installation process much easier and save you time and frustration.
Adjustable wrench
An adjustable wrench is a must-have tool when it comes to installing a tank on a toilet. It allows you to tighten or loosen nuts and bolts without damaging them. With an adjustable wrench, you’ll be able to securely fasten the tank to the toilet bowl and ensure a leak-proof connection.
Screwdriver
A screwdriver is another essential tool for installing a tank on a toilet. It is used to tighten or loosen screws that hold different parts of the toilet together. Whether you’re attaching the tank to the bowl or connecting the flush valve, a screwdriver will come in handy.
Teflon tape
Teflon tape, also known as plumber’s tape, is used to create a watertight seal when connecting water supply lines. Simply wrap the tape around the threaded end of the pipe or fitting before attaching it to the tank. Teflon tape helps prevent leaks and ensures a secure connection.
Bucket or towels
During the installation process, it’s important to be prepared for any potential water spills or leaks. Keeping a bucket or towels nearby will help you quickly mop up any water that may escape during the installation. This prevents water damage to your bathroom floor and keeps the area clean and dry.
By having these essential tools on hand, you’ll be well-equipped to install a tank on your toilet successfully. Remember to always read the manufacturer’s instructions and follow proper safety procedures during the installation process.
Supplies Needed For The Installation Process
Before you can install a tank on your toilet, it’s important to gather all the necessary supplies. This will ensure a smooth and hassle-free installation. Here are the essential supplies you’ll need:
Tank-to-toilet gasket
The tank-to-toilet gasket is a crucial component that creates a watertight seal between the tank and the bowl. This rubber gasket prevents any water leakage and ensures a tight connection. It’s important to choose a high-quality gasket that fits your toilet model perfectly. The gasket should be thick and durable to provide a long-lasting seal. Inspect the gasket for any cracks or damage before installation.
Tank bolts and washers
Tank bolts and washers secure the tank tightly to the bowl. These bolts should be made from sturdy materials like solid brass or stainless steel to prevent rust and corrosion over time. The washers sit between the bolt head and the tank, ensuring a secure connection. Make sure to choose bolts of the appropriate length for your toilet model to ensure a proper fit.

Water supply line
The water supply line is responsible for delivering water to the toilet tank. It connects the tank’s inlet valve to the water supply valve. When choosing a supply line, opt for a flexible and durable one that is resistant to kinks and leaks. It’s also important to select the correct size (typically 3/8 or 1/2 inch) to ensure a proper connection.
Wax ring
The wax ring is a key component that creates a watertight seal between the toilet bowl and the floor drain. It prevents any odor or sewer gases from escaping into your bathroom. Opt for a high-quality wax ring that is suitable for your toilet model and the type of flooring you have. Ensure that the ring is pliable and of the appropriate thickness to provide a proper seal.
Rubber spud gasket
The rubber spud gasket is a small but important part that seals the flush valve to the toilet tank. This gasket prevents any water leakage from the tank to the bowl. It’s essential to choose a spud gasket that matches the flush valve size of your toilet tank. Inspect the gasket for any signs of wear or damage before installation.
By gathering these necessary supplies, you’ll be well-prepared to install a tank on your toilet. Remember to carefully follow the manufacturer’s instructions and take your time to ensure a successful installation. Proper installation of these supplies will not only prevent leaks but also contribute to the overall longevity and functionality of your toilet.
Shutting Off The Water Supply
Before installing a tank on a toilet, you need to shut off the water supply to ensure a smooth and hassle-free process. This step is crucial to prevent any water leakage or damage while working on the toilet tank. In this guide, we will discuss how to shut off the water supply effectively.
1. Locating the shut-off valve
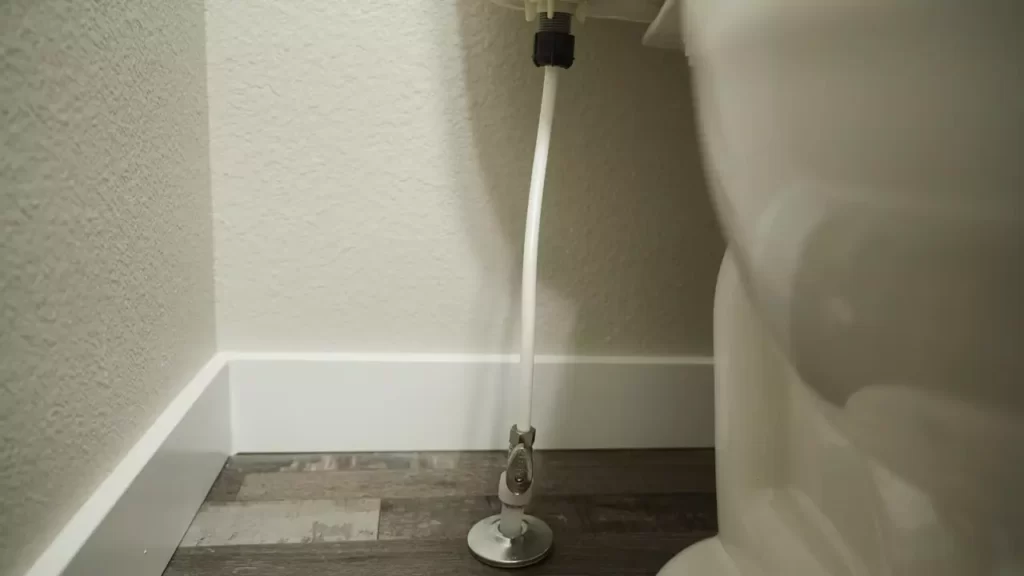
The shut-off valve is usually located near the bottom left side of the toilet tank. If you’re having trouble finding it, here’s a simple method to locate it:
- Check for a thin hose or pipe connected to the tank
- Follow the hose or pipe until you reach the shut-off valve
- You can also look for a round knob or lever near the base of the toilet
Once you’ve located the shut-off valve, you’re ready to proceed to the next step.
2. Turning off the water supply
To turn off the water supply, follow these steps:
- Using your hand or a wrench, turn the shut-off valve clockwise (to the right)
- Continue turning until you can no longer hear or see water flowing into the toilet tank
Make sure to verify that the water supply is completely shut off by flushing the toilet and checking if no more water enters the tank.
By shutting off the water supply, you have taken the necessary precautions to avoid any potential water leakage or damage while installing the tank on your toilet. This step ensures a smooth and trouble-free installation process.
Draining The Tank And Removing Excess Water
Flushing the toilet
Before you begin draining the tank and removing excess water, it’s important to flush the toilet to remove any remaining water in the bowl.
To do this, simply press the flush lever or button down firmly until all the water has emptied from the bowl. This will help prevent any excessive water from splashing around while you work on removing the tank.
Using a sponge or towel to soak up remaining water
With the toilet bowl empty, you can now focus on draining the tank and removing any excess water that may still be present.
Grab a sponge or towel that you don’t mind getting wet, as this step involves soaking up the remaining water in the tank.
- Locate the water supply valve, usually located behind the toilet near the wall.
- Turn the valve clockwise to shut off the water flow to the toilet.
- Flush the toilet again to ensure there is no water left in the tank.
- Use the sponge or towel to soak up any remaining water in the tank, being careful not to let it spill onto the floor.
- Wring out the sponge or towel into a bucket or sink, disposing of the water properly.
- Repeat this process until there is no more water left in the tank.
By following these steps, you can effectively drain the tank and remove any excess water, preparing it for further maintenance or installation tasks.
Detaching The Tank From The Toilet
Unscrewing the tank bolts
To start detaching the tank from the toilet, you will need to unscrew the tank bolts. These bolts secure the tank to the toilet bowl and can typically be found on the bottom of the tank. Begin by locating the bolts and using a wrench or pair of pliers to loosen them. Remember to turn the bolts counterclockwise to loosen them.
If the bolts are rusted or difficult to loosen, applying some penetrating oil can help to loosen them up. Once the bolts are loose, continue unscrewing them until they are completely removed.
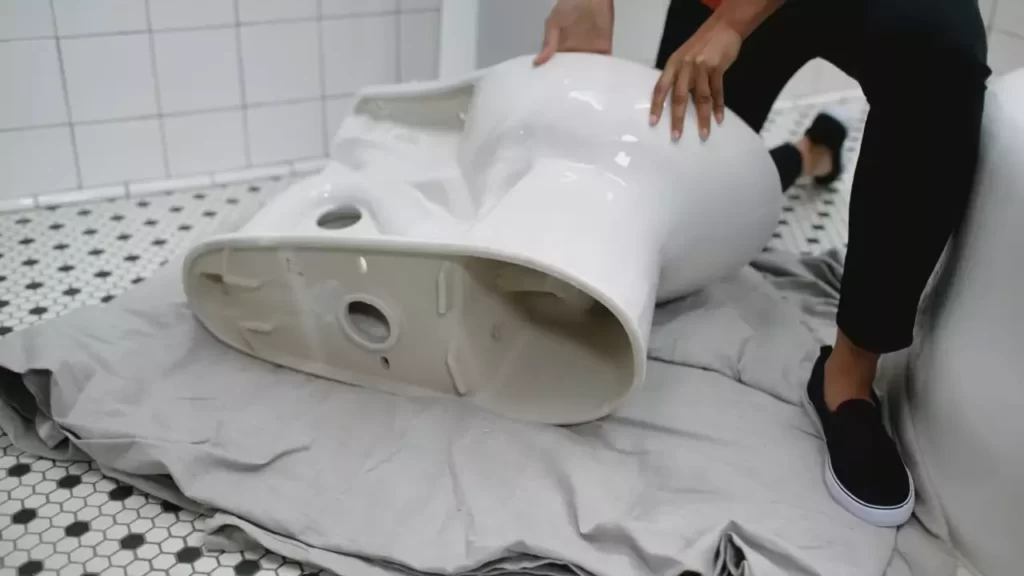
Lifting the tank off the toilet bowl
After removing the tank bolts, it’s time to lift the tank off the toilet bowl. Carefully grasp the tank with both hands, ensuring a firm grip. Gently lift the tank upwards, keeping it level to prevent any damage. Keep in mind that the tank may still have some water inside, so be prepared for some water to spill out as you lift it. To avoid any potential accidents, it’s a good idea to place a towel or bucket nearby to catch any water that may escape. Once the tank is lifted, set it aside in a safe place where it won’t be in the way or at risk of getting damaged.
Remember, when detaching the tank from the toilet, it’s important to stay cautious and take your time. This will help prevent any mishaps or damage during the process. With the tank now detached, you can move on to the next steps in installing a new tank or performing any necessary repairs.
Preparing The Toilet Bowl For Installation
Before you can install a tank on a toilet, it is important to properly prepare the toilet bowl. This involves cleaning the area thoroughly and inspecting and replacing the wax ring. By following these steps, you can ensure a secure and leak-free installation that will last for years to come.
Cleaning the area
Start by cleaning the area around the toilet bowl. Use a mild detergent or bathroom cleaner to remove any dirt, grime, or residue on the surface. Pay special attention to the areas where the tank and bowl will come into contact, as well as the area underneath the toilet where the wax ring will be placed.
Pro tip: It’s a good idea to wear gloves while cleaning to protect your hands and maintain proper hygiene.
Inspecting and replacing the wax ring
The wax ring is a crucial component that forms a watertight seal between the toilet bowl and the sewer pipe. Over time, wax rings can deteriorate or become damaged, resulting in leaks. Before installing the tank, inspect the wax ring to ensure it is in good condition.
If you notice any cracks, deformities, or signs of wear, it is important to replace the wax ring. This can be done by carefully removing the old ring and replacing it with a new one. Wax rings can be purchased at most hardware or home improvement stores, and they are relatively inexpensive.
Note: It’s important to choose a wax ring that is the correct size and thickness for your toilet bowl. Consult the manufacturer’s instructions or ask a knowledgeable salesperson for guidance.
Once you have replaced the wax ring, it’s essential to position it correctly. Carefully place the wax ring over the drain opening in the toilet bowl, ensuring that it is centered and fully seated. Applying gentle pressure, press down on the wax ring to create a secure seal.
Pro tip: To further ensure a tight seal, consider using a bead of plumber’s putty around the base of the toilet bowl before installing the tank.
By cleaning the area and inspecting and replacing the wax ring, you can ensure that your toilet bowl is properly prepared for the installation of a tank. This will not only help prevent leaks and damage but also provide a solid foundation for the overall functionality of your toilet.
Attaching The Tank To The Toilet Bowl
Attaching the tank to the toilet bowl is the final step in installing a tank on a toilet. This step ensures that the tank is securely connected to the toilet bowl, allowing for proper flushing and water flow. In order to attach the tank correctly, there are a few key components and steps to follow. These include placing the rubber spud gasket and tank-to-toilet gasket, and securing the tank with bolts and washers.
To begin, make sure you have all the necessary components: the rubber spud gasket, tank-to-toilet gasket, bolts, washers, and a wrench. These components are vital for creating a watertight seal between the tank and toilet bowl.
1. Placing the rubber spud gasket and tank-to-toilet gasket
To start the attachment process, place the rubber spud gasket on the bottom of the flush valve opening in the toilet bowl. This gasket acts as a sealant between the tank and the bowl, preventing any leaks. Make sure the gasket is properly aligned with the opening to ensure a tight fit.
Next, position the tank-to-toilet gasket on the top of the bowl outlet. This gasket connects the tank and the bowl, allowing for the smooth flow of water during flushing. Align the gasket with the bowl outlet, ensuring it sits evenly on top.
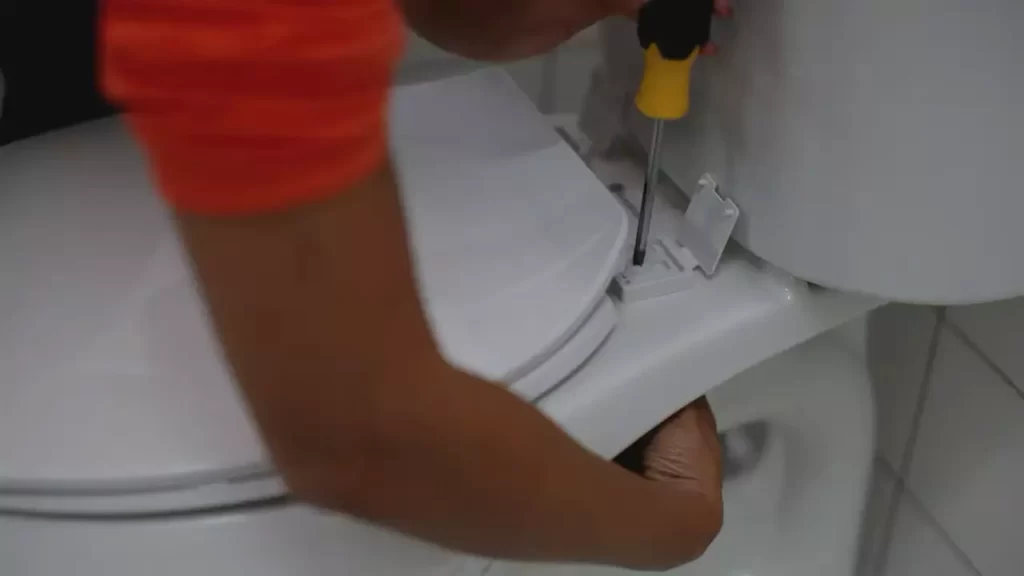
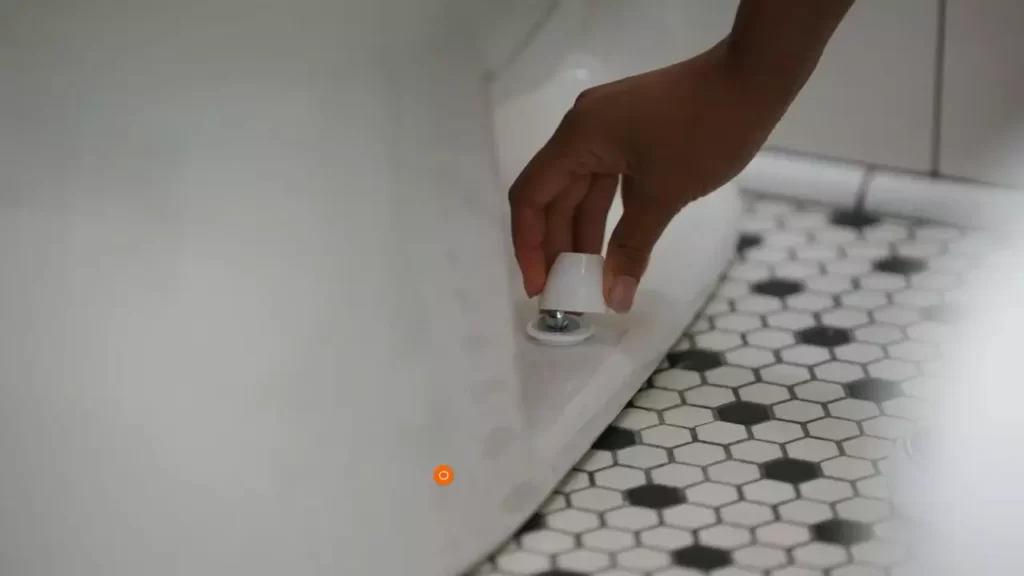
2. Securing the tank with bolts and washers
Once the gaskets are in place, you can secure the tank to the toilet bowl using bolts and washers. Begin by inserting the bolts through the mounting holes on the bottom of the tank. Place a washer onto each bolt, making sure it sits flush against the bottom of the tank.
Carefully lower the tank onto the bowl, aligning the mounting holes on the tank with the corresponding holes on the bowl. Make sure the gaskets remain in place as you position the tank.
Thread the bolts through the mounting holes on the bowl, ensuring they go through the corresponding holes in the tank. Once the bolts are through, place a washer onto each bolt yet again, this time on the inside of the bowl.
Finally, tighten the bolts with a wrench, alternating between them until they are secure. Avoid over tightening, as this could damage the tank or bowl.
With the tank securely attached to the toilet bowl, you can proceed to the final step of the installation process. Connecting the water supply line and conducting a leak test will ensure everything is functioning correctly. Once the test is complete, you will have successfully installed a tank on your toilet, ready to be used for years to come.
Connecting The Water Supply Line
Connecting the water supply line is an essential step in installing a tank on a toilet. This ensures that the toilet will have a continuous supply of water for flushing and refilling the tank. In this section, we will walk you through the process of connecting the water supply line to the toilet’s fill valve.
Applying Teflon tape to the connection
Before attaching the water supply line, it is crucial to apply Teflon tape to the connection. Teflon tape, also known as plumber’s tape, helps create a watertight seal and prevents leaks. Follow these steps to apply Teflon tape:
- Start by wrapping the Teflon tape around the threaded end of the fill valve. Make sure to wrap it in a clockwise direction, overlapping the tape as you go.
- Continue wrapping the tape until you have covered the entire threaded section of the fill valve. Be sure to press the tape firmly to ensure a secure and tight seal.
Attaching the water supply line to the fill valve
Once you have applied Teflon tape to the connection, you can proceed to attach the water supply line to the fill valve. Follow these steps to properly attach the water supply line:
- Take the end of the water supply line that corresponds to the fill valve and insert it into the threaded connection.
- Tighten the nut on the supply line connection by hand. Then, use an adjustable wrench to give it a final snug turn. Be careful not to overtighten the nut, as it may cause damage to the fill valve or the supply line.
- Give the water supply line a gentle tug to ensure that it is securely attached to the fill valve.
Once you have completed these steps, the water supply line should be properly connected to the fill valve. Take a moment to inspect the connection for any leaks. If you notice any leaks, you may need to reapply Teflon tape or tighten the nut further. Remember, a secure and leak-free connection is crucial for proper toilet functioning.
Now that you have successfully connected the water supply line, you can proceed with the remaining steps to complete the installation of the tank on your toilet. With the water supply line securely in place, you are one step closer to enjoying a fully functional and efficient toilet.
Turning On The Water Supply
Once you have successfully installed the tank on your toilet, the next step is to turn on the water supply. Before you do so, it’s important to follow the proper procedures to ensure a smooth and leak-free installation. This step-by-step guide will walk you through the process of turning on the water supply and checking for any leaks.
Opening the Shut-Off Valve
The shut-off valve is usually located near the base of the toilet. It controls the flow of water to your toilet. To open the shut-off valve, follow these simple steps:
- Locate the shut-off valve, which is typically a small lever or knob.
- Turn the lever or knob counterclockwise to open the valve.
- Listen for the sound of water flowing to confirm that the valve is open.
Once the shut-off valve is opened, water will start flowing into the toilet tank. This is an essential step in the installation process, as it ensures that your toilet is ready for use.
Checking for Any Leaks
After turning on the water supply, it’s important to check for any leaks. Even a small leak can lead to significant water damage if left unattended. Follow these steps to check for leaks:
- Carefully inspect the area around the shut-off valve and the connection between the valve and the toilet tank. Look for any signs of water dripping or pooling.
- Check the base of the toilet for any water seeping out. If you notice water, it may indicate a leak in the wax seal between the toilet and the floor.
- Take note of any water puddles or dampness on the floor near the toilet. This can be a sign of a hidden leak that requires further investigation.
- If you suspect a leak, tighten any loose connections or replace faulty parts as necessary. It’s crucial to address leaks immediately to prevent water damage and to ensure the proper functioning of your toilet.
By following these steps and taking the necessary precautions, you can confidently turn on the water supply to your newly installed toilet tank. Remember to regularly check for leaks and address any issues promptly to maintain the efficiency and longevity of your toilet.
Adjusting The Water Level And Fill Valve
One of the essential steps in installing a tank on a toilet is adjusting the water level and fill valve. It ensures proper functioning of the toilet and prevents any issues such as overflowing or inadequate flushing. In this section, we will guide you through the process of verifying the correct water level and making adjustments as necessary.
Verifying the correct water level
Before you start making any adjustments, it’s crucial to verify that the water level in the tank is at the correct level. Having the right water level is important for efficient flushing and preventing any leaks.
- Remove the toilet tank lid carefully.
- Observe the water level inside the tank. It should be below the top of the overflow tube.
Making adjustments as necessary
If you find that the water level in the tank is too low or too high, it’s time to make the necessary adjustments to ensure proper functioning of your toilet.
Adjusting the water level
To increase the water level:
- Locate the float arm or float cup, which is responsible for controlling the water level.
- If you have a float arm, gently bend it downwards to raise the water level. If you have a float cup, you may need to rotate it clockwise to increase the water level.
- Check the water level again and repeat the adjustment until it reaches the desired level.
To decrease the water level:
- Locate the float arm or float cup.
- If you have a float arm, gently bend it upwards to lower the water level. If you have a float cup, you may need to rotate it counterclockwise to decrease the water level.
- Check the water level again and repeat the adjustment if necessary until it is at the desired level.
Adjusting the fill valve
The fill valve is responsible for refilling the toilet tank after each flush. If you notice that the tank is not refilling to the desired level, you may need to adjust the fill valve.
Here’s how you can do it:
- Locate the fill valve. It is usually located on the left side of the tank.
- Turn the adjustment screw or knob on the fill valve in a clockwise direction to increase the water level. If you need to decrease the water level, turn it counterclockwise.
- Check the water level again and repeat the adjustment if necessary until it is at the desired level.
Remember to flush the toilet and observe the water level after each adjustment to ensure that it remains within the correct range.
By following these steps and making the necessary adjustments, you can ensure that your toilet’s water level and fill valve are set correctly, allowing for optimal performance and water efficiency.
Flushing And Testing The Toilet
Once the tank is securely installed on the toilet, it’s time to move on to the crucial step of flushing and testing the toilet. This step ensures that the toilet is functioning properly and that there are no issues or malfunctions that need to be addressed. Proper flushing and refilling of the tank are essential for a well-performing toilet. In this section, we will discuss how to ensure proper flushing and refilling, as well as how to check for any issues or malfunctions.
Ensuring Proper Flushing and Refilling
To ensure proper flushing and refilling, follow these steps:
- Check the water level: Before flushing the toilet, check the water level in the tank. It should be just below the top of the overflow tube. If the water level is too low or too high, it can affect the flushing performance. Adjust the water level by using the fill valve or adjusting the float if necessary.
- Flush the toilet: Once you have checked the water level, go ahead and flush the toilet. Observe the flushing action to see if it is efficient and powerful. The water should flow swiftly and carry away all the waste without any hesitation or clogging.
- Inspect the flush valve: After flushing, check the flush valve to ensure it closes completely. A faulty flush valve can cause water to continuously run into the bowl, leading to unnecessary water waste. If the flush valve doesn’t close properly, it may need to be adjusted or replaced.
- Refill the tank: Once the toilet has been flushed, allow the tank to refill completely. This ensures that there is enough water in the tank for the next flush. Listen for any unusual sounds during the refilling process, as this could indicate a problem with the fill valve.
Checking for Any Issues or Malfunctions
After flushing and refilling the toilet, it’s important to check for any issues or malfunctions. Here are some things to look out for:
- Leaking water: Check around the base of the toilet and the floor for any signs of leaking water. A leaky toilet can waste a significant amount of water and may require immediate attention.
- Weird sounds: Listen for any unusual sounds coming from the tank or the bowl. Gurgling or hissing noises could indicate a problem with the fill valve or the flush valve.
- Slow or weak flushing: If the toilet is not flushing with enough force or if it takes a long time for the bowl to empty, it may be a sign of a clog or a problem with the flush valve.
- Overflow issues: Test the overflow tube by pouring water into the tank until it reaches the top of the overflow tube. The excess water should flow into the tube without overflowing the tank. If it overflows, there may be a clog or a problem with the fill valve.
By following these steps and checking for any issues or malfunctions, you can ensure that your newly installed tank on the toilet is functioning properly. Taking the time to properly flush and test the toilet will save you from potential headaches and plumbing problems down the line.
Frequently Asked Questions For How To Install A Tank On A Toilet
How Do You Attach The Tank To The Toilet Bowl?
To attach the tank to the toilet bowl, follow these steps:
1. Place the tank on the back of the bowl, lining up the mounting holes.
2. Insert bolts from inside the tank.
3. Secure bolts with nuts and washers, tightening evenly.
4. Connect the water supply line.
5. Test for leaks.
Can You Put Any Tank On A Toilet Bowl?
No, you cannot put any tank on a toilet bowl. Toilets are designed to work with specific tanks that are compatible with their shape and size. Using a mismatched tank can lead to functionality issues and potential damage. Make sure to choose the right tank for your toilet to ensure proper operation.
Can You Just Change The Tank On A Toilet?
Yes, you can change the tank on a toilet. It is a relatively simple process that can be done by following a few basic steps.
What Connects The Tank To The Toilet?
The tank is connected to the toilet through a water supply line.
Conclusion
To summarize, installing a tank on a toilet may seem like a daunting task, but with the right guidance, it can be a straightforward process. By following these step-by-step instructions and using the necessary tools, anyone can successfully complete this DIY project.
Remember to shut off the water supply and take necessary safety precautions. With a little patience and attention to detail, you can have your toilet up and running smoothly in no time. Happy installing!